Friday, July 30, 2010

Mystery foot identified and my efforts with the narrow hem foot

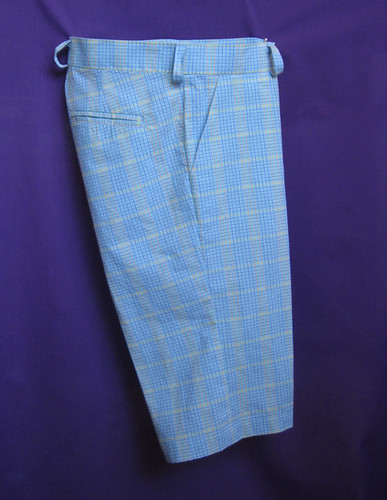
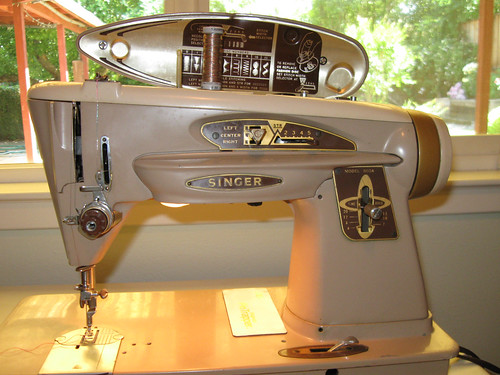
Recently I posted about my new to me vintage Singer Rocketeer machine, and asked if anyone could identify this sewing machine foot which came with it.  A few people asked me to post a follow up if I found out what it was, and I am happy to report . . . 
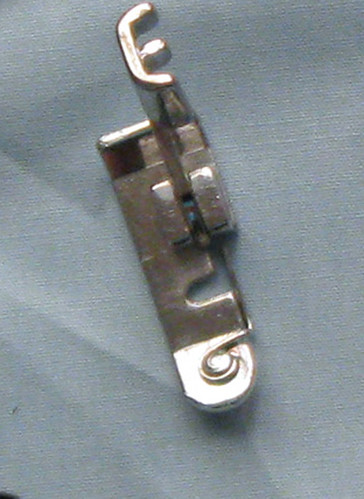
Overcasting Foot

I sent an e-mail to Charlene Phillips of The Sew Box,  who replied with the identification as well as some instruction on how to use it.  She has written a very useful book about vintage sewing machine attachments and has a great website.  Here is my original post about the book and using the gathering foot.     

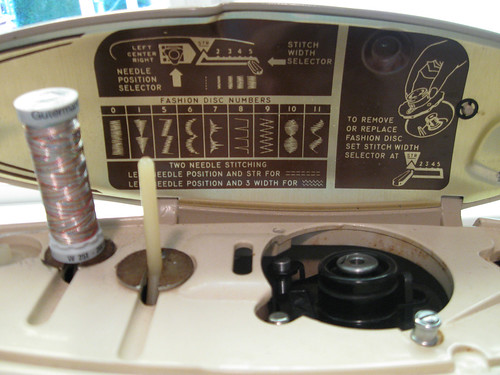
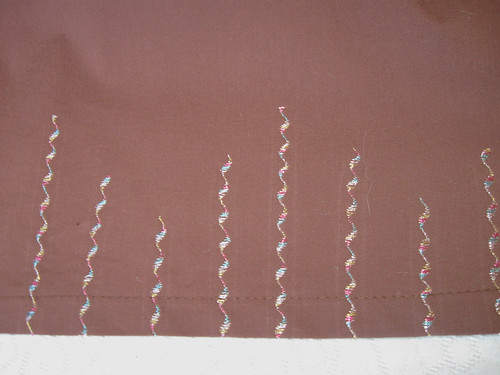
The answer is an Overcasting foot, and it creates a stitch along the edge of the fabric to finish the edge. In some respects it is the overlock stitch of a previous era.  The only problem with this is that my machine does not seem to have any stitch or cam that creates the overcast stitch.   So how to use it is still a mystery.  She sent me a photo and the stitch is creates looks a lot like a blanket stitch on the edge of the fabric.  I am sure those of you with those snazzy new electronic machines know all about this stitch - but we of the non-electronic era
must make do with our lovely steel attachments to get these fancy (useful) stitches.

Searching around the sewing blog world, I found this blog,  Brian Sews, which has tons of great info on vintage sewing machines and attachments.  I have been trying without any success to use the narrow hem foot. It could be incredibly useful for hemming silks, making dinner napkins and other items that have a very narrow hem however I could not get the hang of it.  Thankfully, Brian has a great post with video on his blog showing how to use it.  

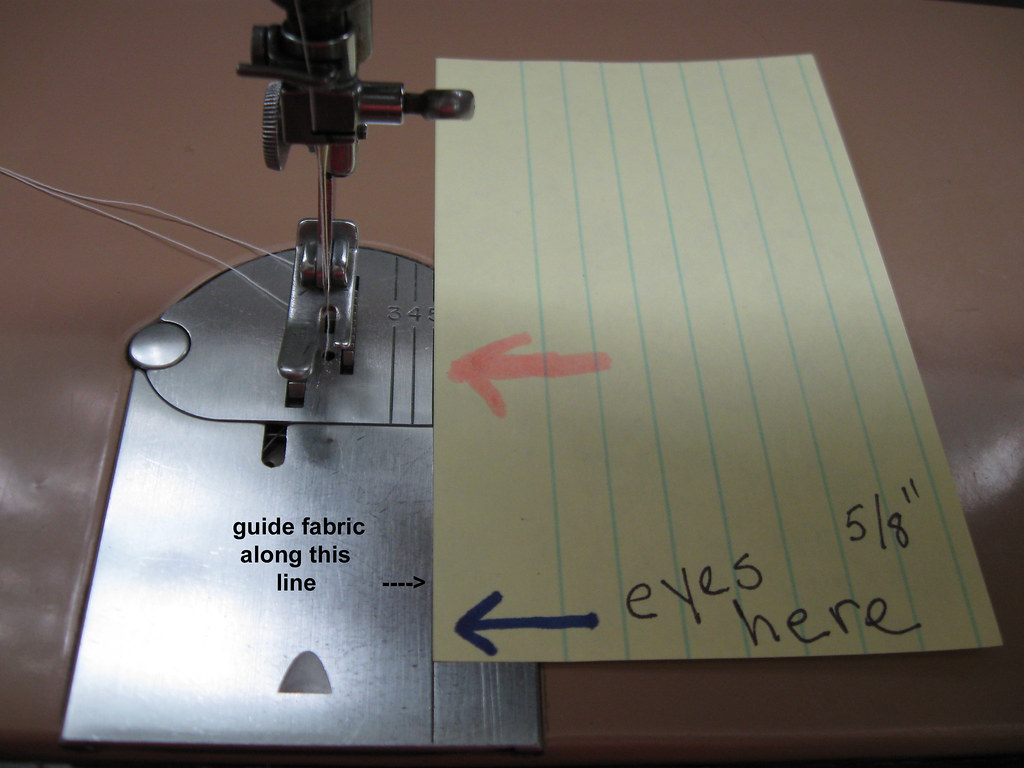
So I have been practicing.  The key to consistent hemming is how you hold the fabric feeding into the foot.  

Here is the narrow hem foot in action.


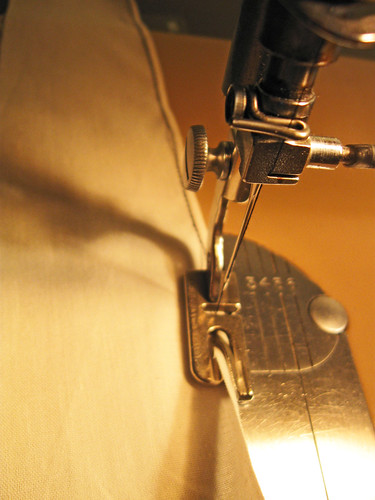
Not yet ready for prime time,  if I actually used it on a garment, I would be doing a lot of picking out stitches and re-doing which does not seem like fun.   Example of my wobbly sttiching.


I see great potential for this foot - so useful, especially on children's clothes, sheer fabrics etc.
But not quite yet.  I am seriously thinking about ordering the next size up, which I think is 1/4" narrow hem.  Probably just as useful but not quite so tricky.  I will let you know.


succulent
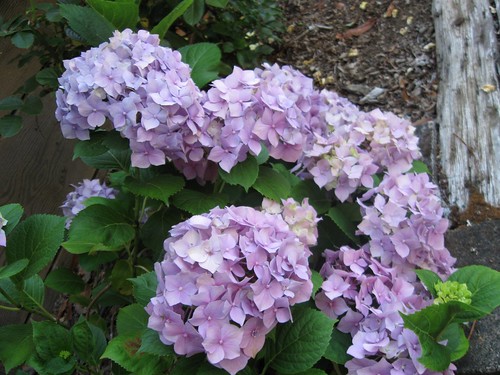
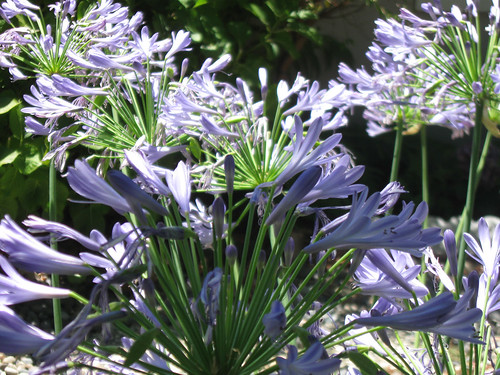
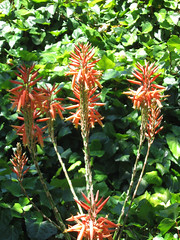
And today's SunnyGal Garden photo -  my neighbor gave me this plant several years ago.  I just stuck it in the ground and now it is about 4 feet across.    Aloe, so I am told.


Tuesday, July 27, 2010

Floral Dress for a Sunny Day

Last Saturday I went to my cousin's wedding in Napa, CA.  I don't think I have ever been to a wedding with a yellow color theme, and it was beautiful.  The flowers were gorgeous and the cake was delicious, frosted in butter yellow icing with white snowflakes as a nod to their Colorado connections, with a Mr. and Mrs. snowboarder on top.  So cute.


In between my other projects, I quickly finished the dress I wore.  


The fabric I had written about in another post.  (purchased from FashionFabricsClub)  For this dress, I decided to do a simple square bodice and then add a full skirt.  I used New Look 6457 for the bodice, and raised the top seam up about 1".  I was not sure where the waist should end up, so I lengthened the bodice pieces which ended up causing a lot of extra work later because I had to fiddle around with the placement of the skirt, and I was not totally happy with it, could have been up another 1/2" or so.  (But only I would notice it.)
I used the dress form to fit the bodice, and then fit the lining pieces the same way.
The one construction tip that I have been using lately is to sew the zipper into the bodice and then the bodice can be fitted on the body or the dress form, without the skirt being attached.  After I am happy with the bodice fit, then I take out the stitches about 1-2" above the skirt placement, sew on the skirt and then finish sewing in the zipper.  Here is a photo of that process, with the zipper shown unattached to the skirt.  I was so clever and put some text on the photo with Photoshop to indicate the zipper and now I see I spelled "invisible" wrong, and can't figure out how to re-edit in Photoshop.  oh well.


For the skirt pleats I just cut the front and back, and then made 1" pleats using a clear ruler.
After I sewed on the skirt, the waist was a bit bulky, so I trimmed it a lot and did a row of stitching to hold it together. 


I used my favorite construction method of sewing all front pieces and then all back pieces, adding the zipper, and then fitting on the body.  Patterns rarely have you do this, but it makes fitting so much better.   See below, the top facings are sewn into the side seam, but I hardly think it makes any difference.  Added shoulder straps as I am never comfortable with strapless dresses.   Under the back facing, there is a hidden strip of elastic across the top, which is a clever idea that gives it a bit of hold.  I will have to remember that for future dresses.


And in honor of my very flowery dress, today's SunnyGal garden photo, some lavender hydrangeas that live in a shady corner of the yard.


Thursday, July 22, 2010

Triumph over Plaid

There have been many plaid creations since I began sewing, I recall a plaid wool jumper made in junior high that was scarily mismatched which I wore it anyway.  Later some great plaid items, a few blazers with exceptional plaid matching which I pointed out to everyone, whether they were interested or not.  But perhaps one of my greatest plaid triumphs is today, as I finished a pair of plaid Bermuda shorts for my friend Ashley.


She is abolutely miniature - I recently hemmed a pair of True Religion jeans she snagged at our local warehouse store,  and they were size 24.  So last winter I made a pair of pants for her by using her well-worn pair of khakis as a template to make a pattern.  Khakis she bought long ago at Gap Kids!  And she is 5 feet tall.  Adult woman.  Over 30.  Full grown.  Kind of.   
Anyway - she had remarked that she would love to have some preppy looking plaid shorts.
So I decided to give it a try.   I found this cotton plaid at Discount Fabrics in Berkeley, it is a little bit seersucker-y,   and super soft.    


Here is the side view.


Back view.   OK, even the waistband plaid is centered and that was a lucky accident as I cut it out from scraps, put a center back seam in it and pinned it on without even paying attention.
But those welt pockets, yes, I did cut those out just so they would be all matchy.


Since I made the pattern myself - I had to do some measuring, create notches/marking dots on the side seams and hope for the best.  Getting the front and back center seams right is just a matter of carefully laying out the fabric before cutting.  I do line up the plaids from fold to selvage and put pins in on the lines, then roll back the fabric to see that the pin is at the same line on the underneath fabric.  For the piece above the front pocket, I finished off the short front and laid that onto fabric, and then cut those pieces to match.

So - victory over plaid.   Bring it on, fabric.  I will triumph.

And today's SunnyGal Garden photo.    Maybe because of all the rain we had this past winter, but these Agapanthus (Lily of the Nile) are really blooming beautifully this year.  This is such a common plant here in Northern California, maybe we take it for granted.  I love the shades of purplish blue and how it moves in the breeze.


Sunday, July 18, 2010

Double the Sewing Fun

I started sewing at age 9 year and was lucky enough to have my Aunt Jo (really my great aunt) help me with my sewing projects. She was the great sewer in the family, she made beautiful clothes for herself and some great dresses for me and my sister. Starting soon after that I would go over to Marta’s house for sewing lessons and that individual attention made all the difference. Now I have the opportunity to pass on my love of sewing so I have a few students this summer for personalized sewing lessons. Some are really serious, some are fearless with the pins and scissors, but so far they have all been a pleasure to work with and have potential to be making their own prom dresses in no time.


Last week I taught an all day sewing lesson with twin 13 year old girls. From shopping for fabric and patterns at 9 am to the final pressing at 4 pm we completed their tops in record time, including a break at lunch for pizza. I was exhausted without sewing a stitch. My mother is a retired elementary school teacher, and every time I teach some sewing to kids I tell her I don’t know how she taught every day, all day, 25 children in the classroom and didn’t collapse on the couch at 3 pm calling for a martini. (for the record after school she did all the usual household stuff, made great dinners and helped us with our homework, no collapsing at all)


They chose Simplicity 3750 and used quilting cotton.
                      
Here they are in their finished tops.


Back view and their Next Top Model pose.


Here are some observations I have made about beginning sewers.


1)   Sewing in a straight line is a learned skill. Experienced sewers know that the machine feeds the fabric and only needs to be guided very lightly to keep a consistent seam allowance. New sewers tend to push and pull the fabric, and their 5/8” seam allowance is a bit wobbly.


2)   Since kids don’t drive - the concept of the foot pedal as a gas pedal that makes the machine go faster or slower is an alien idea. Again, practice on this is everything.
Once a sewer can control the speed of the machine with the foot pedal, everything
becomes much easier, particularly slowing down to create accuracy on curves, with
narrower seams, as well as removing pins before sewing over them.


I try to get my students to look at the fabric in front of the presser foot, about 2 or 3 inches in front of the needle. If you are staring at the needle going up and down then it is unlikely that you are maintaining the fabric at the 5/8” line.


The needle will go up and down whether you look at it or not, and if you keep your eyes on the fabric about 2” in front of the needle, lining up your seam allowance with the 5/8” guide on the sewing machine you will have a consistent straight seam.  If your sewing machine does not have a line along the flat part as mine has, then a post-it note is a good way to create the line. For kids I always put that on the machine, it adds a great visual guideline for fabric placement.  For myself, when sewing seams or topstitching at anything above 3/4” width I always use the post-it trick.


Today’s SunnyGal Garden photo
Jackson and Perkins Floribunda rose: Miss Behavin’

Saturday, July 10, 2010

My New Old Rocketeer


My first post here was an admiration of my Singer Sewing Machine.  Now I have another addition.  Not quite an obsession, but the start of a collection.   My “new-old” sewing machine is a Singer Model 503 Slant-O-Matic.  
Referred to as a Singer Rocketeer.  Seeing as I have been making do with my original Singer Straight Stitch for as long as I have been sewing, the thought of zig-zag makes my head spin.  Not just zig-zag, this machine has a variety of stitches which are achieved by changing the cams on top of the machine.

Rocketeer machine


And who can resist the look of this machine.  I am not sure where the Rocketeer name came from, possibly from the shape of the machine,  looking like a rocket  (seems a bit of a reach to me)
 I didn’t really need it, but my sister was given this machine, and said I could have it.  Just the small matter of shipping it back to CA.  I gladly paid $ 132 to ship it here but it sustained some serious damage.  Scratches all over the top, one of the side door hinges broken off, the top thread guide bent, and the plastic carrying case a total loss as the hinges were snapped off. Very sad but all in all still usable.  It had a bit of rust and  grime but not too bad considering it has been living in Hawaii for the past 50 years.

I took it apart, cleaned, and oiled the machine, lubricated the gears, and now it purrs like a kitten.   One great thing about having this machine is that all my accessories (various feet, buttonholers etc)  work on this machine as well as my original one.
Here is a look at the top.  I have not tried it yet, but you can see it has two thread holders and can do double topstitching.  Amazingly the workings inside the top cover were undamaged.  


Rocketeer close up top
These are the sewing machine feet and other items that came with it. Most of them I already had but the roller foot is new, as well as all the ones pertaining to the zig-zag.  


Rocketeer accessories

mystery sewing foot


There are actually a couple of feet here
that I cannot identify.  If anyone has this 
machine or another old Singer and can tell me what
this one is for I would appreciate it.  In a previous post
and website, however I don't find this one in there.
So still a mystery.


I wanted to try the decorative stitches so I made a cotton skirt and put some squiggles around the bottom edge with metallic thread.  (Chosen because I have these new shoes which are a copper color metallic)   The squiggles are
random, I didn’t mark anything as you can tell.

brown skirt embroidery closeupBrown skirt front

Not sure it is a success, but it is my first effort with the decorative stitches.   Actually I like the metallic stitching a lot more than the actual skirt style.  This is Simplicity 2451.


There is something about the pleats across the front that bug me, it is kind of puffy in a place where you don’t want puffy.  The skirt fits and if it was a flat front it would be fine.
Brown skirt pleatsSo I am not sure about this skirt pattern.  I have made it before, using it as the skirt for a wool suit I made a few months ago. (Suit for a Japanese Wedding)   However for that skirt I took out the dip in the center front of the skirt and made the waistband piece a straight line instead of a curve and that seems to work better.  This pattern has another version with no pleats and a flared hem which I may try but it might just be a loser, at least for me.  


I do see possibilities for the decorative stitches and zig-zag.  After a lifetime of straight stitch I can’t really wrap my mind around it.  Yesterday I was doing something requiring a small piece of elastic, and after I finished creating a channel and inserting the elastic I thought hey - I could have sewin it on with the zig-zag in one minute. Oh well, another thing to practice.  Along with that 1/8 roll hemmer foot which I have yet to master.
Onward - working on my pink/green floral dress.  
And here is today’s SunnyGal garden photo which I took some weeks ago, when the Spanish lavender was in full bloom.


rose and lavender