Wednesday, December 29, 2010

Coat progress and a question

It was a blustery day here,  perfect to stay inside and sew.  OK - we don't have blizzards or below zero temperatures - but for California it was downright chilly!  My coat is coming along better than expected.  After my last post I played around with my muslin to find the collar roll line, even though I said I was going to skip it.  But this wool is so perfect for steam shaping, so persistence has paid off.    


Coat side pocket extensions
Before I get to the collar - I have a quibble with the pattern companies on pockets.  On many of the patterns for coats, and dresses too, the pocket is sewn right on the side seam allowance, at about 1/4" from the cutting line.  Then when the side seam is pressed the pocket seam and fabric is really only 3/8" or so distant from the side seam.  I don't like it when I can see the pocket lining, when the wearer moves or sits down.  The best hidden pocket should disappear in to the seam, wherever it is.  I realize that the pocket bag on the back can be of self fabric, but even then that seam could show. This oversight by the pattern designer can be remedied by adding an addition to the side seam at the location of the pocket, and then sewing the pocket pieces on that.  Thus the pocket is tucked about 1" or more away from the seam and should stay hidden.  


While I like multi-size patterns a lot, I think the pattern companies fall back on the excuse of simplifying things like this to eliminate features that you find on higher quality ready to wear or many vintage patterns.  One more reason to look closely at vintage designs, there is a wealth of information in those older patterns and books.


Here is my coat thus far, with under collar sewn on.  Lots more to do before I attach the upper collar and lapel, mostly trim that seam and catchstitch it above and below that seam.  The interfacing used is Pro-Tailor Deluxe Fusible from Fashion Sewing Supply.  


Coat lapel with roll line

Here is a look at the under collar.  Once I figured out on the muslin where the collar roll line was, I transfered that marking back to the pattern piece.  Then I cut a 2nd layer of interfacing on the straight grain of the interfacing (as opposed to the original layer of interfacing which is on the bias just like the undercollar.  After that I folded the collar at the roll line and placed it around a pressing ham, and steamed it, then left it overnight.  In the morning it was as seen above, with a nice soft roll that will stay, and support the upper collar. 

Coat collar inside with roll line

My question for the day is the following:  Velvet upper collar ?  or continue with same fabric, black wool?   This is just a test look,  black velvet draped over left side and wool on the right.
Lapel test with velvet collarThe velvet looks a bit odd because of the flash.  I was sure I wanted a velvet collar, to make it a bit dressy and I don't like itchy wool on the back of my neck.  It could look like some weird Victorian gentleman's coat.  Which is a nice look but not what I was going for.  I have to see it in the daylight tomorrow but I am almost sure which way to go.


How do you solve the itchy collar dilemma?   Or do you avoid wool entirely?  Let me know what you think.   

Next post, adding darts on the back and my adjustment to the pattern's lining design.

Happy Holiday Sewing,    Beth


Monday, December 27, 2010

Coat plans plus enter the giveaway

Today I have been working on a muslin for a coat that I plan to do this week.  For my birthday some months ago some very dear friends gave me a gift certificate for Gorgeous Fabrics and I felt I should make something substantial that would last for a while and I could happily think of them every time I wear it.  I ordered this black basketweave wool coating.  It is so soft and just weighty enough to be  perfect for a coat.   


Black  wool plus ining

I did lighten up the photo a bit so you can see the weave,  which makes the lining look more red than black, but it is very much a black lining with a red accent.  Either way I am happy with the lining as well, from Fashion Fabrics Club.   Note on fabric preparation:  I did pre-shrink this wool by putting it in the dryer with 2 fluffy dark color towels which I had soaked with very hot water and wrung out , to create a steam dry effect as instructed on Off the Cuff blog of Pamela Erny.  (also plan to use all her interfacings on this project).  The wool measured 131.75" long before and 128.5" after so that was very worthwhile to do.

I had planned to do a very serious coat - by serious I mean old-fashioned hand tailoring, pad stitching, collar shaping etc.  But I have not really found any pattern that suited. Searching for a style that is not too trendy - since I want it to last a while and be worn with evening clothes, dresses etc in the wintertime.  My thought is that the dress I wear can be this year's style or next,  but the coat needs to be a supporting player, not the star in this little fashion drama.  Maybe I am erring on the side of caution, but this is what I have selected, Simplicity 2311, version in the center shown in red.

S2311 pattern envelope

Here is the muslin, not quite fully put together and looking like some kind of weird lab coat in the aqua color.  I keep staring at the lapels and even marked with a felt pen where I thought the roll line should be.  But I decided I was trying to fit a square peg into a round hole with this one.  The collar as designed is supposed to be a little bit oversized with a soft roll so I decided to go with it.  This way it is all fusible interfacing and I should have a coat in a few days.


Coat muslin collar

Tomorrow some real sewing on this project, right now I am off to dinner with friends with a detour to get some coat buttons on the way :)

And the giveaway mentioned in my last post continues.  Sign up to be a blog follower or leave a comment to enter a drawing Jan 2 for a box of See's chocolate candy - a California favorite.

Happy Holiday Sewing,  Beth

Wednesday, December 22, 2010

SunnyGal Holiday Giveaway

Happy Holidays to blog readers and sewers everywhere.   Time for a SunnyGal Blog Giveaway!  I appreciate everyone that reads and comments, and feel connected to others around the world that share my passion and enthusiasm for sewing in a way that we all could only have imagined just a few years ago.


I was finishing up my Christmas shopping the other day and decided to add one blog reader to the list.   So someone will receive a 1/2 lb. box of See's Candy, which is just the right size to fit in one of those small flat rate postal boxes.


What does that have to do with sewing?


Maybe nothing, but it is a treat and a very local one at that, I think everyone who has grown up in California is familiar with See's Candy.  See's is a west coast tradition, with stores completely done in black and white decor, including the salespeople who wear very vintage looking uniforms (think 50's nurse outfits) with black bows and buttons.  I confess that I have a take it or leave it attitude to most things chocolate (yes - my family thinks I am crazy) but See's is delicious.   


See's candy box

I had always been ambivalent about the superiority of See's candy, but a few years ago I became a believer.  I was getting ready for a combined business trip and vacation to Italy and my mother insisted I bring both my business hosts and my friends some gifts.  She suggested See's candy.  In her words "everyone likes it."  I countered with the fact that they have all kinds of delicious treats and chocolates in Italy so why should I bring that, plus did I really want to add 4 or 5 pounds of chocolate to my suitcase?  But in the end I listened to my mother (another victory for moms everywhere) and she was right.  But not as we expected.  
Unfortunately and for the first time ever in my traveling life my luggage did not arrive in Milan when I did, leaving me to apologize to my business hosts for arriving empty handed.  On a fashion note, I had worn a black suit on the airplane, and had several tops and other important items in my carry-on as well as all my toiletries (back when you could carry any and everything in your carry-on) so my Italian hosts were somewhat amazed that I could look reasonably well put together for 2 WHOLE DAYS without my suitcase.  Believe me, I astonished myself as well.  That taught me a valuable lesson on packing for travel but that is a topic for another day.  I concluded my business meetings, went back to my hotel to check out and call the airline, finding my suitcase had arrived.  So I hauled my candy laden suitcase onto the train to Venice to meet my friends who live there.  I gave out all the See's chocolate boxes to my friends, their parents and my pal Chiara's boss who hosted a dinner party.   At the office the next morning he confessed that after we all left, he and his wife ate the entire 1 pound box because they could not stop.  Everyone else thanked me profusely and raved so I became a believer.  Now it is my go to gift for all occasions - can't miss.

Just a warning for all chocoholics.   I see on their website, Sees.com that they have a few shops in other states, in Japan and Hong Kong, as well as online.

So if you are interested in this giveaway,  please leave a comment below or sign up to follow the blog. I will select from everyone who comments or signs up to follow the blog between now and Jan 2 by random drawing.  


Sewing plans:  next week I will be making a black wool coat, as I decided my wardrobe was missing a dressy coat for winter or evening outfits.  So hopefully I will get that finished by Dec 31.  Stay tuned.


Happy Holidays to everyone 
Beth

Saturday, December 18, 2010

Tis the season for more plaid

It has become a tradition that I make some holiday outfits for my little cousins, a family of 4 sisters plus their cousin. So yes, 5 matching holiday outfits, for ages 2 - 10.  There is a brother in there too but he escapes - although last year he did receive a matching necktie. 


My 10 year old cousin is quite tall for her age, has outgrown the looks still worn by her younger sisters, and I heard she liked the clothes shown this year by a popular American designer well known for his classic and preppie styles.  So using that as an inspiration I designed this skirt which has a flat front, partial elastic waistband and a faux wrap with ruffles all around.    I think this style will be going on my own wish list - I have a remnant of charcoal grey wool crepe that would be perfect with this design.

Purple plaid skirt

For the younger girls I made jumper style dresses, probably will be worn with a blouse or turtleneck sweater.   
Plaid jumpers all 3

This fabric was fantastic to work with, I bought it at my favorite fabric store, Stone Mountainand woven into the selvedge are the words "pura lana vergine tartan exclusiva".  Totally worth the price to buy virgin wool made in Italy.  It feels almost like cashmere.    I lined them in purple and got a bit carried away with the seam finish on the hems.  The pattern is Simplicity 2320.

S2320Jumper hem


A couple of notes on matching plaids.  

  • Start with high quality wool.  You may not want to spend the money on expensive fabric when first working with plaid, but usually the higher quality fabrics are very even, not twisted on the bolt, selvedges nice and straight.  This will help with laying the fabric down and getting the lines to match.   I suggest a slim skirt as a first project, takes very little yardage.
  • Refold the fabric.  Instead of 1 fold and matching the selvedges, fold both sides of the fabric inward, creating 2 folds.  Then you can place the center front and back of your skirt on or near these folds, and the side seams will be adjacent for matching.
  • Check and double check when laying out the fabric.  I start at the fold, and slowly roll the top layer out, matching the plaids as I go.  Then I check by poking a pin through the fabric and making sure it is hitting matching spots on the plaid grid.
  • Shift on the seams to match the plaids,  I think it is OK to move the pieces in relation to each other up to 1/8 -  1/4 ", particularly the side seams.  or just a portion of a seam.  Despite what seems like perfect cutting out - there is always a bit of a shift but you can ease it back in.

plaid matching

Another technique is to cut out one piece, flip it over, place it on the fabric matching the plaids and cut out a mirror image based on the previous.  I did use this method to make the dresses above, since I made 2 of the size 3T and wanted them to be the same.   Looking carefully you can see the side front piece on top of the fabric, to use it as the pattern piece.

plaid layout

The only change I made on this pattern was to cut out the center front bodice piece on the bias, to create visual interest on the front.  I love the juxtaposition of straight and bias plaid and this style seemed to call for that.  Here is a look at the front and back of the size 3T.

plaid front and back

For another of my small friends I had a Chanel inspiration so I made this little 2-piece outfit from a boucle I ordered from Fabric.com, which has powder blue and sparkly threads among the black.   It may be hard to see, but the hem of the vest and skirt are fringed, very easy to do with a loose weave.  I machine stitched a double row of very small stitches about 3/4" from the edge and then just pulled out the threads parallel to the hem.  Great fast hem finish - I will definitely keep this one in my bag of tricks.   Outfit is approximately size 5T.

Maddiesuit

For the rest of this week I will be finishing a number of projects, perhaps some Christmas gift sewing for my mom and sis - but that is all I will say as they read this blog.
Then my last big project of 2010, a coat for myself.  I have some black basketweave wool, my first purchase from Gorgeous Fabrics - so I am eager to begin that.

Happy Holiday Sewing to all,   Beth

Monday, December 6, 2010

Special handling notes - corduroy and velvet

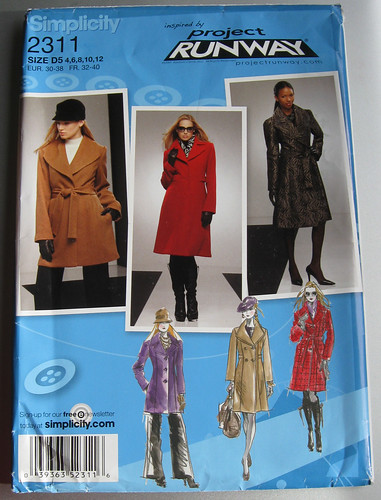
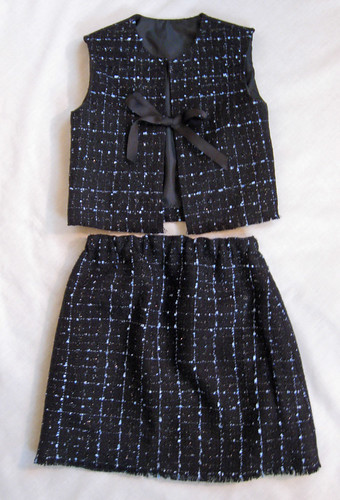
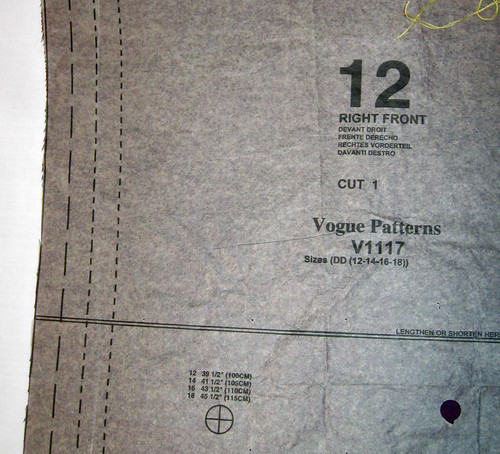
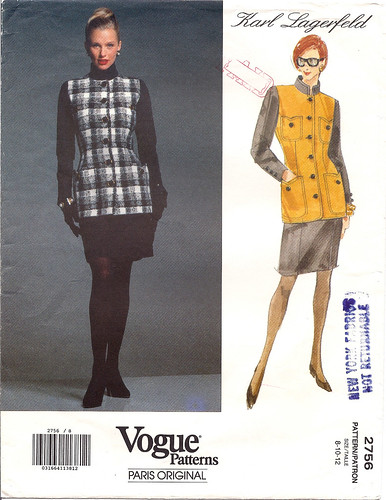
Last week I started something I had no business working on.  This time of year I have plenty of projects to cram in before the holidays, including my Vogue 1117 Michael Kors dress I posted last week, but somehow I decided that my wardrobe was lacking in jackets which are not business wear but still look sharp.  It is very easy to do my shopping and errands wearing some version of gym wear, but that is not great advertising for a dressmaker and sewing teacher.  So I pulled out Simplicity 2455, a pattern I had selected for a plaid jacket but decided was too much trouble to match in plaid, yet just right for a solid color.  It looks a bit frumpy on the pattern envelope but has potential. 


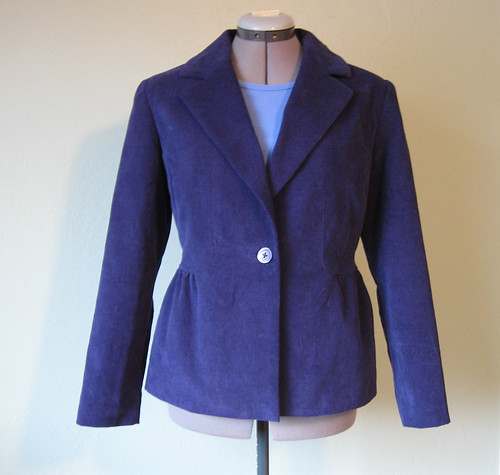
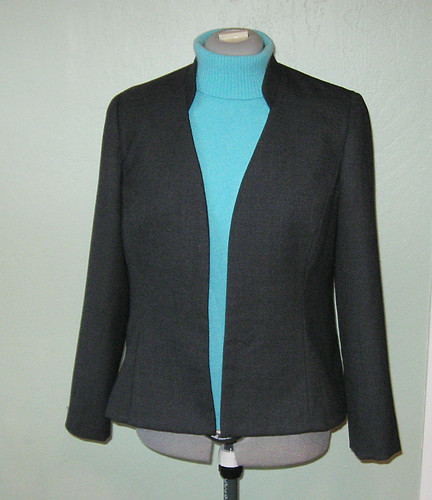
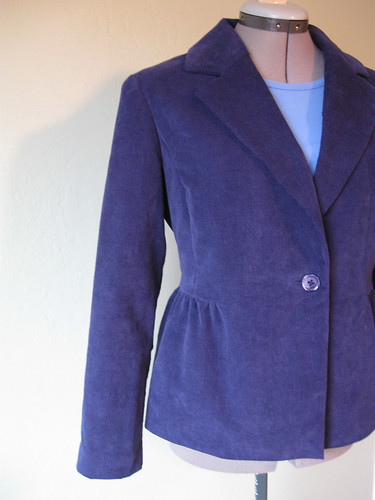
Here is the finished jacket.  Blue uncut corduroy purchased on a whim at Joann's, but perfect to wear with jeans.  I regret that it has no Lycra content which would be more comfy but I did add a bit more ease across the shoulders to compensate.
Blue cord jacket front

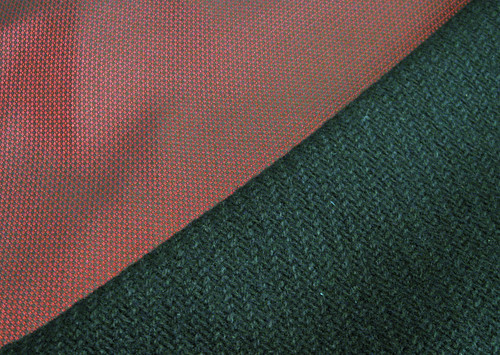
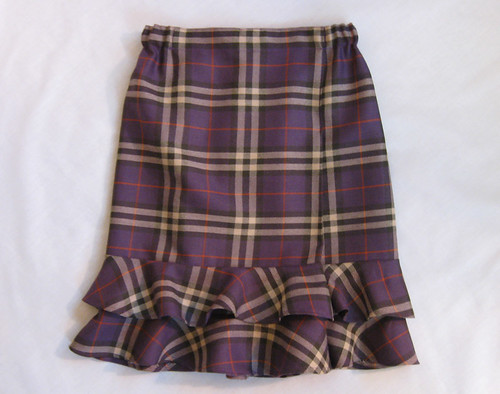
I really like this pattern, with the gathered peplum effect and will make it again in the spring, maybe in another solid.  Here are a few construction details.
Uncut corduroy must be treated in the same way as velvet or any other fabric with pile or nap. Note that you must cut out all pieces running in the same direction.  Here is where that cryptic phrase on the back of the pattern envelope comes into play,  usually something like "extra fabric needed to match plaids or a one-way design fabric".    I like to have the nap running smoothly downward, contrary to my Sewing Made Easy book, copyright 1950 which tells me that short napped fabrics such as corduroy, velvet and velveteen usually have the nap running upward.  I am such a rebel.   But their second commandment for napped fabrics I do follow, which is to press on a Velvet Board.  
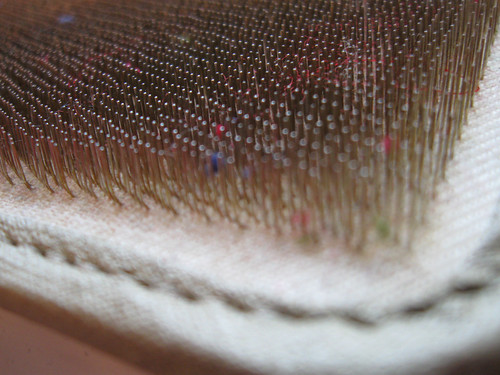
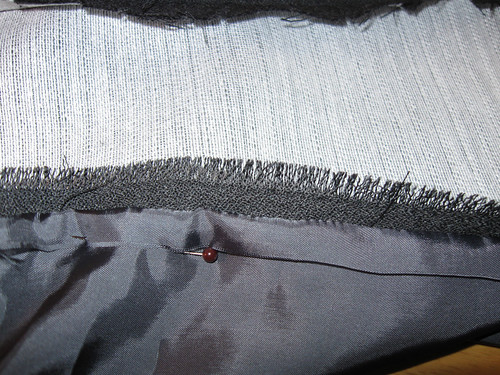
So now we get up close and personal with the Velvet Board  (also known as a needle board).
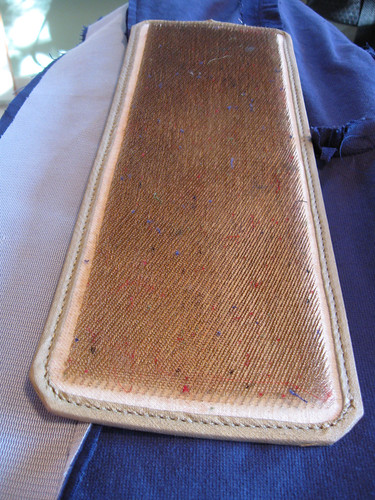
It is comprised of thousands of 1/4 inch stiff wire pieces and mine is filled with fuzz and fibers from previous projects.  At right is a full view of the Velvet board, which measures 12 inches long by 4 inches wide.
Velvet board closeupVelvet board full
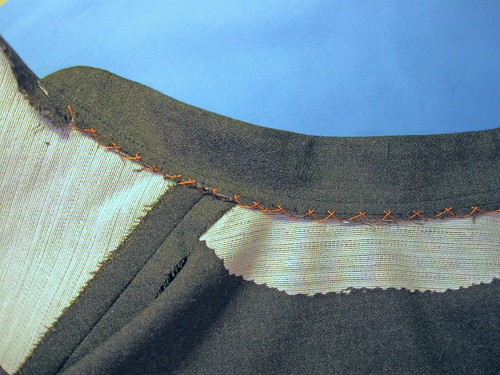
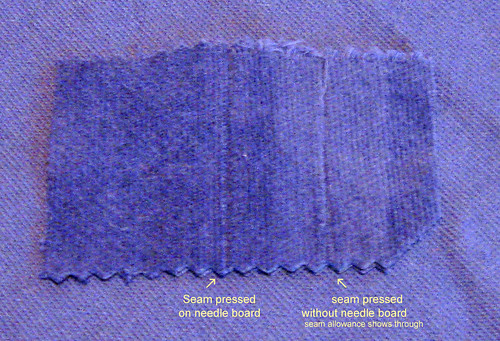
Why the velvet board?  It is essential for pressing on garments constructed of napped or pile fabrics.   I made a small example so you can see the difference obtained by using the velvet board for pressing.  Seam on right - velvet board not used and the result is the ghostly reflection of seam allowances showing in the nap on the outside of the garment.
Seam on left, pressed on velvet board and the seam allowances are not visible.  The trick with using the velvet board it to keep it on your ironing space at all times and think twice before reaching for the iron - just to be sure you use it on every seam or corner.

Corduroyseam allow

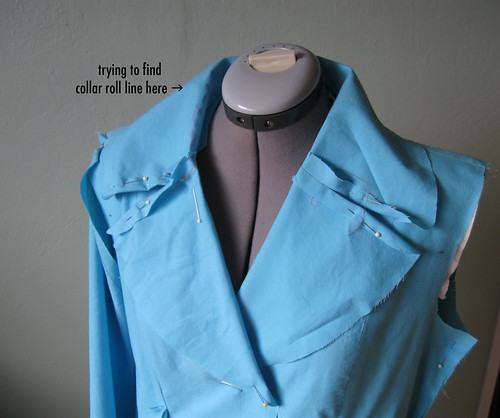
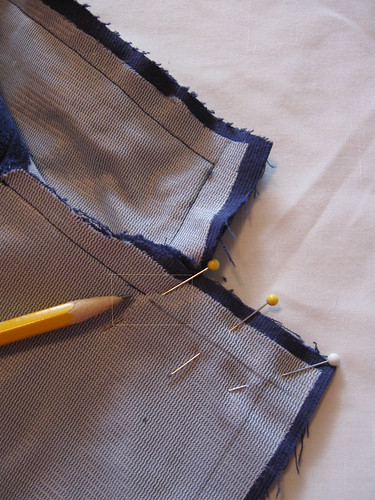
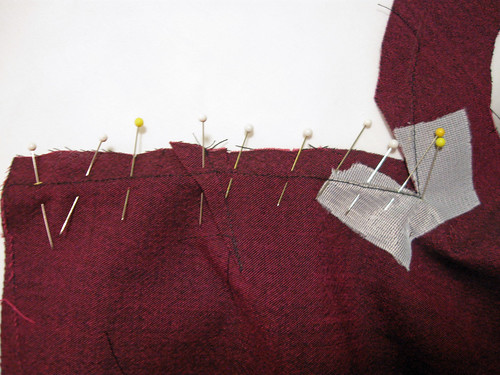
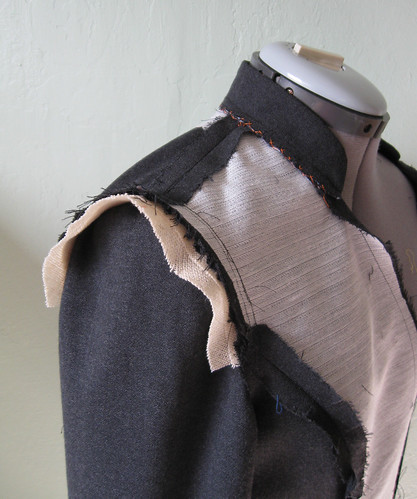
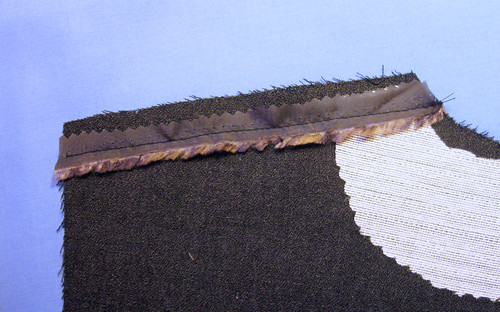
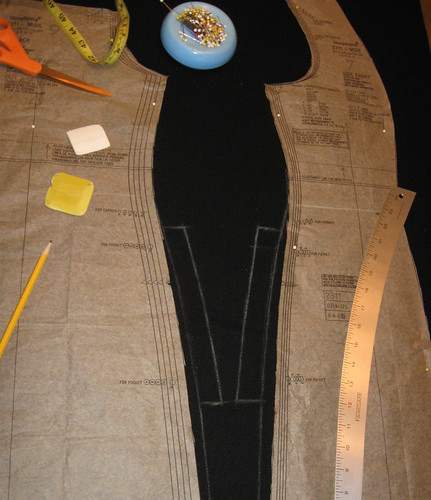
Another construction note, on lapels.  One of the best things about fusible interfacing is that since it is inside the garment, and unseen, you can draw and mark on it with abandon.   Here I have drawn on the stitching line with pencil, for the lapel.  It really helps create a crisp corner, no wobbing and I find it to be a timesaver.  Also note,  when you get to the inside corner of the lapel, where it meets the corner, stop your stitching about 2 stitch lengths from the marked dot point, secure your stitiching there.  Do the same on the collar portion of the lapel.  When you finish and turn inside out, you will have a nice smooth lapel, and no ripples or bumps where the lapel point meets.  There will actually be a little hole at this inside corner, about 1/8" diameter, but it will not show.  
Blue cord collar inside

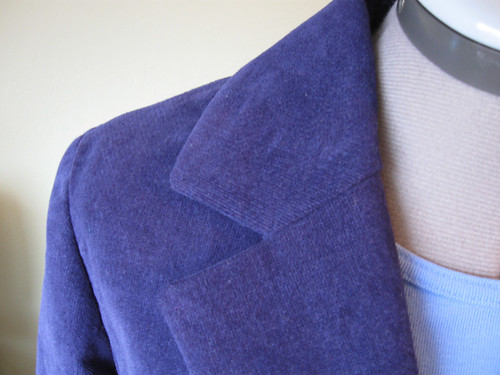
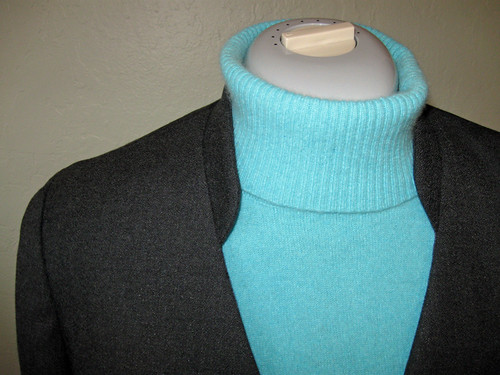
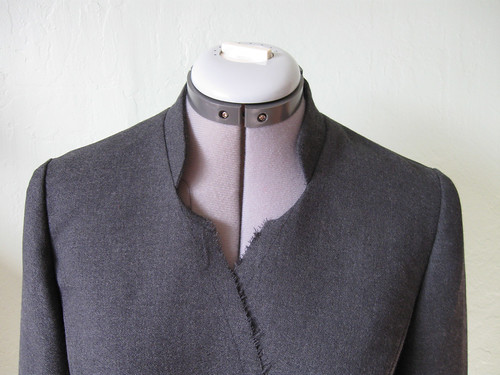
Finished lapel.  On corduroy or velvet, the lapel and collar points will never be as crisp or pointy as on a cotton or wool, but that is part of the charm and softness of the garment.

Blue cord lapel

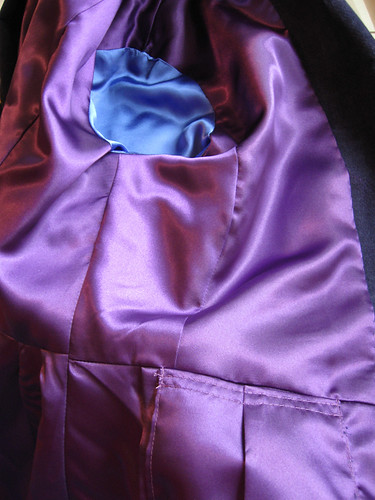
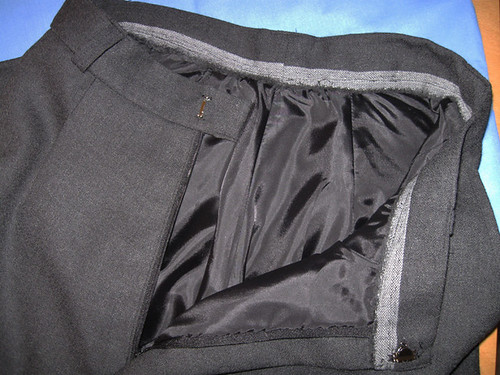
I did a bound buttonhole as a machine stitched buttonhole would have marked up the nap.  I couldn't figure out where to add pockets on this pattern as it had none, and I didn't want patch pockets, so I added an inside pocket in the front of the lining.

Blue cord buttonhole
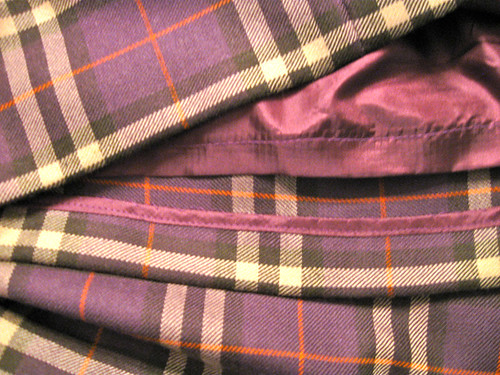
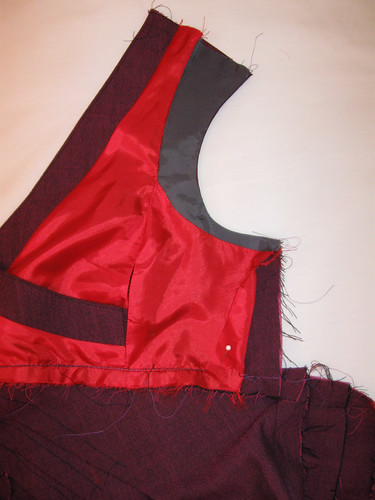
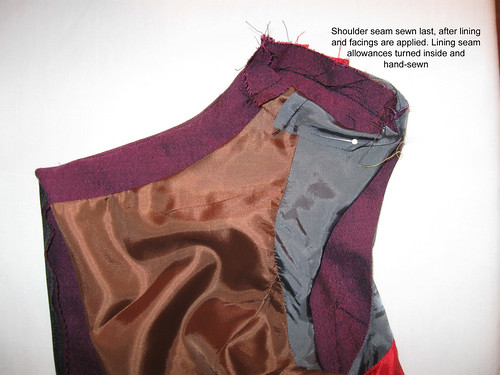
Here is the inside of the jacket, purple satin lining in the body, and blue satin lining in the sleeves.  The purple is reclaimed from a coat I started about 2 years ago, never finished and tossed out, but kept the lining pieces.  Since this jacket has small pieces I was able to recut it to work.  I like a satiny lining on winter coats and jackets - it gives an additional bit of structure and makes them easy to slip on and off over my winter sweaters. 
Blue cord lining
Some colors make me crazy to photograph - like this blue, which seems to look different in each photo.  The first one seems the more true to life.   Here are 2 more views, of the back and  side seam detail.
Blue cord jacket backBlue cord jacket side

Additional info to all who have commented below on this tool I called a Velvet board, perhaps I should have called it a Needle board.  It  seems like that is what it is called if you are
searching for notions or sewing supplies.  


Recently Rosalind asked me about lining jackets, so coming up I will be making a winter wool coat for myself, and I will post some info about linings then.
Until then, more holiday sewing and garden clean up, in between the raindrops. Plus planting bags of tulips which are easy to buy (colorful packages beckoning) but not so easy to get myself outside to dig and plant. 


Happy December sewing to all,  Beth
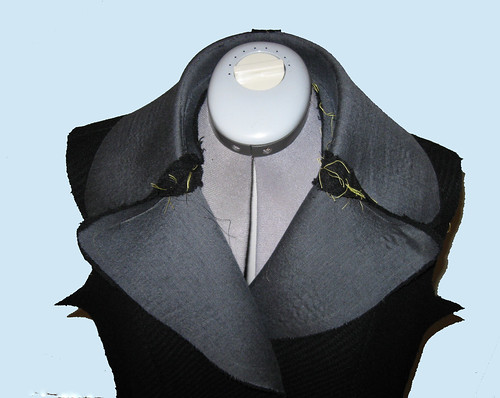
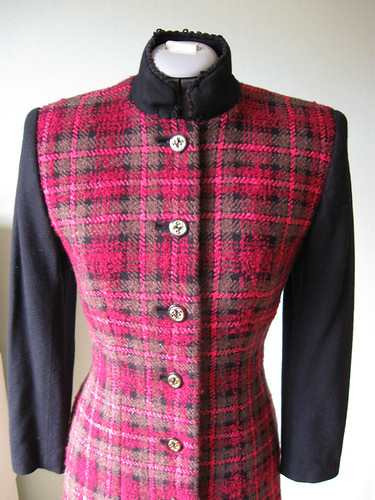
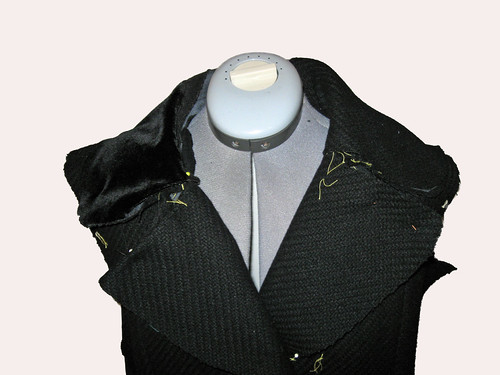
Wednesday, December 1, 2010

Vogue 1117 Michael Kors dress, my new fave

Today I put the finishing touches on this Vogue 1117 Michael Kors dress, and I am loving it.  
My previous post was about fabric and fitting. on this "rated average difficulty but is a bit beyond that" pattern.


Korsdress close up


This one was meant to be a test version, using some of my estate sale find fabric, and I am really happy with it.  I will be wearing this to some holiday festivities this year.  Kind of different for me, as close to a little black dress as I ever get since I rarely wear black. 
The dress form photo is first in this blog post so you can see the detail on the front of the dress which is so clever.  OK - a shot of the dress on me.  I had to tweak this in photoshop in an attempt to make the details visible, consequently the color looks a bit weird.  I was zipping out the door for a haircut appointment today - so I cropped my bad hair day right out of the photo.   I wish I could take beautiful and mysterious photos like Yoshimi - who sews fantastic things and models in an interesting way.   Also I would like to grow 4 inches but that seems unlikely.  (5 ft  3.5 in)


MKdress1


A few notes on this pattern, Vogue 1117
  • very figure flattering,  accentuates the good parts and kind of distracts from the rest
  • not so easy to fit.  Take note of the measurements on the pattern pieces, very necessary to read and take heed of on this pattern.  I suggest cutting out your usual size but adding an extra 1" seam allowance on all side pieces, to play with fit.  That bodice seam may hit at an odd place if you are tall or long waisted. 
  • fabric with some lycra or other stretch fabric might be better than a menswear suiting which they suggest.  Tightly woven suiting is a very unforgiving fabric to work with.
  • the armholes are a teeny bit tight, maybe I took it in too much right under the arm but the way they are cut is a but snug.
  • hand sewing is your friend on this dress - the instructions have you insert the lining almost fully by machine - which I rarely do since it makes fitting more dfficult.  I could sew the whole thing much faster if I put the lining in by hand as the last step.
  • I took in almost one inch out of the center back seam, even more at the waist. I am coming to the conclusion that not only am I a different size top and bottom, but also front and back.    But really who isn't?
Now for a peek behind the curtain.   Years ago I concluded that when I work on any sort of special occasion dress for myself, the sewing style changes.  I love tailoring, making wool jackets that will last for years, with spiffy linings and crisp welt pockets. Summer dresses that become my staples - sewn to last.   But a dress I will maybe wear only once?  or a few times at the most?  That is when I rummage through my lining bin, use up all those 1/2 and 7/8 yard pieces of various colors that are perfectly good leftovers.   So this dress has lining in red, grey and a sad brown that I am happy to use up.
Sometimes the sewing on the inside is not up to par either.  But I have never been to a party where someone admired my dress and then asked me to turn it inside out so they could inspect my seams.   I may have offered to show them but that is a different story (and guaranteed to send them off in search of another drink)
Kors mistake


Speaking of drink - what happened here?  yes one of those little treats where you happily finish a tricky seam and turn it over to see that you have sewn your dress bodice into the facing.
I seem to do some variation of this at least once per garment.  


Some construction details.   As mentioned above, I like to sew the side seams last so the lining is an issue.  Dresses like this with a wrap bodice call for a bit of a concession in that I sew the lining about 3/4 of the way, and leave a little flap unsewn near the side seams which can be turned back to allow the dress side seam to be adjusted.  Below you can see the little white dot which is the pin holding the lining back from the side seam.
Kors lining front
Now that the facing with lining is attached front and back, I can start fitting the side seams and the shoulder seam.  I was thinking I would need to take in the inner shoulder seam but in the end I did not.  However I was committed to this construction method so the shoulder seams get sewn up and then the lining tucked in, pressed and hand stitched.  Even the lining on this dress has fiddly little pieces.  However the lining did fit the dress like a dream so who am I to criticize Michael Kors (or whichever of his minions designed it) 

Kors back facing

In summary:  if you are looking for a challenge give it a try.  Now that I made this one I am very likely to make it again in the spring in a lighter color cotton sateen with some lycra.   The skirt seam details don't show well on a dark color, but I know they are there  :)


Thank you to everyone who reads my blog, and I appreciate all the comments and compliments.   
Happy Hectic December sewing to all,  from Beth


Friday, November 19, 2010

Michael Kors dress - Vogue 1117

The holidays are fast approaching and I have resolved to have a new dress for a holiday party or two.  Last year I was like the proverbial cobbler's children who had no shoes.  In my case - the busy dressmaker with no dress.  This year I am staying in CA for the holidays so I have a bit more time.  Also, I am waiting for fabric that I ordered last week to make some children's jumpers, hopefully it will arrive tomorrow but I am not counting on it.  


So I was rummaging through my file boxes looking for something to make, and came across this pattern which I bought last year but had never made.  Perfect time to try it out.  The suggested fabrics are men's suiting, crepe, and lightweight tweed.  Having none of these in my stash I pulled out a fabric that I bought at an estate sale months ago. I would call it a twill or a kind of denim.  The threads are magenta and black, which combine into a smokey merlot color (if that is a color).  Very easy to work with and presses well.  No stretch which would be nice, but for one dollar at an estate sale I am not complaining.  


MKdresspatternandfabric

This pattern is a rated average but  I would definitely call it advanced.  Lots of pieces and plenty of marking to do.  
The question of size is one I am still playing with.  I usually start with a size 12 bodice and then play around with the actual measurements.  Lately the patterns seem to add way more ease than is necessary or flattering.  For example, the size 12 pattern is for a 34" bust.  See the circle with the X in it on the pattern below, the pattern it shows a finished bust measurement of 38" which would be 4" total of ease.   I always use these finished measurement indicators which convention dictates are printed on the front pattern pieces, usually bust, waist and hip although depending on the style they can omit the waist, hip or both.  For a multi-size pattern they can help you decide which size to use or how to choose a different size for top and bottom and grade the difference.  Quick method of checking is to hold the measure tape around you at the measurement, for this one bust at 38", and imagine that as the garment.  Does it stand too far away from your body?  or too tight to sit down?  
I think for a sleeveless dress that 4" of ease in the bodice will be way too much, and I will probably end up taking it in about 2" but I am going to baste together the front and back and then see how it fits.  This is one more reason that I rarely assemble dresses as the pattern instructs, for me it works better to sew side seams as the last for fitting purposes.

Mkdresspatternfront

Here is the front skirt piece, same circle with X indicating the finished measurements for hip for the various sizes.  You can see that I was lazy and just cut it out as the largest size on the pattern paper, so I will use it as an extra-large seam allowance.  

MKdresspatternskirt

Lastly, here is a look at the inside of the front bodice.  The pattern instructions have you sew a small piece of bias fabric on the right side over that inside corner and then slash, turn to inside and then attach the side bodice.  I understand that they are creating a seam allowance where none exists at the inside point of that corner, but thank goodness for fusible interfacing.  Last year I saw this post on a great sewing blog, Erica B's DIY Style,  Vogue 1117 - Michael Kors Starlet Dress all about making this dress, she gave a lot of great tips on sewing it including this one on step 8 in the instructions.  If you are making this dress read her post first.  So I did as she instructed with the fusible and it worked fine.  


Mkdress corner fusible

Today I hope to finish a couple of muslins that I have started, finish a dress I am making for a client, get to the gym for a serious workout, and who knows what else.  MUST turn off computer!   Expecting our first big storm here so no gardening (whew, relief) 


Here is today's SunnyGal garden photo, took this about 2 weeks ago after a quick rain shower.  Mini roses in a pot that have stayed alive and blooming for 6 years.  I was in the parking garage elevator in Union Square in San Francisco, leaving the shopping district and a woman got on the elevator with what appeared to be a table centerpiece.  I said it was pretty and she said "will you take it, I don't even want it."   I never turn down a plant so I came home with it and it has bloomed ever since. 

MiniRoses

Thursday, November 11, 2010

Never can say goodbye

What do you do with items you have sewn but no longer wear?  I have a few treasured pieces that remain hanging in the closet, despite not being worn for ages.  Here is the prime example.


KLplaid suit

Vogue Paris Original 2756 Karl Lagerfeld Suit.  I made this sometime in the 90's when I started work in the corporate world.  I loved this suit and probably wore it way too often. But as I recall, these were my first bound buttonholes. The sleeves and collar are wool jersey and there is a small bit of braid trim on the collar.  The skirt is the same black wool jersey.  If you are noticing the pleat perfection in the skirt, I can't take credit.   At the time I made this I was taking a class on pleated garments at the Sewing Workshop in SF (no longer there) and part of the project was the opportunity to send some fabric out to be professionally pleated.  The buttons came from Britex, a downtown San Francisco fabric store that I recommend if you are in the city.

I still have the pattern, I think my jacket looks similar to Karl's.  However I didn't go with the ultra European 90's red hair or the very Karl glasses shown on the line drawing model.

KLVogue2756

I still wear the skirt once in a while, and I would maybe wear the jacket, except as you can see it does have rather large shoulder pads - at the time they looked good.
Maybe I should operate on this jacket - change the shoulder pads, although who knows what that would do to the sleeves.  Hmmm.   


KLjacket close up

So this suit still hangs in my closet.  I have plenty of other suits I made, leftover from my crazy corporate days and I wear them on occasion but this one is very dear.  I saw a post a few months ago by the Slapdash Sewist,  bye-bye-baby-baby-goodbye and she discussed donating or otherwise getting rid of things she had sewn.  In particular I noted her comment about the lack of size labels in handmade clothes, something I had never thought about.  

This dress is another creation that I just can't part with.  I confess that this no longer fits like it did.  A bit tight in the hip area.  I made this to wear to a friend's wedding.   Self designed, in that I took a basic sheath dress and played around with the ruffles until I had the type of ruffle effect that I wanted.    I made the belt and used a covered buckle kit, those kits are great and are become more difficult to find.

pinkdress ruffles

Digging around in my photo books I did find this blast from the past.  That  is my friend Ashley on the left,  we have switched hairstyles these days as I have the short hair now and she has the shoulder length. But she is just as tiny as ever. It was for her that I made some plaid Bermuda shorts earlier this year, wrote about it in this post.

me&Ashleypink dress

The wedding was in Portland, Oregon and I forgot to pack the belt in my suitcase - so the dress looks a bit long.  But I did not forget my matching shoes!  

There are a few more gems hanging in the closet.  My sister, who is a professional organizer, recommends that for each new item you bring into your house, you should get rid of one like item.  Sorry sis, not going to happen here.  (Although she recently organized my garage and now it is perfection - just have to keep it that way).

So the question to you - what handmade but no longer worn clothes are you still keeping?
and why?


Tuesday, November 2, 2010

Wool Crepe Jacket and Pants - done!

This afternoon I finished the wool suit that I have been working on in my last 2 posts.   Lots of intentions to do the hemming and hand sewing these past two evenings in front of the TV - but the World Series was too exciting for a San Francisco Giants baseball fan and for once I actually watched instead of just listening as I sew.  Victory in 5 games and now "back to our regularly scheduled programming".


Here is the finished jacket, which is New Look 6633.  A very simple pattern that sews up extremely well, and can be a matching jacket for a dress, a stand alone jacket, or as I have done part of a wool suit with pants.   I used this pattern last year for a 2 piece outfit in silk dupioni that the same person wore to a wedding,  pictured in a previous post .


Ellenjacket2

Here is a close up of the collar.   Sort of an asian inspired shape to the collar, and so simple to sew.  I also think the sleeves/armholes are very well drafted on this pattern, the sleeves go in very smoothly, with just the right amount of ease.   Note to beginning sewers - don't presume sleeve issues are to do with your sewing skills - I have realized over time that some sleeves are perfectly designed and sew beautifully with almost any fabric - and some sleeves are a nightmare that should never have made it out of the design department.  But the mystery is figuring out which is which. 


Ellenjacketcollar

I also made a pair of pants to complete this outfit.  Last year I copied a pair of existing pants which is not as tricky as it sounds.  Making a pattern from a well-fitting pair of pants you already own can be less frustrating than dealing with a new pattern and trying to get the fit right.  I suggest for a first try using a fairly loose pant, something like a trouser style.
Maybe I will do a post after the holidays on how I do this.  


Here is the inside of the pants,  I cut the waistband on the selvedge of the fabric and used that as the seam finish, stitching in the ditch on the right side to secure it.  Doing this eliminates turning the waistband seam allowance over and creating one more fabric layer.  On men's trousers you always see the waistband done this way, often with a contrast binding over the edge of the waistband.  I put a center back seam in the waistband, which makes for easy alterations.  Have you noticed that some ready to wear women's pants are constructed this way?  I have seen this at Banana Republic and a few other brands.  Wonder why the pattern companies don't do this.  SO much easier to make tiny adjustments to the waistband at the end of assembling a pair of pants.   For the zipper I used the Sandra Betzina fly front zipper method, video instruction on Threads magazine website. - foolproof.  

Ellentrouserwaistband

Here is today's SunnyGal garden photo.  I looked outside today around noon and the leaves on the crepe myrtle tree seemed to turn orange overnight.  Maybe in honor of the SF Giants?
Time to enjoy as next week they will be on the ground.


crepemyrtleleavesNov

Tuesday, October 26, 2010

Grey wool crepe suit - sleeves and more

Sewing on the grey wool crepe suit from my previous post continues.  This fabric is a dream.  The jacket is almost finished, but I took a few pictures along the way.   If you notice the orange thread near the collar, I will explain that below.

Grey suit sleeve head

Grey suit shoulder stayTo stay the shoulders, instead of stay tape, I cut a piece of the selvedge from the lining, and used that in place of stay tape.  I think the commercial stay tapes are just a bit too stiff whereas the lining selvedge is thin and presses better but achieves the same effect and satisfies my fabric miser tendencies.


Since I almost always sew in linings by hand, I can do what I like with the seam allowances at the neck and collar so in this case I have sewn them down flat using a catchstitch.  
A catchstitch is kind of a criss-cross X pattern of stitching that is really useful.  If you want to see how to do it check out this Oliver + S blog post or there are a number of videos online.


Grey suit catchstitch

Getting back to the orange thread - this catchstitch will never be seen, so I went to my stash of silk thread and picked the most unlikely color that I will never need for any other project.
I found this little rack of threads at an estate sale and bought it along with a huge trove of other goodies.   See those beautiful little wooden spools of Belding and Corticelli silk thread.
I miss that company that seemed to disappear when I wasn't looking and always thought the thread colors were like little jewels.

Silk threads

Once the sleeves were attached I sewed on sleeve heads.  I think this is some kind of wool, not sure as I have a big piece and cut out the sleeve heads myself.  Bias strips 10" x 2" and then fold over about 1/3 and press lightly.    Hand sewn in place onto the seam allowance on the sleeve side.    The photo on the right shows the sleeve head in place on the sleeve on the right side of the photo, the left side sleeve does not have its sleeve head.  It may be subtle but there is a difference.   The sleeve with the sleeve head has not been pressed (and will not be)
but the sleeve cap is smooth and ever so slightly filled out.


Grey suit shoulder difference
Grey suit sleeve head

The last step I have finished on this jacket is to sew in the lining, here I have used a combination of machine sewing and hand sewing.   Then I got to try out a new technique called Ravel Grading that I learned from Pamela Emy on her blog, Off-The-Cuff.  Her blog is fantastic and I have learned so many great things since I discovered it.  Plus her interfacing is really superior and now my first choice for tailoring projects.


By doing the Ravel Grading, bulk is eliminated in the seam allowance without trimming.
On this wool crepe the technique works especially well, I am interested to see how it works on other fabrics.   Here I have removed threads for about 1/4" reducing the thickness of the seam allowance on the center front edges of the jacket.  

Grey suit ravel grade

Next up,  finish this jacket - started the pants last night.


Here is today's SunnyGal Garden photo, taken on Saturday in the rain.  Most years after the pink Jasmine on the back fence has finished blooming, I see the morning glories growing and they bloom in the late summer, so there is a scattering of these purple jewels across the green carpet of the jasmine vine.  But this year there have been no flowers until just the last week or so.  What a strange garden year it has been in N. Calif. 2010.   The first of the morning glories, when they should be ending!


morningglory