Wednesday, January 30, 2019

Silk version of BurdaStyle 04-2018-105 shirt with dart details

While I'm currently working on a raspberry color silk charmeuse shirt, today's post is my recently completed silk crepe de chine shirt, a pattern repeat that I'm not sure was the optimal choice for this fabric. I decided to use a Burda magazine pattern I previously sewed up in in a print cotton, as the details didn't show on the first version.

The darts look a bit bumpy in this picture - I have subsequently pressed the shirt front again after I saw these dress form photos and the front is smoother. However I think the pattern is a tiny bit problematic just across the upper chest - I found that it needed about 1/4" more fabric at the center where the button band meets the shirt front, which would eliminate a tiny bit of pulling. Although it is not as noticeable when worn - the shape of a dress form never really mimics the curves that a person has. Also in a crisper fabric this pattern definitely works better.

Dart shirt front details

Also while I like that blank wall for taking pictures - eek the color of it is...not good. I am even thinking of painting a white square on that section of my house for optimal sewing project photos. Crazy or dedicated?  My house is a pale sage green color - nice for houses but a bit glum for photo backgrounds.

Blue silk dart shirt 1


On the topic of silk, I posted an in-progress photo on my IG of the silk charmeuse and received a comment asking about how I dealt with the static when wearing silk. What? I've never had this issue. Perhaps it has to do with the climate where you are.  We have a fairly consistent humidity and temperature and I never hear people mention a problem with static - in fact it is kind of an unusual occurrence. I think it happens more in cold dry air? So I have no advice on this one.

Again - disclaimer on my embarrassing lack of pressing here:)  or in fact bad pressing to add wrinkles where none should be!
However you can see the seaming on this shirt - it has the interesting sleeves which have a seam at the elbow, lining up with the seam at the waist back and front.

dart shirt back view

I bought this fabric at Mood Fabrics in NY back in October 2016. It does coordinate with the wool I bought, which I sewed up into a jacket. Here's the post on that jacket and another silk blouse. Why I bought two similar silks I'm not sure.


blue silk dart shirt 2

The other day I did a big closet clean out (along with everyone else in the world, right?) and found these jeans which are kind of a cross between boot-cut and wide leg. They are definitely not skinny jeans, and maybe 7 years old? Anyway I kind of like them again and think they will go back into the jeans rotation.

Dart shirt side view

The sleeve doesn't appear as full in this silk version as it did in the cotton version, I suppose due to the drape of the fabric.

Sewing detail:  I didn't take any photos as I sewed, except for this one. When I do a button front shirt I like to finish the buttonholes, sew on the buttons and then hem the shirt. I've found this is the best way for me to get the center front right, and not have the underneath peek out at the bottom.

Blue dart shirt hemming details

Which involves a bit of extra work. I hemmed the shirt bottom, lining up the two sides and then finalized the bottom of the button band.


blue silk dart shirt back view

I quite like the length of this shirt - longish in the back but not too long. I'll have to remember that when I hem my next shirt.

IMG_4531

Here's the illustration from the magazine. April 2018. I have searched for other versions of this shirt online, not found many.  I think Burda suffers in that it it's a bit difficult to tag the various specific patterns on Instagram so it makes finding inspiration or comparison difficult.

So that's the latest on my blue silk blouse. I find it a bit funny as I used to dislike navy blue and dark blue in general and now I have quite a few things including 3 shirts in dark blue. Oh well, it's nice to explore the color wheel. Although brown/rust/beige - not going there!

With apologies to everyone in the polar vortex - we have daffodils blooming and yesterday afternoon I was out in the front yard pulling weeds and planting some new succulents. In a t-shirt! Saying hi to people out walking their dogs wearing shorts! It's not really shorts weather although some people do seem to wear shorts all the time. Oh California - so smug until the big quake comes and knocks us into the ocean 😎 Hopefully not in our lifetimes (or anyone's).

Silk dart shirt 3


Happy winter sewing, and stay warm everybody,
Beth

Today's garden photo - a pink camellia. They are messy shrubs and seem to be all over in the older suburban neighborhoods. I think because they stay green all year round and don't need much to keep blooming. The flowers don't last long but they are pretty and bloom in January when we need some color.

IMG_1123

Tuesday, January 22, 2019

Random Threads # 34: buttons, 30 wears, and can you be too dressed up?

Time for another Random Threads post, it's been a while. The last one was in October and as usual I have a number of topics jotted down on a page in my notebook. Also as usual I have a couple of cryptic notes that probably made sense at the time but today have no meaning. Here's one "measuring suits". I wonder what I meant by that? Yes I resolved to write out my thoughts more clearly so weeks later I could remember - didn't happen:). We shall never know what that topic idea would lead to.

But the rest of my notes make sense so let's dive in.

30 wears:  I've seen this idea around for a while - the challenge to think about whether you will wear something at least 30 times before you purchase. It's a good contrast to fast fashion and the disposability of a lot of ready-to-wear, and takes a more sustainable view of our wardrobes. But what about if you make your clothes? I bet I have a lot of things I made that will never achieve 30 wears, and yet I have a lot of garments that I have kept and worn for upwards of 10 years, worn possibly hundreds of times. Do the two balance out? I'm not contributing to the landfill as so much of my handmade wardrobe is still in my closets, mostly because I can't bear to part with most of the things I've made. I've said before that I think something you wear to a special occasion or a party is almost like a costume - I'm not interested in perfect insides and want to sew those items up fast. And perhaps even pass them on to a friend so they can wear to a party with a different group of people. Coats and jackets - they get the long term treatment, sewn as well as I can, linings that will last, true investment pieces. I think the 30 wears idea is smart, particularly when it comes to shoes, belts, bags - those should be useful and I find the items that I buy thoughtfully and think about future wearings stand the test of time.

Spare buttons:  When you buy a shirt it often has a spare button, which I would snip off and stick in the button jar. And people so often give me the remainder from their closet clean out, which means I have a lot of orphan buttons. But what about when you sew a shirt. Think about all those aforementioned silk blouses and other shirts I'm wearing. Do you set aside an extra button in case you lose one. I'm starting to think I should. New idea is to make a card and attach 1 button each time I make a shirt with a short notation as to which shirt it goes to. For coats and jackets I always buy one extra button - often they are $ 5 buttons and if I lose one I want to be able to replace and not have to invest in a whole new set!

Untitled


Dressy vs. casual style:  Do you find yourself sewing up things that are slightly too fancy for your day to day life but you want to wear them anyway? and then people ask the very annoying question "why are you so dressed up?"  I wonder if this is a distinctly American question or does it happen everywhere? I dress as my mood takes me, so sometimes I might be a little too dressed up for the occasion - but as stitchers we know the feeling when you've just finished an item and you want to wear it - whether or not the time is ideal. Lately I've been liking the feeling of silk blouses, and decided that I would wear them anytime - regardless of my day's activities. Perhaps this happens more in the winter - the very nature of summer clothes is more casual. And then there is that word fancy. I think this is a word that Americans can understand in the context - we would say things like "come over to eat on Sat, nothing fancy" or "the party was really fancy" or I want to look good but not too fancy" Am I overthinking this word? chime in and tell me if you know just what I mean. I've asked friends from around the world and I find it hard to make an exact translation - in England does fancy mean a costume occasion, and/or a desire?  And my Italian friends offer "elegante". I do love all things linguistic, whether word origin, usage or languages so maybe I just pay more attention that is warranted to this one.

Fashion and Politics intersecting perfectly to me: I happened to see the new Instagram ExcellentCoatsonIrritatedWomen the week that it started, and wow, this has given me a lot of glee over the last month. The profile pic kind of says it all (Nancy P in that fab Max Mara coat) but who knew there were so many great photos of inspiring women wearing great coats. Check it out.

Stuff not yet blogged:  It sounds so trite to say that time is flying by but eek, where do the days go? And I really want to blog just about everything I sew, if only I could sit down and do it. In particular I'm really satisfied at the response to my posts on items I've sewn for my friend Heather. As I say in my sewing classes, everyone probably needs some adjustments on a sewing pattern and I think showing how I get a nice fit on a variety of styles for her is useful. By the way - if I haven't mentioned it before, she is about 5'2" tall. I would love to know how tall people are when I read their blogs or pattern reviews, it really shows how patterns look on various figures and heights. Anyway - here's a silk blouse I made for her in November, we didn't have a chance to take a photo of it on her but perhaps I should blog it - I think the pattern envelope is not really very inspiring but it has very nice lines and sewed up well. Vogue 9086. Plus plenty of options via the seaming for fit adjustments, always a bonus! And a built in hidden-buttonhole front closure which is a great way to learn how to do that clever technique.

Silk stripe blouse with pattern env


Pants pattern poses: I love to see all the different variations on a pattern, on different body shapes, different fabrics etc. Thanks, Internet! But there are certain patterns that people rave about but to me they look slightly awkward in the photos - like they don't quite fit and if you stand a certain way it might disguise the fit issues. For the most part it's pants patterns where I notice this - I might as well get specific, it's those Persophene pants. A lot of what I can call a superman pose - hands on hips, feet apart. These pants have no side seam right? so not much shaping. Does it even matter? if the person likes how they feel that is the important thing. But it is interesting how the fashion pendulum swings from ankle squeezing skinny jeans to wide leg pants. Kind of fun to think what it might be 10 years from now, any predictions?

Coat muslin out of felt:  I happened to see a post recently where someone made their test garment for a coat pattern in felt. Genius! I think they sell cheap 60" wide felt at Joann's, so a low investment and it would behave more like a wool coat than thin muslin ever could. I might have to try this next time I'm doing a coat pattern.

Classes at Hello Stitch Studio: This spring will be two years since I started teaching classes at Hello Stitch - that went by fast as well. We have a bunch of great classes coming up, however I am sorry/not sorry to say that most of the classes in Feb are sold out! It must be something in the air for 2019, I think lots of people finally resolved to learn to sew their own clothes, with more inquiries than ever before. We are doing a Level 1: Learn to Sew Series, the February sessions are full but it will repeat starting in April. and we will also have a Level 2: Learn to Sew series which will be a bit more advanced, and include some work on pattern fitting, plus zippers. We're working on a class series that will focus on Sleeves - how to adjust for fit, tips and tricks for  how to sew in a beautiful sleeve, etc. So if you are interested in that let me know as we haven't finalized it on the schedule yet.
A lot of our classes now are based on a specific sewing pattern, which is a good way to focus on some specific techniques. Spring is approaching and we have spots open in the Wrap dress class in late March, and the Bondi dress in April. But I would say if you are interested in a class - it's better to sign up as soon as you can, we do a waitlist if they are full but no guarantee a spot will open up.

Still available: this upcoming weekend I'm doing the Ash jeans weekend workshop - there are some spots still open in this class. The pattern has really impressed me and I'm looking forward to seeing how it fits on a variety of people. Stone Mountain has the pattern and they have all kinds of great denim and kits if you want to buy everything you need at once. This is a 2-day class, with lunches included. So indulge yourself in a sewing weekend!  By the way - you can use any jeans pattern so if you already own a jeans pattern feel free to use that.

Jeans zip and waistband

Up next - a slight sewing palate cleanser, as the wool blazer jacket for Heather is just about finished but waiting for a final try on from her, so in the meanwhile I started in on something from the December 2018 Burda magazine. That magazine taunts me - so many things in it I'd like to sew. (well that could apply to so many tempting things, reading blogs, looking at IG, talking with friends, they all make me want to sew something new and different)

Burda blue dress in progress

This dress will have long sleeves and I'm not convinced on the zipper - will have to get the back attached and see if it's needed. Now I want a teal colored coat. See...always something trying to get on the to-sew list.

Stay warm everybody - sometimes I'm asked if I can even wear a coat here in California as it doesn't really get cold (not my words) anyway this morning at 8:00 am it was about 37℉ so to me that's cold. But by this afternoon it should be in the mid 60's ℉ so I guess I will shut up about the chilly weather. Eek, New England and the Great lakes - how do you survive???   Hang in there - spring is coming, soon I hope.

Happy January Sewing, Beth

Today's garden photo - reaching back to September when I had all kinds of dahlias blooming. 

IMG_0382

Tuesday, January 15, 2019

McCalls 6172 Blazer jacket, including fit adjustment details

Is it just something I notice because I like them, or are blazer jackets everywhere right now? Particularly when I see features on fashion-y websites with the title of "Is it really fall if you're not wearing a (plaid) blazer?" Sounds good to me, and plaid, even better. For some reason sewing a piece that includes a collar and lapel is my happy sewing place. So back in October I had a jacket class on the schedule at Hello Stitch, and also I had a pattern that I thought would work for Heather. So to combine 2 projects in one, I decided to test out this pattern and adjust it to fit her, and then sew up the jacket in my weekend class to demonstrate all kinds of techniques like welt pockets, pressing, interfacing choices etc.

Which meant I wanted to make it wearable - but not invest a lot into it. Also I would be toting it back and forth to the studio so I didn't want to use some precious fabric and have to treat it carefully. Enter the stash sale find. I bought a big piece of mystery fabric (like 5 yards of 60"wide) at the ASG stash sale in early October. It's navy blue, most likely some wool content, but slightly thinner and lighter than I would ordinarily use for a jacket. However it pressed really well, didn't wrinkle and ended up making a not too bad lightweight blazer jacket.

So here is the finished jacket.  By the way - keep reading to see the exact pattern piece adjustments for fit.

Navy blazer

I almost felt like this was a proof of concept jacket for Heather - as I just wanted to get the fit right, and see how the length looked, the size of the pockets etc. All in all it turned out well enough to continue ahead with some wool fabric we bought at Britex, for considerably more than I spent at the stash sale (I think $ 6 for the big piece).

Here's the pattern envelope, it's McCalls 6172 which might still be available, or you can find a copy on eBay. It's one of the Palmer and Pletsch patterns which has all the info on fit adjustments, as well as the lines pre-marked on the pattern pieces to do a full bust adjustment, swayback etc. I have found these patterns to be really easy to use and I think if you were trying to get a grip on pattern fit they are a really good place to start. Manju in the UK has used this pattern and wrote "I think I have found my perfect blazer pattern"and hers fits really well.

Mc6172 pattern env

When it comes to blazer patterns for myself I have an older Vogue one that I've made I think 4 or 5 times, so when you find a nice one with the classic details it pays to get it to fit perfectly and then sew in different fabrics which change the look entirely.

The photos on Heather are not my best, it was late afternoon and I didn't take into account difficulty of photographing dark garment on sunny day, all the details are lost but you can see the fit and proportion are good. She's wearing it over her silk wrap dress and it became an unintentional yet feminine business look. I actually think she will get more wear out of this jacket with a t-shirt or casual cotton top, plus jeans and flats for running around town.

Navy blazer front view1


Ok, here's the info many of you are interested in.  I did a full bust adjustment on the jacket front, which gave more circumference as well as added length.
To start I usually trace the pattern piece that I'm altering in case it goes awry and I can start again or have it as reference for measurements. This is particularly helpful if you make adjustments on top of initial adjustments, you need to get the pattern pieces to join together and if you've chopped it up a lot  it starts to get very confusing.

Revise jacket front McCall blazer On the left, original jacket front. Note that this is an armhole princess seam jacket, so it has a center front, side front, and then side back and center back.
I wanted to add about 1" at the bust, and the pattern has the lines for doing both a standard FBA as well as the "Y" FBA, which you can see is what I did. Either way you end up with a small dart (I think called a Dior dart) in the princess seam which actually gives some nice shaping. So note that there is a bit more room above the bust due to the FBA, and then more length down the center front (the red lines indicated between the marked buttonholes. I also moved the vertical dart over, or at least left the dart leg closer to the side as it was and just moved the other side nearer it. I remarked the end of the pocket as well (since this adjustment added across the front but the pocket doesn't need to grow).


blue welt pockets

Here's a close up view on the pockets - always the most stressful part of any jacket! and you can see this isn't the most luxurious fabric, but it was fine for this test version.


Navy blazer pockets

I put lining on the inside of the pocket flap, I just like them to be a bit thinner than two layers of the wool fabric. Every little ridge and bump can show with this type of fabric, particularly as it is a solid color. My next version is a shetland wool with many different color wool fibers and it hides everything :)

Gratuitous inside construction shot!  With some white basting thread on the back princess seams as the fit was still being worked out there. For you serger maniacs - note the serger will never touch anything I make that is fully lined - oh no - I think it just makes extra lumps of thread on the seam allowances and is totally unnecessary. A few unravelly bits - learn to deal!

navy jacket inside interfacing


Another quirk of my jacket making - I never use the lining pieces. Too much trouble to get those out of the pattern pieces, I just use the jacket pieces and adapt as needed.

So for the front lining, I overlay the front Facing on the adjusted jacket front, which shows me where the lining would join to the front facing, and then trace a lining piece. Which includes our nice little fitting dart for the win.

Lining pattern piece for blazer front

In the interest of speed and also it seems to match a classic blue blazer, I did keyhole buttons on my old Singer sewing machine. (Singer 401 if you're interested, the very best buttonholes). Up close and personal here with the attachment, I think I went around two more times and used a wider stitch for a more substantial buttonhole. That's what I like about this attachment, you can go around multiple times in the exact same place to build up the stitches for a really nice buttonhole.

Navy blazer buttonhole


Navy blazer button sewing

And then I posted the above image on my Instagram and whew - quite the interest in this gadget. Which I call a button sewing gizmo for lack of a better name. You can see it kind of holds the button in place and raises it up various heights so you can achieve the thread shank which is so necessary on outerwear.

When I first started blogging I did a lot more posts with sewing and fit details. Lately with everything on my plate I find it a bit difficult to take all the photos as I sew and then sit down and write a lengthy post. In the interest of documenting the 2nd version of this pattern I decided to do an Instagram story along each step of the 2nd version I am currently making. And then saving each story to create one long Highlight on my Instagram profile page. It has basically turned it into a somewhat dry movie/slide show that will only appeal to serious sewing nerds - my people! So if you don't do Instagram or have a humongous IG feed and haven't seen any of this but are craving more jacket sewing details, including some of my late night narrations you can see the whole thing. (eek, does anyone like to hear themselves recorded?) The jacket isn't quite finished but it's getting near the home stretch.
I hope I won't regret putting this here - there are some serious weirdos that follow on IG - which for the most part I block.  Anyway, go to my home page on IG, it's the Wool jacket highlight.

Forgot about this one - back view. I used the mid-length view on the pattern and didn't change the length at all. I did take it in a bit at the waist in the side back princess seams, probably the same about as I added in the front for the FBA, which then retained the waist shaping.

Navy blazer back view

Navy blazer on H

I might have to try this pattern for myself!

In other sewing news - this upcoming weekend is my Copy Your Garment class - I love this one, where you make a pattern from an existing garment, without taking it apart. Or as Stacey at the studio says "clone your clothes". I think there are just a couple of spots available.
The following weekend is Make Your Own Jeans - 1 pattern/4 styles. I am really impressed with this Megan Nielsen jeans pattern, which I showed in my previous post. 
And then lots of other classes in Feb and March - all listed on the Hello Stitch Studio website. Then I need to think about Frocktails in Feb. with Bay Area Sewists. Because I need something to wear, ha ha. Might have to do a deep closet dive to find something that hasn't had many outings.

it's a very rainy here all week so ideal for staying in and finishing up so many projects.
Happy Sewing,
Beth

summer throwback - is it spring yet? I see a few of these petunias in my yard that are surviving and may live to bloom another summer.

IMG_0365

Saturday, January 5, 2019

Ash jeans from Megan Nielsen Patterns and Quilted Vest McCalls 7695

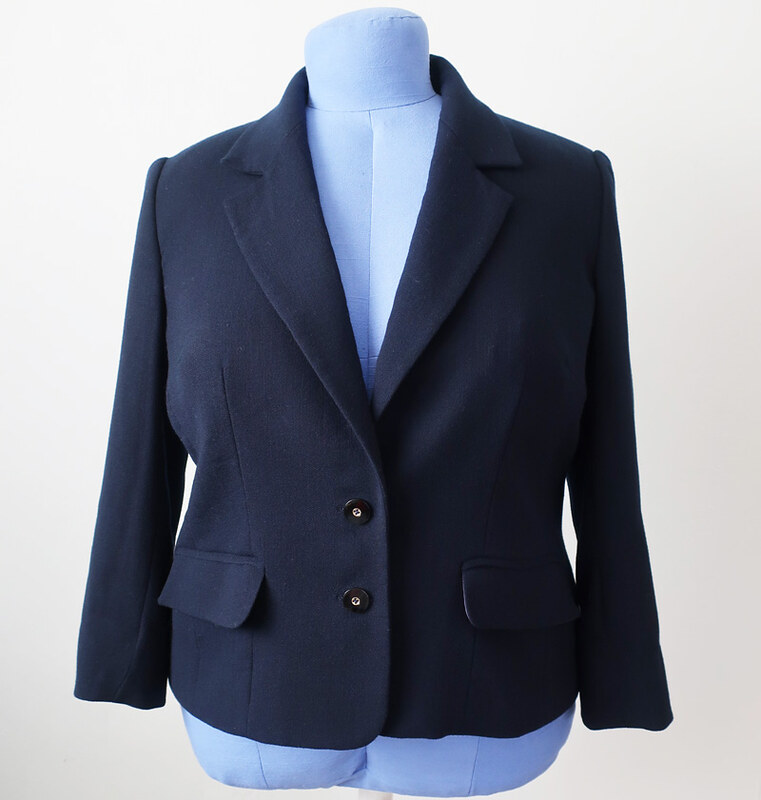
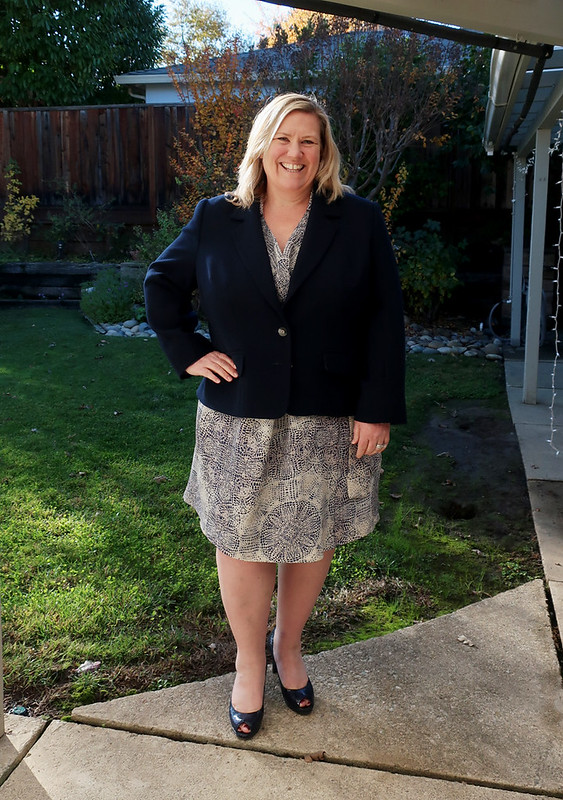
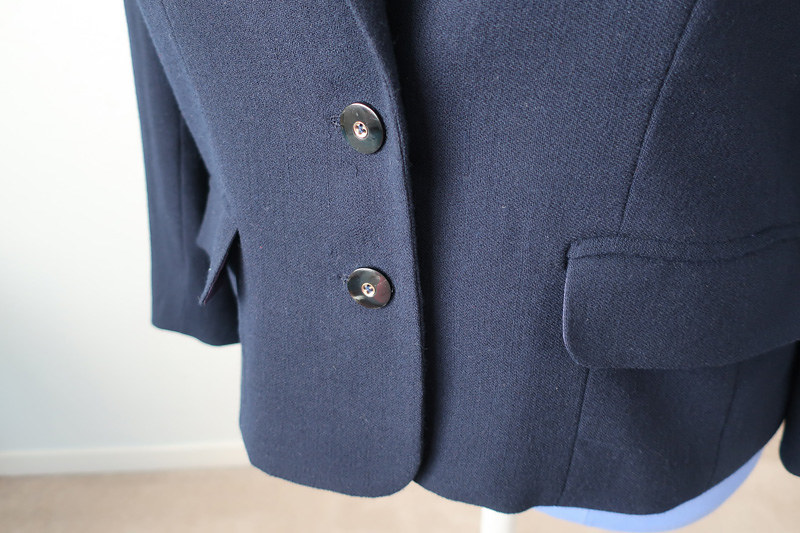
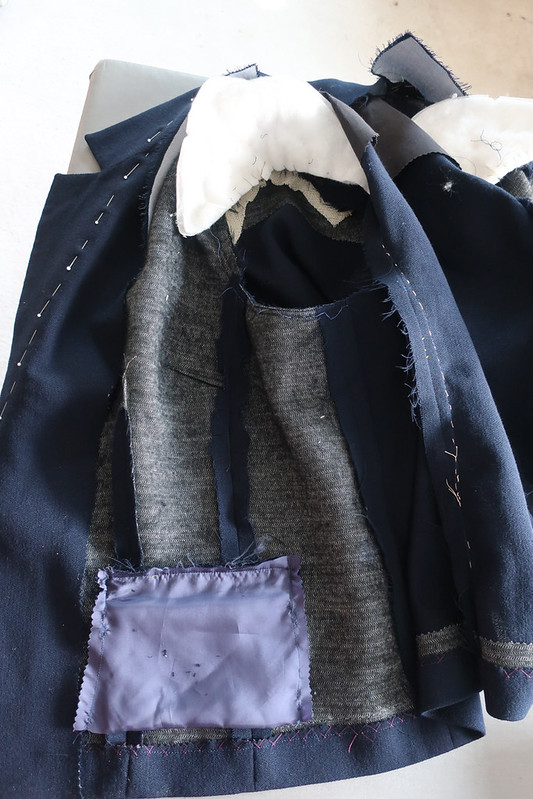
The last few weeks I've been sewing quite a mix of different items. I've sewn some holiday-wearable items for myself, such as the sparkly knit top in my previous post. I have a few things for Heather in the works, including her wool blazer. By the way, for that jacket I'm trying to post daily various aspects of that jacket construction in my Instagram Stories, but also saving a lot of photos with captions and info in my Highlights there - so they will be viewable in the future.
That means the third category of my recent sewing is items I'm making in anticipation of an upcoming class at Hello Stitch Studio. Later in January we're doing a weekend jeans making class (Jan 26-27) so I've sewn up a couple of pairs. At the end of February we have a quilted jacket class scheduled - which will be great for the Tamarack jacket pattern or any another quilted jacket/vest pattern.

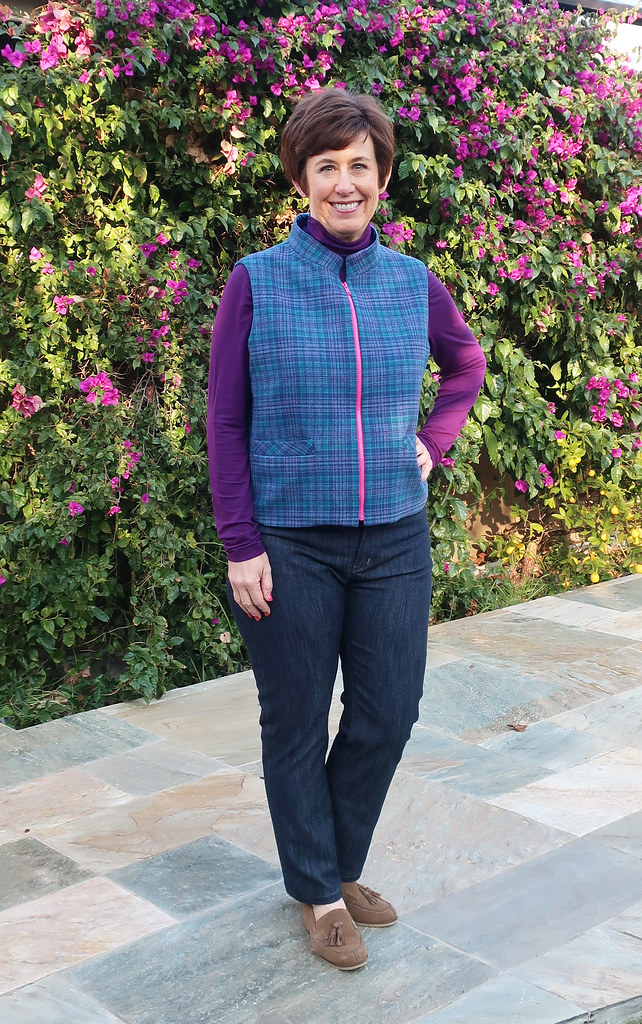
Plus worn together they make the perfect weekend wardrobe choice :)  I decided to start out my quilting with a vest, so this is 
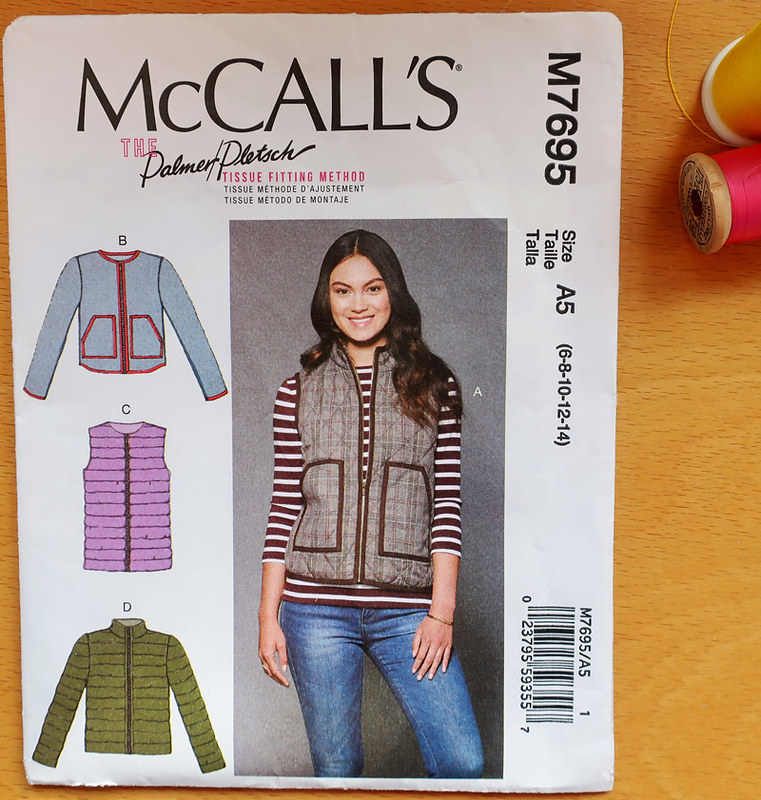
McCalls 7695. It is similar to the Grainline Tamarack jacket but has a zipper closure and also the vest option. It has a collar but it would be quite easy to add a collar to the Grainline jacket and I will cover that in the class.

Those are the Megan Nielsen Ash jeans in the slim version. They have 4 options, skinny, slim, wide leg and bootcut.
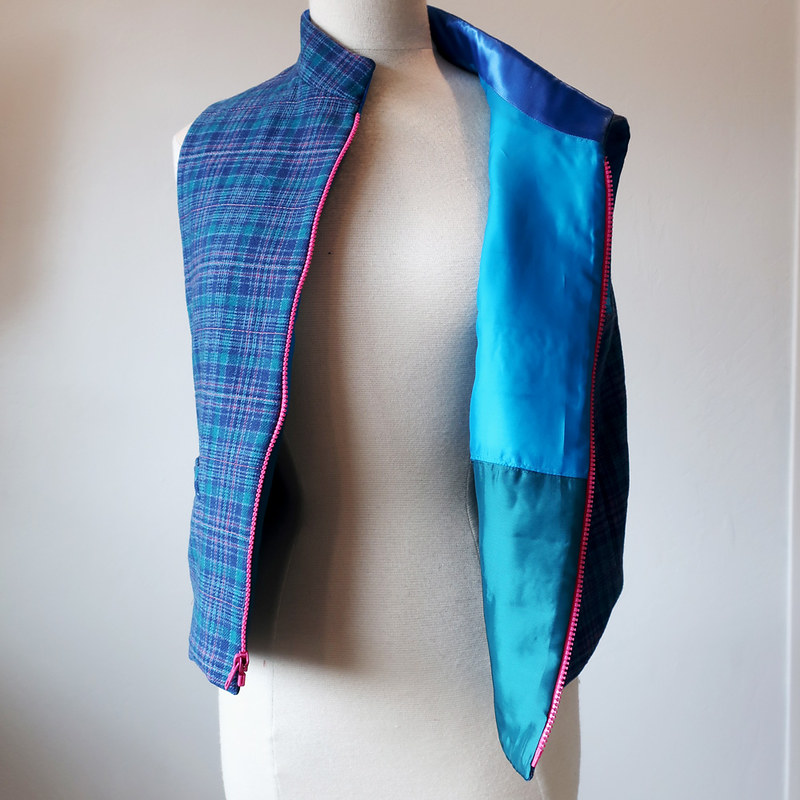
plaid vest 3


Vest details first.

Vest close up on form

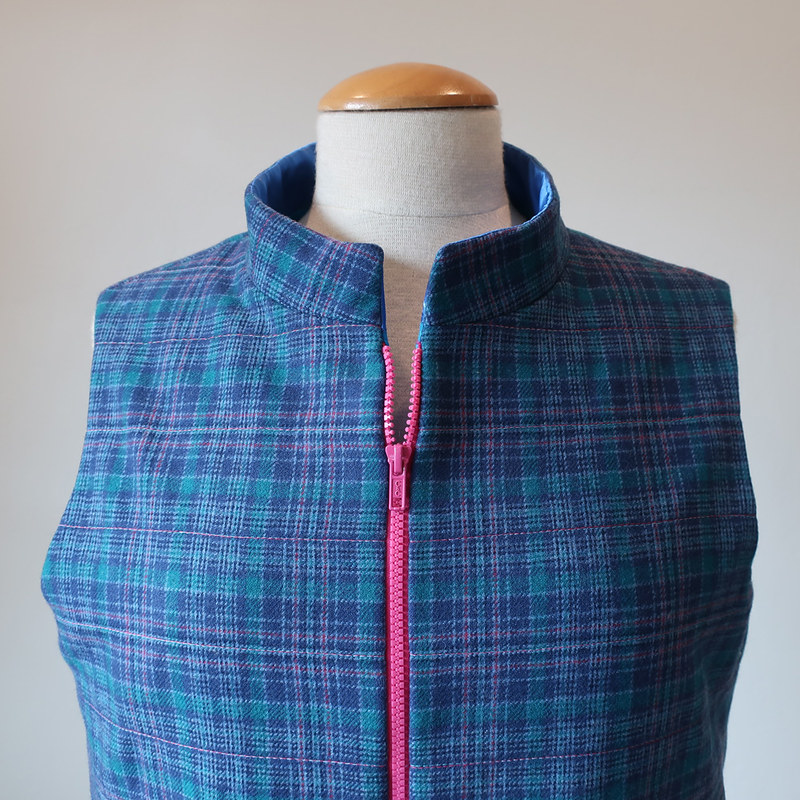
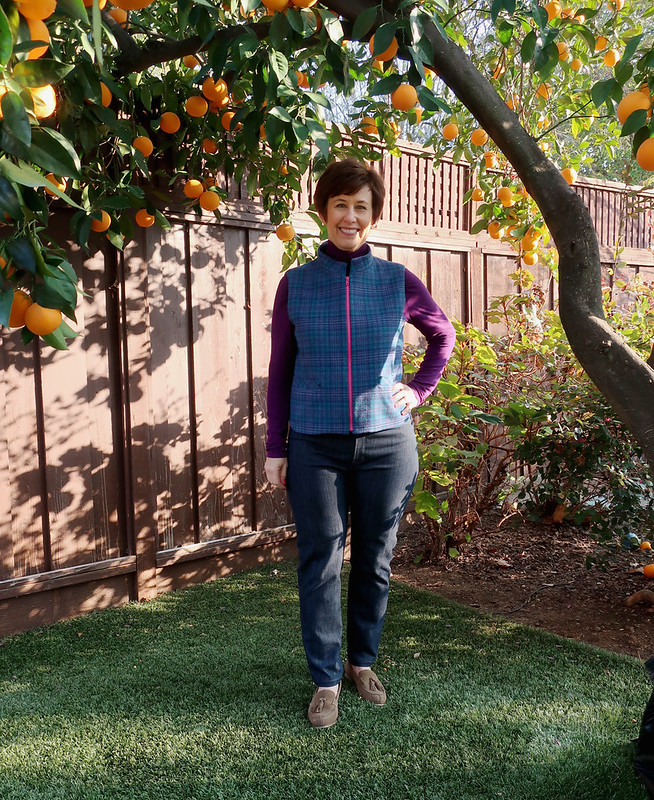
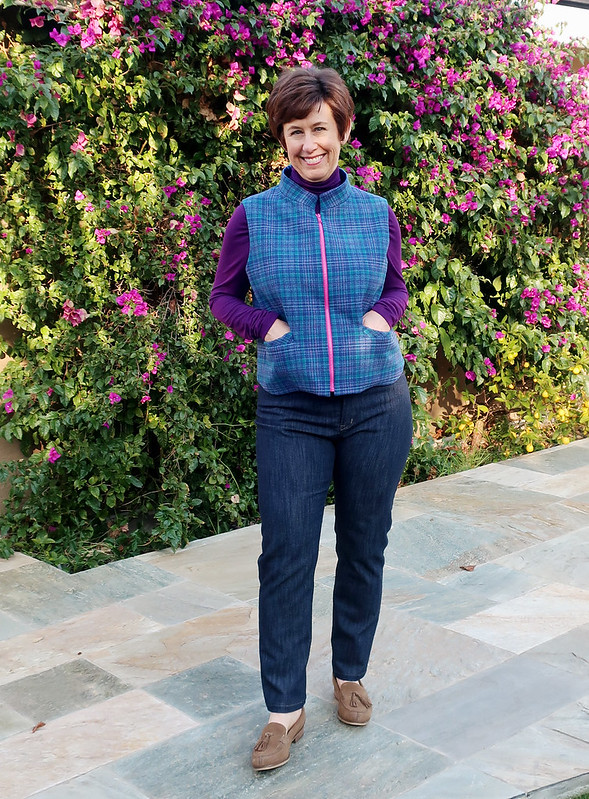
I had this piece of plaid wool which wasn't enough to make much of anything, perhaps a skirt but it was just the right amount for this vest. The intention was to cut it a bit longer but late night cutting had me follow the pattern markings, and I'm ok with the length. In fact since it's shorter I can wear it under other coats. Now is the time that I will confess I have an inexplicable fear of separating zippers. Well not a fear exactly - an aversion. I don't like to wear things that have them and I really don't like sewing them. So I decided to go with plaid, ha ha, because I want extra stress of matching.
Actually thought it wasn't bad at all. I did have to shorten this zipper which mean some work with a pliers to crush the plastic teeth so they would come off but it was a good way to get out some aggression.

The fact that I chose this plaid means that the quilting lines don't really show, you can barely see them, stitched also in a rose pink. I used a very thin cotton batting, I think it's called Warm and Natural Cotton (whatever was on sale at joann's that day) so it was easy to sew but didn't add a lot of thickness.

Mc vest

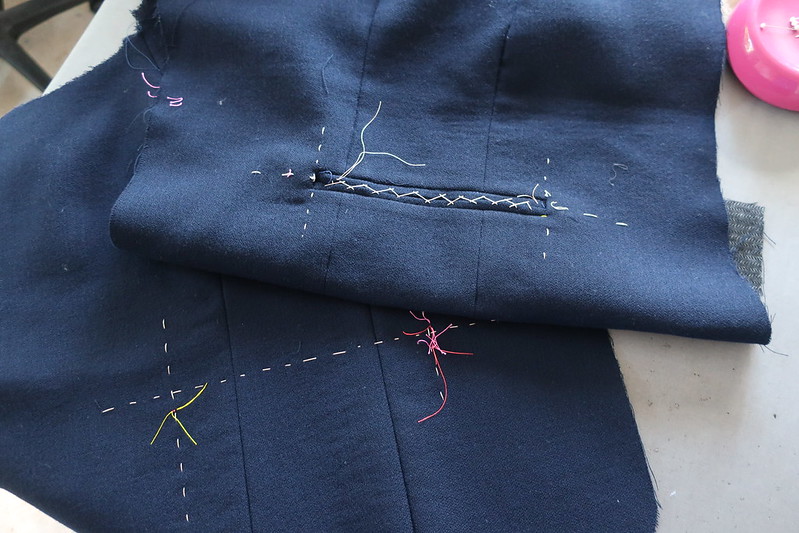
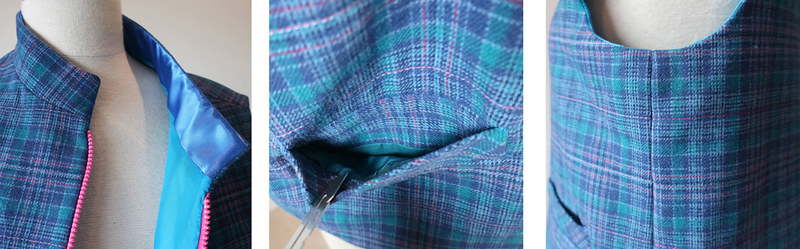
The pattern has patch pockets and a lot of bias binding. It looks ok but a little too much to my eye, and I didn't like the pockets outlined in the bias. Plus more plaid matching, ugh. So I decided to do some welt pocket with bias,.

Vest welt pocket

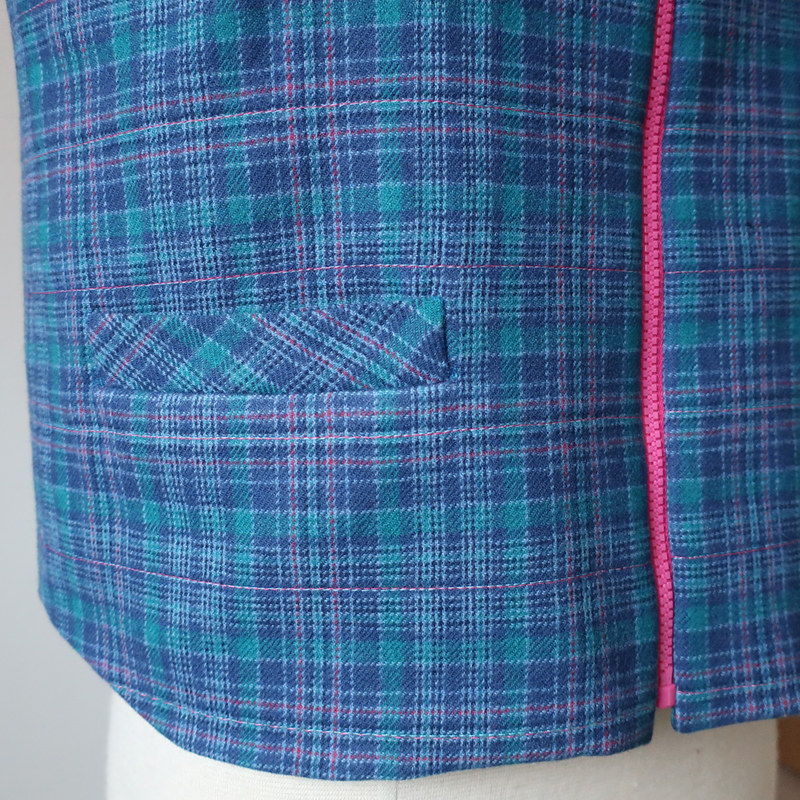
So they're not as good for putting your hands in your pockets but I like the way the look. The trick to doing bias welt pockets is to stretch the fabric before making the welt so that the edge doesn't sag or stretch once it is sewn.

Vest zipper and lining

I bagged the lining all around the upper edge, the hem and the armholes, leaving the side seams open, so I could trim all the seams and then pull it through. Ok now I see one benefit of a separating zipper :).
Then I stitched up the side seams of the wool and about an inch of the lining, and then closed up the lining side seams by hand stitching. I did all the quilting only on the wool so the lining isn't quilted. I kind of looked at the pattern instructions and it seemed that's how they are doing it in the McCalls pattern. The multi color linings is me using up some scraps of jewel tone lining fabrics, yay for using up scraps!! and then the collar facing is a thick satin lining which I selected because it felt nice and the color was perfect. I did put batting on the wool on the collar, and then some interfacing on the satin facing so it would have structure and stand up.

vest 3 views details


vest on form side view

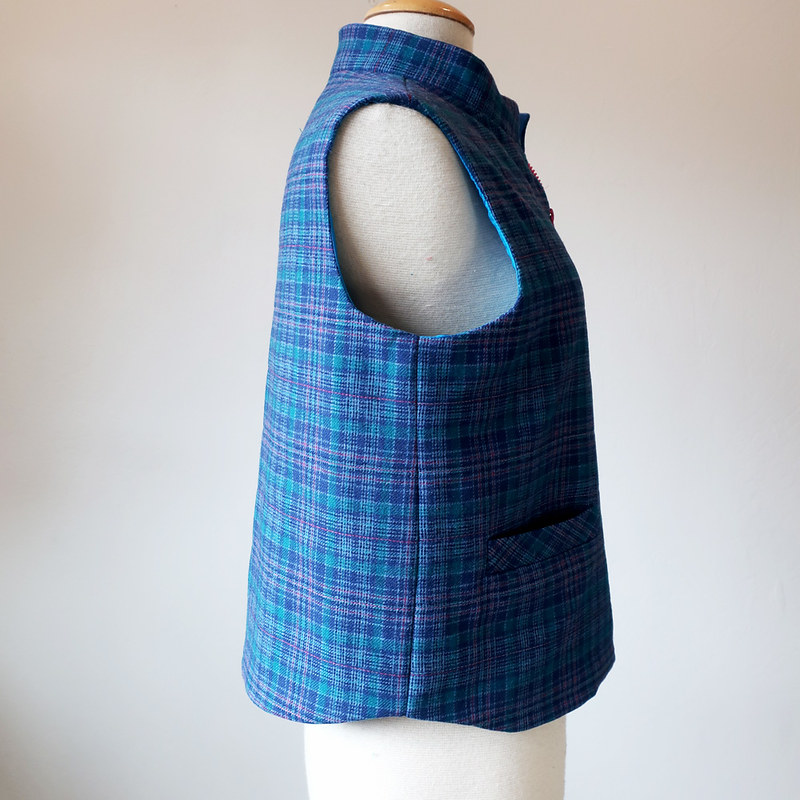
I believe I made a size 12 (my usual size in McCalls/Vogue etc) and it's roomy - in a good way so it can be worn over a sweater layer. The one change I did make was to do the swayback alteration which is marked on the pattern. I prefer to call this the "shortening the back length" adjustment but in this case I guess it did give a bit of shaping there. If you can picture it with more length then the back would have floated out more at the waist. It's a boxy style but intentionally so.  I didn't realize until after that I took only photographs with it zipped all the way up, which is not really the way I will probably wear it. So you will have to use your imagination on that.
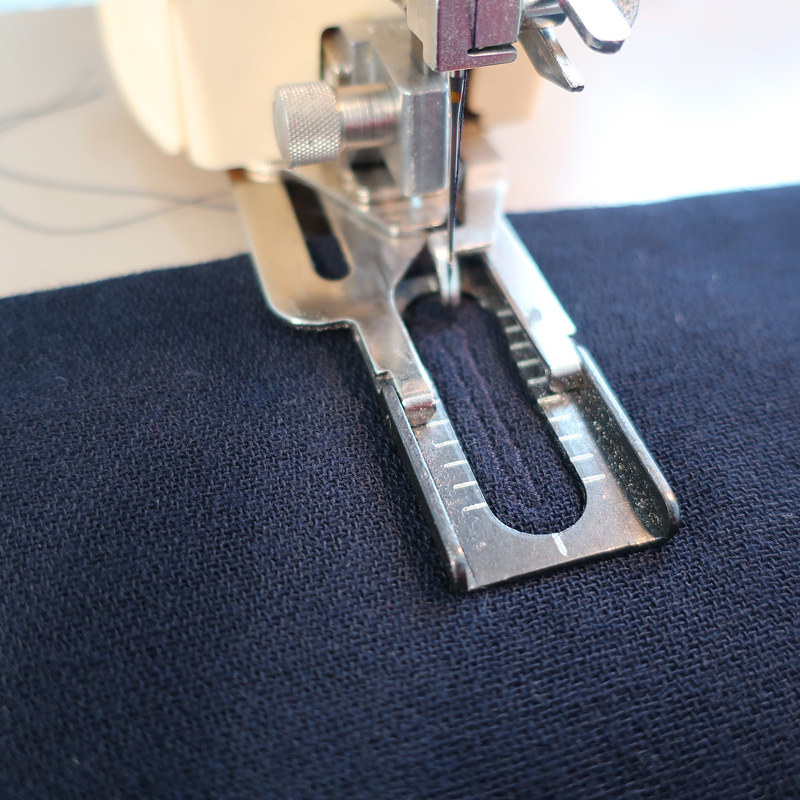
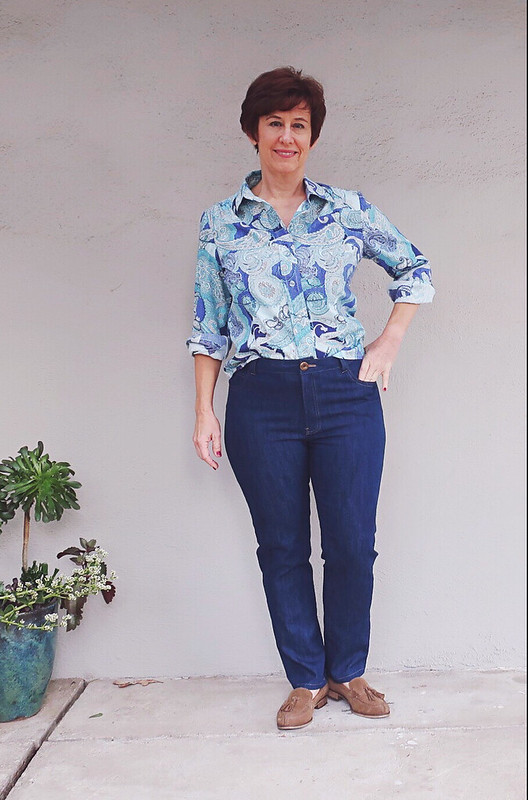
Onto the Ash Jeans.

jeans 4

I've mostly steered away from sewing jeans as I already have so many pairs, I have no trouble fitting into ready-to-wear jeans and while I wear them all the time in fall and winter once the weather warms up they are not really my go-to item. So for convenience sake and in the interest of devoting my sewing time to things that interest me more (jackets and summer dresses) I never really got all that interested. However this pattern intrigued me and also we wanted to schedule another jeans class at the studio - so I gave it a try. I've made 2 pairs so far and had great success with this pattern so I think it's a winner. Plus it has the various leg styles in the pattern, with different pattern pieces for each style so you can play around with size on one style and still have the other pattern pieces not touched. The description says "comfortable rise" which I think is kind of a mid or high rise on most people, depending on your body shape. I have a very long rise and the first pair I made fit quite well, the waistband landed at just the right spot in the front, although they did need more length over my backside. Which I kind of figured going into the project but I wanted to sew them exactly as designed to see the result.

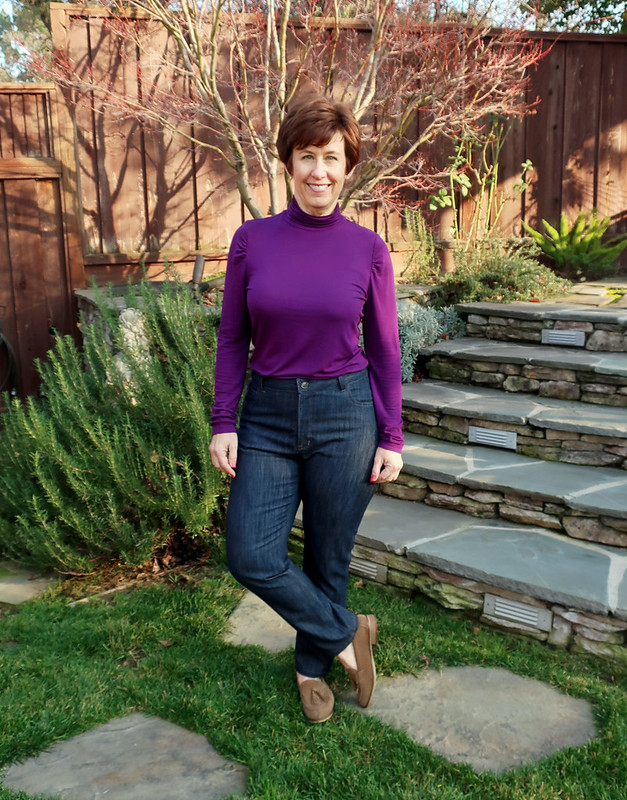
I sewed a Size 32 which is for a person with Waist 32" and Hip 42" which is almost spot on for me. The finished garment measure says it is 40.5" for Hip and since they are stretch jeans that worked out perfectly.
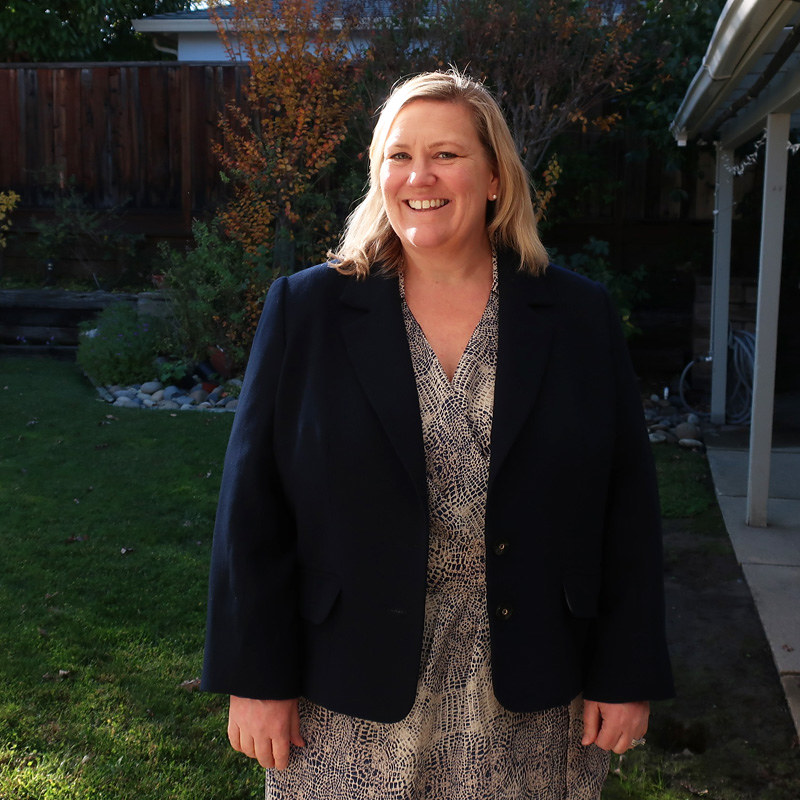
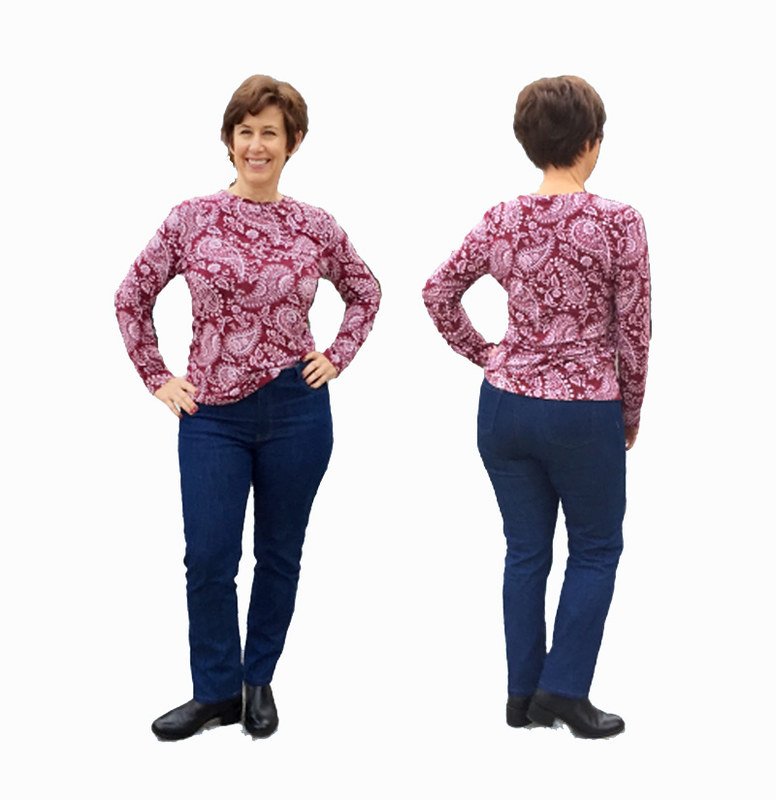
Here's a couple of pictures of the first pair I sewed (which are on display over at the studio).  I look mildly stunned but I had just finished these and walked outside at 4pm, set up the timer on my camera and clicked. Not bad for zero fit adjustments. The denim was at the minimum of the stretch requirement which actually I think works well as it has a "hold you in" effect. It was something I got at a Bay Area Sewists Fabric swap. Which you will see is a theme of my jeans sewing to this point :)

Ash jeans first version

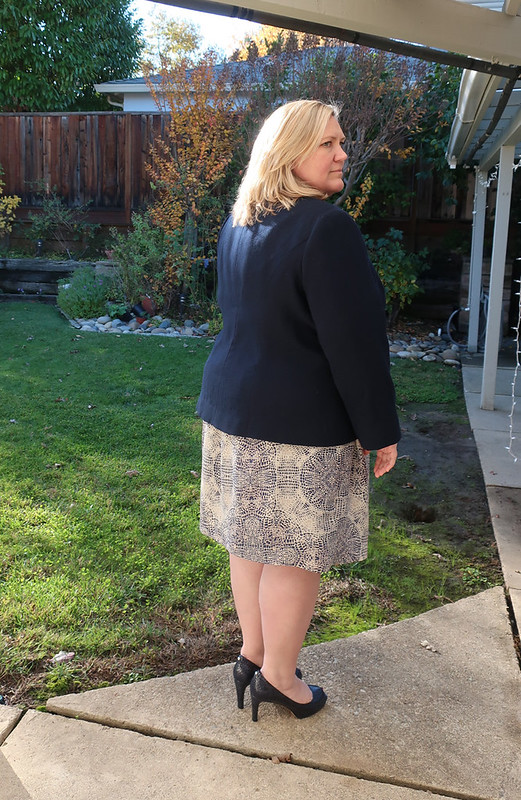
Same jeans, different day, and a slightly goofy pair of photos I extracted from a dark grey background, so the jeans are more visible. But maybe not much of an improvement. In any case the fit worked out well. They are a bit short at the back waist, pull down somewhat especially for sitting which makes me feel like I needed about 1 inch more length at the back rise.

Jeans first version front and back

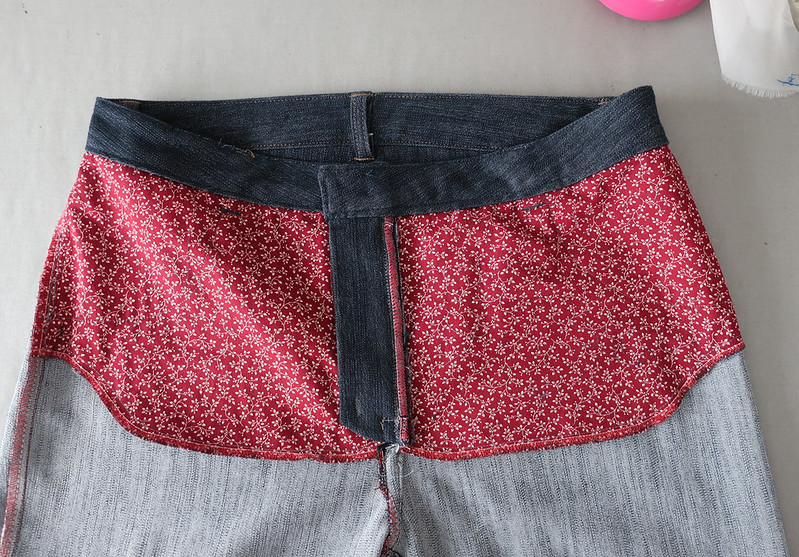
Back to the second pair, I think if you make more than one pair with different denims you can really see how the fit changes just by changing the fabric. The second pair feels slightly more tight even though this denim I thought had more stretch, and I lengthened the rise both front and back 1/2" and then another 1/2' on the back.

jeans 1 side back view

When it comes to pants, I have a lot of drag lines on one side due to a spinal curve and and a notably lower left side. Not noticeable in dresses, it's an issue from my hip bones downwards. Anyway, all clothes have some lines when you are wearing them, moving, walking etc since hopefully none of us stand still like mannequins. So I don't let it bother me and just hem each leg as needed.

That denim is very comfy and has a nice weight. For some reason it doesn't seem like a winter wear denim - maybe because of the tones of white threads in the blue. I like dark solid denim for winter jeans. So I will see how these work in the spring with t-shirts.

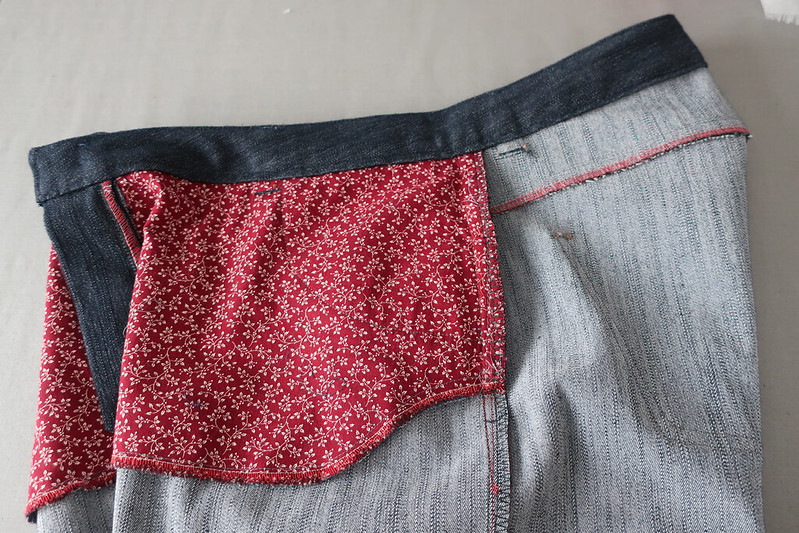
The other change I made is to do a front pocket stay. The pattern is designed with a pocket that folds back and just creates the pocket but I like jeans where the cotton pocket lining continues all the way to the center front. It keeps the pocket flat against the body.

Jeans pocket stay

I am not the neatest topstitcher, that's for sure. And topstitch designs don't give me a thrill - to each her own as regards to sewing details as I know a lot of people making jeans really enjoy all the stitching details (now a lovely welt pocket, that is a different story).

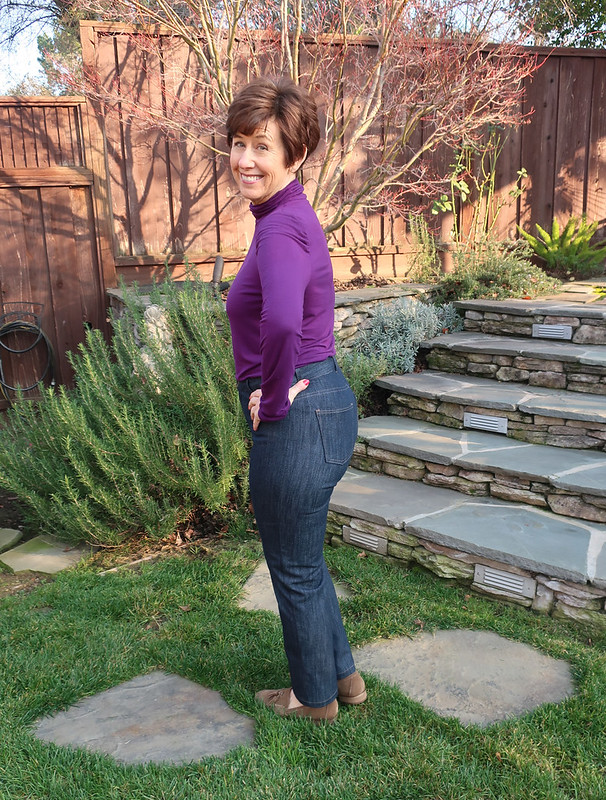
Here's the side view and you can see the extra height or length that I added in the back, which is taken up by my long backside.

jeans back yoke adjustment

Jeans zip and waistband

I have to buy some jeans buttons over at Stone Mountain so until I get over there to buy some I put a hook plus a button on the outside.

As mentioned - not really pockets in this vest for putting your hands in. But will work for carrying my keys when on the go. I'm glad I went back to the store for the pink zipper - the color makes me smile.

plaid vest 1

So that's the latest on my jeans sewing, and now I will return to the other stuff in my sewing queue. Such as a number of dreamy things in my latest Burda magazines, a new Vogue dress pattern I don't need but want to make, and something for Frocktails later this Feb. Today I'm working on the wool blazer and it's a good day to be inside, blustery rain and so cold. OK cold for us Californians, down to the 30's ℉ at night here.

As mentioned above, lots of classes on the schedule at Hello Stitch, some of which are filling up fast or are already sold out. I am constantly delighted at the great people who come to my classes, mostly women but a few men, and people who are so interesting! Interesting to me and to one another, the discussions as we spend the day sewing and learning are part of the pleasure of doing the classes. Don't be shy, join in!

Happy New Year Sewing,  Beth

today's garden photo - under my friend Alice's orange tree which is absolutely covered with fruit. Her tree is a navel orange variety and they all seem to ripen at once. My orange tree is a Valencia, so the fruit stays on the tree practically year round. But my tree is not in a very photogenic spot. There are so many fruit trees in the neighborhood as the climate is just right for plums, figs, and citrus. And rose pruning might be next week - when we have a dry day I should get out of the sewing room and into the garden.

plaid vest under orange tree