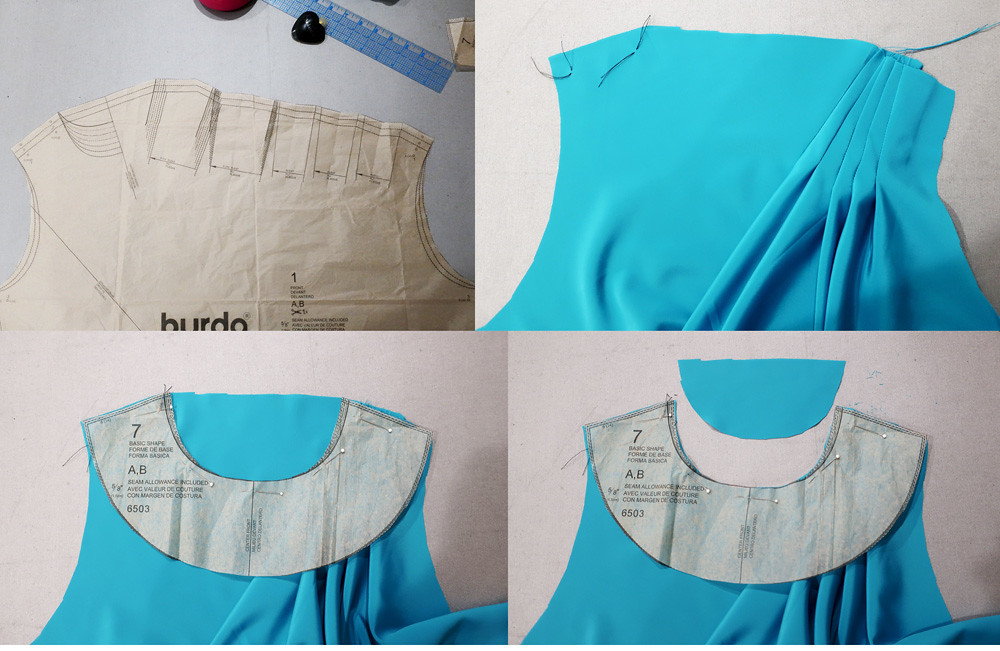
OK, back to Burda. In the first part of this topic, I showed how I deal with the pattern sheets, find all the pattern pieces and trace out the pattern. Today I'll show how I do the next steps, which are to adjust the pattern for fit and then add seam allowances. Everyone has their own method for fitting and I am constantly learning new tips from everyone who posts. Plus I think seeing sewing patterns on the variety of shapes and measurements is so helpful.
For this post I decided to use a different pattern than the one that I showed previously. I chose a dress pattern that has a fitted bodice and skirt, since it will give the opportunity to show how those are adjusted and joined at the waist. Also these are just very basic adjustments and I often do way more fitting on the fly, taking in seams a 1/4" here or there and raising or lowering the waist seam.
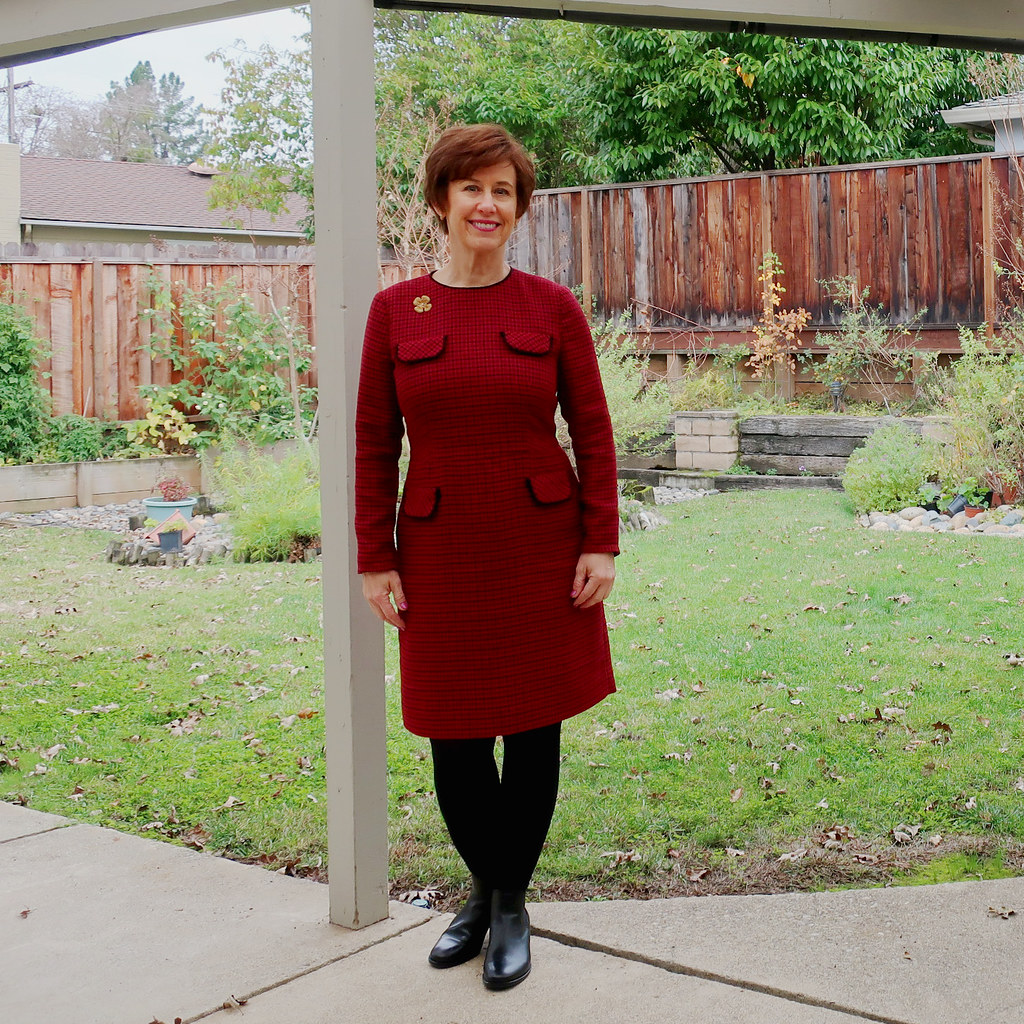
I chose a dress from the January 2019 Burda which is really similar to a dress I made in 2018. Here is that one, which was a Burda envelope pattern 6385. This might be one of my best fitting dresses, which I give credit to several things, to a good pattern, choosing the right size to begin with, and to my own fussing with it for several evenings until I was satisfied.
So I looked through my Burda magazines to find something similar, a classic sheath dress with bodice darts, and a waist seam. I found this Jan 2019 # 121 dress which is quite similar and good for showing the adjustments.
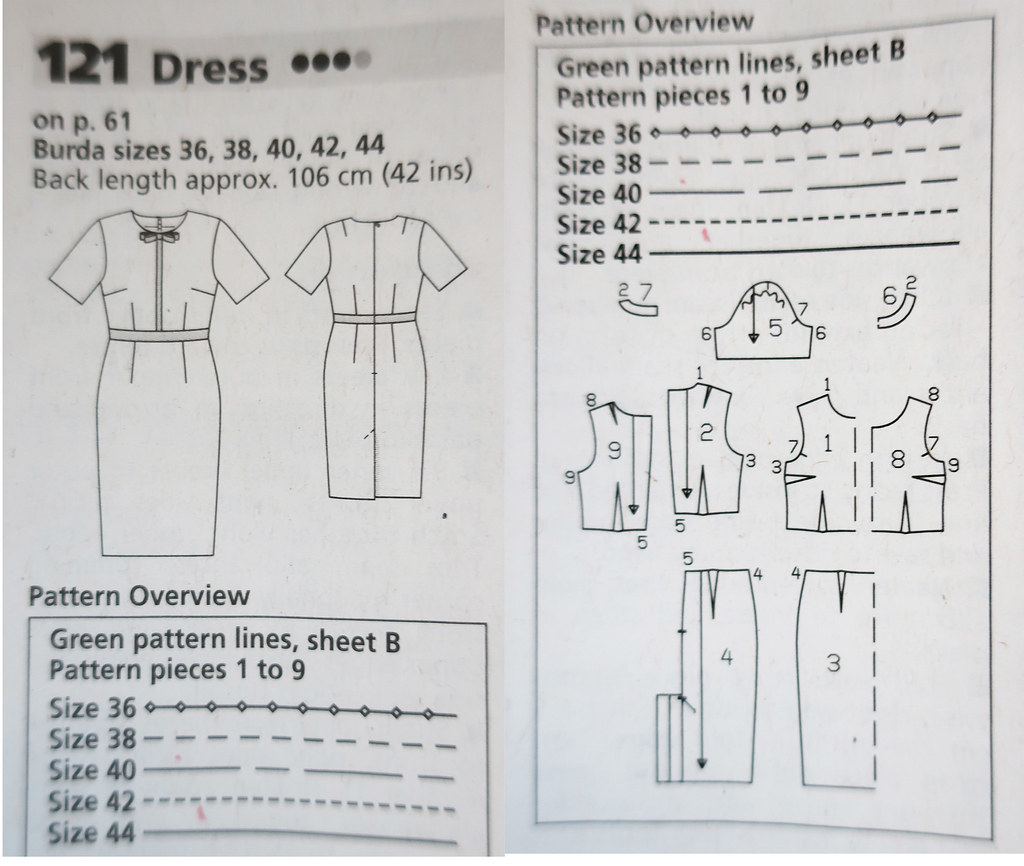
As in my previous post, I have traced my Burda size which is 38, and then in addition I have traced the sides in two more sizes, 40 and 42 (dotted blue lines on side seams). I find this is useful if I am just going to blend between sizes, since I need the size 42 for bottom half. In garments that are not very fitted but I want to retain the ease of the original design, that's how I do it. But for this dress which is supposed to be quite close fitting I will be more exact. For now ignore those red lines of the side seams as I will discuss further down.
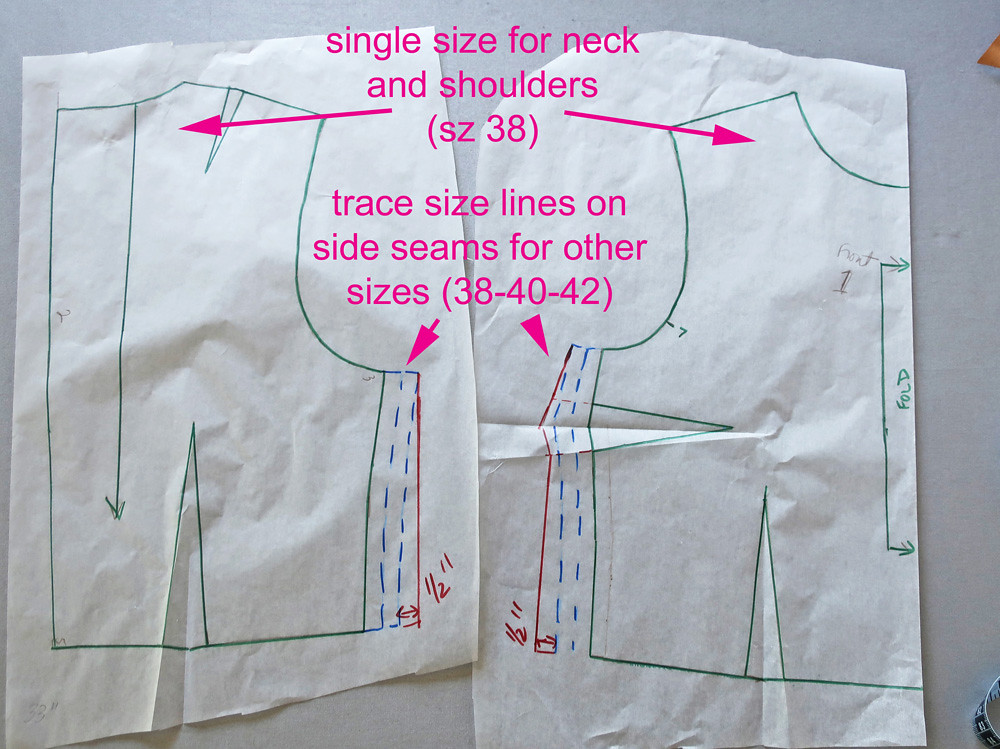
First step is to note if the shoulder seam is at the top of the shoulder, which it is. (as opposed to a drop shoulder or some other shift). Then I measure the distance from shoulder seam to bust point. On this one it looks to be about 10 inches which is fine for me. If it were in the 8 to 9 inch range I would lower the bust dart.
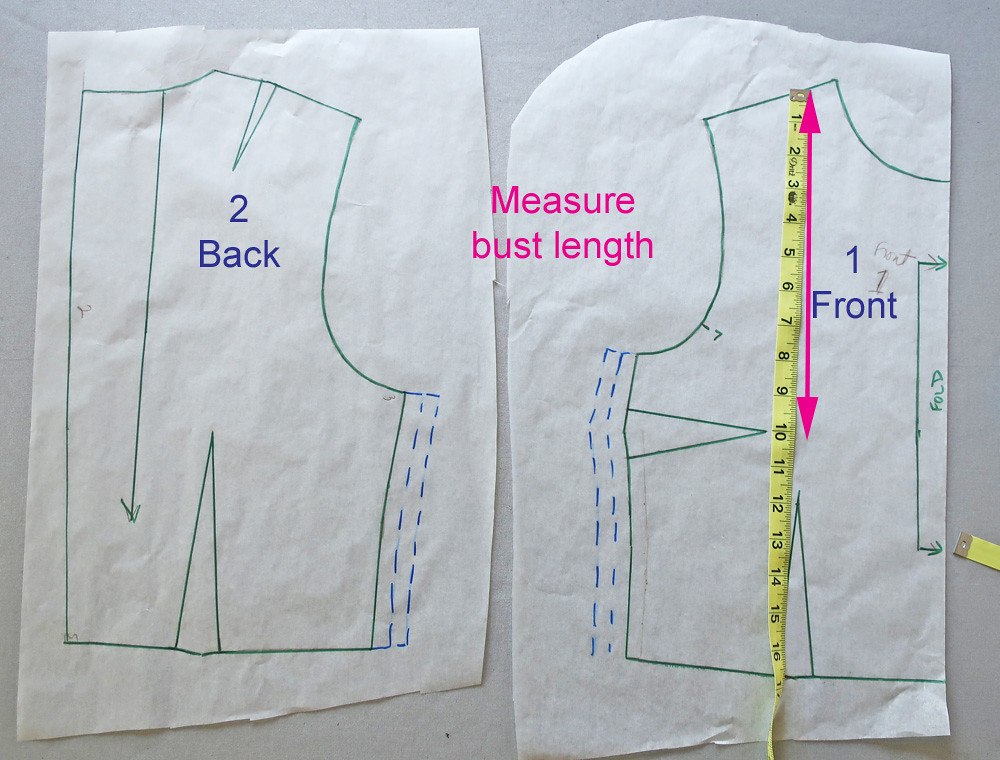
Next I measure the circumference at the bustline. It took me all my sewing life but I can now see the advantage of working with sewing patterns that don't have seam allowances :) it is far easier to measure these things, adjust and then add the seam allowance after that. Anyway - I measure the width of the front and back, usually jot it right on the pattern as otherwise I measure, repeat the number in my head, move on to the other piece, measure, and realize the first number has vanished from my brain. So I write it down and then I can add up and do some math. At this point I just write the measurements and move on to measuring the waist. I will adjust the entire bodice at once so now I'm just seeing what the circumferences are on the size 38.

Up next is the waist circumference. I tend to place the measuring tape down and "jump" over the darts, i.e. move the tape as I go across the pattern, but is is probably a good idea to pin the darts closed so you don't forget any. Here the darts are pinned closed which gives an accurate width at the waist. Another couple of measurements that I write down somewhere on the paper.

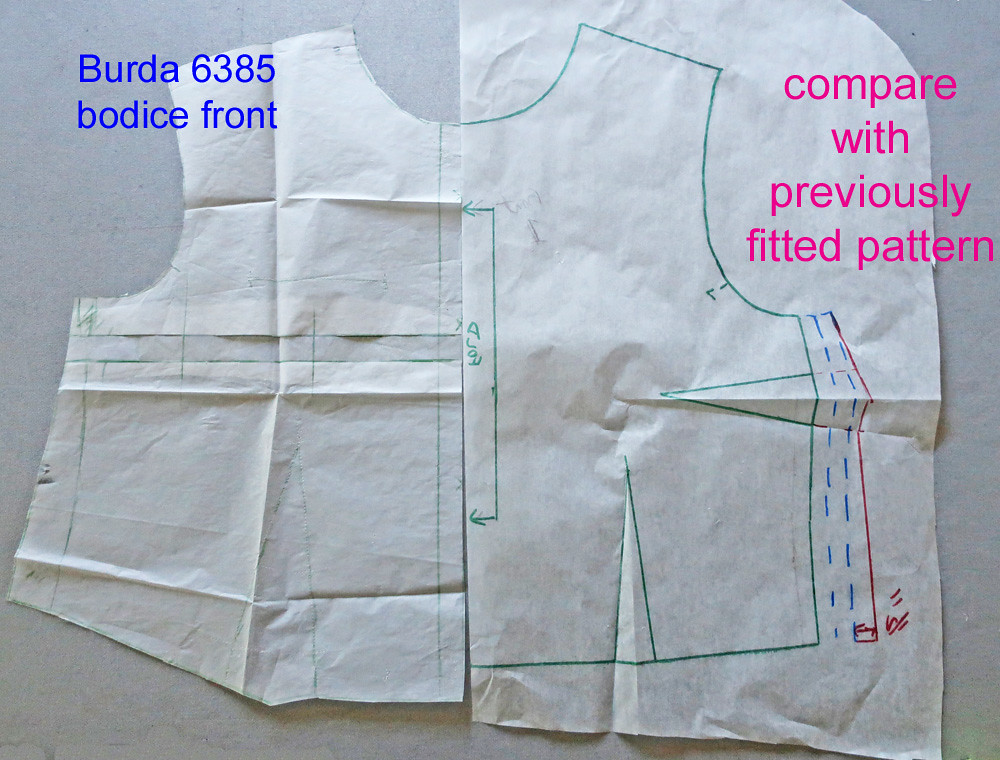
After I took the bust and waist measurements I decided to compare with the pattern pieces for the red plaid dress shown above. The reason for this is that this new one seemed a bit short. The neckline and shoulders are almost identical (remember that the one on the left has the seam allowances already on it). That Burda 6385 has only one dart, a vertical dart from the waist to the bust point. For interest I compared the width of that dart to the sum of the two dart amounts on the bodice on the right - and they were almost identical. Interesting and/or predictable.
However the thing to note is the length I have added to the Burda 6385. It seemed too short in front so I did lengthen the front about 1/2". For this reason I decided to add length to the bodice on the new pattern. If I add length at the waist of a bodice pattern I can always remove it later when I baste on the skirt and check the placement of the waist seam. My sewing/fitting is all about fit insurance. Adding to the seam allowances so that I have some wiggle room when I get to sewing the actual garment together. It is definitely more time consuming but for me the result is more satisfying.
For sake of being complete, here is the same comparison of the back pattern pieces. I lengthened the back bodice of the envelope pattern the same as the front, and looking at this I think the magazine pattern needs that length as well.

Sometimes if a pattern is quite similar it's helpful to overlay the new one on top of something previously adjusted, as here. It's not an exact comparison but I find it useful to get an overall impression of the shape of the pattern pieces, to see where the darts are and mostly for length. These are all secondary checks, the measuring of the pattern is the primary method and then the comparison is just to evaluate proportions.

Here are my bodice pieces with final adjustments added. I've added 1/2 inch of length across the bottom of both pieces, and then used the size 42 at the waist plus another 1/2" for fit insurance. I am sure I would take that in when I sew it up, but I like to have extra there so that I can fit it in the fabric and see how it feels once the zipper is in. Remember this is all before the seam allowances for sewing have been added.

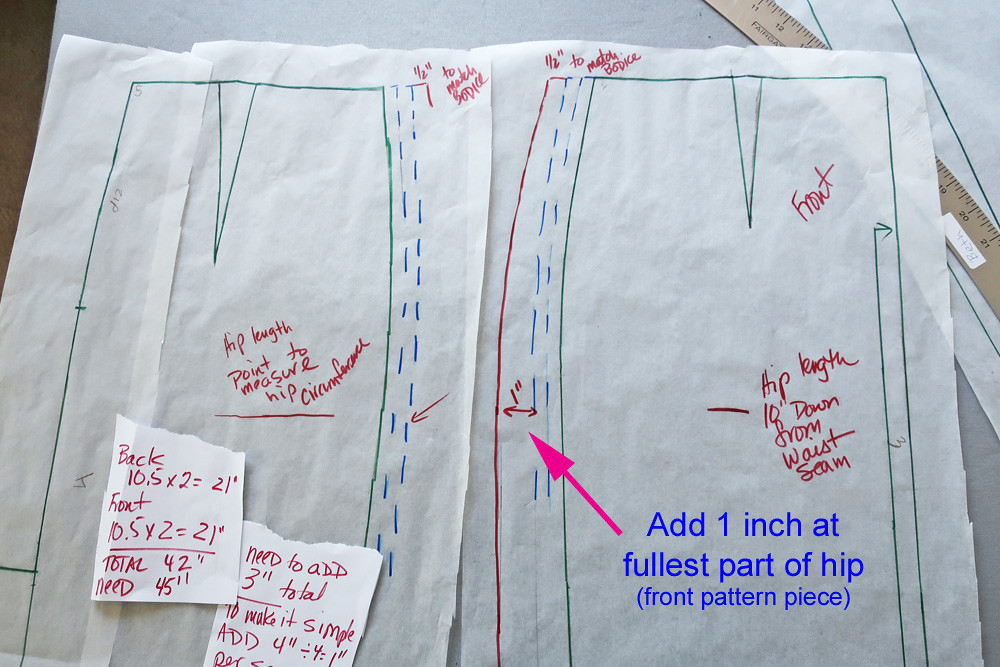
Now for the skirt pieces. Same method, I trace the pattern piece in size 38, plus the dotted lines on the side seams for the size 40 and 42. Size 42 (or 44) is closer to correct for my hip measurement, but I like to be able to see the relationship to the upper part of the garment so I put all the sizes on the side seam. Same process with measuring the circumference at the hip of the pattern pieces. Note on the skirt I'm measuring the circumference for the size 42, as that is nearer what the size chart tells me to use. I could actually go with 44 but I wanted to show the blending of sizes, or how I adjust when out of the size range.
A really important thing to note is how far down to measure. I call this hip depth, as is noted in some books. There are probably other names for this as well. But it is the distance from the waist to the fullest part of the hip. Mine is quite long for a person who is not tall, so 10" down from the waist is where I need to make sure to have the widest part of the skirt pattern.

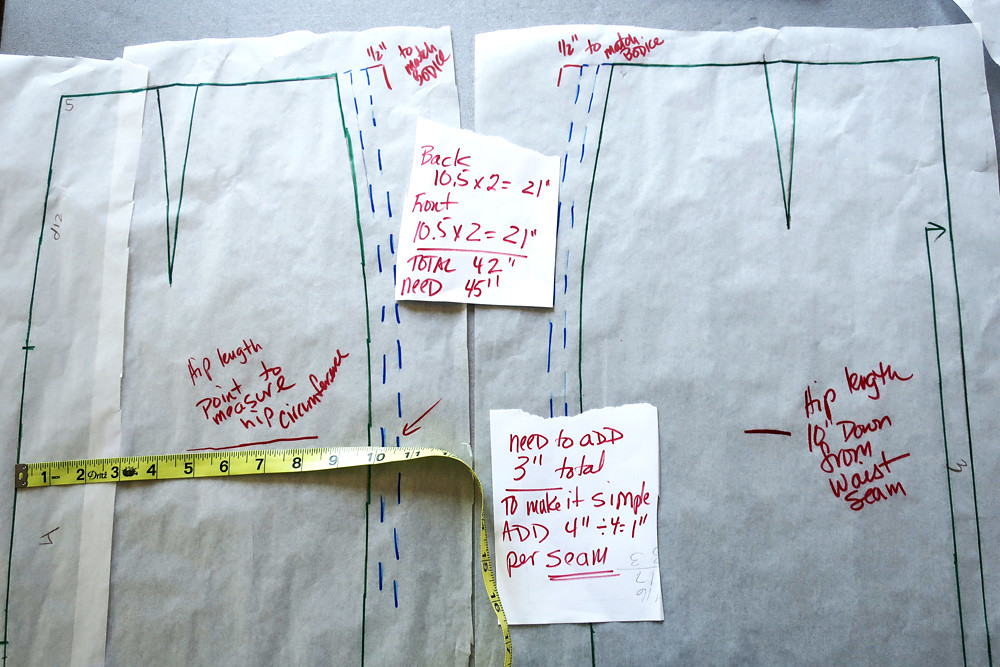
Next is to measure the circumference of the skirt pattern pieces. I jotted the measurement of the pattern pieces on the scrap of paper. The pattern circumference for size 42 happens to be 42 inches which is my hip measurement. But of course a skirt needs ease so I need to add. I sometimes check the size chart to see how much ease over the body measurement the pattern is adding, and in this case it's 3 inches. So that means we need to add 3 inches total (divided over the 2 seams, which comprise of 4 edges...math and sewing right?) Anyway - who needs to divide 3 inches by 4 when I could just add 4 total inches and make life easier, plus I am probably adding more than necessary and will adjust during fitting. So I will add 1 inch per seam and blend that to the waist. The top of the skirt pieces already have their 1/2" added in red, so the skirt waist edge matches the bodice edge.
And here's the 1 inch added to the front skirt pattern piece.
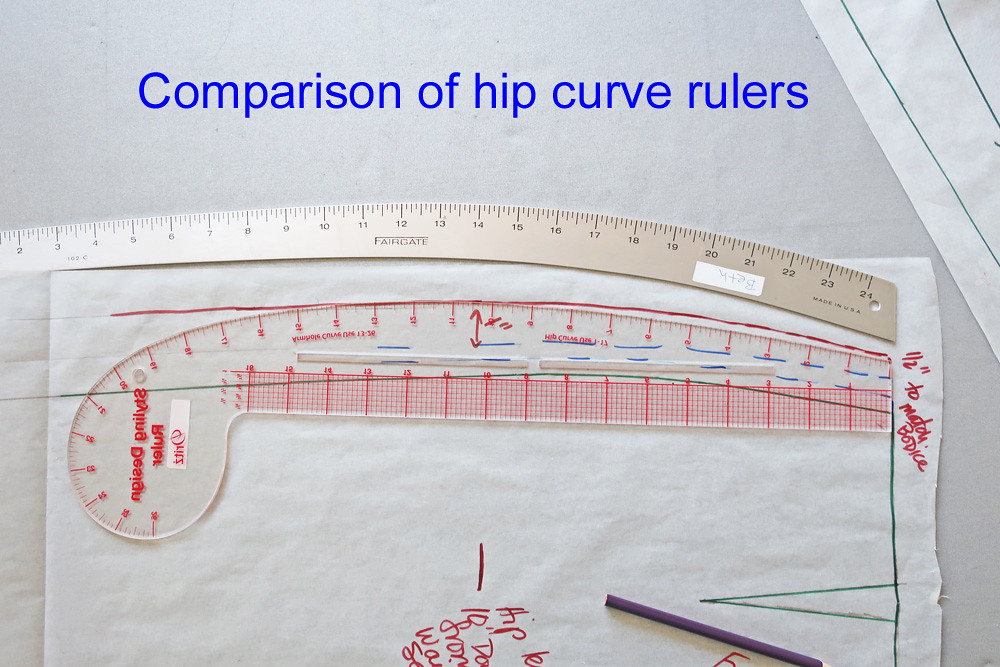
How do I decide how to create that hip curve? I have a couple of different rulers that I use for this. I used the metal ruler to draw in the curve, I like this ruler as it is longer, it tapers in towards the hem of the skirt so it creates a nice flowing line. Also you can shift it up or down to get the right curve shape. However, I've found that it creates too much width at the high hip - the area between the waist and the full hip, so I go back and shave off about 1/4 inch in that area, and the plastic design ruler has a nice curve for this purpose. Really it's just trial and error and knowing what shape you like in a finished item. I've learned this through doing fit adjustments as I sew the pattern pieces together, pinning and then going back to the worktable and seeing how the curves look.
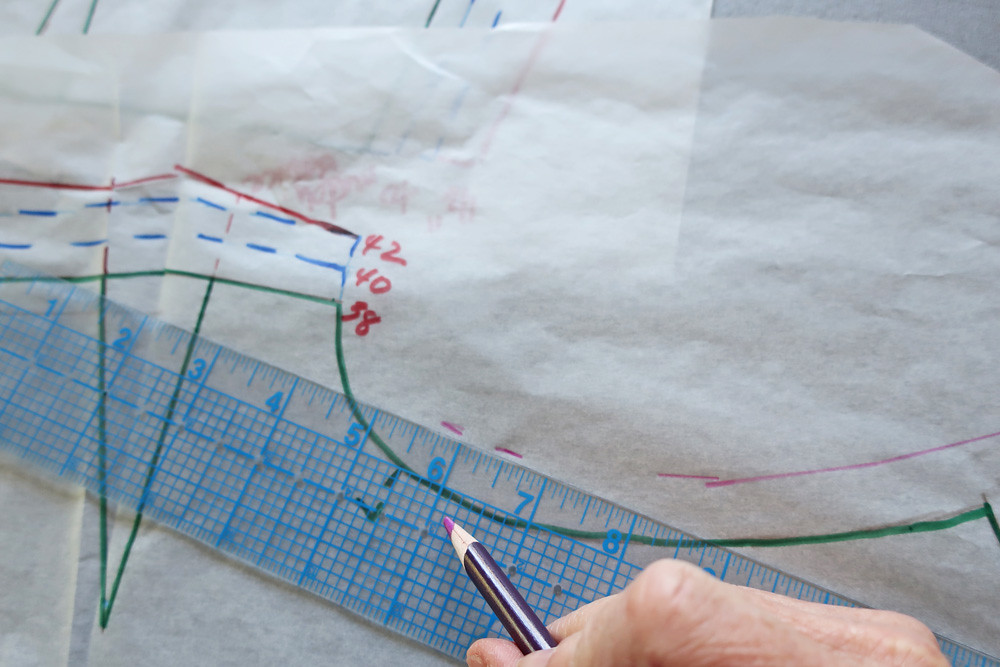
Once I have the front skirt piece adjusted to my liking, I draw it in solidly and then overlay the back pattern piece, matching up the size lines and trace the same hip curve. This way the front and back pattern pieces match.

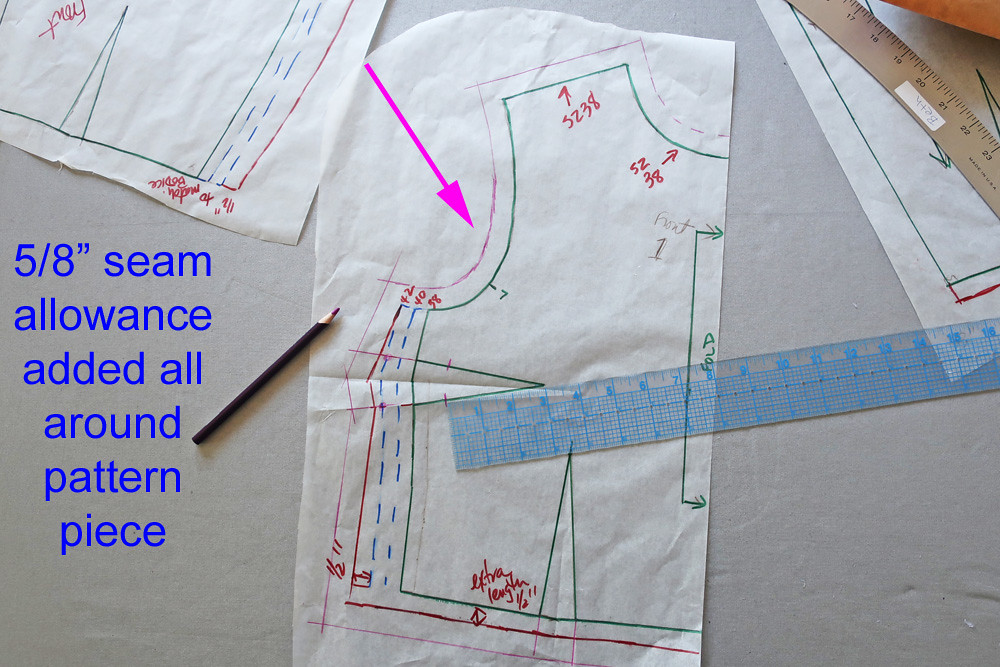
Almost finished - time to add the seam allowances to the pattern pieces. I have a special ruler that is 5/8" wide but I find it just as easy to use the regular ruler. Somehow my eye is drawn to the 5/8" line on that ruler and I can go pretty fast with it. For the curve areas I do dashed lines, just shifting the ruler as I go and then connect the dots later. You can see my love of using various colored pencils - the little kid in me takes great pleasure in choosing a color to use from my box of Prismacolor pencils.
I know in the previous post someone asked about 5/8 inch seam allowance. I learned to sew using American sewing patterns which have traditionally used the 5/8" seam allowance and by this time in life I can see that distance without even measuring. I am so used to it that I basically have trouble using other amounts - in fact I have to remind myself if working with a pattern that is different. But you can add whatever you find helpful. Another commonly expressed idea is that the 5/8 inch is not very accurate and the 3/8 or 1/4 inch are more accurate for sewing and minimal trimming. This is also true but at this point when I sew I am matching stitching lines and the seam allowance doesn't matter for assembling the item. I think in couture the seam allowance is often more like 1 inch and I like that as well, it gives so much more leeway for fit adjustments as you go.
Below is the front bodice piece with seam allowance added. I always add some dots to the dart so I can mark with tailor's tacks and then accurately stitch. Some people might finish their pattern adjustment and then add the seam allowance on the actual fabric, but I like to have the cutting be complete foolproof, and also I want the pattern piece to be something I can use again so having all the seam allowances on the paper makes it easy to cut out for me. Also if you have a printed fabric I think marking the seam allowance in chalk or something like that would be hard to see.
If I were to sew this up then I would do some fit adjustments in the final fabric, I'm sure the waist will need some refining, often I need to narrow the center back at the neckline so I would do that as I baste and try on the dress. It might seem like a lot of fussing, basting, trying on, etc but I find it worthwhile for a fitted dress like this. And if I'm feeling organized I will immediately make notes and adjustments on the pattern pieces so I can refine it for another version. If there is another version. As I wrote this post I was realizing that I can use that envelope pattern as a starting point for a dress idea I have.
So that's the scoop on how I do the fit adjustments and seam allowances on these Burda magazine patterns. If the style is quite loose or has a lot of ease, I just measure the circumferences on my starting size of 38 and sometimes do no changes at all. It just depends on the style.
In fact some things you just can't get to the final good fit by adjusting the pattern and I think it all comes down to choosing the best size for the neck and shoulders, having fit insurance in the body of the dress and then adjusting in the final fabric. For a good example here is an older post for a dress I sewed for my friend Heather. This Burda magazine pattern was so complex there was no way I could perfectly adjust the paper pattern and it just had to be tried on and pin fitted to refine. That dress is so beautiful that I insisted we repeat it again in a summer casual version blogged here.
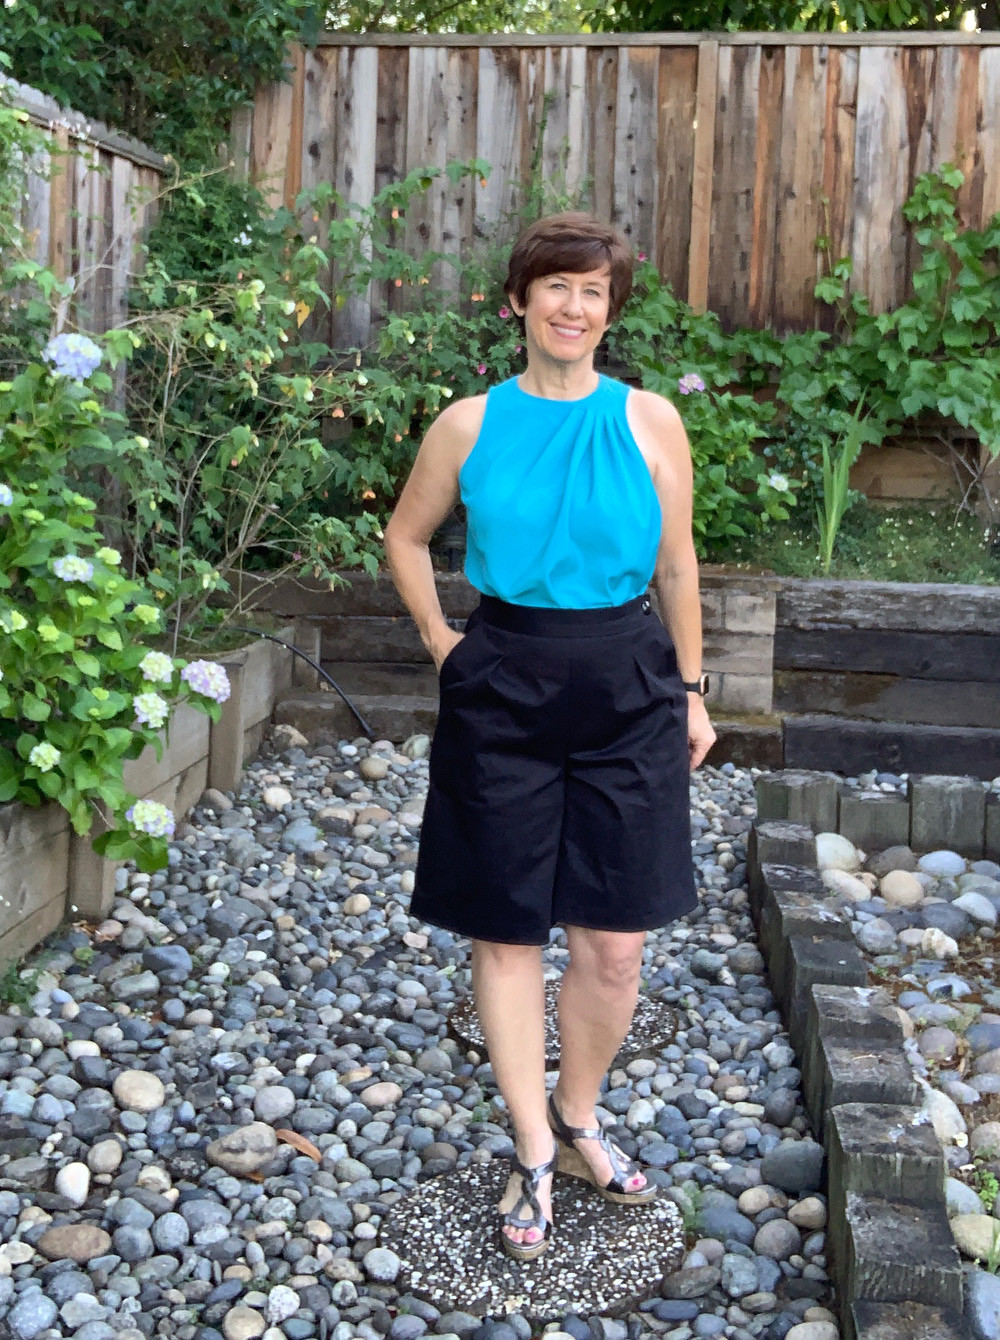
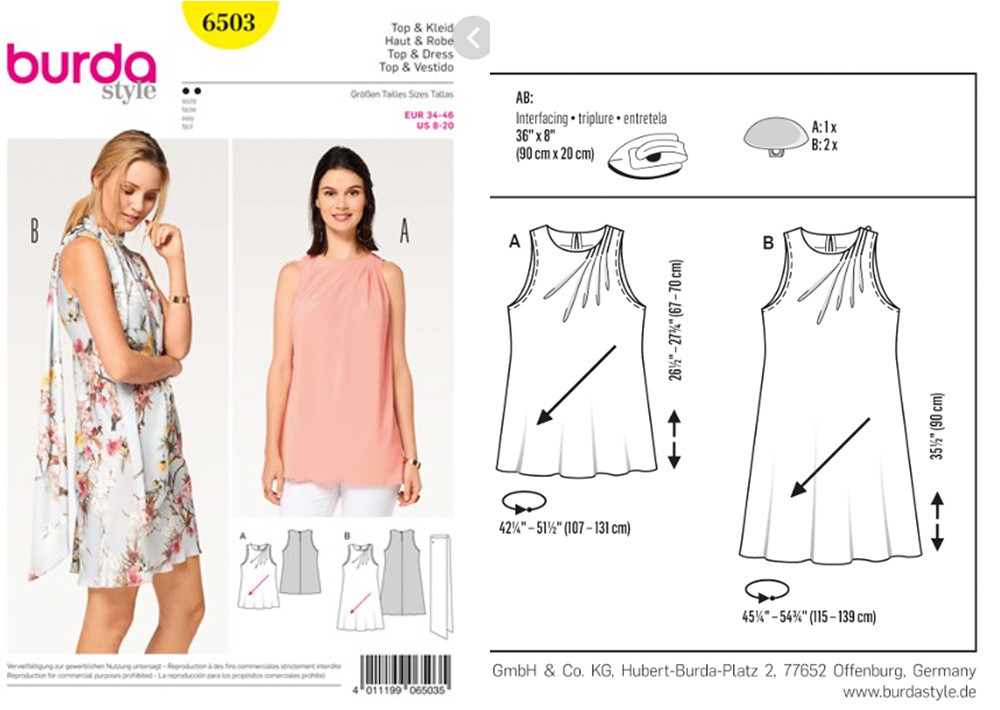
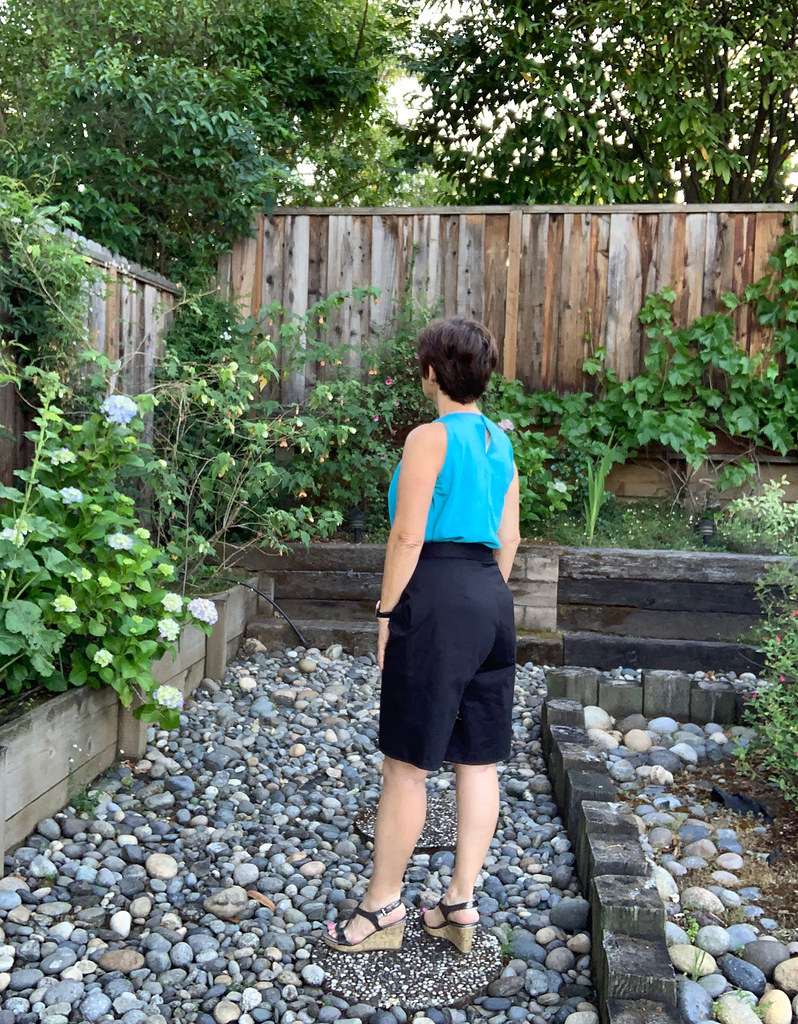
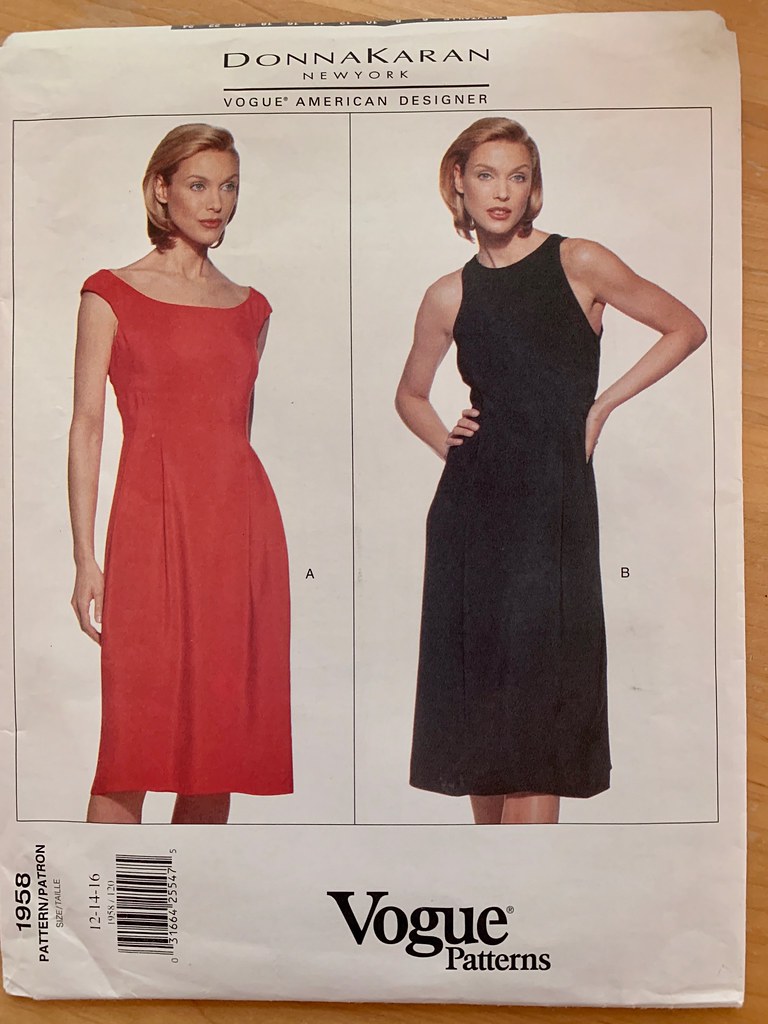
Up next, not sure. I have my crazy denim pantsuit to show you which deserves a post or two. I've sewn a few other tops, nothing exciting. I made a pattern yesterday from a pair of ready to wear shorts that are getting worn out but I love them so figured I would try to recreate. Plus making shorts is a good way to use up small remainders of denim that I have hanging around. And I started on this Vogue pattern, and in red. I want to sew all the Donna Karan Vogue patterns! they are all so nice and such variety. thank you eBay! I seem to have good luck with sewing things that are red, and my personal sewjo is a bit lacking these days of not going anywhere so I decided to sew up this from a red cotton sateen in my stash. Of course I'm making View B on the right - with my favorite armhole shape. No rush to finish so it's about half done and perhaps not quite the right fabric but a good test.
Stay well everybody and happy sewing.
Beth
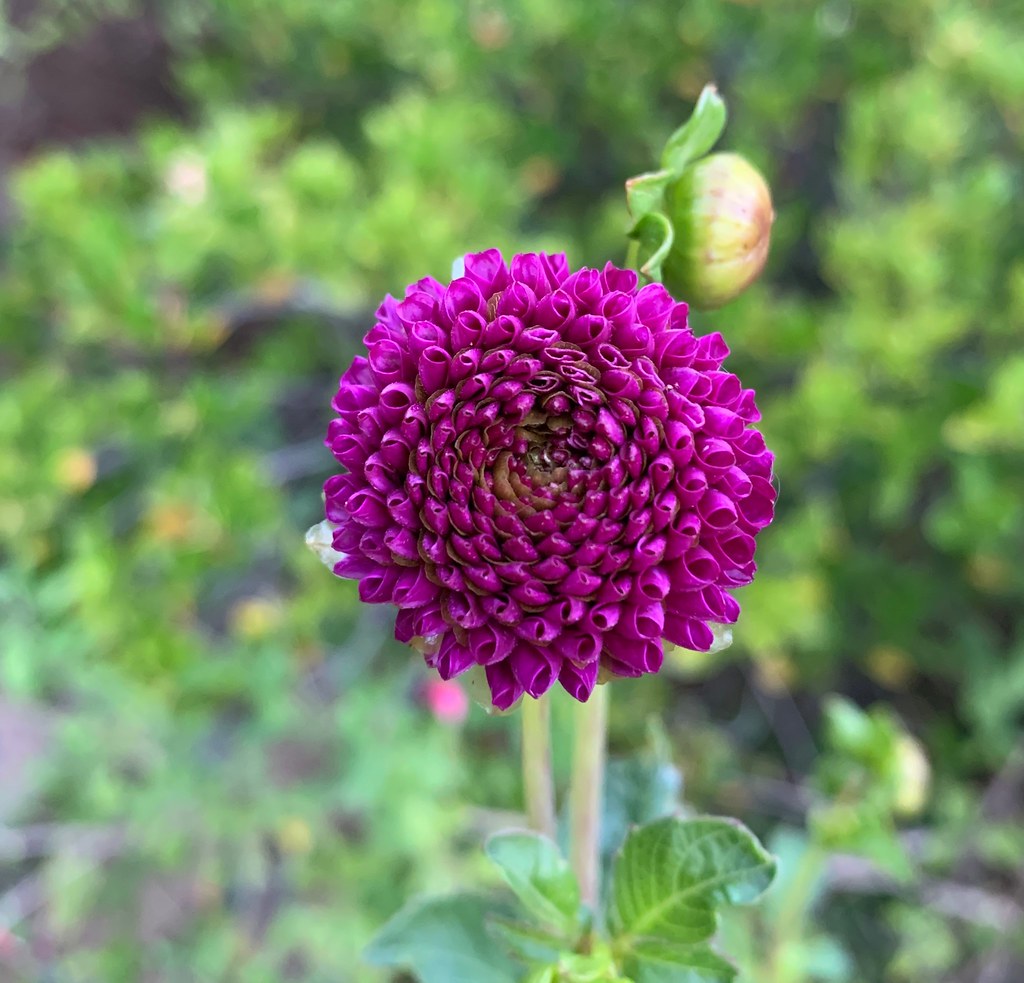
today's garden photo - there is so much to choose from now, May and June are the best times for blooms in our soon to be very dry N. California gardens. Most years I buy a bag of dahlia tubers and I didn't really pay attention to the description, so now I have plenty of these tiny but oh so perfect little flowers. They are getting tall and have lots of blooms so even though they are small (about 1 to 2 inches across) they add a beautiful color.