Wednesday, June 30, 2021

Just Patterns Tatjana Trousers as shorts with some design changes

After the last year when I have sewn several dresses (like this and this) that have not really been worn during this weird year, I figured it was time to start off my summer sewing with some more practical separates. (And I will wear those dresses soon:).  Once I made the first version of the Tatjana Trousers from Just Patterns I was really impressed with them and resolved to try them as shorts. You can see my second version here paired with my vintage Vogue tweed blazer.

When I sewed that black pair, I had just read an article in Threads magazine showing how to make fit adjustments to the back of pants which I tried. Fitting magic! or at least a fitting adjustment that was ideal for my needs. 

Here are my finished shorts. Which have no pleats. More on that pattern modification below. 

Tatjana shorts1

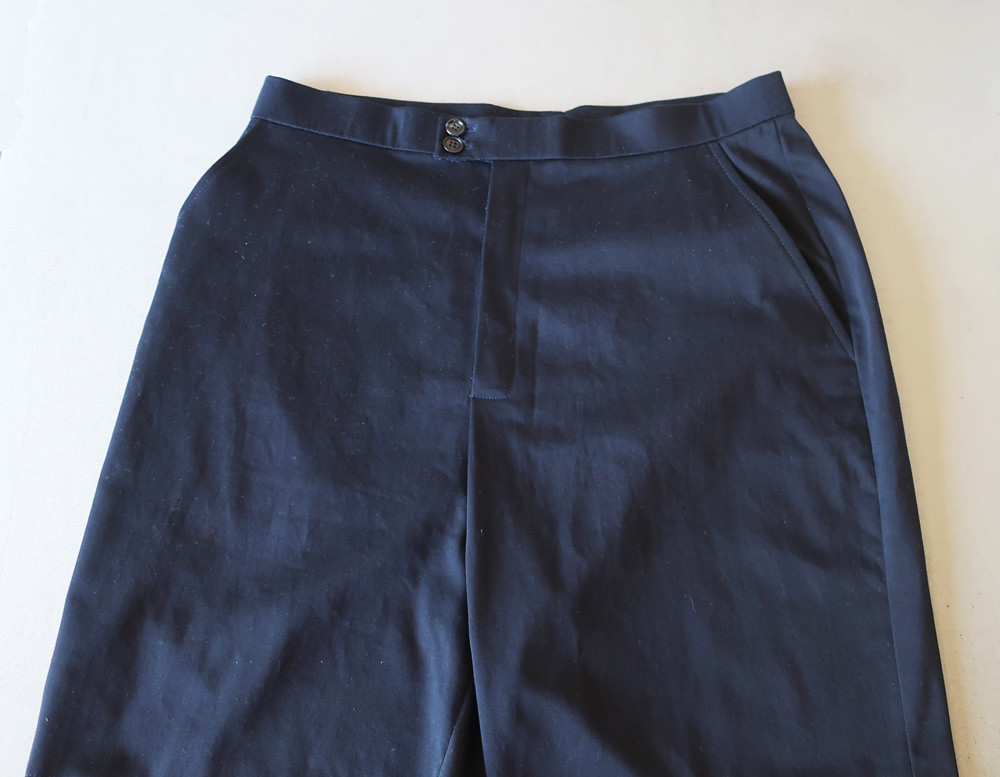
Here's the front of the shorts, with the photo lightened a bit so you can hopefully see details. Actually the absence of details, as I removed the the front pleats. This pants pattern has what I consider a high waist, or at least hits at the natural waist which is above where most pants patterns are designed. This is ideal for me as I have a very long rise for a short person.  For comparison the finished zipper length here is 7" whereas on my Ash jeans the zipper is 5.25" long. 


Blue shorts front

I had been thinking about how to remove the pleats for a while and then I saw an Instagram post from @elmeretakespictures who showed how she was removing the pleats of the Flint trousers using a tutorial from the Megan Nielsen blog.  Exactly what I was looking for!  What do we call that when someone posts on the sewing intterwebs the exact thing you are thinking about?  Sewindipity?  I'm going to start using that.  

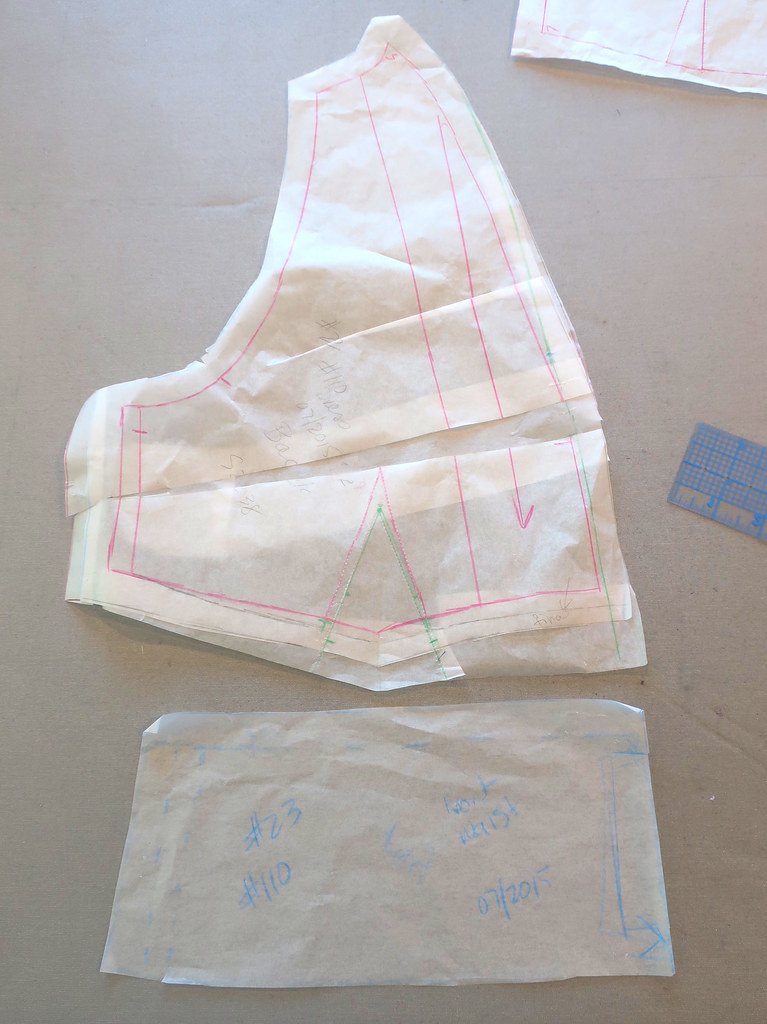
So here is my explainer of how I did it.  Not exactly a tutorial but hopefully you get the idea. Here's the front pattern piece of the Tatjana trousers with the existing pleat fold lines shown. One small pleat next to the pocket edge and then a larger pleat in the middle. 

tatjana pattern front

To remove the pleats, I followed the method from the Megan Nielsen blog and overlapped the larger pleat, taking up the excess length horizontally by also slashing the pattern there and overlapping. For the smaller pleat I just used my standard method of folding it out in the pattern paper and smooshing it where it got to the end. Then I needed to fill it the top edge to make it smooth for attaching the waistband. I did forget to check the pocket pieces so they didn't catch complete in the waistband seam bt I will go back and add a bit of height to that piece to match the pants front piece. 

Tatjana removing pleats

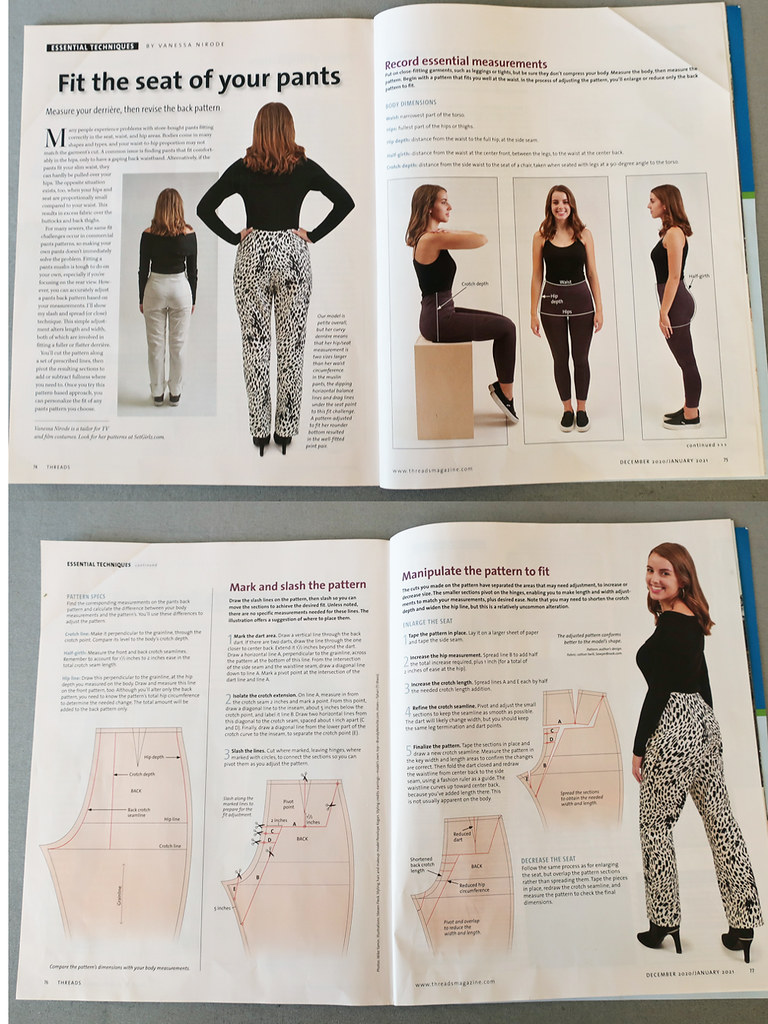
So that's the front, it doesn't change the waist circumference of the pants nor the rise.  The back I had already adjusted based on an article in a recent Threads magazine. I continue to subscribe to Threads although now they are reducing it to 4 issues per year, they say more content per issue. But I can say that in each issue I learn something, be it a great big fitting revelation or a small tip that makes sewing easier. Plus their website has a wealth of information - I always suggest to people in my classes to check there first if they are looking for how to do something, very reliable information presented well. I took a picture of the cover of the issue I am referring to for the pants adjustment so you can see which one, Jan 2021 and get an idea of the articles. Better Fitting Pants and Muslin to Pattern How-to, both useful. Although some of their features have the same flaw as the pattern companies - fabric choice! see below. 


Threads mag cover

Here's a look at the article, I was very peeved that they decided to photograph this using that print fabric on the pants. Way to obscure the details!  But I wanted to show you how they do the diagrams, they are 

Pants fitting diagrams

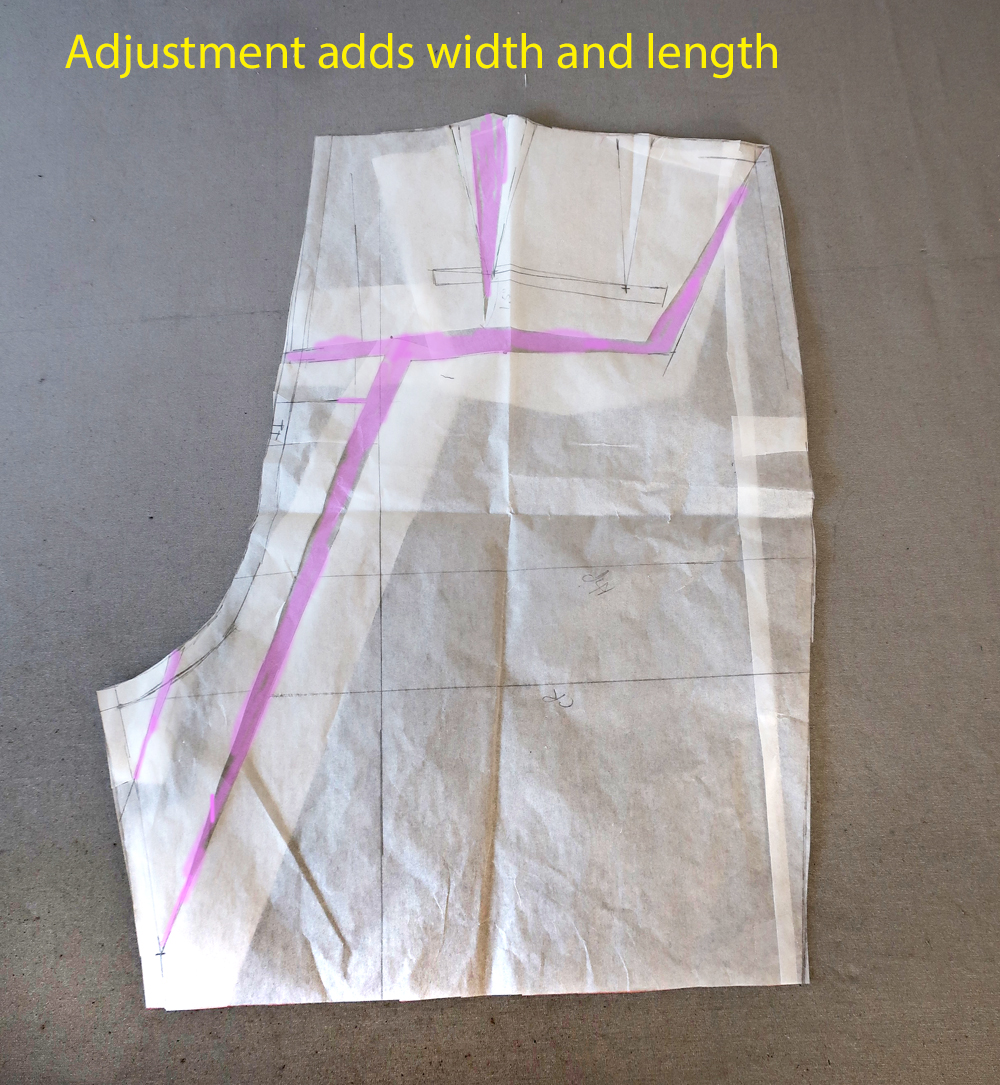
Here is my adjusted pattern piece.  I added 1/2" in width at the hip, and about 1/2" in length. This adjustment also makes the dart larger. This pattern has 2 back darts and I could have shifted some of the increase to the other dart but for now I left it as is. I have highlighted in pin the addition. I then needed to redraw the pocket to make it straight but otherwise this is a great way of adjusting just the pants back, adding space where needed and keeping the side seams unchanged. 

tatjana back adjustments

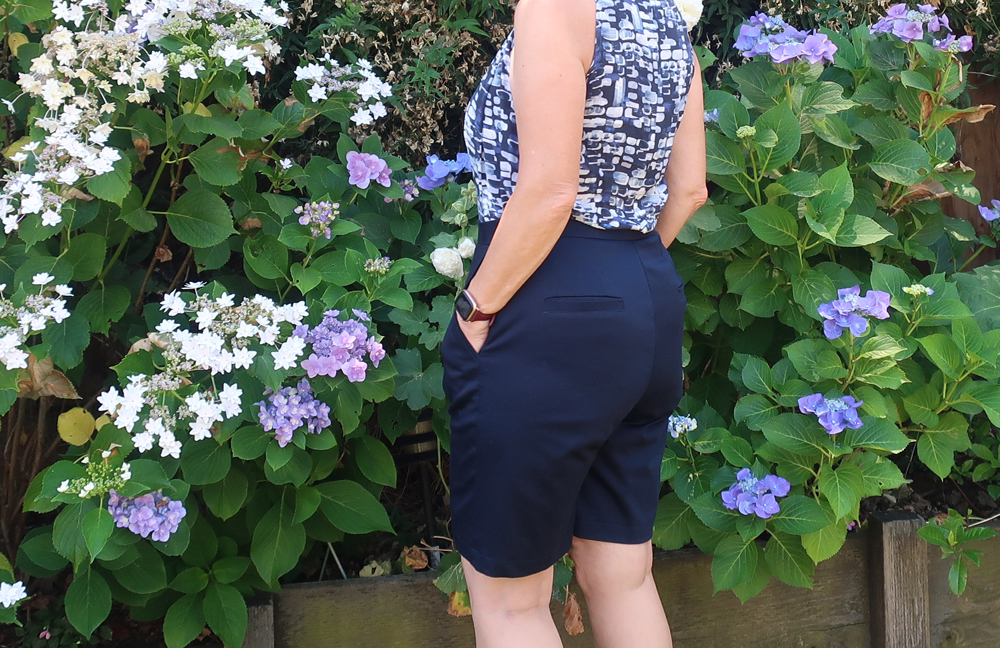
OK I guess you want to see the pants back on me, so here is one picture. It's not likely I will wear tops tucked in with shorts but I think with wool trousers I would. Perhaps if I make this winter I might put pocket flaps just to break up that expanse on the backside and add some interest there. In any case I'm pretty satisfied with these adjustments and now I plan to use this same pattern to make a more narrow leg pant (using this article that I also came across on the Threads website)

Tatjana trousers back view3


blue shorts back

I meant to topstitch around the entire welt pocket which is a detail you see on khaki pants or shorts. Next time. 
One other change I made was to narrow the width of the waistband. As designed it's a bit too wide for me and so I just added interfacing then trimmed away the extra. These shorts gave me an opportunity to use some of the many packages of waistband interfacing I have accumulated after going to many many rummage sales. The type of waistband interfacing only works well on straight waistbands but if your pattern does have one then it is really quick and easy to use and makes a stiff waistband that doesn't crumple. 

Shorts waistband interfacing

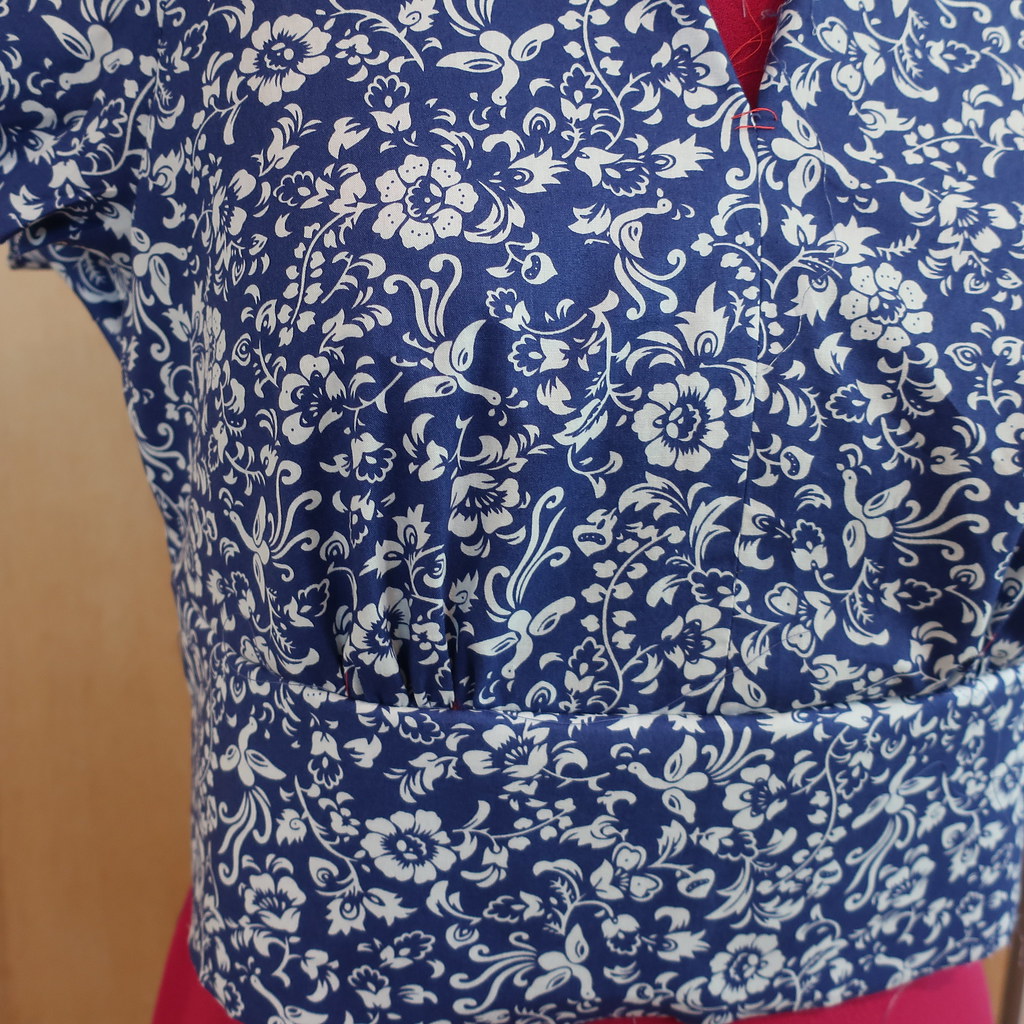
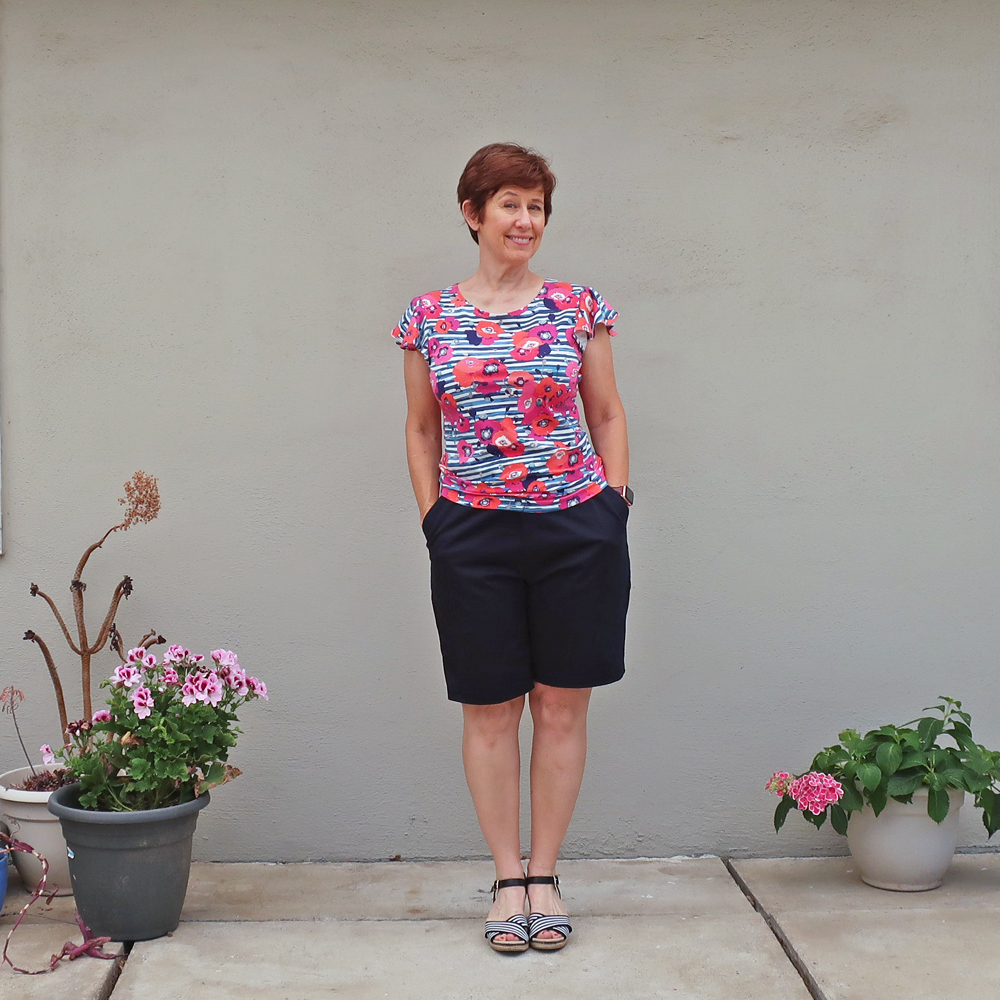
Another look at my shorts, plus a top I started a while ago and recently finished. I'm not crazy about it but it's nice to wear on a warm day since it is the most floaty rayon lawn. 

Tatjana shorts2 with Burda top


Top Burda 07-2018


mosaic top front adn back

I quite like the neckline and the upper part but the body had too much fabric so I took out some of the pleats and also some width at the side seam. Perhaps it needs that tie as shown in the pattern. I think it just has too much fabric in the front, not my style. 

So that's the latest on my new shorts. If you make this pattern I defy you to refrain from putting your hands in the pockets at all times. Irresistible!  Worn here with one of my favorite t-shirts, I think it's a McCalls pattern mash-up. Made with this Art Gallery knit from a few years back. Such good quality and I love the fabric. I keep looking at their fabrics but nothing has grabbed me again. Kind of pricey but I only need 1 yard to make a top and considering how often I wear this it's a very good value. 


Tatjanashorts 2

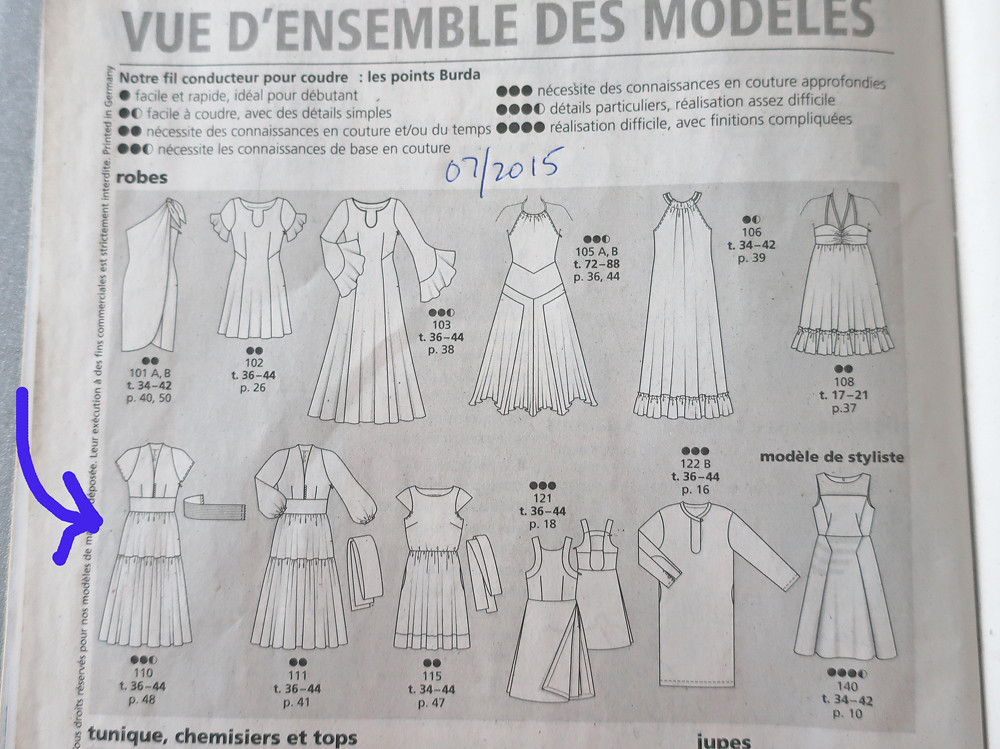
I just started a chambray shift dress with a pattern I found in a 1998 Burda magazine. (Is 1998 vintage? or just old?)  I have one online class for July which is Sew Lab. Just a 3 session class where you can ask any questions and get help with unfinished projects, advice on new ones and just sew together a bit. Then in August I'm taking a break and then we start some in-person classes in September, Yay!!
I will have details soon. 

Happy Summer Sewing,
Beth

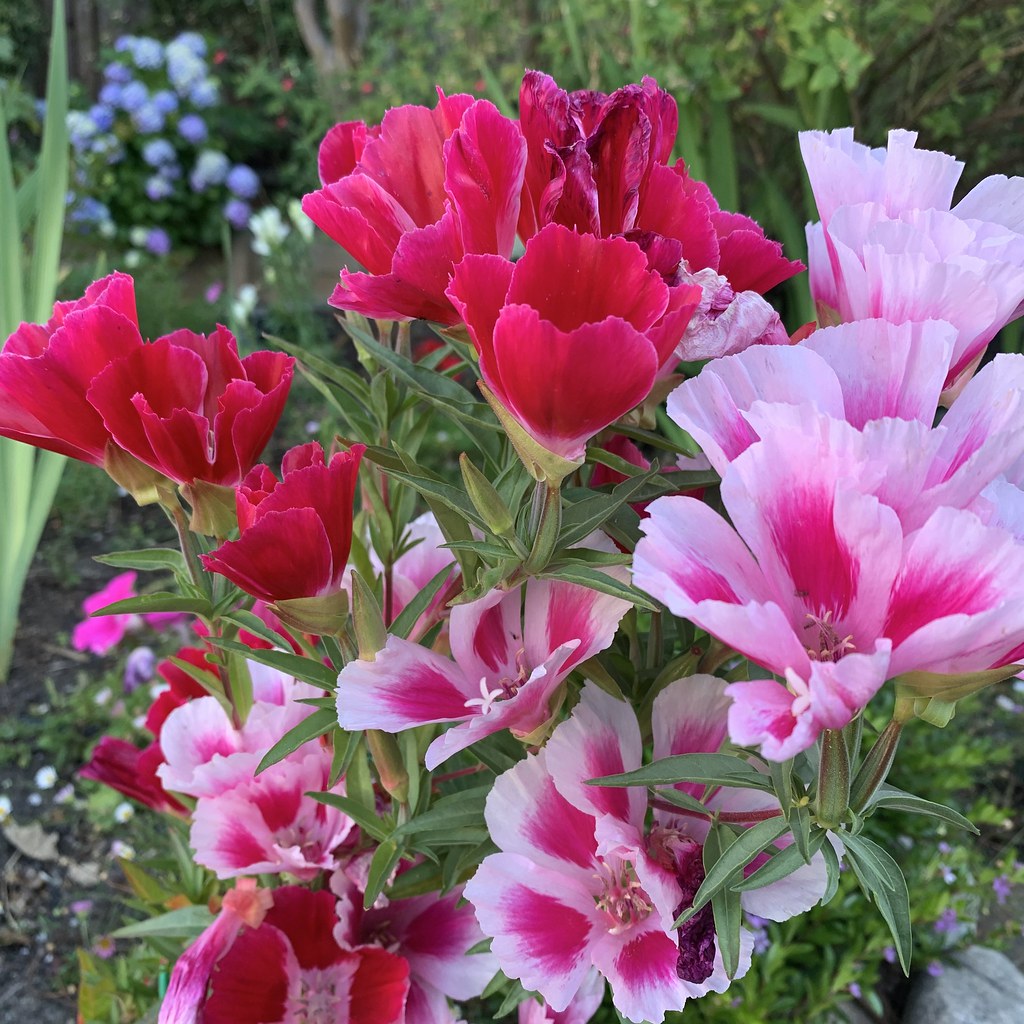
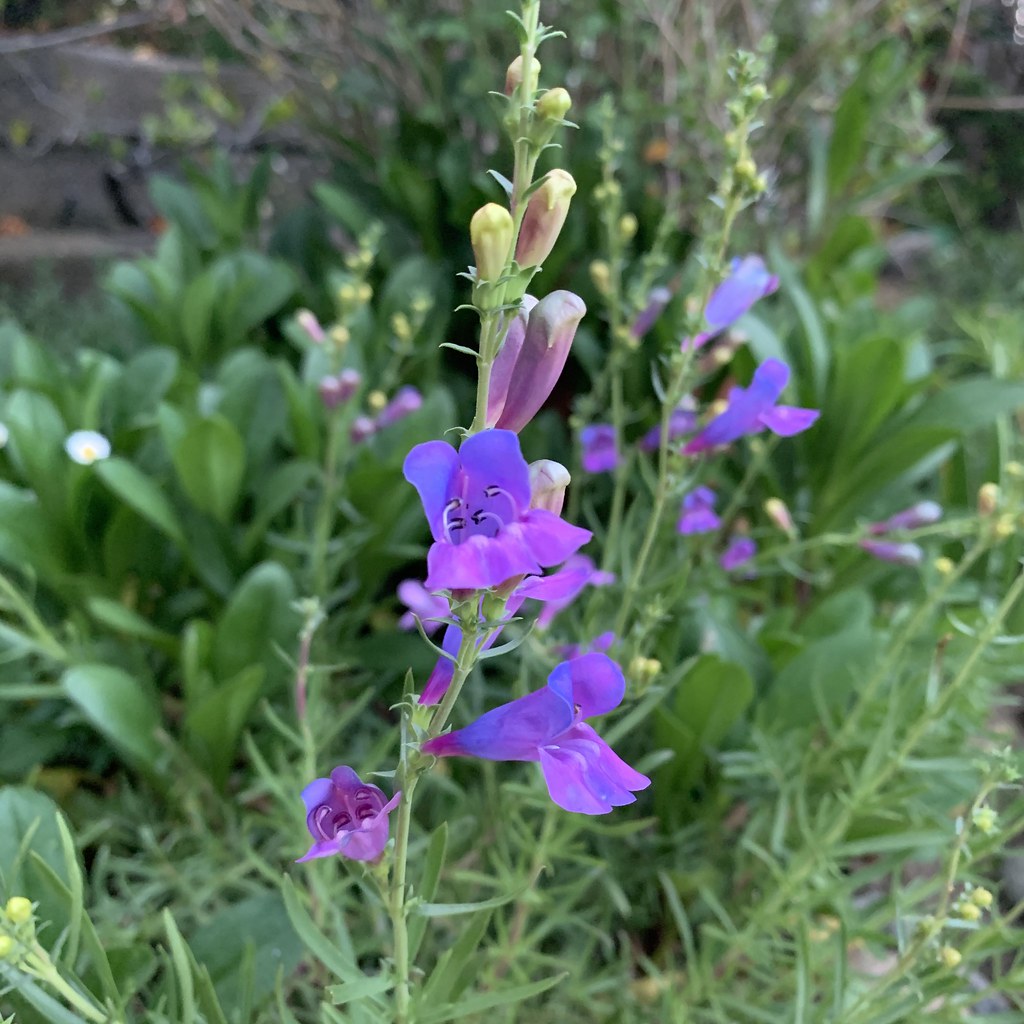
Today's garden photo, a look at my hollyhocks next to the hydrangeas, which you saw in the photo above. This is the 3rd year for the hollyhocks and they are bursting with blooms. Despite living in dry N. California I do like the cottage garden look, so I'm really pleased with these and will get some other colors next year. 

0D56C3AA-A793-47CB-93DD-281BDCE02FA5_1_201_a

Friday, June 18, 2021

New spring dress, Burda 07/2015 No. 110

It feels so good to have a new dress finished. In the previous post I showed all kinds of pattern fitting adjustments on this pattern. A lot of my dresses are sleeveless so it's nice to have one with sleeves for a change. I really like this fabric and the color - the fabric was provided to me from Minerva and it comes in a red version too which I might try for a different style. Here's the fabric link. 

IMG_6215  


That photo encapsulates my mood - I don't want to jinx things but it seems life is getting back to normal and it's so nice to go out with friends to enjoy their company! On a very breezy and sunny afternoon.

The pattern is from an older Burda issue, July 2015. These older Burda issues from the summer months are filled with really cute dresses or tops that suit my wardrobe. I've made a couple of these gems previously, you can see here and here.

Blue poplin dress1

Here's another look at the pattern diagram. I might trace off the #102 dress in the top row as well, perhaps leaving off the sleeves or putting a small cap sleeve but that looks like it would be nice for a lightweight summer fabric as well.

Burda tech drawing July 2015

In the previous post I mentioned that I put in the zipper in the center back, but don't completely sew it, and I wait to finish it until after I attach the skirt. Bobbi commented in my last post that she wondered how I do that. Here's a photo of the back, with the zipper partially sewn in,

Blue poplin bodice back

If you look at the bottom you can see that the zipper is sewn in the center back seam except for the bottom two or three inches. I then attach the skirt pieces, it could be a style with a basic bodice, or a dress like this with a waistband, but the goal is to be able to move the skirt placement up or down a little before completing the zipper. At this point I try on the bodice, and often use a piece of elastic and some pins to see where I want the seam of the skirt to land on the back bodice. Then I sew on the skirt and sew the remaining portion of the zipper. 

Bluepoplin10

That belt has been in my wardrobe for ages, I bought it as I love that color and it has gone with so many items in my wardrobe. It pays to have a consistent color palette. 


Blue poplin back on form


ACS_0038

They don't show in any of these photos but I did put pockets. And a little confession, the belt fits but it's not super comfortable (let's blame pandemic baking :) So I made a fabric sash belt. The pattern had the option of a kind of pleated waistband or a very long double wrap sash, however I just made a 2 inch wide sash that I could tie in front. And this photo reminds me that while a lot of my plants are doing fine the succulents definitely need some attention, look at that sad spindly thing on the left. 

Poplin dress wc

So that's my most recent finished item, I am currently making some shorts using the Tatjana trousers pattern from Just Patterns. After that I have some smallish pieces of silk so perhaps some summer tops which seem to be the things I get the most use from this time of year. As it was 108º F here yesterday and today a cool and balmy 104º F. hahahah we are melting and it's only June. Trying not to think about August 😅.

Next month I'm doing a slightly different sewing class for my online class offering with Hello Stitch Studio. We have had really great success with the online classes and even when the studio opens back up we will continue to offer them. Some people have said it's the only opportunity they have to fit in a live sewing class, by doing it online. So I'm working on some ideas for fall, and most likely will do a blazer class online starting in October. If all goes well I will do it in person at the studio as well but all the scheduling is still being worked out. My first in-person class will be in September and will be a beginner class, so if you have some friends that admire your sewing or wish they could learn send 'em our way! Oh, now I realize I didn't say what the July class will be, it's going to be a Sew Lab - which is the only name I could think for it. But it will be a "help you with whatever you are working on" class. So deciphering cryptic instructions, troubleshooting fabrics, fitting help, zipper dilemmas, I will answer any and all questions to the best of my ability. 

So that's the latest. We are hoping for a cool down this weekend, to a chilly 90º ha ha.  The bay area is so strange, at the coast it can be 40º lower that here in the inland area, and by yet miles it's only about 18 miles from SF to my house. And it's not officially Summer yet!! Microclimates everywhere. 


IMG_6215

Have a great weekend! Happy Sewing,
Beth

today's garden photo is my newest plant discovery, which is Clarkia. I think it's clarkia amoena. I happened across a 6-pack of these at the plant nursery a few months ago and gave them a try. Oo I hope they seed themselves because they are so nice. And of the 6 plants there were a peachy white combo, pink streaked with rose, white and pink, and then that one luscious rose red. These will definitely have a place in my garden next year, just like fabric I will always choose the bright and colorful. Plus one of the nicknames is Farewell to Spring which seems very appropriate right now. 

D77B8C7C-1646-4D7E-9F01-BD9AB96F29ED_1_201_a

Friday, June 11, 2021

Fitting the pattern, dress from Burda July 2015 no. 110

It's been ages since I've done the type of post where I show all my pattern fit changes but I have one to show you today. Lately I haven't sewn much of anything that needed some deep scrutiny to evaluate the pattern fit and work on adjustments prior to sewing. I did a couple of dresses last summer which were interesting patterns and that's what attracted me - something to get into during our long long time of stay-at-home during 2020. You can see them here:  red sateen Vogue dress and vintage look Burda dress. Otherwise my sewing the last few months has been doing samples and preparing for online classes. 

However this dress design is something I always noticed when I looked through the Burdastyle website, or it occasionally pops up in my Instagram feed - and I think hmm, I should track down that pattern and sew it up. Combine that with the tiered skirt trend this year and it was the perfect pattern to use with a length of fabric I received from Minerva.com. I chose the fabric with a vague idea of this type of dress, and then one day was looking through some older Burda magazines and realized that I had this pattern in one of them.  Here's a link to the fabric if you are interested. It comes in red as well. 

Here's a look at the work in progress, I think I adjusted the waist height a bit after this photo, and it might just be basted together. But I love this fabric, it was perfect for this type of dress. 

2D302054-A234-4DE4-B5EE-544CCFBA556B

Burda mag dress 2015

Here's a look at the pattern in the magazine, it had several views, the long sleeve, the short sleeve I sewed and then also a top version. I skipped the various belt options and can you believe I have that blue belt in my wardrobe, what a perfect match. 

Burda tech drawing July 2015

This issue (which happens to be in French) has lots of really cute things and you can expect to see another of these patterns. 

Let's talk pattern adjustments. I made size 38 in the shoulders, sleeves, neckline, and graded out a bit in the waist to fit. Once I tried it on I could see that I needed more length over the bust, which moved the midriff part to the right place, but it was also too roomy at the center front. I cut it open horizontally across the center front to see how much more length was needed, plus I pinched out some width down the vertical seam.

Muslin no. 1

Here is the second test version, much better. At this point I decided to change the vertical bust darts to gathers. I like that look on a dress with a midriff band. I marked on the center where I wanted the seam to begin as it was too low (or I am not tall enough :) 

Muslin No. 2

Here are my paper pattern pieces for the front. I didn't change out the dart markings, just gathered the space between the dart legs when I sewed it up. Also note some of the extra length I decided to add to the bottom edge, that way I could take some away if it turned out to be too long. 

Burda final pattern pieces

Here's the 2nd test version on one of my dress forms. This one is kind of old, someone gave it to me a while ago and I padded it up to match me as the shoulders on it are quite small and it resembles me a lot more than some of the other types. I keep that lightweight wool crepe dress on the form because I don't like looking at the dials and the various odd bits of padding that are under it, plus that dress bodice fits just how I like. Also the neckline depth, width, and the location of the waist seam are ideal for comparing other patterns. As you can see if you look closely I even have the center front marked with a thread trace so I often tissue fit other patterns on top of this form. However I always do a final fit and adjust side seams on myself, as every fabric differs.  Here's a closer look at that wool dress. 

Muslin No. 2 on form


Once I had the fitting worked out it was just onto sewing. I put lightweight interfacing on the center back seam and put in an invisible zipper. 

Interfacing on back seam


Blue poplin bodice back

Then I sewed the top half of the dress, put in the invisible zipper but left it unattached about 2" from the bottom in preparation of adding the skirt later. I often do dresses this way as I like to adjust where the waist seam is, and also I can fit the top on me without dealing with the skirt portion. 

So that's where I will leave this - next time I will post the finished dress which I actually have worn on an outing. Yay! going out of the house!!


Blue poplin bodice close up

Other projects I have going on now:  I'm halfway through my online jeans class via Hello Stitch Studio, and next month will be a shorter offering. I'm doing a Sew Lab where you can join in to ask questions and get help with your projects. And after that I think we will be scheduling in-person classes. So exciting to get back to that!

Happy Sewing and stay well,
Beth

Today's garden photo is this purple penstemon which caught my eye at the nursery. I love the colors but I think it is an early bloomer and the flowers may be gone. Will have to do my research better in the future as I like things that put on a show for a while. But the color is lovely.


Untitled