Saturday, July 25, 2020

Vintage DKNY dress, Vogue 1958 in cotton sateen

My love for the Vogue patterns by designer Donna Karan runs very deep, and I have a secret mission to sew up all of them. Which will never happen but I can pretend. However my late night eBay pattern browsing brought me to what can only be classified as my perfect DKNY pattern, and it landed in my shopping cart with not a moment's hesitation.
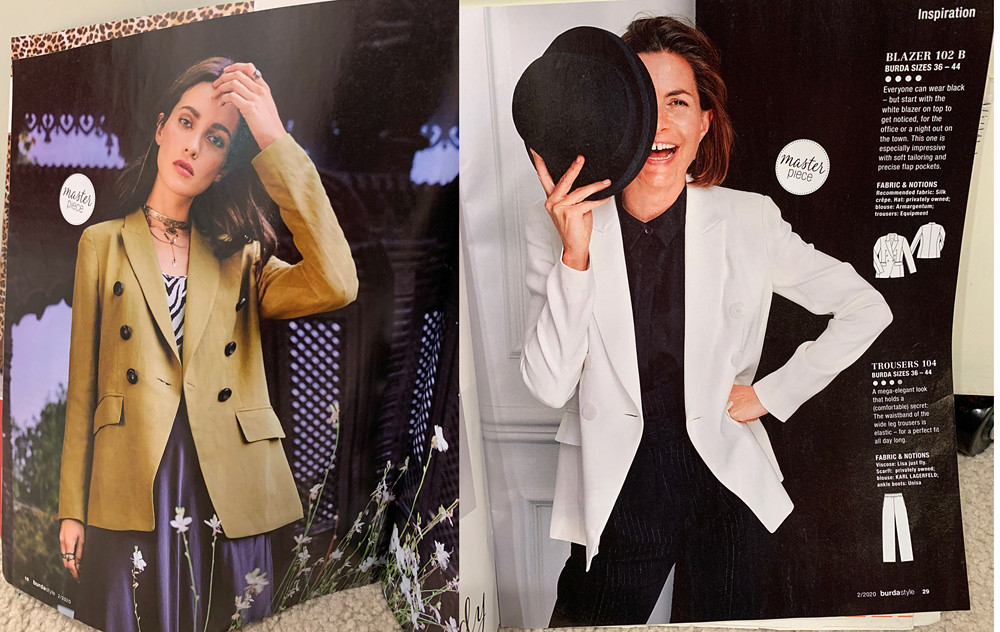
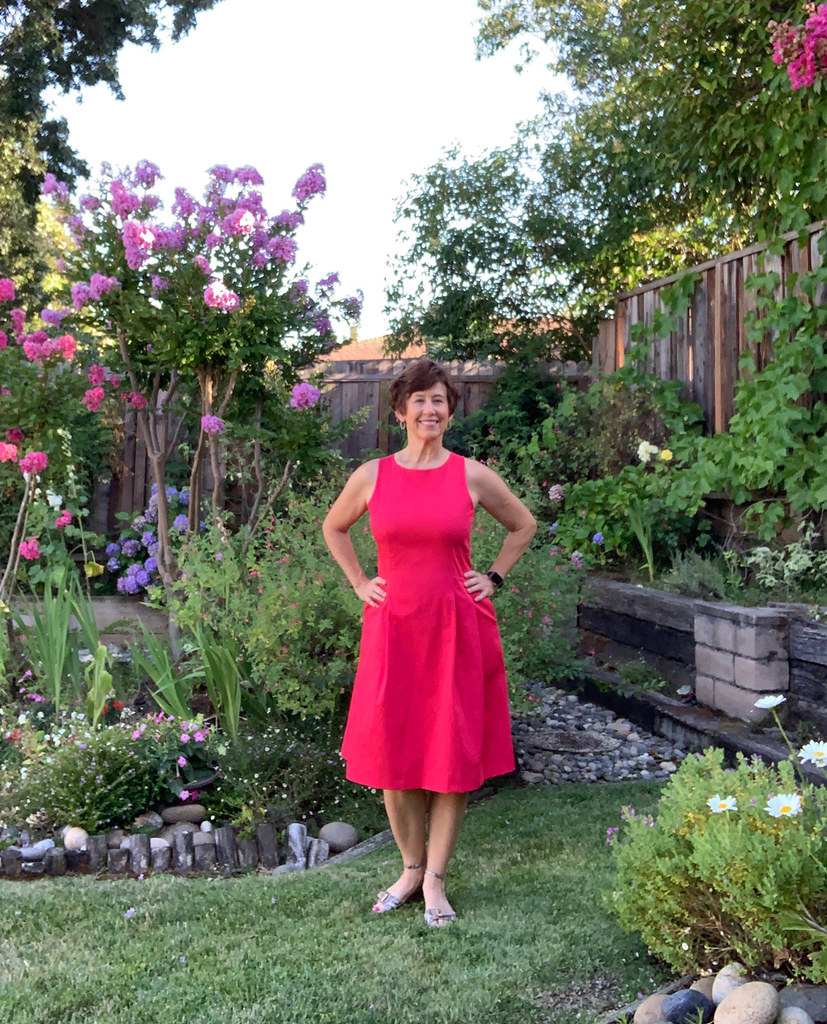
As soon as it arrived I wanted to stitch it up but alas, where does one wear a nice new dress these days? I was feeling a bit weighed down by our current societal situation, and slightly exasperated with sewing silly things I don't need, and then I decided - a red dress! There is something about a red dress that just cheers me up and the inspiration was right there on the pattern envelope. Not to mention that I had this red cotton sateen in my fabric stash for several years so it seemed a good time to use it.  So a red dress it was, and I love it but due to trying to outsmart myself it was a lengthy fitting journey to get here.  

Red sateen dress9


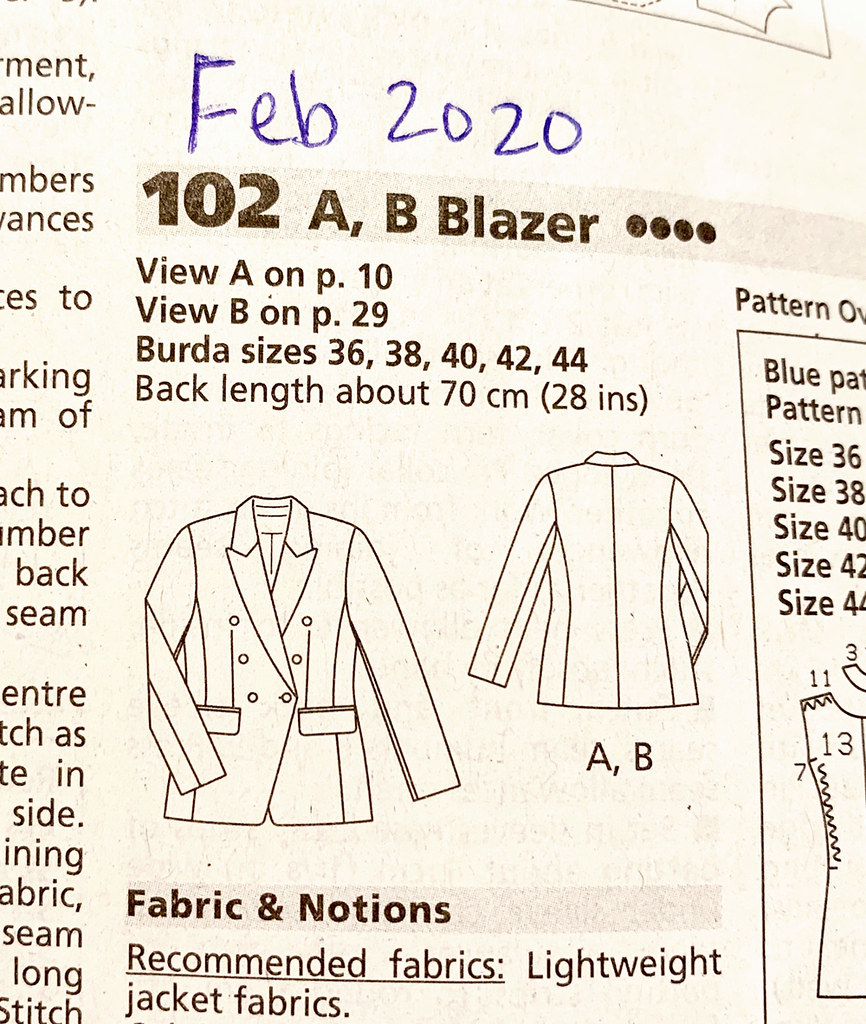
Of course I decided to make View B, shown on the pattern envelope on the right in black. My preference for that armhole cut is well know, but I did think the center front neckline looked a bit high. This pattern was a 3 size one, so it included sizes 12-14-16.

Vogue 1958 DKNY pattern red dress

I thought perhaps by using the size 16 lines at the neck I could then cut it down at the neckline so I cut out a bit of a mish-mash on the sizes and figured I could shape and adjust the upper part of the dress in the fabric. Which is what I did but it probably created way more work, and a lot of pin something, try on, take off, make small adjustment and repeat until I liked the result.

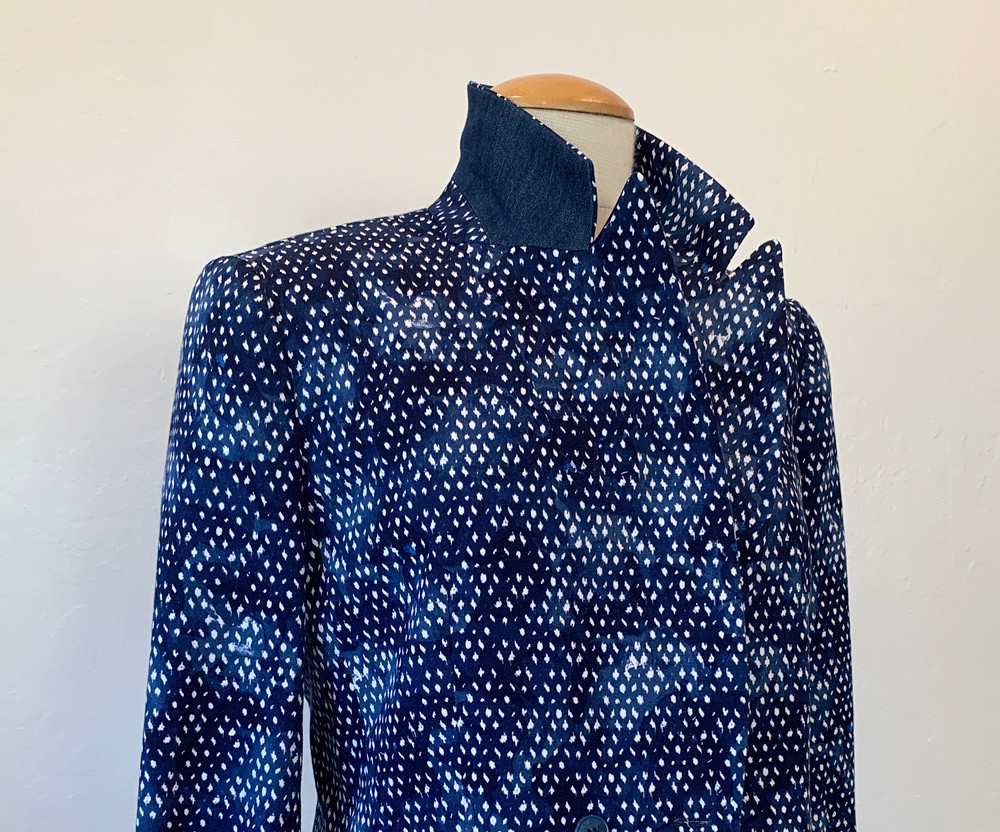
Here's the technical drawing for this pattern. which shows the seaming. The upper part of the bodice is continuous with the skirt front and then there is a waist inset, with a dart forming a pleat. I love patterns with interesting seaming and construction, to me they are so much more visually interesting and much more fun to sew.

Vogue 1958 DKNY pattern tech drawing


Red sateen vogue dress pattern piece front

I did some pin fitting of the upper part of the bodice and decided (1) to add a bit of length to the center front so the waist seam would land in the right spot. This shifted the angle of the front and added to the horizontal width of the front neckline, so (2) I pinched that out with tiny folds to retain the width of the neckline. (3) Since I was cutting out the size 16 at the shoulder I raised the underarm about 3/4". (which I often do on sleeveless dresses, it can always be removed later but I don't like when they land too low).  I used the size 16 on the side seams so I could adjust the side seam later, the markings of the pleats and dart are the same for all sizes so no change there. Also, to do this adjustment I cut off the upper part of the pattern, traced and adjusted it on tissue and then attached back to the bigger pattern piece. So just FYI - no need to trace an entire pattern. You bought it, you own it, cut it up and work with it, and if you are concerned with fit adjustments just trace the pattern pieces that will need adjustments.


Red sateen dress 2

All my outdoor photos are a bit out of focus, which is something I didn't notice until days later, but hopefully you can see the dress well enough.


Red sateen dress construction

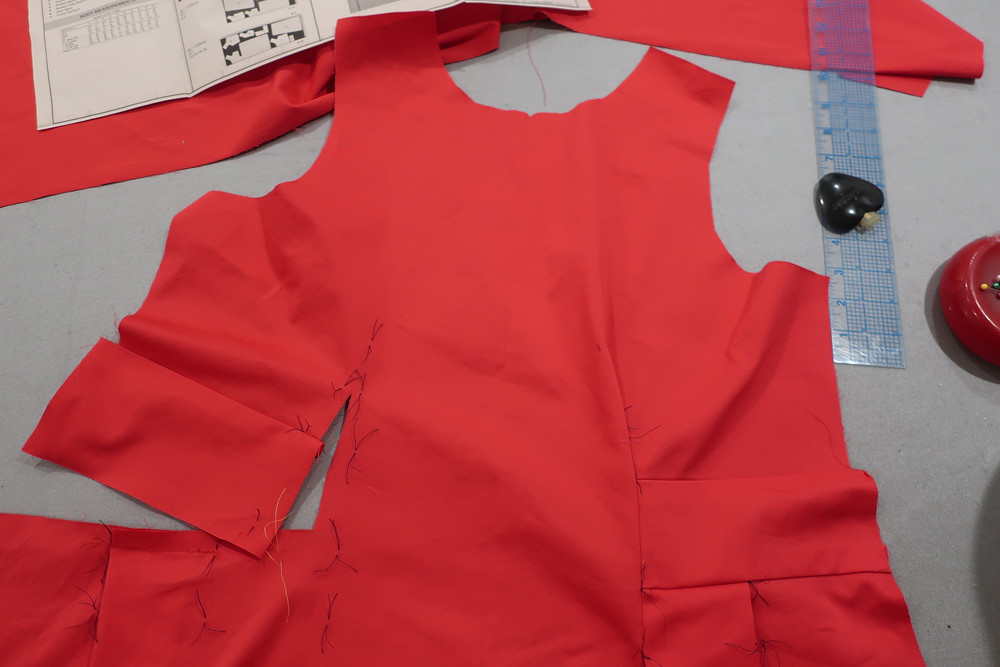
There is a look at the dress front, you can see how the waist inset is attached to the bodice side front and then the dart is sewn in order to make the pleat.

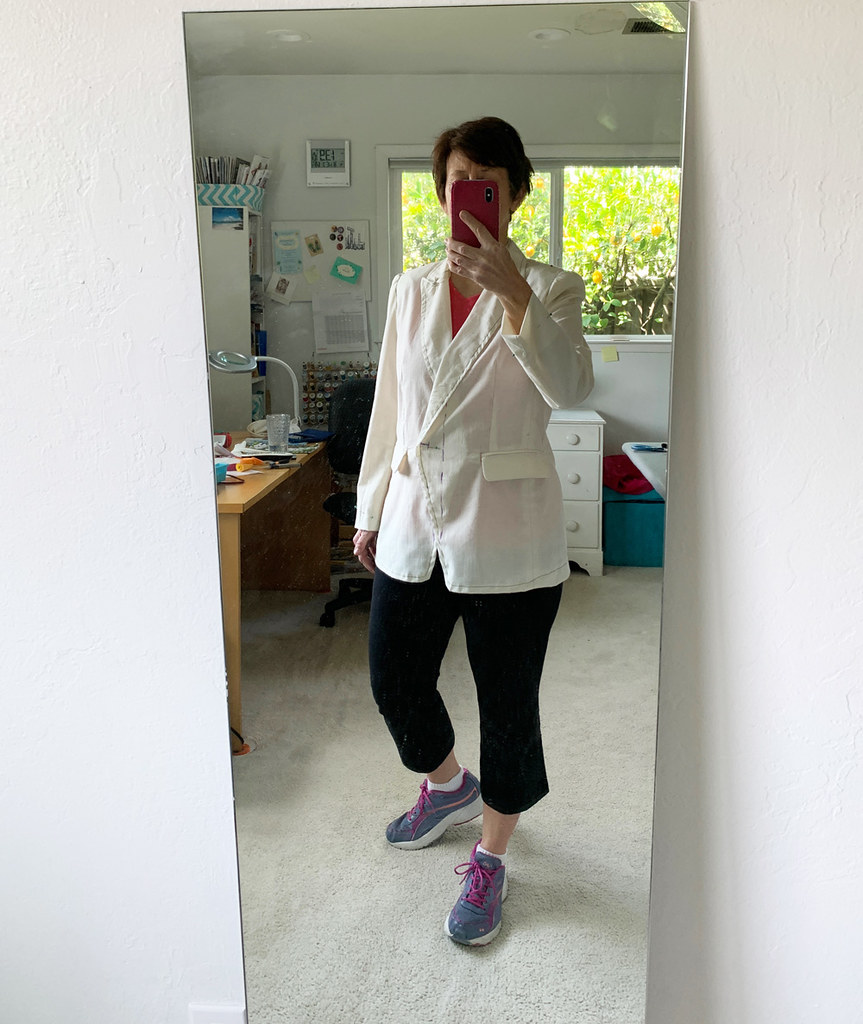
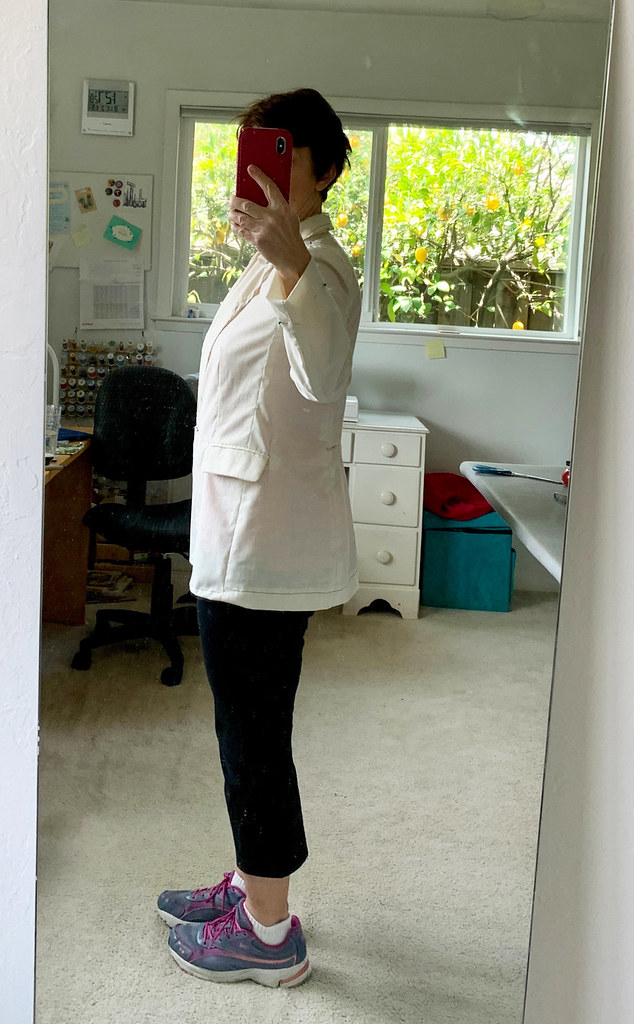
More fitting reality. The trouble with taking an iPhone photo of the back view in the mirror is that you have to raise your arm to hold the phone and it distorts the garment :) although with a sleeveless dress it's not such a problem. I've included this picture as it included the shoulder seam pinned together (follow the green arrow). People often ask how to fit yourself, by yourself and my answer is "carefully" haha. For something like this it's almost impossible to pin the shoulders together as a seam, so I just overlap and then it's much easier to pin. Also you can pin both shoulders and often find the seam amount might be different so it's more of a custom fit. I also don't worry about the edges, if the inner neckline edge matches then I will just shave off extra at the outer edge.

Red sateen fitting back view


Red sateen front and back on form

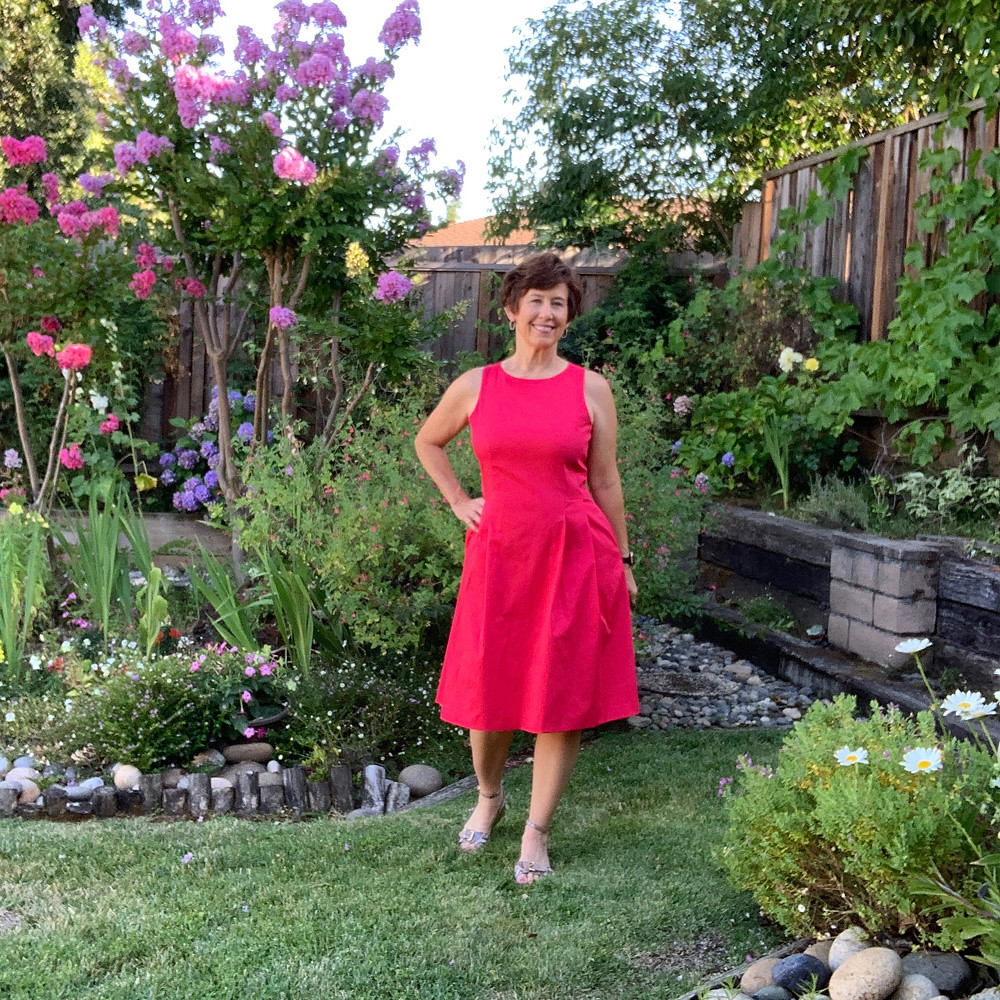
Now that I'm looking at all these pictures I realize that this dress is kind of difficult to photograph. Also it looks quite wrinkly but that's cotton sateen, it's never going to be entirely smooth. This fabric is probably a bit too stiff for this pattern, looking at the envelope it seems their fabrics are more drapey, I think a crepe would be ideal. This red version was intended to be a wearable test but I like it enough to call it good for this pattern. So many other patterns calling my name right now.


Red sateen dress 4

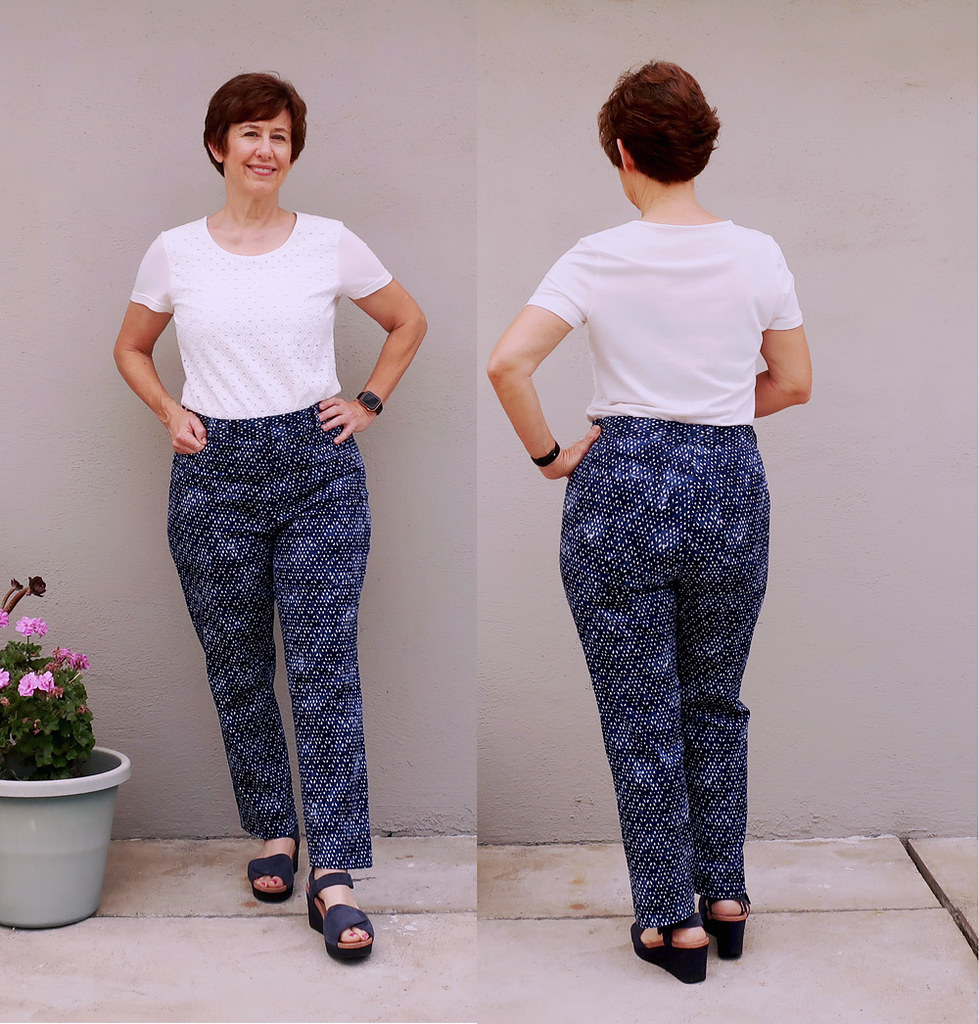
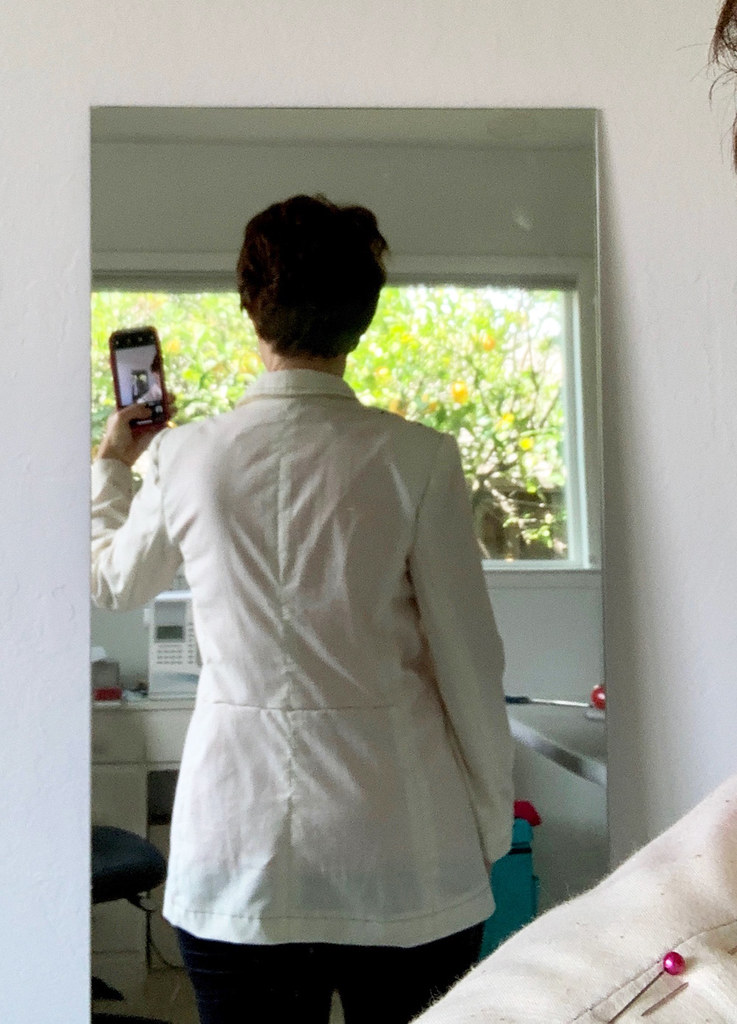
I'm very happy with the fit across the upper back however I think the back waist seam is a tiny bit low. You can't tell in this photo but I think the pleats would hang better if it were shorter.

Here I've pinned up the center back with a horizontal tuck to show how that raises the waist seam. I usually do this on most patterns but looking at the pattern pieces it didn't seem necessary. Or perhaps I meant to do it when I attached the skirt but I forgot!

Red sateen back shortening example

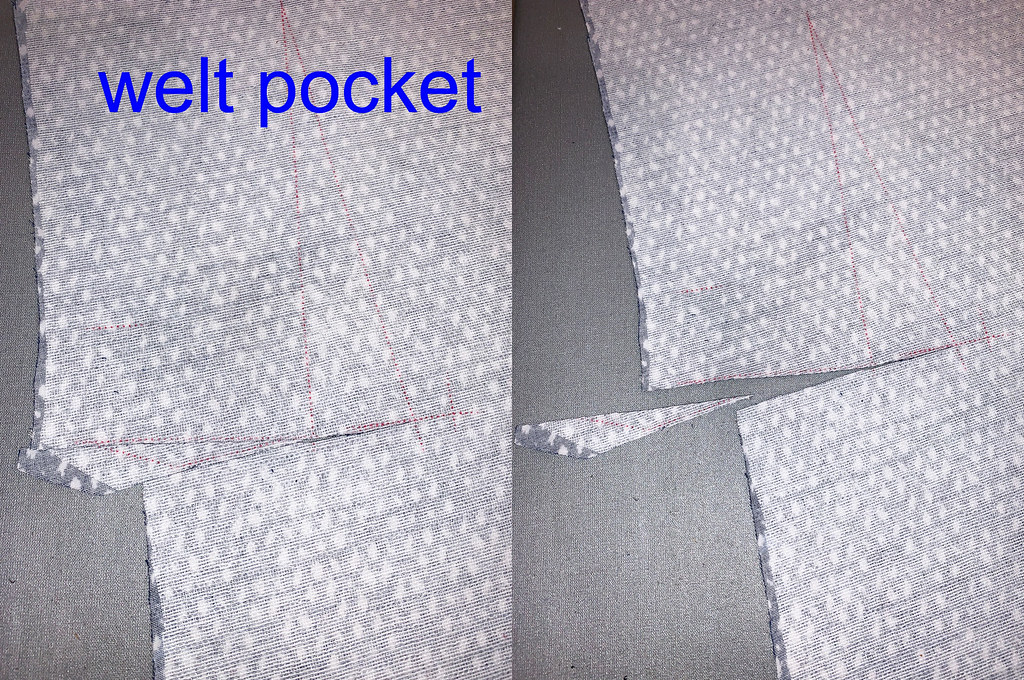
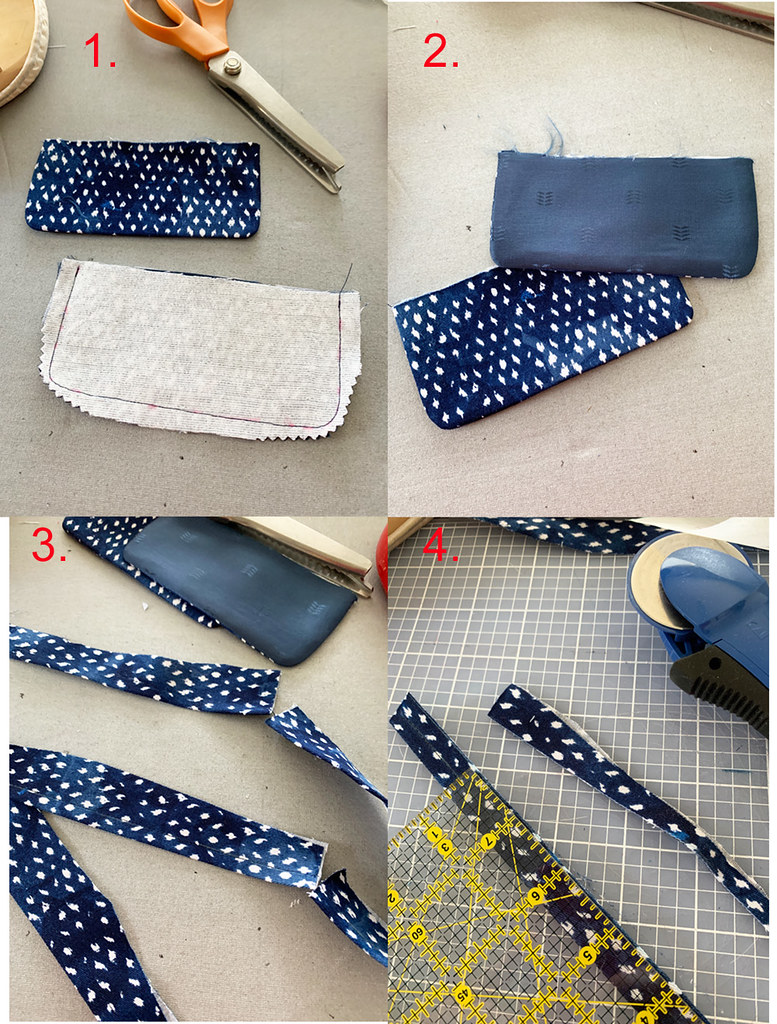
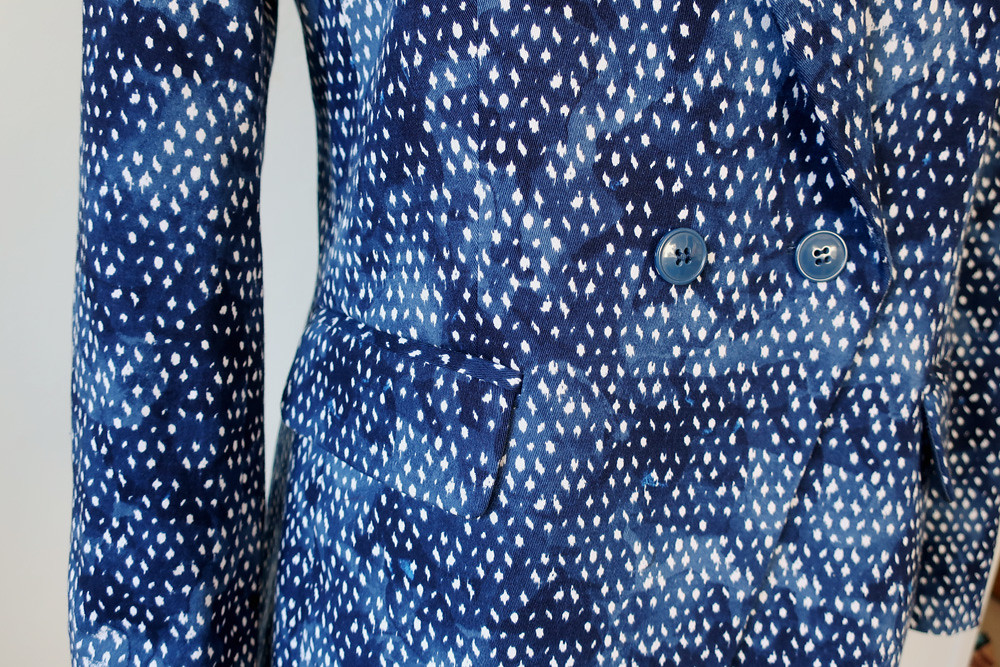
And in what can only be described as a very sad oversight, this dress pattern did not have pockets. Which I am not obsessed with but in a dress with smooth side seams and plenty of room for them it seems like it would have been nice.

Red sateen dress pocket

I don't really use pockets in dresses much - what are you going to put in there? plus whatever you do put pulls too much. However for standing around and taking pictures then pockets are a must, right ???


Red sateen dress1


Red sateen dress on form front1

More fitting adjustments, I did sew up the front, back, finish the shoulder seams and neckline, and then sew the side seams last with adjustments and basting along the way. This view B is finished with bias binding on the neck and armhole, which is a bit of a surprise but I decided to go with it as it made the fitting easier. The view A has an all in one facing.

Red sateen dress 8

Did you take ballet when you were a kid? Looking at these photos I kind of laughed as I did ballet for years and had a built in advantage of having turned out feet before I even started! And obviously still do, have the turnout I mean :)

So that 's the scoop on this Vogue pattern, a while back on Instagram I asked if anyone could guess the copyright date, and the answers were varied. Which I think goes to show that styles are constantly repeating and good ones are timeless.  The answer is: © 1997, so this pattern is 23 years old. I wonder what other pattern gems are waiting for me?

Up next, more cotton sateen from the stash which I've turned into a strappy sundress, and a post on sewing things that didn't work out. Yes it happens! thankfully not often.

Soon I will have some class listings on the Hello Stitch website for virtual classes via Zoom that we will be offering. To start the first one will be more for beginners, so I will ask you to forward to your
"sewing curious" friends and push them to get started on this fantastic hobby/obsession.

Red sateen dress 6

Happy Summer Sewing,
Beth

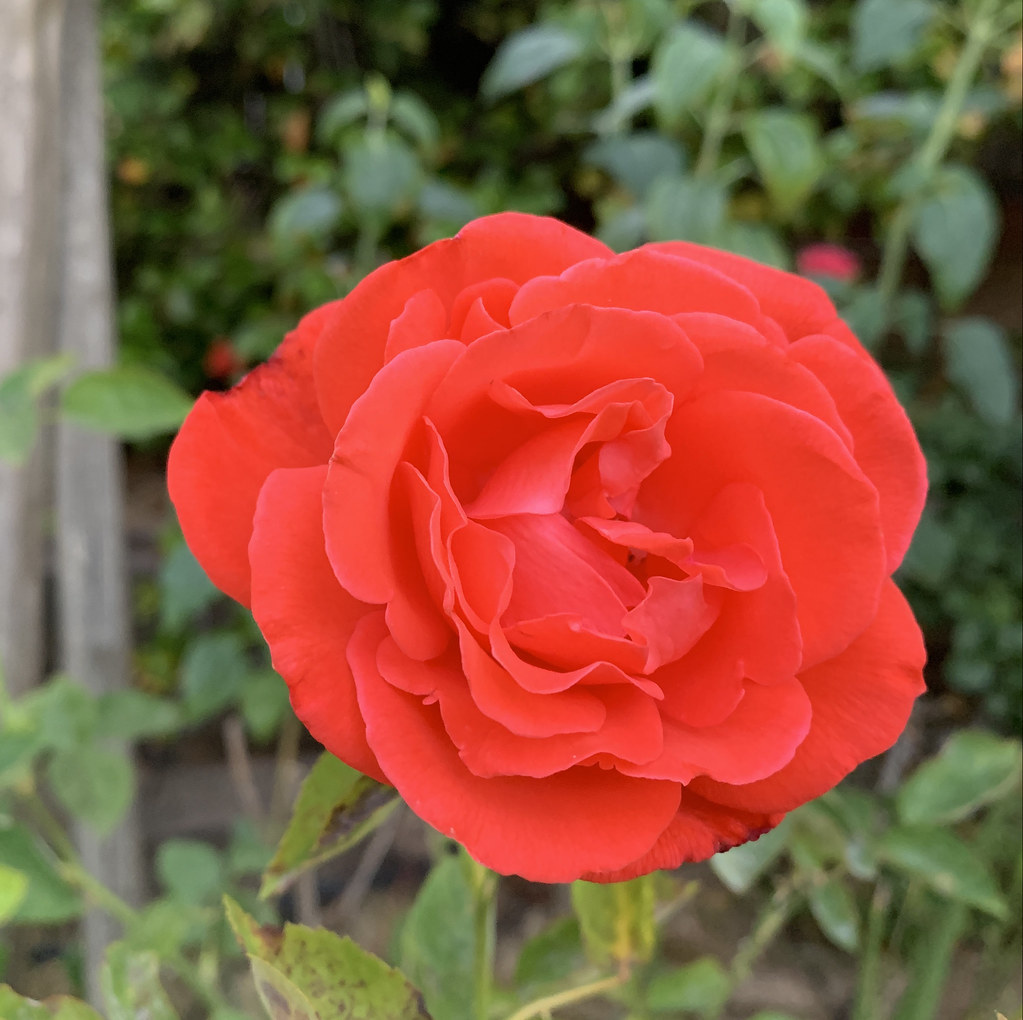
Today's garden photo, I think this rose is Tropicana. No blooms right now, as all the roses get a bit tired in the heat but it will probably put out a few more blooms in the next month.  

IMG_2642

Sunday, July 19, 2020

Finale: Denim Peak Lapel Blazer and jeans

Now that I've finished my denim outfit there is nothing more I want to do than jump on a plane and go somewhere with a suitcase full of t-shirts and denim. Somewhere I could sightsee, meet up with far flung friends and spend time in some fantastic restaurants with no thoughts of a pandemic and all the accompanying troubles. But alas that is not to be, at least not for a while so I will stay put and dream. How about you? feeling the same I imagine, and trying to enjoy the summer while it's here.

This all means that my crazy denim pantsuit will have to wait for an outing, both because I'm not really going anywhere plus it's a bit too warm to wear this. A perfect early fall outfit so it will have to wait. Hmmm....waiting. That seems to be the watchword of the day now, every day. Do you think there will be a huge pent up demand to do everything, see everyone, and just relax? I kind of think there will be. Meanwhile I'm sewing and sharing here and dreaming of something better.

Denim suit front view with sunglasses

There it is, both pieces worn together and I think it needs the sneakers plus a pop of pink to tone down all that speckled denim. The shades seemed necessary as well.

Here's the jacket on the dress form. The main detail on this jacket is the peak lapel, which is the pointed lapel that almost meets the collar. I had wanted to sew one of this style for ages, and found on in the Feb. 2020 Burda.

Denim blazer on form with red sleeve lining

The sewing details are in my previous two posts, where you can see the jacket pattern and quite a bit about sewing the collar and the pockets.

Here's the first blog post with details on making a muslin to check out the pattern. 

Here's the second blog post with details on sewing the collar, lapels and pockets.


Denim blazer with mn jeans front view

Alternate view taken on a different day. I think the jacket is quite wearable on it's own with solid jeans, although I rarely wear white tee shirts. They always seem like a good idea in theory but I never reach for them as I prefer to wear something colorful 99% of the time.
The jeans are the Megan Nielsen Ash jeans, which I sewed back in February when I taught one my last classes prior to the shutdown. I miss you Hello Stitch !!!!!  By the way, we are gearing up to do some more virtual classes coming up in Aug. and September so perhaps I will see you then. Any interest in a virtual class of me constructing a blazer - perhaps as a sew-along? let me know.


Denim blazer with mn jeans back view

There you can see the contrast under collar. I am really happy with this pattern and I can't wait to make it in the fall in a solid color.


Denim jeans suit 1

The jeans pattern I used for the print ones are a self-made pattern. I copied a RTW pair of jeans about 3 years ago and use that one a lot, particularly for stretch denim, and as it turned out they are really similar in size and proportion to the Ash jeans that I make. On my self-made pattern the legs are a bit wonky but they suffice, and I keep meaning to perfect but have never gotten around to it.

Although looking at the back I don't really see a problem, perhaps they could be narrower at the knees and lower leg but if I want that effect then I'll just make the Megan Nielsen ones. Yeah, I am a high waisted jeans girl and was so happy when that fashion pendulum swung that way. I have a really long lower torso so any jeans that are low waist are not for me, not comfortable and way too low for
wearing.

Denim print jeans front and back


Denim blazer back on form

This denim came from Joann's last summer, I bought it with no plan in mind and thought I might make some kind of two piece outfit but nothing specific. It's a nice weight denim with a medium amount of stretch, perhaps 2% lycra?


Burda denim blazer lining view

I want to say that my mismatched patchwork lining is due to being in lockdown and no shopping but that would not be true, if you have seen other jackets I've made this is a standard feature of my sewing, such as this blazer.  I just can't deal with buying a matching lining for every project that results from my sewing whims, so I rummage through the lining box and see what pieces are large enough to cut out a lining. I usually make the body from one color and the sleeves from another.


Denim blazer peak lapel close up

Here's another look at that lovely lapel with a piece of white paper behind it one one side. The detail just disappears in this print so I must sew it again!

And a look at the inside of the jeans. I was happy to use this small remnant of a Hawaiian fabric - it complements nicely. And the inner waistband is in solid denim, a scrap from the jeans I'm wearing int the picture above. Because when I cut out this printed denim all that remained was shreds - not even enough for the inner waist. But using a solid works out well.

Print jeans inside view

Ok that's all for now. I have quite a few things I've sewn recently so you can expect a stream of blogging if I can sit myself down and concentrate :)

I hope everyone is well and making it through these strange times. I really cherish my friends and family here near me but also my far flung sewing friends, seeing what everyone is up to these days is definitely heartwarming, now more than ever.

A big thank you to everyone who comments or writes to me saying that you enjoy reading and seeing my sewing  - it means so much and I appreciate you all.

And now I have to run. Although somehow this picture makes me think of that song "Walk like an Egyptian". OK now I just watched the video, that is a time capsule!!  Every style comes around, when will that hair return? hopefully not in my lifetime :)

Denim suit side view


Happy Sewing and stay well,
Beth

Today's garden photo, here in N. California unless we go crazy with the watering the dahlias burst into color in late spring and then look a bit crispy come August - just the time when I see the east coast gardeners and their beautiful dahlia beds. This is my kind of dahlia - bold and colorful. 

IMG_2897

Sunday, July 12, 2020

Part 2: Denim Peak Lapel Blazer, Burda Feb 2020 #102

A nice surprise, who knew that quite a few of you are interested in this pattern, based on the comments and messages I've received. To review, this is from the February 2020 Burda Magazine, pattern # 102 . I notice that on the US website they seem to put up the patterns very quickly so you can purchase them individually for print at home PDF instantaneous gratification. Also I think I will start a pinterest board with my picks from each month's issue, so I can glance through that to recall my favs (instead of my usual method of leafing through each magazine until I find what I'm looking for).

Let's get to the most important feature of this jacket, that pointed lapel. Time to confess that I actually was quite concerned with how it would look. Sometimes turning a crisp corner is an elusive goal but whew! this turned out great. Very happy with that pointy edge. Also I'm kind of getting into doing  the old-school type of blog posts filled with sewing details and close up views. As long as we are stuck at home I will try to continue - it's nice to think about what I might do on autopilot but might be very interesting to people who are ready to try some of these techniques or garments.

Denim blazer under collar

Of course working with denim is a plus in this case, it does press well and is not quite a thick as perhaps a wool might be. Although I have definite plans to make this pattern again in the fall in a wool. You know me, once I get a jacket pattern I like I will repeat in a different fabric for a new look.

So how to get that crisp corner?  Planning and preparation, leaving nothing to chance. First up, I had marked the roll line and the dart with the wax tracing paper. Note that this pattern has the lapel roll line marked on the pattern piece, can I say hurrah! I get so annoyed with a lot of modern patterns that don't include this detail. The line is indicated, so I stitched some cotton stay tape along the line, tightening it up ever so slightly. To do that I place it, mark the ends and then shift the bottom about 1/4" and then distribute that ease along the whole length. You can see my little red pencil marks at the bottom where I've shifted it. The top red mark intersects with the 5/8" stitch line.

Denim jacket front tape lapel

Next, in order to incorporate that skinny dart that hides below the lapel, first the under collar and the collar stand need to be stitched together. I find it such a time saver to draw my stitch lines in, then I can match the intersection points for the seam lines and everything goes together perfectly. That is the beauty of having interfacing on it - you can draw with pencil right on it and it will never be seen. Another thing to note is that I always mark the center of each pattern piece and use those as an extra little match position, I do this on everything. Dresses, shirts, jackets, tops. If it has a center I mark it.
It makes pinning on facings or collars that much easier.  You can see I don't mark the entire stitch line, just the edges where there are corners or pivots.

Denim jacket upper and under collar


Here's how the collar and jacket body match up. The  intersection marked at the lower corner of the collar stand matches up to the two dots on the dart which are brought together. On looking at this photo I though they were sewn continuously but in fact not, below this is the dart pinned together.

Denim blazer attaching collar1


Denim blazer attaching collar 2

So the collar is sewn on, then the dart is sewn up. Lastly the remaining edge of the collar is attached.
The image on the left is a bit of repeat, but it's interesting to see it side by side with the collar and lapel completely stitched. And you can see that all my stitch lines are penciled on which makes sewing it so much easier. I do shorten the stitch length quite a bit for that peak lapel which makes it easier to turn that small sharp corner.

Denim Jacket lapel sewing composite

Once it is all sewn then the trimming commences. The ONLY way to get a nice crisp lapel is to seriously trim the seam allowances and press. Looking through my photos I didn't take pictures at that stage but you can look at this previous blog post and see some good details on this step.

Here's one more thing I took a few photos of, and it's actually a step that precedes the collar. Before the collar you much stitch the front and back together at the shoulder seams. There is a bit of ease built in to that seam with the back being larger than the front. I find in my classes that this always stumps people and they want to trim it off, but no! it's there on purpose to give extra room and shaping across the back.

My photo cut off the outer edge but they are lined up (where the armhole is) so that means there is a scant 1/4" of differential at the inner neck. They need to be matched up there - at the stitching line as indicated in this photo. Which makes the back longer but that is eased to match the front.

Denim jacket shoulder seam match
I find the easiest way to match is to bend the sides toward the front, it makes them marry up well and then I pin to distribute the ease. Jacket patterns usually tell you to add some stay tape on this seam but I like to use the selvedge of bemberg or silk as it is quite stable but adds no bulk, plus presses perfectly. So save your selvedges to use for ultra thin stay tape. The photo on the right shows it stitched and the jacket back curve which will match the body and shoulder area.

Denim jacket shoulder stay

For the under collar I used a scrap of some solid denim from my stash, it added some visual interest to the jacket and as I was also cutting out jeans from this print denim I was really short on fabric. In fact I think I would have had to piece the under collar with a seam had I not used the contrast fabric.


Denim blazer contrast undercollar

That's how the finished collar plus dart looks, this is before pressing. But it is a nicely designed pattern and that dart points right into the seam of the collar stand.

Just as a reminder, here is the drawing for this pattern. My previous post is about doing the muslin and checking the fit before I started sewing.


Burda Feb 2020 blazer 102 drawing

Another sneak peek and getting ahead of myself, this is what lockdown lining looks like.
Who am I kidding? I can't attribute that to staying in and not shopping - that is my standard modus operandi for linings. Raid the lining bin and come up with something that is reasonably coordinating. More than one color, sure. A print, almost never! Anyway I had an idea of rolling up the sleeves on this jacket which called for a nice scarlett lining.

Denim jacket sewing in lining


Last look at my finished collar and lapel. I put a piece of printer paper under it so that it could be seen. I do love this wacky fabric but the details disappear.


Denim blazer peak lapel close up

Next up, I will show you the finished jacket and then put it away until probably late September - it's far too hot for jacket wearing around here now.

In other sewing, I've finished a dress from a DKNY pattern that I was a bit lukewarm on while sewing, despite loving the pattern and the style, the I finished it, put it on and I love it! Thankfully I have way more sewing successes than fails, but I do have a couple of fails to show you as well. Mostly due to choosing pattern styles that I just don't think suit me at all. Next up I'm sewing a sundress as it is definitely sundress weather around here, and a jumpsuit.

This morning I helped my mom make plum jam, and we had to laugh as it never fails that the jam making day is over 100℉. Very hot work! Of course around here the plums are ripe in July so of course it will be in the 100's. Anyway - I always have more respect for those pioneer women who did all these things in long dresses, wood stoves and of course no air conditioning!

Happy Summer Sewing,  Beth

Today's garden photo, this gorgeous gardenia. Every year I get worried about the gardenias which have probably been here maybe a few decades? I don't like to prune them because I don't want to lose even one of these fragrant blooms. They are putting on a show right now and the fragrance is beautiful.

IMG_2875

Tuesday, July 7, 2020

Denim Peak Lapel Blazer: Burda Feb 2020 # 102

After my recent posts I'm now sure that there are plenty of you that sew from the various pattern magazines. Thank you so much for all the kind comments about my posts and the useful info in your comments. Including the suggestion to try the Spanish sewing magazine Patrones, it has a really clever app which I immediately downloaded and bought 2 issues. They are quite a bargain at
$ 3.99 each and I've started on a dress to try them out. That blog post will be forthcoming but I have a lot of already sewn stuff to catch up with here.

And who who wants to raise their hand and say they feel kind of weird about sewing new clothes right now? Although if you are in Europe or other parts of the world perhaps things are getting a lot better and you resuming some semblance of normal life. Here in California it's a roller coaster ride of ups and downs with the corona virus, from having good stats to spikes in cases, with businesses opening up and then putting the brakes on. It is beyond annoying that we in the US can't get it together to defeat this thing and I could rant endlessly about politics but I will still recommend votesaveamerica.com and their effort to win swing states and defeat Republican office holders.

Back to sewing, just to keep myself busy during these times I have concluded that I might as well sew things that are fun or interesting or just plain pretty, whether or not I have a possibility to wear them anytime soon. If I have to stay mostly home, not be traveling or doing the usual fun summer things then I will indulge my sewing habit and try out some new, shall we say "experimental" items.
This project doesn't really qualify as experimental (more on those in future posts) but I did wrestle with the idea of another blazer jacket. However I've always wanted to try one with peak lapels, they look a bit tricky to sew and possibly a nice challenge.

Cut to the chase - I'm really happy with how it turned out although due to my fabric choice it's almost impossible to see the details! Thus the turned up lapel here so you can see the lapel detail.

denim jacket front lapels view

I have lots of sewing details so this post will be about the pattern and checking out the fit, with final photos to follow in a subsequent post.


Here's the technical drawing from the Feb. 2020 Burda magazine. I had an idea floating in my head to try this style of lapel and had been looking around for a pattern when this arrived with perfect timing.
It is double-breasted which is not my favorite although it suits this style - perhaps it's the tradition and I decided to give it a try. Also it's a bit of a longer blazer which is nice for a change.

Burda Feb 2020 blazer 102 drawing

Burda denim jacket magazine photos

Those are the photos from the magazine. How I wish that all patterns and magazines would just show the garment clearly instead of people goofing around, looking like they have a headache or hiding behind their hat. In any case - the technical drawing is how I decide so I guess I can ignore the styling (which never makes me like a pattern more - usually the opposite).

I decided to make a muslin to see about the fit, and if I even liked the pattern. Also I was concerned it might be too long.

Burda denim blazer test 2

Being that I have plenty of time on my hands these days 😒 I made a very thorough test garment, with pocket welts and flaps. Some things that I actually do for all test garments are to press under the seam allowance on edges such as collar, press up the hem, etc. This is so that I can see what the proportions of the actual garment look like. I think if you leave the seam allowances and try to evaluate the fit and proportion it will look off and you can't evaluate properly. Also I wanted to see exactly how close that lapel notch was. I used size 38 for neck, shoulders, bust, graded out to about 42 at hip level and then did a little fine tuning at the back hip area.

Real me in the sewing room here. I don't know how so many sewing bloggers take reasonably good mirror selfies, I find the fact that you have to hold the phone up to take the picture immediately creates all kinds of wrinkles and drag lines in the garment.

Denim blazer muslin view 1

Note that I marked the center front line on the muslin. This is SO important when you make a muslin or in fact make anything that closes in the front and want to check the fit. It's a must to match that center front line and go from there otherwise the impression of the fit is all wrong.

Denim jacket marking with wax paper

These photos show marking the darts and other lines on the inside of the interfaced jacket, but I use the same method when I make the muslin, I mark all the lines, darts, dots etc using this wax tracing paper. I think for the jacket proper I do one piece at a time, whereas for the muslin I sandwich the tracing paper inside the two muslin layer, with the red wax paper folded to have two surfaces of it touching the muslin fabric.


Denim blazer back view muslin

Back view of muslin, the center back was definitely sticking out a bit and the hem was a bit lower in the back which tells me that it needed shortening in the back length. Many people want to call this a swayback adjustment but my perception of it is a length adjustment. I pinched out about 3/8" wide fold so that adds up to a 3/4" length shortening, which I tapered to zero at the back princess seam,
You can see it's also a bit wide at the hem edge.

Denim blazer side view muslin

Making this muslin showed that I might have overshot the mark at the hip area and I ended up taking it in just a little bit around the hem in the princess seams. But I think I saved that for when I sewed it in the real fabric as muslin just doesn't behave the same and I like to do these small circumference adjustments in the real fabric. But that hem looks level in the back and I think the back waist shortening did the trick.

Another thing to note when I make the jacket muslin is to pin in shoulder pads. The fit and hang of the jacket really depend on them. In the final version I may use slightly different ones but the muslin is such a limp fabric as compared to most jacket fabrics that they are really needed to get the right impression of fit and shape.

Construction: this jacket starts with the pockets, as most jackets I make seem to. The front must be all prepared with the interfacing, markings etc and then the side panels sewn to the front jacket pieces.

Here's the cutting lines for the welt pocket, similar to other jackets I've made (like this one), you have to slice across the markings, just up to the dart leg, and sew the dart, which makes the upper part swing into being level with the rest of the pocket. I find the pocket works better if there is that angle that is taken up by the dart, and if you look at my post where I compare blazer patterns  I noticed that the Jasika blazer didn't have that same angle and I found it a bit troublesome to sew.

Denim blazer pocket cut out

Once the dart and then the princess seams are sewn, then I can make the welt pockets.  Here's a composite of some of the steps for making the pocket flaps and welts.

Denim blazer pocket parts

I like to use lining fabric as the back side of my pocket flaps, it is less bulky and presses well.
I tend to use 1/4" wide welts and I make them quite a bit longer than the pocket, and then trim when I've pinned or stitched on. I never use any pattern piece that comes with a jacket for the welts. Making pocket welts is one of the few times I use a rotary cutter!

Finished pockets. The details just disappear on this fabric - you can be sure I will make this pattern again come autumn in a solid color. Somehow I feel the need for a burgundy or perhaps even purple blazer. I like to use scraps for the pocket linings which will never show so in this case I used up some pieces of pink bemberg.
Blazer jacket denim 2 pockets

This is a serious stash project, as fabric, linings and buttons all came from stuff I already had. Which is how things are these days during stay-at-home sewing, right?  Here's another small peek at this jacket, and in my next post I'll cover lapel sewing and lining. Plus bonus jeans! Yes, I said I would and I did,  it's full pantsuit time. Definitely a slightly wacky one but I'm pretty happy with it.


Denim blazer button front


That's part one of this denim jacket, and then I have a few dress projects on the table. Plus a Random Threads post this month.

What else have I been up to? Some socializing at a safe distance - very grateful for the lovely weather and outdoor space. Plenty of gardening, and trying to incorporate some new workouts via YouTube which are actually more fun than I expected.

Stay well everyone and happy sewing,
Beth

Today's garden photo, it's a hydrangea bonanza in my front and back yard right now. Purple, pink, blue, and these lovely white ones which I think are called shooting star hydrangeas? or at least that's what I call them. I was watering in the front the other day and a woman who was walking by stopped to ask how I controlled the color of the various hydrangeas. Which made me laugh and I told her that it was survival of the fittest in my garden - the color is what it is, and plants that don't thrive are moved or sent packing. But this one is thriving - so it will stay 😀

IMG_2878