Showing posts with label pants. Show all posts

Friday, March 29, 2024

Purple Pants - two patterns, Leisl + Co Peckham and VikiSews Edna

Did I need two pairs of purple pants?  Or any purple pants at all? Not really, But I had some purple fabric in my stash and decided to work out a new pants pattern, the Leisl + Co. Peckham pants. With a number of changes I'm fairly satisfied with how they turned out - although the elastic waistband which is a feature of this pattern is what I actually eliminated in my version. 
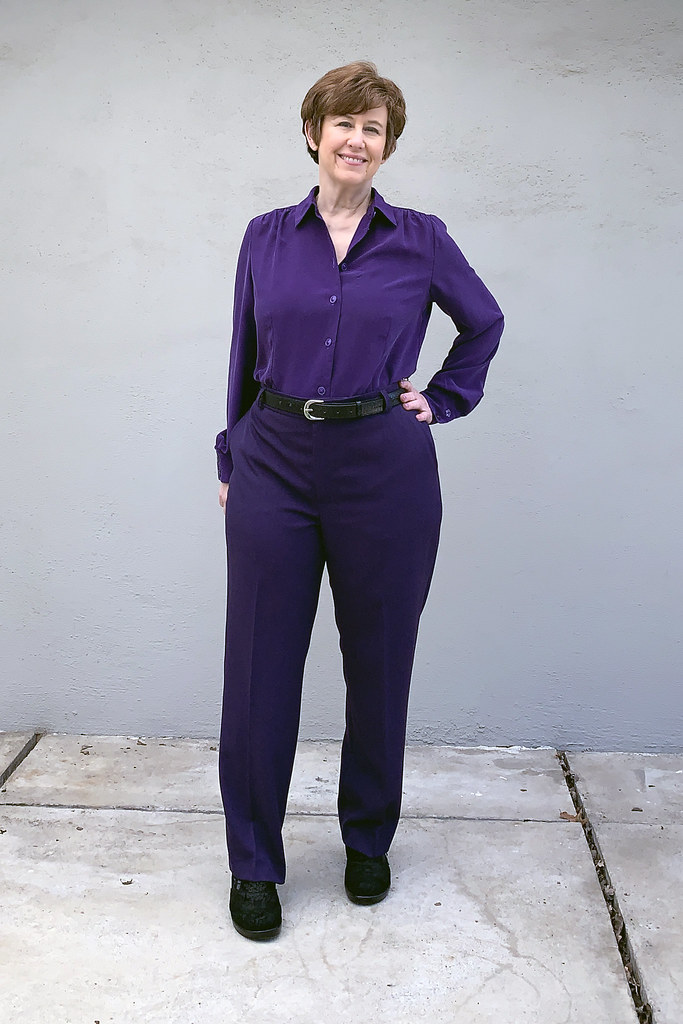
Leisl pants 1

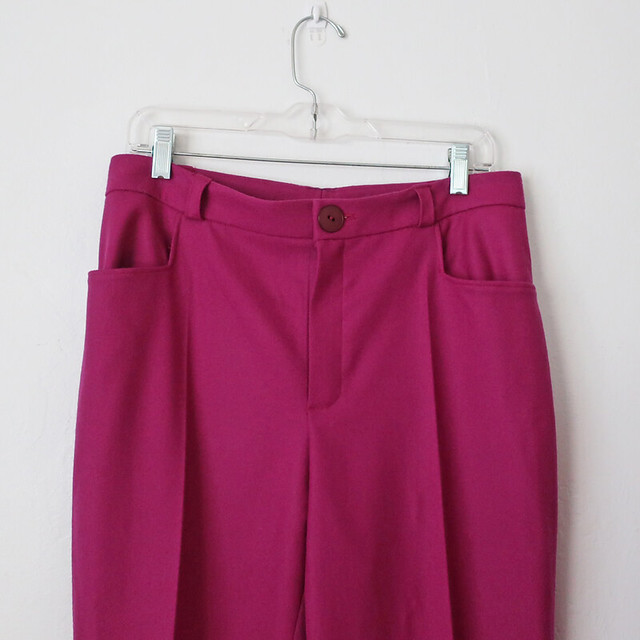
Here are the Peckham trousers, the fabric is a stretch woven, I think it has about 1 or 2% stretch and the pattern does call for stretch woven. 
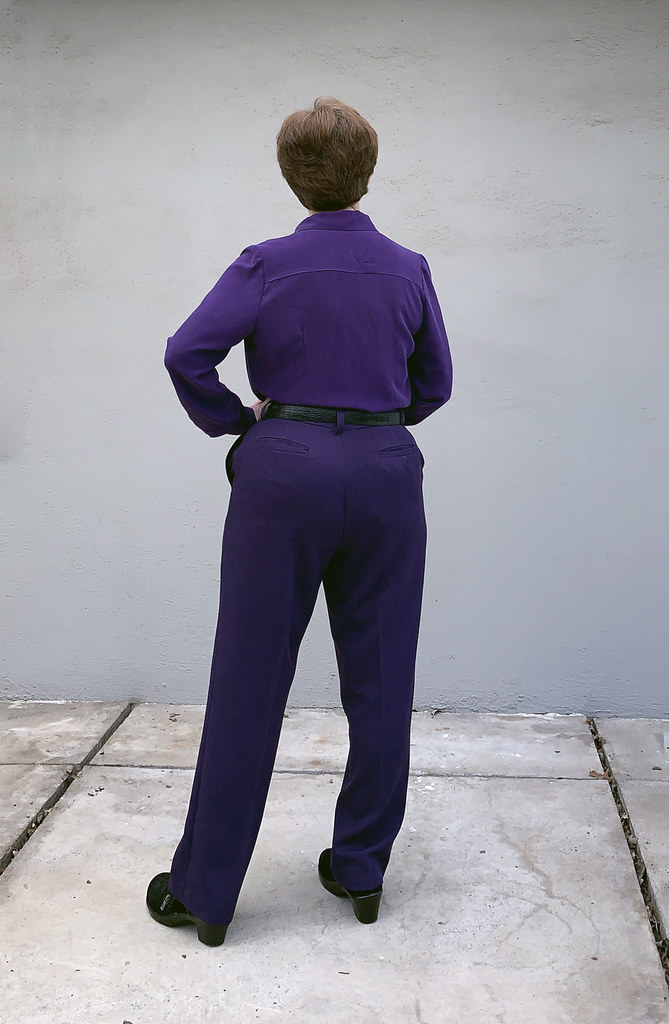
Leisl pants back view

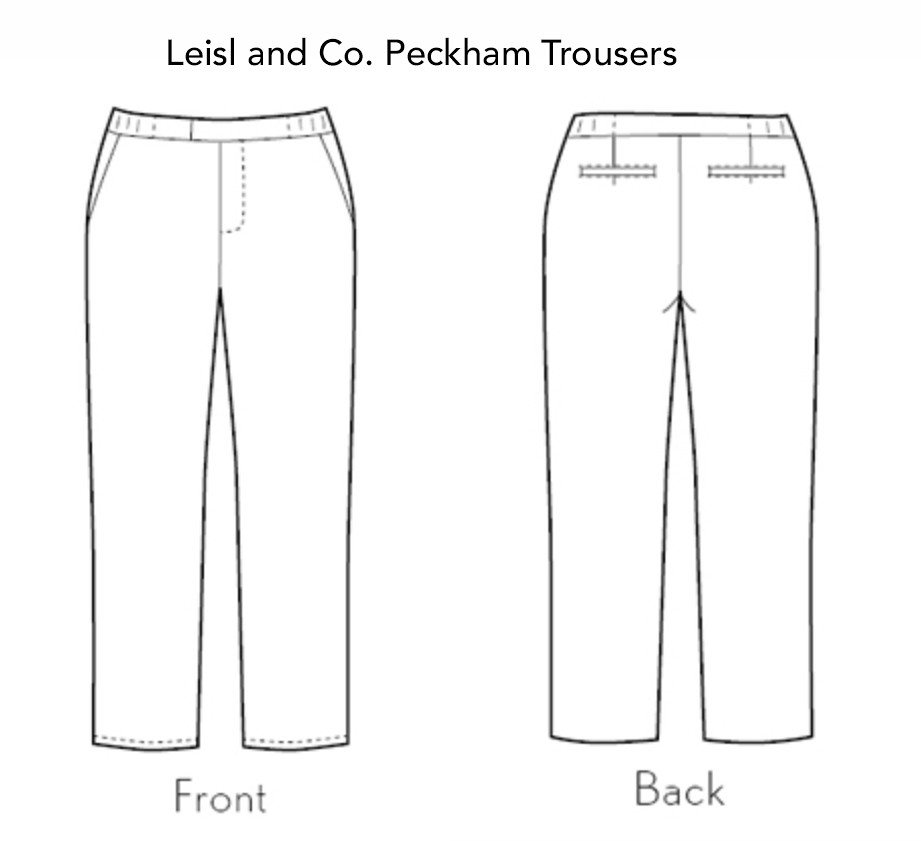
Peckman diagram

Changes I made to this pattern:
  • Raised the waist all around about 3/4"
  • eliminated the elastic waistband
  • added a seam in the waistband at center back.
  • shaved off about 1/2" on the upper side edge of each back piece
  • took in the center back about 1" after waistband was attached. 
  • due to my uneven hips, lowered the waistband about 1/2" on the right side tapering back to center front and center back. 
No changes in the legs or the crotch seam shape. In this pattern the inseam is moved forward which is much more similar to many ready to wear pants which I think fit better than most sewing patterns where the inseam is at the lowest point of the crotch curve. The designer has industry experience in ready to wear and it does show in the pants pattern of Leisl and Co. 

Now for things I don't like about this pattern:
  • 1/2" seam allowances.  Just my personal preference but I hate these, I am so used to 5/8" so I have to concentrate when I sew any other seam allowance. 
  • Elastic insets in waistband. In theory it sounded good but when I sewed up a test version they were just very bunchy and the waist was too big and needed a lot of adjustment. 
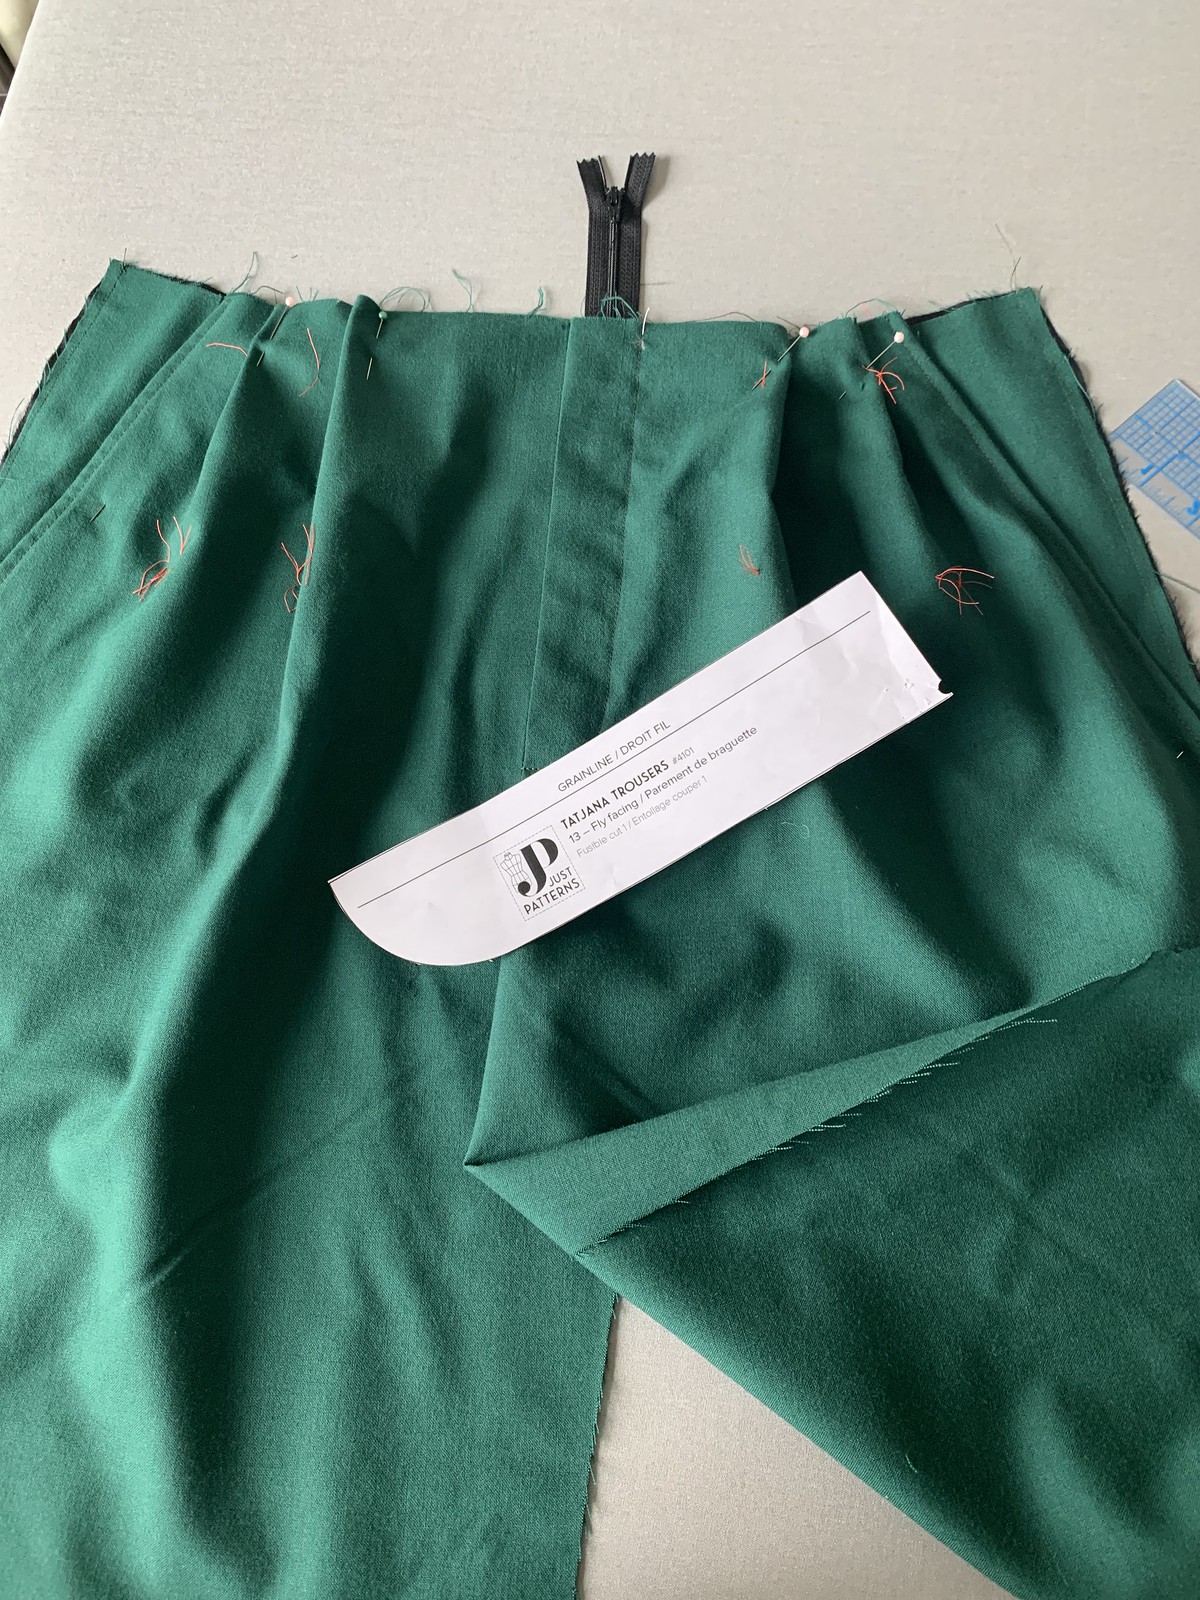
  • Zipper fly method - I prefer to use a cut on fly for trousers, reinforced with interfacing, it just comes out much better than sewing on a lot of fly pieces that add bulk. I changed it to a cut on fly.Test Peckham pants
This is my test version, I used some wool crepe that someone had given me during the pandemic - definitely not my color. I ended up taking in a lot of fabric when people were stuck at home and doing closet cleaning, figuring I would use it eventually for tests, samples, etc. but I think I need to start culling as even with making test versions of patterns I won't use up all these fabrics. 

Here's the pattern image. Why do pattern designers use print fabric to show the example on their pattern?? Which is another reason why I really don't look at the examples but just at the line drawing.
Leisl Peckham trousers image

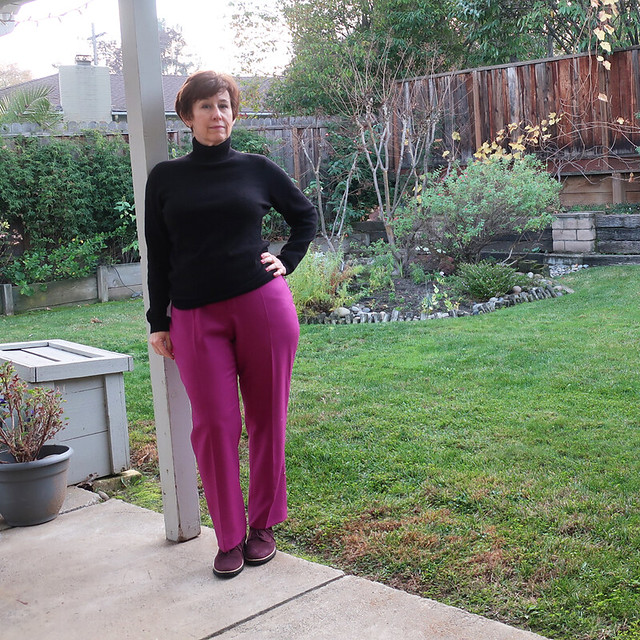
Now for Pants pattern # 2. This one is the VikiSews Edna Trousers. I kept the same purple silk shirt on for these pictures and it is definitely a different shade of purple, plus if I didn't have my hand in the pocket that would be better. But anyway I like how these fit as well. 

VikiSews Edna purple1
This is actually the second time I have made these, I thought I had posted on the blog but I think only on Instagram about 12 months ago. This pattern calls for woven and this is a wool twill with no stretch. I think they would be fine with a slight stretch fabric as well. 

VIkisews pants back
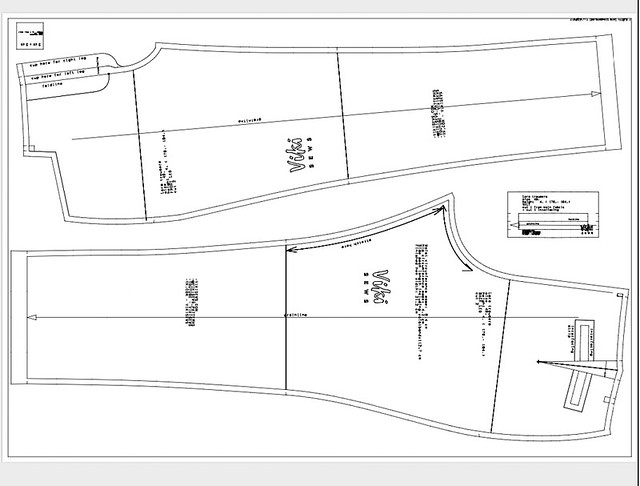
Here's the line drawing for the VikiSews Edna trousers. I think it is a bit idealized, but the basics are visible. The useful thing on their website is to compare all the line drawings of the different pants they offer, looking at leg width, pocket shape, etc to choose one that I liked. 

Vikisews Edna diagram
Changes I made to this pattern:
  • this has a shaped waistband and I lie that better, but I did create a seam in the center back waistband so I can fit that area.
  • added seams in the waistband at the side seams, for additional fitting. 
  • I might have raised the waist in the back about 1".I can't recall but I think so as most pants are dip down at the back waist on me. 
  • printed it as a copy shop size file which has the seam allowances as 3/8" and it is easy to change that to 5/8" which just makes it easier for me to sew. 
What I like about all the VikiSews patterns, and the pants particular are the instruction which are outstanding. This is the only pattern brand that details the steam shaping of the pants legs and also has the crease line marked, which you press before you sew up the pants. I really like the width of the legs on both these patterns, perhaps the Leisl and Co Peckham pants have a slightly more fitted leg which makes sense as it is designed for stretch woven.  
Dislikes - can't think of any. These VikiSews patterns are really well designed. And they have the same forward inseam as mentioned for the Peckham pants above. 
Vikisews Edna image

So that's the latest on my pants sewing adventures. 
Another look at the Peckham pants.
Leisl pant front 2
And another look at the VikiSews Edna pants. 
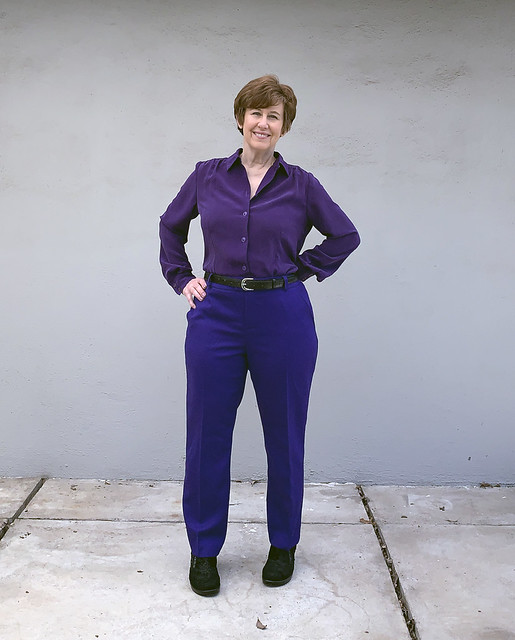
Vikisews pants front2

Enough purple for you?  I made that shirt using a silk that I bought in NY in October at Chic Fabrics. It does match quite well the first pants and I actually wore that outfit the other day. 

I think I will make some cotton sateen pants or lightweight chino in one of these patterns for spring/summer as an alternative to always wearing jeans.

I have a couple of in person classes coming up in April  
Copy your Favorite Shirt class with Hello Stitch Studio, April 13, details here. 

Make the Kalle Shirt or Dress, Weekend Workshop April 27/28, details here. 

Up next in my sewing, no idea. The weather has been so cold and rainy and I am ready for spring! We had a few gorgeous sunny days recently and I am ready for more shorts weather. Even with the chill I have been out in the garden quite a lot and things are getting ready to burst into bloom. 

Happy Sewing,
Beth

throwback photo for the garden, a dahlia from last summer. At the end of the season I put all the dahlias in a garden bed and let nature do what it wanted. Just the other day I saw the first shoots poking out of the soil so they are on the way. 


pink dahlia 2023

Monday, January 1, 2024

Tatjana Trousers in green wool

Happy New Year!  At the end of 2023 I ended up with 2 different pieces of green wool due to a mixup and the wool crepe has become a dress for Heather (will blog soon). So I had a piece of another green wool that had a nice drape and seemed perfect for some pleated trousers. Which it was!

It's not the first time I have used this pattern and I will probably use it again in the spring as I want some black or blue lightweight shorts. Also I'm teaching an online class starting on Tues. Jan 16 so I thought I would brush up on my trouser making. 

Tatjana trousers front view

The weather was really gloomy last week and so I decided to take some indoor shots, and also to crop my top half which still looked like I had just got out of bed :).  

I did do a few adjustments on this pattern and also I didn't really follow the instructions.
  • Cut size 44 
  • Used the back pattern piece I had previously adjusted, details on this blog post. 
  • Raised the waist height 1"
  • Cut 4 separate waistband pieces and sewed them on the separately so I could adjust center back and side seams all the way up
  • adjusted the front pleats, made the near center pleat less wide and also straightened the angle of the pleat
  • raised the bottom point of the zipper up 1"
Here's a look at the front after I had put in the zipper and pockets. I always use a too long zipper and then just cut it down after attaching the waistband. I also pinned the pleats and decided on the final amount of pleat once I was attaching the waistband. 

IMG_0758

Back view of the trousers.

Tatjana trousers back view

On the hanger, you can see that the back rise has extra length due to the adjustment I linked to above. Also the seam at the side of the waistband.

Tatjana trousers side view

On Instagram I asked what color top would go with these pants and got some good responses. So if I find a nice plaid shirting I will try that, I don't think I have any plaid shirts in my wardrobe now. 

As I mentioned above, I do have an online class coming up in a couple of weeks. Here's a link to register for this class:  Trouser Techniques Class online with Hello Stitch.

Trouser class

I have some in-person classes coming up as well. Hello Stitch Studio has the option to hold some 2-day classes in the bay area so I am teaching a Chore Jacket 
class in late January. Sat 1/27 and Sun. 1/28. I'm really excited to do a 2-day class which will give people opportunity to get near the finish line on their jackets. 
Here is the link to register and see all the details: Chore Jacket Class.

Chore jacket image

One more in-person class on January 12 is a Simple Top class which I will be teaching in Lafayette. This is a great class for people who are new to making garments as I provide the pattern and also samples to try on to help choose your size.  Here's the link to register:   Cotton Patch Simple Top Class Jan 

CP class Jan

So that's the latest on classes. I was all set to sew myself a two-color wool coat, and I had prepared the pattern, made a muslin etc. The beauty of this idea is that it uses some pieces of coat weight wool remaining from other projects. However I don't think we are going to have any coat weather here in N. California this year. It usually is coldest in late Nov and Dec and it was barely coat weather then. So not sure if I will do it. But I might. Although I was sorting through my fabric stash the other day and came across some summer fabrics I never got around to sewing this year. Maybe I should get a jump on spring instead?  Stay tuned. 

Happy New Year sewing,
Beth

Today's garden photo: I am just about to give my roses their big pruning in the next week so here's a picture from last summer. No idea of the variety, it didn't do much the first couple of years but now reliably puts out these bright coral blooms. 

IMG_9945

Friday, January 14, 2022

New Pattern Reviews: Butterick 6862 blazer and VikiSews Lora Pants

This year I'm going to try and do more posts about the patterns that I sew, with sewing details and definitely some critiques. When I make things for myself it's usually for one of the following reasons.

  1. I need an item to wear to an event. (although events have been thin on the ground as we well know these past 18 months. Also my closet could probably yield anything required).
  2. A new-to-me pattern that I just feel like sewing. It could be a new release pattern, something that catches my eye, or a vintage pattern. But at the moment I notice it I can imagine how I might wear it, and then my "must make" urge sets in. 
  3. Fabric attraction. Very often I come across a fabric that appeals and I just want it in my wardrobe. 
I think most every who sews and reads this blog can relate to these feelings. Some people are wardrobe planners but I've never been that way, no plan for the year or pledge to sew up specific things. But I'm always on the lookout for novelty and yet I do repeat patterns a lot. For my Blazer Jacket class that I taught online last fall in addition to the Jasika blazer that I made for my friend I decided to try a jacket pattern that was a new release from Butterick. 
To sum up my response to this jacket pattern - I didn't like it! The fabric I used ended up being problematic (more on that below) but in general the pattern didn't work out for me and I will explain why. 
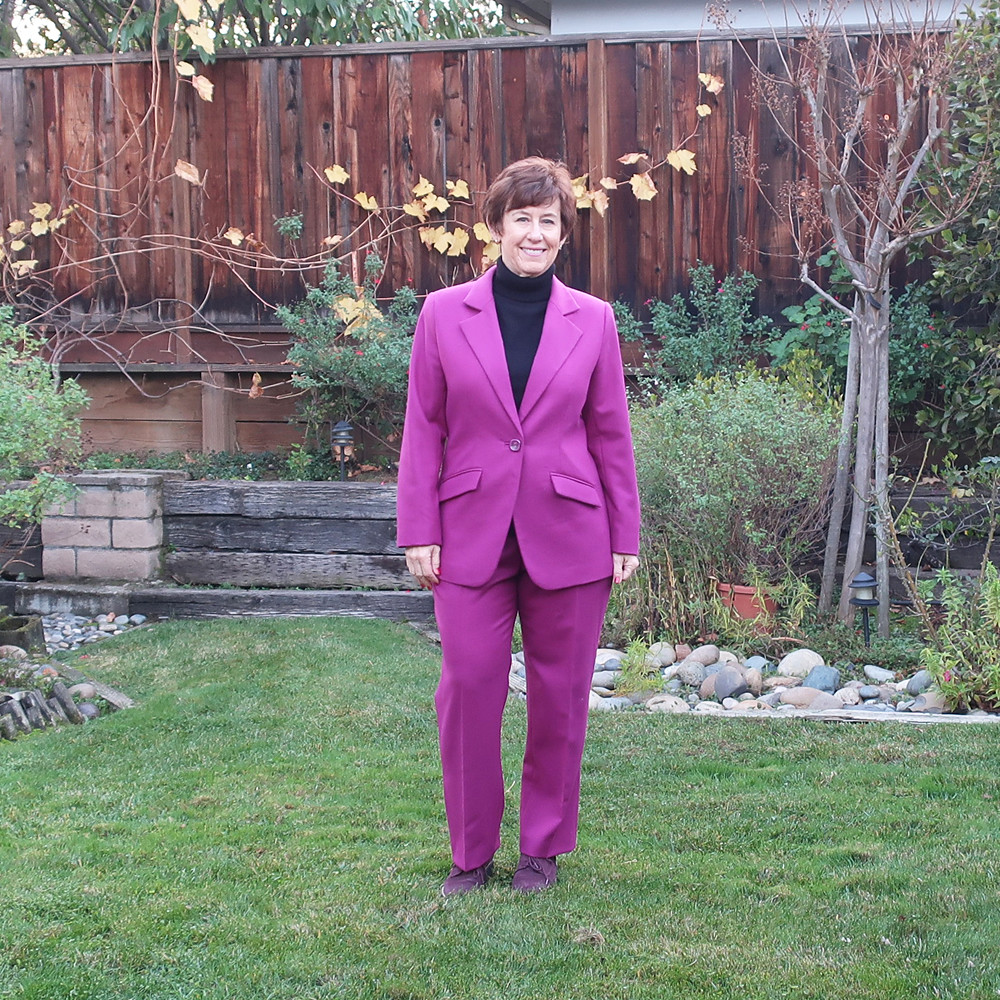
Although some of you might take one look at the color and blame it on that :) which is understandable. Also I didn't really need a matching pair of pants but wanted to further refine this VikiSews pants pattern and had the fabric to make them. 
pink suit2

To review:  I was looking to make a blazer during my class to show some construction techniques and also I wanted to make something different than a blazer pattern which I have made already 3 times, that being the Pauline Alice Saler blazer. Here's a look at one of my favorite versions. I've made a blazer with peak lapels as this Butterick blazer has, and I wanted to make a single breasted jacket as I have a double breasted version - which was also a success. But you know the desire to try something different always gets you when looking at patterns. Also this is a Palmer and Pletsch pattern and I've had such good success with those patterns. But this one - not so much.
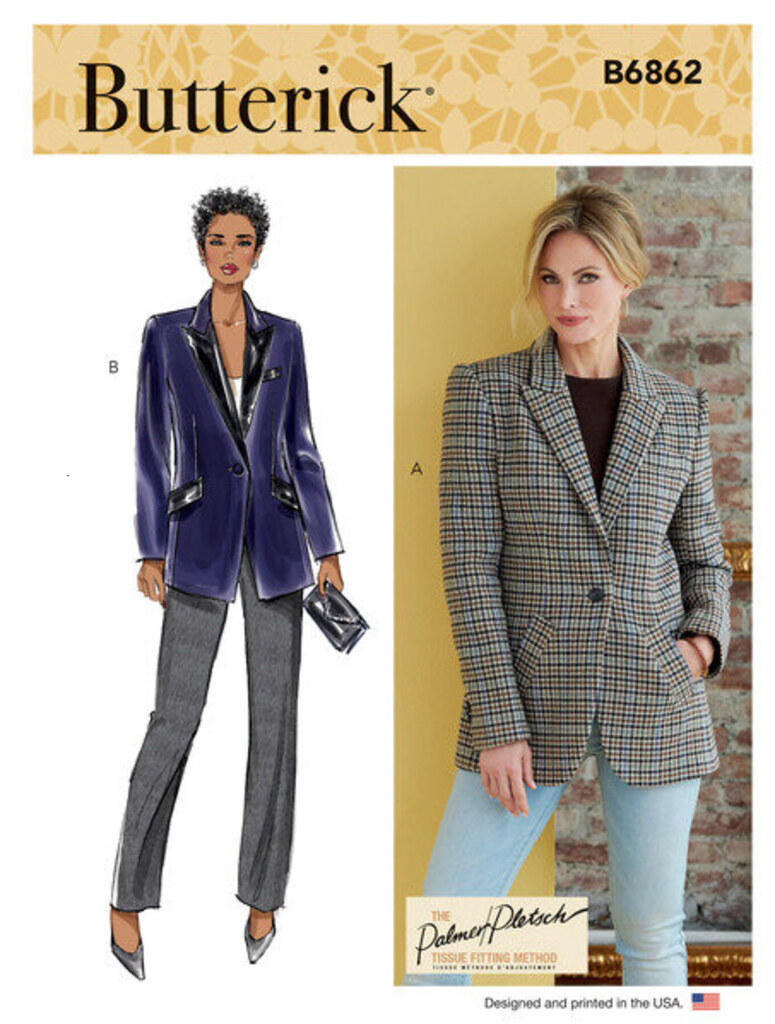
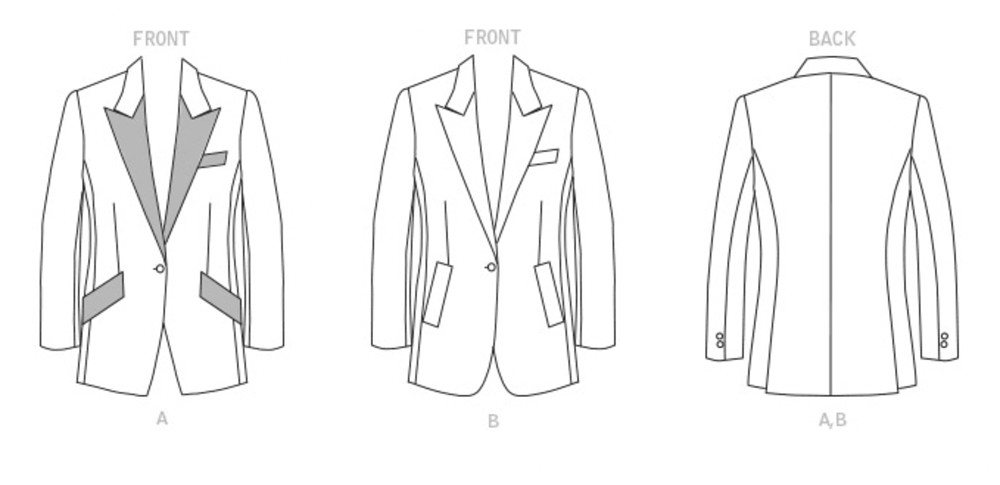
Here's the pattern envelope image and the technical drawing.
B6862 Butterick jacket diagram
Once I start sewing things I get very particular on details such as the shape of the lapel or angle of the pocket. But for once I was determined to sew up a pattern as is so I could follow the instructions and discuss the steps in the class. As it turned out almost every one was making the Jasika or McCalls 6172 which is a good pattern I've recommended a lot. So in the end I didn't really need a second example to sew along with the class. But since I had started it I did continue. 
So what didn't I like about this pattern? I started with my usual size 12 in Vogue/Butterick/McCalls and yet I found this jacket very oversized in a way that it didn't appear on the pattern. The shoulders were a good inch wider than other jackets I have and I moved the sleeve cap in about 1/2". The slanted welt pockets didn't appeal to me, I preferred the flap pockets so I used the front hem shape from View B and the pockets from View A. Now looking at it I don't really care for that much of an angle on the front pockets, maybe just a look I have to get used to. The sleeves were really a problem, they were huge! in terms of width, like at the elbow way too wide. It's a two piece sleeve so I narrowed it using those seams but I still think they are a bit big. My biggest issue was with the lapel design. 

lapel change pink2 jacket
I think they are just an awkward shape and I've made other jackets with this lapel which seemed more elegant to me. I took these pictures showing the inside and outside of my lapel, before and after changing the shape so you can see that I sewed it very accurately and didn't have an issue with pressing and trimming. So I decided to do some redesign on the lapel shape and changed it into more of a standard notch lapel. It still looks a bit out of proportion to me but I think it looks better.

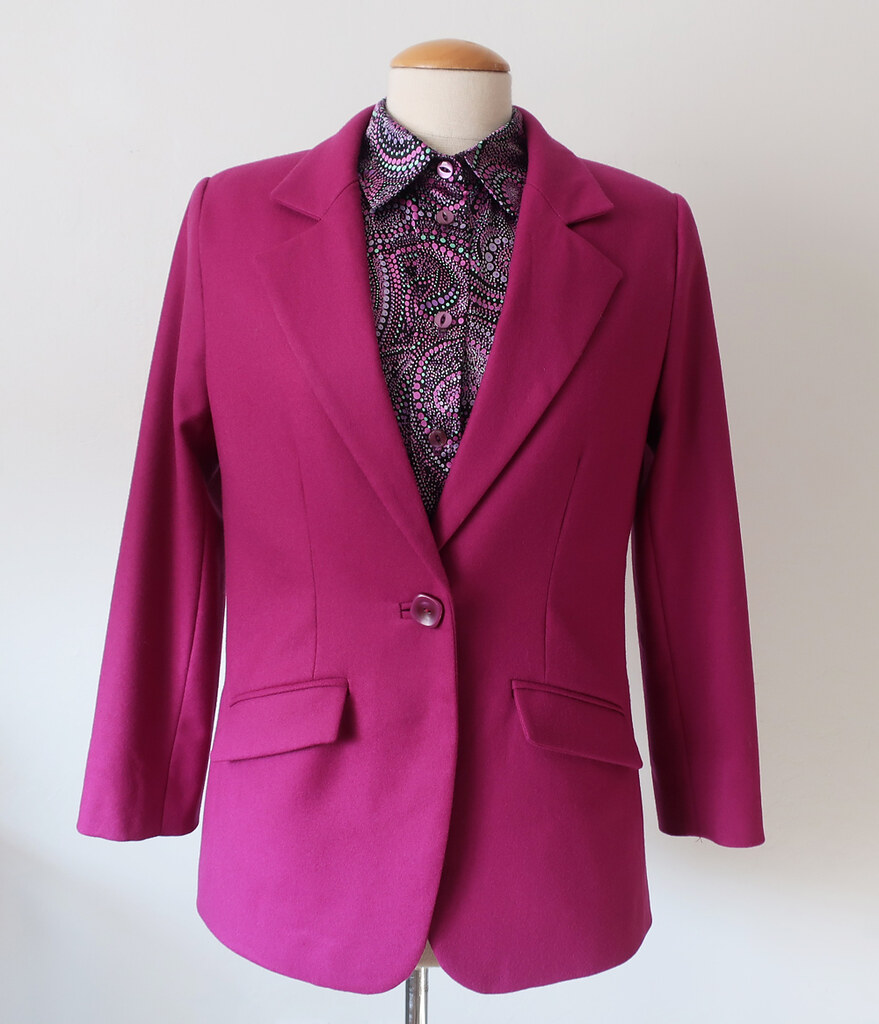
Pink jacket and blouse1

Now onto the fabric issues. I fully admit that this was a piece of fabric that was given to me so I had no investment in this project (other than time and interfacing). The color was pretty albeit a bit on the vibrant side, even for me. It seemed like a nice woven wool. But it was evil! There was something about this fabric that didn't press correctly and I've never run into this issue before. Sometimes sections would press perfectly well, and other areas would give a strange result, kind of a rippled bubble effect. 
Here's an example.  Look at that sleeve, I have pressed it normally and those wavy rippled lines appear. Sometimes I could press them out and other times pressing would make them appear. It was maddening. 

pink jacket fabric issue

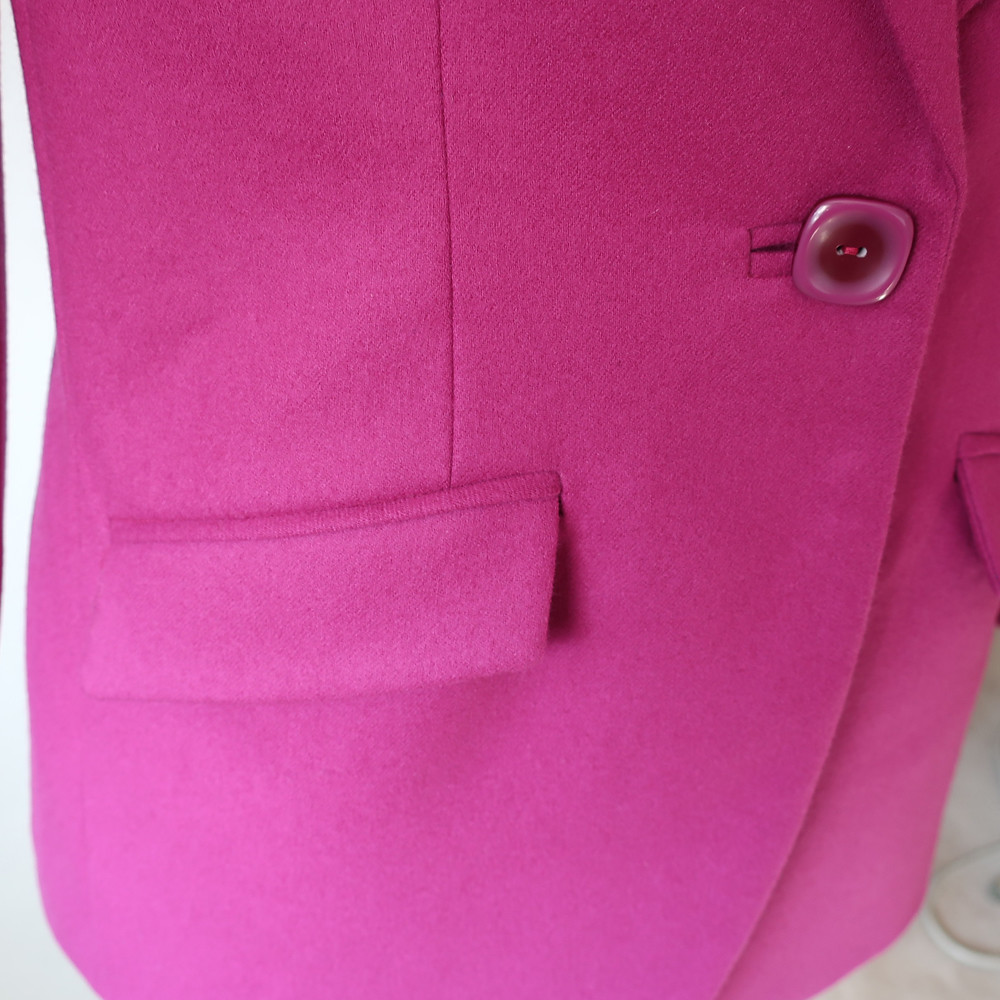
Other areas pressed fairly well, both pockets came out OK which was good. By the way I bought that beautiful single button at Stone Mountain. So glad they are open for shopping again as their button wall is my go-to for perfect buttons, particularly for jackets and coats. 

pink jacket pocket and button

Here's another area that is a bit wavy, the lapel. Although I think I pressed this multiple times and got it to settle down. Using this fabric just reinforced my opinion that the plaid wool I used in the Jasika jacket was perfection. 

pink lapel


Pink jacket back

I think you can see how wide it is at the back of the armhole. I did make a muslin and moved the armhole in but it didn't seem quite so problematic. I figured it would hang differently (better) in wool than in a cotton muslin. Wrong!  In any case this whole project was just a disappointment and I don't have that happen very often. 
Shall we talk about something else?  I'm really impressed with VikiSews patterns. I bought this pants pattern to try them out, and they fit very well right from the start. 

pink pants2

The VikiSews patterns are single size patterns and I prefer that. I think for pants it's a lot easier to just start with your hip measurement, choose the size and then adjust other sections, like waist or length, as needed. I chose the size closest to my hip measurement and the website tells you how much ease is in a particular style. For this pattern the hip ease is 4 cm. so about 1.5 inches.  That's the total difference between your body and the finished garment, which seems about right for close fitting pants. 
Things I like about these patterns:
  1. The crease lines are indicated and you use those in the pressing to shape the pants.
  2. The pattern markings are excellent.
  3. The shape of the hips and crotch curve are more like ready-to-wear pants or at least pants that I own.
  4. The instructions are very detailed and specific on how to shape the pants front and back using pressing/steam before you ever sew a stitch. This is how I learned to make wool trousers and it really builds in fit and shaping before you even sew. 
  5. The instructions are photographs and are extremely detailed so you can't really go wrong. 
Vikisews pants image

pink pants front

Once again I will blame this annoying fabric for my less than stellar pressing. Also if I were planning to wear these pants I would have added a lining as this is a bit too itchy to wear without. But for working out this pattern it was fine. 

Here's a look at the diagram of this pattern so you can see the shaping. It definitely accounts for a hip curve which suits me well. I perhaps could have used one size smaller as I did have to shave off about a 1/4" at the widest part of the hip and also take out about 1" total at the center back waist but I tend to start with a larger pant as despite being relatively short I have a long rise. 
Lora pants diagram


Vikisews pants1
And here my expression says "what a lot of sewing time for something I am not going to wear." Although I am tempted since my suede shoes match so well with this outfit :) I neglected to take any pictures of the back of these pants so I will wait until I make another pair and get some better pictures then. 
So that's a start to my intention to blog more often and dive deep into sewing and pattern details. I have a few other items finished and then it may be time to contemplate spring sewing. What? Winter comes through fast here in N. California. Yesterday I saw plenty of out in shorts walking their dogs. Although we are hoping for more rain, still needed. 
I'm still teaching classes at Hello Stitch Studio in Berkeley, they are closing their doors as mentioned in my previous post but will be open through February. After that I have a some opportunities to teach at other venues so I will update soon.

Happy Winter Sewing,
Beth

Today's garden photo, something to remind us that summer is coming. I took this back in July and didn't even see the little extra visitor until later when I was looking at the image on my phone. I'm posting this today because due to that big rain we had last month, and then warm sunshine all the sunflower seeds that fell from these flowerheads are sprouting along my driveway, and some are almost 2 feet tall. Sunflowers in January! ok that is weird even for us. After some frosty nights they look a bit worse for wear but I think a few might make it and be full grown in a few months. Climate change in my front yard :)

A5CB42E6-1C42-47BF-8435-CE606D7C383C_1_201_a

Thursday, June 20, 2019

Deer and Doe Myosotis dress and True Bias Emerson Crop Pants: sewing examples for classes

When we create sewing classes at Hello Stitch Studio where I teach, we've found that choosing a specific pattern and designing a class around that works out better than general sewing classes. I think because people who are new to sewing can visualize the finished item (plus probably have seen many nice versions on line). Those who are more experienced might decide to try a new style, and every one gets the encouragement and camaraderie of sewing together.

In so many classes I ask people how they know one another and come to find out they just met there in the class - while I thought they were already friends! Some even decide to take another class together which is really nice. I think everyone bonds over sewing successes and failures and there just aren't that many opportunities in everyday life to talk sewing. I mean really, do your office mates want to hear about your latest pattern haul? Well maybe - I don't know what your office is like :) but if anything like my previous corporate life there were always a few comments about stuff I made but nobody wanted to hear about fabric shopping bargains.

The latest two patterns that we've selected for summer classes are ones that fit into a summer wardrobe but I think can be useful all year round. I always sew at least one version of the pattern prior to my classes, just to compare to the instructions and check for any tricky bits.

By the way - be sure to scroll down to the 2nd outfit as it is a bit of departure for me, style-wise and I think I love it!

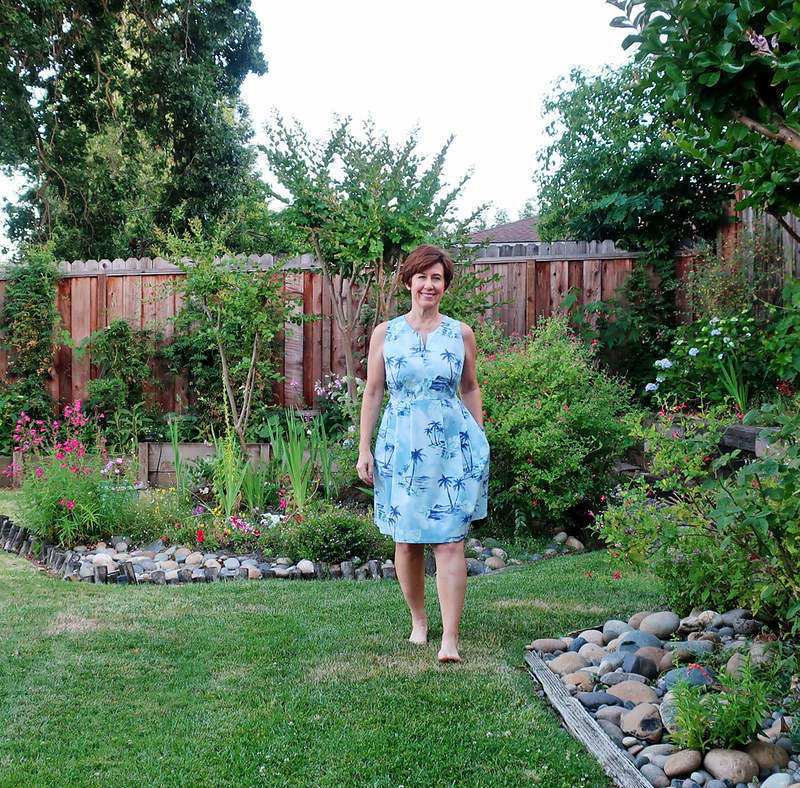
Myosotis dress 3

The Deer and Doe Myosotis Dress is the first Deer and Doe pattern that I've made, although around here I've seen plenty of great versions of the Magnolia dress and if I were a maxi dress wear I might consider it (but I'm not!)
The class at Hello Stitch is on Sunday July 14 and I think there are 3 spots still available.

The reason I chose this pattern is that I think it is IDEAL for pattern hacking. A nice basic pattern that you can change up and use in a lot of different ways. As you can see from my summertime version below.

My changes: Sleeveless, slightly cut-in armhole, no neckband, in fact I opened the neckline about 1 inch all around. Oh yeah, and pleats in the skirt instead of gathers. Also a tie at the back waist for more shaping. Facing for neckline and button front, bias binding for armholes.

What else could I do with this pattern? Here are some more ideas:
-Make it long sleeved, with perhaps a ruffle at the sleeve hem or a standard button placket and cuff.
-Add a shirt collar to the collar stand
-Drop the seam to the true waist by adding length in the bodice front and back.
-Continue the button placket down the front of the skirt to make it a true shirtdress
-Use a contrast fabric for the upper and lower half.
-Play with stripes by adding trim or a hem band
-Reduce the width of the skirt for a different silhouette

IMG_0663

Closer look at the pattern and the adjusted neckline.

IMG_0664

Closer look at the fabric and the skirt pleats.  This might be the oldest fabric in my stash that I can recall buying, at Stone Mountain of course:) and it was in the 50% off cotton section, which is mostly quilting cottons. This happens to be a Robert Kaufman fabric, with a slightly brushed/sateen surface but not stiff. I think I've had it for maybe 10 years and not sure what possessed me to use it for this but now I think it will be my summer beach cover up dress.

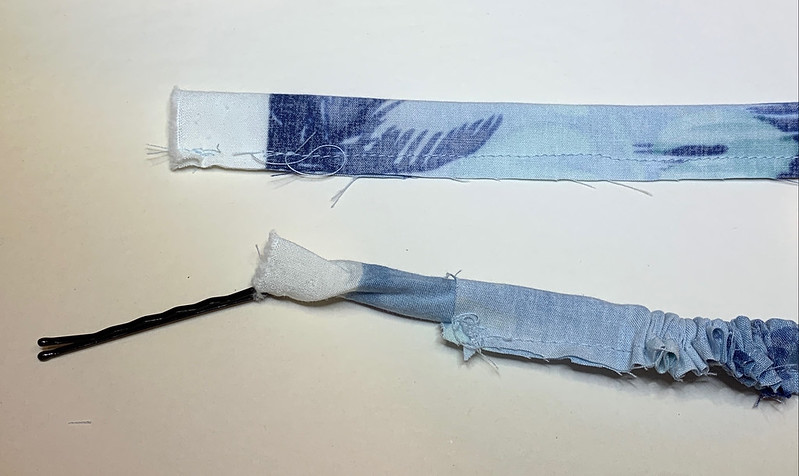
The only slight sewing detail is this - hairpins are perfect for turning smallish tube of fabric.

IMG_0658

Up next: the Emerson Crop Pants from True Bias. Or in my case the not cropped pants, i.e. the full length pants and a matching top to fool you into thinking it's a jumpsuit.


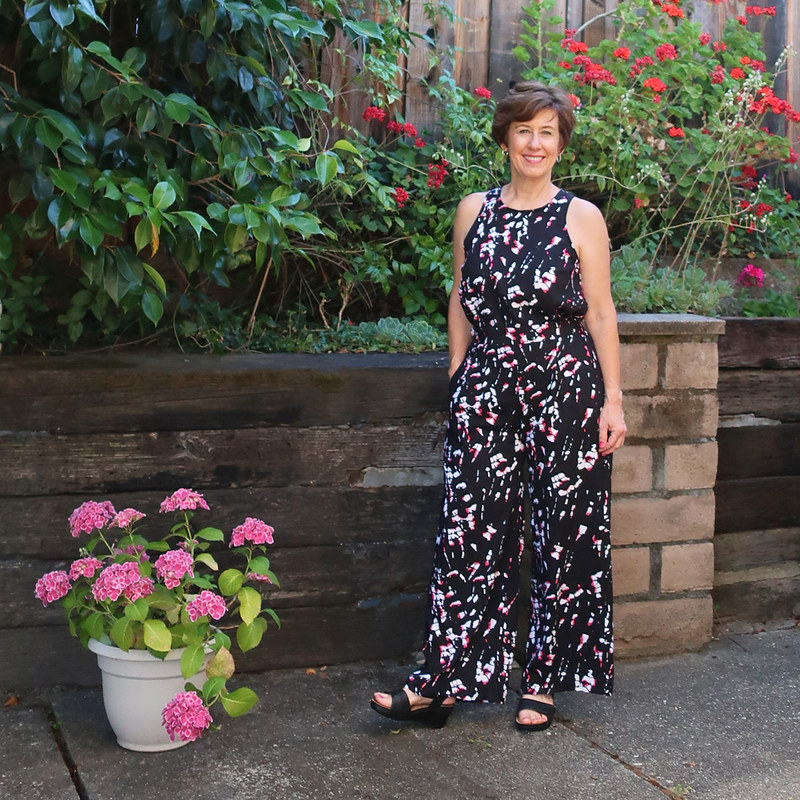
Emerson outfit3

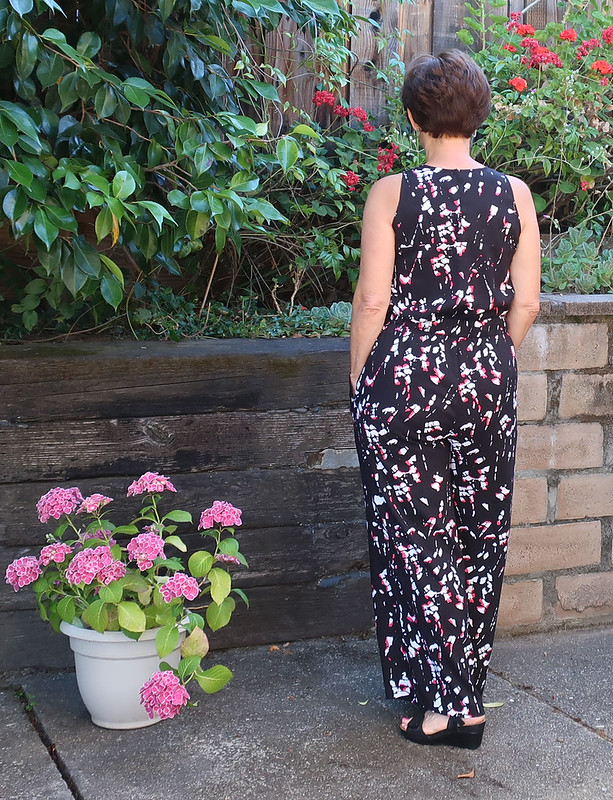
Do these qualify as wacky pants? Somehow I think so. I was given this fabric with a few other pieces by the owners of Hello Stitch as they were remainders from a fabric swap day they had last month. OK, it's a little wild but it does have pink in it and also is a very lovely weight of rayon that is perfect for both these pants and the top. Plus I have enough remaining to make a skirt so versatile, right?

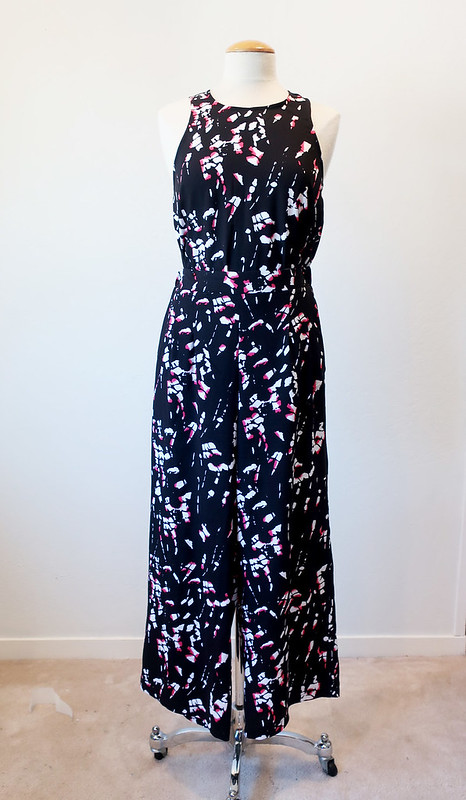
I lightened this photo a bit but it's still hard to see the details on the pants, which are probably well known by now, they have deep slant pockets, a flat front, two small pleats in front and then a wide elastic gathered back.

Emerson outfit on form


Black print bondi top front and back on form

The top is my favorite Bondi dress pattern as a top. Here's my first version of the dress, and here's the version in silk crepe I made as a top.  Gosh I wear that top a lot, so it was an easy choice to use it again for this outfit.

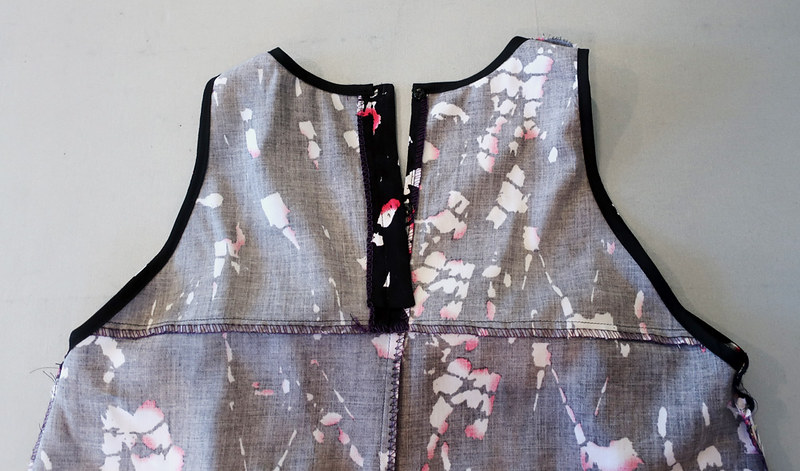
Sewing details, I don't like how the Bondi top has a loop and button closure in the back, as sewing a loop is a pain (although I have used tiny elastic which works a treat) but I decided to add a small ? placket, where I could sew a couple of snaps for closing. Also if wearing a racer back bra it keeps the center back from opening.

Bondi print top inside view

I finished the edges with bias binding I made from some black cotton voile in my stash. I can't stand to use purchased bias tape, I think it's way too stiff for most garments, and bias in self fabric or a lightweight voile, ambiance lining or silk works really well.

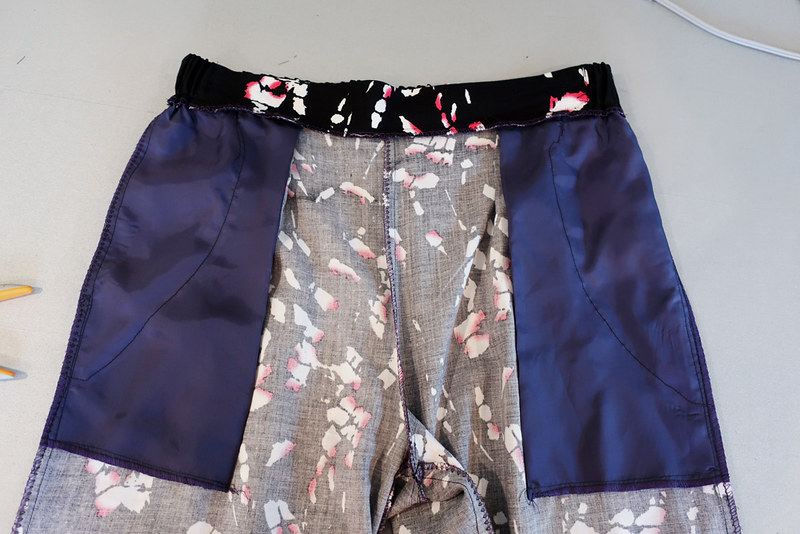
Emerson print pants inside pockets

Since I was being stingy with the fabric so I could make a skirt, I used a remnant of ambiance lining for the pockets, and sewed on the outer fabric over that where it would show on the slant pocket.


Emerson outfit back view

I chose the Emerson pattern size by my hip measurements and they fit perfectly. I made the high rise version ( or the regular rise, perhaps the other option is called the mid-rise). And I lengthened by about 5 inches and then had about 2 inches of hem to play with.

So that's the latest on my sewing for upcoming Hello Stitch classes. Soon I'm going to make a Zadie jumpsuit for myself, the class on August 3 is sold out, so we've added another one on Sept 22.

You can read more details and register for the classes here at Hello Stitch Studio which is in Berkeley.
Next up I will be starting on a Closet Case Files Jasika Blazer jacket - the class is in Sept and I think there are just 2 spots remaining in that one. (Note if you have some other jacket pattern you prefer to make that is OK with me).

And then some sewing for my Mom as she has a birthday party coming up and I found a great fabric to make her a new top, plus the June Burda arrived (Yay!!!) so I'm sure I will find something in that.

Emerson outfit4

Happy Summer sewing, Beth

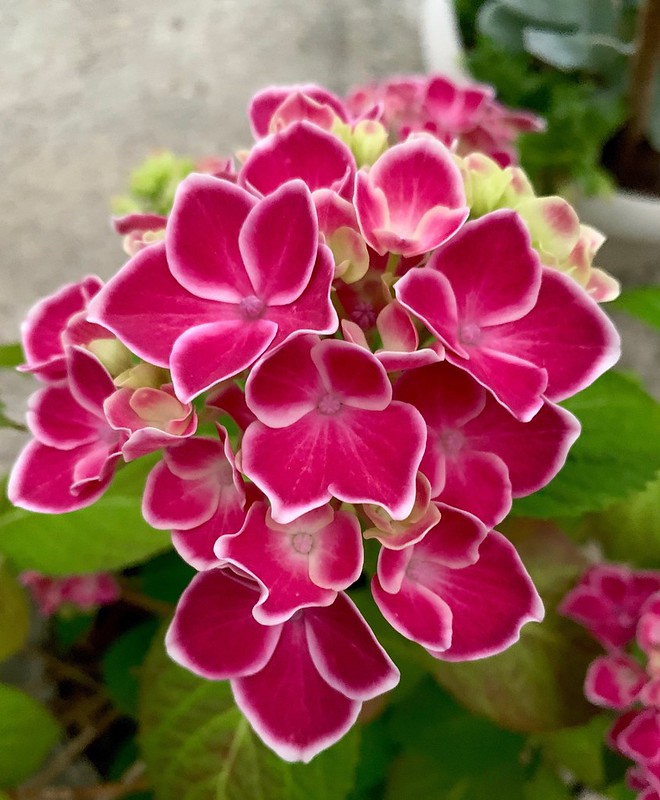
Today's garden photo - the same hydrangea that is shown above in the white pot. It looked a little scraggly all winter and I never dreamed it would come out with all these blooms. Another Trader Joe's plant that I couldn't resist. Plus it's kept its color and is blooming in the same pink color as when I first brought it home. A winner!

IMG_0651

Sunday, February 7, 2016

My shirt obsession continues, and a Bootstrap Fashion custom jeans pattern is a nice suprise

That title pretty much encapsulates my sewing of late. I don't know why I am making so many shirts lately, although a shirt is a reasonably quick item to sew. And very satisfying to do all that precise work. I have this Simplicity pattern adjusted to perfection (S2339). Plus I have a file folder filled with alternate pattern pieces, to rotate the darts into gathers, or choose from various buttonhole plackets. This might be the closest I have ever come to creating a TNT pattern. While I have made some dress patterns and a few skirts over and over, this is the one pattern that I would reliably use to design something new. I have a yearning for a shirtdress for spring, and even bought the famous McCalls shirtdress pattern (MC 6696) however the other day the idea popped into my head to just use this shirt pattern and create a skirt. Hmmm.
So shirt details first and then the Bootstrap jeans custom size pattern details.

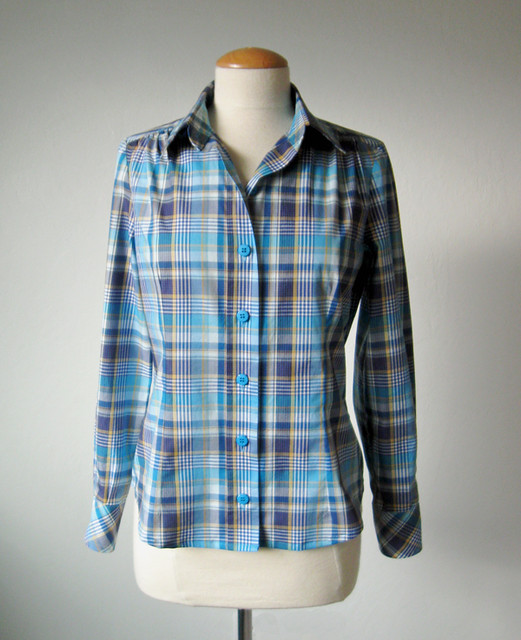
Back to this new shirt. Since it is plaid I decided to use my version where the horizontal bust darts are converted into shoulder gathers. Here's a link to a shirt with that detail, and here's a link to a post I did on Craftsy showing how to convert the dart to gathers.


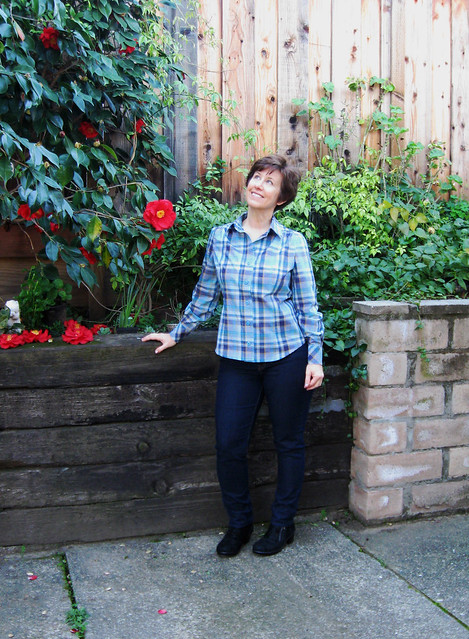
Plaid shirt front1

This is one of the few fabrics that I have ever purchased at Fabrix in San Francisco on Clement St.  When I lived in the city I would stop in there once in while but now I rarely go to this store. I think Shams finds some treasures there periodically. It's one of those places that are hit or miss but lots of bargains. Although the parking in that neighborhood is insanely difficult. So it has been marinating on my fabric rack for a while - maybe 4-5 years. Which is unusual as I don't keep stuff all that long but it finally made it onto my cutting table.

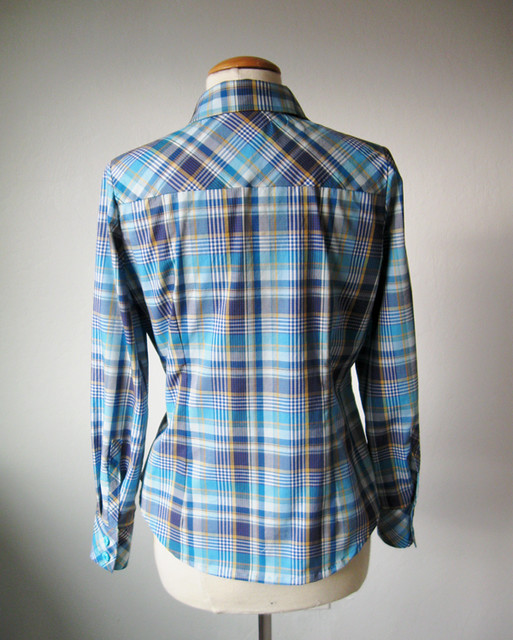
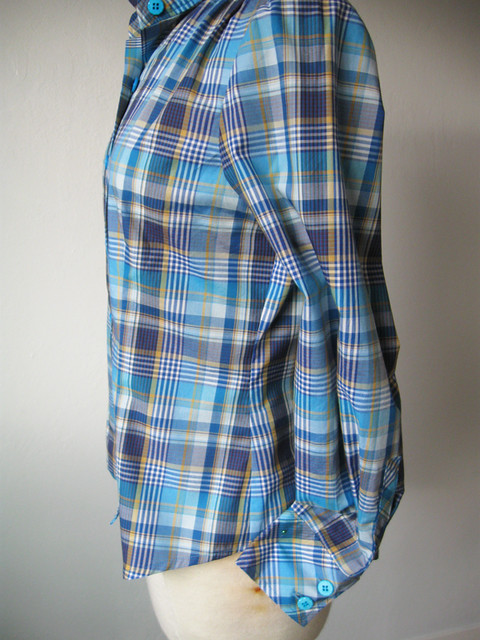
The main reason I decided to use the shoulder gathers instead of the dart is for the plaid matching. Which worked a treat and I'm quite satisfied if I do say so myself :)  No pesky bust dart to throw off the side seam matching, thus the sleeves are matched too. Score!

blue plaid shirt side seam

That is a scorch mark on the side of my dress form (another garage sale purchase) I think it got too close to someone's wall heater in its previous life.

What am I looking at?  Bees!  so many honeybees already in the garden. Swarming all over this camellia. Which is the only one of its type in my garden, so sticky with nectar that the bees love it. And of course in most all the pictures my front button alignment is off a teensy bit. Oh that makes me crazy.

blue plaid cotton shirt on me2

But here it looks OK. The buttons were also in my button box. I don't think I would have picked these particular ones out if I had been in the store choosing buttons for this shirt, but I had plenty, enough for shirt front and cuffs so it seemed like a good reuse.


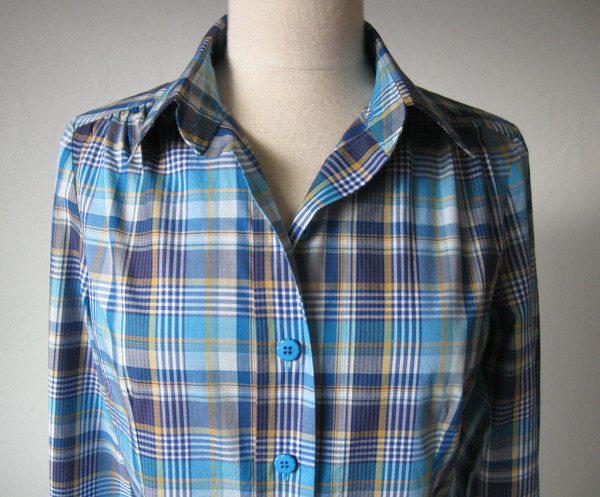
blue plaid shirt collar

A few touches of bias.

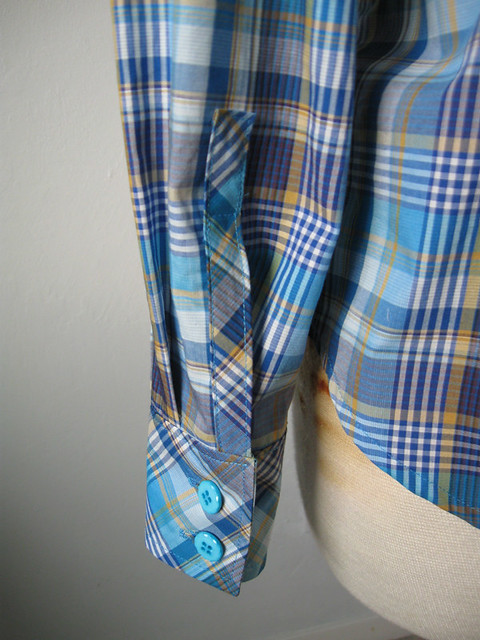
blue plaid shirt cuff blue plaid shirt back

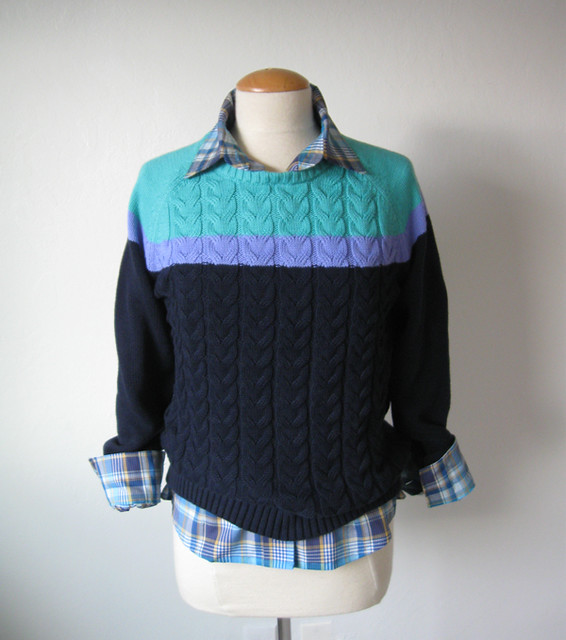
I received this sweater as a Christmas gift, so that is mostly what prompted me to use this fabric for a shirt.  Also why I tend to make shirtsleeves a bit on the long side, so I can flip up the cuffs when I am wearing a long sleeve sweater, just a habit. The colors are not exactly the same, but I think complementary. So far I have not worn either piece despite finishing about two weeks ago - maybe tomorrow.

blue sweater with plaid shirt


Now for the Bootstrap Fashion Patterns jeans adventure. 
To sum up the experience - I am impressed!
I have sewed a Bootstrap Fashion pattern previously, a dress and the fit was very good. And since pants are my achilles heel of fitting - I figured why not try their new custom jeans pattern? Actually I am not at all interested in making jeans per se. I have lots of ready-to-wear jeans and I just find it way easier to buy them than to source the just right denim - do all that topstitching - tweak the fit etc. So jeans sewing - a phrase that my grandmother used to use comes to mind - I just can't be bothered. But pants in general - those I would like to sew more often. And a well fitting jeans pattern I could use to make pants in other fabrics, like cotton sateen for summer or corduroy for winter. On Bootstrap there are 3 different custom jeans patterns, listed in their Indie designer section. All by the same designer Vado, she created a skinny jeans pattern, an at-waist bootcut pattern and a loose boyfriend jeans style.
Skinny jeans are super cute on lots of people but I just never feel right in them - and having a very long rise a higher waist jean usually fits better so I picked that one.

Bootstrap Fashion custom jeans choices

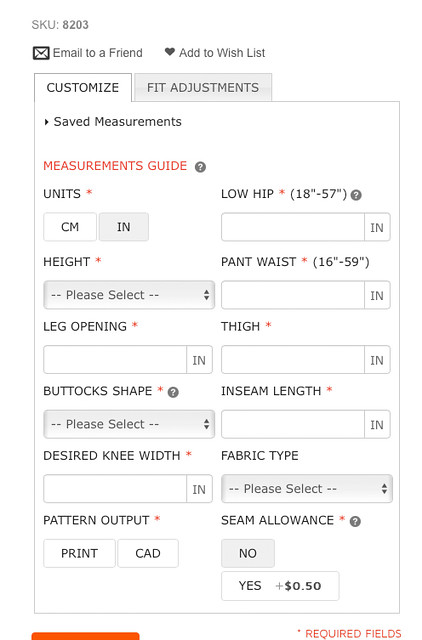
As usual with Bootstrap patterns you enter your measurements for a custom fit. I was pretty exact with my measurements as I wanted to see how they came out, what kind of ease etc was designed in the pattern.

Jeans measurement input


For the knee width I used the measurements from an existing pair of jeans that I have, also the leg opening (which is the bottom hem opening). Thinking about it later you could change those to obtain straight leg or any other variation. Much like their other patterns where you can choose belly shape (which I like to categorize as choosing anywhere between flat-abs up to 2nd trimester) on the jeans pattern it's not belly shape but you can indicate the shape of your bum. Useful! I picked average but for next time I might choose curvy.  The other change I will make next time (oh yeah, there will be a next time) is to increase the waist measurement entry. My waist is rather high, so my smallest natural waist point is probably 2 inches higher than where the top of the pants landed. I think if I add about 2 or 3 inches then the fit will be better around that spot and I can always take them in if needed.
Now for the result. I chose no-stretch for this version as I had a piece of 100% cotton corduroy to use for the test. Also I thought a non-stretch fabric would be a better indicator of fit. You can select fabric type, no stretch or various %'s of stretch which is clever.

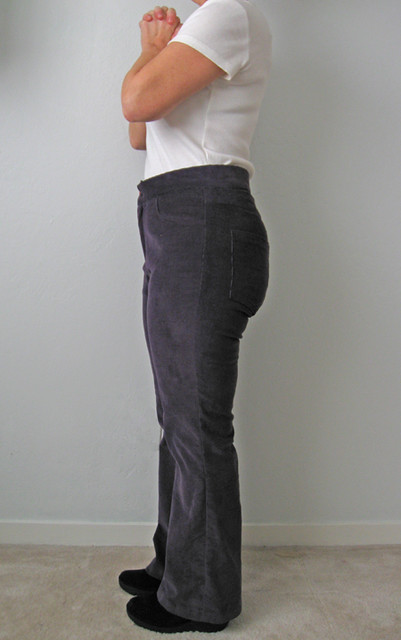
Not bad huh?  The part that really amazed me was that the knee was in the right place, the length was correct, the back rise was just about right and the fit around the thighs felt like ready to wear jeans.

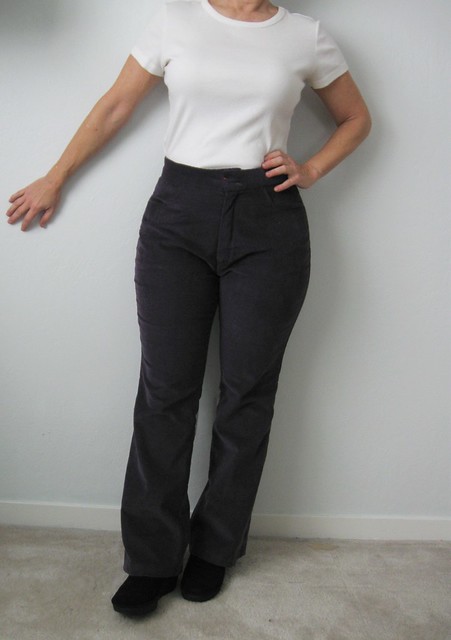
purple cords side view

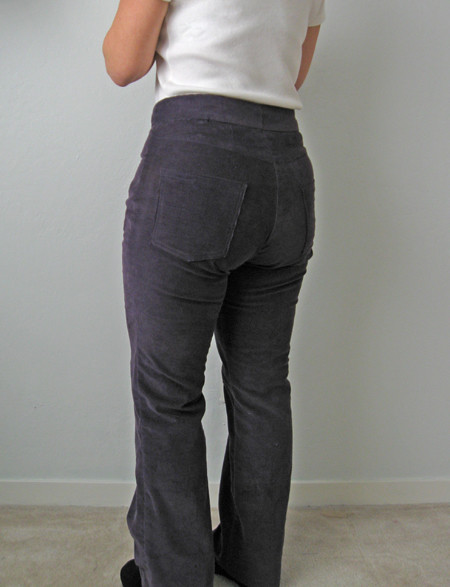
In the interest of science - sewing science :)   I am putting these fairly awkward photos of my rear view up here.  You can see the waist is a bit tight but in the right spot. I think the pockets are a bit oversized and low, I don't like jeans pockets to be at all on the thigh but that is easily changed. I left off the belt loops for this test version. Although maybe I will leave them off future versions depending on the fabric. On the other hand I wear belts a lot. Buying jeans/pants to fit my bum means the waist is so often too big. Perhaps it's time to fix that.

purple cords back view

Front view.

purple cords on me5

In the front rise I think there is a bit too much length, generally pants that fit me best have a lower front and then are higher at the back waist. Also I think I used a too long zipper which messes up the front a bit. These were not ever gonna be real pants  (something I would wear out of the house) but I figured maybe usable, but then I went and cut a hole in the front under the zipper. So no, not wearable now.

That's the scoop on my Bootstrap fashion jeans experiment. Getting very near success. I think I will try another pattern, with the changes I noted about and also use a 1% or 2% stretch fabric. Because walking around in those corduroy pants made me realize how much I love a little bit of lycra.

Earlier this week I started another silk blouse - a version with the hidden buttonhole placket as several people left comments on my previous post that they would like to see how to do it. That will be coming up soon and it gave me an idea for a Craftsy post as well. (lately I am coming up blank on topics for my Craftsy blog posts - any suggestions would be welcome :) Do you read the Craftsy sewing blog? Some interesting stuff there. Where I have really learned some nice tips and tricks are by reading their other blog subcategories - cooking, gardening, photography are the ones I find useful.

So Super Bowl Sunday is just about over - despite having zero interest in either team it's fun to watch especially since it was here in the bay area. It has been madness all week. The city was crazy!
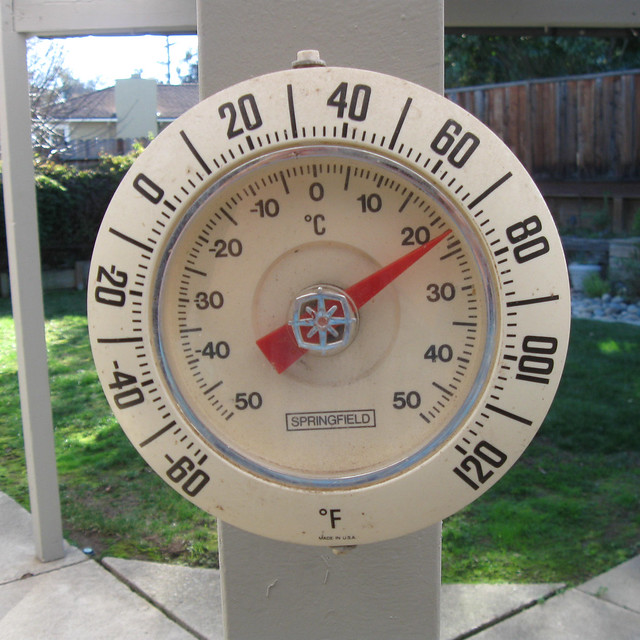
Also this happened today. Yep, spring is here. Although we are seriously hoping for more - more -  more rain. My new roses need it!
thermometer sunday feb

Happy Sunday sewing, Beth