Showing posts with label Vintage Vogue. Show all posts

Thursday, November 3, 2022

Blazer season, vintage Vogue 1193 pattern repeat

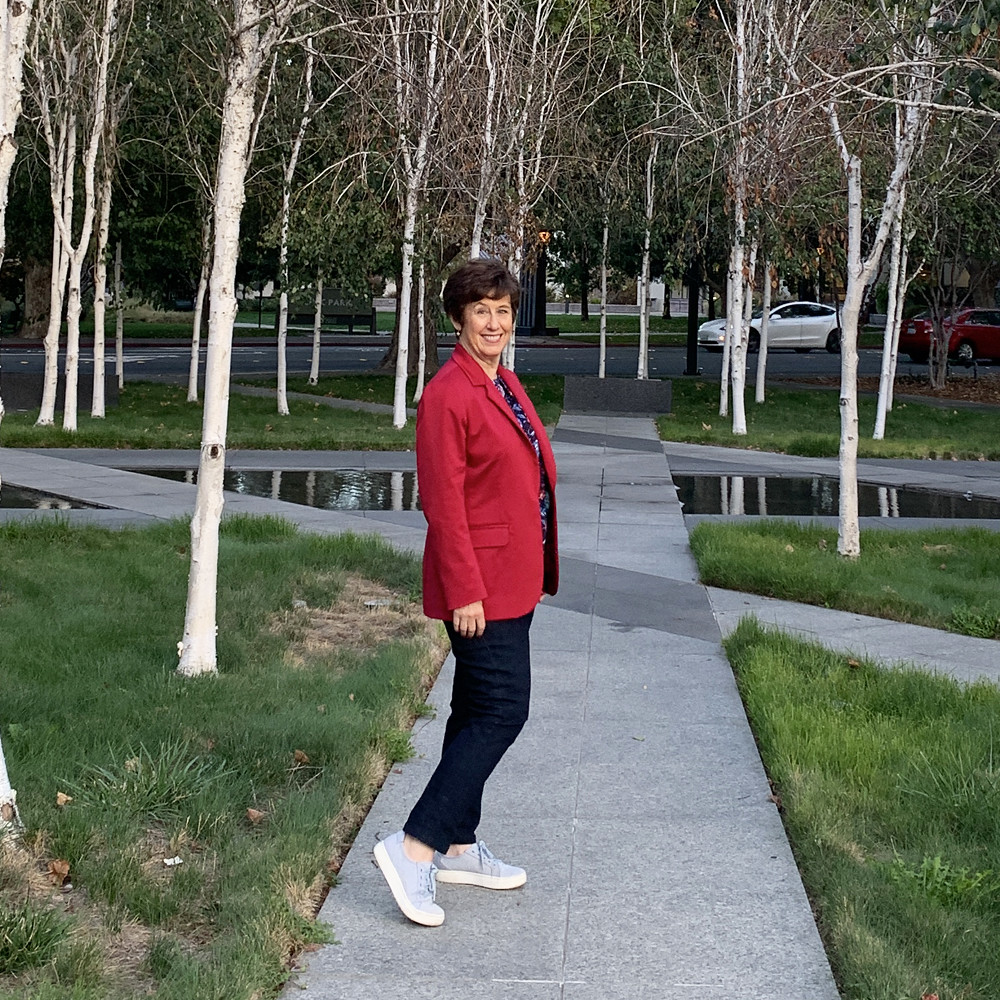
Last month I was surveying my fabric stash and noticed this heavy weight cotton sateen that I've had for absolutely ages, and decided it would make a neutral blazer to wear with lots of my various tops. Yes, solid red is a neutral for me :)  I decided to repeat a pattern I had made earlier this year, in a too heavy wool tweed that might have been better suited to a coat pattern.  Also I was just about to begin my online Blazer making class, which is going well and everyone is conquering welt pockets. 
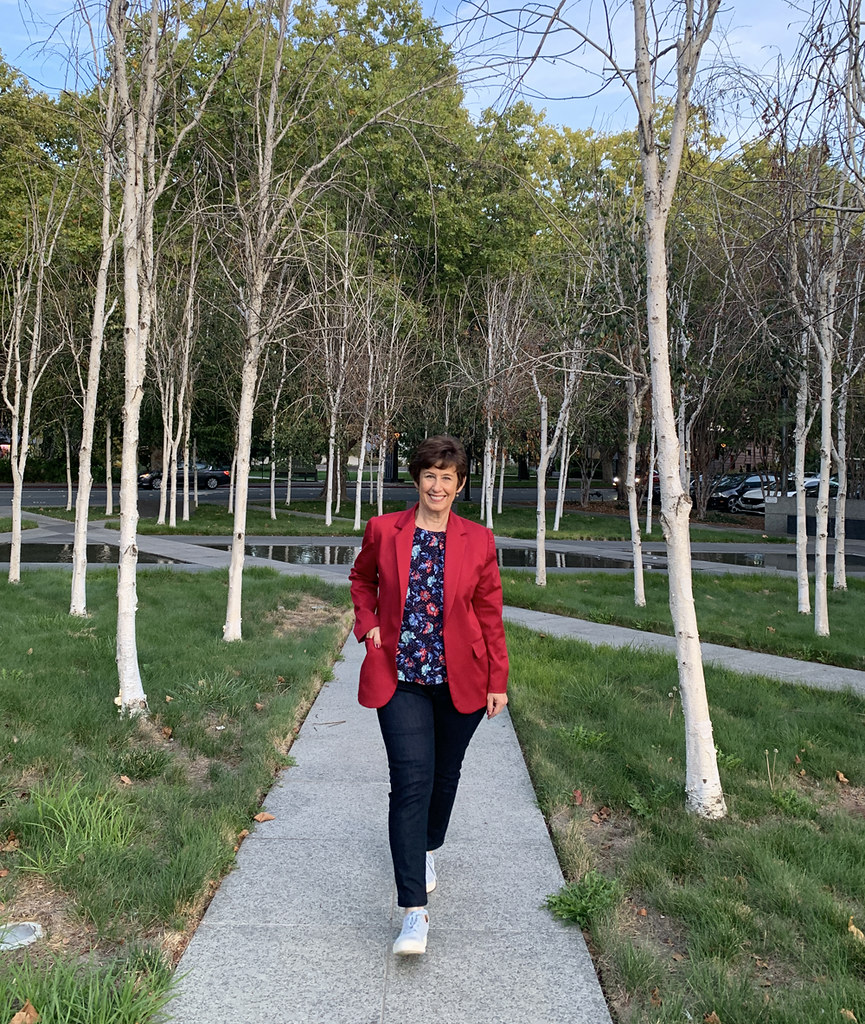
red blazer at park2 vintage Vogue 1193

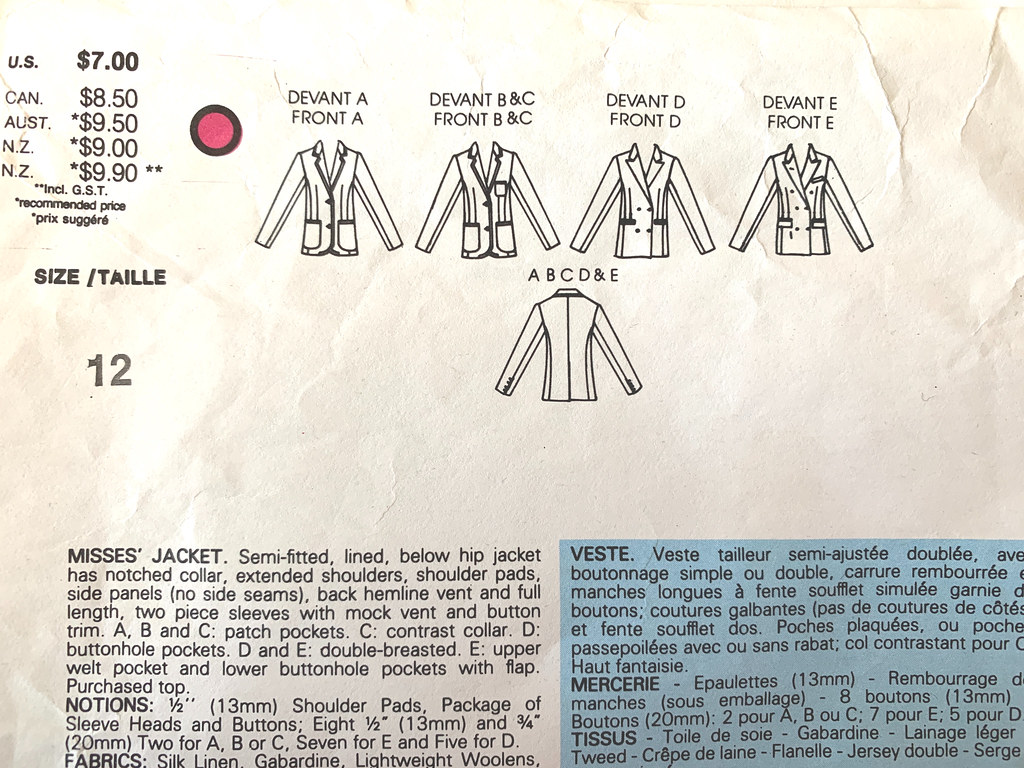
Here's a look at the pattern envelope. If you look at the technical drawings on patterns you can see the lines and details, and realize that so many patterns are basically the same as a newly released pattern. This one has the option of pocket variations and also a double breasted version which I might just try. 
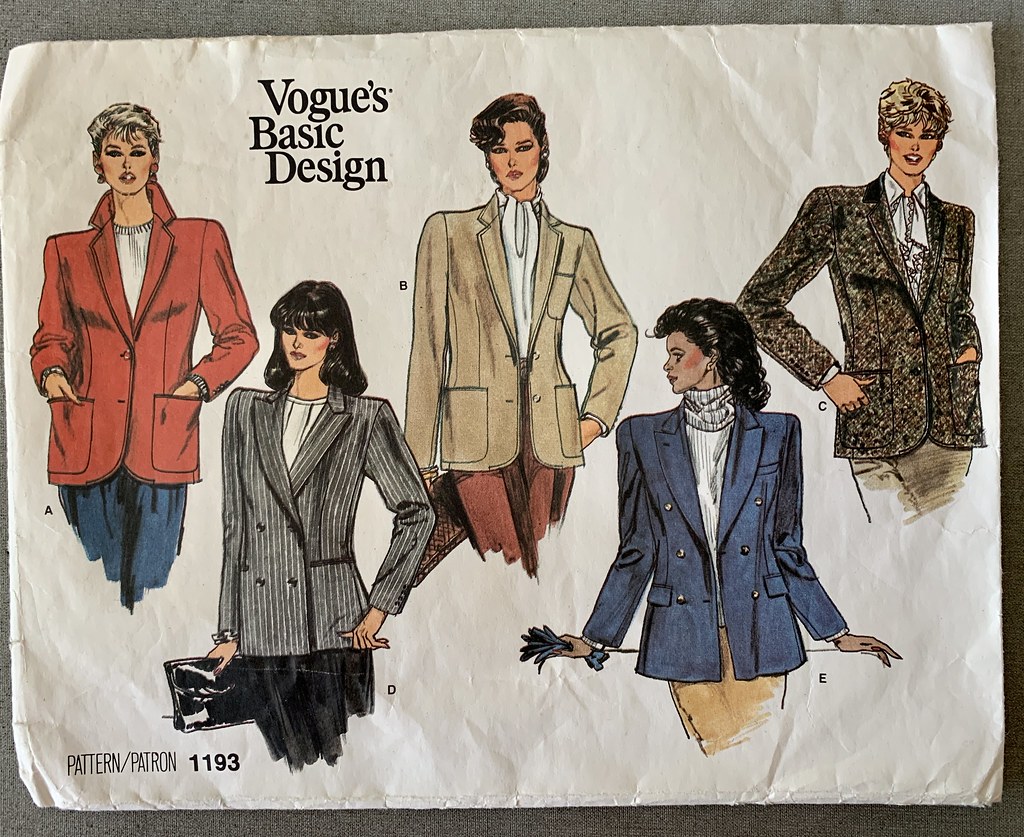
Vogue 1193 Pattern envelope


Vogue 1193 technical drawings

I did change the patch pockets of Version A out for the welt pockets of Version D.

Here's a look on the dress form.
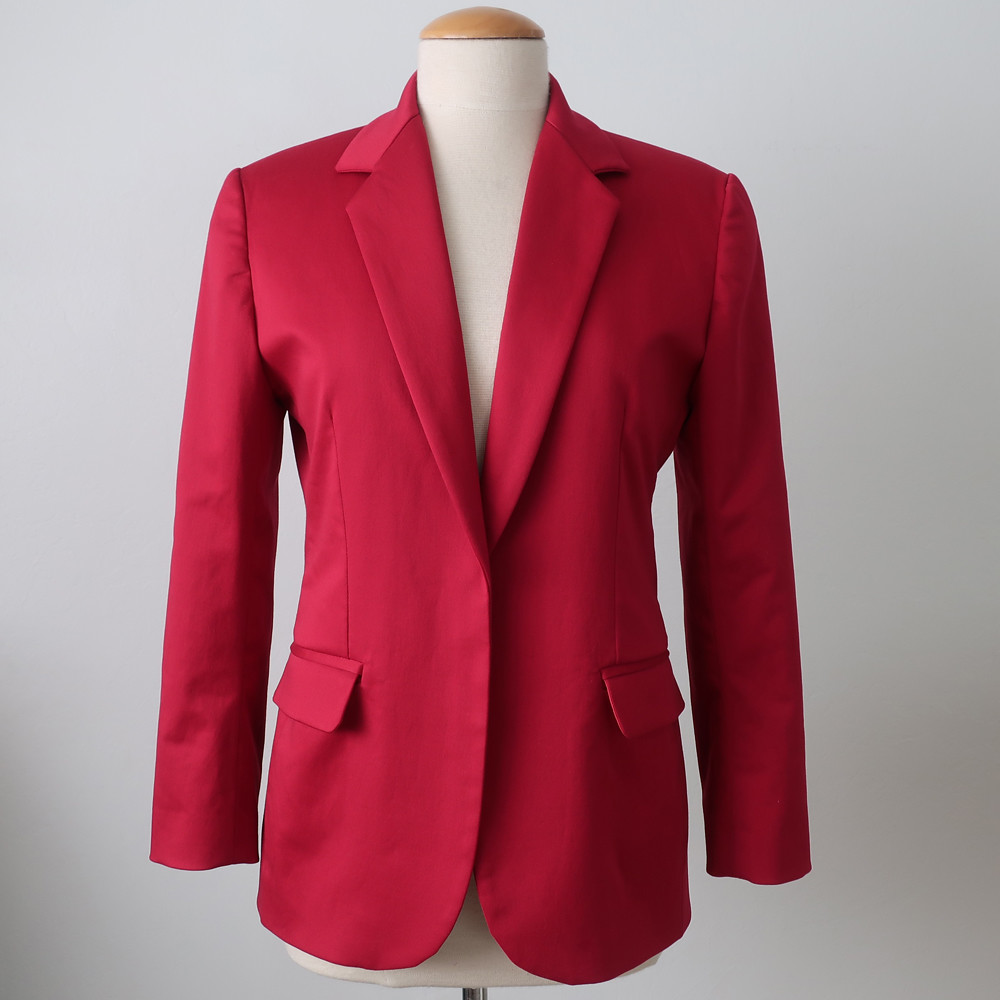
Red blazer front vintage Vogue 1193
As you can see it is missing the button and buttonhole in the front. I didn't have a single button in my stash that would work, so I will leave it off for a while and see if I can find a nice one when I next go fabric shopping in Berkeley or SF.

Let's talk about welt pockets. When I'm teaching the jacket making classes I always say once you get the welt pockets completed it's smooth sailing from there on. Well that might not be exactly true, but I like to be encouraging. Plus a nice welt pocket does make the jacket look so sharp and I think mastering that skill gives you a lot of confidence to tackle the other steps. 

Red blazer pocket vintage Vogue 1193

This fabric doesn't have much room for error, not like a nice wool tweed that is soft and pliable, but on the plus side it's not going to unravel. 

Red inside pocket vintage Vogue 1193

A look at the inside, I always make a thread ladder to show the pocket line on the front of the jacket as that is where you apply and stitch the pocket welts. The pocket pieces for the welts are something you can toss, I never use and just make my own, longer than needed and then cut down as I apply.
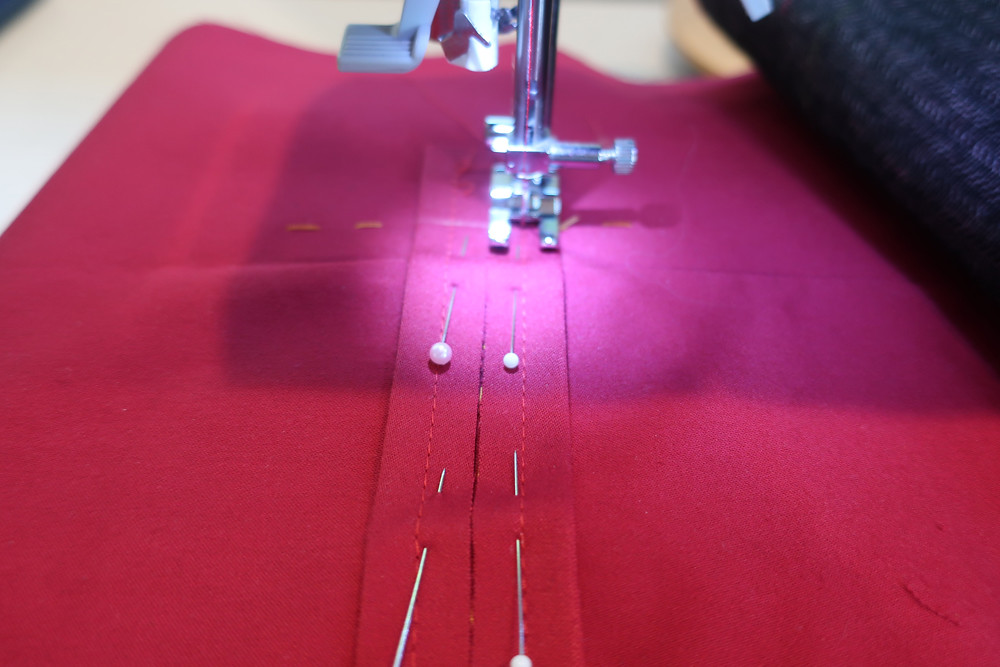
pocket welt sewing vintage Vogue 1193

If you have an open toe foot for your machine it does make seeing where you are stitching a lot easier. 

And just to show that we all  make mistakes, these little folds of fabric can happen anywhere you are stitching, this was on the lower pocket lining and it was a quick step to unstitch and redo it. I think they also happen so often when sewing in sleeves as well, just a tiny bit of fabric gets folded as you are sewing along and it makes a pucker. 
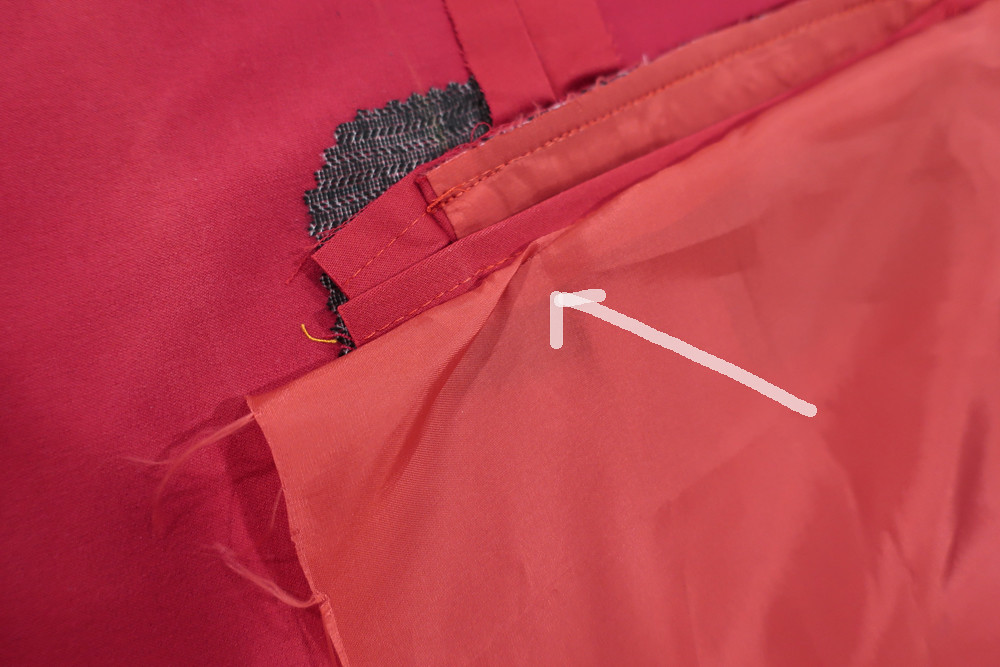
Pocket mistake2 vintage Vogue 1193


Red blazer at park3 vintage Vogue 1193

Of course wearing my Ash jeans. I love that pattern! Just cut out a corduroy flare version with stretch corduroy from Minerva which is exactly the corduroy I had been searching for. 
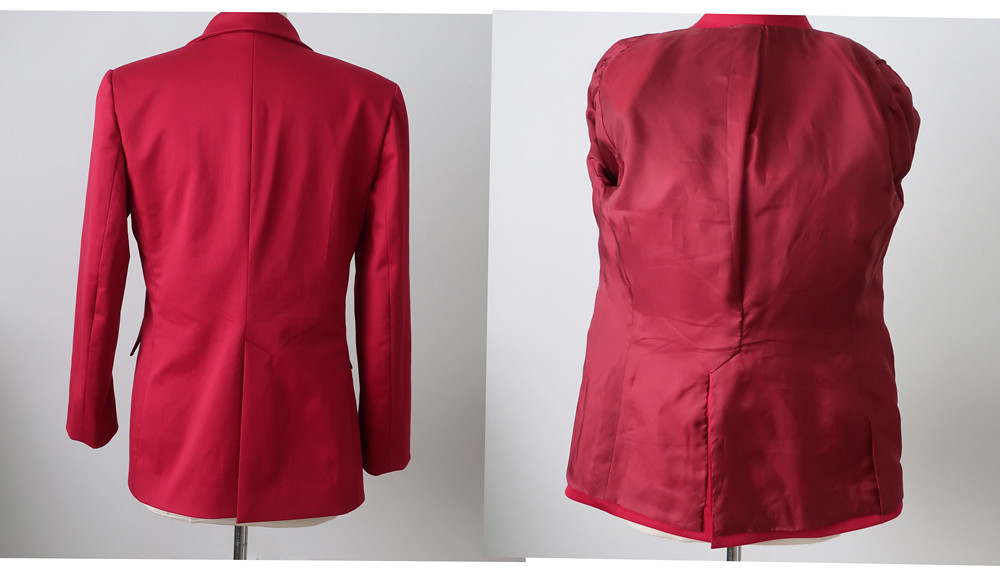
Red jacket back 2 views

I did put the back vent in this one, it seemed to go with the style and color. As usual I omitted the back facing and put the lining up to the edge of the collar.
Attaching the lining to the hem of the jacket and the vent were done with hand stitches. 
Red blazer at park vintage Vogue 1193

So that's the latest on this vintage pattern blazer. I just started to make a new coat for my friend Heather, in a beautiful camel colored wool from Britex so I will post about that project.
I have a few in-person and online classes scheduled between now and the end of the year. Including a couple of classes on fitting, Bodice Fitting Dec. 2 and Pattern Adjustment-Make-Fit a Test Garment on Dec. 3. I've listed all the upcoming classes on another page on this blog, at the top menu click on Sewing Class Schedule. The Bodice Fitting Class will also be an online version, on Sat. Dec 10 if that works for you.

It's actually coat weather - I wore my tricolor coat last evening and it was just right. 

My front garden revamp is finished so other than planting a few daffodil bulbs (around 70) I'm putting the planting aside and waiting for everything to burst into bloom in spring. 

Happy Sewing,
Beth

Today's garden photo, a few of these daisies still blooming, it's a bit patch which I plan to divide for more plantings.  Plus one of my bee friends visiting.Daisy with bee

Sunday, March 21, 2021

Vintage Vogue Suit, completed

Time to post this finished blazer and move on to spring projects. I started this jacket back in late November, as I was looking for a time consuming project that would keep me busy during the winter months. As it turned out my stay-at-home time increased even more, with the weather making most outdoor socialization not possible and the surge of cases here in California very serious. So it was a project for the dark days of December and to be honest, I'm not all that wild about this jacket. In fact since I have so many other jackets which are more colorful I feel like I will probably never wear it and plan to see if any of my friends would want it. 

But onward to discussing the finishing touches. If you want to see the pattern look at my first post which was back at the end of January. The pattern is a vintage Vogue designer pattern, Vogue 1987 Yves St. Laurent suit, I think released sometime in 1978. I also made the blouse in the pattern but I don't like it at all, and then made some trousers using a different pattern however they have a very similar look. 

Tweed blazer sq

If you look at my previous posts you can see that I used most of the traditional tailoring methods for this jacket, with horsehair canvas, pad stitching, hand sewn patch pockets etc. In fact the pattern instructions specify all these techniques which was one reason I decided to use them. I haven't made anything using those techniques in a long time and probably won't again. It was rather satisfying to see all those pad stitches creating a shape but I do prefer using modern fusible interfacings.


IMG_5430


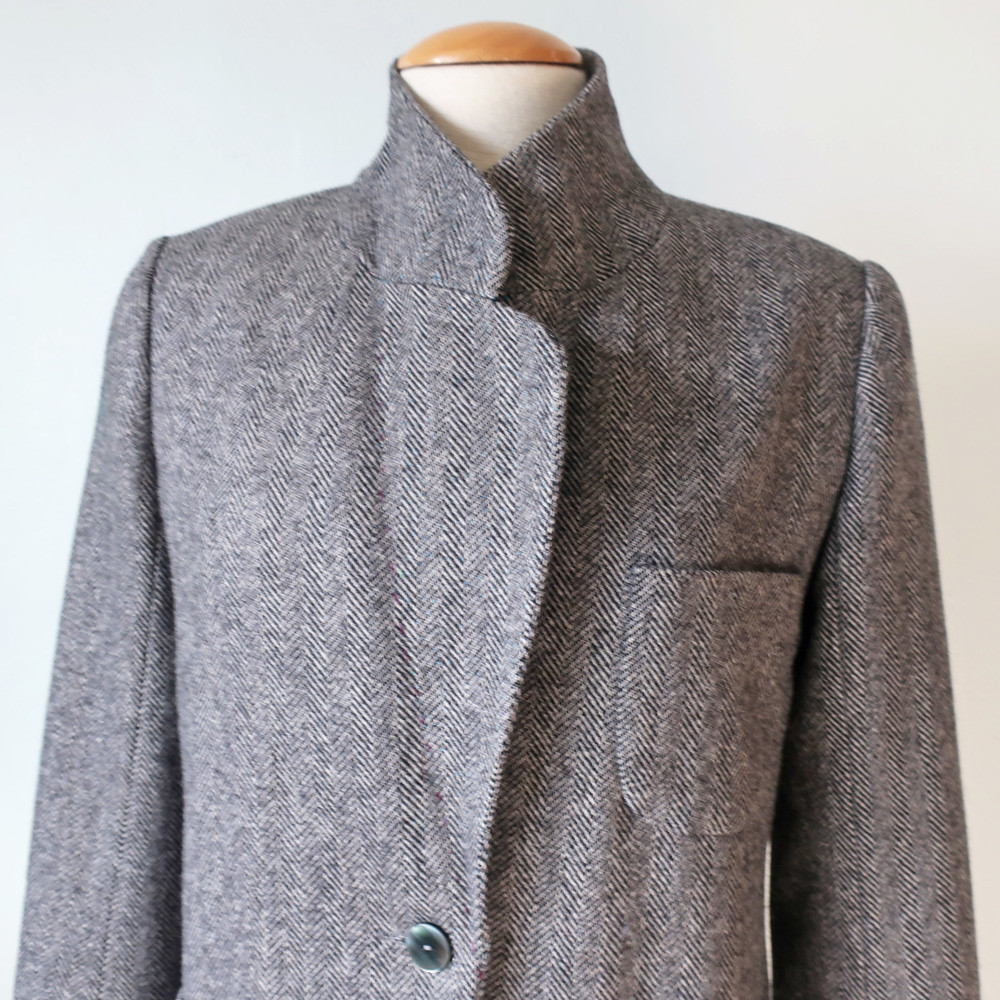
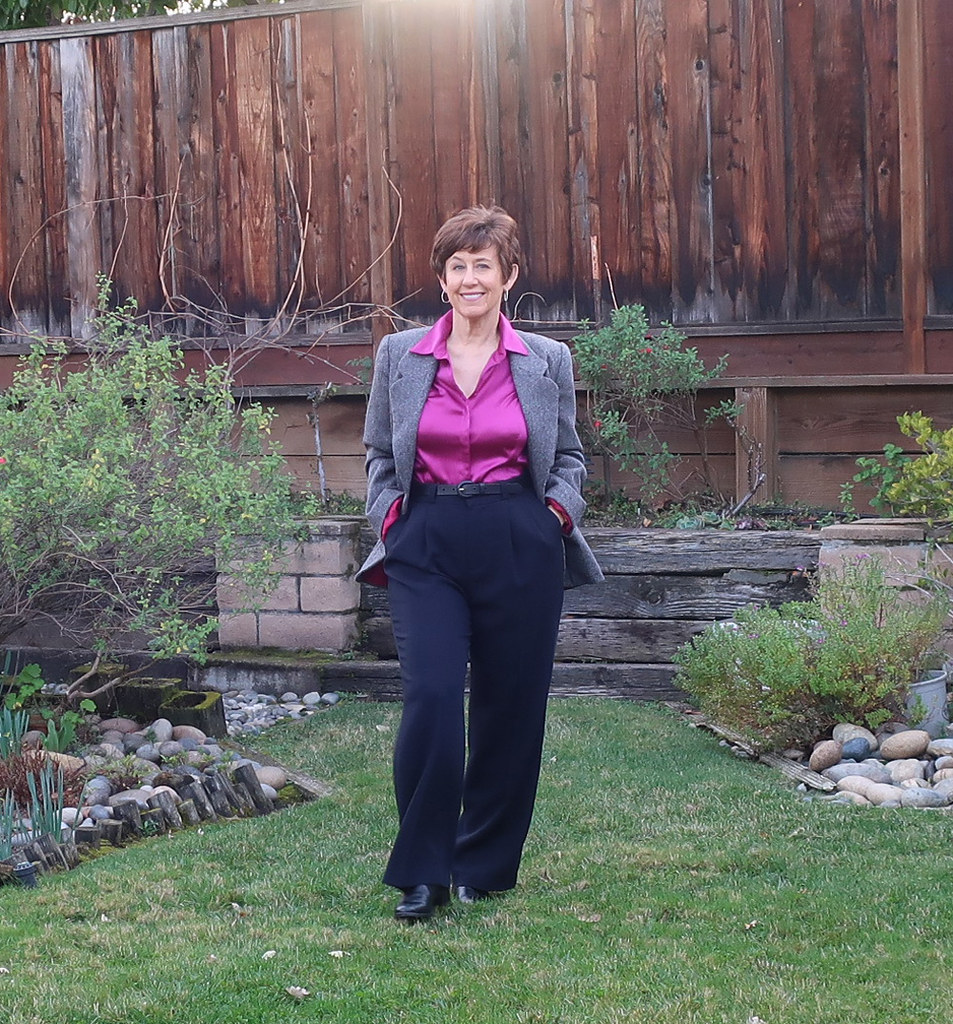
I finished the jacket a few weeks ago and on a rainy day when the light was nice I stopped by a friends and she took some pictures in the park. On the whole the fit of the jacket is ok, I did make a muslin and I feel that it is the right measurements on me, but I don't care for the exaggerated and lower lapel shape, plus there is something about the hang of the sleeves on me that isn't quite right. 

IMG_3654

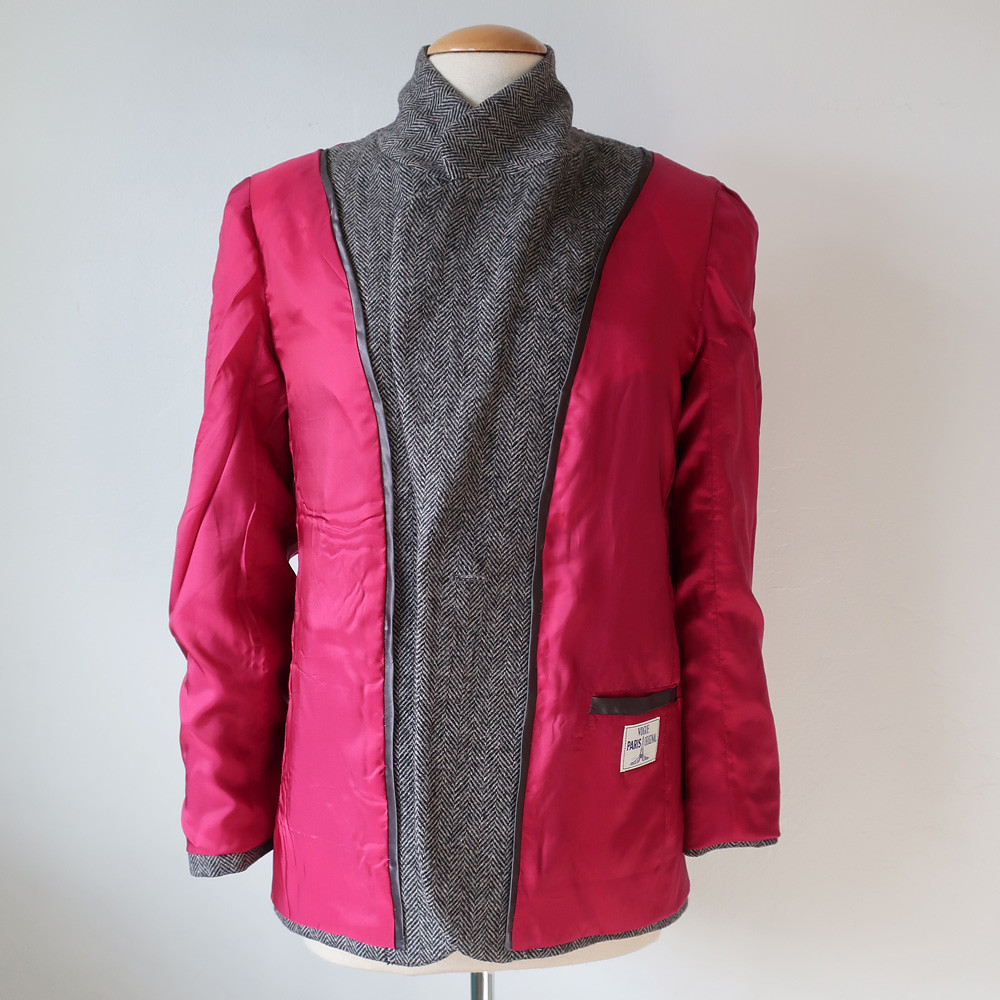
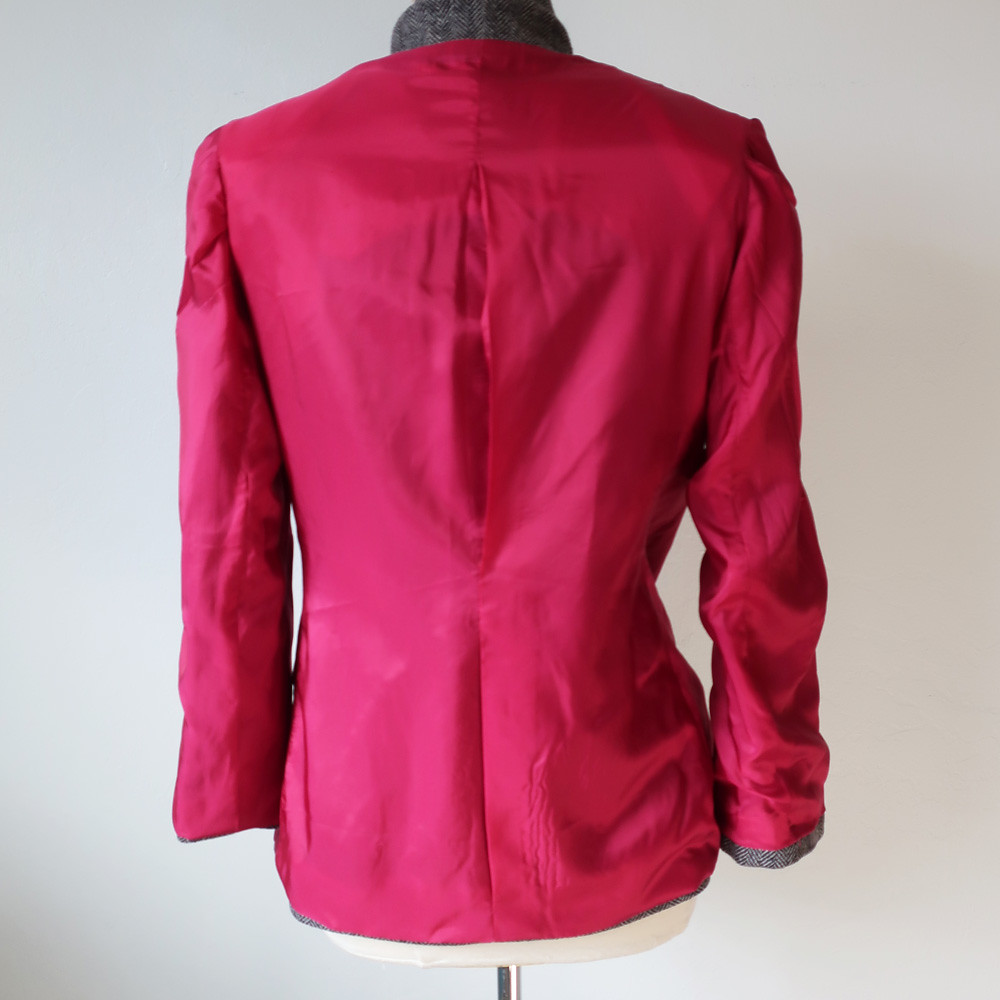
It needed some zing so I used this rose colored bemberg lining and with some remaining silk charmeuse from the pocket linings I made some flat piping for the edges. 

tweed blazer sleeve button

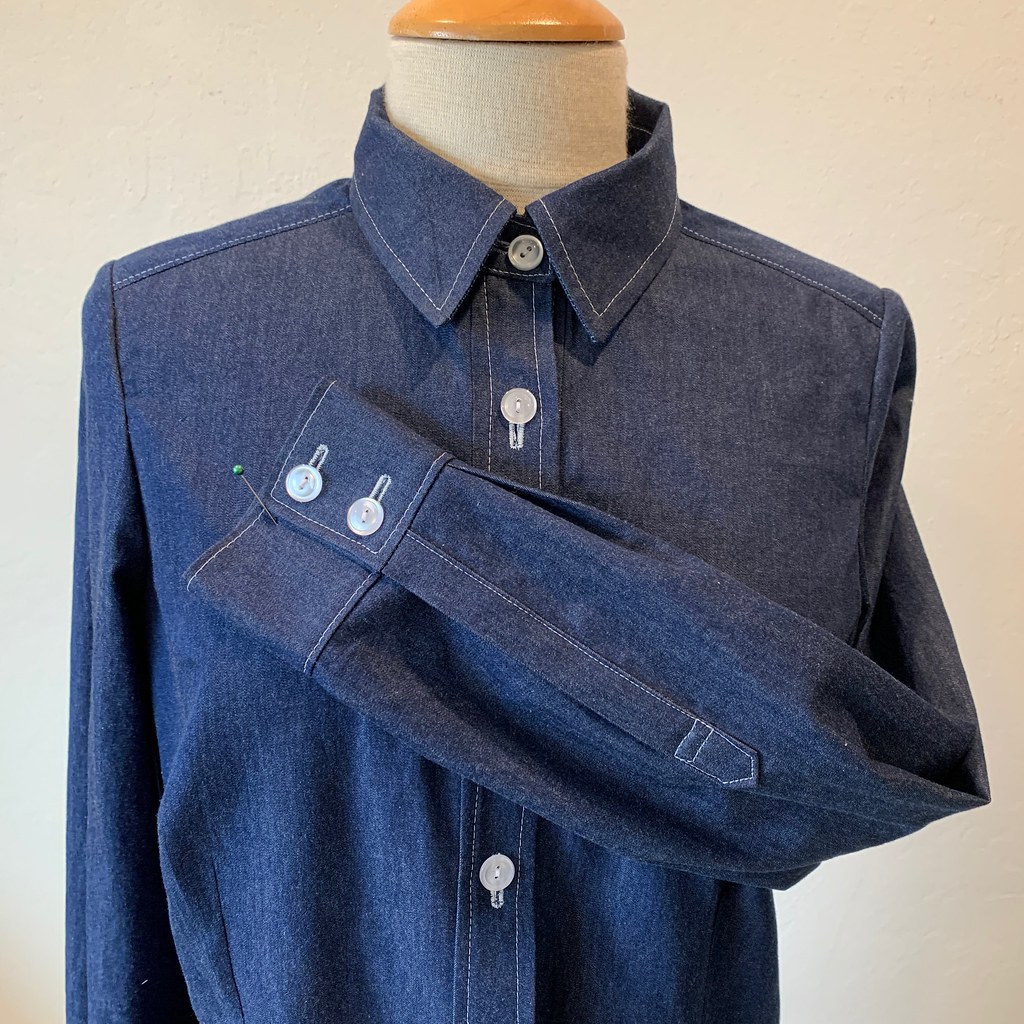
The sleeves do have a button opening but it is different from that you see on most jackets as it is a rounded end and just one button. The pattern was great to work with as it had every pattern piece for the lining, interfacing and jacket included. 

IMG_3653

I noticed on the pattern envelope it was one that came with this label, however my pattern which I got at at a Bay Area Sewists Meetup swap didn't have it in the envelope, perhaps the original owner used it on her jacket. In any case, I had a few of these Vogue designer labels but not this exact one so I ordered it on eBay. I added that welt pocket inside the front lining, it's not on the original pattern but I often add pockets in the lining of coats or jackets. 

Tweed blazer back sq

Back view, it's a more boxy shape than I've made in a while.  


Tweed jacket with black pants1


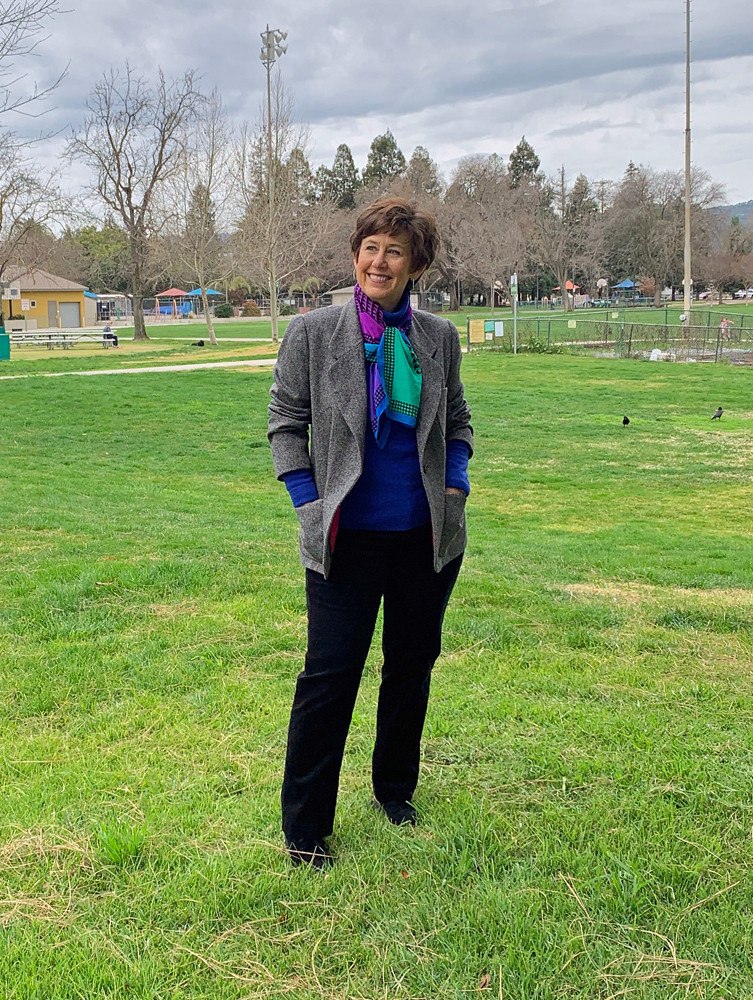
Here it is worn with a silk blouse and my Tatjana trousers made in black wool crepe. The trousers deserve their own blog post but I think that will wait until I make them in a fabric that shows up better in photos. The pattern is from my friend Delphine's pattern company, Just Patterns and this is the Tatjana trousers. It's a really great pattern and for experienced sewers it includes all the info you need but can skip the instructions, or if you are a beginner the instructions are quite thorough. 

IMG_5429

I think this is the combo of fabric and pattern that would become a slouchy and comfortable blazer, getting softer and more worn in over the years, and due to the wool tweed will probably last for ages. 
In the photo above I'm wearing it with a turtleneck sweater and black jeans, not the pleated trousers. 

Tweed blazer back of lapel

A look at that lapel crease and the upper pocket. I'm very happy with that pad stitching and the built in shaping it gives the jacket, it was a perfect combo with this nice herringbone wool fabric. 

IMG_3651

Back lining view which shows the center back pleat. I think the sleeve lining is a bit too long, as it wants to peek out when worn. I will go back and fix that. I didn't shorten the sleeves when I made the jacket (as I usually do) since I had a sneaking suspicion I would pass this one on to a friend.

Tweed jacket and pants2

Yeah baby, the 70's are back. As the expression on my face says, No thank you to the fashions of that era. Big shoulder pads and pleated trousers, not something that I think looks right on me but perhaps it might with some modifications. I've seen so many ruffles, pants shapes and dress styles from that decade reviving now - not one of the best fashion eras but perhaps a lot better than what came next, the 80's which don't deserve any repeat!

Next up some jumpsuit sewing, or actually boiler suit and/or flight suit sewing, as our Hello Stitch Studio class in April is just that. Plus I've a few silk fabrics that are just longing to be sewn up into spring tops. 

Happy Spring Sewing,
Beth

Today's garden photo - some very reliable dianthus that are blooming right now. Dianthus are also called pinks and I think they are the most sewing themed flower, with the edges looking like they have been cut with pinking shears. 

IMG_5568

Sunday, March 14, 2021

Vintage Vogue Suit part 3

Time to finish my blog posts on this jacket - as I have sewn several other things in the interim and I want to get caught up with my sewing/blogging. The previous post covered the collar and lapel construction, with all the pad stitching and pressing details. Next up were the pockets. I don't think I've ever made a jacket with hand sewn pockets but I decided to follow the pattern instructions and give it a go. IMG_5194
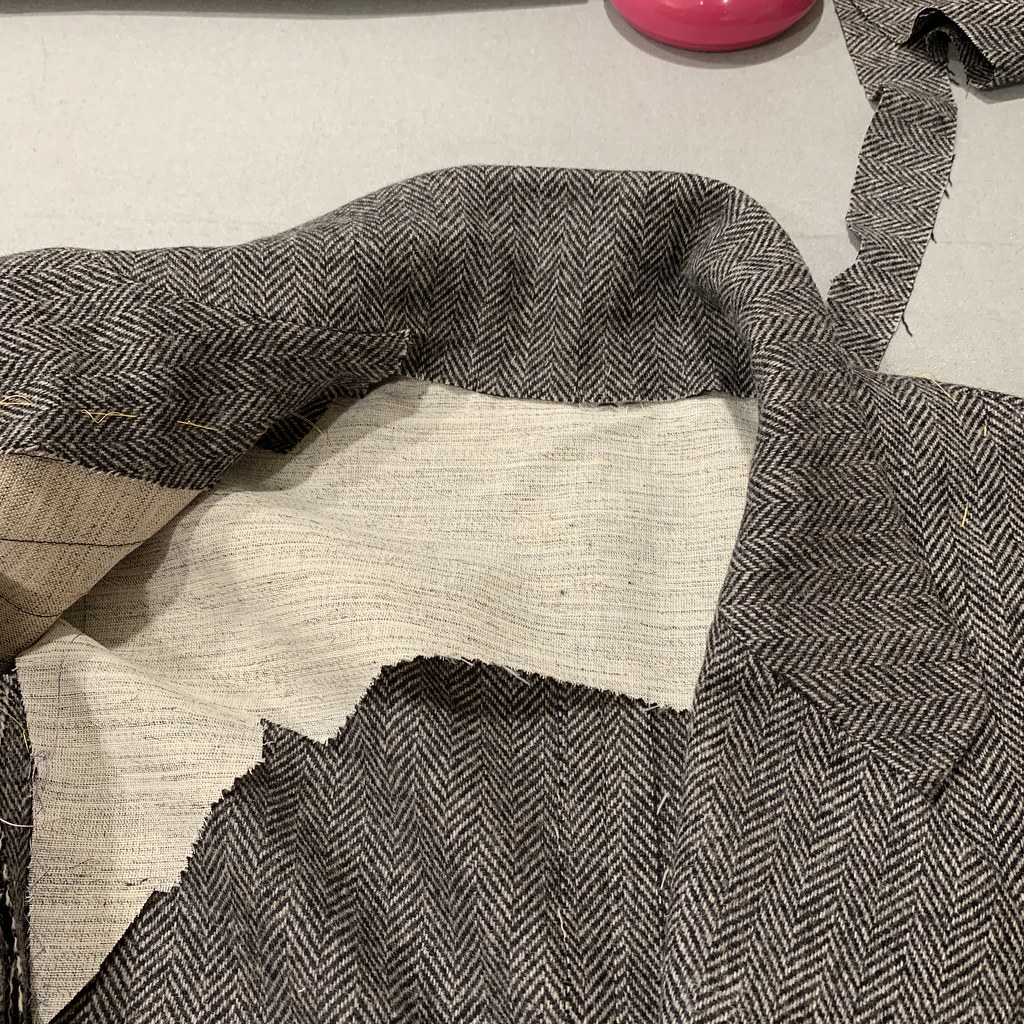

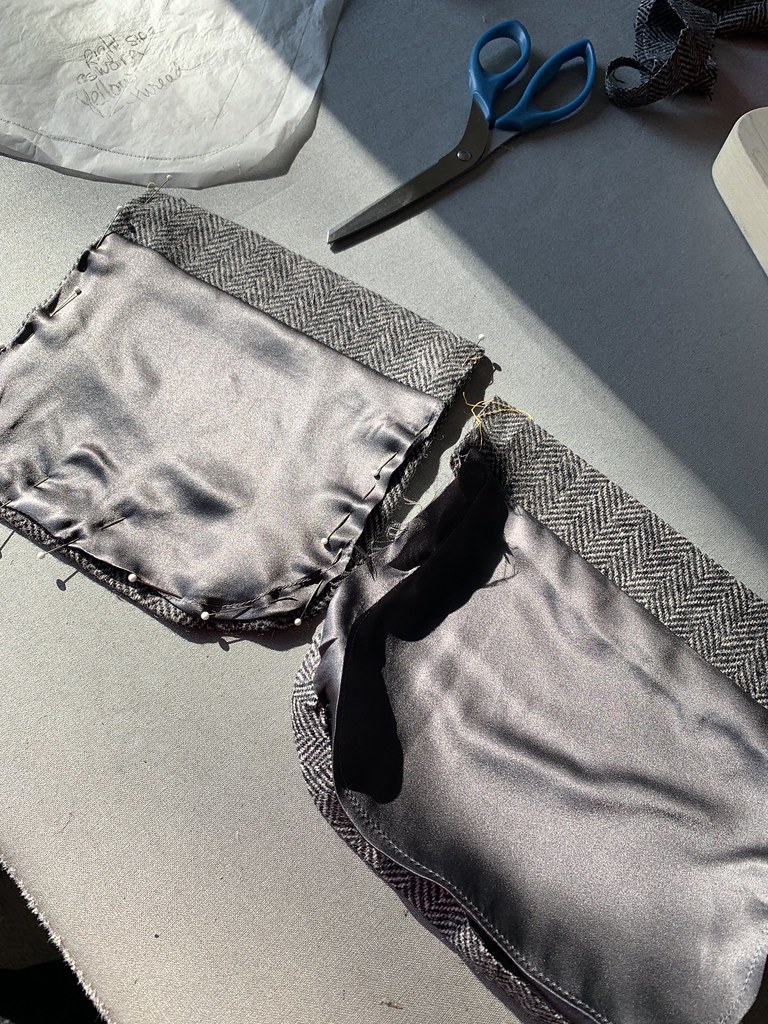
The jacket had the pattern pieces for the pockets plus separate pattern pieces for the actual pocket lining. I actually traced the pattern pieces and placed them over the jacket so I could match the herringbone stripes in the fabric.

IMG_5184

The fold line is marked by my yellow tailor's tacks, and then the left and right pockets are differentiated by the yellow and green basting threads shown on the pockets above. 
I did put some lightweight fusible interfacing on the wrong side of the pockets. It just seemed to need a little more structure so they would lay flat and not sag on the jacket front. I trimmed the fusible away in the seam allowance before applying. I made a pressing template from a manila folder, which is my go-to item to cut up and make templates. It really helped with getting the rounded corners of the pocket to press perfectly and all match. 
IMG_5185

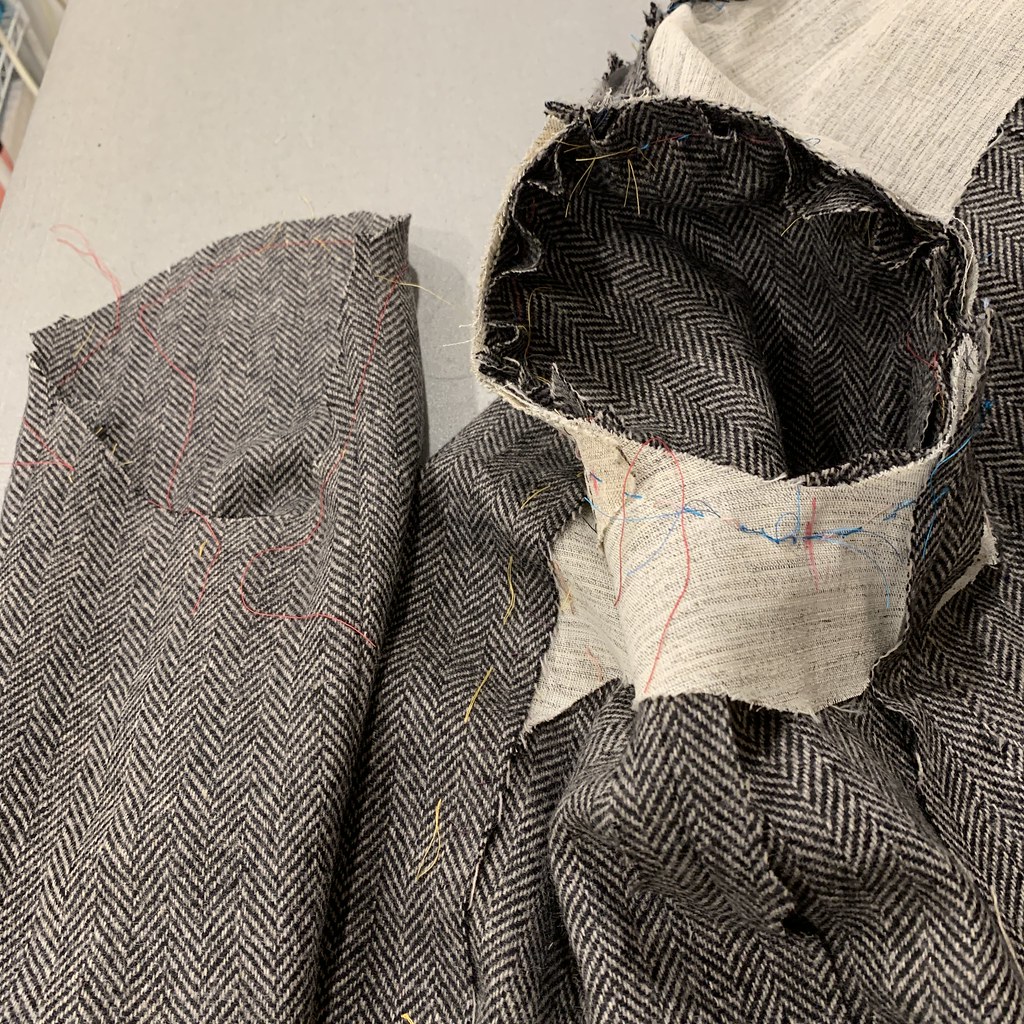
Behind the pockets on the inside of the jacket the instructions said to stitch a rectangle of firm cotton fabric, to give the stitching at the corners of the pocket some reinforcement. That is the spot that might ultimately tear a bit on a pocket. I did baste it down a bit more than they indicated, so that I wouldn't mistakenly stitch it down with a crease when hand sewing on the pockets. 

IMG_5197

Next was applying the pocket lining. I rummaged around in the scrap bag and came up with just enough of this grey silk charmeuse to make the linings. Which was also hand sewn to the pockets. 

IMG_5193


IMG_5186 

Here's a look at my pattern matching, a detail that will be lost when the jacket is viewed as a whole but I just had to do it. 
Then the pockets are basted on, and hand stitched all around. I went around each pocket twice, plus extra reinforcement at the tops. 

IMG_5198


IMG_3563

Which seemed like it took forever but was worthwhile. I found the trick was not to pull the silk thread too tight as the patch pocket needs to be secure but also almost float on top of the jacket front. 
Once the pockets were completed then the sleeves were next. 
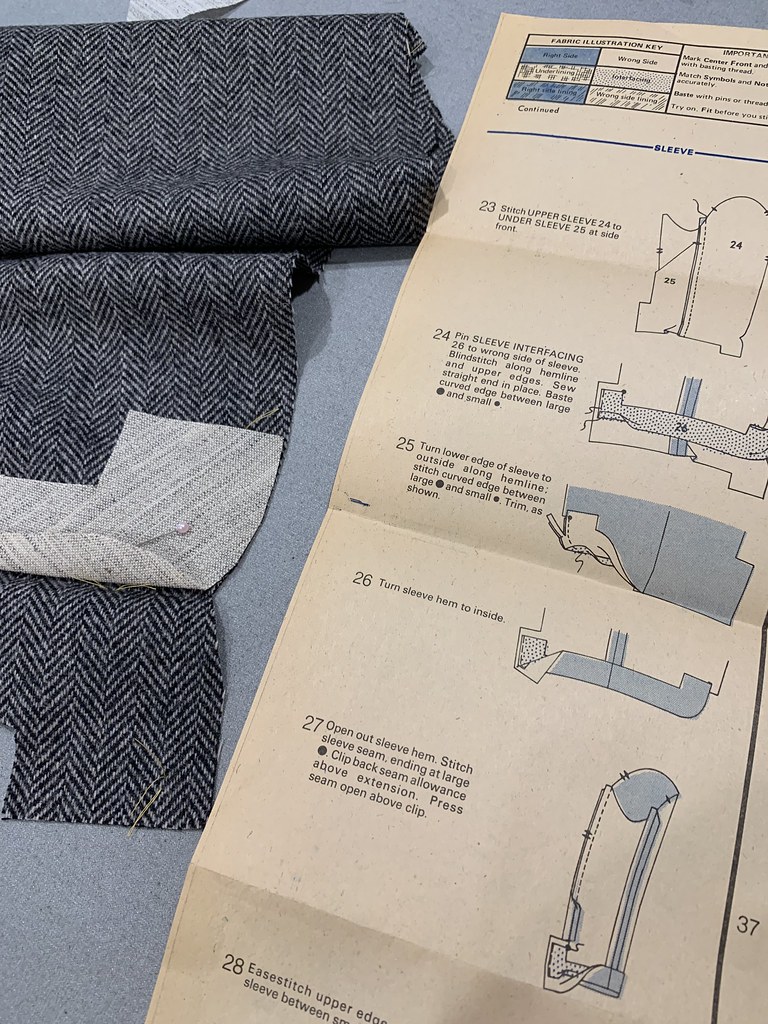
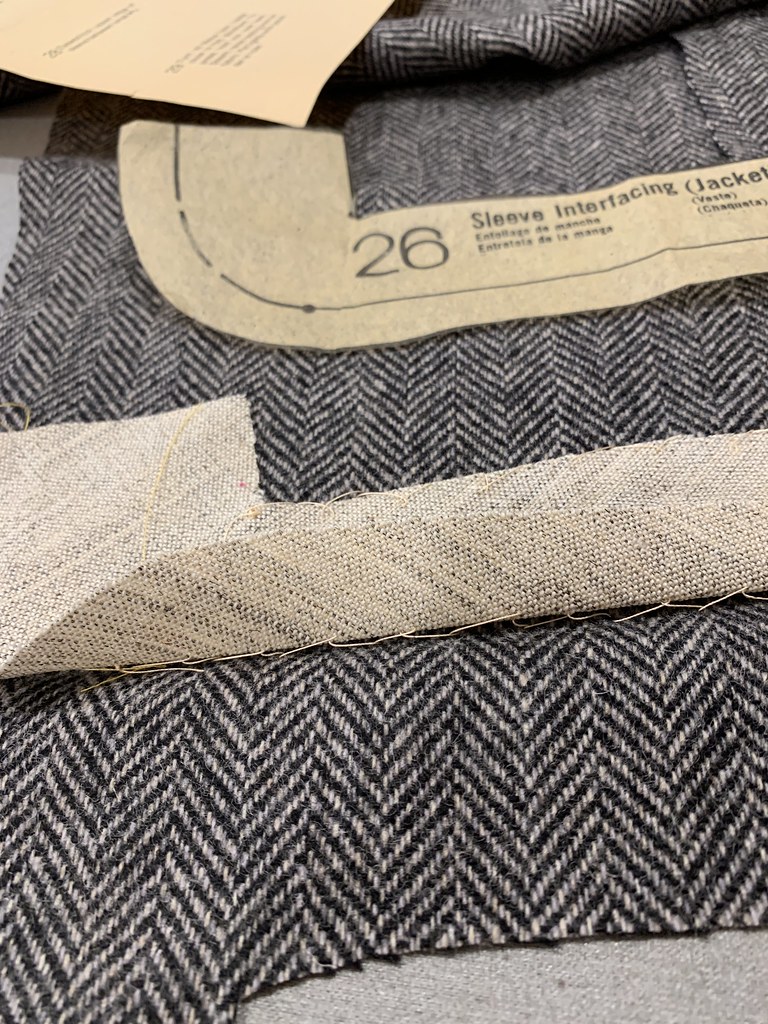
The pattern came with a specific piece for the hair canvas interfacing which goes at the sleeve hem.

IMG_5012

IMG_5014

IMG_5013

After stitching on the hair canvas, then the sleeve seams are sewn up, with the curved self-facings. 
Next up, sewing in the sleeves. 

IMG_5183

I basted in the sleeves before sewing the on the machine. As it turned out, the sleeves are the one part of the jacket where I'm not really happy with the fit. I just sewed them in according to the markings and didn't really try it on. Now I think I could have rotated the sleeve a bit forward to change how they hang, which I often do with other jackets. 
The pattern called for a 1/2" shoulder pad but it also needed a sleeve head so I added that, but didn't take a picture. 
After that, it was hemming the jacket, then putting in the lining which I did in the same manner as I have in other blazers I've made. So sewing all the lining pieces together, and then hand stitching it to the the jacket facings and hem. 
Here's a look at the finished jacket - but I'll have more photos in the next post, including the lining and wearing it with my Tatjana trousers from Just Patterns

Tweed blazer sleeve side view

So that's this jacket almost completely blogged - and I'm ready to move on to other things. Which include a plaid coat that I finished as our warm weather is arriving. Another coat I'll have at the ready for next winter, when hopefully we are going out of the house!! 

Happy Sewing,
Beth

Daffodils blooming everywhere now.  

IMG_5567

Sunday, February 28, 2021

Vintage Vogue Suit part 2

Time to pick up where I left off on this vintage Vogue pattern. It's all finished and on a rainy day (one of our few) I took a couple of outdoor shots. That may be all there is. I'm actually not crazy about this jacket, while I'm glad to have it finished it might just be another one of those 2020 items I give to a friend. However it did pass the time during the winter and reminded me why I like to use the quicker tailoring techniques to make things. Further down in this post I will pick up where I left off with sewing details in my previous post.

It has been finished for a couple of weeks, but it just feels so strange to add substantial items to my wardrobe with basically nowhere to wear things. In fact I was at Trader Joe's this week, wearing my bright blue wool blazer (here's the link) and one of the guys stocking the freezer cabinet turned around and said "great jacket - love the color!" So perhaps I need to wear some of these items for my mundane outings. Fingers crossed that summer is a lot different around here - I don't even want to talk about it (going on 12 months of social distance here in N. Calif 😩. 

As to what I've been sewing - not all that much as I just finished a month of teaching several online classes  via Zoom for Hello Stitch Studio. I can say they are a lot more to prepare than teaching in person but I'm happy to do them. We structure the classes as part instruction/learning time and part social time. I think we all miss our sewing social events so much and while I talk often and even see some friends periodically most of my friends don't sew. (and think that making clothes is a mysterious and unfathomable activity).

We have two classes in our monthly sewing club starting this week, the Button Front Shirt class which is an early session (4-5:30 pm pst ) and you can use any shirt pattern.  Also we have the  Myosotis Dress class 7-8:30pm. If you want to join in this class it would be fine to use shirt dress pattern that you already have. One upside of this whole situation is that people from outside the bay area can join in so it's been great to meet (virtually) some new people.  Here's the link to Hello Stitch Studio for all their other offerings. I made this chambray shirt in the class a few months ago, so I will be looking around in my stash tomorrow for fabric to use in new shirt project in the class. 

Chambray shirt

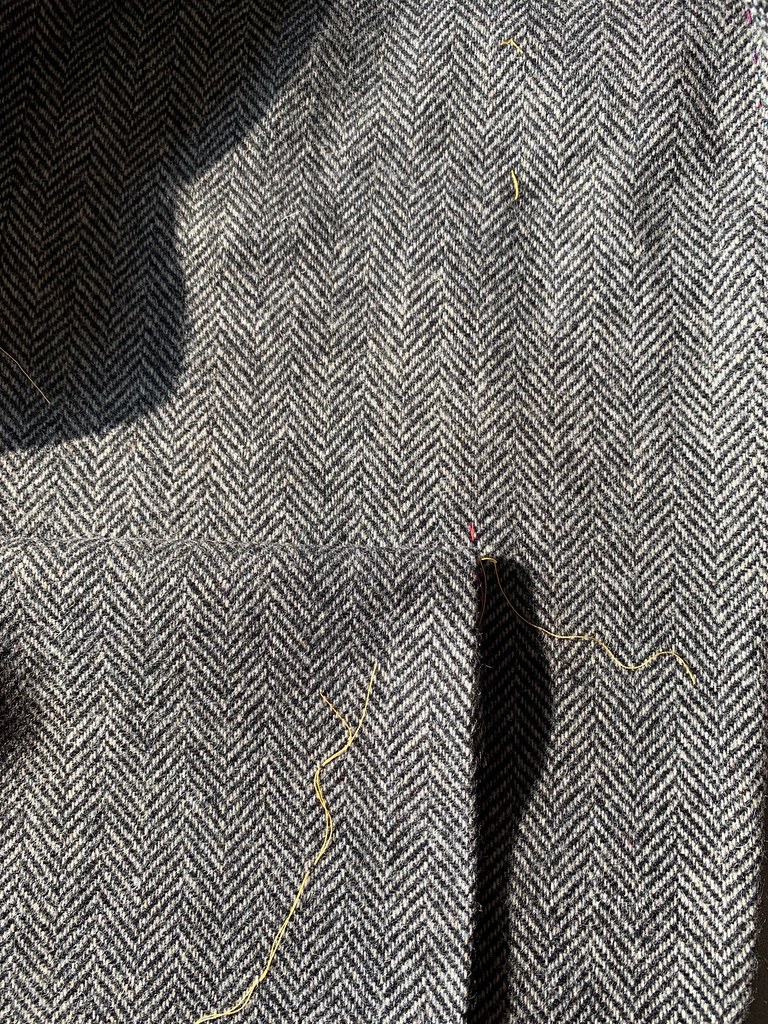
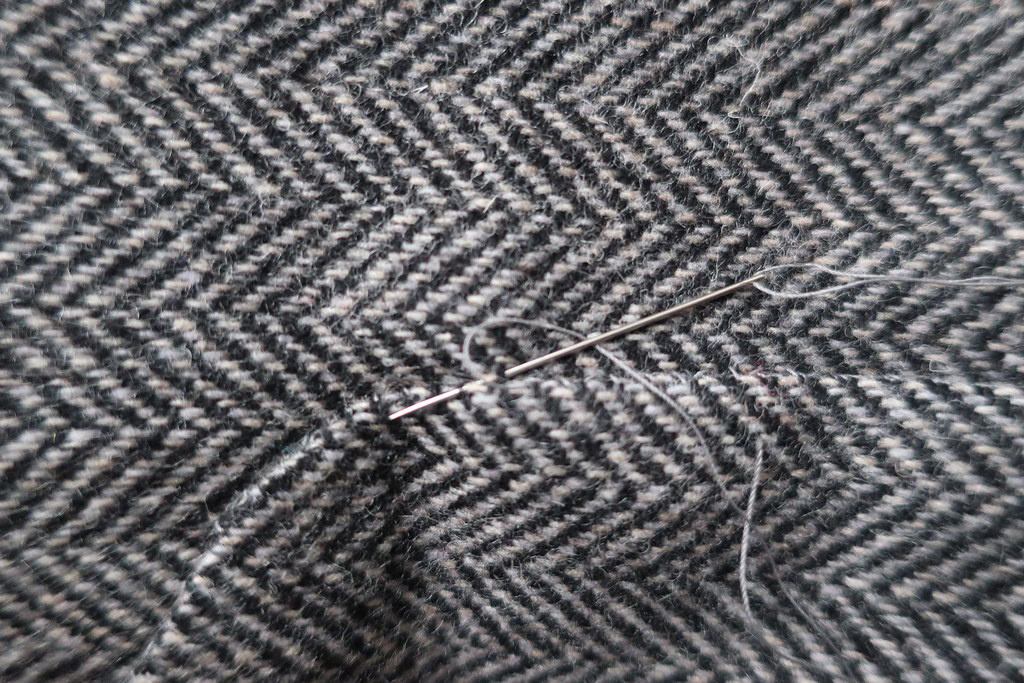
OK, back to jacket construction. In my previous post I ended with the start of pad stitching on the lapels. The next pattern piece to be pad stitched was the collar. I really feel I am out of practice with this stitching technique but wool tweed is a very helpful fabric and my stitching seemed to work. I like to use a contrast silk thread color as it make me happy to see the stitches marching along in turquoise rows, plus it doesn't show on the other side since the needle takes an invisible bite into the wool on the right side. 

IMG_4929

Next step is attaching the under collar to the jacket front. At this point it is sewn on but not trimmed nor the seam pressed.

IMG_4980

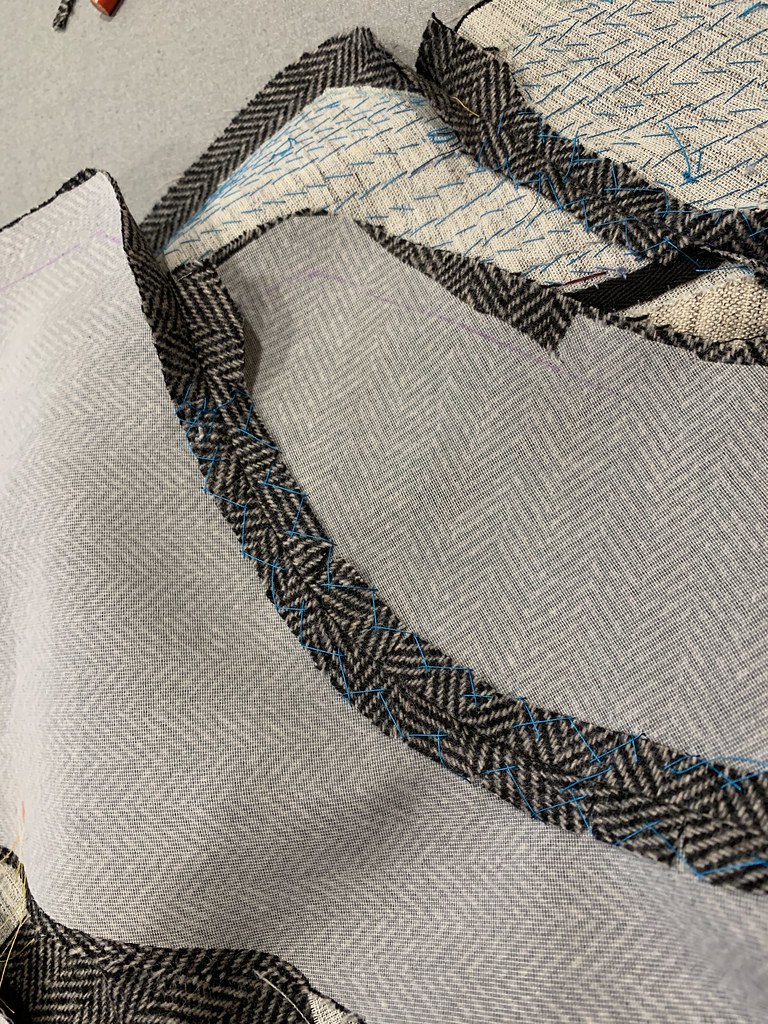
My next step is to press that seam which joins the collar to the lapel, trim and catch-stitch it down with silk thread. I do this same process also when I have made a jacket using fusible interfacings, it keeps the seam allowances smooth inside the jacket and then the upper collar and lapel can overlay with out any seam allowance getting in the way. 

IMG_4982

Onward to the upper collar and lapel. Here is where in deviated from the pattern instructions, they didn't have any interfacing on the upper collar but I don't like the way that looks, although in this fabric it might not have been as noticeable as it might be on a solid or light color fabric. In any case I put some lightweight fusible on the upper collar and the jacket lapel facings.  The seam there was also trimmed and then catch-stitched down.

IMG_4981

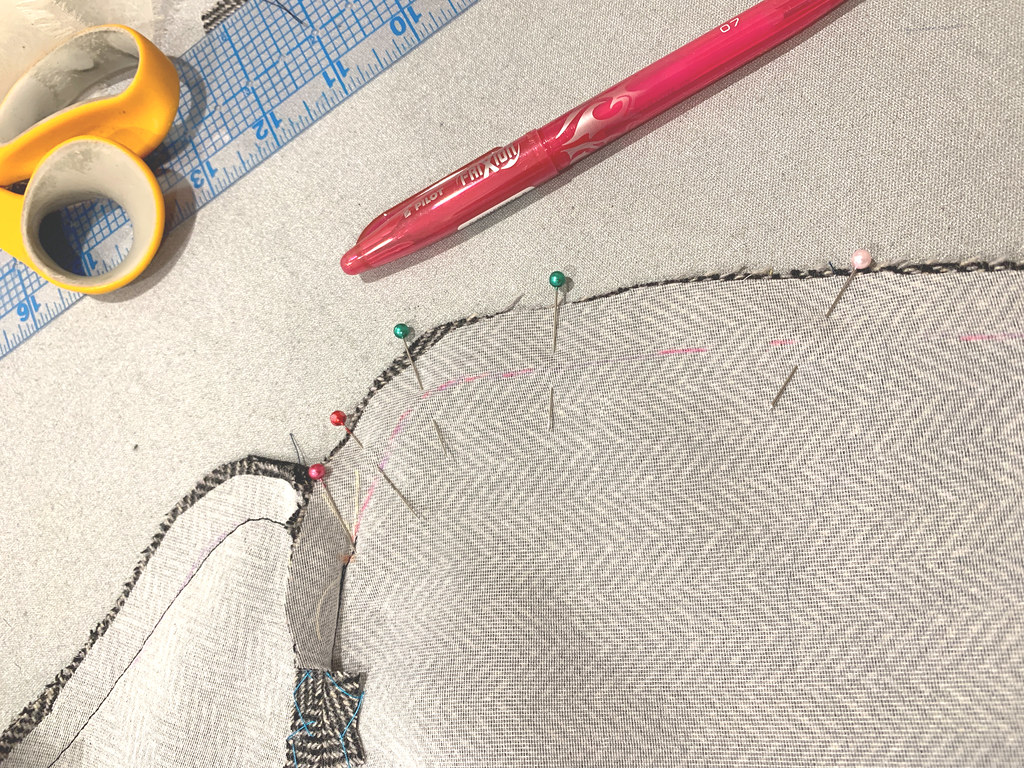
Time to sew the upper collar/lapel facing to the jacket body. I have no reservations about marking my stitching line on curves, angles etc. It just makes the machine sewing more accurate and avoids having to redo things. Soft lead pencil, chalk or Frixon pens all work fine for this purpose. 

IMG_4984

More trimming. Grading the seam of the collar.

IMG_5006


IMG_5007

Pressing open the seam on the edge of the collar and lapel, and notching the curves which need space when the seam allowance is on the inside. 

IMG_5018

Collar and lapels done. Onward to a couple of steps that I have never done before. Hand sewn patch pockets! I had doubts but I do like them. So sleeves, pockets and a few finishing details will be in the next post which I intend to do later this week. I like to blog projects as I go and this has been lingering a while. 

IMG_5016

That is a very satisfying lapel :)  The herringbone stripes show off the collar angle nicely. So that's the mid-point on this jacket construction. I did make the shirt that is shown on the pattern but it is just way to 70's for me (the collar puts it out of the range of wearable for me) but I will post it you can see how it looks. The start of this jacket as well as a look at the Vogue pattern and the muslin are in my previous post here. 

Stay well and Happy Sewing,
Beth

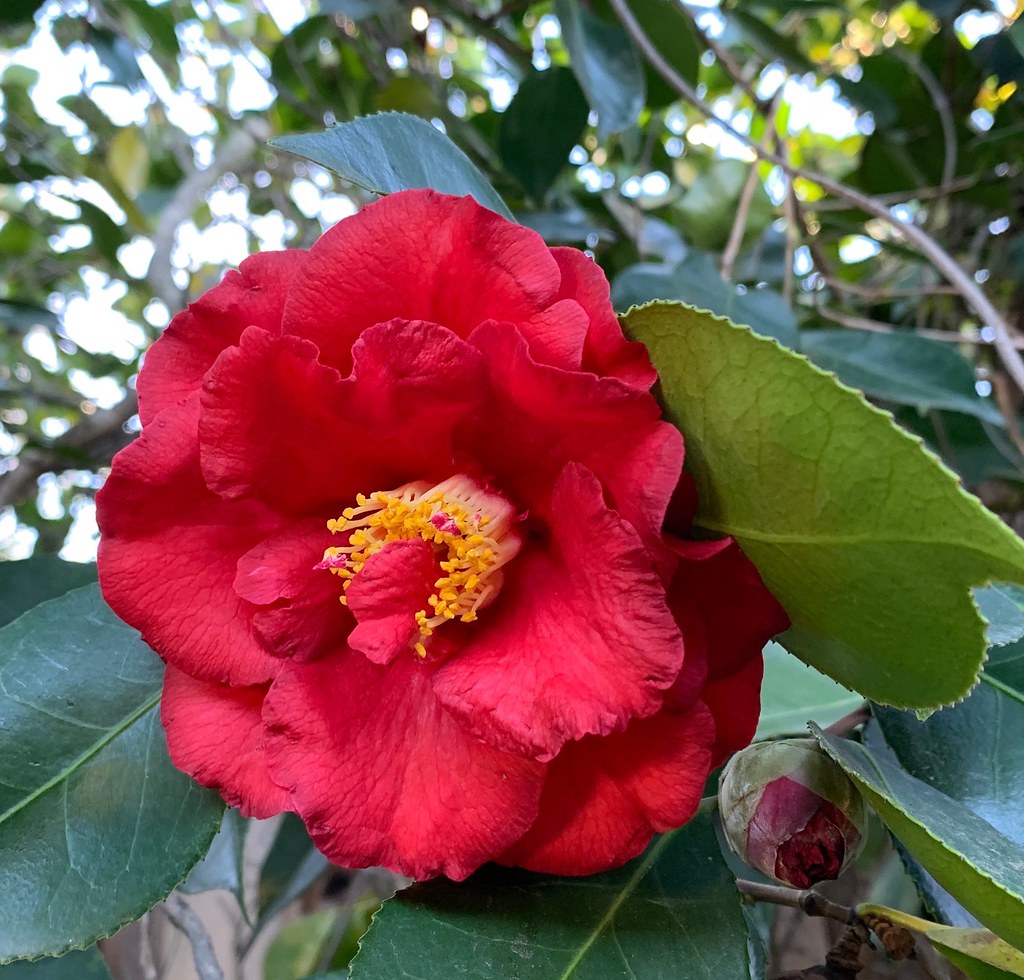
Today's garden photo, not a lot blooming right now although the roses are all trimmed and sprouting their new leaves and stems. There were tomato plants for sale at the nursery this week. I have a new neighbor who has moved here from Michigan and she was saying that this California garden thing is quite confusing - I can imagine. Apparently they have plenty of snow on the ground in her former neighborhood while we are out walking in shorts and dealing with our drip irrigation in anticipation of the dry year to come. Here's a camellia that always puts out so many of these huge red blooms, filled with nectar for the bees and hummingbirds. 

red camelia

Saturday, March 26, 2011

One year of blogging and a pattern giveaway

Time for a little sewing retrospection and a giveaway in honor of my first year of blogging and my 100th follower.  It has been a great year of sewing and of reading so many fantastic blogs.  Quite a contrast with the start of my sewing obsession.  Then I could talk sewing with people in classes or force my coworkers to examine a particularly successful welt pocket  - whether they wanted to or  not.  But today we can all ask a question or float an idea and be assured of great feedback from so many sewers worldwide.  
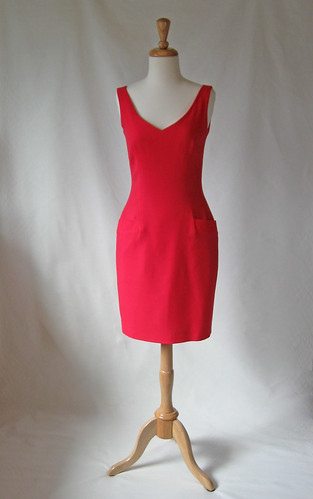
Yesterday I went through some boxes of old patterns and came across something that became one of my all time favorite dresses.  Sometimes (I wish it was always) I achieve the perfect combination of fabric choice, color, style, fit, everything that makes a dress perfect, and makes me perfectly happy.   
Red DK dress front

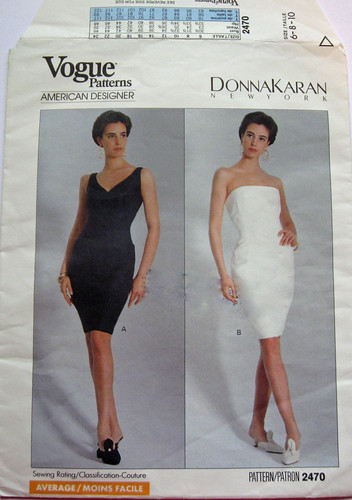
V2470 DK pattern red dr                                                                                                              The pattern is Vogue 2470 Donna Karan, View A, coral wool crepe.  Such a simple style, but such a great pattern.  The V-neck in front and back was just right, double vertical darts gave the waist shaping, the welt pocket adding a little interest.   I wore this dress forever, to every possible occasion, I didn't care if people had already seen it many times before.  Change the jewelry, change the shoes, change the jacket, I am not the Little Black Dress type - but coral red, yes.  Kind of sad that now it is shoved in the back of the closet, but things do drop in the rotation.  Truth be told I can fit in it, i.e. zip it up, but its a teeny bit tight.  Kind of a motivator - or at least to remake the pattern. I always wanted try view B. 


Back in the 90's I was just starting in the corporate world, and I made all my clothes for work, mostly suits and dresses, with Vogue designer patterns. I had an impression at the time that the Vogue patterns were better than others, and looking through the stash that probably was correct. I had a Badgley Mischka jacket pattern that I recall making 3 times, as well as an Anne Klein blouse where I made every version. Interesting to see the designers come and go over the years. It looks like Donna Karan has had consistent success over the years, as this dress is a new favorite and there are some brand new patterns that also look good.  I also found a Michael Kors for Style patterns, what happened to the Style pattern company?  
Here are some patterns from my archive, all Vogue Designer patterns from the 90's and 2000.


Giveaway  --->;  If you are interested in any of these 4 patterns listed below, leave a comment as to which one you would like and I will send it off to you.  First comment per pattern will receive it. 
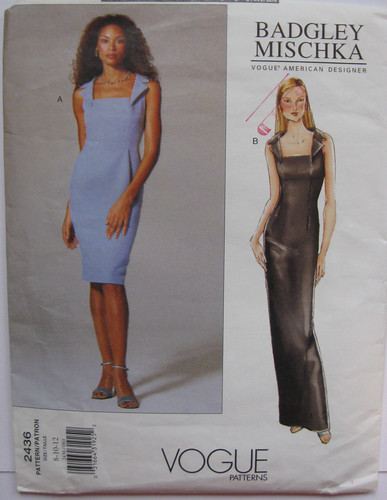
V2436 BadgleyMischka


Badgley Mischka Vogue 2436  

year 2000   Size 8-10-12
never used 
link to see back of pattern info


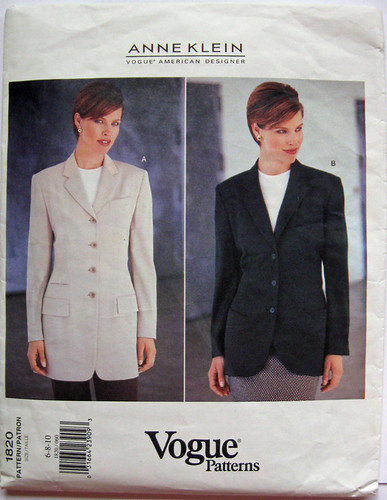
V1820 AnneKleinjacket


                                         Anne Klein Vogue 1820
                                        year 1996 size 6-8-10
                                        never used
                                        link to back of pattern info


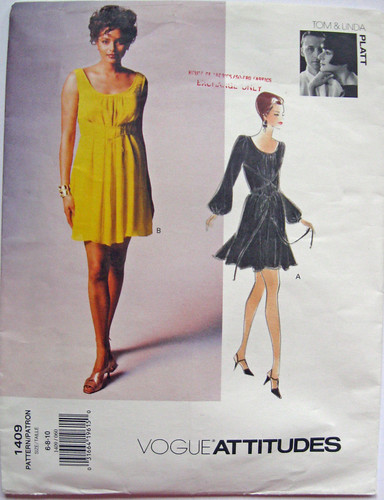
V1409 Yellow dress


Vogue 1409 Tom and Linda Platt

year 1994    size 6-8-10
I did cut this one out, on size 8-10 lines
Made it but actually tossed out, which is sad
since it took a lot of yardage.  I am not the 
flowy dress type, but I always like them on 
other people. 
link to back of pattern info


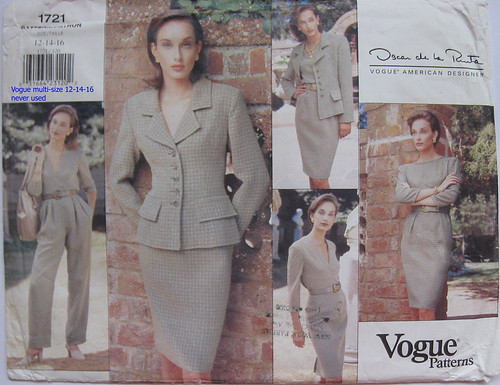
V1721 DeLaRenta pattern
                  Vogue 1721 Oscar de la Renta
                 Jacket, skirt, dress, blouse, pants
                 certainly got your money's worth on 
                 this pattern.
                 year 1996  size 12-14-16
                never used
                link to back of pattern info


If no one wants these patterns - I understand, as they are not quite vintage  - I hope not !
But who knows, maybe there will be a big 90's fashion craze soon and you will be ahead of the pack.


Thank you to everyone who reads this blog, your comments are appreciated.  
Happy Sewing,   Beth