Sunday, May 29, 2016

Random Threads # 21: currently sewing and what's on deck

Recently I did a post on Craftsy on the topic of "Unexpected placed to find sewing supplies". One suggestion was to put the word out to family and friends. You might the surprised at the stuff that will come your way. Everyone seems to know someone who is clearing house and wants things to go somewhere they will be appreciated - so let your social circle know you are interested. There might be some junk but someone will surprise you with a stack of fantastic fabrics or a pair of expensive sewing shears. Who knows what treasures might come your way?

Around here I find that I might just be a victim of my own success in this area. Recently I have had several friends drop off bags of fabric - things that have collected/bought/stashed that they just know they will never get to. Add this to some items purchased on a couple of shopping excursions to Stone Mountain Fabrics recently, and two fabrics that I have designed using the allowance provided to me by My Fabric Designs. Bottom line - SO MUCH FABRIC!

I have never been a fabric stasher. It's just not in my nature to purchase fabric for the "someday" sew. I have mostly been a "buy it - sew it - wear it"  type of maker. I don't like having my sewing dollars tied up in a stack of fabric, and I really dislike having to find place to store it. Most of the time I have been inspired by a new pattern and then gone on the hunt for the perfect fabric, then sewn it up to wear right away. Or have had the "I need something for this occasion" be it a party or travel.

But lately I have been accumulating a lot of fabric. Partly due to my habit of checking in at local garage sales. Positive reinforcement - I have found some genuinely fantastic things so then the idea is always in the back of my mind that I will discover the next treasure. (For newer readers you might enjoy reading this 2-part post, starting here, where I found a vintage dress pattern and fabric at a garage sale, along with lots of other goodies).

I had better get busy with sewing up some of this accumulation, right? Or develop the stash habit. That second one seems more likely!

So here is what is in progress around here.

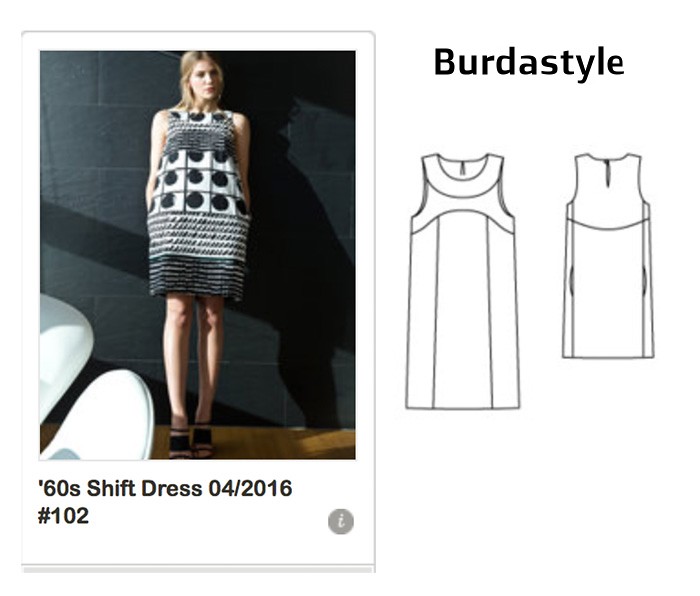
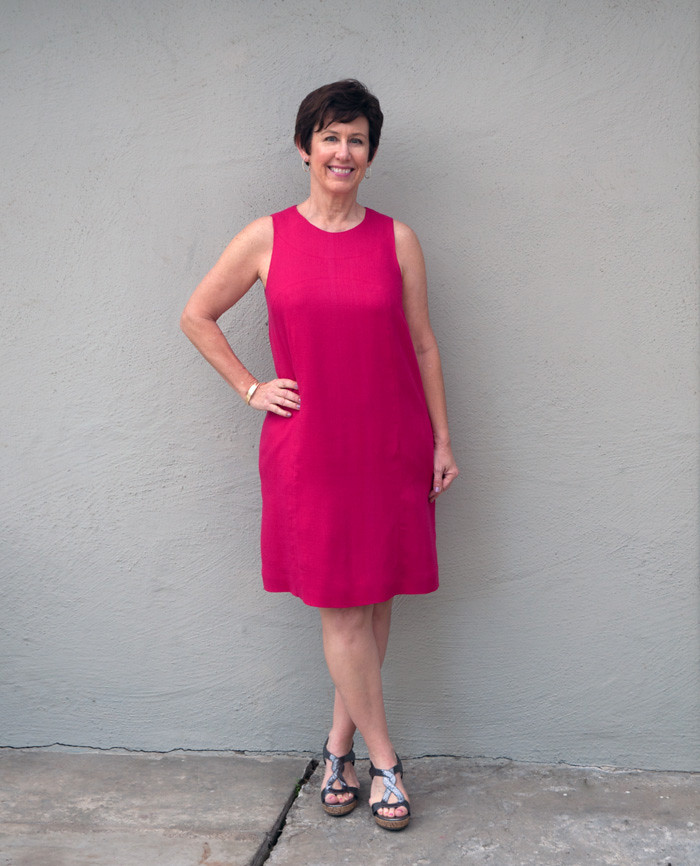
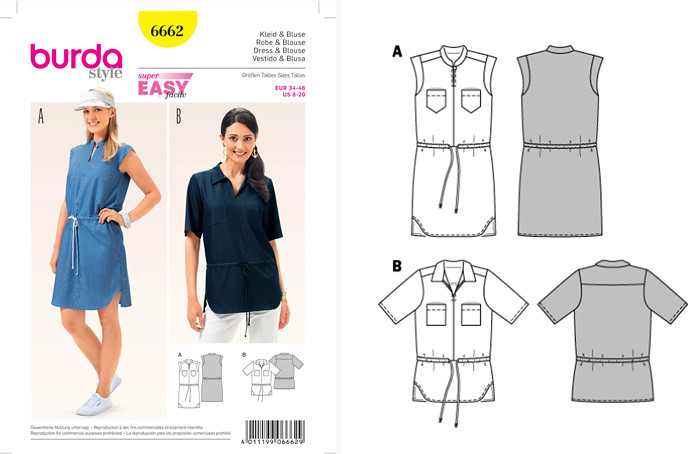
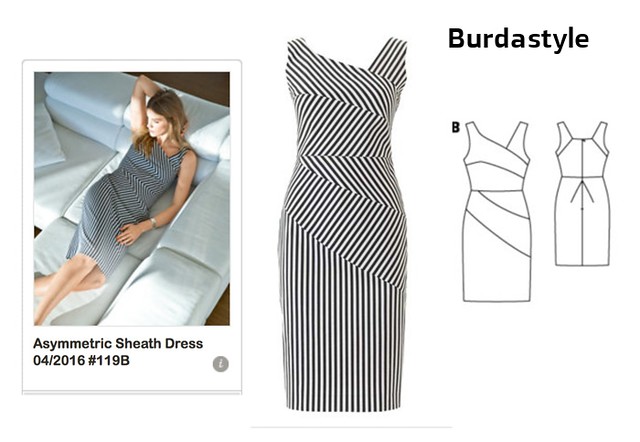
Do you know how difficult it is to find a vertically striped knit? You probably do if you are trying to make this Burda dress. The pattern specifies knit with crosswise stretch and vertical stripe. Which makes sense if you look at how the bottom of the skirt is on the fabric. Very similar to this dress although on that one the fabric started out as horizontal stripes and only the bottom is cut with the stripes going up and down.

Burdastyle asymetrical dressblack stripe

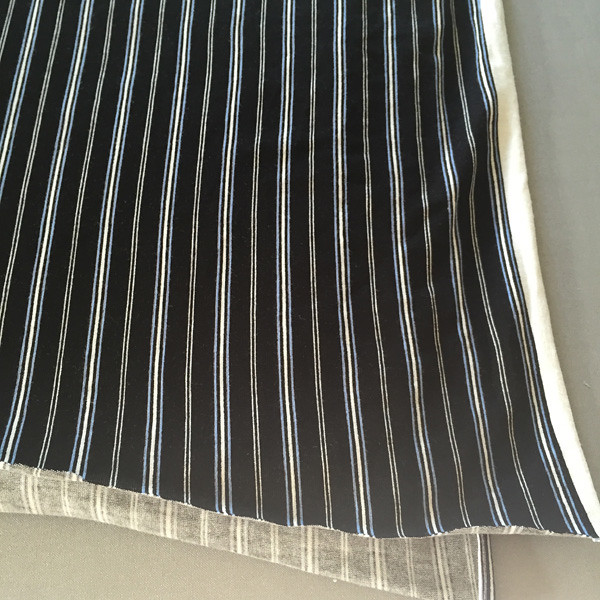
Happily I found this one at Stone Mountain, and while I don't wear black very often I have the feeling  if it comes out well it will get worn a lot. Basic black with a twist sounds very useful. Plus there is a light blue stripe in there, not easy to see but there to lighten it up a bit. Also this is an even stripe which I think is important for this dress. I hope to match the stripes perfectly - stay tuned :)

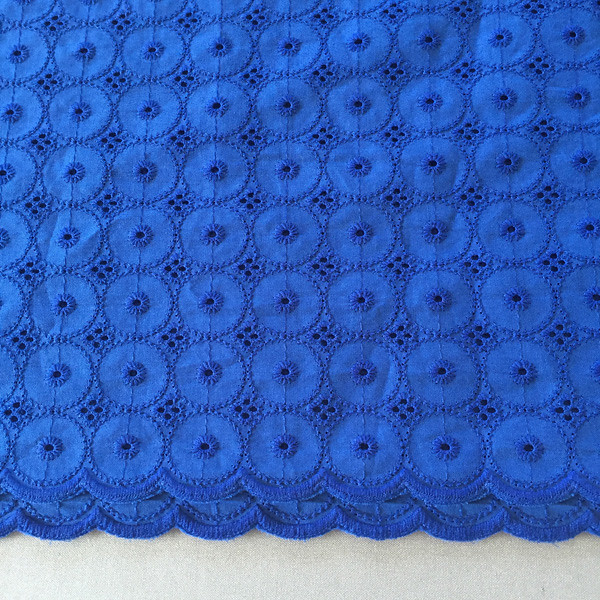
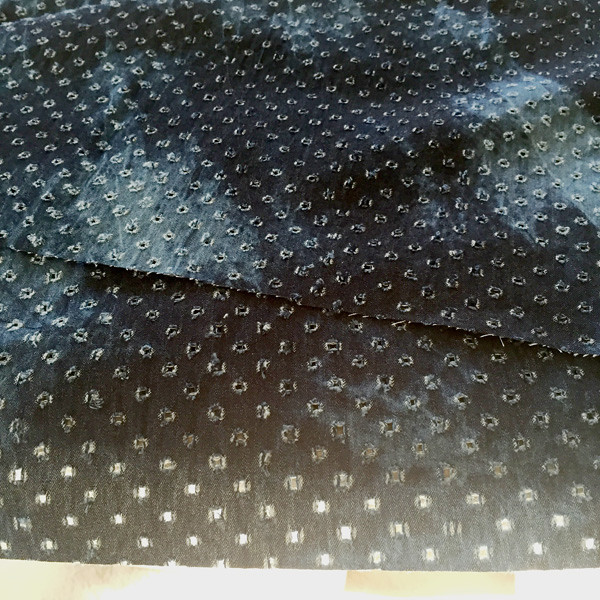
These next two were bought by my friend Alice - which I will be sewing up for her. The royal blue eyelet is a gorgeous color - so it will be some kind of tunic top with the selvedge creating the bottom hem. The one on the right is really unusual. It is a lightweight denim or chambray - slightly tie-dyed looking and has holes in it, not really an eyelet or lace but perforated. Really cool and this will probably be a skirt. I DO NOT need but am fighting the urge to go back and buy some for myself.

royal blue eyeletdenim eyelet

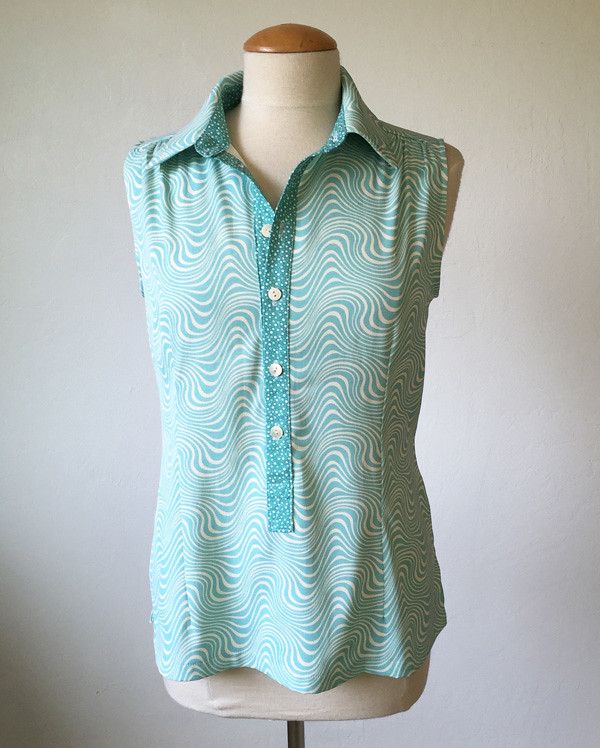
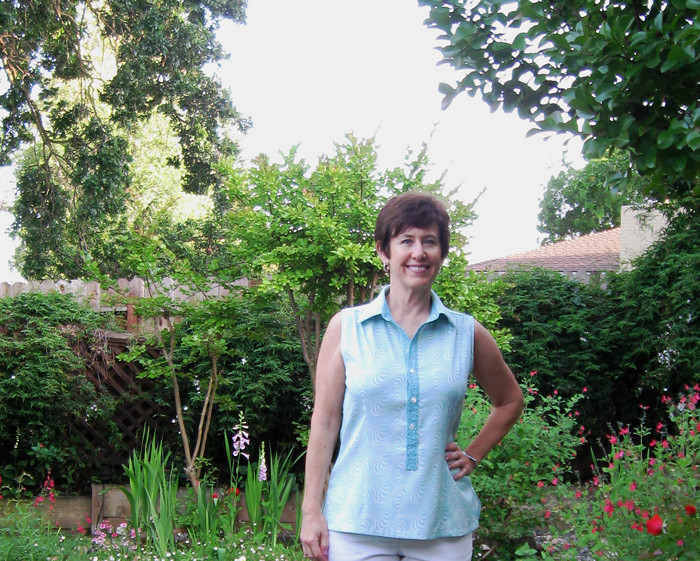
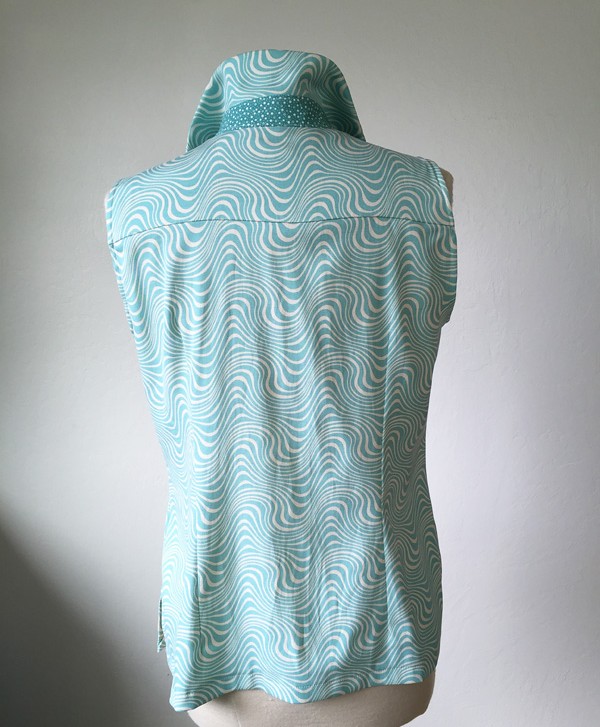
Turning to my self-designed fabrics, this one is a silk crepe de chine from My Fabric Designs. The quality and weight of the fabric is really nice. And once again I declare that I am not very artistic so it is a pattern I created in Photoshop. The aqua color is not exactly what I was thinking of  - I was hope for more of a turquoise (deeper) color but this is quite pretty and definitely a color I will wear. So for weeks I have been trying to figure out what pattern to use and the leading contender is this Vogue 1387, the cap sleeve version. Although I am thinking I can recreate the look from patterns I already have.

aqua squares silk

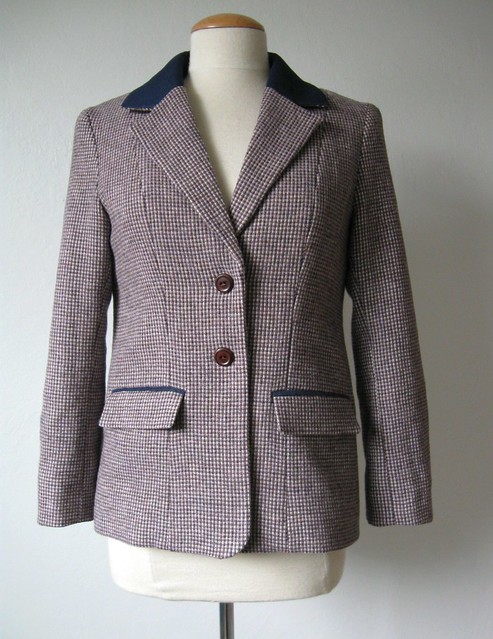
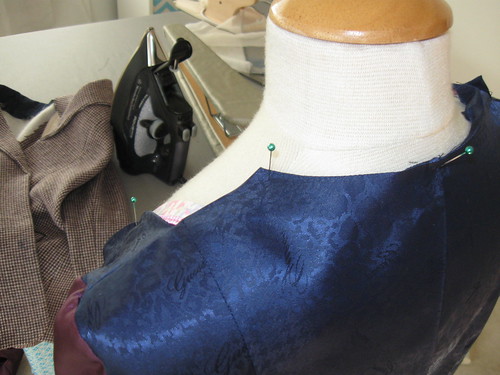
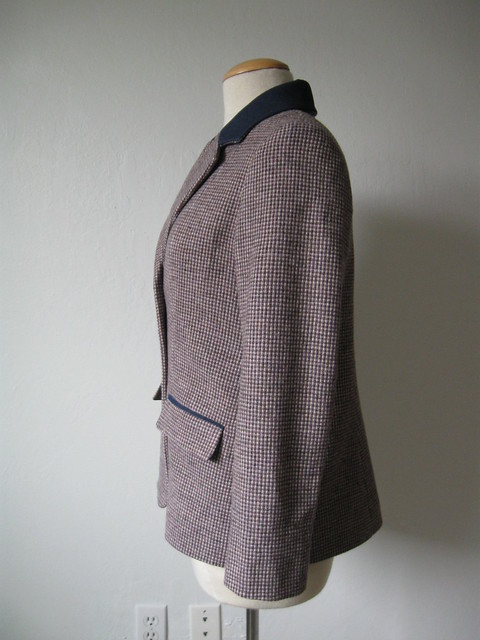
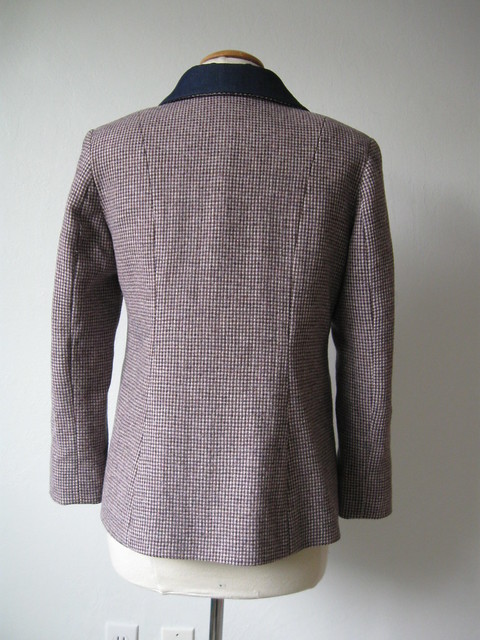
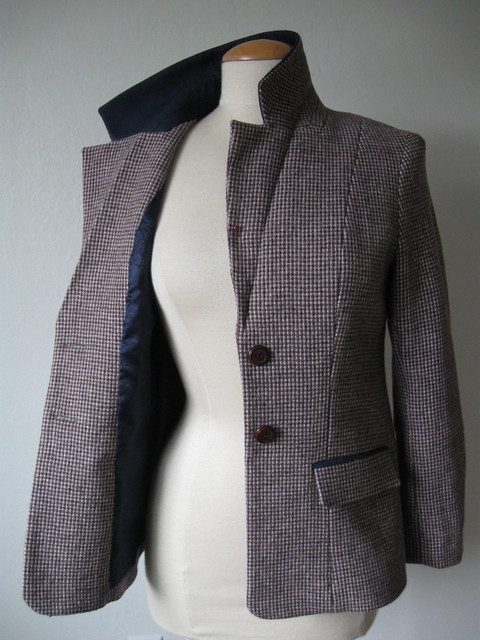
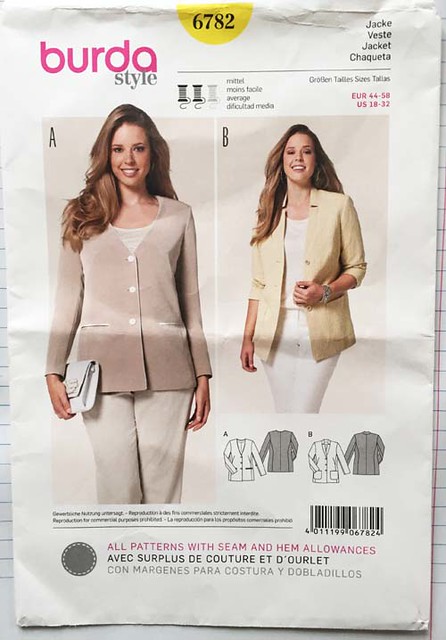
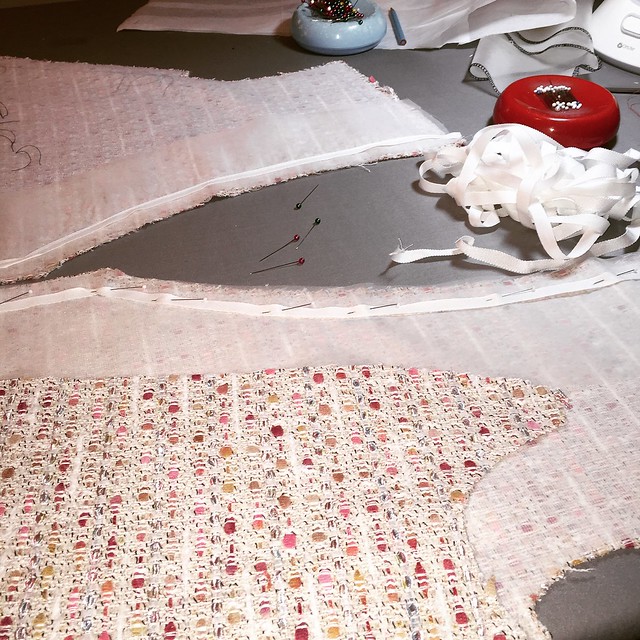
In other projects I am in the midst of making an outfit for my friend Heather using fabric she bought last year at Mood in New York. Hand sewing, basting, fitting, subtle stripe matching etc are making it a slow project but I think this week I will buckle down and finish it. It is a jacket and then a dress with the boucle for the skirt portion and wool knit for the bodice.
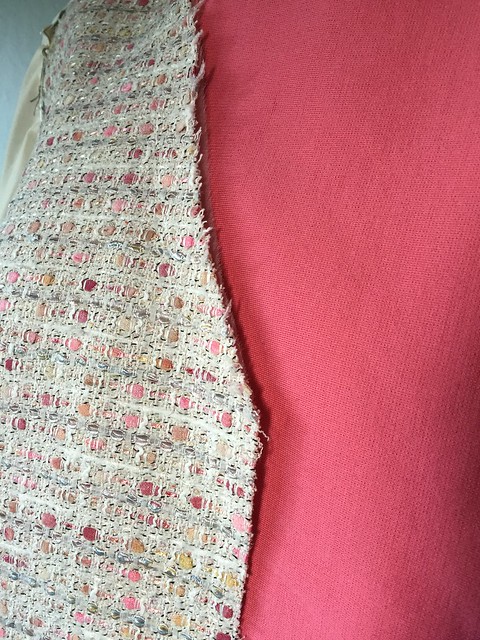
Here is the Burda pattern I'm using. I think these Burda plus coat and jacket patterns are really great. Of course every pattern needs fitting but the style lines are really nice on a lot of these. On the right is the boucle fabric from Mood and then the wool double-knit that I found at Stone Mountain - perfect color match for the salmon pink in the boucle.

Burda 6782 jacket pattern envBoucle with wool knit

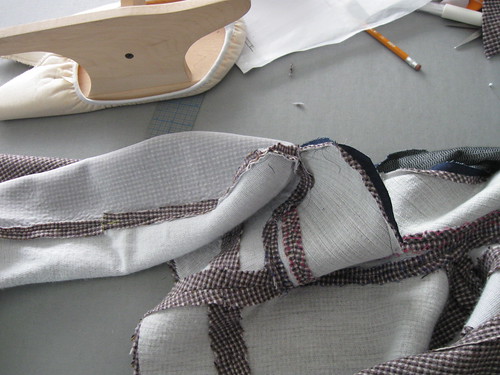
Gratuitous in process peek - and I will tell you that I unstitched the organza and then applied weft fusible to all the pattern pieces, then added the organza plus stay tape. The boucle fabric on its own was just to wimpy to make a jacket that would hold a good shape.

Starting boucle jacket

What else?

I bought a couple of PDF patterns from the Burda website on Wednesday and of course they are having a sale this weekend - while the savings would be a few dollars it bugs me nonetheless. I am seriously thinking about subscribing to Burda, although I looked at it in the store the other day and concluded that $ 5.99 per PDF is SO worth it not to have to trace from those confounding tracing sheets. I think it is probably like anything else, if you've been doing it for years then you have the knack for it but I don't and it looks headache inducing to me.

Blogging, yes or no? It must be going around like a chain letter or a summer cold but it seems like I have read so many posts recently about blogging. Is it dead? Who is quitting? taking a hiatus? switching to Instagram? Returning after a break? Kind of interesting and I think blogging is like anything else - including sewing or any other pastime. Always evolving, sometimes taking a back seat to life, or being put down for months or years at a time. Or superseded by some other interest. I really like (love) reading blogs so I selfishly hope that all my favorites keep on blogging forever. I am drawn to the written word, love to hear the stories behind the creating, or just some opinions on the latest patterns, styles etc. Instagram just doesn't do it for me - I do use it and see beautiful things there but often see a post and want more info that only a blog post can offer. But do what makes you happy! For me the writing has turned into almost the best part, I love writing the posts and hope you enjoy reading them.

Speaking of writing - I am thinking up topics for my Craftsy Sewing blog posts for July. I have covered sleeve adjustments, some wrap dress fitting tips and lots of other things over there but always on the hunt for a new idea. Any suggestions, please let me know!

Travel thoughts. Lately I have been captured by the idea of a trip to New York. It has been ages since I have been and it just seems to be calling me.  Anything interesting happening this summer? Also I have a Mood credit to spend which was the prize for the Color Block contest on Pattern Review, I keep looking at the website but nothing has grabbed me yet. So perhaps some in-person shopping.

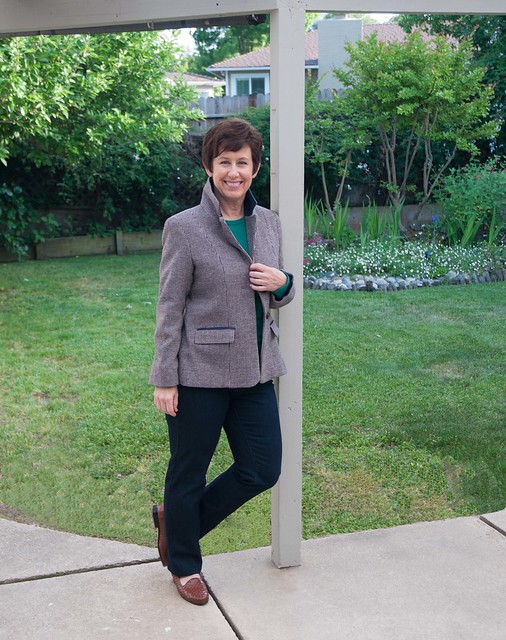
Thank you so much for all the nice comments on my previous post - the Saler Jacket from Pauline Alice patterns. I do plan to revisit that pattern as I want to try making a jacket like that in a knit.

It is Memorial Day weekend here in the US, and in my part of California the weather is cooperating. So nice. It might be time to jump in the swimming pool tomorrow - yippee, summer is here!

Happy weekend sewing, Beth

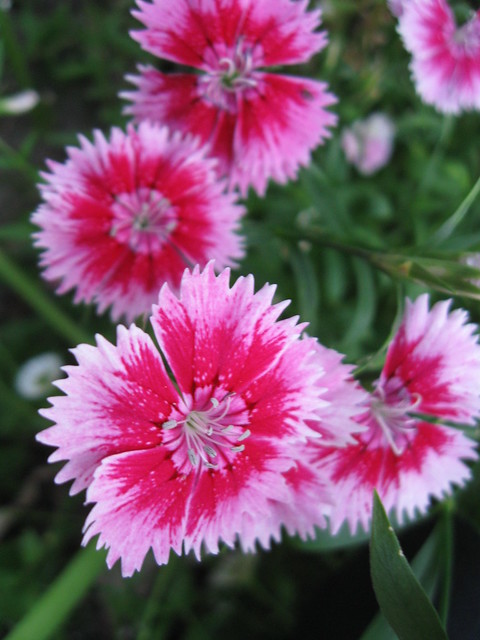
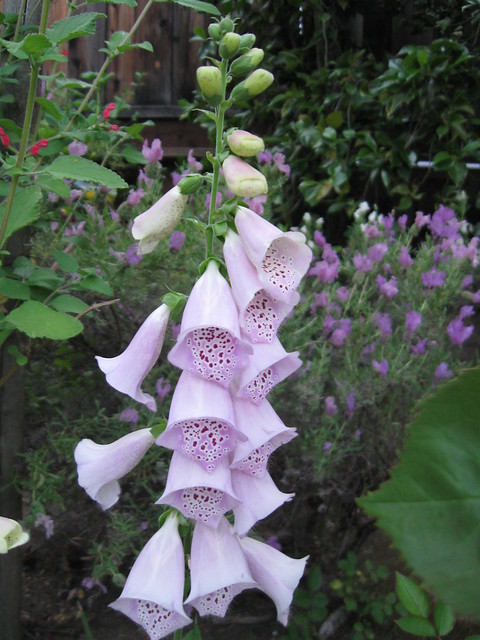
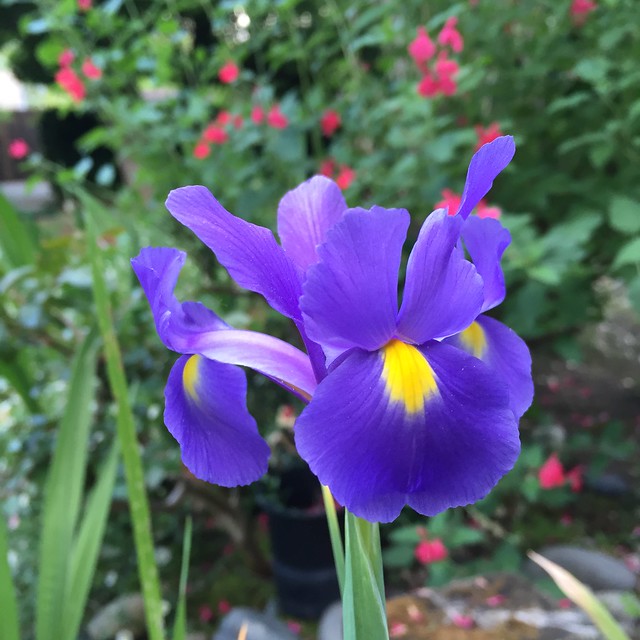
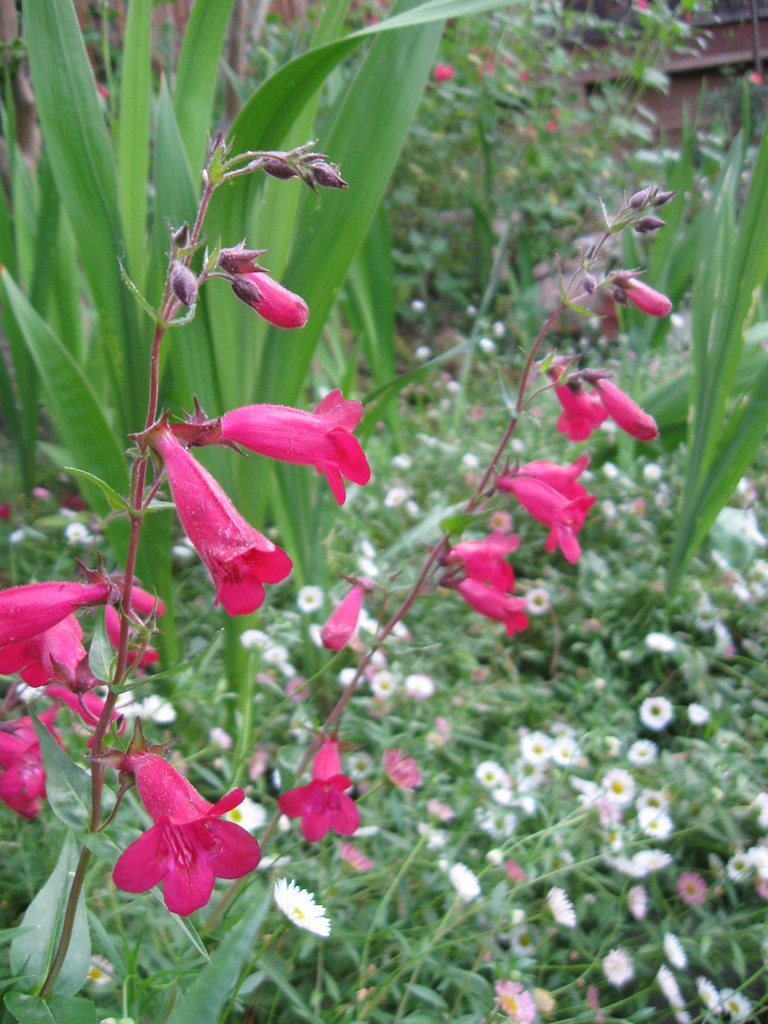
and today's garden photo - it warms my frugal little heart when a little plant keeps on blooming year after year. I love these little dianthus, also called pinks - both for the color and the name.


dianthus pinks

Monday, May 23, 2016

Saler jacket: new pattern from Pauline Alice patterns

Do you ever make something and then you just can't wait to wear it? Do you ever start with a piece of fabric that just seems "meh" and turns out to be a wardrobe workhorse? Who knew that the exact thing that my closet was lacking was a neutral tone jacket. So versatile - mixing with most any top I have. Well probably a lot of you knew that already but my disdain for most things neutral - be them beige, brown, gray or similar shades is well documented.

Lately I have been trying to branch out in my sewing, trying some colors I ordinarily skip over and testing out some new shapes. So far - so good with this experiment.

Also an experiment - pattern testing. By this time I have sewn a few Pauline Alice patterns and even tested her Quart coat pattern so I was glad to test this new one, her Saler jacket pattern.

I will give you the lapel casually flipped up view first, to slightly conceal my small bit of creativity with this not so exciting fabric. Although I am excited at how it turned out, and as mentioned in the first paragraph I have been wearing this so much already. It is looking a bit rumpled but that is due to my casual lean against the post here. Gosh,  how to models do it - look so relaxed and yet perfect? Nearly impossible for us mere mortals.

Saler jacket 1

OK here is a better view on the dress form. I am very happy with the proportions on this jacket in terms of the width of the neckline, fit in the shoulders and chest which are the important areas for a well fitting jacket. All the rest, such as the hip width etc. can be fitting based on using different cutting lines of a multi-size pattern and one's own measurements but the shoulders and neckline are really important. Also the width of the sleeve, and the slope of the shoulder. All those details are what I look for in a jacket pattern and so far I think Pauline has a good sensibility for the design in that area. Or perhaps they happen to fit me. Although I made the Quart coat for someone else and that had a good shape as well.


Saler jacket on form front4

My creativity and also a nod to the very traditional English tweed jacket was to add a little contrast to the upper collar and the pocket welt.

Saler pocket detail

I used her test pattern version so mine looks slightly different from her final result. I changed the location of the pockets, made them lower and I think she has done that also on her final version. I also moved them away from the center front. I might have changed the angle a bit but I was kind of improvising since they were in an odd place on the tester version.


Saler tweed jacket

For the contrast fabric I wanted to use some navy blue suede so I searched around for a scrap. But the only suedes I had were odd colors - like a orchid pink or jade green so that was not happening. I have a really old navy blue suede coat that I bought in Florence years ago and seriously thought about cutting that up but stopped myself. (Although that will probably happen one of these days). And then I had a light bulb moment - DENIM! As I have said before, everything is better with denim :)

Saler jacket inside collar and lining


This view shows that the collar is actually a two piece collar which is a nice traditional touch. However I think it is a bit too small - so it is more for looks since it doesn't land on the the roll line of the collar. Which is kind of too bad as I do like a two piece jacket collar if it is designed to assist in the roll of the upper collar.


saler pressing seams collar


This wool fabric plus the interfacing becomes slightly bulky although it did press with steam beautifully. Before I put the jacket together I trim and grade all the seams, edges and corners and then press all the seams open (flat) before then turning and pressing the actual collar and lapel shape. That wooden object at the top of the image is invaluable for all pressing. I think it is called a "June Tailor pressing board". If you search using that you will find it. I also use a clapper, and a sleeve board. And sometimes even a wooden spoon for certain things - although not this time.

On the inside - lots of interfacing. On the jacket body, lapel and under collar I used Pro-Weft Supreme Medium, and then on the upper collar and lapel I used a mix of more Pro-Weft (to give the denim which was very lightweight some heft) and then ProSheer Elegance on the lapel facing. All interfacing are from Fashion Sewing Supply.com  - and they are having a sale on right now: 15% off. Their interfacings are all I use these days, it is so convenient to order - plus they are wide, mostly 60" so I think a good value.

saler inside collars2

For the under collar and the seams on the upper collar, they are all stitched down with a catch stitch using silk thread. You can see the two pieces of the collar, and that horizontal seam.

I actually made a pre-test test version - if that is a thing - when I first received the pattern PDF from Pauline. That one I made from a piece of fabric that I probably bought for a buck thinking it would be useful for a jacket muslin. A poly-wool blend that would withstand who knows what - and it resulted in a very hideous jacket muslin that said "make me again in a better quality fabric". Although this fabric you see now is also, shall we say, "2nd-tier" in my stash. Also bought at a garage sale or some such for a few bucks. Also with muslin making in mind. But I am glad I gave it a try.

Perhaps you have noticed that I changed the lining so there is no back neck facing. I just can't stand to have a piece of wool on my back neckline - too itchy in that spot. Another thing I don't like is bagging the lining - while it is more "ready-to-wear" unless you know a specific pattern fits to perfection (including hem length and sleeve hem, shape at waist etc) then I much prefer to do some fit adjustments as I go along, and then just sew the lining in by hand. The back neck facing is just incorporated into the back lining.

Saler prepping lining1

Plus I really enjoy doing hand sewing. To me it is relaxing. Anyone else think so?

saler sewing in lining closeup

One other change is curve of the bottom front edge. If you see her pattern it is sort of a cutaway shape and I'm not crazy about that so I added some to that edge. I also lengthened the jacket by 1 inch. Which might seem counterintuitive as I am not tall but I just have very specific views on where a jacket should land on me. These are the small changes that make me happy to sew my own clothes so I don't have to live with some small detail that might not be to my liking. The part below the red line is what I added.

Saler front edge change

Since it is a pattern and I took these here are more views of the jacket. The sleeves on this were spot on. Also her instructions seem very good and she includes pattern pieces for everything including interfacing which is very helpful if you are new to jacket sewing.


Saler side view on form

Back view.  I forgot to mention that this pattern has shoulder princess seams, front and back which are really great for fitting and also look very nice. I addd some width at the hip and I split it up all around on the princess seams which is a good way to do it and keep the proportions.


Saler back view on form

One last parting shot - I am so happy with this denim collar. And pattern love - I might even make this in a knit, unlined or partially lined. Buttons from my button cookie tin - yay! and they are just right. A lucky dip into the button tin that day.

Saler jacket on form front3

In summary - another very nice jacket pattern from Pauline Alice. My version looks so different from her version in her pattern store - I think hers is in a cotton twill maybe? It just shows that a pattern can be whatever you make of it depending on fabric choice. I will do a review on Pattern Review soon with more details, and maybe on The Foldline. I signed up for that site and then have not been back much.

So this really is the last non-summer item! Onward to a silk crepe de chine print and some eyelet. (broderie anglaise for my AU and NZ friends).

Have a great week - I will be hoping on Thursday that I will not be in Jury Service!  EEEK! ok it is our civic duty but......so many other things I would rather be doing, right?

Happy Sewing, Beth

today's garden photo - these foxgloves. This is maybe the 3rd or 4th year since I discovered these would grow here. This year's crop are a bit wimpy,  I think you have to get them in the ground at just the right moment but in any case they are so pretty. And give that cottage garden look which is very hard to achieve here. The salvia and lavender in the background do so much better in our dry climate.

foxglove

Wednesday, May 18, 2016

Shirt placket experiment - the wearable test version

For someone who doesn't really wear button up shirts all that regularly I seem to sew a lot of them! Actually sewing shirts is very rewarding. Maybe it is all that precision, and the fact that a shirt is a lot of components so it lends itself to sewing when time permits. Collar and stand in one session, sewing the sleeves and cuffs at another time when I have a spare minute, and before you know it is all done.

So I got the idea to try and make the popover version which seems everywhere now. (I have seen in ready-to-wear a lot lately) Do you get the Land's End catalog? I wouldn't say they are on the cutting edge of style but they do have some nice basics and since I don't sew everything I order once in a while from them. So I saw the popover shirt in their catalog. I have strangely good luck with some of their shoes, and I know a lot of people who swear by their swimsuits. I think I have one two-piece swimsuit but since I can't stand a one-piece swimsuit their selection is lacking for me.

Anyway -  the popover is just like a button front shirt except the button band does not continue all the way down so the shirt has to go over your head. No particular need, I just thought it was kind of cute. And after my success with the hidden buttonhole placket this one was next on my to-do list.

Plus I will be doing a how-to post which will be on the Craftsy blog, so I will link when that posts over there.

aquatop front view

This is the weirdest fabric ever! Or maybe not.... I got it at a Bay Area Sewists group meet up where we swapped fabric. Not sure why I took it, it was about 1.3 yards and it has a significant stretch although it is not a knit. And that print - kind of mesmerizing.  (wait a few weeks - I am working on another item with an even weirder print).  And also the fabric is very lightweight, almost floaty. On the negative side it has a strange feel, maybe because of all the lycra content? But perfect for a test version of a top. I wanted to do a contrast placket - mostly so I could see what I was doing while working out the measurements but also thought it would look good. So I rummaged in my fabric stash and scraps and almost gave up until I found this scrap of quilting cotton which I had used a while ago for some other post. Bingo! on the color match.

The pattern is the same one I have used for all my button front shirts, Simplicity 2339 with various modifications. The bust darts are rotated to shoulder gathers which I really like.

aquatop3 closeup

Next version I will shorten the placket about 6-7 inches. It is not necessary to have it be as long as I made it - I was just playing around with the concept on this one.

aquatop back view

Back view - no changes to the shirt pattern here.
Although for a sleeveless version I moved the top of the armhole in considerably. Something I do after I sew it up, so I can see how it looks on me and get the edge right where I want it on my shoulder. So I try it on, mark with pins where I want the edge to be on either side, then measure and take the average. Note my thread trace, I am a big thread marker - it is just so much easier than putting in a pin which will probably fall out before I get to that part. So I just run a little thread at the spot and then I can put the project down and come back to it without any problems. The thread is marking the final edge, so I removed some portion but left enough of a seam allowance. And tapered to nothing at about 4 inches down.

aquatop shoulder width change

Placket inside - I am really happy with how it turned out and perhaps I will use this on a tunic top as well. The most difficult part of this redesign is finding the center front of the shirt front when there is a sewn on button band - but completely do-able.

aquatop inside placket

For the inside yoke I use some white cotton batiste as I thought the pattern might show through. The armholes have bias binding, which I rarely do but it seems just right on this type of shirt. And some side slits at the hem.

aquatop side view

So that's the latest on my wearable muslin popover top. Originally I took this early morning photo but it was too bright so you can't really see the top - but as the I was standing there I was being buzzed by hummingbirds. Photobombed by a hummingbird :) One evening the sprinklers were on around dusk (back when we watered with abandon!) and I watched a hummingbird fly in place for what seemed like 5 minutes, bobbing up and down in the air above the falling water, taking a shower. They are so fascinating. I keep trying to find a nest but I think they are well hidden.

aqua top with bird

Up next - I am still working in bits and pieces on an outfit for my friend Heather using her Mood fabric boucle - mixed with some wool double knit for a hopefully versatile business and more outfit. Plus I have been given a ton of fabrics by friends who just don't want them in their house anymore - yes please to fabric (after all that was the inspiration for my tri-color coat)

And making a summer shift dress to use as an example dress this weekend when I teach a class at Sips N Sews sewing studio in San Francisco. If you are interested you can still sign up.

Happy Sewing, Beth

Today's garden photo is this blue iris, I kind of forgot that I even planted these bulbs and had blooms from maybe half of the bag - both yellow and blue. What a color!

April flowers

Thursday, May 5, 2016

Random Threads # 20: thoughts on practice and a few questions answered

The end of winter always gives my sewing a boost. Not that I need one really, as long as there is a new coat or jacket pattern that I don't need but seem to sew up anyway. Speaking of which - I did a pattern test for my favorite indie pattern designer (alluded to recently) and I can't wait for her release. Since completed I have been wearing the item all the time. And learned a lesson about neutrals. But that can wait for a later post.

Back to spring sewing - I made a test version of a Burda pattern that grabbed my attention recently. As I mentioned in this post, I am trying some new-to-me silhouettes. Here is the Burda pattern, and I think the success is almost entirely due to how they placed the print in the fabric.

Burda mod style dress
So I gave it a go using some fabric that I had in the stash - which I recall buying at a thrift store. It is not the most sturdy of weave - tends to get all unravely as soon as you handle it. So I figured, oh it is a test version, just to see fit and if I like the shape. Didn't wash the fabric. Which was a slight mistake as it had a musty smell which I didn't notice when sewing but later did as it sat on my dress form. Weird! Anyway - it has been airing out in the garage for a week and the smell is gone. Should have washed it - but I thought it was just going to be for testing, and now I like it.

Pink Burda dress on me1

Unfortunately in a solid color you can't see the seaming at all, and this is one of those dresses that looks so much better in real life, moving around, than it does when standing still for a photo. Looking at that image I think it looks like a sack - but my friends said "ooo cute dress" when they saw it. So I am going to go with the live and in person feedback and ignore the photo evidence! One thing I loved about this is the neckline / armholes / upper back fit perfectly using size 38. Not a change done. Yippee! the proportions are just perfect on me. So I will definitely make it again in a print. I think in a washed silk it would be so perfect. Perhaps needs a bit of jewelry, a nice long necklace. (despite the fact that I am not much of a jewelry wearer - something about having extra things on me bugs - particularly necklaces).

pink dress 3 views

Last week I bought some silk at Stone Mountain which is a panel with a stripe effect similar to the Burda example - so perhaps I will try that. $ 11 for one yard 55" wide panel which was upstairs in their half-off section. Lots of treasures there :)

Are you a podcast junkie?  I would not be able to get through a gym workout without them but I do find them so great to listen to at other times as well. This week I have been listening to the Freakonomics podcast episodes about practice, persistence and grit. The ability to stick with things to improve your skills. How does this apply to sewing? Well the obvious point that practice, doing things until you get the hang of it, be it buttonholes, or zippers. or inserting sleeves or matching plaids. All things where you obviously become more adept with practice. But I suggest applying training methods to your sewing, like you would a sport. In tennis you do drills - how about buttonhole drills. I never go straight to making the buttonholes on a garment - whether bound ones or machine made. I always make a few practice ones in scraps - with the same interfacing as the garment, same amount of layers etc. It's a dry run for the real thing, and it is amazing how many times what I thought I would do is not how I actually did it. Or just found out little things about how the fabric behaves, or the color of thread that is best. Do tests with everything - audition the interfacing for a garment on scraps, test all the possible stitch lengths and threads for topstitching, baste the sleeves from your muslin into the actual garment just to see how they fit.  All these "drills" will pay off in the finished item.

Recent questions:  I am kind of remiss in answering questions that are left in the comments so here are a few answers.
Julie asked how to keep the V-neckline corners from flipping out on this dress and I know exactly what she means. That does tend to happen. Even more so if the neckline is too big, so first make sure it is fitted to your upper chest. Then I suggest a good interfacing, even some extra silk organza in that area to keep it flat. And under stitching really helps. You want to make sure the facing is slightly pulling the outer fabric towards your body.
Nancy asked a question about the same dress - how to keep the bra straps hidden with the cut in armholes. Since I have a lot of things with this shape, the obvious answer is a racer-back bra but I don't tend to like those. I have a little clear stretch plastic thingie which hooks the straps together, but it is kind of lumpy. So I made my own version, just some soft elastic, and a couple of snaps. The beauty of this is that you can make a bunch, not be concerned if you lose it - toss a couple in your travel bag for summer trips and also make in various colors and stretchiness for various bras or tops.
Imb09 asked about the pink and white dot fabric I made using MyFabricDesigns, and whether it was available for purchase. I haven't uploaded any of my designs as purchasable items, maybe I will do that. I have two more on the way to me, including a silk crepe de chine so I can't wait to see that in person.
Sewmanju asked me about interfacing the button band on the denim shirtdress. The pattern doesn't say to interface that area which is a bit of a worry with buttonholes. However the fabric is folded back onto itself, so you are actually creating a buttonhole on three layers of the fabric. In this situation the actual fabric is acting as a layer of interfacing. I think if you add interfacing then it becomes too stiff. I notice this on a few shirts where you fold back twice to create the button band. In a sewn-on button band there are only two layers of fabric - thus you add the 3rd layer which is interfacing.

Sewing Lessons - I have updated my sewing instruction website (Sunnygalstudio.com) with info on remote sessions. So if you are across the globe and not able to be here in California but want to get some help with a technique, get pattern and fabric advice or get some fit feedback  - we can talk via Skype or FaceTime.

Craftsy posts - Here are a couple of my latest Craftsy posts,  the jeans alteration post was a win as I found those white jeans in just my size, except for that waist fit issue, at a thrift store for $ 5 with the Macy's tags still on! (otherwise I don't think I would bought used white jeans) Here is the jeans alteration post and here is the polished sewing post.

Craftsy posts May 2016

I have a feeling that the jeans alteration post is going to be a popular one. They recently had a post with their most shared sewing posts and I think my Craftsy post on sewing princess seams was at the top with over 19,000 shares. I'll have to ponder what I did right in that one to come up with more ideas for the future.

I am in the midst of a very involved project for my friend Heather, making her a boucle jacket and then also a dress with both the boucle and a wool double knit. This is a slow and steady project, as it has been for all her fabrics she bought at Mood in NY last summer. Speaking of Mood, I have a $ 100 credit there which was my prize for winning the Color-Block contest on Pattern Review a few months ago. I keep going to the website but so far I can't figure out what I want to buy. I need to go in person, right?

In other purchase news - I do not need to buy any more patterns but am getting so close to buying this  Burda 04/2016 # 119B dress if only I can find the right striped fabric. And today I happened to see this Burda pattern and now I want it also. Kind of basic, the shirt sleeve proportions are all wrong, but the pattern has potential and I love that drawstring waist. Hmmm, I think I can just create it on my own. And save $ 8. On the to-do list that goes.


Burda 6662 pattern env

Speaking of the Simplicity website - still horrendous. What a mess, searchablility is non-existent. I used to look at it all the time to compare/choose patterns. Weird what some companies will do.

OK - that's all for today. Saturday I will be teaching at Sips N Sews in San Francisco, a 3-hour workshop on home dec pillows. And then the following Saturday 5/14 is the UFO - Sew Lab. Bring in your unfinished or problem projects for some help to get them completed. Then Sunday 5/22 is the all day workshop to make a Summer Dress. Hope to see some of you there on any of these days.

Happy Sewing, Beth

Today's garden picture - this is a penstemon bought 2 years ago at the local junior college horticultural department plant sale. The colors are so nice and it draws in the hummingbirds.

penstemon