Sunday, July 25, 2021

Helena Wrap Dress from Just Patterns

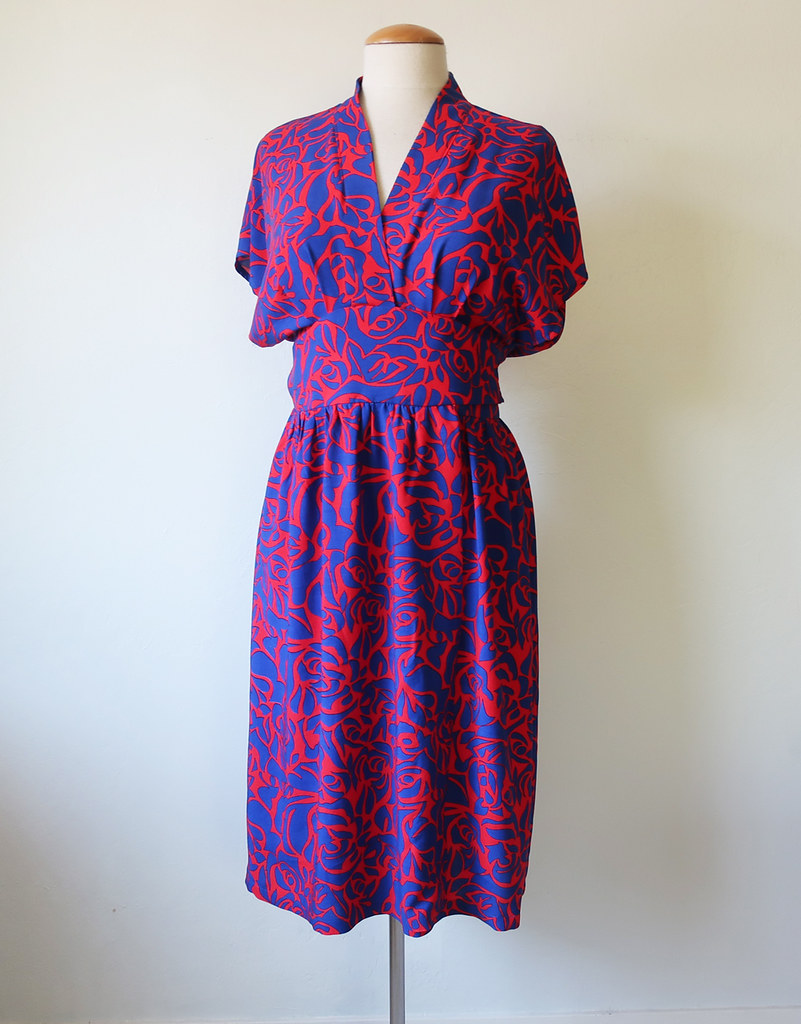
When my friend Delphine of Just-Patterns asked me if I would like to sew her latest patterns I said yes right away. It's a bit outside of my usual style but this past year that has been my sewing theme, to try new silhouettes and see if I like them. This dress came together so easily and I highly recommend. It's the Helena Wrap Dress from Just Patterns

Helena dress3

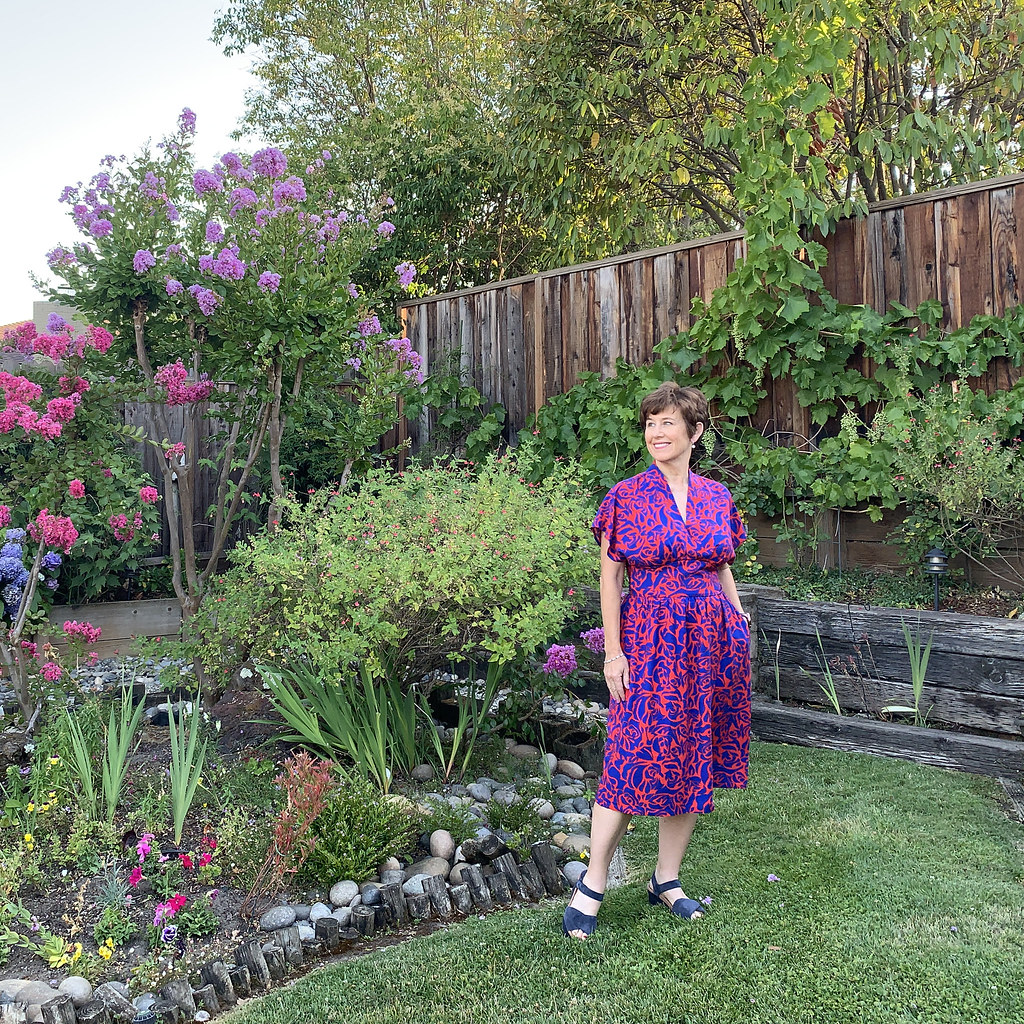
I also think this is a case where the fabric choice was just right. Which was a bit of luck, as I had to look around in my stash to find a piece with enough yardage. This is rayon challis I ordered a few months ago from Fashion Fabrics Club and when it arrived I thought it was way too bright even for me. But I decided to give it a try for this and it worked out well. 

Here's the pattern drawing from the Just-Patterns website. 
Helena Tech drawing
Note that the recommended fabrics are mid-weight fabrics with some body such as linen, cotton poplin etc. I'm trying not to buy any fabric these days and have acquired so much yardage in the past year that I determined to use something from my stash. Looking at the design I think it would work for a lot of woven fabrics not mentions, such as silk crepe de chine, or even wool crepe. 


Helena front

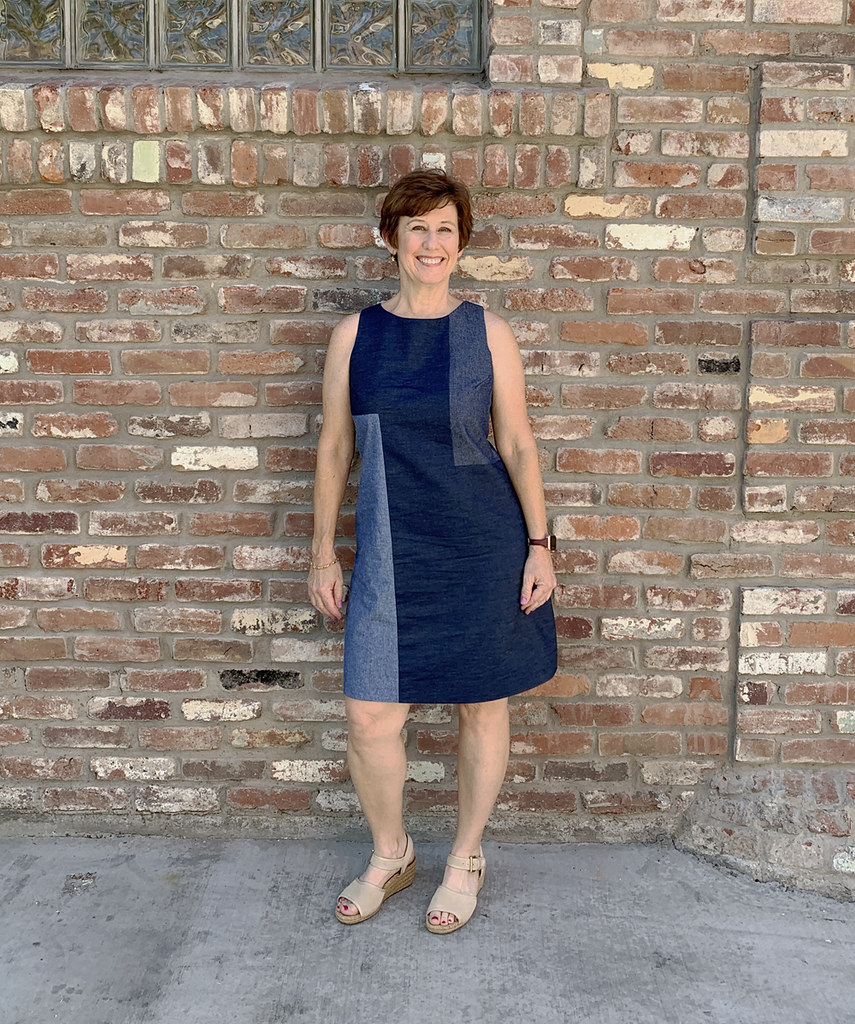
I sewed size 40 as it for bust 36" and waist 28.5"  which is right around my measurements however I did add a bit at the waist which I will show below. The fabric requirement for that size is 3 yards of 60" fabric. That is a quantity that I almost never buy! Since I am shorter than most patterns specification (5'3") I can always shorten skirts and then play around with the cutting layout to squeeze the pattern pieces on. 

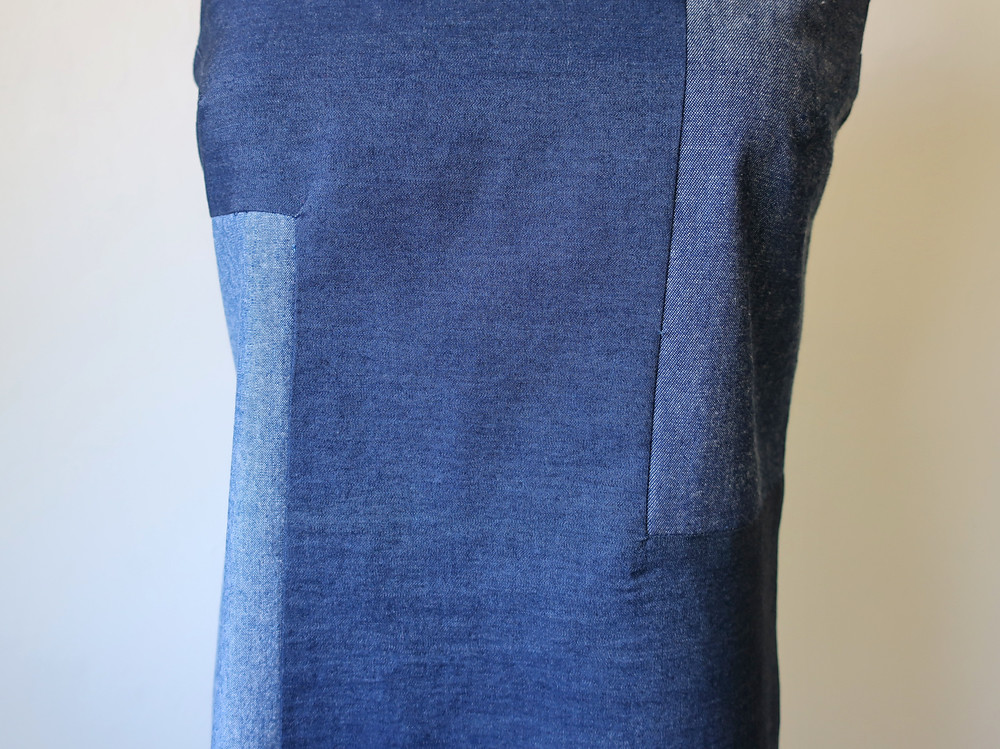
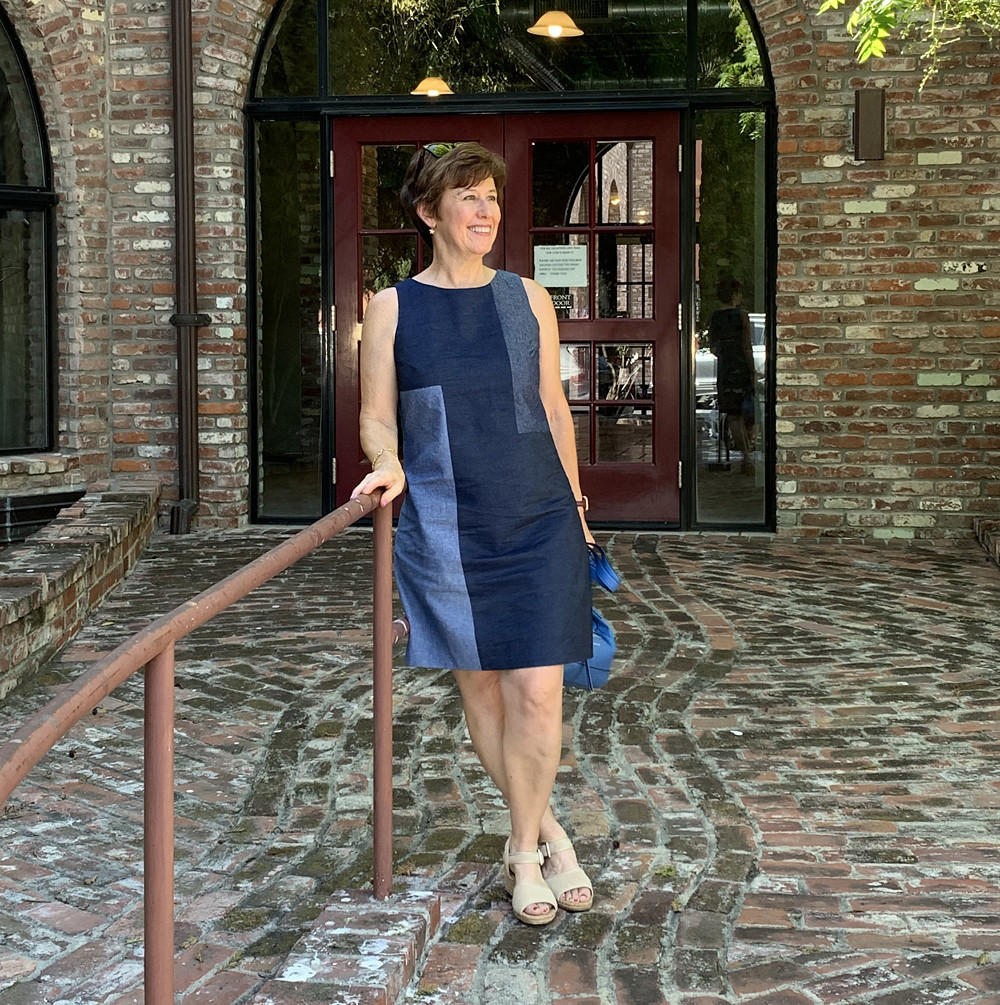
My fabric was about 2 1/3 yards. I removed 6" from the skirt length before I started cutting out and that helped a lot. I cut the pockets in half and only used the printed fabric for the back half of the pocket, and used a lining fabric for the front half, then seamed it where the fold would be. This is a common change I make on pockets anyway.  The reason I put the fashion fabric on the back is that this is the side that can possibly peek out when the garment is sewn. 

Helena inside fr and back

I also used a red cotton for the inside waistbands, so that also saved some fabric. Since this rayon is a bit limp as compared to some of the recommended fabrics, I put a fairly stiff interfacing on both the outer and inner waistband pieces which worked well. 

Helena dress4

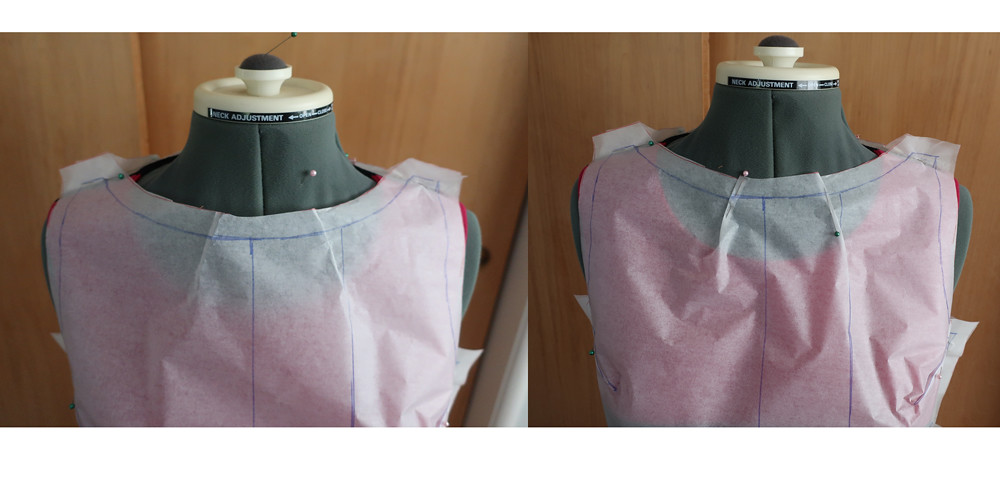
For other fit adjustments, I added some width at the waistband, as the finished garment measurement was just around my waist number and I wanted a bit of extra ease at that area. 

Helena wrap dress front pieces

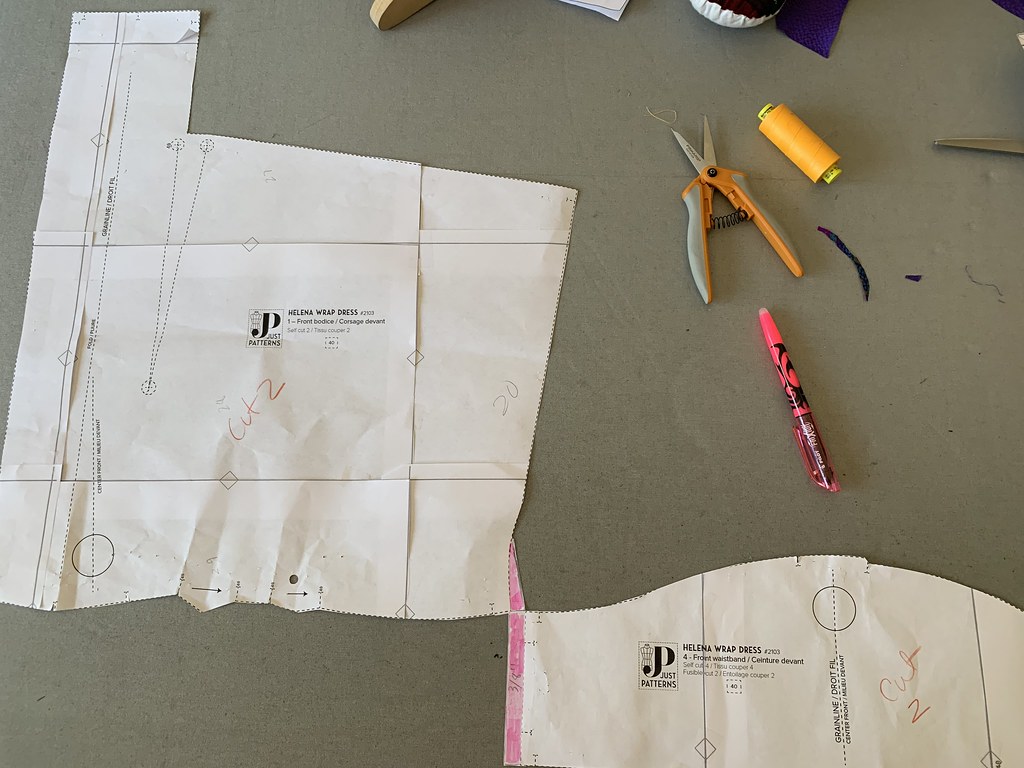
The amount I added is shown in pink. For the bodice I just tapered it away as it neared the sleeve. Now that the dress is finished I could probably omitted that although the extra in the waist circumference means I can wrap the dress overlapping nicely in the front, probably a bit more than the pattern is designed for. I did omit the sleeve bands, I basted them on but they made the proportions look odd to me, I like more arm showing so you can easily skip then and just put a narrow hem on the sleeves, or a facing if you want them to have more structure. Now that I see the photos and also on the advice of some sewing friends I'm going to take it in under the arm, to make the dress a bit less full at that point and also make the armhole opening smaller, perhaps just by an inch. All these things are not exactly fit adjustments, but more changes due to proportion and making a garment just right for my height and frame shape. 

The instructions on this pattern are very clear and the pattern pieces are well marked. I did read the instructions just to make sure I was sewing it correctly and then I did my own thing - as I usually do :)
The only quibble I have with this pattern is that it has 3/8" seam allowances which I suppose are more professional (?) but I can never get used to them and also they don't allow for any small fit adjustments as you go. In fact now that I like the Tatjana trouser pattern so much I'm going to go back and adjust my tracing to have 5/8" seam allowances. That way I can sew it on auto-pilot, I'm just a robot when it comes to sewing and have to constantly remind myself about 3/8". 


Helena front close up


Helena dress 5 backJPG

I've seen a few versions of this Helena dress made as a top and that is a clever idea, also as a 2-piece outfit which makes it very versatile. 

Up next, I'm sewing a pattern repeat however I think my fabric choice won't turn out as well as my first version (it happens :)  and then it will be time to make a birthday dress. Which I'm not sure about as I haven't worn the one I made last year.  Although it's supposed to be a hot spell this upcoming week and I have a few things on my calendar so perhaps I will reach for that one. 


702FFB1B-9FA1-4797-97B1-0F3E4D027039_1_201_a


Big news - in person classes are back on the calendar at Hello Stitch Studio in Berkeley. So happy! Right now I have a beginner class starting in mid-September but we are working on adding a few more so stay tuned. And due to requests from students, I will continue doing live/online classes in the fall as well. So it should be a busy time and I'm really looking forward to sewing with people again. 

Happy Summer Sewing, 
Beth

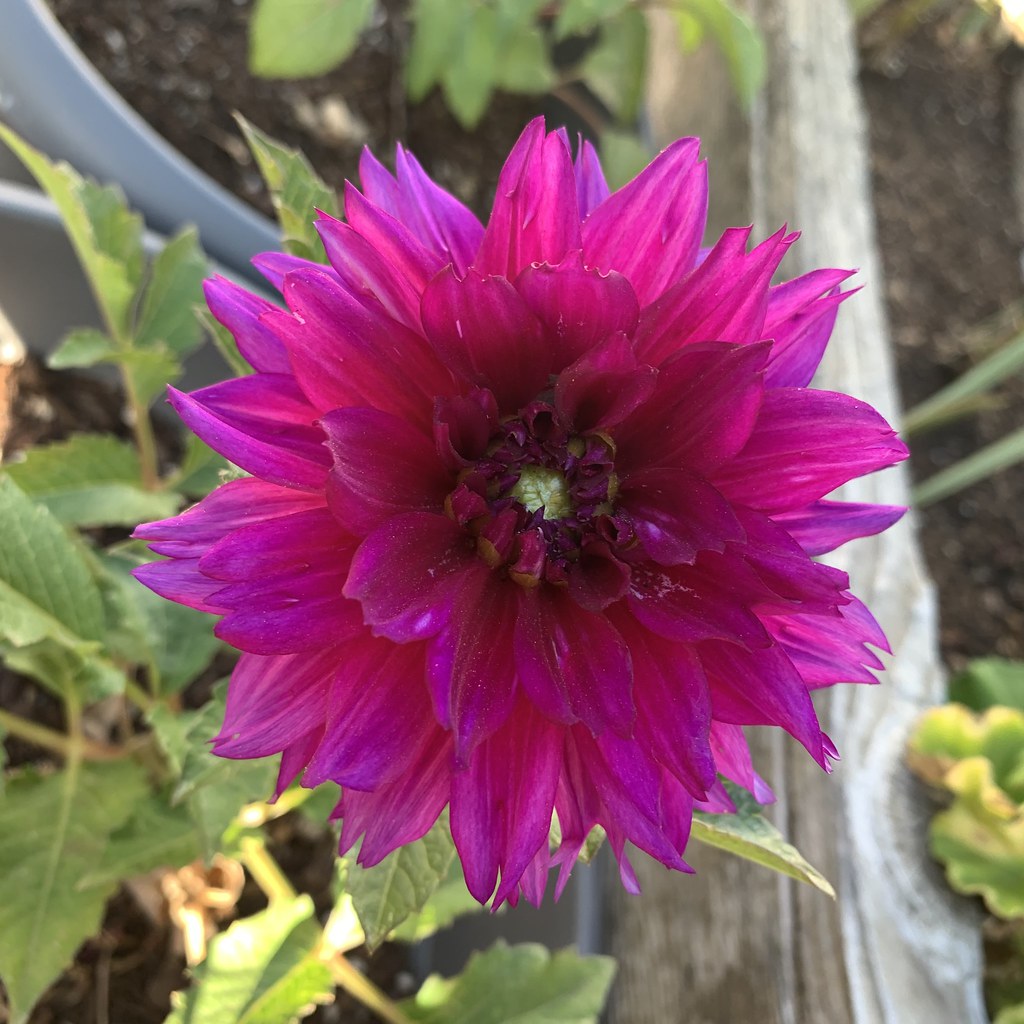
Today's garden photo needs to be something as vibrant as that dress, so it's this dahlia. My dahlias have not been doing very well this year, and you can see from the photos above that the drought has really taken a toll with everything very dry. I have drip irrigation in the areas where there are roses, hydrangeas, gardenias etc. and then sprinklers for the lawn which is mostly a lost cause. I think in the fall a conversion of the lawns to drought tolerant plantings is the only way to go. But that's a project to contemplate on a rainy day (which I hope we have come October!!) as the ground is like cement now and impossible to do any yard work other than water, mulch and hope for rain. 


Dahlia 2021


Monday, July 12, 2021

Chambray Color Block Dress from Burda vintage magazine

The current trend is a a lot of ruffles, gathers and generally items that take a lot of fabric. Perhaps that's why when I look at patterns or magazines I'm drawn to simpler styles, and if something is color-blocked it will always catch my eye. And I don't think the year of a pattern makes any difference, some things are classic and always look good. 

Chambray dress2

This is Burda issue July 1998, it's one I was given recently. So I think that qualifies as vintage, being over 20 years old. Here's the magazine photo, which is such a good pattern for using up some not very big pieces of fabric. My one regret is that I wish I had used the other side of the fabric in the upper block, it is lighter and would make more of a contrast. I think the high contrast of their color selection makes it more interesting.

Colorblock burda magazine pic


Chambray dress 3

This shift dress doesn't really have a lot shaping, it has bust darts that start from the armhole. I decided to make a muslin which I don't do all that often for simple dresses but I could tell by looking at the pattern pieces that I wouldn't like the neckline at all. That high boatneck is just not comfortable to me and I always change them. 

Color block neck darts on muslin
Here's the front neckline on my dress form. This is an old dress form that is adjusted and padded to be pretty similar to my shape, and I keep that pink wool dress on it as I really like the fit of that bodice.  I can then compare all pattern shapes to that one and know that I'm in the ballpark for shoulder width, neckline depth, etc. Here you can see I removed some width across the front neckline by pinning out some small tucks. For a dress like this where I'm sewing a bit fast and loose I fold out the tuck to flatten the pattern in that area and call it a day. In the photo below you can see that I have added to the neckline on the inner edge of the shoulder seam, on front and back to make that boatneck less wide. I also lowered the front neckline about 5/8". I shortened the back waist length a good inch (which is a standard adjustment for me, also shown below. And then I took in the center back seam about 5/8' when I put in the zipper. also a common adjustment for me. I suppose all that narrowing of the shoulders I could do by narrowing the upper bodice but for simple shift dresses I find it easier to do it this way as I can see how much I want to change in small areas. 


Fitting adjustment center back

This pattern piece also shows the color block lines. When I made the muslin test version I just made it like a simple shift dress all one piece, and then once I had the pattern adjustments I traced the extra block sections and then added seam allowances. 

Chambray dress4

I neglected to take any pictures of the back of the dress on my and this one is not ideal as the dress is sticking a bit as I turn but you get the idea. No shaping to speak of and putting in any curves or darts would mess up the block areas. Oh and it was around 102ºF the afternoon when these pictures were taken so it was quickly done in the shade and then onto the cafe for a drink!

colorblock dr front and back


Burda color block tech drawing

I always like to see the technical drawing of any pattern, don't you? I did add about 6 inches to the pattern but making it longer kind of spoiled the look, so I hemmed it above knee, although not quite as short as their example. 

colorblock dr front close up Corner of color block pieces

There's a look at the corners, outside and then on the inside. I put a small piece of fusible interfacing on the corner that needed to be clipped, then I stay stitched it to reinforce, then clipped and sewed to the corresponding section. I think of these as one and done corners, it doesn't pay to have to unpick, redo and start to chew up the seam allowance so it's best to get it right the first time :) 

So that's the latest on my random summer sewing. It was a scorcher this past weekend, around 110ºF for the high so not much of anything was accomplished other than trying not to melt. Up next I have used my Tatjana trousers minus the pleats pattern, (seen in my previous post as shorts) and further remodeled it to narrow the legs. A bit of an experiment and I'm not sure how it went, but I will show all in a post soon. They aren't hemmed yet and I think I will better be able to evaluate when they are hemmed and pressed. 

Sewing classes are on a summer break for new but Hello Stitch Studio is opening back up this month and we are planning in-person classes in September and October. As well as continuing to offer some online classes. At the end of my most recent class I was surprised that people said "you will continue with the online even when the studio opens, right?"  and the reasons were interesting. (time available to participate, distance etc) So I will do both and keep you updated. 

That's the latest. Stay cool and enjoy the summer. Life is looking more like normal here - we are fortunate to have a very low case rate and high vaccination rate so things are good! (if only we could get out of our drought situation - it's always something).

Chambray dress3

Happy Hot Summer Sewing,
Beth

Today's garden photo, a new to me plant. This year and last I have tried a lot of new plants and some of them have been great discoveries. This is another one I will plant again next spring, the color is amazing. It's Lisanthus. 


Lisanthus