Showing posts with label Singer. Show all posts

Thursday, June 6, 2013

A new aquisition

It is taking all my will power not to start this post with the phrase "they don't make them like they used to".  Look what I did there, snuck it in anyway.  What does this refer to?

new quantum

My new acquisition. Which is here on approval, at least in my mind. A few weeks ago I had an incident with my very well-loved buttonhole making attachment. After that a little voice in the back of my mind was whispering about a new machine with the built in buttonhole feature.  After some research I ordered this Singer Quantum Stylist 9960 from Costco and few days later here it is. 
I have been playing around with it for 3 days and tonight I made a top from start to finish which came out fine. For the first hour I really did not like the machine at all and was sure that after a week of fooling around with it I would be standing in the return line at Costco to get my refund. I think with anything I buy these days I kind of dislike it on principal and then slowly get accustomed. 
Maybe the reason I dislike new equipment is that I am the person that reads the manual, a study-er of the printed material, a consumer of instruction booklets. From the Cuisinart to the new printer to the Iphone to the assemble-it-yourself stuff from Ikea, I like to open the box, take out the instructions, examine all the pieces and go through the process of setting up or connecting or whatever else is indicated. Totally nerdy, huh?  As compared to family and friends who mostly fall into the "just open it and plug it in, lets see how it works" camp. 
Oh well, for my new sewing machine I could do it my way, and to my surprise after a few days, I think I like it. It may be a keeper. Except for one nagging little problem which I will get to. But I have to say the manual is not very useful. Really skimpy on the explanation of how to use all the myriad features. 
Let's remember that I have been sewing on this machine since I was 8 years old. This very one! In fact I have 2 of them, one inherited from my grandmother and one which used to live at my mom's house but she never used. Plus I have my Singer 503 which I brought back from Hawaii.
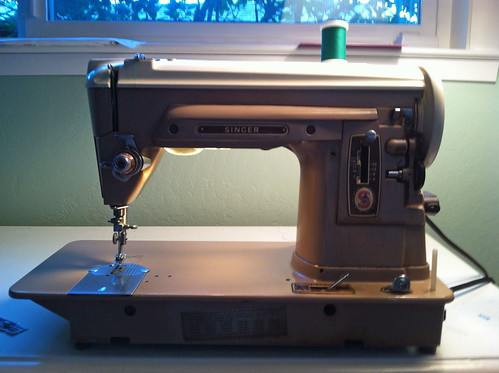
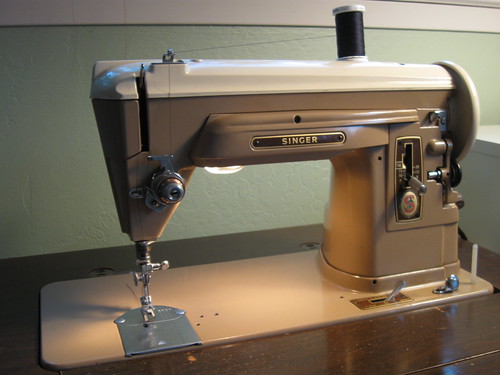
Singer 404
Look at that baby...that soothing coffee and cream color, the warm golden glow of the lamp, the nice open deck, the incredible punching power, the easy maintenance.  It is not going anywhere!

All that Singer love was not the reason I chose the new one, it just happened to be a great deal, had all the features and was at Costco (for you overseas readers - a warehouse store with great deals, lots of gigantic bulk packages, and the most amazing return policy ever).

But my lifelong habituation to a straight stitch only machine may explain why I am starting to bond with this new machine. Please don't laugh now...here are some of the gee whiz features that I am having fun with.
  • it cuts the threads
  • push buttons for backstitching
  • slow stitch mode
  • needle up/down button
  • did I mention it cuts the threads !!!
Ok, so as I said these are not exactly new developments in sewing machine technology but they are new to me.  Not to mention all those stitches at the push of a button. So far it is actually quite easy to use, although stitch length of 3.5 lingo is not computing in my brain yet, as someone who thinks in 8-12 stitches per inch.  Can someone translate for me?
There are some things I don't like, the light is kind of glaring, the presser foot is clunky and the 5/8" marking, which I actually use is not easy to see. Also the whole thing feels so plastic-y, which I guess is to be expected.  

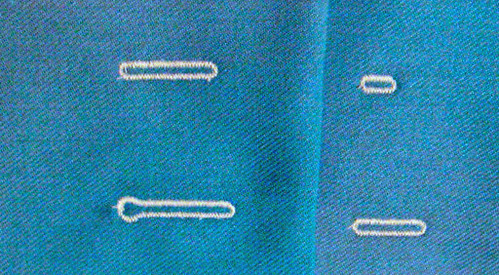
Recall I mentioned one teensy problem. Ha, a big problem. So far the buttonholes are  #%*$ (swear words).  Here is a example of my attempts. Mostly they came out like the one in the upper left corner. It does one side then goes up the other side and instead of doing the 2nd half it wants to keep going until I stop it.  I am wondering if the problem is the attachment.  I do notice the little bar gizmo you pull down to engage the buttonholer track is wobbly and doesn't seem quite right. I will play with it a bit more and then maybe decide there is a problem. Also see on the sample buttonholes the bar tack at the end is overzealous, a big lump really so that is not acceptable. Doesn't it just figure that the one thing I thought I wanted is not working properly? Although reading lots of blogs or forums on buttonholes has convinced me that the old buttonhole attachment makes vastly superior buttonholes so that is probably the way to go.

buttonhole samples

This weekend I will play around with it a bit more and see what else it can do. As for actual sewing this time of year I am always busier with custom sewing, so I have been making things mostly for others.
Here is a peek at something I am just completing for my friend Heather. It is rayon jersey that she bought at Britex, kind of light navy blue on white. Super soft and flowy, perfect fabric choice. This Vogue 8787 is a winner in my estimation. For once the construction order is actually reasonable! Also the cowl neckline is very well designed and falls very nicely when worn. I know I will be making this one again. 

                      V8787 blue white knit dressV8787 pattern envelope

I would love to hear your thoughts on new sewing machine selection. What did you choose? and are you happy with it?  Are the old machines better?  (in a word, yes)

Here is an unexpected pleasure in the garden. I used to plant pansies in the late winter but switched to violas (smaller version of this plant) and they are much more hardy, plus reseed all over, in a good way. So this spring I had lots of tiny jewels like this pop up in the lawn.

Viola in lawn

Happy summer sewing. It is supposed to be over 100 F here this weekend so I anticipate a lot of lounging by the pool and not much sewing.  Well maybe a little.
Beth

Monday, May 30, 2011

Singer Vintage Buttonhole attachment, with video!

One of my favorite things about the Singer slant needle sewing machine that I use is the buttonhole attachment.  The buttonholes are strong, always look exactly the same and it can be used on almost any fabric.  In my last post I mentioned using the buttonhole attachment and Robin of a little sewing mentioned she would like to hear more about it.  Since I have many projects in the works but nothing finished and blog-worthy right now, here is a post about buttonholes.  I think that like zippers, buttonholes can strike fear into the heart of the beginning sewer, but they are not bad at all once you get the hang of it.  In fact, this attachment does all the work, so really the only part of the process that the sewer is responsible for is the buttonhole spacing, marking the garment and then placing the needle in just the right spot to start the buttonhole.


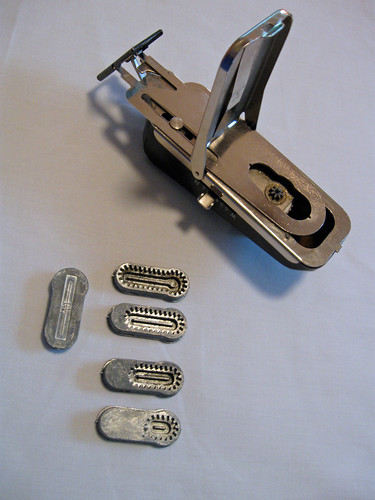
Singer buttonhole attachment with templatesTo get started, you need to choose the template based on the size of the button.  The Singer attachment has 5 templates, but I only ever use 4 of them.  Once in a great while I use the keyhole template, if I make a wool jacket that seems to call for that style, but otherwise I use the straight one for large buttons.  Then the other sizes are good for coats, dresses and blouses.  The tiny one is cute but very small - maybe for children's or doll's clothes.  
The attachment is flipped over on its back, with the door open, so you can see where you drop in the template and the teeth of the buttonholer grab onto the template.


Here is the first page from the manual, the parts labeled with their technical names such as "bight adjuster" and "feed cover plate" 
Buttonhole attachment manual page 1


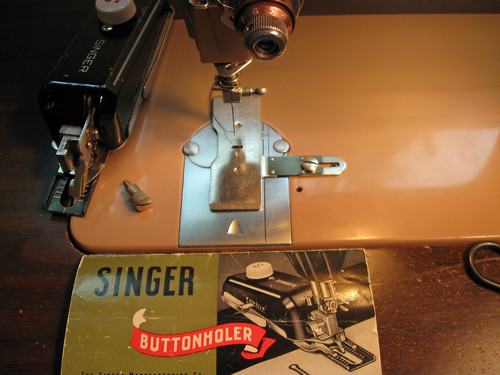
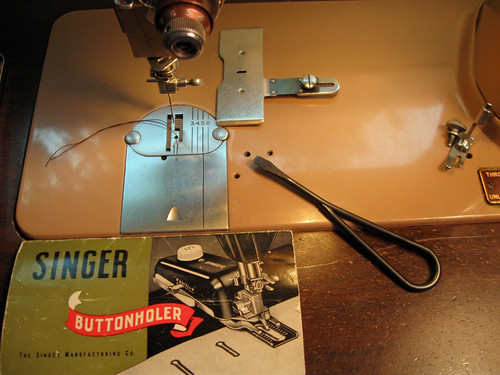
Back to the sewing machine.  You remove the regular sewing foot, and the screw that holds it on.  The buttonholer has its own screw, slightly different, used to attach it.  The Feed Cover Plate has to be attached to the surface of the sewing machine,  the screwdriver is pointing to the screw hole that is the correct one to use.  I have mindlessly screwed it into the wrong one and then wondered what was wrong after I attached the buttonholer, so attention here.
Button hole attachment on machine


Buttonhole attachment plate placement


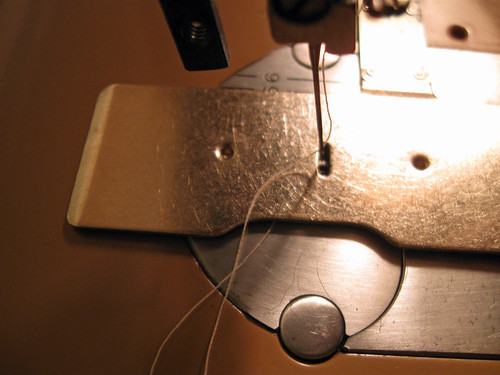
A little fiddling with the cover plate is important, as the needle must go through the very small hole and if it is off center it will hit the cover plate and break the needle, so check before proceeding. Button attachment plate


Here is a short (1 minute) video of the buttonhole attachment in action.  It is a bit blurry - my first time trying to video and sew.  Mostly I wanted to show the action of the attachment and how fast it is.


Wasn't that exciting ? OK, maybe not so much but imagine making a garment with 8 buttonholes, plenty of time for daydreaming or pattern planning while hypnotically watching that little gizmo go round and round.
Samples of the different buttonholes, made on a scrap of wool with no interfacing. I went around 2 times for each buttonhole. 
Button size sample
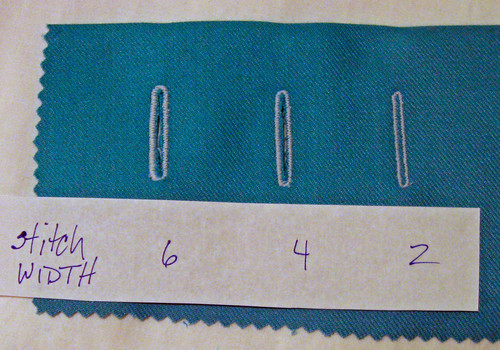
You can also change the width of the stitch, rather like adjusting a zig-zag stitch.  They call it "bight adjustment" in the instructions.  Here is a sample using the different widths.  This is useful depending on the type of fabric and size of buttonhole selected. I usually make a few test buttonholes on scraps to choose the right combination of size and stitch width.  

Button stitch width sample
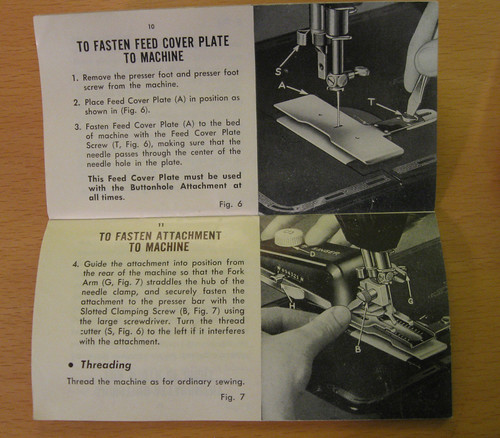
The manual shows the attachment in place much better than photos I took so here is a look at that.  I have learned to use all the Singer attachments from the manuals that came with them, they are incredibly detailed and yet easy to understand.  Perhaps because I am an instruction reader - computers, power tools, tv and cable, photoshop, whatever it is I read the instructions before proceeding.  If that isn't enough,  I take after my dear old dad, go to the library and get a book, try to teach myself whatever is needed.  So I strongly recommend these little instruction books that come with the Singer accessories.  If anyone has an attachment but no instructions, I would be happy to photograph the rest of the pages and post it on my Flickr page. 

Button attachment instruction manual

Had enough about buttonholes?  I was sorting through some past photos and saw that I took a whole series of pics while I was making my winter coat, so maybe a post on my methods for bound buttonholes.  Also regarding these machine worked buttonholes, there are a few tips which occur to me and I have not mentioned here, so I will do another short post on those later this week.  
Red salvia closeupToday I really should get outside and plant the new stuff I purchased this weekend.  Despite our weird late May rain here in N. California, I am trying to change a lot of my garden to low water usage plants.  So here is one of them, a red salvia that the hummingbirds love.                                              


Friday, July 30, 2010

Mystery foot identified and my efforts with the narrow hem foot

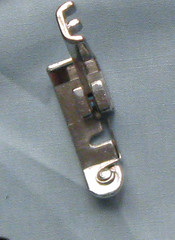
Recently I posted about my new to me vintage Singer Rocketeer machine, and asked if anyone could identify this sewing machine foot which came with it.  A few people asked me to post a follow up if I found out what it was, and I am happy to report . . . 

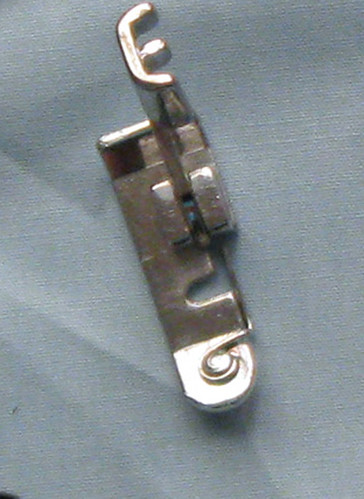
Overcasting Foot

I sent an e-mail to Charlene Phillips of The Sew Box,  who replied with the identification as well as some instruction on how to use it.  She has written a very useful book about vintage sewing machine attachments and has a great website.  Here is my original post about the book and using the gathering foot.     

The answer is an Overcasting foot, and it creates a stitch along the edge of the fabric to finish the edge. In some respects it is the overlock stitch of a previous era.  The only problem with this is that my machine does not seem to have any stitch or cam that creates the overcast stitch.   So how to use it is still a mystery.  She sent me a photo and the stitch is creates looks a lot like a blanket stitch on the edge of the fabric.  I am sure those of you with those snazzy new electronic machines know all about this stitch - but we of the non-electronic era
must make do with our lovely steel attachments to get these fancy (useful) stitches.

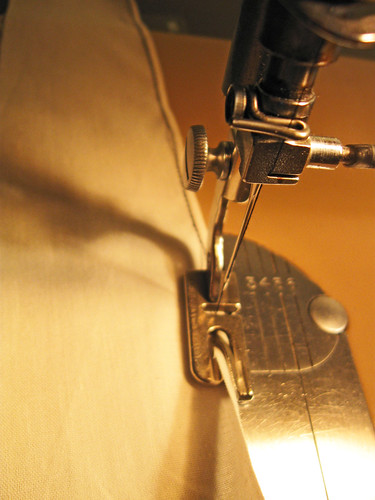
Searching around the sewing blog world, I found this blog,  Brian Sews, which has tons of great info on vintage sewing machines and attachments.  I have been trying without any success to use the narrow hem foot. It could be incredibly useful for hemming silks, making dinner napkins and other items that have a very narrow hem however I could not get the hang of it.  Thankfully, Brian has a great post with video on his blog showing how to use it.  

So I have been practicing.  The key to consistent hemming is how you hold the fabric feeding into the foot.  

Here is the narrow hem foot in action.


Not yet ready for prime time,  if I actually used it on a garment, I would be doing a lot of picking out stitches and re-doing which does not seem like fun.   Example of my wobbly sttiching.


I see great potential for this foot - so useful, especially on children's clothes, sheer fabrics etc.
But not quite yet.  I am seriously thinking about ordering the next size up, which I think is 1/4" narrow hem.  Probably just as useful but not quite so tricky.  I will let you know.


succulentAnd today's SunnyGal Garden photo -  my neighbor gave me this plant several years ago.  I just stuck it in the ground and now it is about 4 feet across.    Aloe, so I am told.


Saturday, July 10, 2010

My New Old Rocketeer


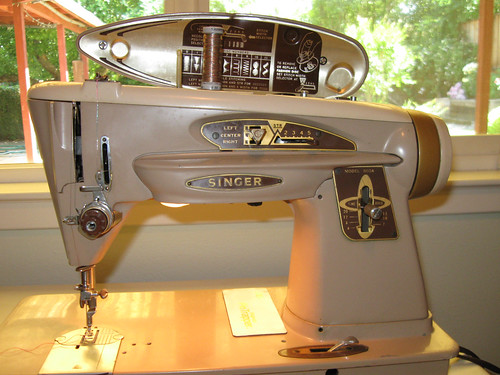
My first post here was an admiration of my Singer Sewing Machine.  Now I have another addition.  Not quite an obsession, but the start of a collection.   My “new-old” sewing machine is a Singer Model 503 Slant-O-Matic.  
Referred to as a Singer Rocketeer.  Seeing as I have been making do with my original Singer Straight Stitch for as long as I have been sewing, the thought of zig-zag makes my head spin.  Not just zig-zag, this machine has a variety of stitches which are achieved by changing the cams on top of the machine.

Rocketeer machine


And who can resist the look of this machine.  I am not sure where the Rocketeer name came from, possibly from the shape of the machine,  looking like a rocket  (seems a bit of a reach to me)
 I didn’t really need it, but my sister was given this machine, and said I could have it.  Just the small matter of shipping it back to CA.  I gladly paid $ 132 to ship it here but it sustained some serious damage.  Scratches all over the top, one of the side door hinges broken off, the top thread guide bent, and the plastic carrying case a total loss as the hinges were snapped off. Very sad but all in all still usable.  It had a bit of rust and  grime but not too bad considering it has been living in Hawaii for the past 50 years.

I took it apart, cleaned, and oiled the machine, lubricated the gears, and now it purrs like a kitten.   One great thing about having this machine is that all my accessories (various feet, buttonholers etc)  work on this machine as well as my original one.
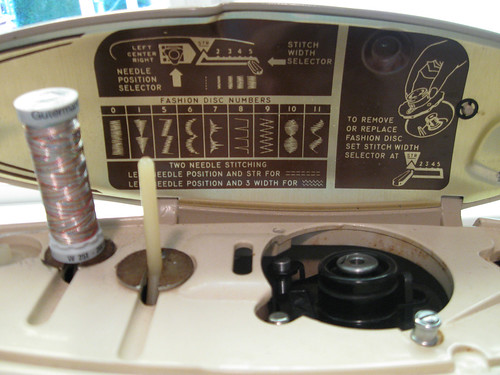
Here is a look at the top.  I have not tried it yet, but you can see it has two thread holders and can do double topstitching.  Amazingly the workings inside the top cover were undamaged.  


Rocketeer close up top
These are the sewing machine feet and other items that came with it. Most of them I already had but the roller foot is new, as well as all the ones pertaining to the zig-zag.  


Rocketeer accessories

mystery sewing foot


There are actually a couple of feet here
that I cannot identify.  If anyone has this 
machine or another old Singer and can tell me what
this one is for I would appreciate it.  In a previous post
and website, however I don't find this one in there.
So still a mystery.


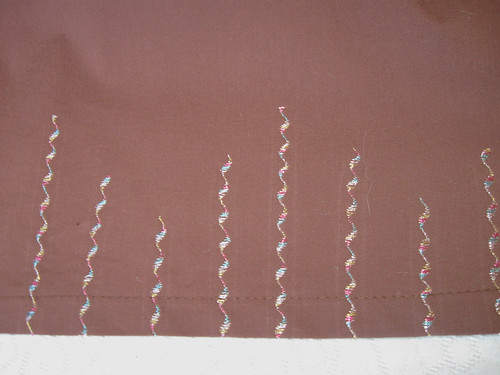
I wanted to try the decorative stitches so I made a cotton skirt and put some squiggles around the bottom edge with metallic thread.  (Chosen because I have these new shoes which are a copper color metallic)   The squiggles are
random, I didn’t mark anything as you can tell.

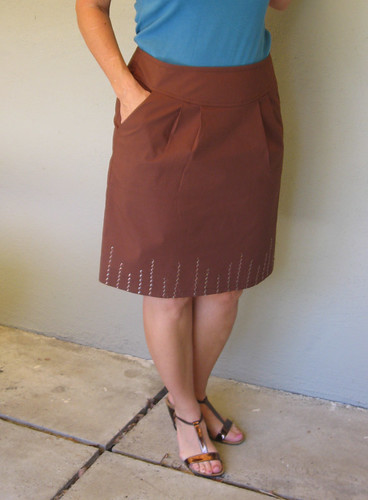
brown skirt embroidery closeupBrown skirt front

Not sure it is a success, but it is my first effort with the decorative stitches.   Actually I like the metallic stitching a lot more than the actual skirt style.  This is Simplicity 2451.


There is something about the pleats across the front that bug me, it is kind of puffy in a place where you don’t want puffy.  The skirt fits and if it was a flat front it would be fine.
Brown skirt pleatsSo I am not sure about this skirt pattern.  I have made it before, using it as the skirt for a wool suit I made a few months ago. (Suit for a Japanese Wedding)   However for that skirt I took out the dip in the center front of the skirt and made the waistband piece a straight line instead of a curve and that seems to work better.  This pattern has another version with no pleats and a flared hem which I may try but it might just be a loser, at least for me.  


I do see possibilities for the decorative stitches and zig-zag.  After a lifetime of straight stitch I can’t really wrap my mind around it.  Yesterday I was doing something requiring a small piece of elastic, and after I finished creating a channel and inserting the elastic I thought hey - I could have sewin it on with the zig-zag in one minute. Oh well, another thing to practice.  Along with that 1/8 roll hemmer foot which I have yet to master.
Onward - working on my pink/green floral dress.  
And here is today’s SunnyGal garden photo which I took some weeks ago, when the Spanish lavender was in full bloom.


rose and lavender

Monday, February 15, 2010

The machine and me

Singer 404 Machine


Is it wrong to love a machine?
Reliable. Strong. Powerful. A little bit worn, a few dings and scratches.
But a few drops of oil and like the tin man it feels so much better.
My constant friend. I have been sewing on this machine since age 9 when my Aunt Jo starting teaching me to sew. It was there in the beginning, when the seams were crooked and the facings lumpy. Through the awkward teenage years of bad fabric choices and hideous style selections. Formals and first job wardrobe. Party dresses and apartment curtains. French tailoring. Silk dresses. A suede skirt. Every season
a new challenge, irresistible fabric to play with, a new technique to take on.
I have heard a hundred variations on the query, “You must have a very fancy sewing machine.” And I always pause, and reflect, and picture my trusty coffee and cream colored hunk of sturdy metal, and think . . . Thank you, Mr. Singer.
Singer Model 404, Straight Stitch, Slant Needle, Drop-in Bobbin
Originally manufactured in the late 1950's.