Saturday, November 25, 2017

An almost free shirt: Simplicity 2339 in Buffalo Check

One of these days I might have to try out a new shirt pattern. Or at least do something to preserve the one I am currently using. After all, a button front shirt is such a basic item, and my feeling is that if it fits well, has the shaping I like, and offers opportunity to change it up with other details then there is absolutely no need to try a new shirt pattern just for the sake of newness. So I guess I've talked myself into preserving this one in a more long-lasting way. I should copy it onto Swedish tracing paper which would be ideal. Resolution for January! I like to use the Swedish tracing paper (which is really more like fabric) as it is easy to pin onto the fabric unlike stiff paper. And since I like to use pins and not pattern weights that will be the way to go.

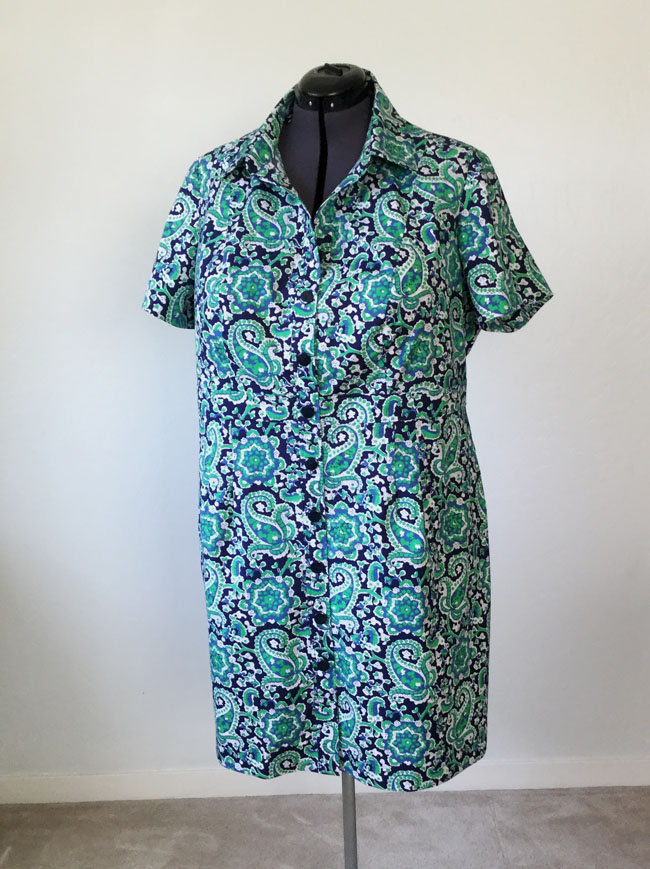
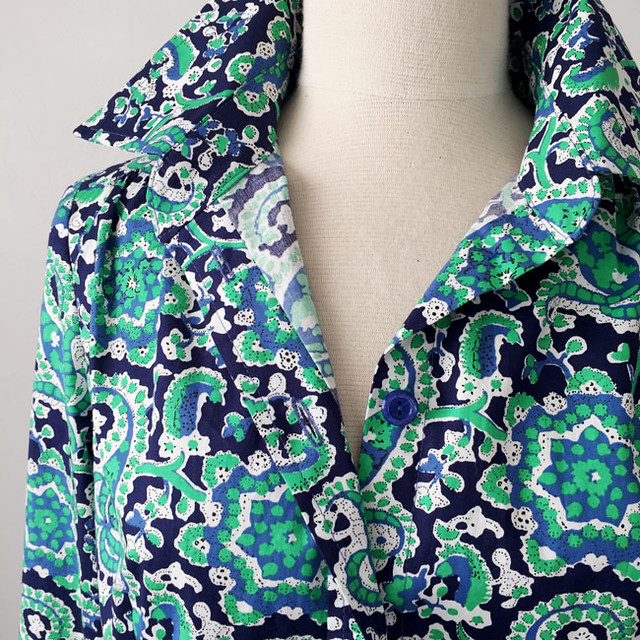
The post title is "an almost free shirt." Almost free, because I think I paid maybe $ 2 for the fabric at a rummage sale. It said "shirt" the minute I saw it and then upon closer inspection it revealed that oh so nice feature - a touch of lycra! So a stretch woven cotton in bright fuchsia pink/black combo. Had to come home with me. With the use of my tattered Simplicity 2339 pattern which I probably paid 99 cents for originally and now have used at least 15 times I call that a good value for money. The button probably cost more than the rest of it and they were not exactly pricey either 😊.


plaid shirt at garden store

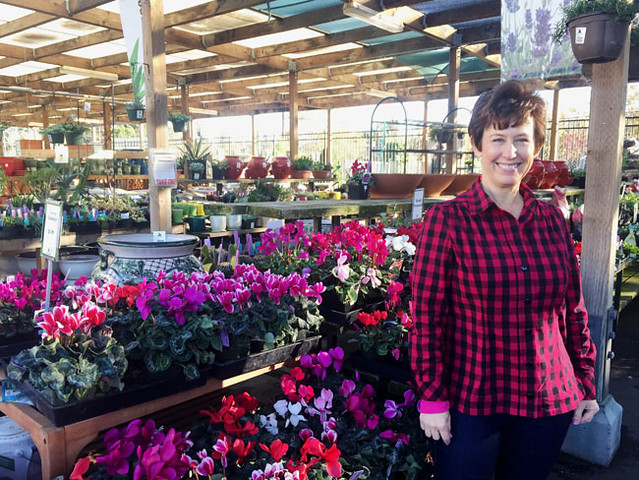
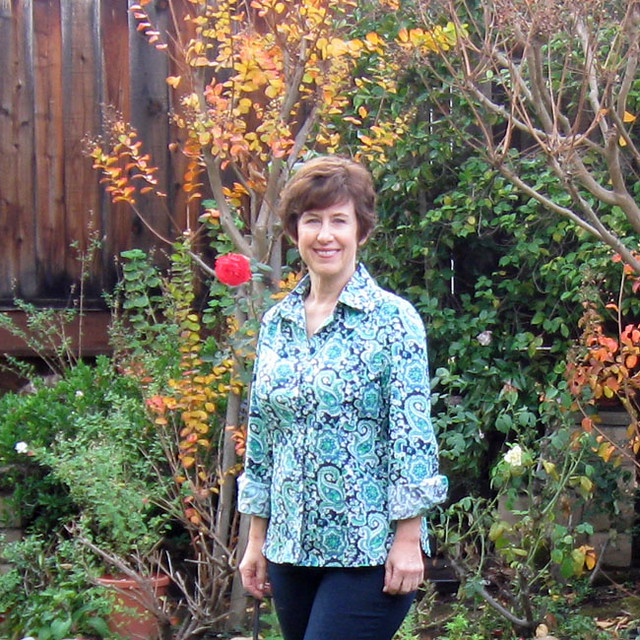
Some things I sew and just wear once in a while, other things are for special occasions, and then some get worn immediately and constantly until I'm just tired of them. I think this shirt will go into the 3rd category, a wear-it-all-the-time shirt at home just about anywhere.

Check things are a bit easier to match than actual plaids, but maybe possible they are more likely to show where things don't line up properly.

check shirt on form front view

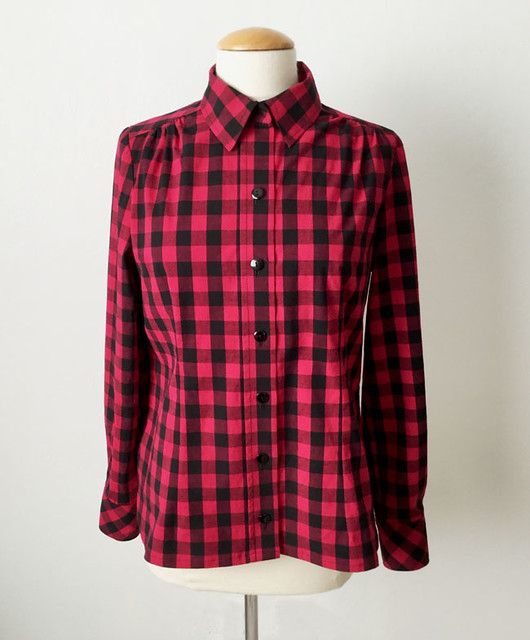
I'm super happy with this one, the front/sides/sleeves lined up very well. My top tip for button front shirts in plaid or check - Firstly - cut it out properly, perhaps even single layer and flip the first front over to cut out a mirror image for the 2nd front. But the actual tip is to carefully line it up when you sew on the buttons, and then do the hem AFTER the buttons are sewn on. So that you can align the front, have the buttons secure the crossways lines, and then have the hem not poke out at the bottom from the shirt side with the buttons. If it needs to be a bit shorter on that side then that is OK. No one will see it and it will look far better than having the underneath part sticking out when it is buttoned up.

check shirt on form back view

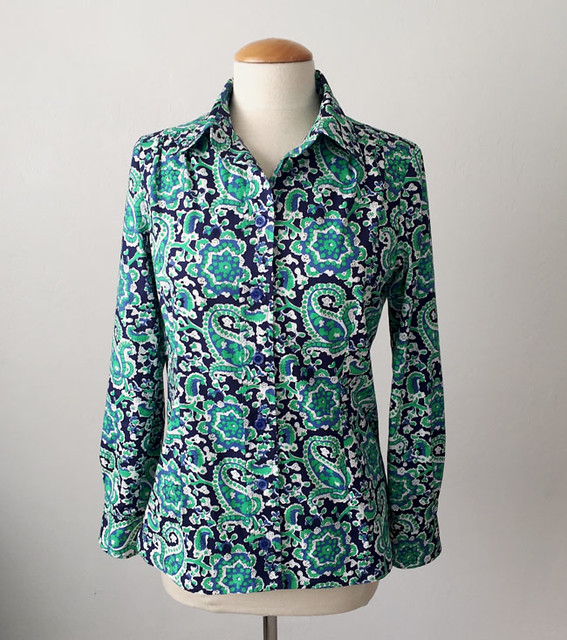
I always put the yoke and cuffs on the bias because it just adds a little more visual interest.

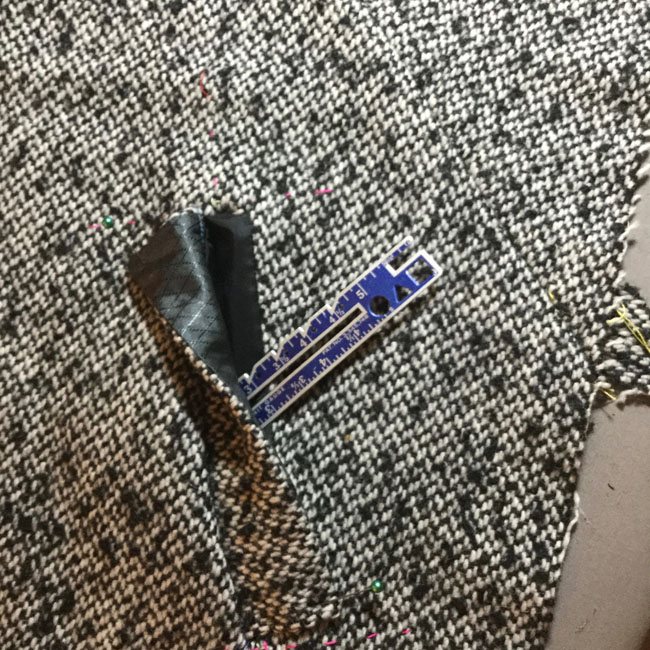
Let's talk about perfection. And perfectionism. It has been fascinating to me to see what people in my classes obsess over and will not be satisfied with, and conversely what they say is just fine or good enough. And their judgements might not agree with how I would see something, but that is another good thing about making things by hand, you get to decide how you want things to be. However - like the hem edge I mentioned above, with some knowledge you can overcome a lot of these small issues that can detract from the overall effect. But it's also good to know where to pick your battles. Which brings me to my next photo.

check shirt cuffs

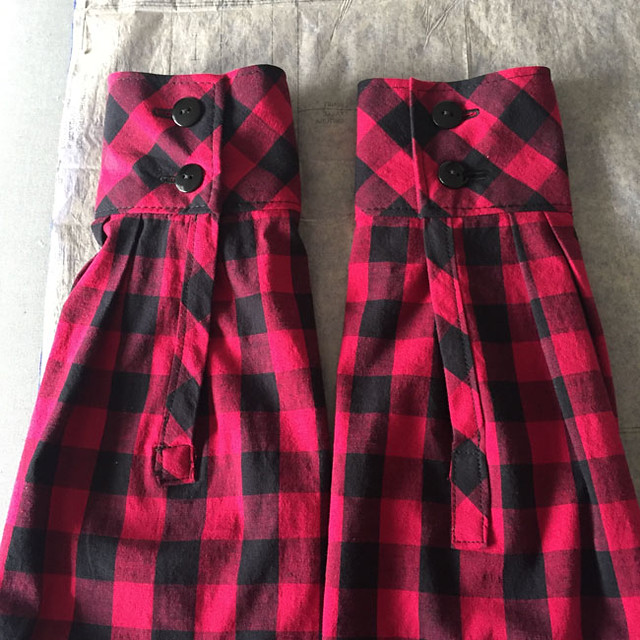
Spot the difference? Note the placket on the cuff opening. I am showing you this as I receive so many  wonderful comments and compliments on my sewing - but sometimes, as we all do,  I make a mistake and then I just have to decide how to deal with it. I put one of the plackets on backwards, so it was going to end up on the inside of the shirt and rather than unpick the whole thing I just reversed the sides, resulting in a stumpy little placket on one side. But the amount of time and eyestrain to remove it just wasn't worth it to me. And I doubt it's visible when I wear the shirt. This is what I mean by pick your battles. If I had messed up the collar band, which is front and center on the shirt then I would likely remove it and start again. Something like a sleeve placket which can be adapted, is on the side of the garment and not really even seen - I can live with a shrunken and slightly lumpy placket.


check shirt at garden store

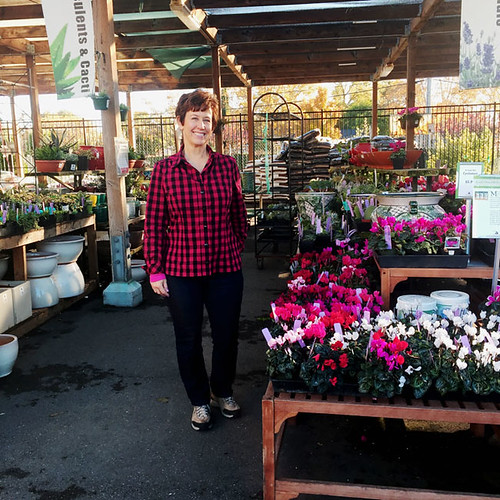
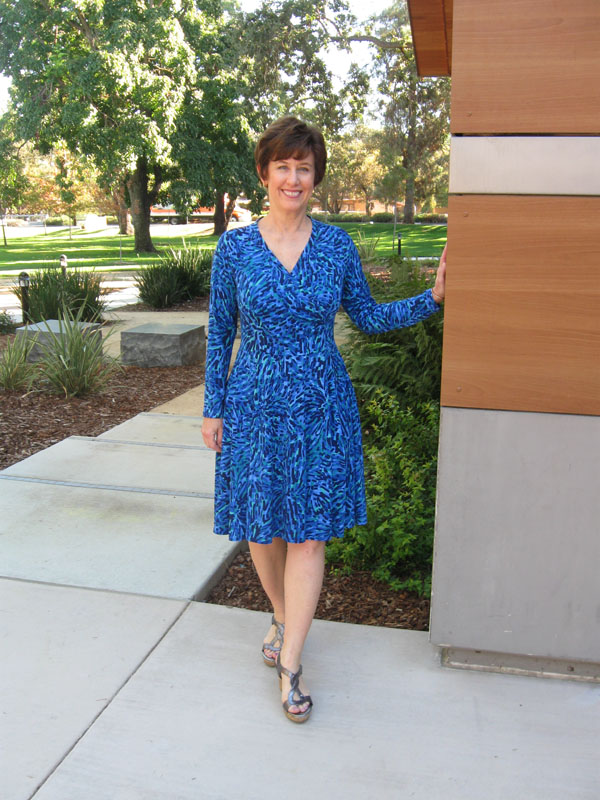
What a glamorous life I lead - taking blog photos at the garden store. Actually I couldn't resist snapping these standing next to the cyclamen. Those colors!

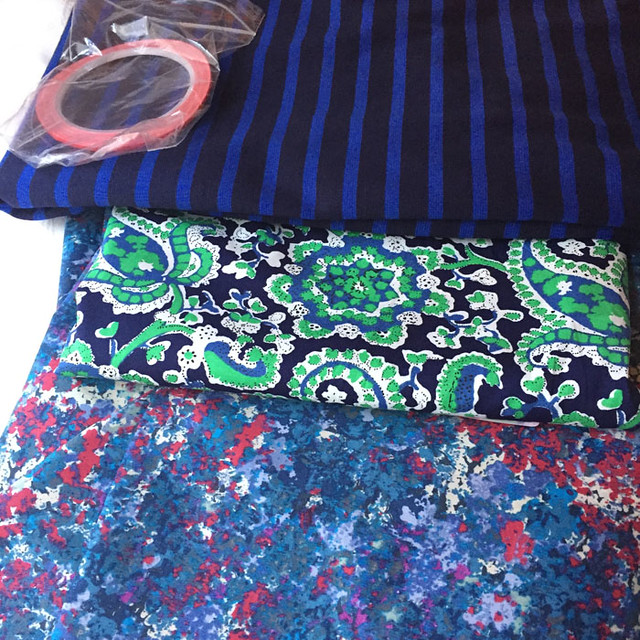
On my cutting table right now, so many things. Actually I have started a silk blouse using a different pattern - although it is a pattern repeat. The fabric is one that I bought at Mood in NY.

blue silk blouse Burda pattern

And I started with this silk to make the blouse first, as I am still playing around with options for the coordinating wool also purchased at Mood.

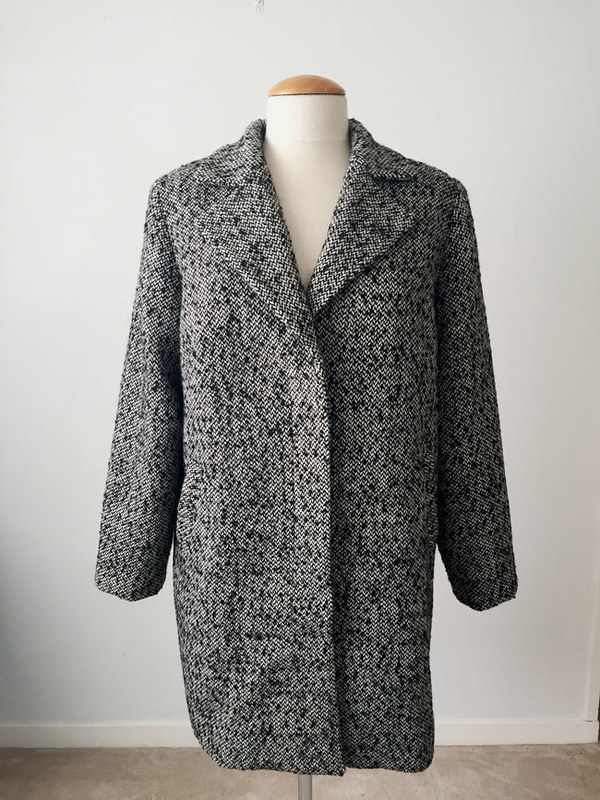
DO not Laugh at this!  Which is a test muslin for a jacket. Sewn using two different scraps of cotton  in order to look at the color block effect. Seems successful even in this goofy quilting cotton combo. And disregard the striped number underneath, a recent project, my first turtleneck which will appear in a future blog post.

test muslin for wool jacket

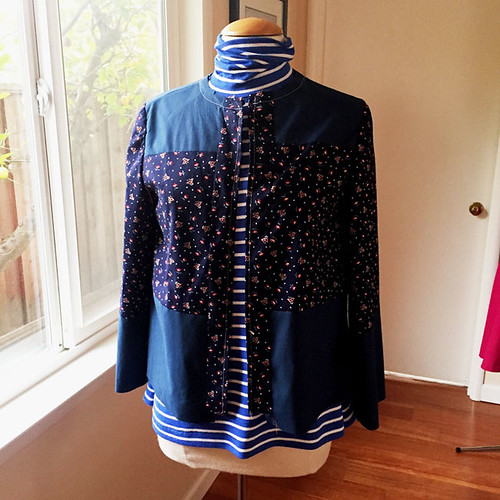
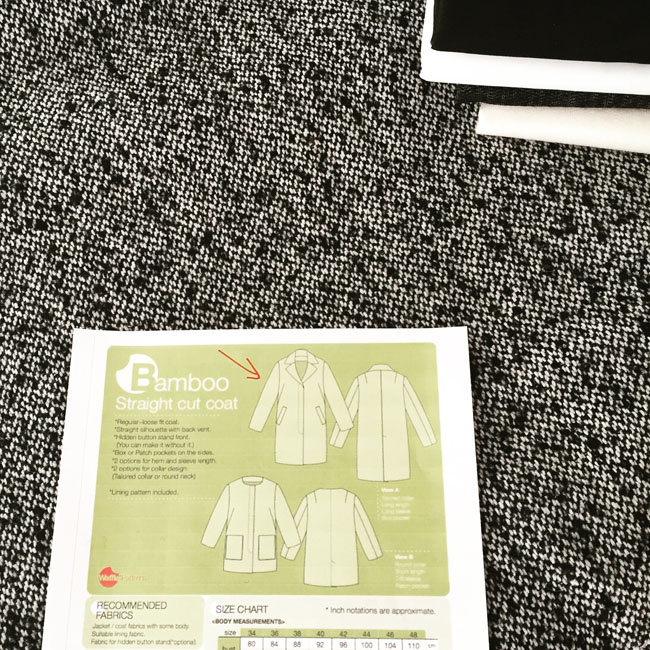
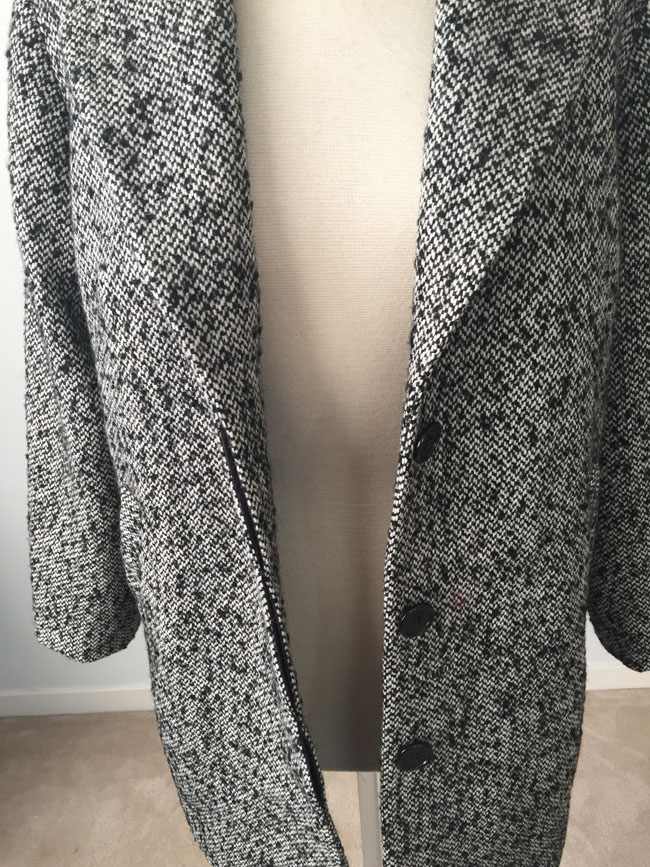
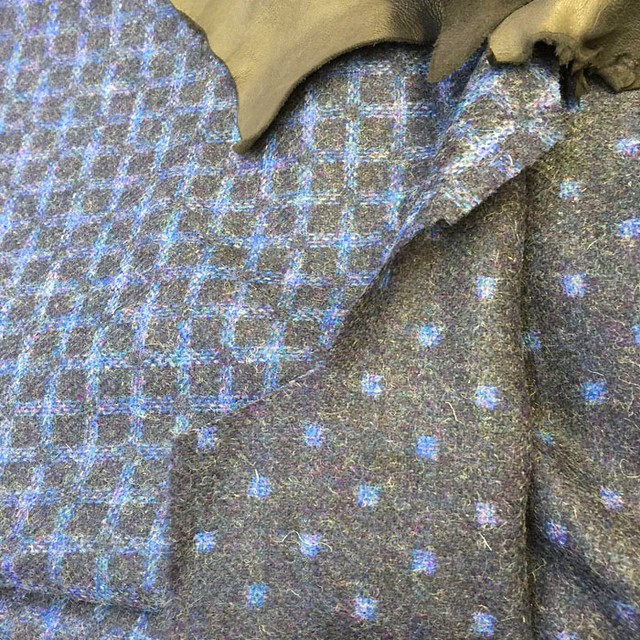
This is McCalls 7549. When this pattern came out I saw a lot of people that put it on their "want to sew" lists and yet I find almost no completed versions. I think it has possibilities. If you do a screen capture of the tech drawing and put into photoshop you can use the paintbrush tool to fill in the shapes with color. I find this super useful for figuring out how to design color block garments. My test below. The fabric I will use is a tweedy plaid and dot pattern which might sound weird but just wait - I think it will be nice. (I certainly hope so after lugging this fabric home and then pondering it for more than a year).

M7549 pattern envelope jacket

coat color test 2

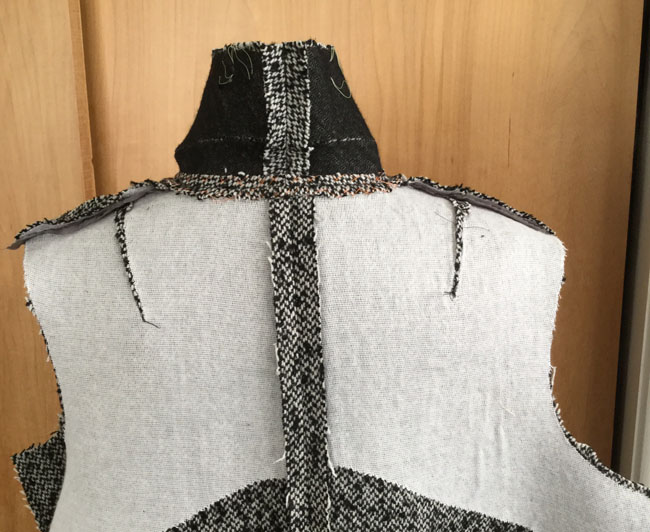
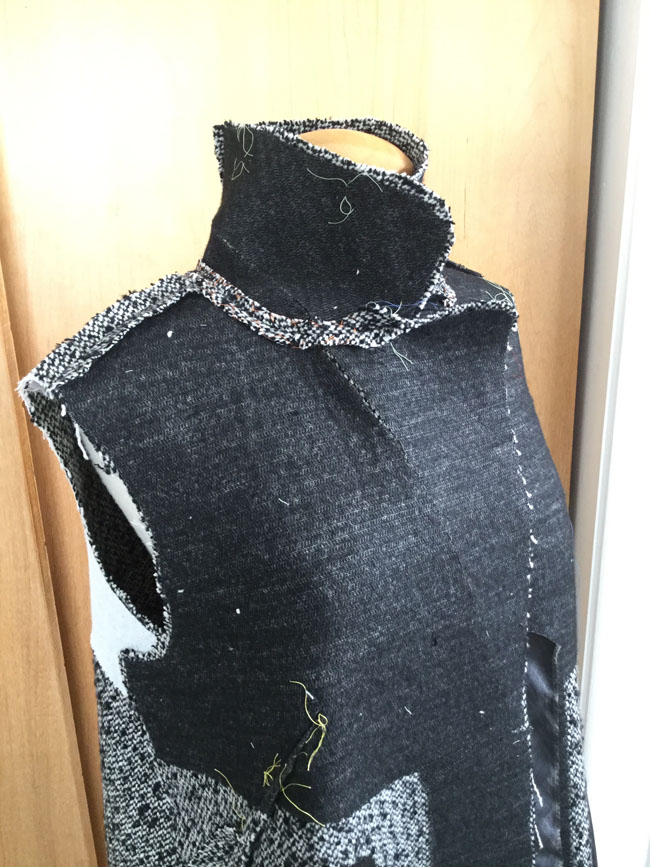
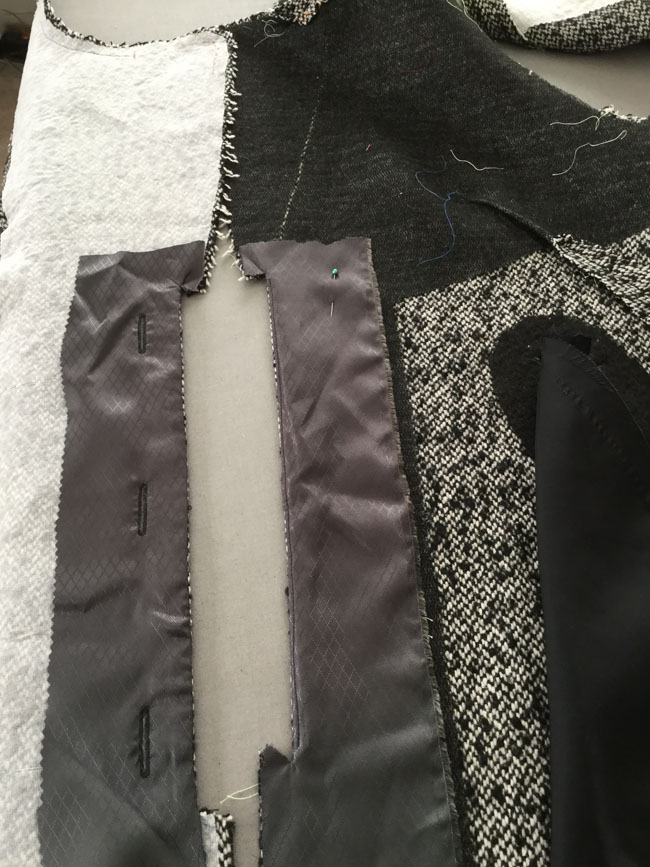
So that's the latest on what I'm sewing. Well actually, not by a long shot- so many things in the works but not a lot of photos to document. Although one other interesting item has me puzzling out the details which you can see here.

Hope everyone is having a great and relaxing Thanksgiving weekend here in the US and getting lots  accomplished wherever you are.

Happy Sewing, Beth

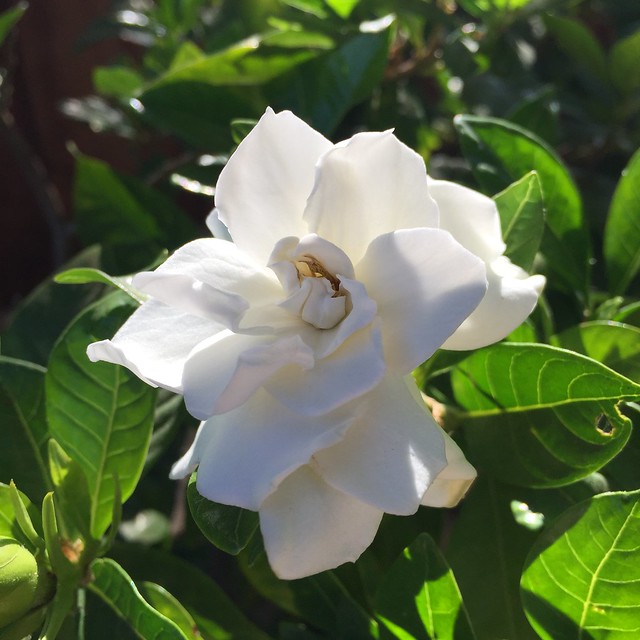
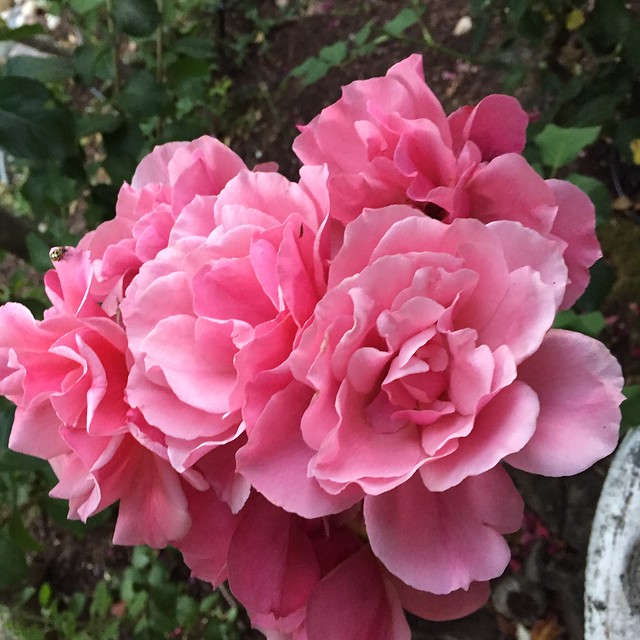
today's garden photo, a velvety red rose that bloomed a few weeks ago among the salvia branches.

IMG_3129


Monday, November 20, 2017

Bamboo coat from Waffle Patterns

If someone asked me what is my favorite thing to sew, I guess the answer would be jackets and coats. Particularly the wool kind. I think making a wool jacket is my version of knitting, a comfortable, soothing, repetitive series of steps that are calming and relaxing. Which might sound odd to a lot of you. I think once you get comfortable with any skill it feels that way. You can be learning to sew, or making bread, or speaking a new language, or skiing, or hitting a golf ball, or any other thing that takes practice, purpose and a desire to improve. But one day you will do it and feel comfortable and relaxed and realize that you are doing this thing for fun and not thinking too much about the how. I suppose what I'm describing is often called being in the mental state of flow - fully immersed, involved, enjoying the activity. Sewing is generally this type of activity for me, and on a good day some of my other pursuits can get there as well. I think a key to feeling this way about sewing is both practicing, learning from mistakes, as well as letting go a bit, not being consumed by the idea of making a mistake. I tell people it's not surgery, it's only cloth and there is always more. Does that seem contradictory? To both focus deeply and let go at the same time?

Back to coats. For my jacket/coat making class at Hello Stitch one of the patterns I recommended was the Bamboo coat from Waffle Patterns. We were looking for a coat or jacket that had a loose and easy fit so as to take that out of the equation, and allow people to concentrate on the technical aspects of sewing and minimize the time needed for fit adjustments. I wanted to sew my own version to see how the instructions were and where there might be some difficulties.

And in fact I sewed this back in October so at the time I had a lot of thoughts, that I should have written down! So just a few impressions remain. The major impression is that it is Drab with a capital D! I like tweedy fabrics, I like a touch of black but there is something about the combo of this fabric with the menswear style that just doesn't give me a thrill. However - a friend of mine with vivid red hair tried it on and it looks great on her. Picture a shoulder length curly gorgeous red-headed bob haircut, coat worn with skinny black jeans and ankle boots and a black leather bag. A perfect slouchy-cool city look. At least that was my impression. I'm always happy when one of my handmade items that doesn't work for me is perfect for someone else!

bamboo coat front on form

My main recollection about sewing this is that following instructions to do details like lapels and welt pockets is kind of difficult. By that I mean that typically I don't read any instructions, and I just do the pattern markings on the fabric and then that's it. I decide where/what to interface, how to sew the pockets or welts, where to put the buttonholes. But for this one I followed the instructions and felt that they were both very thorough and at the same time tricky to understand.

# 1 Positive about this pattern:  The ROLL LINE is marked on the lapel and under collar. Can I say hallelujah? This is my top pet peeve on coat patterns, that very few patterns (even extremely tailored and detailed Vogue or Burda patterns) include the roll line. A few Vogues do and I think they should try to include on on things that are meant to be made of wool. Anyway this pattern has it and you can see that break in the interfacing on what is the under collar. The break there induces the collar to fold (roll) at just the right place.
#2 Positive - lots of interfacing. The instructions are quite detailed on where to put the interfacing, and I think that is what makes the difference between achieving a well-made coat and one that looks, well, homemade. And it is such an easy step but interfacing supports the fabric and gives all the details the oomph needed to retain creases and shape.

bamboo coat back interfacing


inside interfacing front bamboo coat

This pattern has long angled darts which add a little bit of bust and waist shaping without taking away that menswear look.

Bamboo diagram with fabric

Another thing I really liked about this pattern is the hidden buttonhole placket. What a great detail in a coat, it solves the problem of making buttonholes in several thick layers of wool coating because you use a lining inside the placket. Consequently it is one layer of wool there.

Bamboo front hidden buttonhole

And it's only right to include this photo which shows that it might be a good idea for me to look at the instructions more closely - which I thought I was doing. But this hidden buttonhole placket was going so well, and I found some buttons so I just sat down and made the buttonholes. In the WRONG directions. Yep, coat and jacket buttonholes are supposed to be horizontal not vertical. Think about every coat you have had, easier to button if they are horizontal and it keeps the coat closed better. OH well. Can't win 'em all. And I used a lovely piece of of grey that was in my lining scrap bin for the placket facings. I love this type of lining and never see it in the stores anymore. Acetate, kind of hefty and perfect for coats/jackets. Usually with a woven pattern.

bamboo coat hidden buttonhole placket2

The finished coat front is very nice, and the placket instructions were pretty good. (Although I've used this construction method plenty of times before, in my class it was a bit of puzzle for the person who hadn't encountered it before. But a good learning experience).

The part where I put down the instructions and did my own thing was the welt pocket. While the instructions - if you follow them exactly, result in a decent welt pocket with the pocket bag attached - whew they are a slog. A couple of students did them in the class and I hadn't gotten to that point in my coat. So I decided to just do it my own way.  On the right is the pocket piece provided by the pattern, where you stitch it partly on, and then attach the pocket bags, and then fold the sides in and hand stitch some sections.

Bamboo welt pockets 2 types

Ah, no. that seemed way too fussy and not guaranteed to get two matching pockets. So I removed that piece shown on the right. made a wide single welt and used that to make a standard welt pocket. Much better.

welt pocket with ruler on Bamboo

Note that I used lining for the back of the welt, much easier to achieve a crisp edge if it isn't two layers of the wool which was very springy.

bamboo coat on form back view

The back vent is a nice detail. I put some shoulder pads in, very small ones just to keep it from being a bit droopy. Not sure if when I took this picture I had added them yet.

And this is after a very long day at the Hello Stitch Studio - I think this was a day with a mini-class on zippers in the morning and then a knit top class in the afternoon. But I wanted to have a picture with the coat on someone. Also note - I sewed the coat in size 40 with no changes - and the sleeves are way too long for my baby length arms.

bamboo coat on me


We have another session of the Coat/Jacket making class in December, (weekend class 10am-4pm on Dec 16-17) as a couple of people had to postpone from our first in October. Consequently there are a couple of spaces still open so if you have a coat or jacket that you want to do here is the link. The recommended patterns are just a suggestion, email me if you have something else you are thinking of using in the class.

Here's a link to all my classes. One I'm particularly looking forward to is a class we are calling "Pattern Basics: How to read a sewing pattern". I'm planning to cover how to choose a pattern, measuring yourself, how to select your size,  matching fabric with pattern, and then we'll open up some patterns and review what's printed, both in the instructions and on the pattern pieces. Plus some tips on cutting out and marking. I think this will be great for beginners or as a refresher.

In December I plan to do some selfish sewing - including cutting into "my precious" which is a blue two-sided wool that I bought at Mood Fabrics NY last year and has been tormenting me for these many months with the "what should I use it for" question. But I think I've cracked it. It's a lot brighter blue, this photo makes it looks grey.
two sided wool

So that's the latest, I was outside a while ago doing a little autumn weed pulling and pansy planting when the garden lights came on - which means it is too dark to be out there trying to tell weeds from real plants. Is winter over yet? OK, I know it actually hasn't started yet but you know I'm ready for spring.

However I can't complain - even though it has been a bit chilly, no frost yet and I still have lots of gardenias in bloom.

Happy Thanksgiving Sewing,
Beth

IMG_3131

Friday, November 10, 2017

A Shirt and a Shirtdress, Butterick 6333 in paisley cotton poplin

Which came first, the shirt or the shirtdress? In fact the fabric came first, and the idea for the shirt, but then I took a detour to sew this shirtdress.

B6333 green shirtdress close up front neckline

Which is Butterick 6333, a shoulder princess seamed shirt dress pattern with two skirt options.
A really good basic pattern, that I made a little more difficult for myself with some fitting adjustments  that overshot the mark, as well as adding a waistband and zipper. WHAT? a zipper? yep, read on for details.

B6333 pattern env

This is a dress I made for my friend Heather. She has been wanting a shirtdress for a while and we figured it was time to sew up a lightweight cotton one for late summer/fall. I've made a shirtdress style for her previously (probably not blogged) by copying an existing dress she had but for this one we wanted the traditional shirt styling with collar, stand, button band etc. However - and this is a big however, she likes to have a waistband to emphasize the waist, and this pattern didn't have that feature. So I improvised and the waistband you see is actually an applied piece. I sewed the dress as is, but added the waistband overlay on the outside of the bodice front and back, and that worked really well, plus let me do the fitting on the side seams. You know my aversion to sewing the skirt onto the top of a dress in one move, I always do the front, and then the back and sew the side seams near the end.

The second thing that she wanted was not to have the skirt actually unbutton. I can see for wearing that buttons are just a pain, they gape when you sit down and get ruined at the cleaners.

B6333 shirtdress front with text

So I sewed the dress as normal, including the buttonholes all the way down the front of the dress. But from the waistband down to about 5 inches above the hem the dress is stitched closed. The topstitching on the button bands allowed me to overlay them as if they were buttoned and then stitch on either edge of the band. You can't even tell that it is sewn shut but no chance of any wardrobe or button malfunction. I sewed the buttons on in that portion right over the buttonholes (which I didn't slice open, no need). But of course what does this rearrangement require - our old friend the side seam zipper. Which means the dress has to fit at the waist just right, and then the zipper is put in next to last. (the sewing the front shut is actually the last). Well hemming is actually the last.

Dress form view. I did cause myself a bit more work as she has gone down a few inches and so I adjusted the pattern and then had to revise after I cut it out. But thankfully those shoulder princess seams allow for plenty of adjustment.

B6333 green shirtdress on form front

Cute huh? I love this fabric so much. Which is why it made it back with me last November when I shopped at Mood Fabrics.

Mood purchases 2

Heather and I were searching for a stretch cotton in a print, maybe a sateen or a poplin that would work for a shirtdress, and I remembered that I had this fabric from Mood. So I checked on their website and it was still available. They have it still (in 3 color ways) although it says this green/navy is almost sold out. (search stretch cotton poplin).  Soon I plan to use that cotton shirting in the bottom of the photo for another shirt, it goes with so many things in my wardrobe.

Back to fact that I originally bought this cotton for a shirt for me. And here it is, using what else? My trusty Simplicity 2339 shirt pattern. At this point the pattern pieces are getting a bit raggedy, I guess it's time to copy them over onto sturdier paper (maybe 14 versions?)

Green paisley shirt front view

Nothing much to say about this version other than I love the fabric and can wear this with so many things I have.

For every version I have made in the last couple of years I do the front placket as a continuous piece that gets folded and sewn into a small pleat. I was all set to show how I do it but a search through my old blog posts shows that I already did that :)  Here is the link to how to make this type of shirt front placket.

Which you can see a little better in this picture.

Green shirt inside placket front

 The sleeves extra long on this version as I like to wear shirts under sweaters when the weather is colder and flip up the cuffs for a little extra peek at the shirt.  Tower plackets on the cuff opening which are hard to see in this busy fabric.

green paisley shirt cuff

Sewing a button front shirt has turned out to be one of our most popular classes at Hello Stitch Studio in Berkeley where I teach. The next button front shirt class starts Jan 13 as well as some other new classes, including some shorter mini-classes covered one type of techniques. Last week was my first mini class on zippers, and we will be adding more to the 2018 schedule. (including things like buttonholes, welt pockets, facings, linings, popular pattern hacks etc) I'll post when they are available for registration. I think Stacey is in the process of adding them to the website now.

This shirt is a bit longer than other versions, and I changed the shape of the side seam hem edge curve.

green paisley shirt on me

That's it for the paisley fabric from Mood. I have a few good size chunks leftover which might get combined with other retainers and turn into a sleeveless top next summer. But for now they go in the scrap box.

Up next, I have a long list of stuff that is either started or on the proverbial drawing board, including some jeans, a custom dress form, and an assortment of knit tops.

Can you believe Thanksgiving is around the corner - it sounds so trite to say it but this year is flying by. Only 8 more months until summer!

Happy fall sewing, Beth

for today's garden photo, some roses that bloomed back in July. This is one of the oldest rose bushes in my garden, way predates me and despite being in a shady spot puts out these lovely pink blooms. 
So many thorns though - and I've snagged my shirt on it numerous times trying to wriggle past to prune one of it's neighbors. I've planted a number of newer roses in the past few years but these older ones are worth keeping, which they bloom well they are showstoppers. 


IMG_2932


Wednesday, November 1, 2017

Aldaia Dress from Pauline Alice, Version 2 for winter

There are a lot of sewing pattern companies and designers to choose from, and I generally stick to my personal favorites, which these days are Vogue patterns, New Look and Burda (which is a new development in the past couple of years but I'm now a fan). However there is one indie pattern designer that I find always suits my style: Pauline Alice Patterns. So it is no surprise that after sewing this pattern back in September I immediately made plans to sew up a version for colder weather. Finding this perfect knit at Stone Mountain Fabrics was the icing on the cake for my
winter version. And it goes so well with several of my coats!  Which might mean that my color palette is not very varied - but I don't really care. Jewel tones all the way.

Pauline Alice Patterns Aldaia dress v1

My first version of this dress is here, in a cotton-lycra jersey. This version is a rayon jersey, so a bit more drapey, and the skirt is nicely swishy - which you will see if scroll further down. I didn't make any changes from the first version, other than to add the sleeves which I lengthened to make then wrist length.

Pauline Alice Patterns Aldaia dress on dress form, front view

This is such a super speedy dress to sew, and one thing I especially like is that the neck band fits perfectly, meaning it sews onto the bodice with just the right amount of stretch to fit against the neck and have no gaping.

Pauline Alice Patterns Aldaia dress v4

Decidedly minimal sewing details for this one. The adjustment I did on the first version worked perfectly so no need to change that. Looking at my previous post I see that I didn't detail it so here goes. I added one inch of length on the front bodice pieces and attached the skirt at the center front using up that extra inch, and then tapered it away at the side seam. Note that I always construct things with side seams in the order of 1) all the front 2) all the back 3) sew the shoulder seams 4) play around with the fit of the side seams to fine tune. However this does mean that you have to be aware of how the waist seam will match up at the side seams.

fitting blue knit dress

Also note plenty of machine basting (mentioned in my previous Random Threads post) which is the quickest way I know to try out and fine tune the fit, then once it is OK I can sew each seam with normal stitch length, super quick with no pins or fussing since it is basted together. I also took it in a bit under the arm to make the bodice fit closely, however the sleeve is on the slim side so I didn't change it, just eased it in which worked fine.


Pauline Alice Patterns Aldaia blue dress dress back on form

Pauline Alice Patterns Aldaia blue dress dress wrap front

Close up look at the bodice pleating. At my knit dress class everyone asked if I stitched the band with a twin needle - answer is no :) I just did two rows. To me twin needles are kind of fiddly and find it's easier to just stitch a 2nd row of topstitching.

This dress is a little bit twirly and I spent the better part of the afternoon learning how to make/upload a GIF. Be warned, now that I have this minor superpower I will find it hard to resist the lure of the GIF.

Untitled-12

And if that isn't funny enough, when I looked at my photos at home I laughed again.


Pauline Alice Patterns Aldaia dress v5

Because my selected location gives off a distinctly "Miniature Stonehenge" vibe. For those of you who are fans of This is Spinal Tap you will know what I mean. I figured it was time to get out of my backyard and find a new photo location.

Anyway - this dress is a winner and I'm sure it will be worn frequently in the coming months. Now I'm thinking about adding a collar and waist tie to this pattern to give it a bit of a DVF wrap dress look.

Up next - I just ordered a couple of patterns from McCalls including this vest pattern M7693 because I impulsively bought this when I was last at Stone Mountain. Who doesn't need a faux fur vest, right?

Happy Sewing, Beth

Do you laugh and/or cringe when you look at the photos for your blog posts? In this one it appears I'm impersonating a tour guide giving all the details of the mini-Stonehenge... "we couldn't afford the full size replica but this one is portable. Next year we are adding a Sphinx the size of a garden gnome and a 7 foot tall Leaning Tower so you can take those goofy holding up the tower with your hands photos without dealing with tricky things like perspective!"

Aldaia dress v2