
For me it is Simplicity 2339, one of their Amazing Fit patterns that I started using in Dec. 2011. And even then I didn't make it as the pattern was designed. For that version I adapted it to have a hidden buttonhole placket. I was off to the races with this pattern, never once sewing it as it was from the pattern envelope.
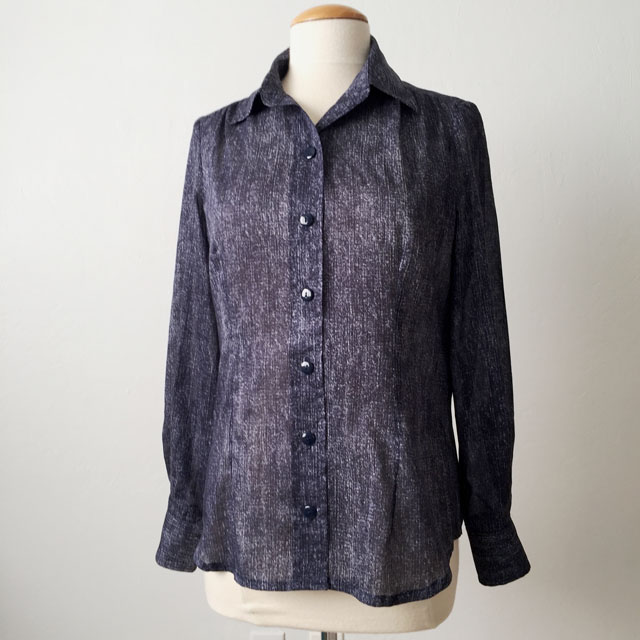
Here is the latest version. As for the fabric, it is divine. A lucky find of this cotton voile at Stone Mountain Fabrics in Berkeley. Their upstairs section is now filled with an assortment of interesting things, a lot of designer roll ends, never the same things on any given week and if you find something that interests you the price is great. It does take a bit of searching - when I was last there I didn't see anything that inspired, and then tucked behind the forest of upright bolts was a skinny cardboard tube with a small amount of this fabric remaining.
While it was 54" wide the amount remaining on the bolt was perhaps 1 yard with a very crooked edge giving me maybe another 1/3 yard in a triangular shape. But it was too lovely to pass up so I bought it - for less than $ 3. It is unbelievably soft, slightly sheer, and vaguely denim looking. A perfect companion piece to so many things in my wardrobe.
Would you believe that I came home, tossed it in the dryer with a wet towel to shrink and then cut it out later that afternoon? I never do that! But it was a vaguely springlike day and I was feeling ready to jettison the coats and sweaters for a light and floaty cotton shirt. Then I played around with my pattern puzzle pieces until I could just squeeze it onto the yardage available.
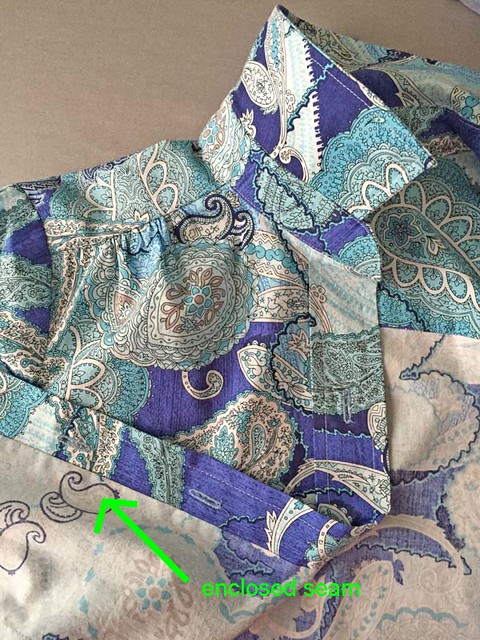
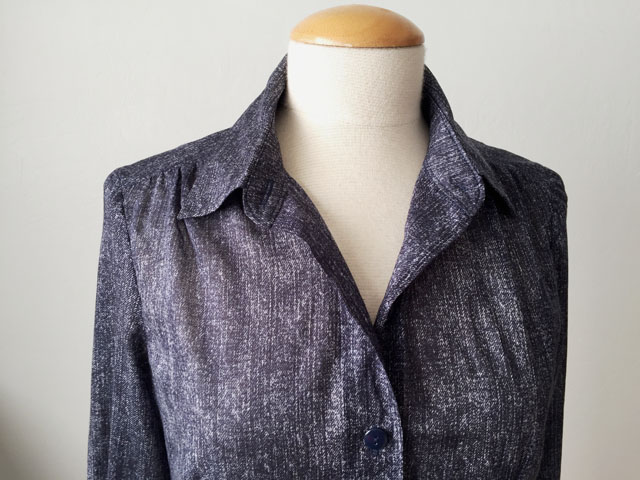
Now for some info on the front closure. A while ago I copied a shirt for someone and it had a placket (button band) that wasn't sewn on but continuous with the fabric of the front of the shirt. I don't know if this has a name in the trade but I refer to it as the one-piece placket. It is slightly difficult to see in this navy blue cotton voile version, so here's a look at it on an older shirt, in cotton poplin.
Now for the how-to. This is a general how-to on creating this - I may have missed some details but I think if you know how to sew shirts and have played around with various placket styles that it will make sense.
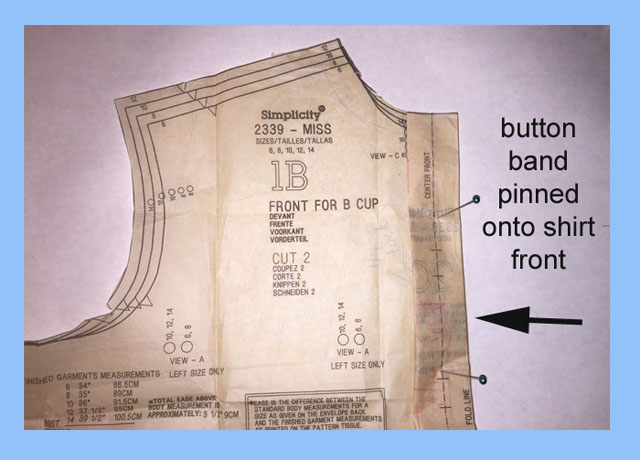
Start with the basic shirt pattern, and the front button band piece. I folded away the seam allowance and overlaid the sewn-on button band to create the dimension of the shirt when completed and the button band is sewn on. Basically you want to see the finished shape of the shirt front where the collar stand is sewn on. Trace this outline, with markings for collar, sleeve etc. I always trace to retain the original pattern for future use. Plus it is easier to mark all over a sheet of blank tracing paper.
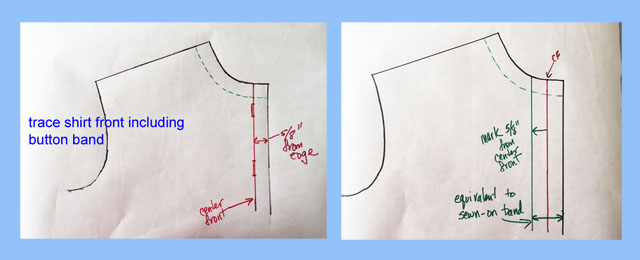
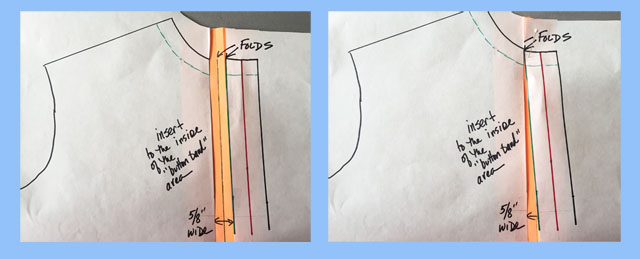
Here's the traced front shirt (for this example I did it on white paper so I can mark with various colored pens. Note that this now includes the center front of the shirt, where the buttonholes will go, but no seam allowances at the center front (don't need them). On the right I have marked 5/8' in from the center front. That inner green line is equivalent to where the seam would be if there was a sewn on button band.
Steps 1 and 2:
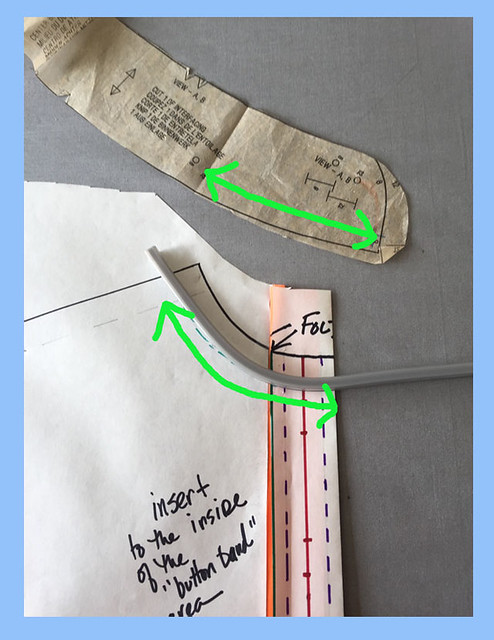
Now I create the extra part (Step 3) which turns into a fold that simulates the edge of the button band, and creates a space where the back of this one piece button band tucks in and gets stitched.
I have sliced open the pattern on the green line and inserted 5/8" of space. Why 5/8" when I am creating a 1/4" tuck? Trial and error has shown me that even on thin fabrics the turn of the cloth takes up some fabric, maybe less than 1/8" but it is something, and you can adjust the actual width on the other side. The image on the right shows how this insert gets folded behind what is becoming the all one piece button band.
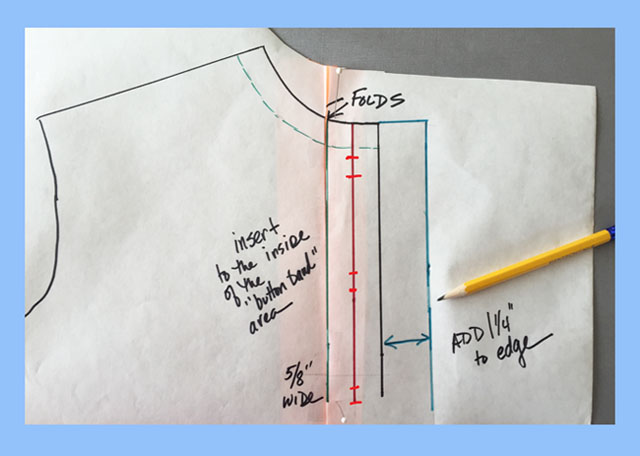
Step 3
Next I add to the side of the shirt another 1 1/4", or equivalent to the width of the button band if you started with a different width button band. Basically this part has to fold behind the front and reach into the fold created by the inset, and then get stitched in there to make the clean finish. Sometimes I even add a little bit more just to be sure, and then trim it off after folding. In case of a thick fabric, like flannel this would be a good idea.
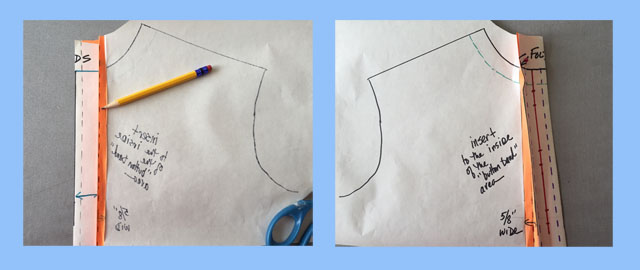
Step 4:
Now the pattern is basically completed, here is the back side of the pattern on the left, showing the extension folded into the tuck (orange paper section). On the right showing the front with the extension folded behind. Also I have marked the stitching that you do on either side of the center front. On the inner side, this serves to catch the extension into the 1/4" tuck, and then stitching the other side 1/4" from the edge gives it symmetry.
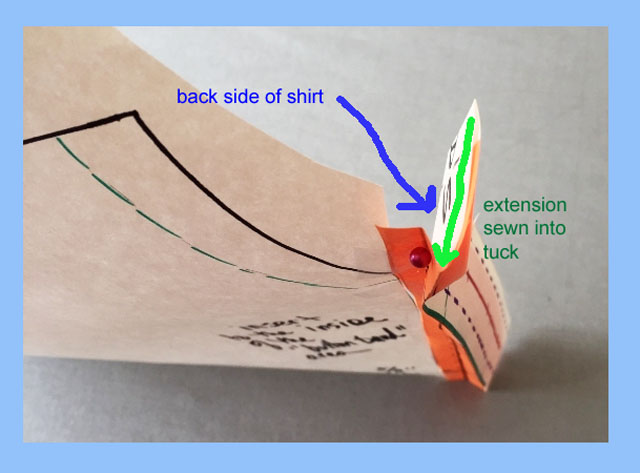
This is the trickiest part to show, here is a view from a different angle. The extension portion fold back inside, is caught in that 1/4" tuck and if all measurements and folds are correct then you sew the tuck at 1/4" and have a clean finish inside the shirt.
What I have not photographed or mentioned is marking and interfacing. I have this pattern piece created and it is well worn, I mark these lines with tailors tacks and then the folding is very quick. The iron is your friend here, I just press the various lines into the fabric and then open it back out and apply a strip of interfacing to the inside of the extension portion. Most fabrics need some interfacing for the buttonholes so don't skip adding this.
One last thing to check before actually using the pattern is to make sure the collar stand matches the newly created shirt front. I use a tape measure set on its side to measure curved distances but I couldn't get it to stay still for a photo - so this is my flexible ruler. The portion of the collar stand and the shirt front should still marry up properly after all the folding and tucking. The green lines are equal so all is good. Don't forget when measuring to take away that seam allowance on the front of the collar stand - see how the green arrow doesn't go to the edge of the pattern piece but stops 5/8" from the edge. This is why they do pattern drafting and design with NO seam allowances - so much easier to do all this and then add back when completed.
As for the other side of the shirt. I cut out two fronts, a right and left exactly the same. Then I create the one-piece button band on one side. After that is done I overlay the other side on top, fold back the extension to create the same finished dimension as the other side. This will ensure that your center fronts are matching. Then then fold it in again to basically create three layers there and a clean finish on that side as well. The original Liberty shirt I was copying had no stitching on that side and I have continued with that. It looks really pretty and feminine with minimal stitching.
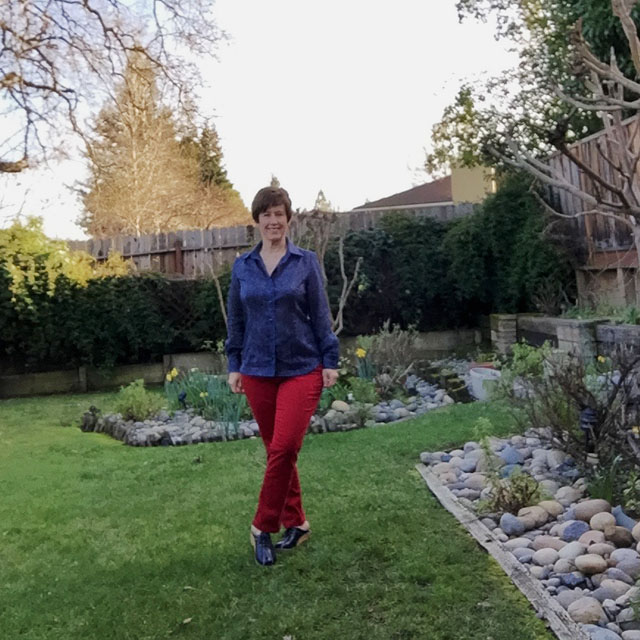
One quick backyard photo to show how this shirt looks, although the light was not optimal. But you get the idea.
Someone asked me on Instagram about the gathered shoulders. That is a case of rotating the horizontal bust dart into shoulder gathers, I wrote a post on Craftsy a while ago about that. I will have to search around to find that and show it again. And it is great for plaids since the bust dart plays havoc with the pattern for matching. You can see how sheer this fabric is - although not really see-through so kind of the best of both features.
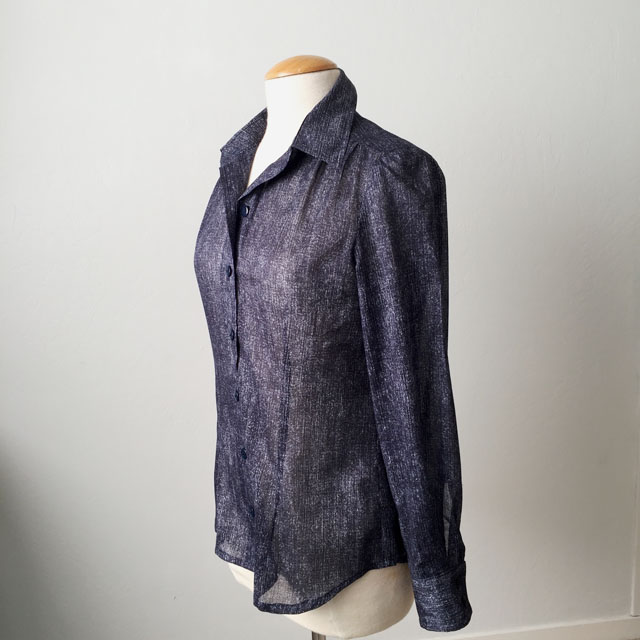
Fabric love on this one - and I think it will be able to be worn with so many things.
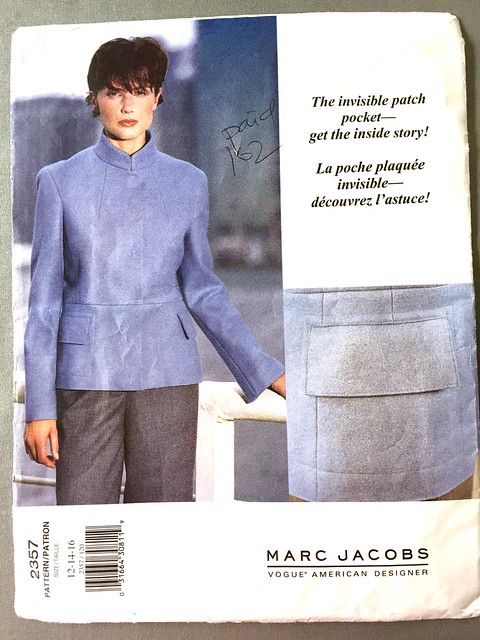
Onward to the next thing - I finally gave into my urge to try a pattern that I found some time ago at some yard sale or other, it is a Vogue designer pattern from 1999, by Marc Jacobs. A designer that I find annoying but occasionally has something really interesting. And my version will be a bit different from the one pictured. Stay tuned :)
It's a rainy Sunday afternoon here, perfect for staying in and doing some sewing. I had ideas of getting out and pulling weeds but the weather said something different - not that I am complaining, ha ha. The weeds will be there next week.
Happy sewing, and if you are in the US then tomorrow is a holiday for most. Yeah! What will you be doing with that time off? I have a guess...
Beth
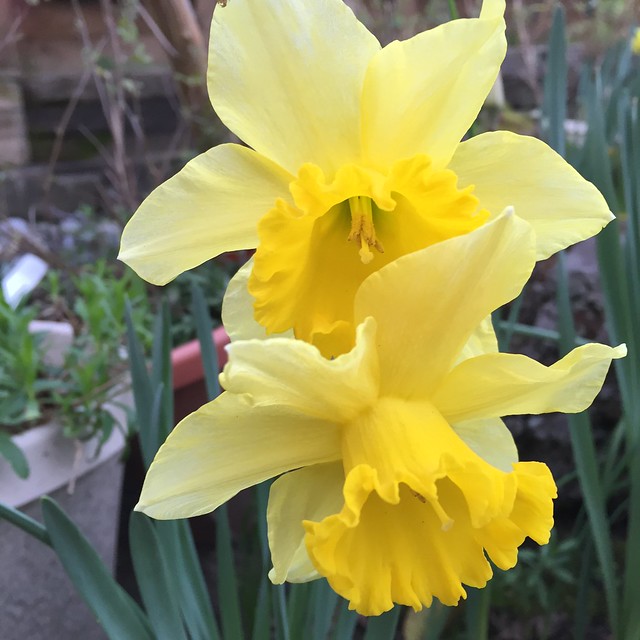
today's garden photo, this time of year what else but daffodils?


It is a beautiful blouse. Raining here too along the Oregon coast. I have the day off tomorrow as well. Nothing but a boring doctor's appointment. Blah.
ReplyDeleteInteresting button band! I'll have to try this one out sometime soon. Lovely shirt!!
ReplyDeleteLovely shirt, Beth. And beautiful fabric, what a find!the color and resemblance to a dark denim is so nice.
ReplyDeleteThe shirt is lovely and made from an amazing piece of fabric. I'm now on the button down shirt journey so I understand your fascination with this pattern and making multiples that work for you.
ReplyDeleteWhat a beautiful shirt! Thanks for the explanation about how the placket works. Very interesting and it must have been a lot of work to do! The orange paper makes it very clear what's going on with the tuck.
ReplyDeleteOh my goodness what a copycat. Read your post and immediately rushed off to find the line drawing for the Marc Jacobs. Bought it on eBay before everyone else reads your post and discovers it. Your shirt is safe from copying. I love the fabric and it looks great on you but personally haven't overcome the trauma of early 90s corporate wear. Think it's the shoulder pads!
ReplyDeleteI'll be sewing my white button front shirt today! I am also kind of getting into the button up shirt lately...although I don't find them particularly fun to sew. This fabric I'm sewing now has a little Lycra in it so I hope it will be more comfortable to wear. I generally hate wearing long sleeved woven shirts (purchased) because they never fit right--I have long arms so they always bind and it drives me nuts. I am going to see if making my own will fix that problem. The pattern I am making has the hidden button band (V1509), which I've never done before so that is fun.
ReplyDeleteHooray for daffodils!! It's my favorite time of year :) Mine are currently popping up under a ton of oaxalis and chickweed. I need a sunny weekend to do some weeding! Anyway, your shirt looks great, and I agree, there is something very satisfying about sewing a shirt!
ReplyDeleteThe shirt looks great! Thanks for the directions on the band. I had an old pattern back in the 80s that a friend's mom got from the factory where she worked that had a similar rtw band. It certainly makes a lot of sense. I think you are on to something with the shirts. Tees are nice and jersey tops are comfy, but a shirt is always more dressed up looking. And thanks for the great daffodil shot. It will be a while before we see that here in New England!
ReplyDeletewhat a gorgeous shirt, and that fabric does indeed look divine! I love the subtly gathered shoulder area, it's beautifully feminine. You look lovely in this :)
ReplyDeleteWhat a beautiful shirt in such a fabulous fabric!
ReplyDeleteBeth, this is a REALLY nice shirt! I adore the fabric and I think it was just waiting for you and this top! I use to make more woven tops when I was working...now I am more into knit tops. However, this one and those jazzy colored pants are making my heart sing!
ReplyDeleteWhat a gorgeous blouse! I love it. Your review is really informative. Thank you!
ReplyDelete