Showing posts with label 1143. Show all posts

Saturday, November 10, 2012

Vogue 1143 Jacket, how I hem sleeves

Thank you to everyone for all your fantastic comments. There certainly was widespread interest in seeing this jacket made up, lots of people said they had the pattern but were waiting to see a few reviews before taking the plunge.  I used a stretch woven that was just the right weight for the jacket but a bit too light for my liking for the pants but I am not sure what would be better.

When it comes to hems I am slightly obsessed with invisibility - and it is entirely possible with a few extra but easy steps.  Nothing new here, this method is available in many sewing texts but I was taking photos all the way through this construction so here is the process.

First step:  decide on the sleeve length.  Pin hem and then mark the edge with a thread trace, as in photo on the right. No need to press the hem, that comes later.
Second step:  apply a strip of fusible interfacing.  For this lightweight fabric I used fusible knit interfacing, for a tailored wool jacket I would use a woven weft fusible. For both these steps a sleeve board is invaluable. A necessity (and often available at garage sales, the older ones are so sturdy).
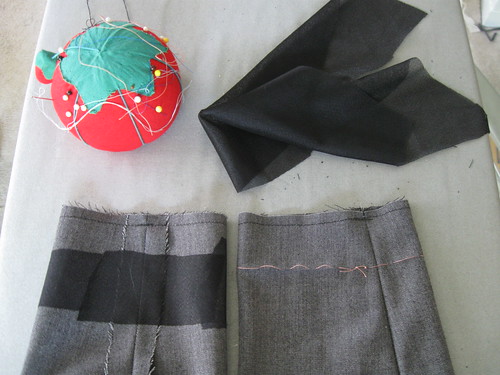
Grey suit sleeve preparation
Next step: I hand sew the hem catching just a few threads of the fusible interfacing and not picking up any threads of the actual sleeve fabric.  Nice and loose - there should be a tiny bit of play in the thread so that it doesn't pull.  I think this is key in hem sewing, the actual hem should have a tiny bit of slack to prevent a stress line across the garment.
.         sleeve hem1Sleeve hem3
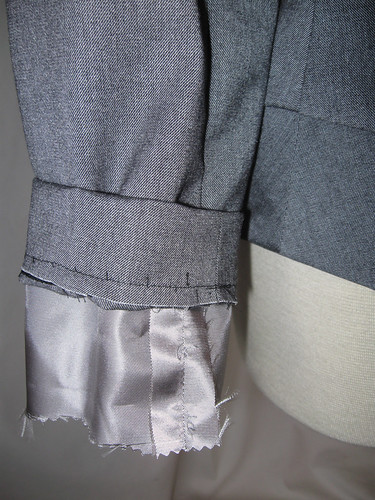
On the right, finished hem, slightly out of focus image but you get the idea.  Next step: while the garment is on a hanger or dress form, cut the sleeve lining about 1/2" longer than the finished hem. Careful with the scissors here!  Let's just say that scissors + finished garment edge can be a dangerous combo.  Moving on...
Next step:  press under the cut edge of the sleeve lining about 1/4" or so.  No need to be super exact. Then turn up sleeve and lining and pin lining to sleeve.  By turning up the sleeve and lining this way you get that little bit of ease in the sleeve lining that allows for arm movement. Easier to show here in the photo below.
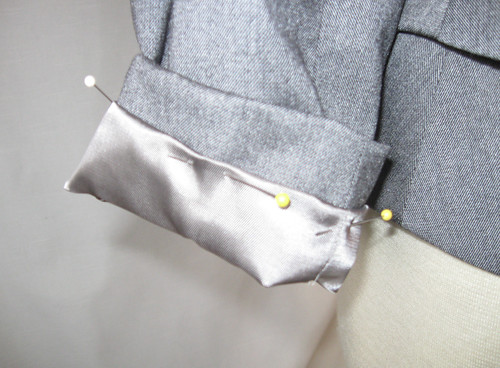
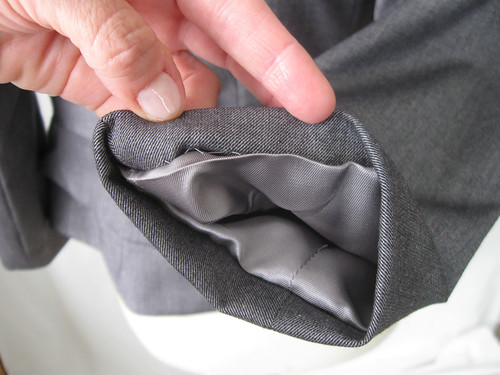
Sleeve hem2
Next step: stitch the lining to the jacket sleeve. See the photo below, I stitch the lining just below the crease, so it is hidden and retains that bit of ease we added with the folding and pinning.Sleeve hem7

The lining for this jacket was well designed, I thought it fit perfectly which does not always seem to be the case. I actually sewed it in by machine as the pattern instructed (a rarity for me - I usually just hand sew in linings - I like that step) Although the bottom of the lining is hand stitched. The lining was a acetate satin that I had in my lining box - a lucky find of just the right color. Well not really, when I find a good lining on a super sale I buy 5 yards or so and stash it away. (grey, navy, black - always useful.)
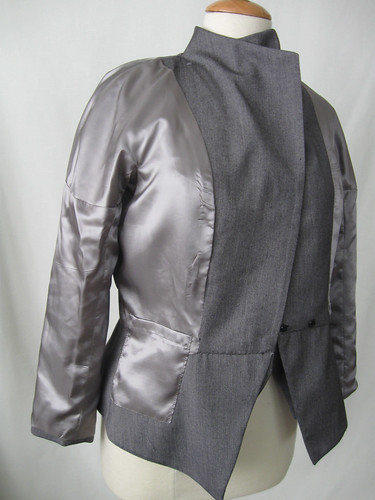
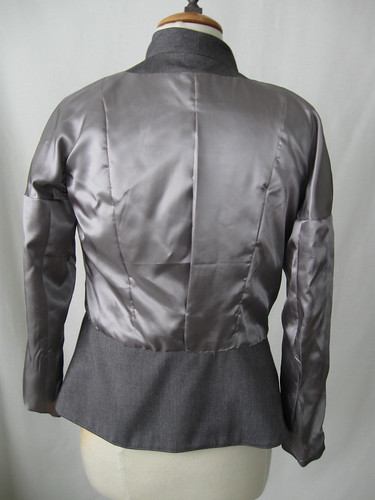
    Sleevehem6Lining back

Is that a pocket you see on the lining front?  Yes!  Once I finished the jacket lining and pinned it in for a check I thought this jacket needed a pocket, for a bit of mad money or business cards. It had to be hand sewed in, usually I would machine sew this type of inner pocket into the lining before it was finished. If you do add this type of pocket - go around the outer edge with your hand stitching twice, with a few random knots. You will be glad you did if you put anything weighty in the pocket, such as the aforementioned phone.
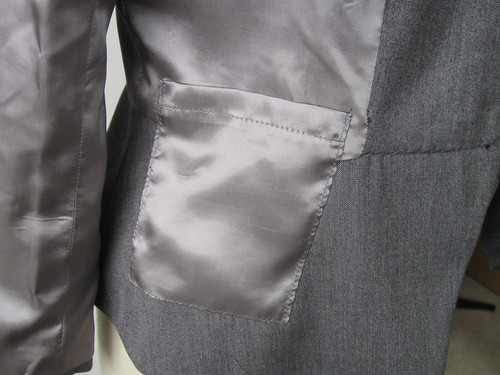
Inside jacket pocket


The front closure:  This is another reason why I mentioned in the previous post that this jacket should be worn closed and belted.  The pattern calls for snaps to close. Not the prettiest method.
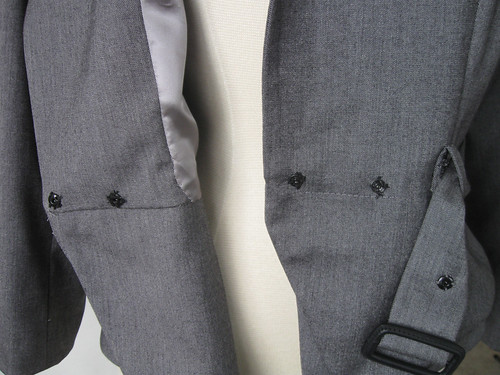
Sleevehem4

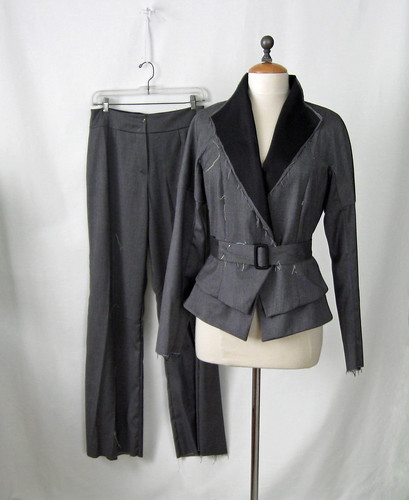
OK - this pattern is DONE!    one last look at the finished jacket. Someone mentioned wearing it with other things, and now I am thinking a skirt but I will have to play around with proportions.
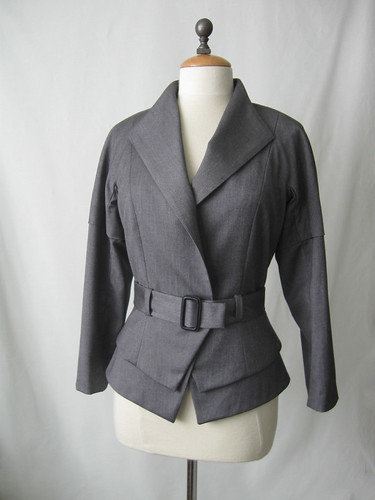
Jacket front finished

Onward to other projects. I am just about finished with a garment refashion (a coat into something else). As I mentioned previously, I remade the Thurlow pants pattern and they are fantastic. Finished a new knit top (New Look 6150, a winner, both versions).  And the holidays just around the corner.  eeeeeek!

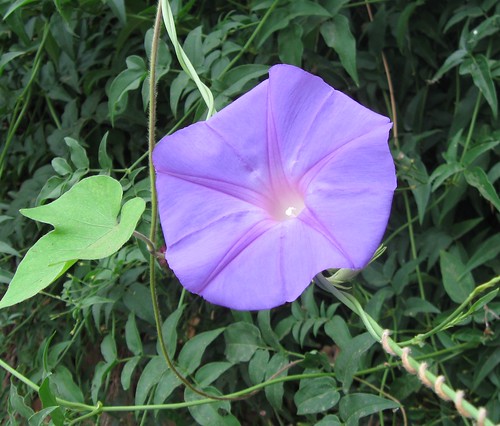
Blue flower from AliceHere is today's SunnyGal garden photo - a plant given to me by my pal Alice. She has a green thumb and end up with lots of giveaway plants. I need more of these, so pretty.      Happy Fall Sewing, Beth

Tuesday, October 30, 2012

Vogue 1143 Jacket, Construction Notes part 2

Thanks for all the encouraging comments on my previous post. I can say this jacket is technically a bit difficult and a little out of the ordinary. I have pushed through the slightly annoying design quirks and come up with a finished outfit that is very satisfying.  When I concluded the previous post, I had set aside the partially constructed jacket in March and just pulled it out of the closet a few weeks ago.  
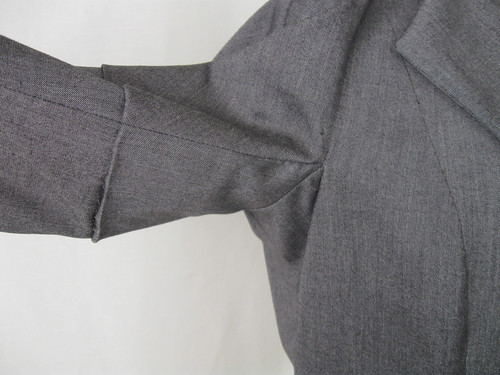
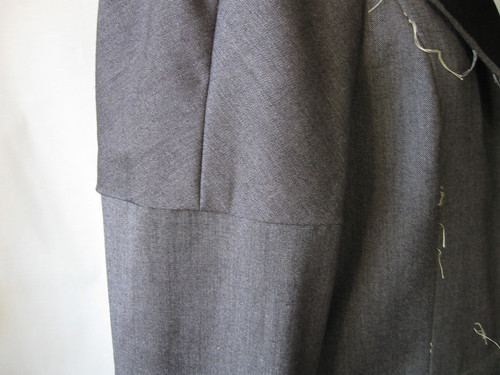
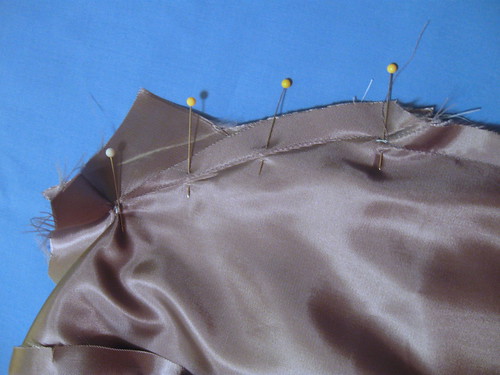
The next step was to attach the sleeves and that is where the quirks (problems) really appeared. The sleeve is composed of 2 pieces, the jacket continues at the shoulder creating the upper portion, and then a lower portion is sewn on, with a pleat effect at the upper arm. It looked good on paper, but in real life was a droopy mess.  Following the pattern instruction I tacked it at the seamlines but that did not do enough to keep the shape called for in the technical drawing (or the pattern photo for that matter). 
Vogue 1143 jacket sleeve problem
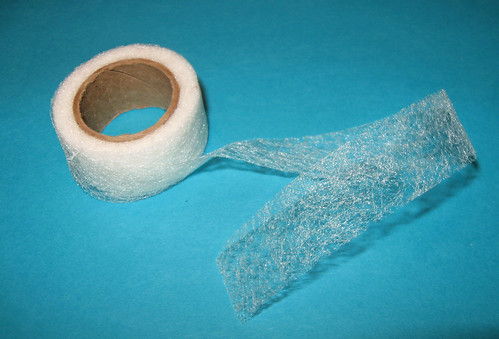
I tried hand stitching it under the folded edge but it there still was pulling and it didn't look right at all. The answer to so many of my sewing dilemmas:  Stitch Witchery
Stitch witchery
Do you use this? I find it invaluable, particularly in tailoring, often where I might hand stitch I find that a little strip of Stitch Witchery is a good problem solver. Note: I rarely use it directly on the fabric where there is no interfacing because it may show on the other side, but for example on lapel facings where two fabrics which are interfaced meet, that is where I might use it to save time and hand sewing (much as I enjoy that). 
I turned the jacket inside out and put a small strip of the stitch witchery inside that fold. That made the fold stay creased and flat so it didn't droop as in the first photo above. Then I hand stitched around the entire circumference of the sleeve, just about 1/4" in from the fold to attach the upper sleeve to the lower portion. In this photo below I am holding the sleeve up so you can just see some of those stitches. So actually a combination of stitch witchery and hand sewing, but as long as it saved the look of the jacket I am happy.

Sleevehem5

And viola, an acceptable sleeve, although much less "3-dimensional' than it looks on the pattern photo where they use Trickery? Photoshop? Hot glue? Who knows what they do to get the photo illustrations for the patterns...but I have my suspicions.

Vogue 1143 jacket sleeve solution

Next up is my method of sleeve and lining hemming, I was going to continue now but I have to run, so I will post that tomorrow.  
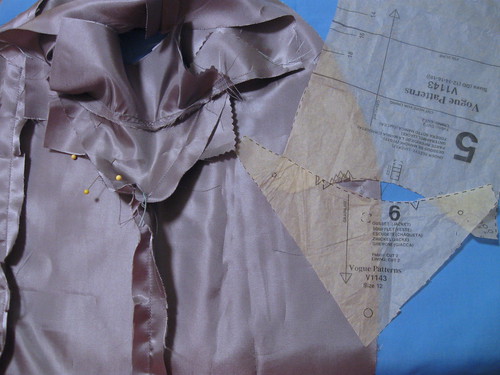
And if anyone is still thinking they might want to try this pattern (even though there are so many others calling to us) here is a look at the lining, same pesky pattern pieces with the underarm gusset and corners to reinforce.  
  
grey suit lining gusset piecesLining sewing gusset

Happy almost Halloween sewing, Beth

Wednesday, October 24, 2012

Vogue 1143 Jacket, Construction Notes part 1

This project, Vogue 1143 has veered perilously near to becoming a UFO - unfinished object.  I started this project back in Jan. 2012 when I rashly offered to sew a Vogue designer pattern chosen by a reader of my blog.  There were times when I thought "be careful what you wish for...or ask for" since the pattern has some real quirks that were quite confounding.  I am glad I persevered and now have it finished.  Even the matching pants, although I used a different pattern for those.  Photos have been taken and I didn't like the length of the pants so I am rehemming, (my pal Alice said it looked like I have no feet - so retake soon.)

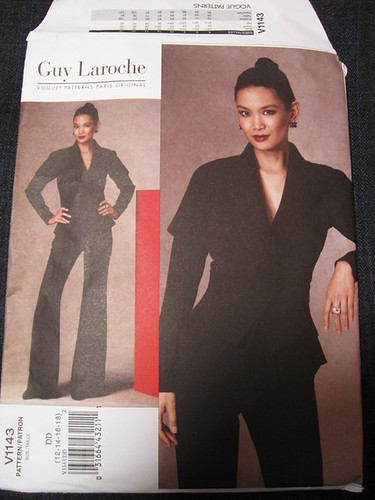
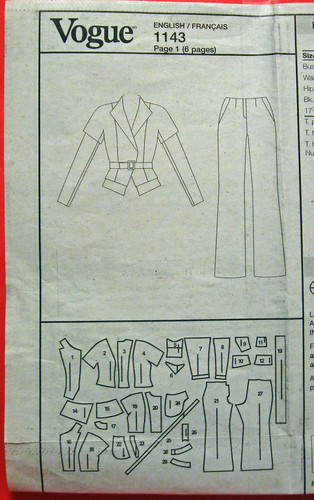
A look at the pattern envelope and the technical drawing which commenter Becki-c wanted to see.

 V1143 pattern envelopeVogue 1143 technical drawing
It is a pattern with a LOT of pieces and definitely some work to alter for fit if the jacket pattern is not a good match for your measurements.  I made my typical Vogue size 12 which was good in the waist and hip, if anything I think I could have gone down a size and felt a bit better in the finished jacket across the shoulders and the waist. 

If I could sum this jacket up in one word I would say "Fussy".  By that I mean very fiddly sewing, lots of angles, an underarm gusset, and double layer sleeves that I had to do some maneuvers to get to a wearable version.  Fussy for the wearing also, because it is a jacket that looks best when worn closed, with a belt, so not an easy breezy casual jacket by any means and the lapel turnback is a bit vague as well.

This pattern has a Vogue rating of Advanced-Plus Difficile and I agree.  Two things to note, I didn't make a muslin, I figured if I was going to sew all those darn pieces I only wanted to do it once ☺ and secondly I actually followed the pattern instructions to the letter, mostly because they were the only reasonable way to construct this jacket due to the attached peplum.

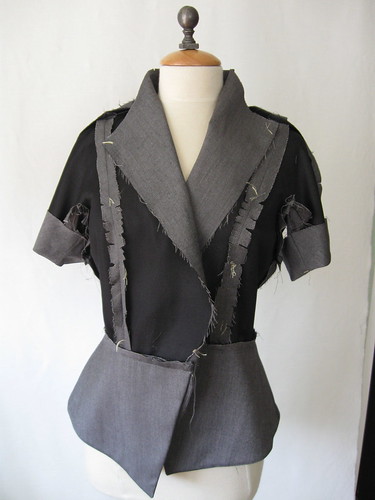
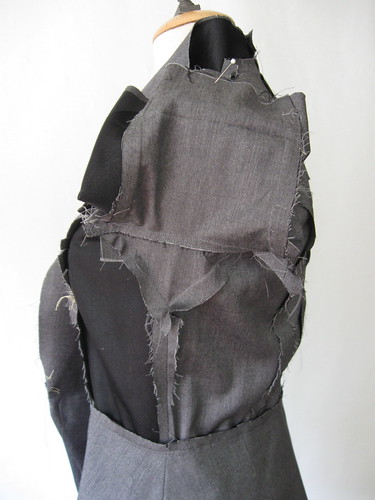
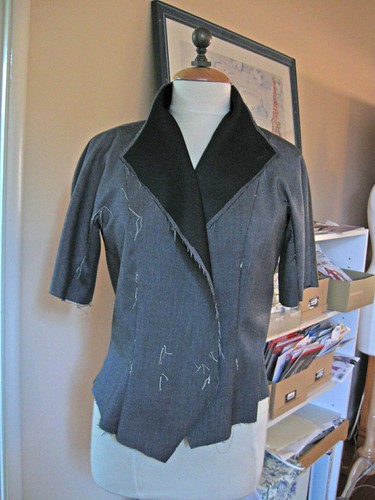
Here is a look at the jacket once assembled, minus the sleeve lower portion. The fabric I used was a "denim-look" stretch woven, 73% poly, 25% rayon, 2% spandex, purchased at the big chain store with a half-off coupon so cost of materials about $ 25.  A lucky random choice as it had just the right weight and stretch, and pressed very well.

IMG_2330IMG_2331

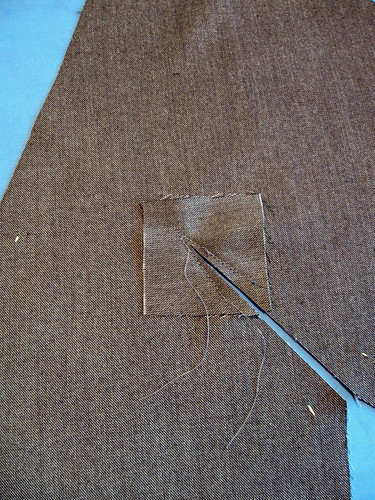
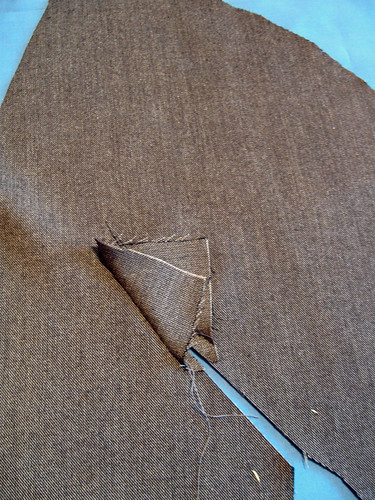
Here is the start of the "advanced" construction, the underarm sleeve gusset insertion. Any pattern with a gusset and/or one that says "slash"  always gives me pause. Left photo is the sewn on bias square which serves to reinforce the gusset inside corner and create seam allowance where it gets too narrow at the corner to sew.

                  Grey Vogue Jacket bias square1Grey vogue suit bias square2

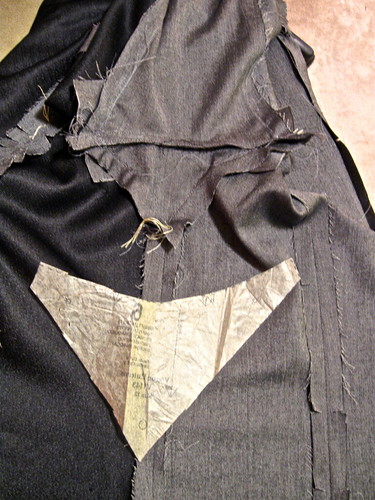
A look at the underarm with gusset inserted. I put the pattern piece below on the side seam so you can see how that shape fits into the area.  At the two upper corners of the sewn-in gusset you can see the bias squares which are reinforcing the corners.  This is a detail (underarm gusset) you see on a few designer pattern and also on some vintage patterns/garments. It is one way to keep the armhole quite close to the body but allow for some range of motion. I saw this feature on Michael Kors dress I made a while ago,  posted here and here and in that  dress I got away with skipping the reinforcing square since the gusset attachment was a bit different, but on the whole a good technique to know.


IMG_2327

When it is all stitched up it looks like this on the inside:

IMG_2332

And this sewing took me to March 2012 when it went on this dress form and stayed there in that state for about 2 months, with everyone coming by asking what that "interesting-looking" thing was.  At that point I became very busy with other projects, the warm weather arrived and this moved from the dress form to a plastic bin with all the many pattern pieces. 

Grey Vogue suit jacket started

Next up, the pesky sleeve problems. But no fear, this story does have an end. In fact I have made a couple of  knit tops in the last few weeks, including something from Pattern Magic, finally.  

Here is today's SunnyGal garden photo, these morning glories are trailing over the fence and mingling with the pink jasmine vine. They are from my neighbor's yard and are very late this year. Talk about tough, look how the one vine has twined around the other.  

Morning glory

Happy sewing and I wish everyone lots of finished objects, Beth

Thursday, September 27, 2012

Vogue 1143 Suit - nearing the finish line

Who thought this Vogue suit had disappeared in the black hole of space? That mysterious vortex of unfinished objects which exerts such a powerful pull on the pesky, the difficult, the not completed in the appropriate season.  You know what I mean. The waning days of winter, a scratchy wool skirt or a heavy jacket.  One evening you are happily stitching on your winter creation and it seems a little warm in the house. You open the window and hear some crickets, or maybe catch a scent of orange blossoms just outside. It is spring! or very nearly.  Suddenly that heavy jacket or long sleeve dress holds no appeal.  There is some nice linen calling your name. A shift dress in a bright cotton. Anything but the thing you are working on now but will never wear until fall returns.  So away it goes, maybe in a bin or  bundled up into a bag and shoved into the back of the closet.  Have you been there?

That is exactly what happened to this suit.  While it is not particularly heavy fabric, a lined, belted, long sleeve jacket just didn't do it for me once June arrived here. This jacket sat on one of my dress forms for months. In July the thermometer was hovering around 100º F and I finally folded it up and put all the pieces away in a bin.  Last week I saw a few falling leaves - so it was time to revisit this suit and get it DONE.  Here is a look at the 2 pieces, jacket is put together and just needs it lining and lapel facing. 

Vogue 1143 suit in progress
I have to say this project confounded me in so many ways but I see some light at the end of the tunnel and have plenty to post about when it is all finished.  I would never have chosen this for myself but last January I made the bold (idiotic) offer to make a Vogue designer pattern chosen by a reader of this blog.  Ruta chose this Vogue 1143 Guy Laroche pattern and while I am very glad she did it was a challenge.  Lots of weird quirks with this pattern plus the frightening idea of pants.   

V1143 pattern envelope
Just about finished and I hope to have finished outfit photos in the next few weeks.  I need some kind of top to wear with this so I will have to ponder that once the jacket is completed.

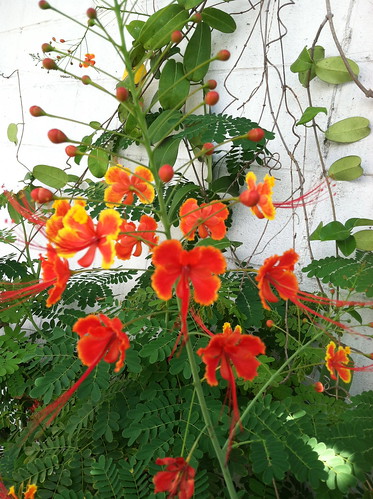
Unrelated to the post above, I saw this plant growing next to a wall when taking an early morning walk on vacation in Hawaii. Wonder what it is. Even the random roadside plants are lovely there.

Orange roadside flower