Friday, June 24, 2016

New Look 6677 + eyelet = summer top perfection

It is entirely possible that I have achieved peak summer top perfection with my latest sewing project. For which I will take partial credit - as this top is for my friend Alice. Who looks so very good in blue. (Which we have already established here - a look at a blue silk jersey dress I sewed for her).

She is always in search of the perfect tunic top, summer or winter version. Recently she did a big clean out and gave me a bunch of patterns she will never use, including the little gem that became this top.

blue eyelet top front view

The minute I finished it I started again on another one, for myself in a small remnant of silk so I will show that one soon.


Alice in blue eyelet top

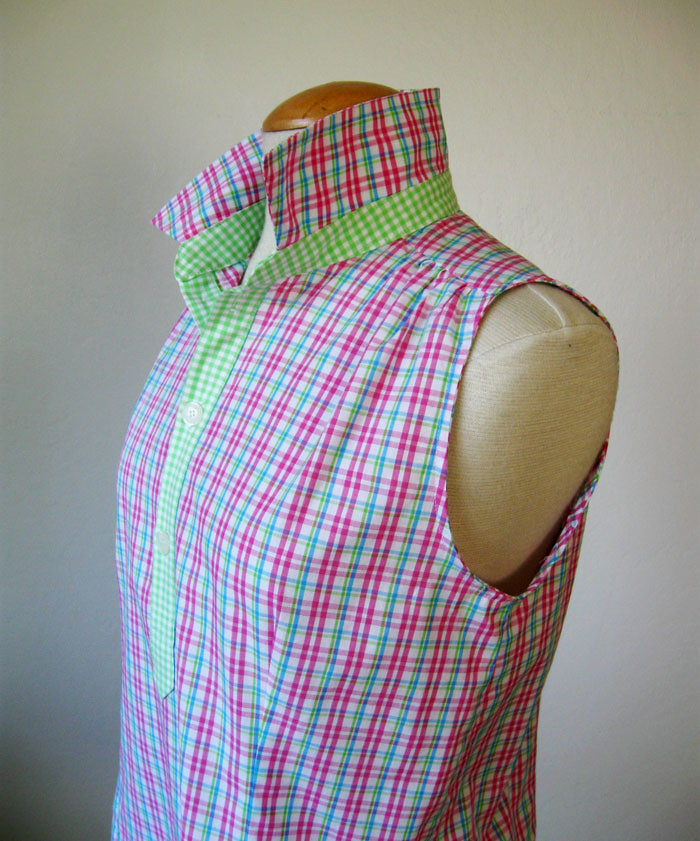
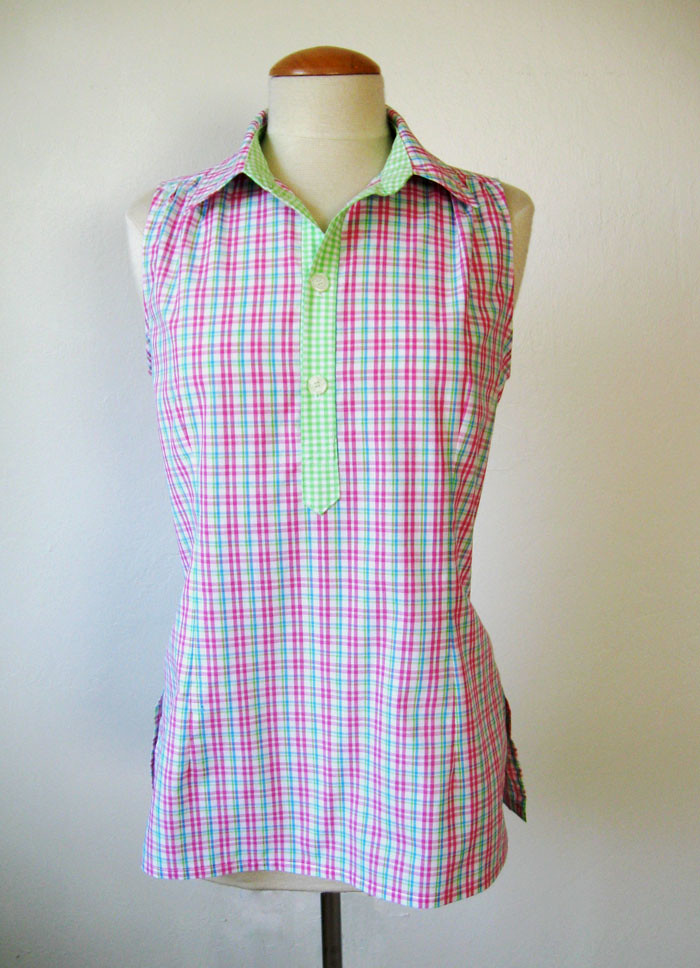
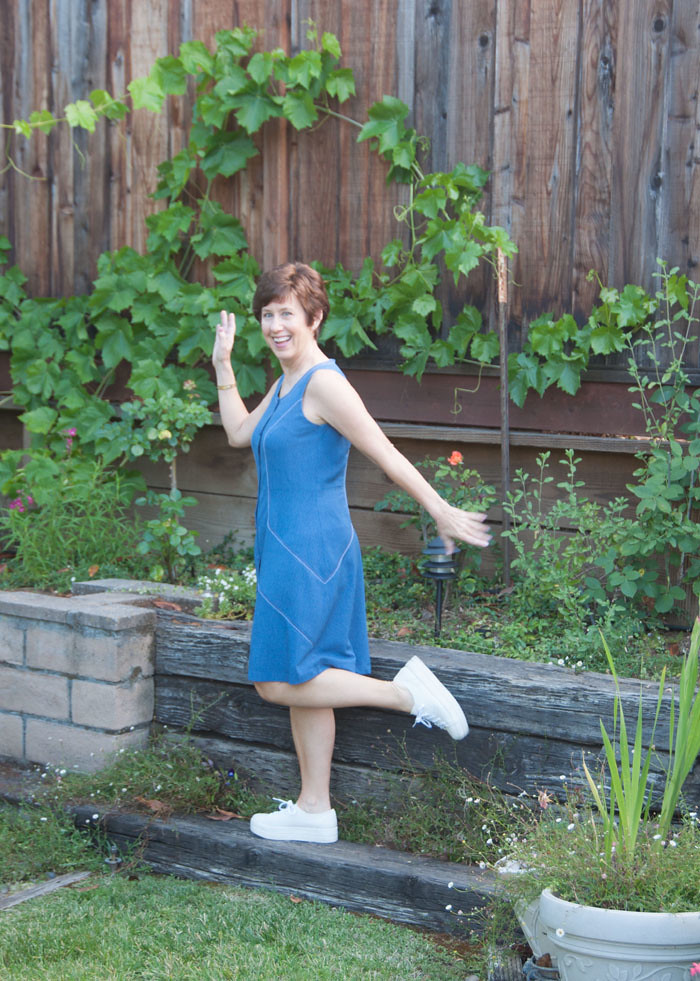
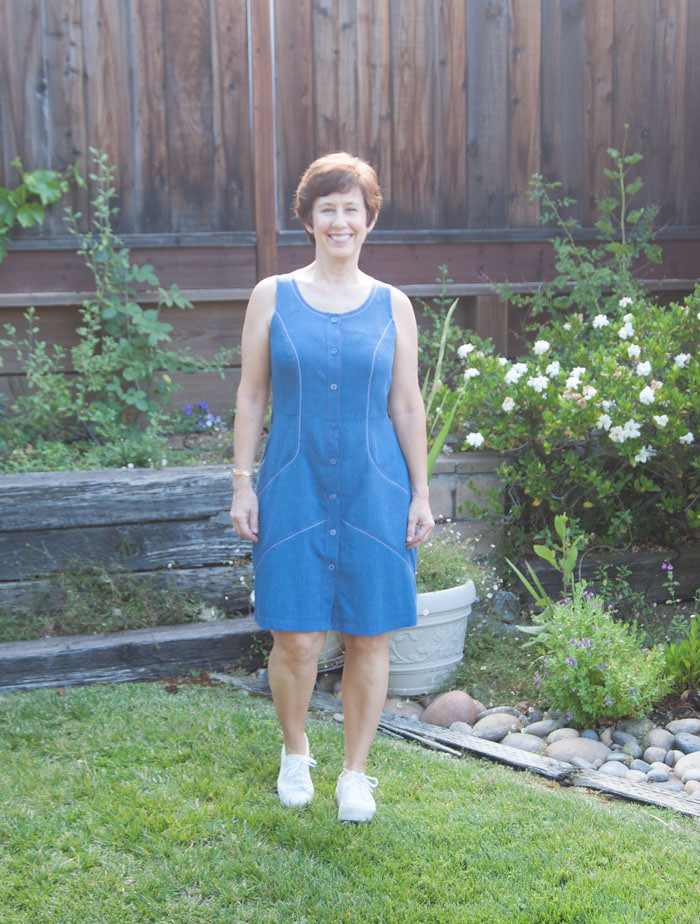
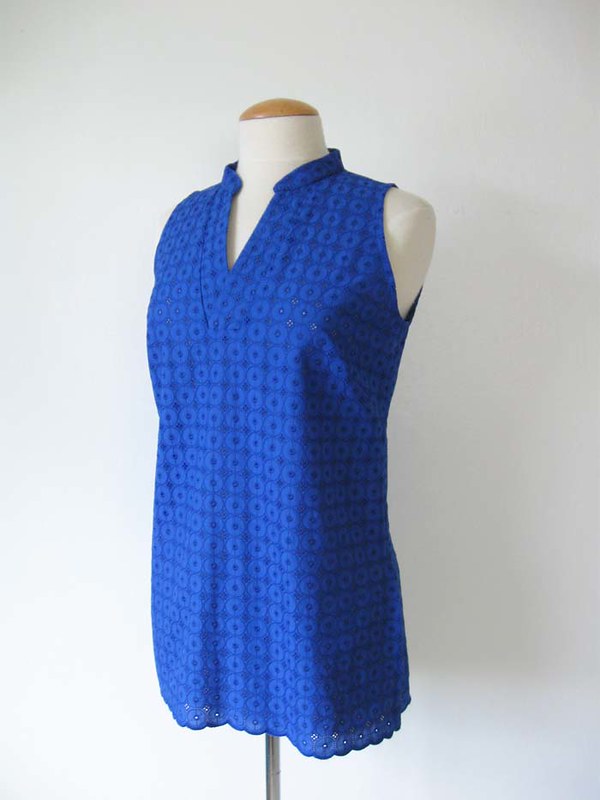
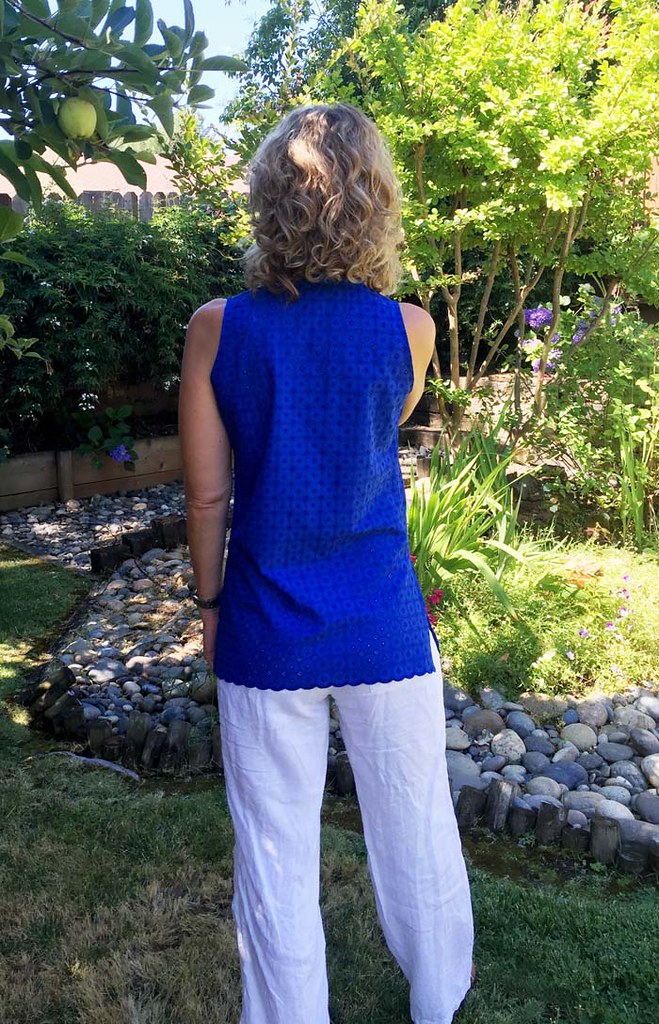
Perfection in a summer top, right?  Of course the color is fantastic - and this fabric is really nice. She bought it in May when we were shopping over at Stone Mountain. I was just there on Monday and I think they still have this color. Now that I've seen this one I want a version for myself in emerald green, although my web searching has not turned up that color way.

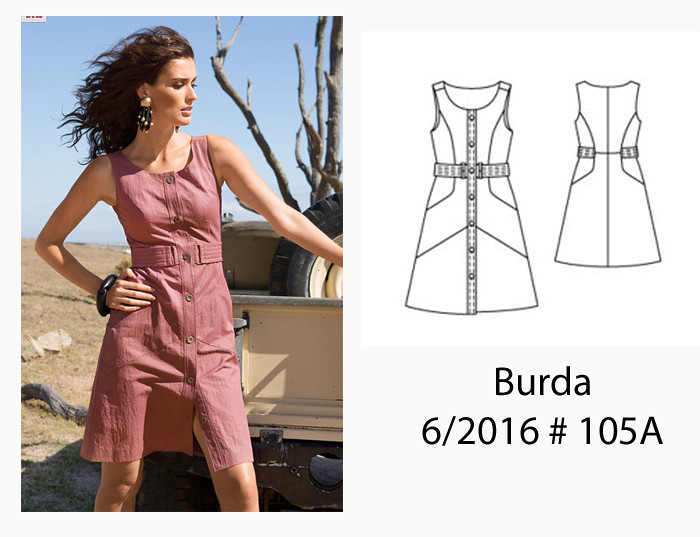
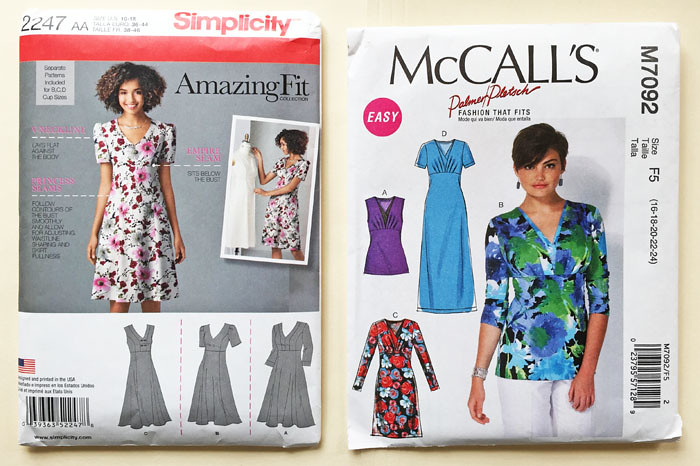
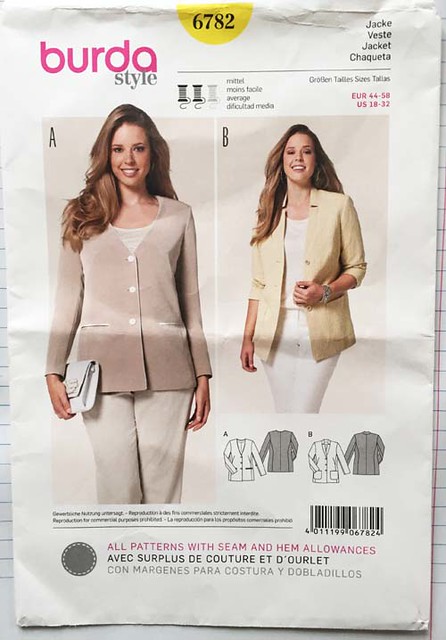
Here is the pattern which at first glance might not look very promising. It has a date of 2007 on the envelope so long out of print.

New Look 6677 pattern env

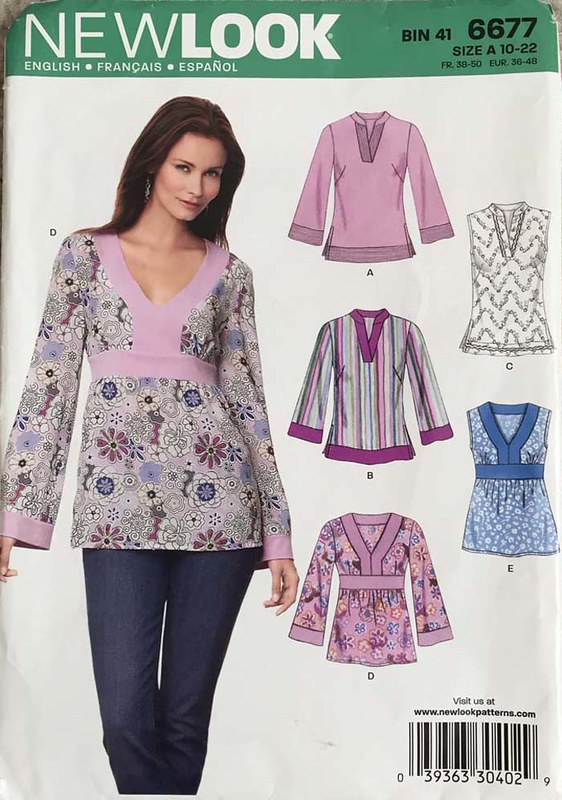
And now I will give my encouragement to try New Look patterns. I'm not sure if they are readily available in other countries but I think so as I have seen them on plenty of UK and Australian sewing blogs. All their patterns are one price ($ 3.99 here in the US) so relatively cheap. They include all the sizes in one pattern envelope. Although their size range is usually more limited than Simplicity or Vogue. Looking at the back of the pattern envelope this one is sizes US 10-22, EU size 36-48, bust measure for those sizes they list as 32"-44". I find their pattern markings to be excellent - and their instructions are good.

But the best part of their patterns typically is that they have more than one view in the pattern envelope. In fact they often have at least two completely different looks. Value for your money. See above  - those tops really have no connection style-wise other than they are in the same envelope. And are vaguely tunic top-y. They have some dress patterns that include mix and match components with different skirt, neckline and sleeve variations where you could make 10 different dresses if you were obsessively inclined to put a pattern through its paces. ALSO - for those of you who think Simplicity patterns have excessive ease, particularly in the neck and shoulders - which is my personal nemesis in pattern fit - then take a look at New Look. I find they have a smaller frame across that area and don't tend to be as large. I have mostly made dresses and tops from New Look patterns including my favorite NL 6150 knit top. Although this one might be my new favorite :)  Lately I have been doing a lot of PDF downloads from the Burda website, as well as a couple of Bootstrap custom patterns and while those are great it is such a pleasure to just use a tissue pattern from the envelope. No printing, no taping, finished garment measurements printed right on there, no seam allowances to add. Easy peasy!

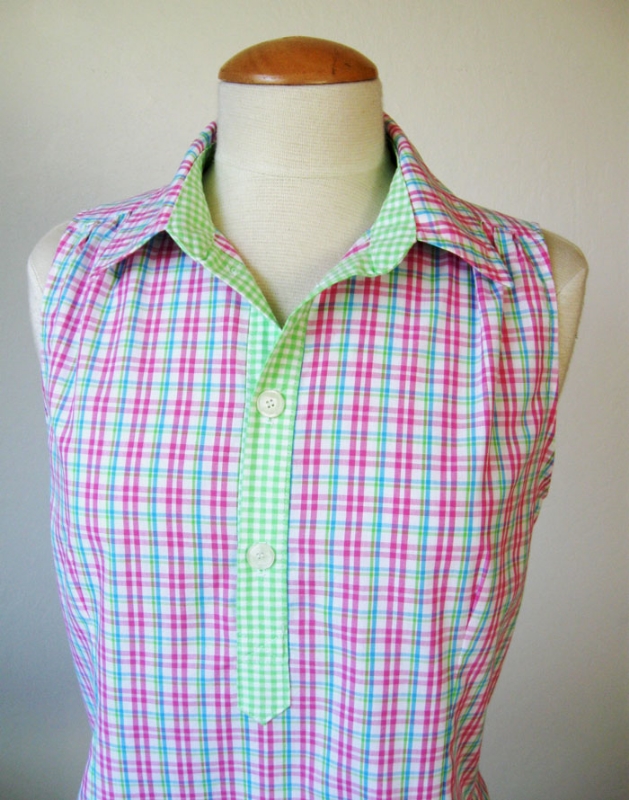
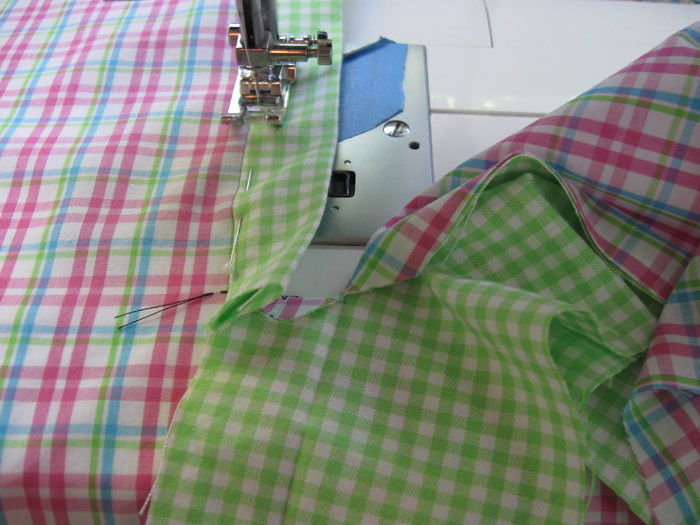
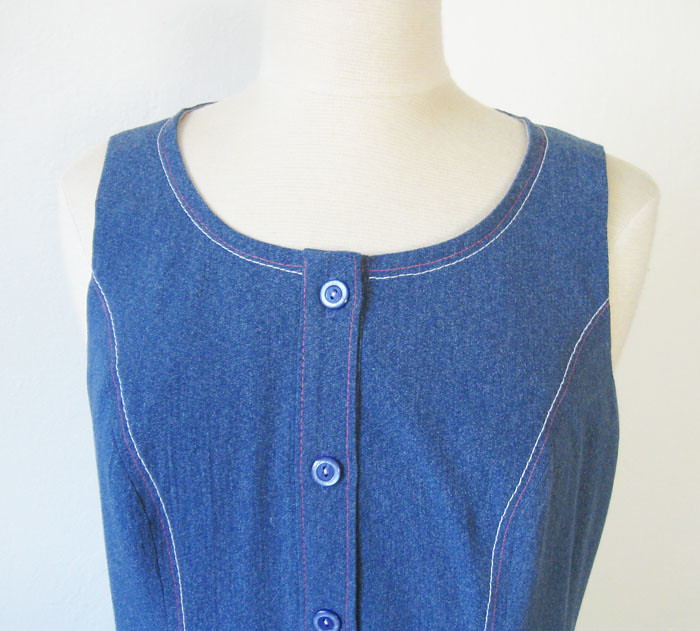
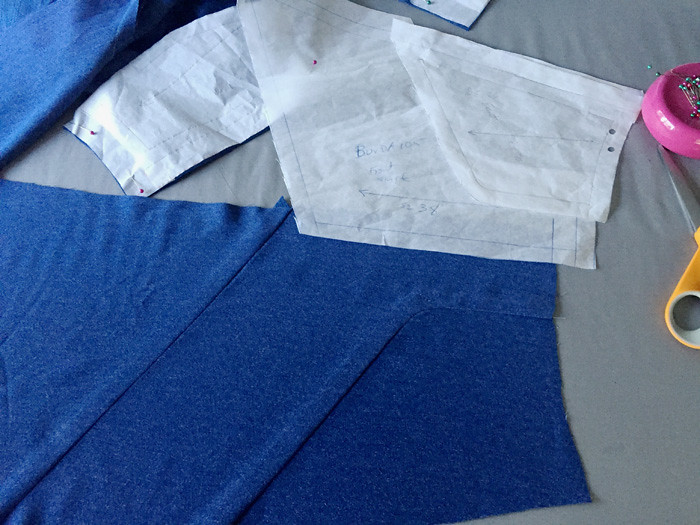
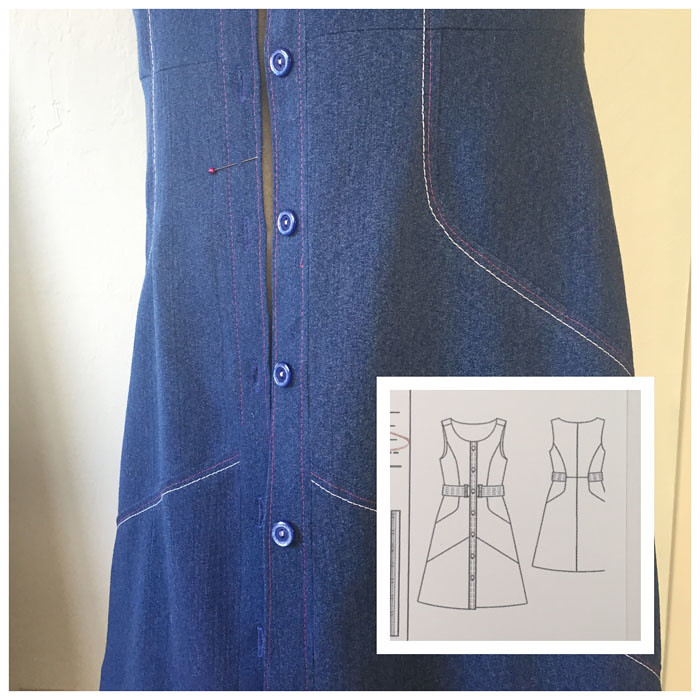
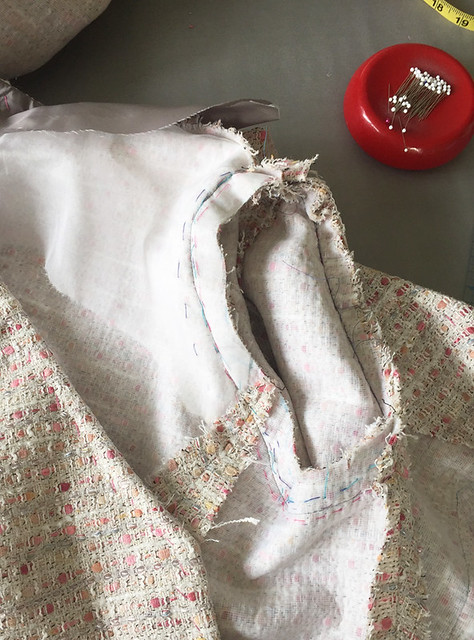
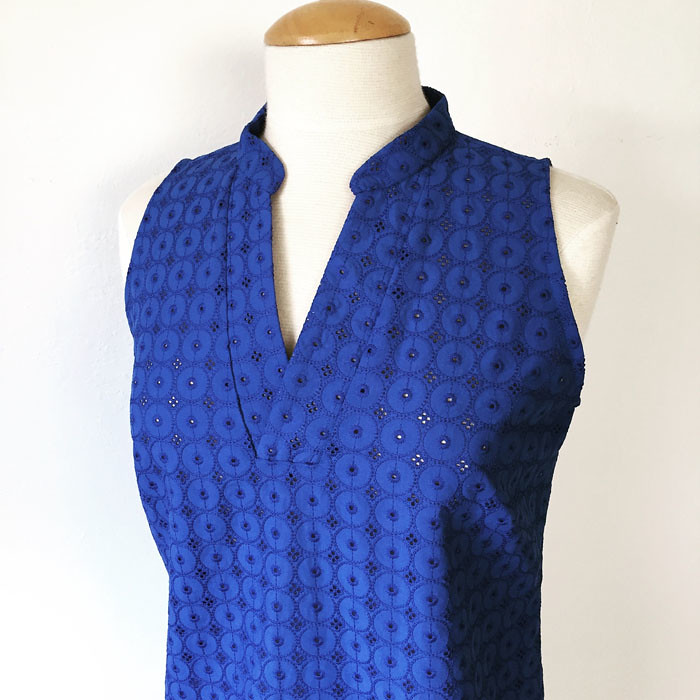
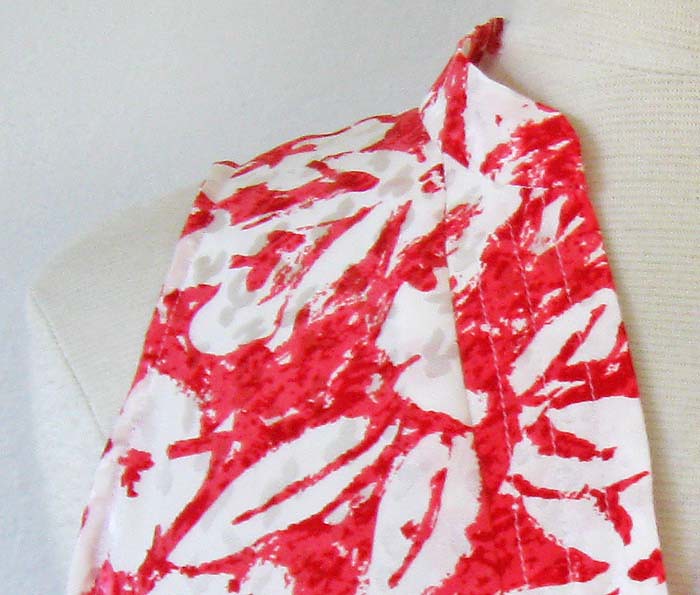
Sewing info: not really all that much to tell on this one. Other than the slightly tricky issue of how to interface that placket and collar.
Can you see it? The interfacing? No, well then my lucky dip into my interfacing stash was a success. I happened to have some silk organza in a color that I would describe as beige/gold/nude. So kind of a non-color and definitely not white. Which turned out to be perfect for the placket and collar so it disappears inside. You don't see it and it preserves the eyelet look in that area. White would have been hideous and also fusible would not have worked either. Silk organza for the win! Plus it has just the right level of body and structure to support the cotton eyelet without changing it.

blue eyelet top

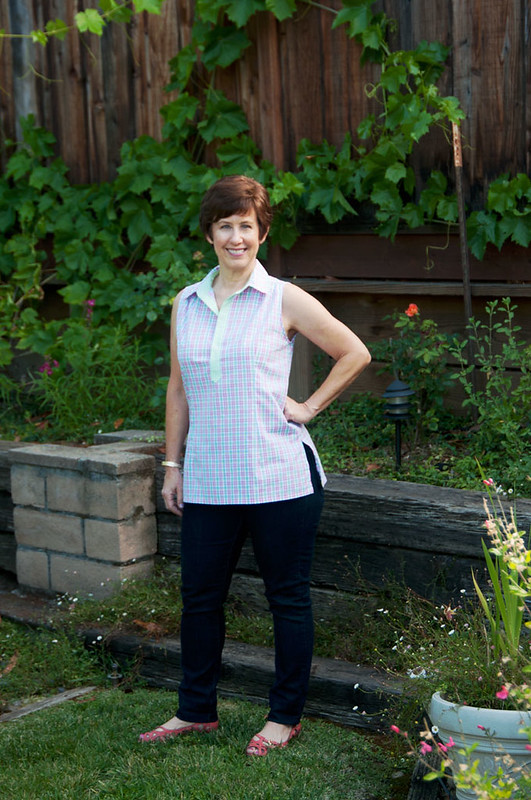
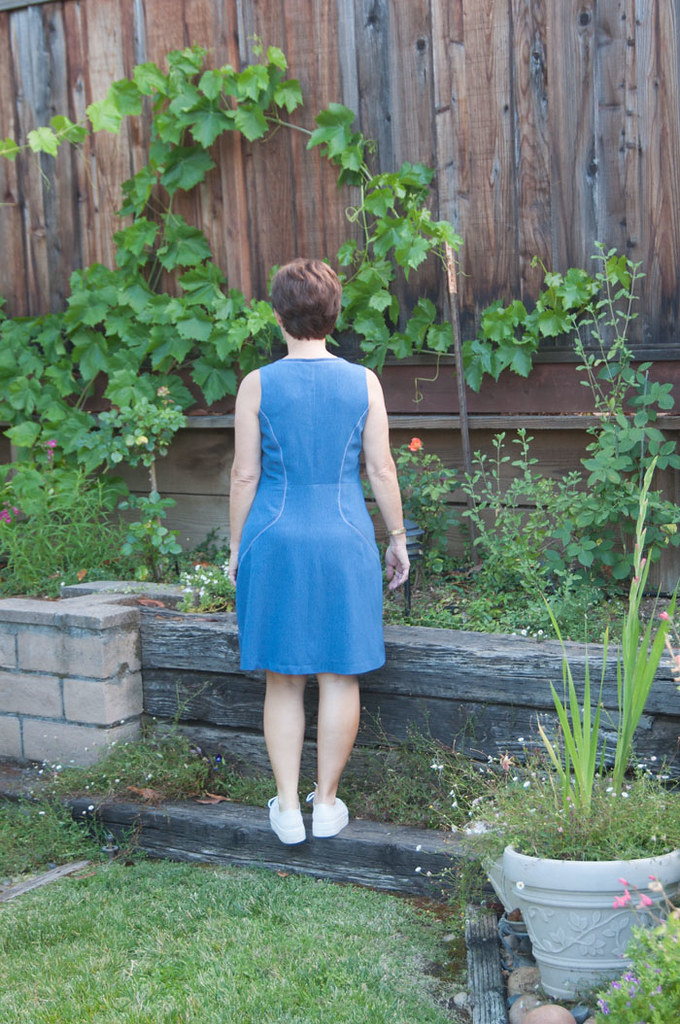
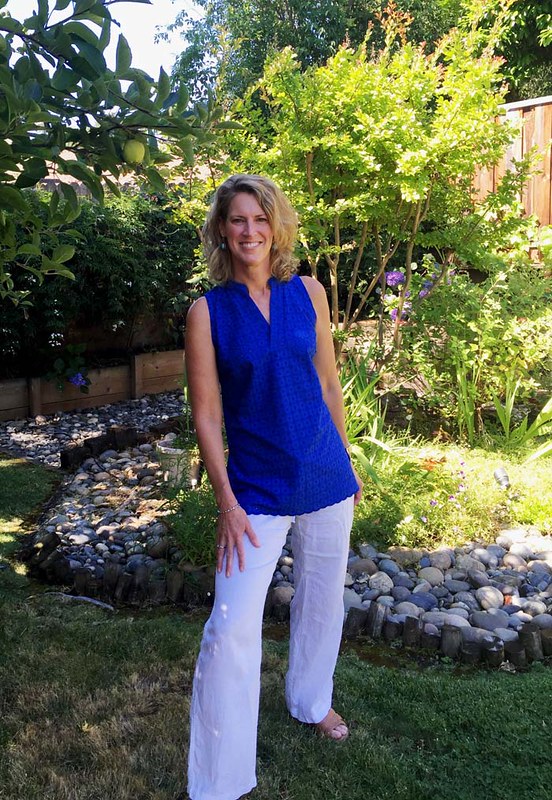
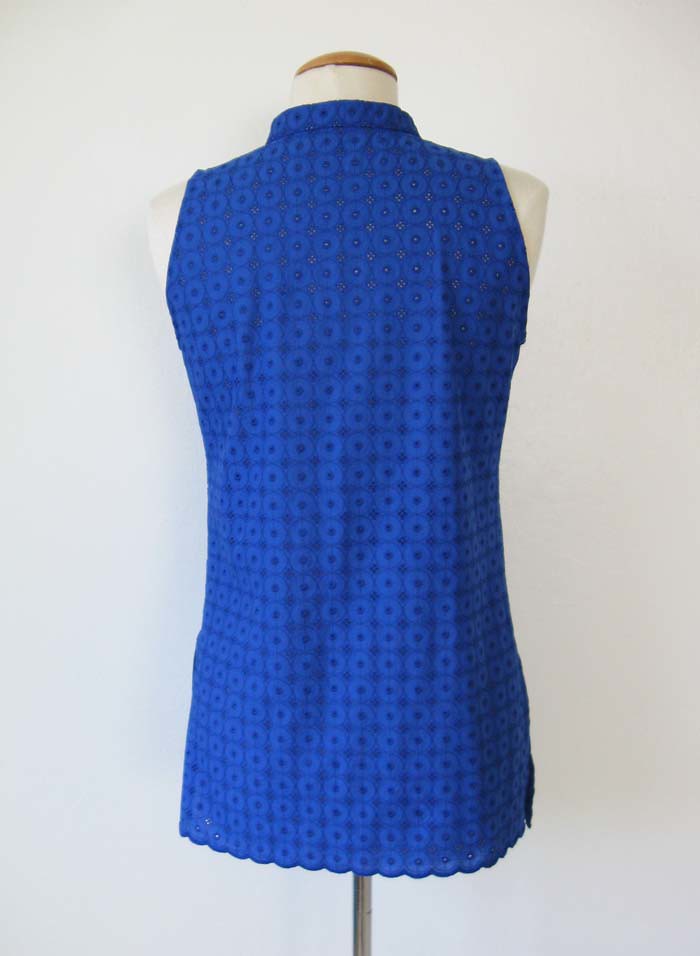
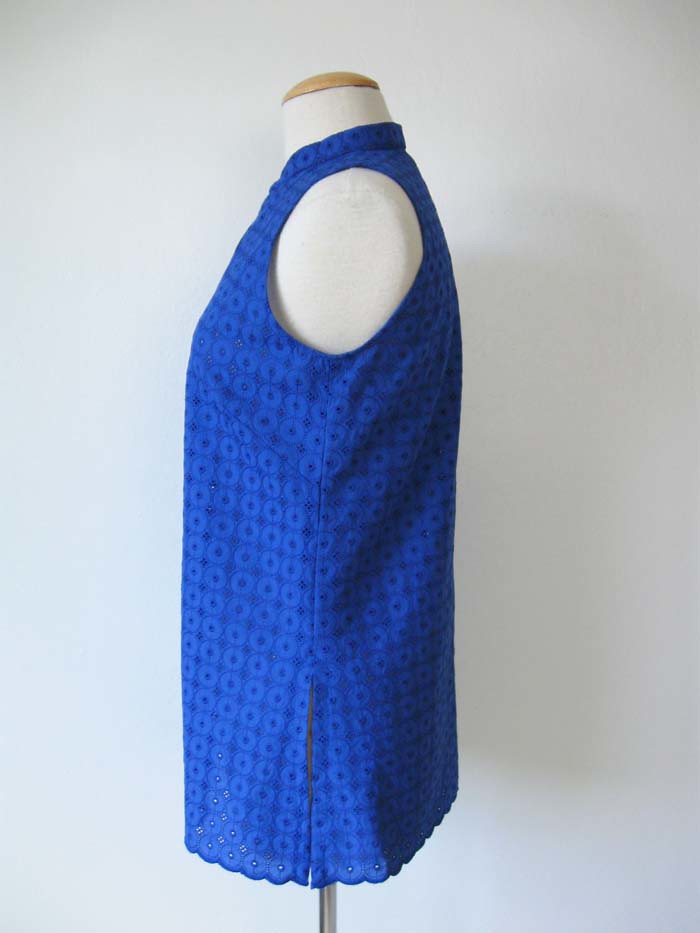
Other adjustments - well obviously - cut in armholes! As I always do. Because I can't stand a sleeveless top with clunky wide shoulders. Alice had used this pattern before so it was a bit chopped up, she had used it previously and made the size 10, which cut off the other sizes in some pieces. However thanks to New Look, the placket was there in all the other sizes (that is a thing they do in their patterns, instead of nesting all the sizes often the facings/plackets/collars etc are each printed in their own size, which makes finding and using a lot easier. And she had mentioned that it was a bit constricting across the shoulders when she made it before, so I morphed this one into a blend of size 10 and 12 to give a bit more room across the back and through the neckline. But the length of the placket in the size 10 was just right so I used that.

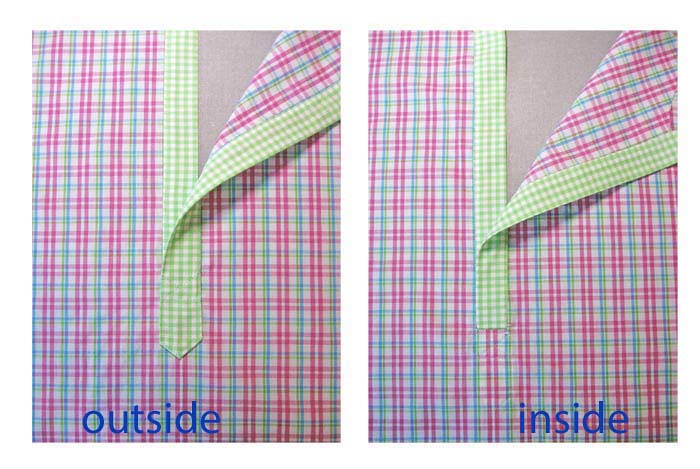
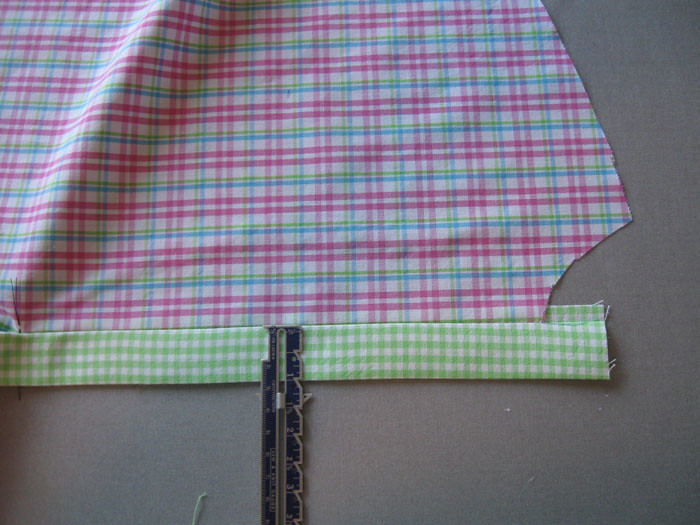
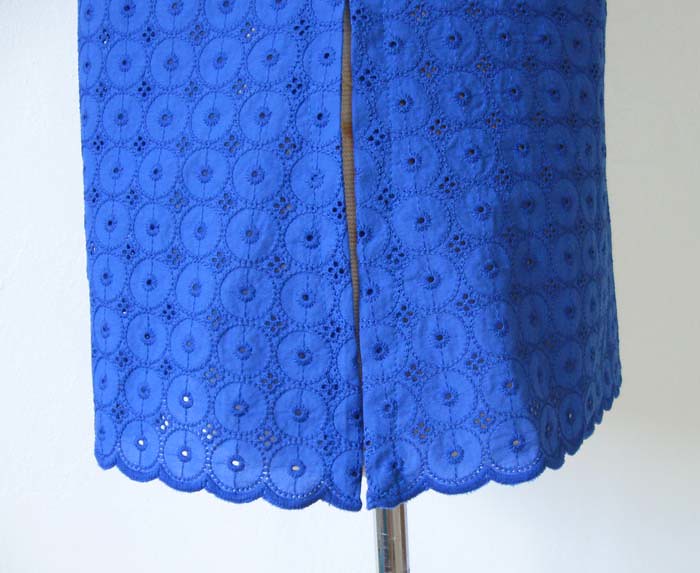
And she wanted the hem edge to take advantage of the scalloped selvedge. Which she mentioned, oh I don't know maybe 4 or 5 (or 10) times. Which was worth mentioning because it is so cute ! Also I lengthened the pattern by 4 inches. You can see I tried to match up the rows of eyelet, not that I think it is noticeable but why not? Actually above on the placket I cut all the pieces exactly the same so the left and right side would match. Not that they it is noticeable  but I think if they were not then it would be noticeable, in a not so good way. Does that make sense?

side hem view blue eyelet top

A few more pictures.


Alice eyelet top back


blue eyelet top back view


blue eyelet side view


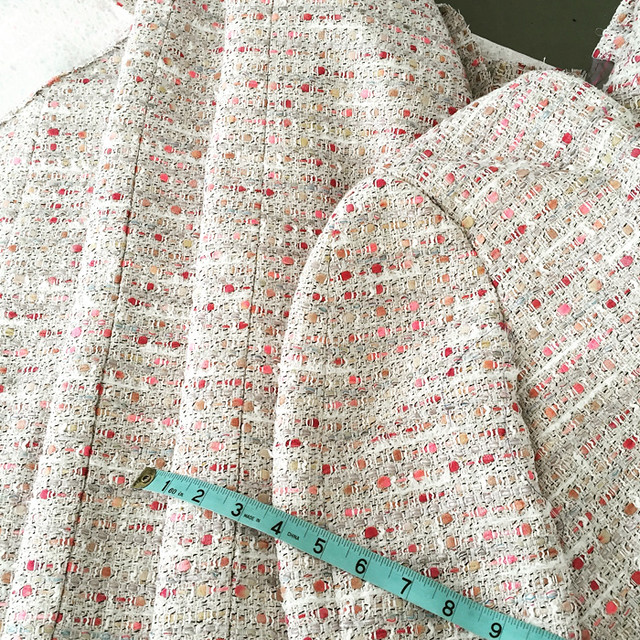
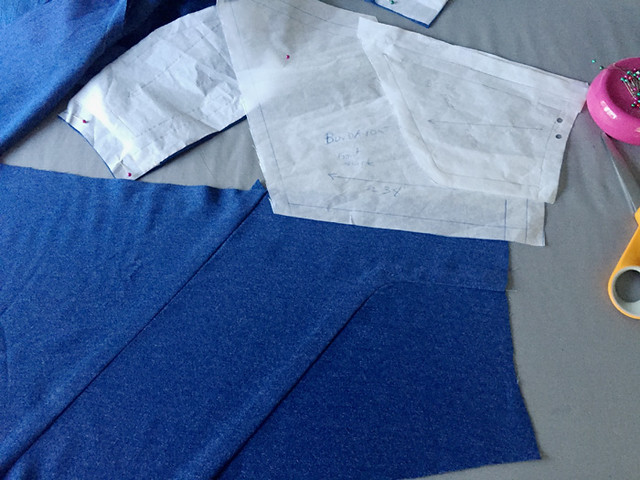
I think it is going to be a hot one here today and through the weekend - so these floaty tops are becoming wardrobe staples. Here is a little sneak peek of the version I sewed for myself - recognize this fabric?

silk top sneak peek

On another note - I think it is time for a new Pattern Whisperer post. I was thinking of skirts - or any requests?

Happy Summer Sewing,
Beth

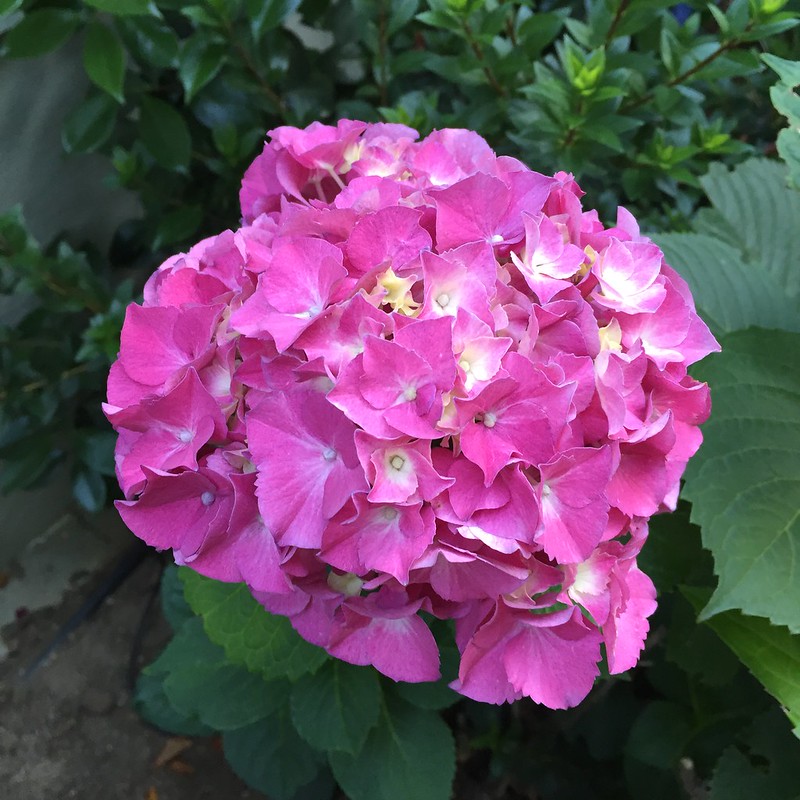
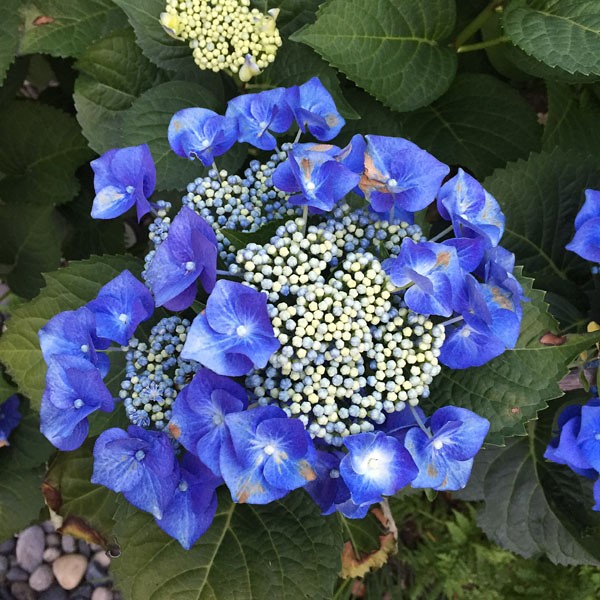
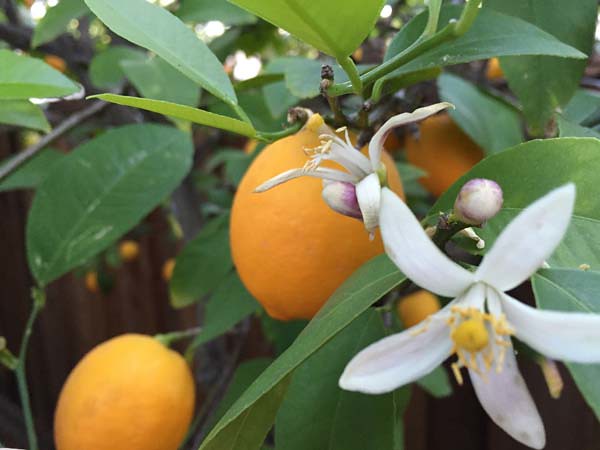
today's garden photo, some pink gladiolus which were the last few bulbs remaining in the bag when I had planted a bunch throughout the yard. And so I stuck them in the not so great soil in the retaining wall next to this blue/purple hydrangea. And what a great color combo they turned out to be. 


flowers June 2016

Sunday, June 19, 2016

Shirt trick - how to make a popover shirt pattern

This is one of those items that was inspired by ready to wear  - I keep seeing this type of shirt everywhere this year, in different fabrics and styles. So I played around with the idea of adapting an existing shirt pattern and came up with something I am very happy with. I did promise a couple of weeks ago that details would follow so here they are. In fact I wrote a how-to post for Craftsy so the link is included below.

pink placket top close up on form

I used my basic shirt pattern which is Simplicity 2339. This is the definition of a TNT pattern as I have now used it at least 12 times since I started blogging.

Here is the top on me - and I see in the pic that the buttons are done up a little wonky making that slight crease near the bottom of the placket - which I swear is not there in real life. Oh well, I am not blinking or making some weird face, so the picture will have to do.


pinkplaid placket top on me

I got this fabric at Joann fabrics, I was just looking for a fabric to make this shirt as I was writing a post for Craftsy, and wanted something that would show up in photos, be easy to press etc. And didn't cost much! I had a couple of suitable fabrics in my stash but actually I didn't want to devote them to this shirt, so instead I bought this with a coupon for about $ 8.00. And then decided it needed the contrast placket, and found that contrast gingham at Stone Mountain.


Craftsy popover blog link photo

Here is the link to the How-To post on Craftsy. It is kind of long so I won't repeat it here, they also made it a downloadable PDF which you can print or save.


pink placket top on form side view of collar

Changes made on the pattern, I used the version with the horizontal bust dart rotated to pleats at the shoulder (my first version here and the Craftsy post with pattern work details here). I also cut in the shoulders a bit for the sleeveless version, there is a good visual for that here on my recent post for the first version of the popover shirt.

This fabric is actually really nice - there is an occasional winner among the mostly not so great yardage at Joanns.

Ok back to the placket. Which I know is not the reinvention of the wheel but it is nice to be able to adapt any shirt pattern to add this feature. Also if you don't like button up shirts because they strain across the bust despite fitting well - this is a option to consider. I could see doing the placket kind of short - just enough to get it over your head and then putting a zipper in the side seam. Which you may think sounds like a lot of trouble but in order to get a well fitting shirt that is comfortable AND stays closed over the bustline might be totally worth it. I am going to make a shirtdress version for my friend Heather with just this technique. (it was her that made this clever observation :)

Placket inside and outside view before buttonholes. This fabric pressed so crisply and was really easy to sew. Also the small plaid was good to keep everything straight, so that is a plus.
final view side by side with text placket

Here are a couple more sewing tips that didn't make it into the Craftsy post. I decide on the width of the placket, usually just the same as the finished width of the button band if the pattern has one. Which is typically 1 inch so I suggest you go with that. When I fold the placket back I don't make markings where I will fold it under, I measure it once sewn and create a 1 inch wide placket, and then tuck the remainder under and topstitch. I find if you press that 1/4" seam allowance previously then due to the turn of the cloth (which is small I admit in this thin fabric but you would be surprised how much it affects the result) then you get a even width in the placket. 

measure placket width

Sewing the placket down, start with the under side placket. Note my tailor's tack there. I use them on everything, not just on jacket tailoring projects. And stitch on the right side of the placket, so you get a nice straight edge. If you look at the Craftsy post this will make sense (I hope).

sewing one side of placket

More sewing details. It always surprises me but one of my most frequently pinned posts on Pinterest is this one on how I sew collars. That is from my early days of blogging - small photos and if I had known it would be read so many times I might have done it differently (better :).

But that is the method I use to get the round part of the collar stand to be flat and have no extra bulk. Although there are a couple of different ways to attach the collar and I am planning one of these days to try another method I saw in a shirt making book. So here is the final step once the band is complete attached to the shirt, the last step is to close up the top of the band - in this case by stitching all around the band.

finish sewing collar pink plaid

More shirt pictures. I made this one more of a tunic length, with side openings at the hem. I included the vertical darts both front and back, I think they give this pattern nice shaping.


pinkplaid placket top back on me

I did the back yoke on the bias because I just can't resist that with a plaid. Plus it looks cute and then there is no need pattern match the yoke to the back.

pink plaid top back view on form

pink plaid placket top on form front

This would also work on a knit top - that would be a great way to make a collared shirt in a knit fabric with the placket. Mental note for the future!

Someone saw this shirt on my dress form and commented that it looked like something to wear to a picnic. I do see that.  No picnics here today but it is Father's day so I am cooking. Also it is supposed to be heading towards 100˚F which is great for the tomatoes but less good for sitting outside on the patio at cocktail hour. Oh well....time for the air conditioning, which I almost never turn on except when guests are coming over in the summertime. (not entirely true - when sewing on a deadline on a hot afternoon I do use it then as well. Sewing is steamy work, right?)

And thank you everyone for the nice comments on my previous posts. A lot of people weighed in on the question of posting the same images on Instagram and the blog and don't mind (prefer actually) seeing the pictures repeated. Or don't do IG so seeing the photos here is new. In any case - I plan to continue blogging and will always go into more detail here so stay tuned. Thanks for reading!

Happy Summer Sewing,
Beth

Today's garden photo - a pink hydrangea that has remained pink - someone asked me what I put on these to keep the colors. Answer - nothing. I do fertilize all the hydrangeas and gardenias with fertilizer for acid loving plants (when I remember to do so) but otherwise they have to produce on their own.


Pink hydrangea

Friday, June 17, 2016

Quick Post - winners of Pattern Drawing

Hi and Happy Friday!

I drew two names for the patterns I posted about earlier this week so will the following readers get in touch and let me know your postal mailing address.   Click the letter symbol to the right for my email address.

Simplicity pattern:  C Berry in New Zealand

McCalls pattern: Liz Wallin in the UK

Thanks everyone for reading and commenting about whether to post things on the blog that may also have appeared on Instagram.
I figure Instagram is good for a sneak peak or just a "what I am doing" on a particular moment but I will always go in depth here about my sewing projects.

On that note here is something I posted there today. I am crazy about this one - if I do say so myself. And its not for me! My friend Alice picked it out and bought the fabric which is gorgeous.  We got it at StoneMountainFabric in Berkeley. They have really expanded their web listings and I see some eyelets there.

I will post more details on this as I made two in a row - different fabrics but I am probably not done yet. It might just be my ideal tunic top.

blue eyelet top


And tomorrow I will post my link to making the popover placket  - as I believe the post will be live on the Craftsy blog tomorrow.

Have a great weekend, 
Beth

Monday, June 13, 2016

Burda 06/2016 # 105: Pattern love!

What is that mysterious combination that makes a perfect garment? Oh I don't mean perfect in execution, or perfect in fit, or perfect in style of the moment? If we could bottle that particular brand of alchemy then we would never have some sewing project that is completed and then languishes in the back of the closet, rarely worn.

This dress is going to have a life different than that - no languishing in the wardrobe. It will be worn. And me with a goofy smile all summer.

Because I just LOVE it!

blue denim dress4

Yes it is kind of simple - but maybe the best things are simple. Something I usually know but have trouble putting into action.

This is from the most recent Burda magazine, although I bought the PDF pattern from their website. Burda 06/2016 #105. Which in my opinion is the only way to go if you are just going to get one or two patterns. Because then no tracing! Aargh that tracing is tough. I guess if you do it often like anything else it gets easier but for me I find it baffling. And I should know as I just found the perfect blouse pattern in an old Burda mag that someone gave me a while ago. ( I think it was Pauline at a Bay Area Sewists meet up in fact I am positive as a couple of the issues are the French versions. By the way, on her blog that Vogue dress sewn with the ponte stripe is something I decided to recreate since her version is great. I have the fabric and everything! maybe later this summer - so thanks Pauline for the Burdas)

Back to this one, here's a look at it on the dress form. It looks slightly limp as this is not really a denim fabric, I would say it is a soft linen with delusions of denim. No idea what the fiber is, presumably some cotton as it presses well. No stretch. It is the remainder from these crazy culottes which I actually like a lot and may need shortening? Also they have no pockets which is a drawback in design...

blue dress composite view

So why do I love this dress?  It sewed together like a dream. Which might seem surprising considering all the pieces.
I did have to do some fitting. Starting with size 38, I added 1" to the length of the bodice, basted the skirt on and then moved it back up 1/2", so that means in the final analysis I added 1/2" to the bodice. I added 1" on the side seam of all the pieces and then I didn't need it at all in the top half of the dress and definitely needed it around the hips. I tweaked the side seam from top to bottom to get a nice fit (which is why I always sew the whole front and whole back and then play with the side seam. I did make a bodice only muslin of this before starting, so I could check the fit in the bust and it seemed good. But the neckline was too big so I pinched out a bit in the front neckline and also took the center back seam in a good inch. Now it comfortably fits my shoulders etc.

Goofing around shot :)  Included so you can see the various angles pieces.


blue denim dress1

Are you slightly mystified by my inconsistent topstitching? Me too. I first did the pink topstitching as long ago I had another perfect denim dress that had rose pink stitching, so I thought I would try it here. And I did but it hardly showed. Well I was not going to remove that so I put another row in white - and since the only actual topstitching thread that I have is white it turned out quite well. But i wasn't going to topstitch the placket - I think that would have been a bit too much. Or maybe not. In any case it is a design element - for this version. And the buttonholes are in blue thread. What a thread rebel I am, Ha!

blu denim on form skirt

A few techniques on display. Note how the bottom of the dress meets at the button placket. That is definitely one of my pet peeves, if the hem of the underneath portion sticks out below the upper portion. Also I am quite happy how all the seam lines match up - that is due to the very nice pattern and then accurate sewing. My only quibble is the back does not have the same amount of angled sections as the front.

However - once I saw this back view then I realized that maybe it is for the best. Or I would have a giant arrow there right on my behind. OK Burda, I will concede that was the right design decision :)

blue denim dress back


blu denim on form bodice

Nakisha asked me on IG what size these buttons were, and I just measured, they are 5/8". Something I bought last week as Joann's had a 60% off all buttons sale so I scooped up a bunch in various basics. I can't stand to have a project finished all but for the buttons so it pays to stockpile some useful colors.

Here is the Burda image and tech drawing. Slightly surprising that I wanted to make this dress as the color they chose is not at all something that would catch my eye. Plus it looks kind of wrinkled, I think it is a stiff or even coated cotton. But those angles on the drawing got me.

Burda 105 dress image


This time I didn't take any in progress pics. To tell the truth I was kind of thinking this would be a muslin. Not!

Burda denim dress

Just one to show the pattern pieces. If you make this be sure to LABEL the various pieces, after you cut them out they kind of look similar but probably would mess it up considerably if you sewed the back upper triangle piece on the front or something like that.

And you can see I omitted the belt. It just seemed unnecessary. Stitcher's choice, right?

One more picture for good measure. I think this is how I might like to spend my summer - in a cool and comfortable denim dress, wearing white sneakers and a ray of sunshine following me around.


blue denim dress3

Does this dress make you think of baseball? something about topstitching and the seams make me think of the stitching on a baseball. Which I guess is not a bad thing in the summertime! Go Giants!

And my post yesterday is a giveaway for a couple of US envelope patterns - drawing for international readers only this time so check it out if you would like to put your name in.

Happy Summer Sewing,
Beth

today's garden photo - this is a giant (and I do mean giant) hydrangea that lives at the front of the house. I never dreamed it would get so big, and it always tries to crowd out the two on either side, which are the mophead variety that I prefer. but the blue is so nice!

blue hydrangea may 2016

Sunday, June 12, 2016

Organizing and a quick pattern giveaway

Even though I am not buying new patterns very often I seem to have quite a stockpile. Which previously was contained in a reasonably neat manner but now seems to have become a messy jumble. I am one of those people who, when looking for something rummage through the patterns, or my recipe book, or workbench in the garage and then once I find what I am looking for dash off to do whatever project was underway. Often leaving the other stuff tossed aside. Mostly tools and patterns for some reason.

And then I get motivated and put everything back where it goes. Until the next time :)  All  you neatniks are shuddering at the thought, right?

Anyway - I did notice that I have some patterns I will never use and thought I might do a drawing for international readers for these two patterns.

Which look rather blah on the pattern envelope. A strange combination of both geriatric and juvenile. How is that even possible?  But they are useful basics that you might want to try if you are located somewhere these big 4 envelope patterns are prohibitively expensive.

patterns for giveaway

The Simplicity pattern is one of there Amazing Fit patterns, which has both cup sizes and lots of info on fitting in the pattern instructions. (it is size US size 10-18, EU size 36-44 although the finished bust measurements run from 36" to 45", allowing for a good 4-6" of ease there. I know that seems excessive but I suggest choosing your pattern size by measuring your high bust and take it from there.


The McCalls pattern is a Palmer and Pletsch pattern, they are well know for fitting - while I don't agree with all their methods or assessment of fit their books do explain really well how to diagnose and adjust most any fit adjustment. Their McCalls patterns are kind of clever as the patterns have pre-printed lines on them for doing an FBA, swayback etc.  This is for knits and is US size 16-24 which says a finished bust measurement of 39.5 to 47.6".  It looks like it would make a quick and easy knit dress for summer or winter depending on the sleeve choice.

Last year I did a giveaway of the Frixon marking pens and decided to toss in a extra pattern with them. I received this response  Marisa in Spain
"The pattern was a complete surprise! Thank you! It is my first envelope pattern e.v.e.r. and I never thought they came with so much information! My first Simplicity pattern too! Usually I buy Burda magazine and Patrones, which are both famous for their  sparce instructions. But those pants, those pants are a complete lesson on how to sew pants!"
"I have read and re-read the pants pattern like if it was a novel. So much information! I might have to think about investing in some Simplicity and Vogue patterns in the future. Meanwhile, I need to source the fabric and the courage to sew a test version."

I hope Marisa doesn't mind that I used her words but they are so charming!  I hope she has had a chance to try out the pants pattern (which was a Simplicity Amazing fit pants pattern). I like the idea of reading a pattern like a novel. As someone who has recently started using Burda patterns I can completely understand about the sparse instructions. I think if I were a beginner they would lead to a lot of tears and throwing things. I know people complain about pattern instructions and I have tried to look at some of my vintage McVoguerick and Simplicity patterns and then compared to current ones - the instructions seem remarkably similar. I think it is just what you are used to.

OK - so international readers only  - please leave a comment and let me know what country you are in, and which pattern you would like. I will do a drawing on Thursday 6/16.

Speaking of Burda - here is a sneak peek of Burda 06/2016 # 105A which has currently jumped into the lead spot for favorite item  of the year. I know - I know. Not a stitch of tailoring, not a lapel to be seen, nothing tricky, just a simple denim dress but ooooh pattern love.

burda dress sneak peek

Dress completed, pictures taken and I will post this one next. By the way if you look at my Instagram you have seem this already. So what is the etiquette for repeating pictures? Is it repetitive to use the same ones on IG and the blog? Does it even matter?

Happy summer sewing,
Beth

garden photo for the day - there are just a few blossoms on the lemon tree, mostly baby lemons trying to make it to next spring. And delicious lemons on the tree, from last year's blossom. fyi, it is a Meyer lemon and they stay on the tree all year round.


lemon blossoms

Monday, June 6, 2016

Many things started and yet not completed

So many partially finished projects these days. Sewing for other people, making some samples for teaching, being distracted by new patterns has lead to a sewing room that looks like a hurricane went through. I am by no means a neat sewer - when I am alone in there everything goes on the floor, pattern pieces, trimmings, thread etc.

Having a dedicated space means I can be as messy as I like but I know it is time to neaten up when I can't find some simple tool. Then I buckle down and get organized, put away all the pattern pieces, pick up the pins, the thread and it does feel so much better. Until the next time. When I cook it is the same  - when the meal is prepared their remains a gigantic pile of dishes to wash and stuff to put away. I think it has to do with flow - and how you work best. How do ultra-neat people do it? I should know from close observation as there are some of those in my family. How about you? are you a constant tidy-er or do you let it pile up and then neaten in one swoop?

What is on my sewing table? It is starting to seem like a never-ending project but I do see the finish line in the distance. I have been making a jacket and dress for my friend Heather using a boucle wool that she bought at Mood last year. I made a couple of muslins for fitting the jacket, and then also for the dress, and then with scheduling time for her to come by for a fitting it does feel like I have been sewing this for months. Here's a picture that I shared on IG this weekend.  That is the sleeve and jacket front, and then the skirt portion of the dress. I was seriously stressing when I originally saw this fabric. And wailed out loud "but it has stripes!" Not that I am against stripes but it does add to the pressure! Even through they are subtle that is all I can see when I look at it. However I am very relieved to say that both pieces are sewn and/or basted together and the stripes are looking good. Whew ! This is actually a very fragile fabric. I guess that is often the case with a boucle, the weave is very loose and some of the fibers are not continuous crosswise. I noticed when handling the jacket that it was becoming a bit fuzzy.


stripe matching

This is the Burda pattern that I am using for the jacket, the version on the left with no collar. It has nice slanted darts coming off princess seams which adds good shaping for a full bust.


Burda 6782 jacket pattern env

A little inside view of the sleeve. I think I took this photo to show how I use different colors of thread. I run a thread trace on the jacket body and on the sleeve on the stitch line, and then do a fitting, mark the actual stitch line with a different color of thread ( and seriously try to remember which thread indicates which!) And now I will say - Sleeves are DIFFICULT! OK, there, I said it. They are a b****!  It is not that tough to get the jacket or dress body to fit someone, but then you have changed the shoulder line or the princess seams or the back or whatever, and all those things conspire to mess up the original sleeve. I feel your pain!

basting sleeve

So don't think I just cut out the sleeve and zippity zip, sew in the sleeve. It is a lot of adjusting, pinning, basting, swearing, trying on and hopefully getting to a nice fit in the end. Now you can see why I was wailing about the stripes :)

I know what else I forgot to mention, I completely fused every piece of this, jacket and dress with interfacing to give it some more strength and structure. The interfacing was a mid-weight weft fusible and then I used silk organza for all the edges - neckline etc.

The dress is all fitted and basted together - so next I will stitch it up for real and then add the lining. Then another fitting for hem lengths and any other small adjustments. Told ya, the never ending project.

Seeking some quick gratification I spend a few hours this weekend on this dress for myself. Which just appeared in the magazine and I pictured it in denim. This one also needed quite a bit of fit adjustment. I started with a Burda 38 and did a lot of adjustment. When I get it finished I will do a full post. And of course it is in denim. Really a faux denim, using the remainder of the fabric from this project.  Man, those are some seriously dorky pics in that post. Oh well....

Burda 105 dress image


Burda denim dress

By the way - this pattern is sewing up like a dream and despite the many pieces is quite easy.


Do you use the same few fabrics over and over? I just had a post on the Craftsy blog with some ideas on extending your fabric repertoire. Check it out, here's the link. Also I noticed that my favorite local independent fabric store Stone Mountain Fabrics had expanded their website so they are selling a great selection of fabrics and patterns on line. And notions - they have a great offering. I see some labels which I am sure I will get next time I'm there!

Craftsy fabric choice post

Also today I have a post on how to make a nightgown using an existing dress pattern. I surprised myself with how much I like it.

nightgown craftsy post image

I finished the post on how to make the shirt placket for Craftsy so I will link to that when it runs which I believe is in about two weeks.

Summer is really here as we had a few days over 100˚F this week. My tomatoes are growing like wild as they just love the heat. And those summer cotton dresses finally get some wearing :)

Happy summer sewing,
Beth

A sunflower which all by itself in the front yard and is now about 6 feet tall. I think it is a happy accident that a bird dropped? and once I realized what it was I left it there. I always see a few around town - growing in the median of roads or other funny spots.

first sunflower