Showing posts with label vintage. Show all posts

Tuesday, August 9, 2022

Vintage Color Block T-Shirt: Stretch and Sew 309

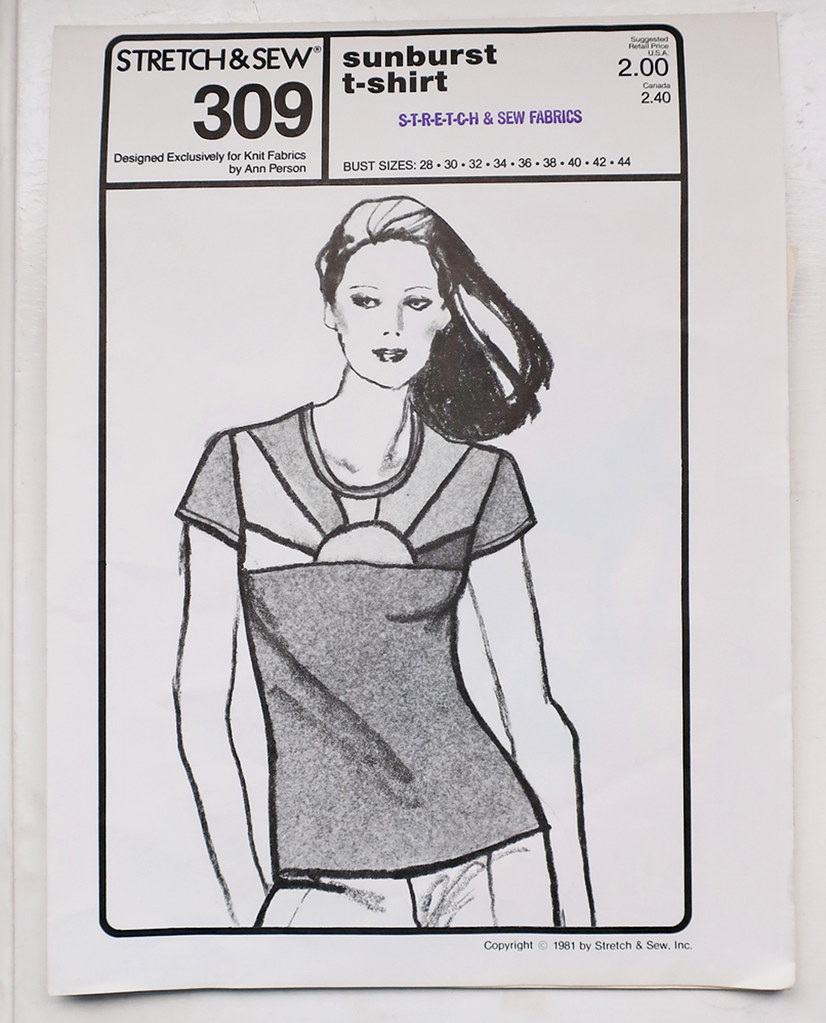
For a while I have been intrigued by the old Stretch and Sew patterns. I've acquired a few over recent years and then recently I found one at a guild sale that might become my new favorite pattern. I always say that, right? Well that's what keeps me sewing, finding a new-to-me pattern that I really like. Actually I thought Stretch and Sew and Kwik Sew patterns were the same company, but a bit of research has told that they are not. The two companies were started by two different women in the 1960's and both seemed to focus on knit fabrics. I have about 5 or 6 of these Stretch and Sew patterns now and you can bet that I will revisit them to find some more gems. I have a top/dress pattern that you would think is a current design, so that may get sewn up soon. 

Kwik Sew t-shirt

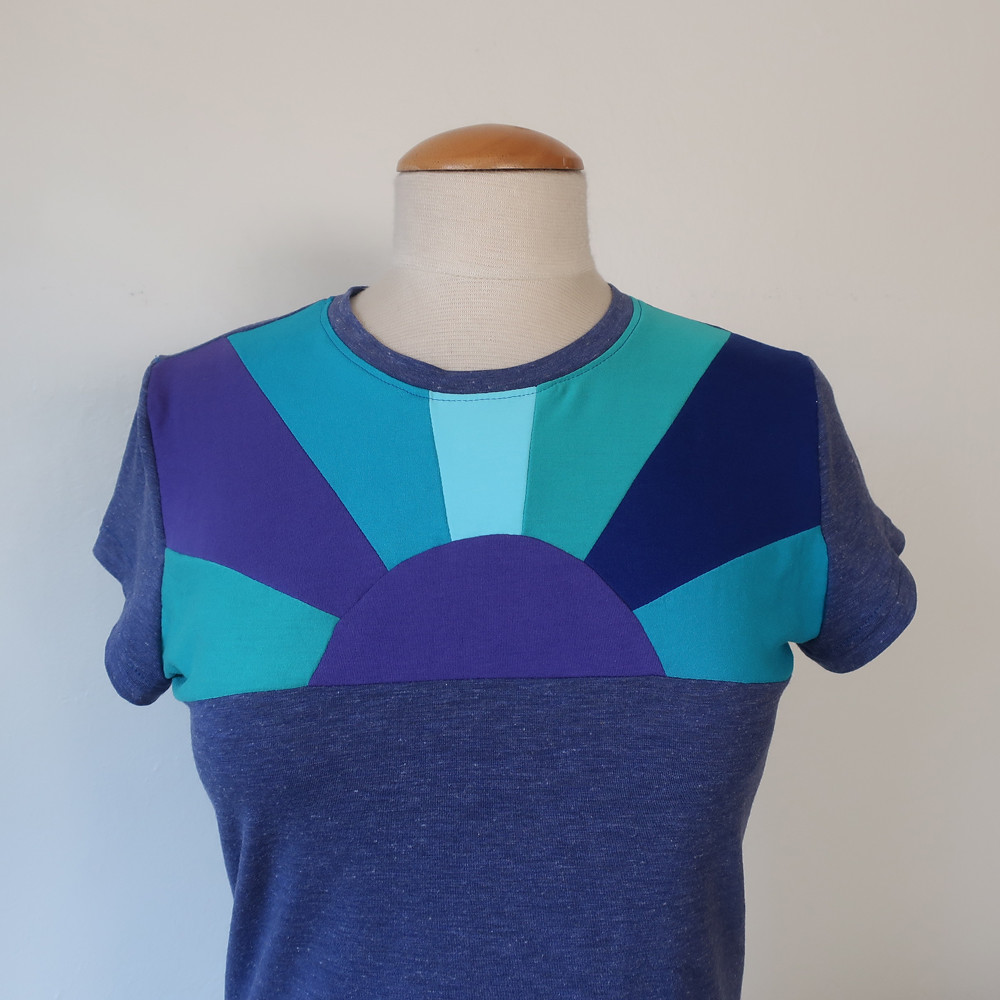
Also this t-shirt was sewn up entirely with scraps and remnants from my stash. Which tells me a couple of things. 1) I definitely have a color palette that I stick to and 2) I keep a lot of knit scraps. For this version I wanted to make something to go along with the July challenge on the SewOver50 Instagram account, the theme was color block. So I was all in - I can never turn down a color-block opportunity. 
You can expect to see this pattern again, in fact I have been collecting old pink/burgundy/wine color cashmere sweaters from the thrift stores for the past 3 or 4 years with just this type of thing in mind. 

Here's the image of the pattern. I sewed mostly a size 38 with some grading out at the hips and the fit was perfect. Another bonus point for these patterns. Also it has kind of a high crew neck which I like in t-shirts. 

Kwiksew tshirt pattern

The sleeves were just a bit too short for my liking, so I hemmed them by adding a band, similar to the neckline to preserve the length and add about 1/4".


Kwik sew tshirt close up

Even though this seems a bit fussy from tracing to finish I think it took me about 2 hours. That is not including the 30 min or so I spent playing around with the colors. To get that last light color section in the center I did rummage around in my t-shirt drawer and finally cut a small piece out of the back of one of my old Target brand t-shirts which I just wear around the house. 

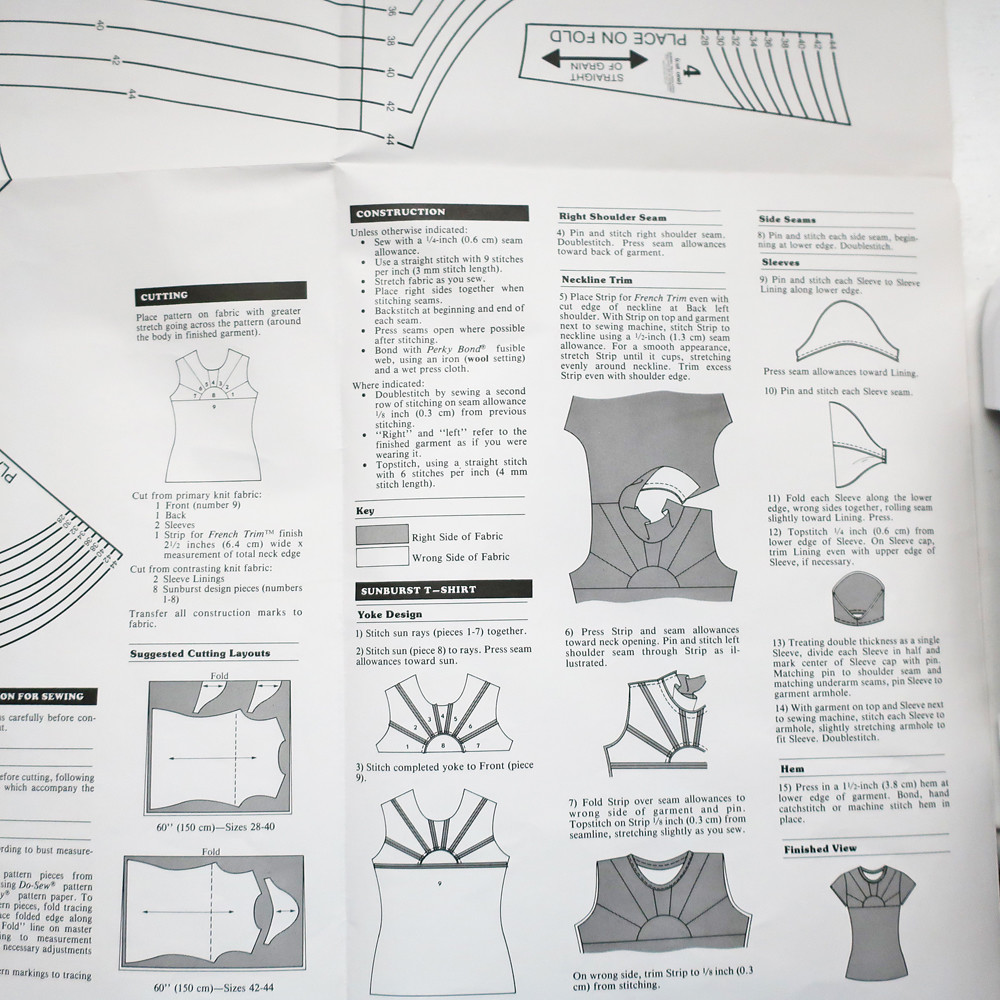
The instructions were excellent, short and to the point but very easy to follow. The seam allowance was 1/4" which worked well for those small pieces. Although I didn't follow them to the letter as I like to sew the neckband in the round. 

Stretch and Sew Instructions


Kwiksew t-shirt back

Back view. Not very interesting but it shows the subtle shaping of the t-shirt. I toyed with the idea of making the sleeves different color knits but I'm glad I just went with the base color for those and kept the color block to the sunburst area. 


Color block tee test

Before I make any color block item I play around with the colors with whatever is to hand, here a combo of colored pencils and sharpie markers. Just to see how it would look. And I decided to repeat the colors which the pattern also calls for. Not sure if I did it just as they did. I just cut them out as I went along and laid them out so I wouldn't get confused. Then it was pretty simple to sew together in order and construct the rest of the t-shirt. 

So that's the latest on my speedy little t-shirt. Up next, I've sewn a couple of summer dresses which I have had some nice chances to wear - so much better than 2 summers ago when we did so much backyard/Zoom socializing. 

I'm teaching classes in person at a couple of shops in the Bay Area, and I'm going to create a page here on the blog so I can list them as they get on the calendar. 
But my favorite class is coming up - yes, Blazer jackets! My online/live class which I did last year is starting on Oct. 4.   Here's the link to register on the Hello Stitch Studio website. 

The never-ending garden project is in the final stage, the back is complete (well is a garden ever complete?)  and the front should be done in the next week or so. Then I can rest, hahahaha, I mean rake leaves, prune shrubs and battle gophers. 

Happy Summer Sewing,
Beth

Today's garden photos - a bonanza of photos at this blooming time of year. 

Kwik sew t-shirt sunny day

I should show you some closeups of the grapevine behind me in that photo - I sewed little mesh bags to protect my grapes from squirrels. 

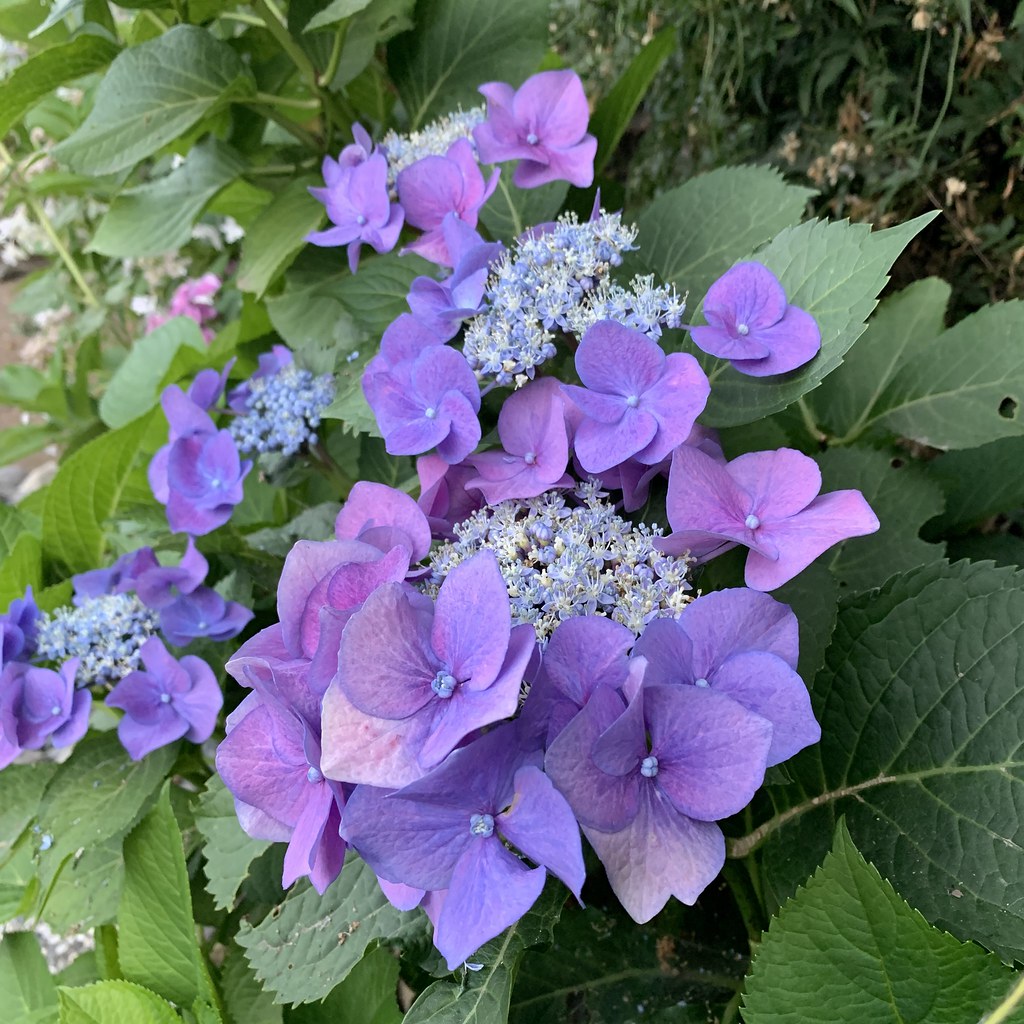
And below, a beautiful purple hydrangea to match my t-shirt :) 

hydrangea purple

Tuesday, April 28, 2020

Vintage Vogue DVF wrap dress V1610

Do you ever have a sewing idea in your head and it comes out exactly as you imagined? I don't really plan my sewing very much, I see a pattern or a fabric and then I figure out what to make. I'm not really a wardrobe planner - that doesn't seem very fun to me, I just go where my mood takes me. But ever since I found this vintage Vogue pattern I knew just the look I wanted and it came out perfectly.

Once we get out of lockdown you might see me wearing this dress all the time! (actually probably not because by then I will have even more random and unnecessary new garments to wear :)


DVF wrap dress 2

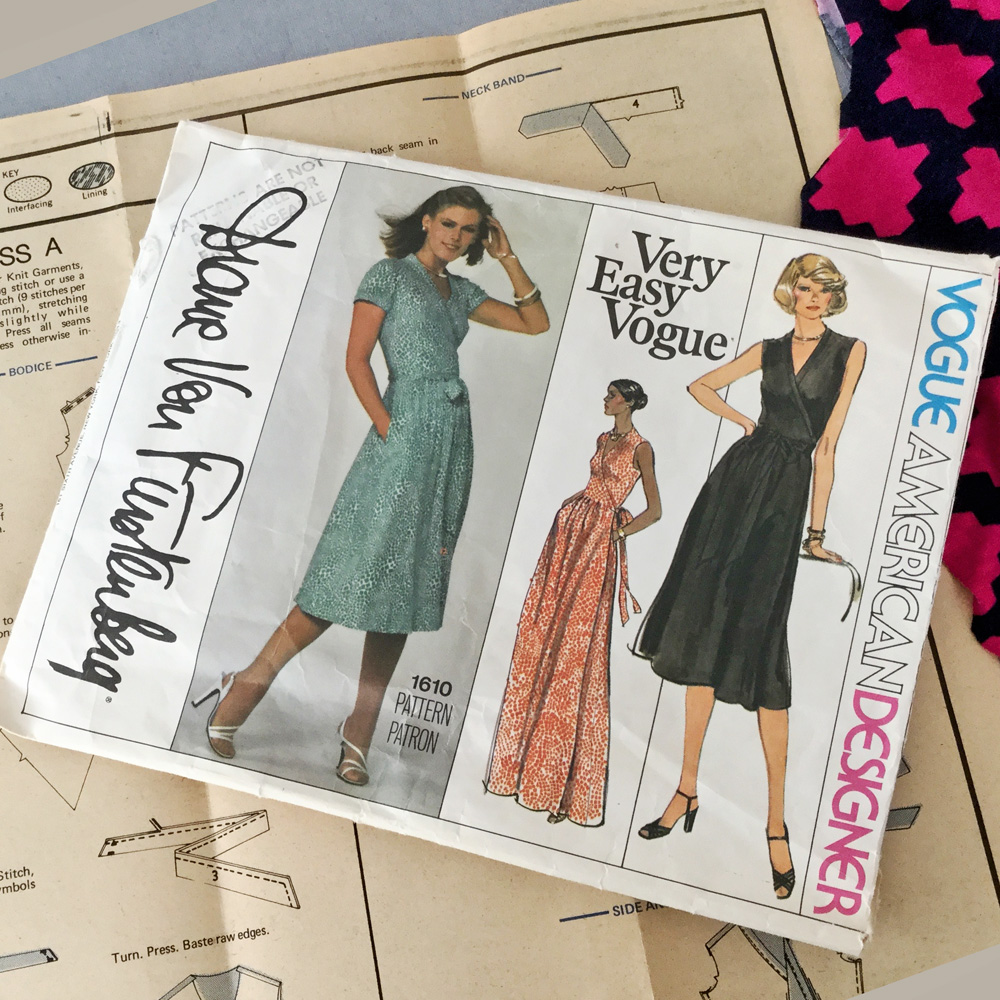
Here is the treasure that I found at a sewing guild stash sale. They often sell patterns for 25 cents so if I see any old Vogue designer patterns I snap them up, more for the fun of a vintage pattern than for any intention of sewing them. But this one I definitely knew I would sew up.

DVF wrap dress 4 pattern

To me there is something delightful about these old Vogue American Designer patterns - they are just so casually chic and stylish. And look - this is a Very Easy Vogue, that's interesting that it was categorized as easy. According to the Vintage pattern Wiki its from Jan/Feb 1977. Vogue 1610 Diane Von Furstenberg wrap dress, for stretch knits only.  Do you ever look at that Vintage pattern Wiki? lots of interesting stuff there.

And this is not THE DVF wrap dress, which is Vogue 1549 but this is a slightly different design, with a gathered skirt and a neck band with no collar.
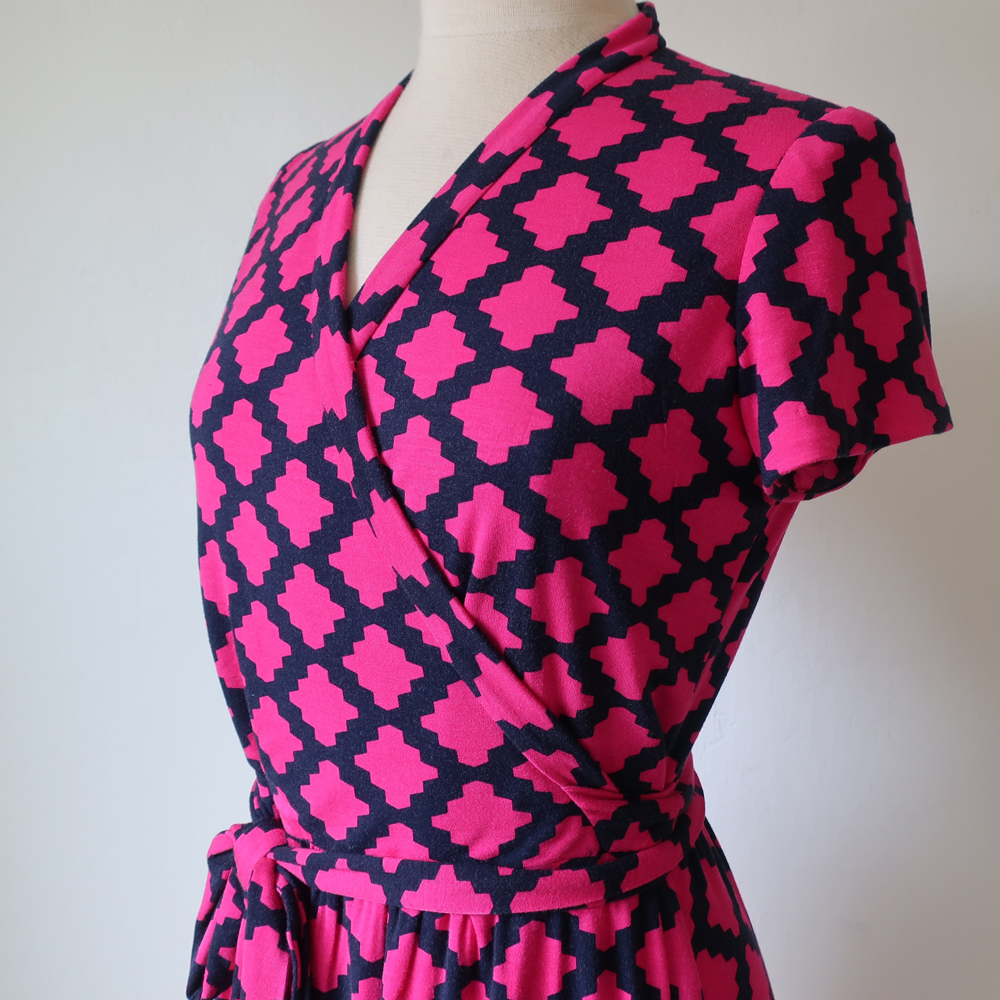

Knit DVF dress bodice only on form

This fabric is from Girl Charlee, they still have some in stock. I used another of their pink/navy knits for a top which I wear a lot. 

Let's talk a little about fit, and knits now versus back in 1977. I think back then the knits were less stretchy, think of more like a cotton interlock and perhaps the fabrics were even only a single stretch direction (crossways grain) instead of the more common printed knits we find now which have 4 way stretch (and sometimes too much).

Check out the stretch guide at the bottom of the pattern envelope. It says the knit should stretch "to here only". I don't think I've seen that on a pattern recently but it explains the issue with this dress and using a 4-way stretch knit.
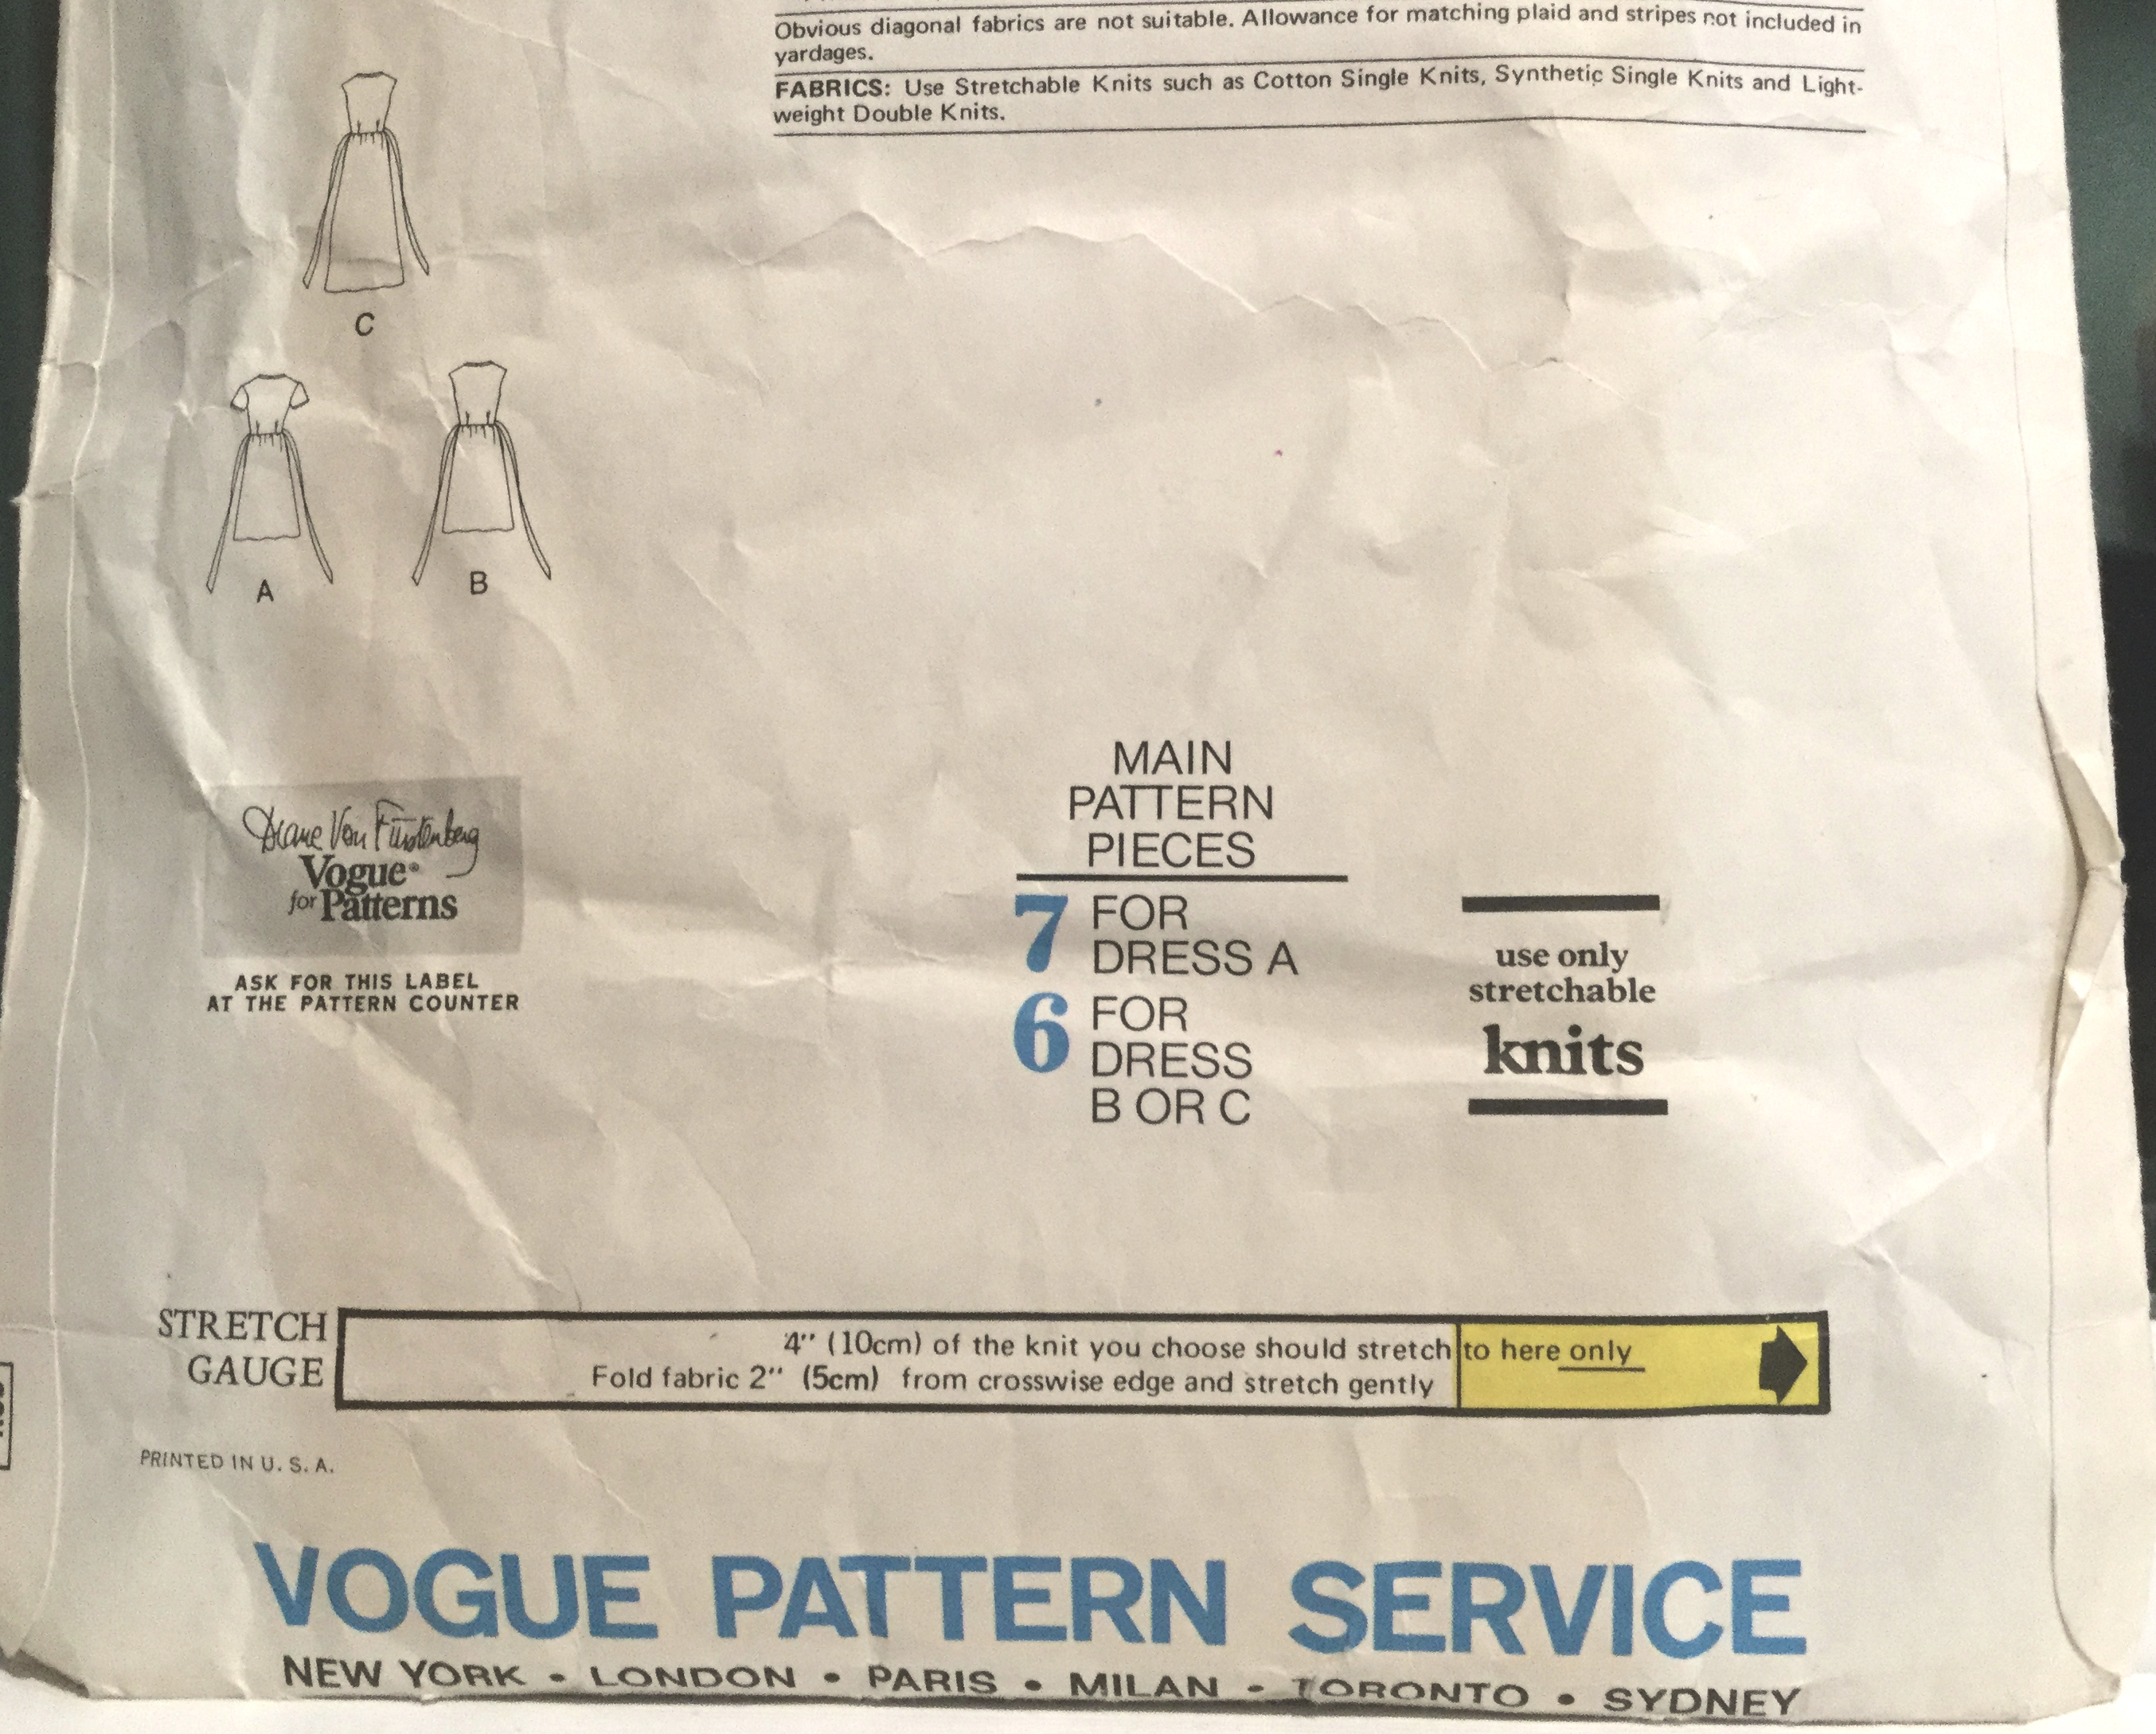
Image 4-27-20 at 8.30 PM

When I bought this pattern I wanted to make it up right away, and to try it out I bought some truly terrible knit fabric at Joann, on a super sale couple so the investment was minimal.
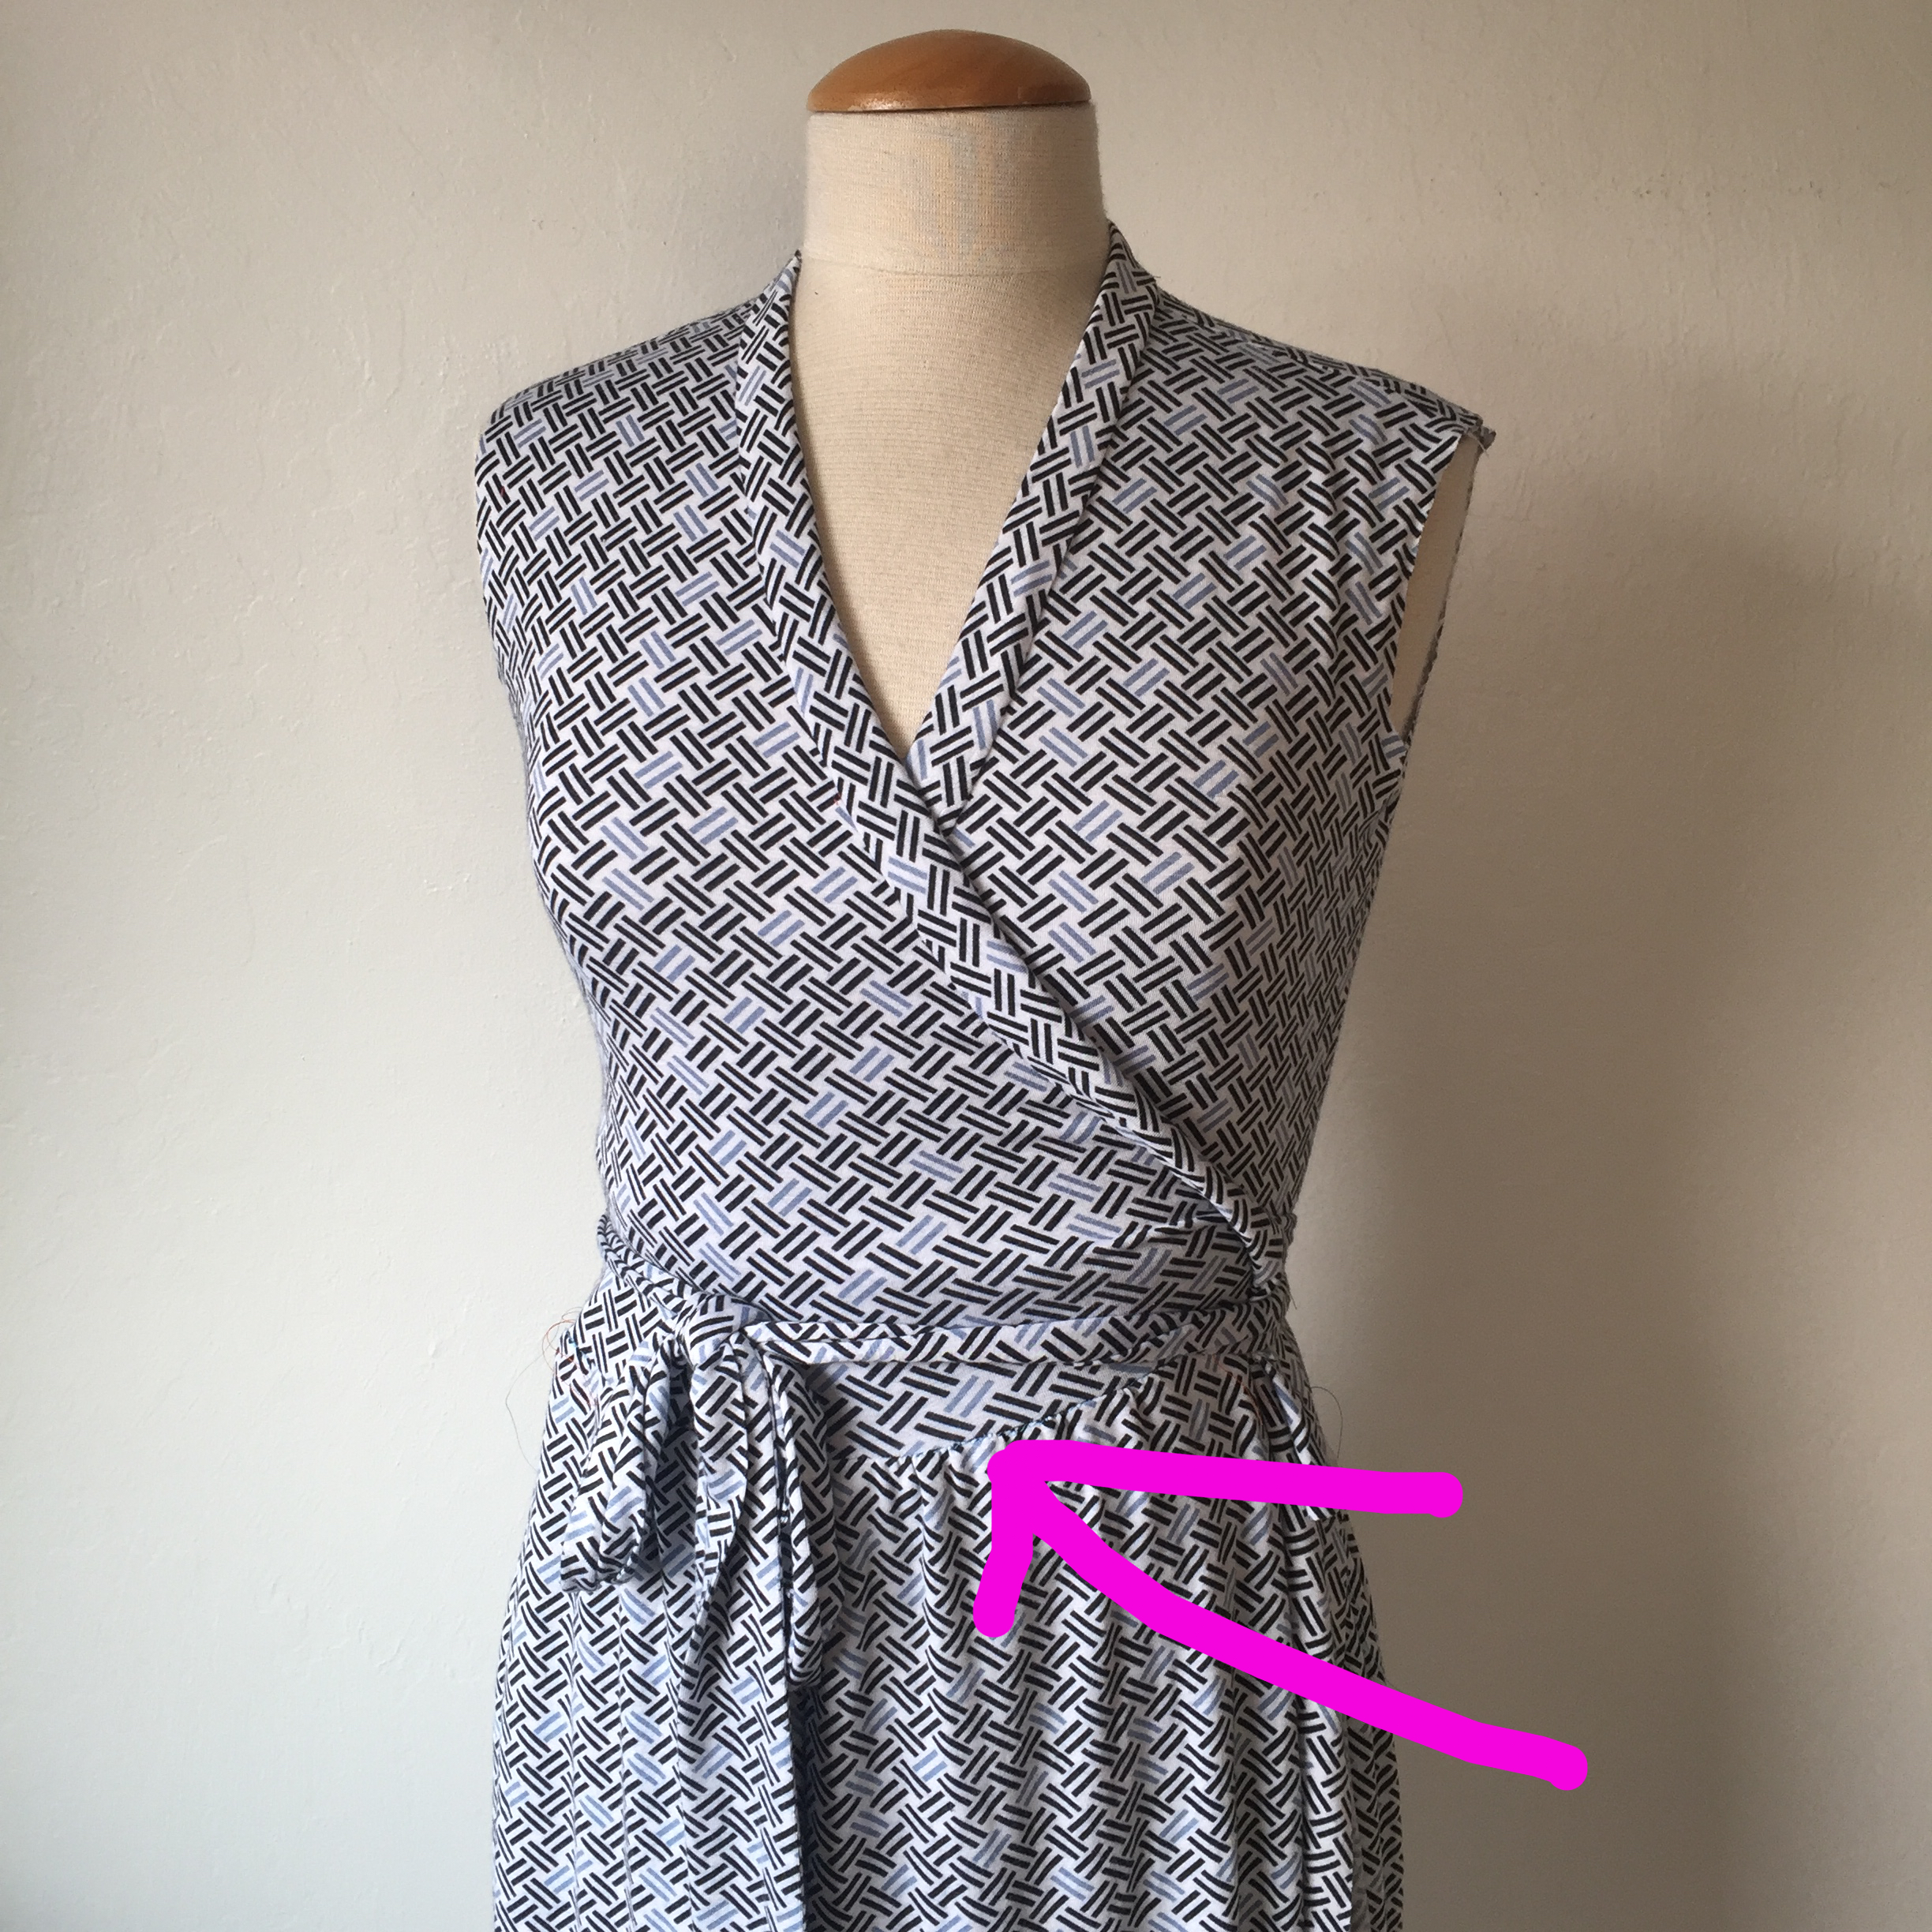

IMG_4235

I sewed it up and you can see what happens on my dress form, the waist seam migrates downward due to the stretch of the fabric. It might not seem bad here but putting in on it was atrocious. Also this fabric had a weird fuzzy feel that made me dislike it even more. Out!

Flash forward to this year when I REALLY wanted the bright pink and navy fabric to work for this dress, and the answer as usual with knits is to line the bodice in a lightweight knit fabric with no lengthwise stretch. I've mentioned doing this before in other posts. The fabric I use to line knits is something I get at Joann's called Jet Set knit. I have no idea what it's for, I usually find it in the aisle with the dance wear knits. It comes in white, black, navy, beige although the stock is hit or miss. Also in purple as evidenced by my use of that color here. Which I found in my lining bin. Thank goodness for my lining bin which sometimes seems like Mary Poppins' travel bag as I seem to find all kind of magic in it which I have no recollection of putting in there. Note - when I go to fabric swaps or stash sales and I see some bargain which has lining potential I spend the $ 2 or $5 or whatever and stash it away. Look how useful these things are! (red coat with hot pink lining)

So the answer to the issue of too much length in the cotton jersey is to underline the front and back bodice with this stable lightweight knit fabric. Problem solved, the bodice now will not stretch from the weight of the skirt and the seam stays at the waist.
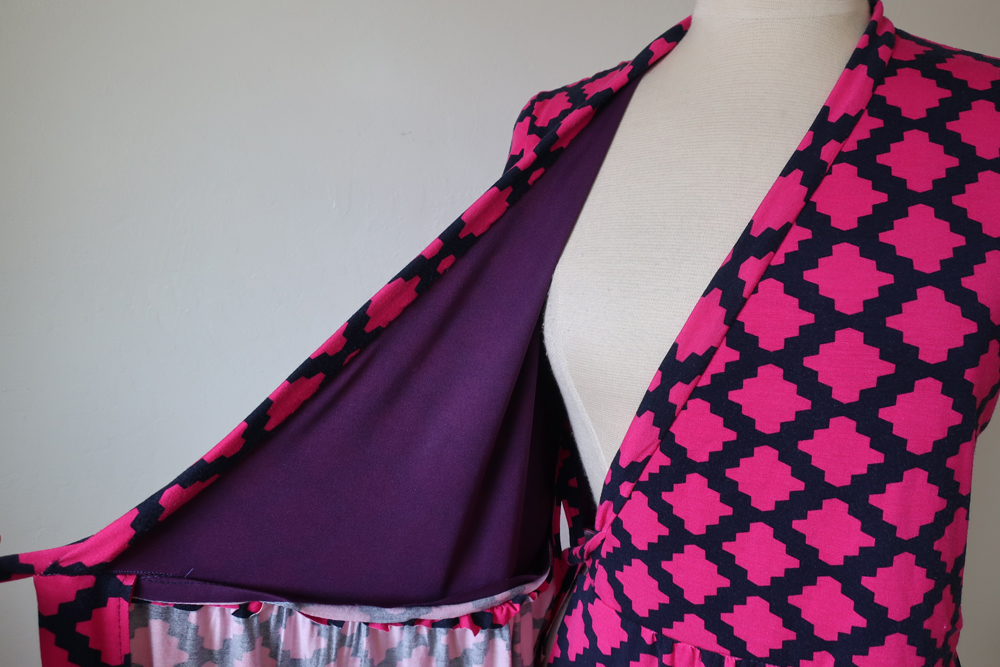
Pink wrap dress inside bodice

I treated the knit lining pieces and the bodice front and back as one, and only put the lining there, not in the sleeves.  The goal was to change the degree of vertical stretch for the bodice pieces. I could tell that the bodice length was OK, it was just the stretch that was the problem.

IMG_4232

To double check that I overlaid a pattern piece from a different knit wrap dress and saw that the length was very similar. I like the fit of that Butterick pattern so I determined that the Vogue would be fine if I could reduce the vertical stretch. Note that a number of the modern Vogue designer patterns I've sewn have lining in knit dresses, probably to control the stretch although some are to add a framework for the twisty details on the outer fabric, such as this dress.
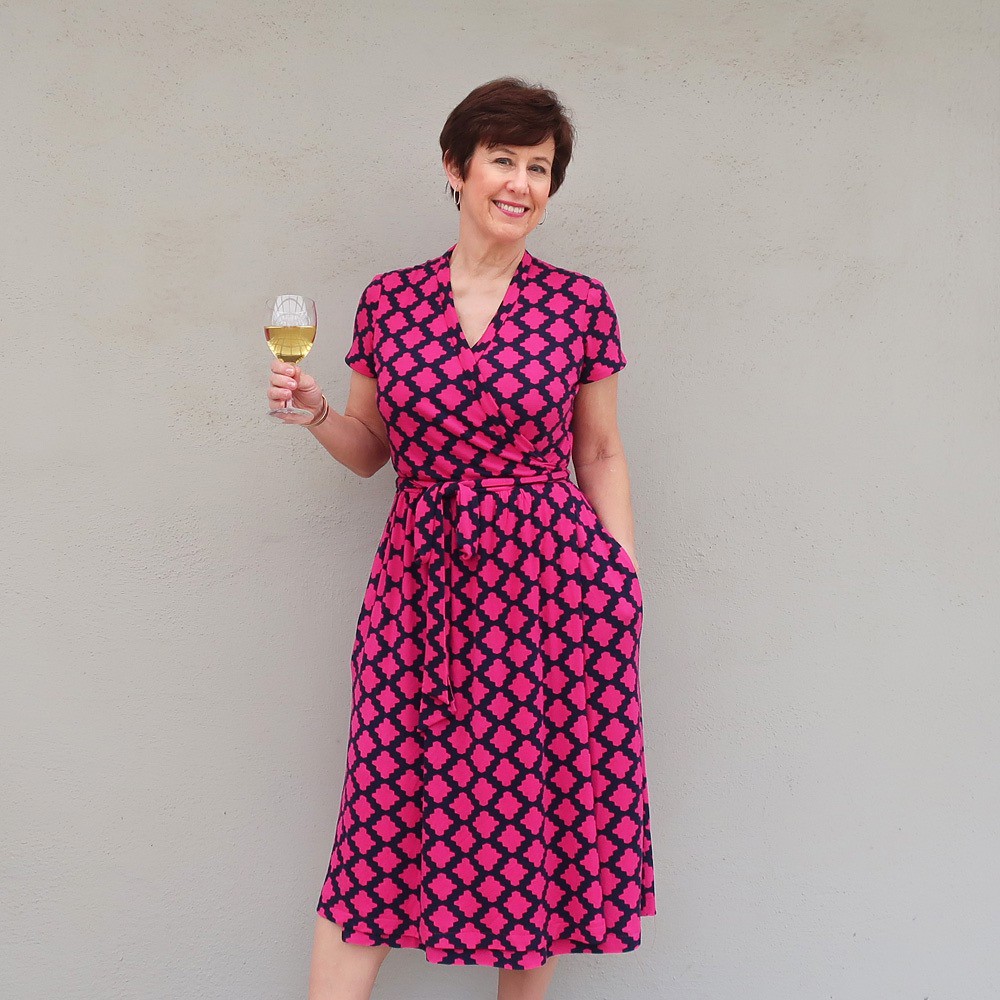

DVF wrap dress 1

Why the glass of wine? I finished this dress on the first weekend of the lockdown and posted this on my Instagram on April 4, for #virtualfrocktails. Looking back now I see that we were fortunate in the SF bay area to have had our Frocktails event in the end of Feb - which I almost missed due to having that nasty flu bug. But I will take that instead of this current virus.

Back to sewing details. Unusual for me I made almost no changes to this pattern, I think I shortened it by maybe 2 inches? and then once I finished it I thought the sleeves were just a tiny bit too long so I turned them up another 1/2".

Pink wrap dress front and back composite

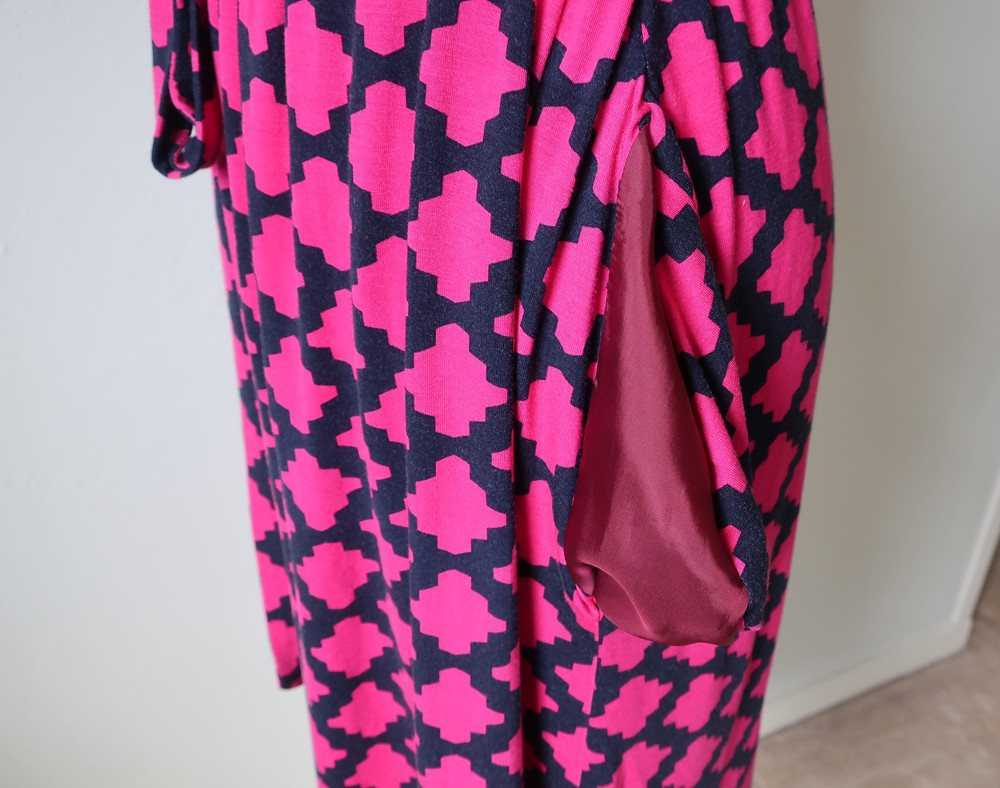
As you can see in the photo with the wine glass, this dress does have pockets. Which are probably useless for putting anything into, since a pocket in a knit dress is going to be a bit saggy. But they are perfect for putting your hands in. Although they are maybe the tiniest pocket pattern pieces I've ever seen.  For pockets in almost anything, if I'm going to use the fashion fabric for the back pocket piece I like to use some lining fabric for the front, so that as the pocket bag lays against the front skirt it is slippery and doesn't stick to the outer fabric. Not the cutest picture below but you get the idea.
Pink wrap dress pocket

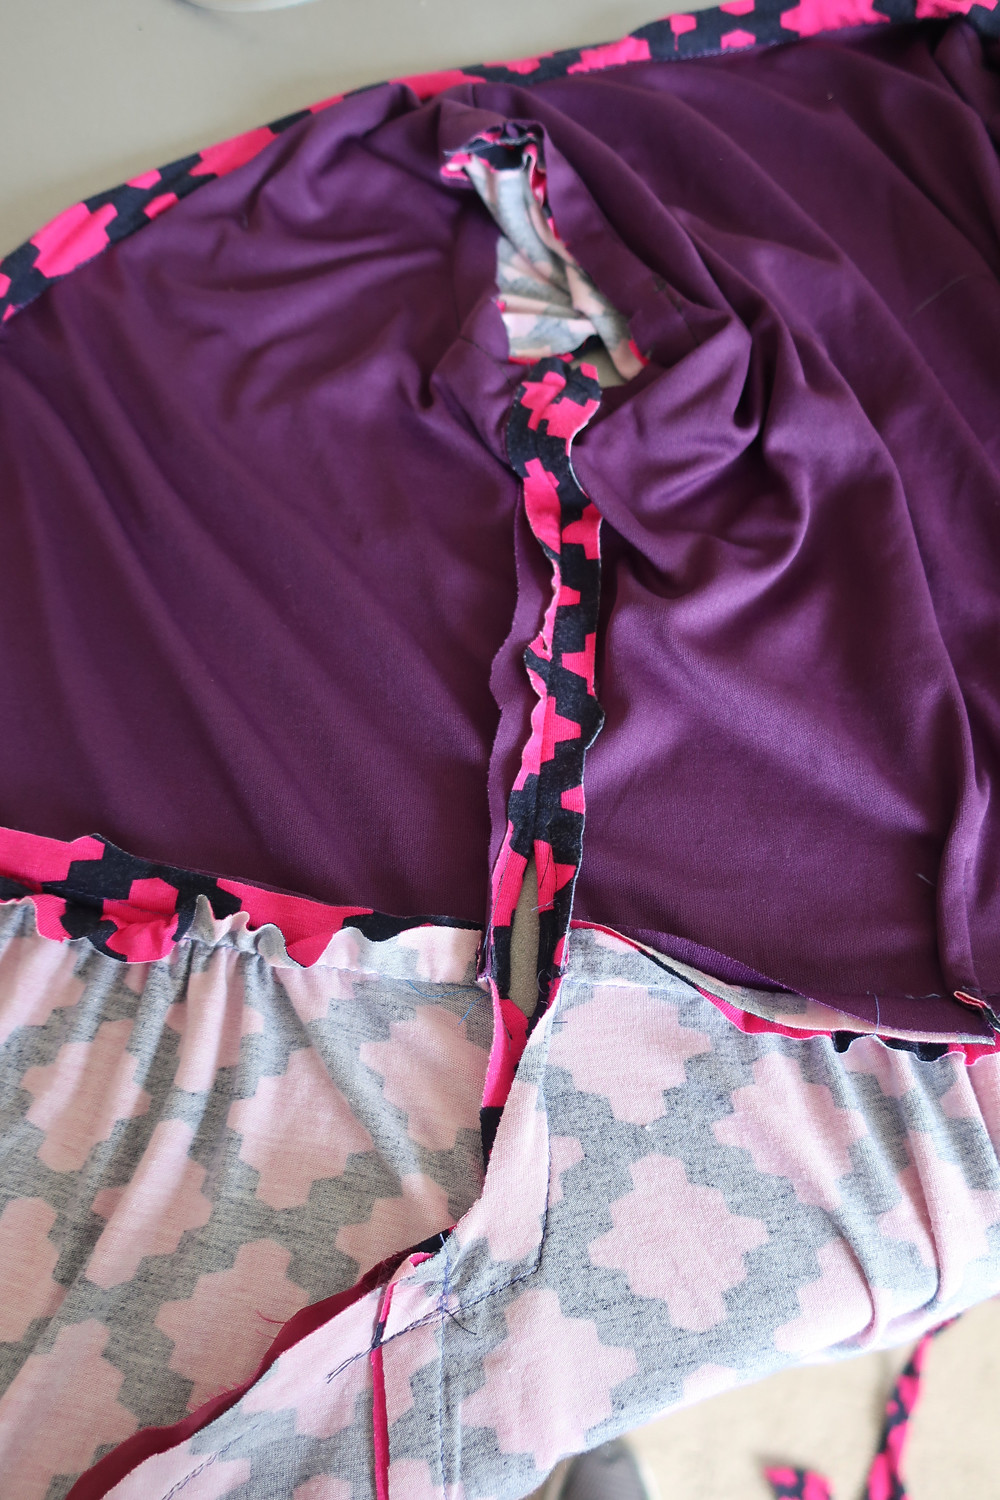
Let's talk inside finishing. I am far from a stickler about how things look on the inside, and I find using the serger to finish seams on knits completely useless. The fabric is never going to unravel and to me it just adds bulk and more steps in the sewing.

Knit DVF dress side seam inside

Yep - that's how I leave it. After this I did trim the seam allowances of the sleeves at the underarm but otherwise nothing else.

In all these pictures I must confess that my eye goes straight to the hem, where the skirt under layer is sticking out a bit below the top layer. So I'll have to fix that before I wear it out and about. It was actually freezing when I ran outside to take these pictures - and fussing about perfection was not in the cards. Thankfully spring has arrives since then and the weather is glorious. On the down side, I've had to start watering the plants - no spring rain for us and I think it will be another terribly dry summer.

Pink wrap dress 6

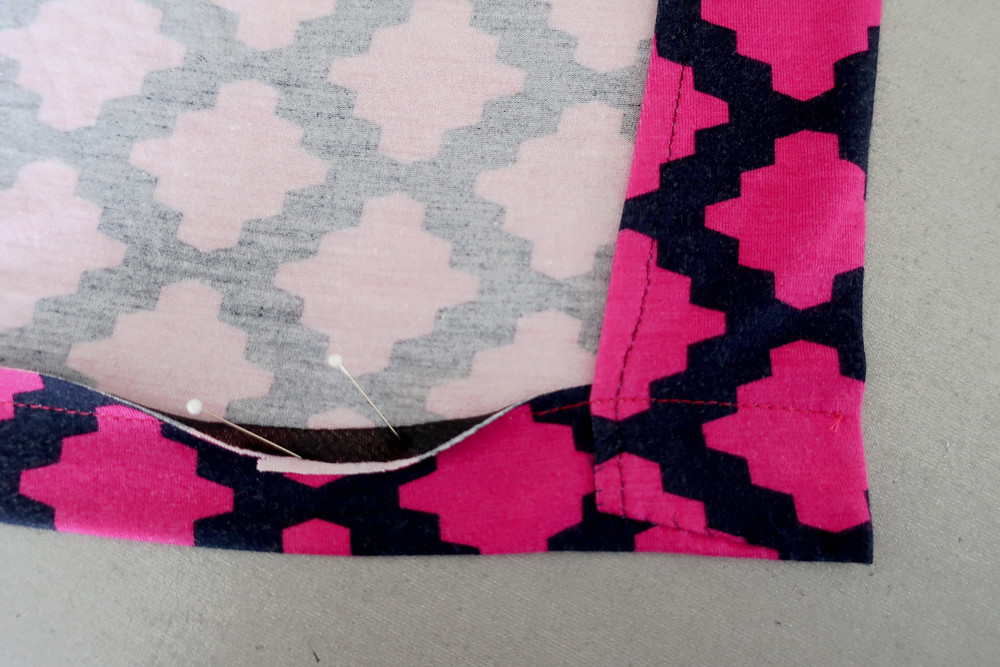
When it comes to hems on knits I don't have a coverstitch machine and I've never found the twin needle thing to work for me. My go-to method for hems on knits is to put a small strip of fusible knit interfacing in the hem allowance, so that the machine stitching is going through both the fashion fabric as well as one layer of interfacing. This gives the hem just the right amount of weight and avoids the ripply situation you can get on knit hems. Then I hand stitched the corner so that nothing was sticking out below the hem edge.
Knit DVF dress hem inside

So that's the scoop on this vintage Vogue pattern. I might even sew it up again, the sleeveless version is calling my name as well. Liking the longer length is something that surprised me, I usually don't make my dresses much past mid-knee as I think the longer length makes me look short but perhaps this works. I'll have to see how I like it with flat sandals.

Item # 2 of my quarantine sewing completed and documented. Up next, I finished a silk top from a New Look pattern that I saw somewhere and had to have. And then my denim blazer, almost done except for the buttonholes however that reveal will have to wait until I complete the jeans and have the full pantsuit. (having doubts about the outfit potential but will make the whole suit just for the fun of it).


Pink wrap dress 7

I hope everyone is well and doing OK with the current situation. Stay safe and keep sewing!

Beth

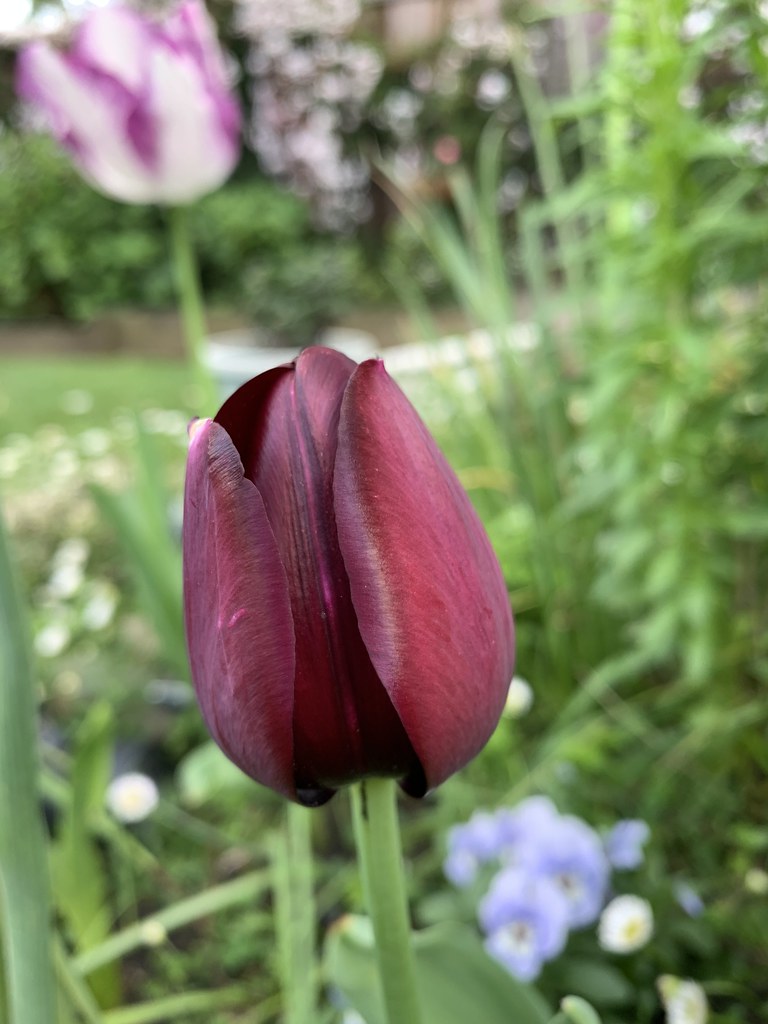
Today's garden photo is this fantastic tulip - it's so dark and saturated in color. A nice surprise among the mystery tulip bulbs that were planted last fall.
IMG_2303

Friday, August 28, 2015

Vintage pattern nostalgia with McCalls 6544

Having learned to sew as a young child means that once in a while I come across a pattern now listed as vintage that I recall making when it was new. I am sure half of those reading know what I mean and the other half will just have to wait a few years to see their current cute styles listed as "vintage" on Etsy (which has a very loose description of vintage).

I am feeling nostalgic this week for all kinds of reasons. Back in Hawaii on vacation and thinking about travel, family and sewing across the years. Nostalgic because I am here with my family and some very good friends, recalling previous trips, and remembering those who aren't with us anymore. A little sad, a little sweet but good memories. I have mentioned before that my parents were not ones for camping or car trips, but a beach house, some palm trees and spending the day swimming in the ocean was their idea of a vacation idyll. I love being a native Californian but Hawaii is my second home, over the years some family members have lived here for extended periods and I have lost count of the number of trips taken over here but it must be around 100. Family vacations, romantic trips, girlfriend getaways, there were times that it took less time to fly to Hawaii and be on the beach than it took to get up to Tahoe for a ski weekend (if you have driven to Tahoe on a Friday night in snowstorm you know what I mean).

So all those vacations photos tucked away somewhere, the funny thing is if I look at them I can recall most every item I sewed, particularly the fabric if not the pattern. One night I was browsing on Etsy and came across a pattern that I knew I had sewn, and even that I had made it twice! So I ordered it and then promptly set it aside for a "sometime sew". A few weeks ago I came across it in my vintage pattern box and figured why not now?

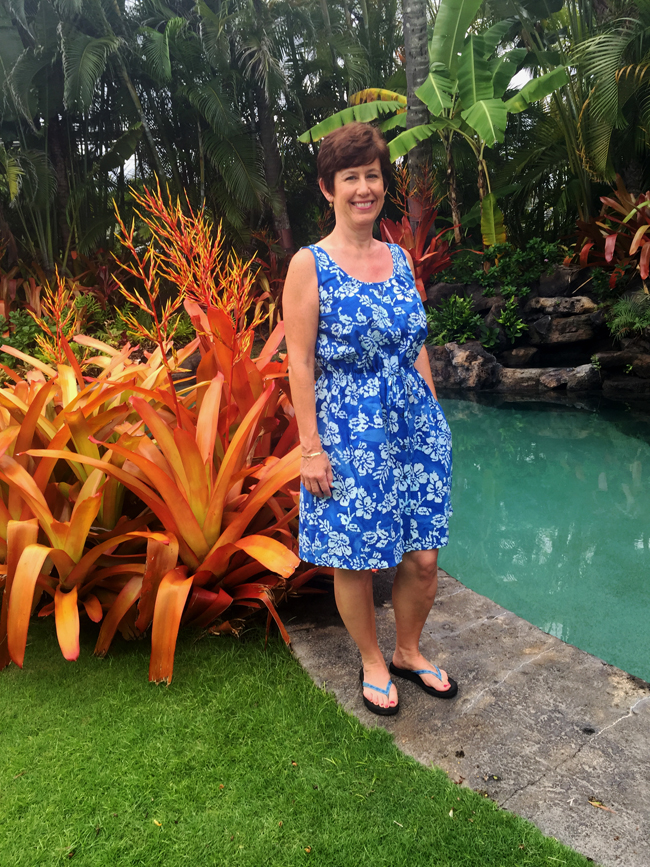
blue batik on me2

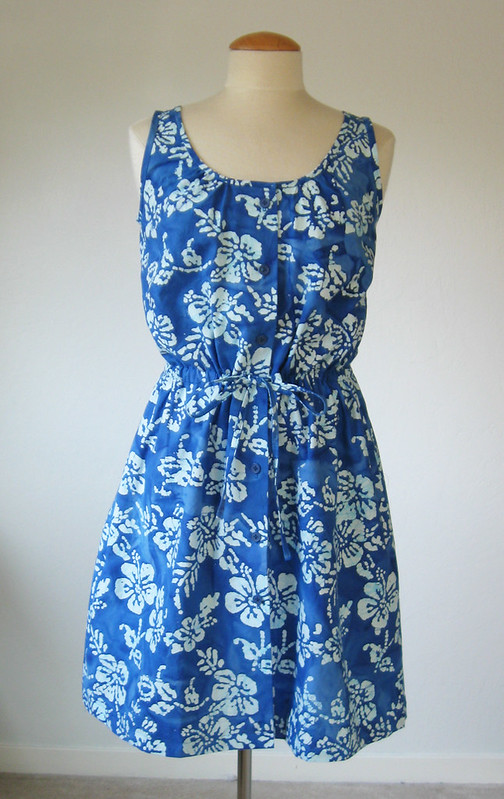
I bought this batik fabric last year over here, and while it is a tiny bit too stiff for a dress that is supposed to be a bit drapey but it works and I love the color. Other than shortening I cut it out as is.

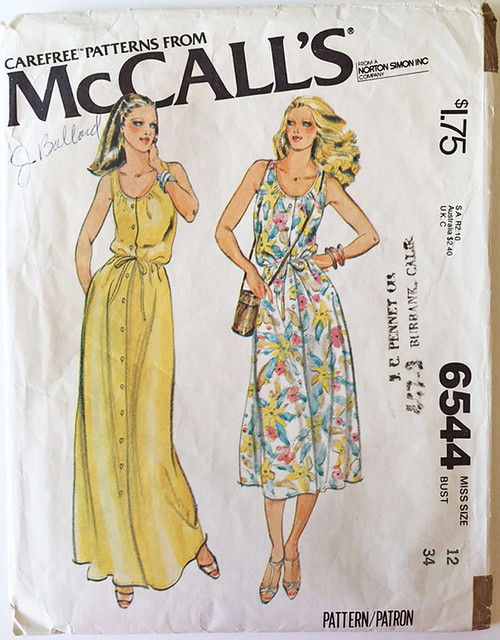
McCalls 6544 vintage pattern envelope

Now is my moment to repeat that there are no new patterns - sewn for a long time and seen it all. Recently I saw a few versions of the True Bias Southport dress and noticed it was quite similar to this pattern. What I like about this McCalls pattern (and a lot of older patterns in general) is that they include the pattern pieces to make the armhole and neckline bindings. Another detail I like is the waistline casing is on the inside and the ties are threaded to the outside via buttonholes at the center front.

blue batik front on form

It doesn't have bust darts, what would be bust darts are rotated into gathers at the neckline which is very pretty. And probably would lay better in a softer fabric. I remember the two versions I made were both rayon challis, one royal blue with black flowers and the other was emerald green (love those jewel tones:)

To fit this I added some length in the front bodice and created horizontal bust darts. If I had not done this then the waist casing would have been pulling upwards. So in this instance the neckline gathers become more for style and less for fit. Other fit changes, pinched out 1.5 inches of length in the middle back tapering to zero at the size seams, as I do with almost all McVoguerick patterns.

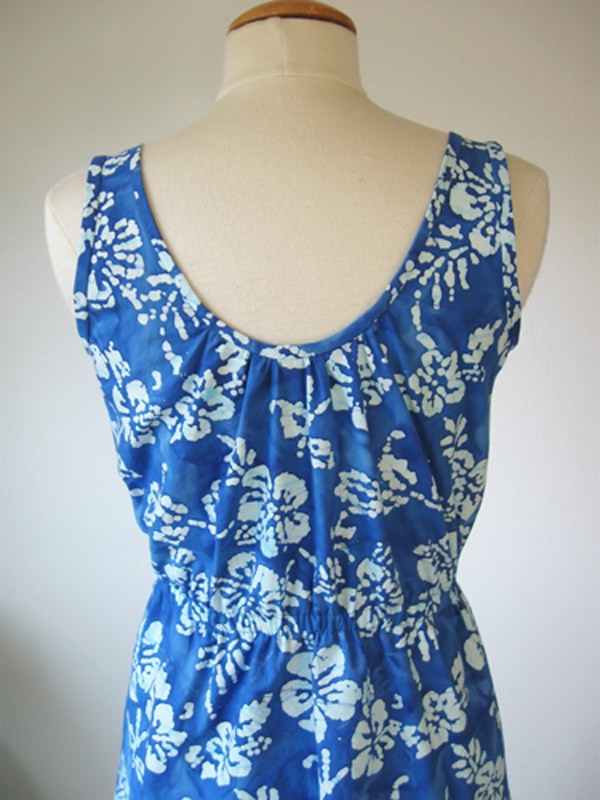
The back has a pretty neckline and the same gathers there.

blue batik back neckline

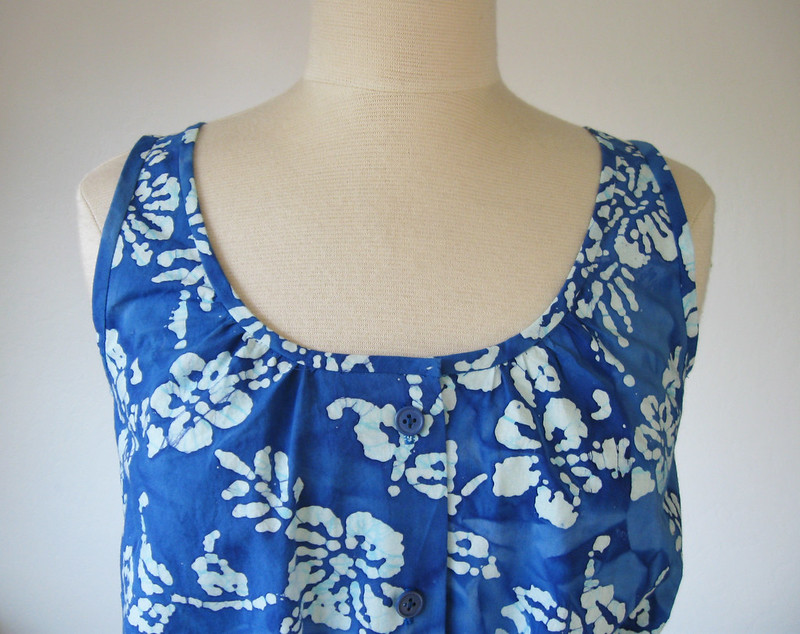
Close up of the front neckline. The pattern has a bias binding that is in the same fabric, that is sewn on and then folded. The pattern says to fold, press under and hand stitch inside - which I like to do but I bet on a current pattern this would not go over very well! Hand sewing seems to be minimized which is understandable, but there are times when it gives a nice result. I suppose it could have been finished with topstitching but for a change I like to see a binding without stitching. In a silk it is especially pretty and I think you have more control with hand sewing tiny bindings.

blue batik front neckline

However the best part of this pattern is that there are pattern pieces included for placing the gathers.
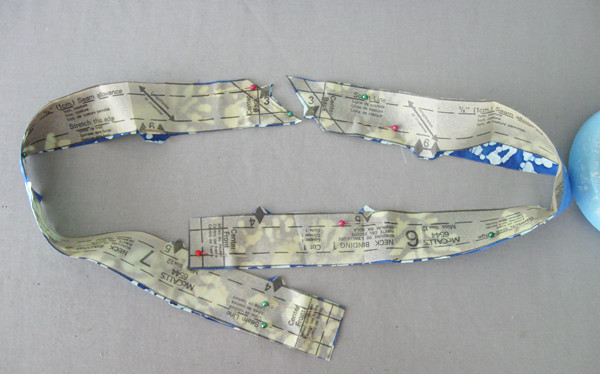
Here are the neckline binding pieces, they give the complete pieces, with that nice diagonal seam in the center back. That is one benefit of the single size older patterns, they could and did include all the pieces for bindings, facings etc and didn't have to create one pattern piece that included all the sizes. It certainly makes working with the pattern a lot easier - not having to hunt for your size among all the pieces. Also the printing was bolder - just a tiny thing but it really makes them clearer. This bias neckline has 3/8" seam allowance, which is clearly marked, plus all the notches, front and back, shoulder seams, etc.

blue batik neck band

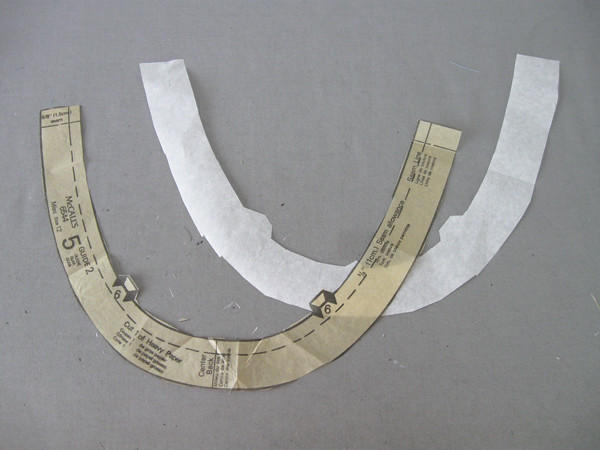
This is the clever bit, the guide for placement of the gathers. Shown here the piece for the back neckline. You cut it out of paper and then can use it as a guide to place the gathers, then stitch them into place before you apply the neckline binding.

blue batik stitching guide

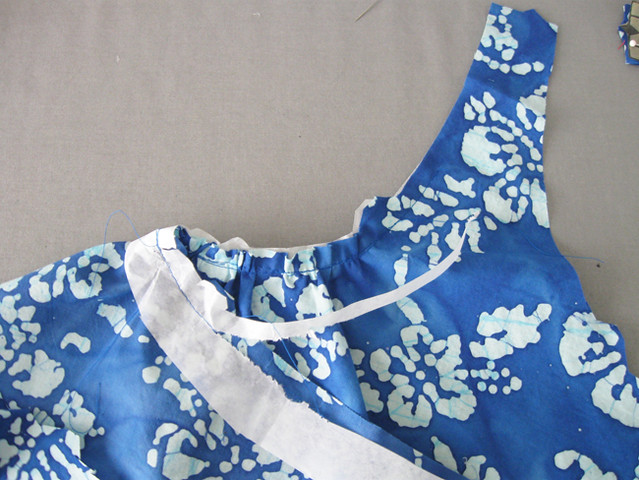
Here is the paper guide sewn onto the dress back neckline. And the stitching perforations make it easy to pull it away. Now the neckline is gathered nicely and you don't have to fiddle with any gathering stitches, trying to make them fit while applying the bias neckline binding. It is especially nice for the bodice front, as the placement of those gathers is more crucial to the fit over the bust.

blue batik gathering guide

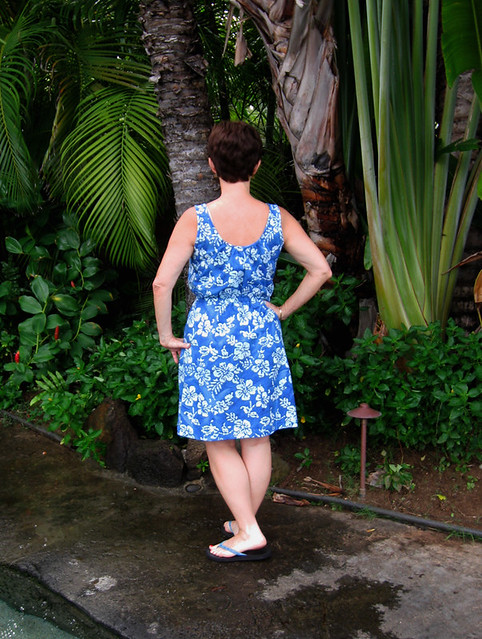
Back view on me

back on me blue batik

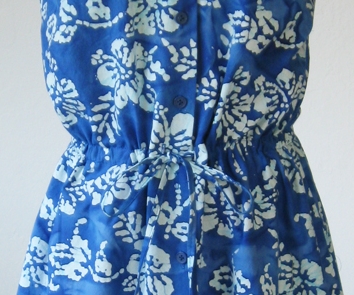
Here is the waist tie, made by sewing a casing on the inside, and making a buttonhole on either side of the center front. The fabric tie is sewn to elastic which makes it very comfortable. And of course pockets in the side seams - as any good pattern should have!  Late night sewing means I scrounged around in my button box and came up with a few cards of these plain blue buttons. Matching well enough and just the right size. It pays to accumulate a lot of button cards when they go on sale.

blue batik front closeup tie

Last fit note, once the neckline was finished I basted up the side seams and decided that 80's shaping (in a word - voluminous!) was not right for me now.  I lopped off a lot of circumference by taking it in about 2 inches at each side seam at the upper bodice and a good 5 inches by the time I got to the hem. It would have been a very full skirt otherwise. I think the finished bust was intended to be about 40 inches - way too much fabric for my 2015 eyes but otherwise a timeless pattern with a lot of good details.

blue batik on me 1

Ok that's all for this one - time to hit the beach. By the way I am participating in the #sewphotohop on Instagram  which has been a lot of fun. A great way to find new-to-me sewing fanatics all over the globe. True confession - I am extra happy when I find some new-to-me blogs this way - I really like reading all the extra details that a blog post can provide.

Up next a few more new items that made it into my suitcase, including a lot of Girl Charlee fabrics. I told you I could not resist a tropical novelty print....

Happy Sewing, Beth


Friday, June 12, 2015

Vintage sewing with McCalls 2386 in cotton sateen

Vintage patterns are not something I use very often but recently I pulled this dress out of the closet and realized it hadn't made an appearance here. For a while I went through a phase of looking at all the incredibly cute vintage patterns available on Etsy or Ebay and then ordering a few. Not with any real intention of sewing them up but just because they were so pretty or unusual. I also went through a phase of selling on Etsy, so I bought a fair amount of yardage which I have been sewing from for a good two years now.

I saw this fabric on line and ordered a lot, like 12 yards as the price was very low, and then when it came I loved it. I made a sample dress, someone contacted me on Etsy. Long story short I made 5 bridesmaid's dresses using this print and had about a yard or so left. Yes - I am short and can get a sleeveless dress out of about 1 yard of 60" wide fabric.

So that is the kind of long backstory of how this dress came to be sewn up.


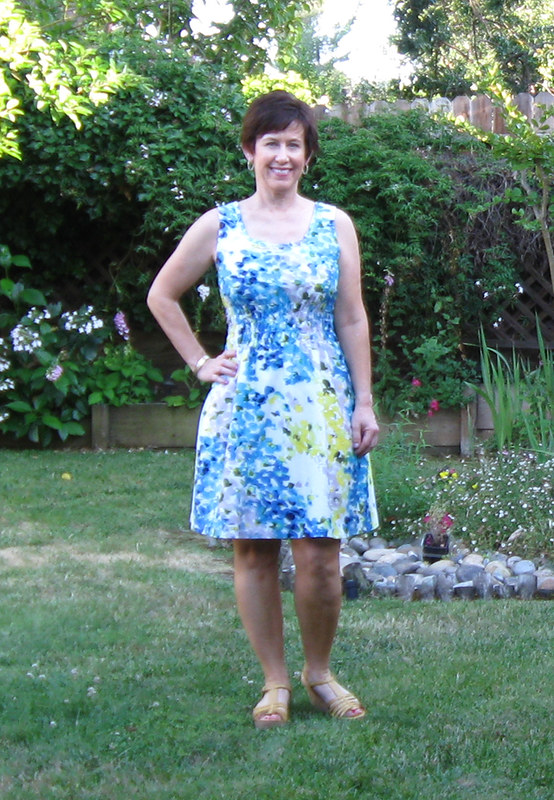
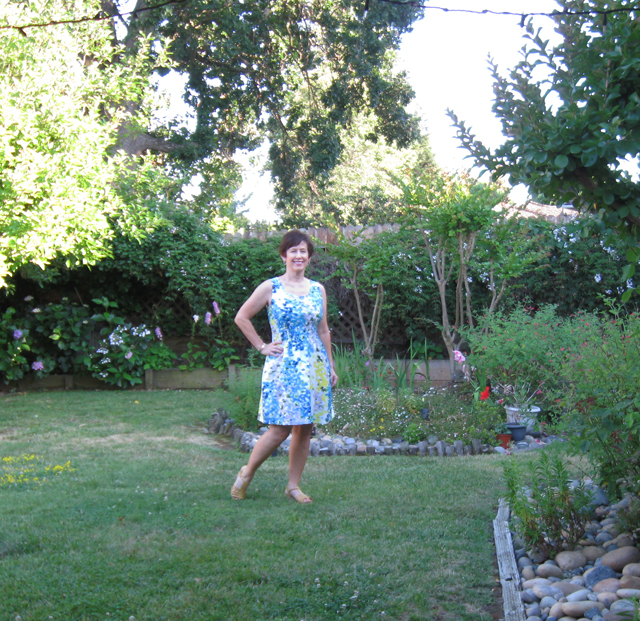
Vintage dress on me

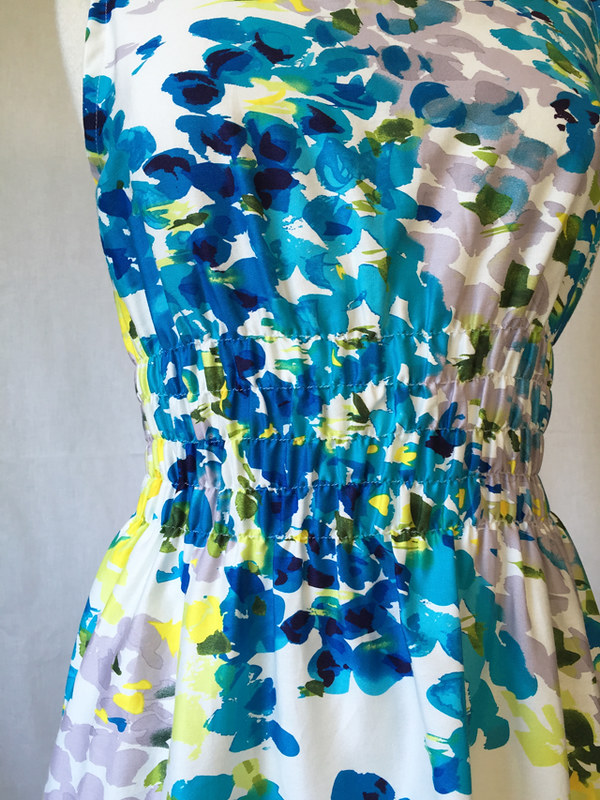
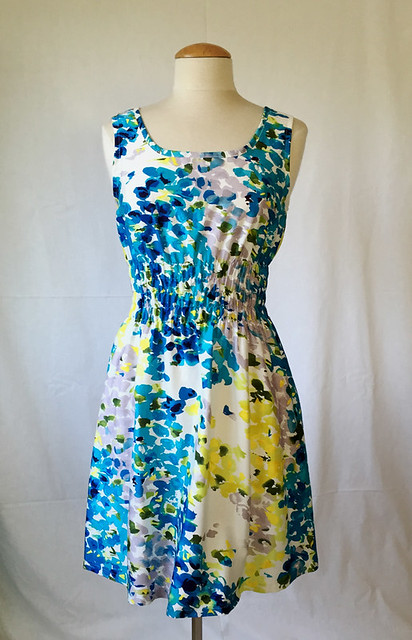
Here is a close up look at the detail on this dress, which is really simple but clever and easy to sew. The shaping is achieve by sewing with elastic thread along pre-marked lines at the waist.


vintage dress gathers

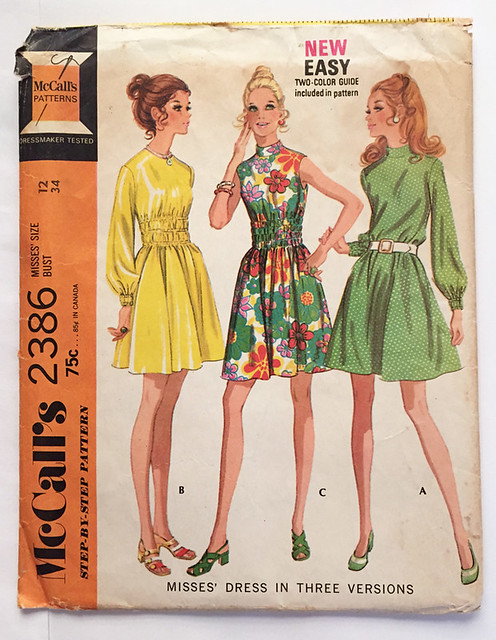
Here is the pattern envelope. You can see I changed the neckline area quite a bit. As it it so reminds me of the later season costuming on Mad Men. Can't you imagine one of the women in the office wearing any of these 3 versions?
Looking at the pattern envelope brings me to something I was thinking about the other day. Why not just draft the pattern instead of buying one for that simple detail of where to put the elastic stitching?
For me it is all about proportion. I could fiddle around with a simple dress pattern and get here in the end but it just seems like so much work. Perhaps that is why I rarely draft anything unless I absolutely have to. It is sooooo much easier to start with the pattern that I want and take it from there. I realize that this presumes knowing how to do the fit adjustments needed and fully admit that fitting is something I don't mind at all, whereas starting from scratch or close to it sound an awful lot like work :)
Anyway - I am happy for the commercial pattern companies, old and new, to do all that work for me.
Dart placement, collar size, skirt width, seaming, etc are all such issues and if the proportions are not right it just bugs me. (my current pet peeve, some indie patterns where the darts are way too long and end up looking strange or too noticeable)  OK rant over. And conversely, to stick up for indie patterns I just started another Pauline Alice pattern last night, it is looking good!

McCalls 2386 vintage pattern

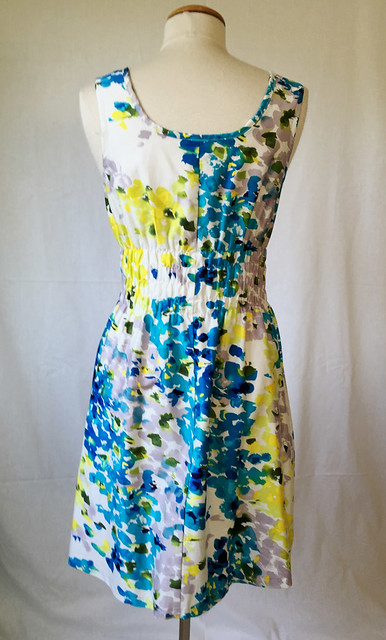
Front and back views. I was actually careful with the pattern placement, yellow is not my favorite shade to wear - don't think I have a single yellow item - and so I wanted the mostly blue/lavender sections on the front bodice.

Vintage dress formVintage dress on form back

MCC Dress on me

This fabric is cotton sateen, with no stretch, and very lightweight. To me it is gorgeous, both the quality of the fabric which really surprised me  - ordered from Fashion Fabrics Club - and the coloration. I just think it looks like a beautiful abstract watercolor painting and the color combo is beautiful.

vintage dress neckline

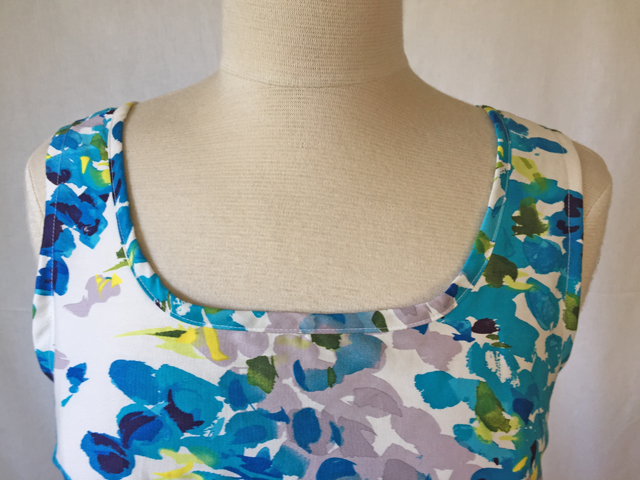
For the neckline, I think I used one of my other sheath dress patterns that has a square neckline and copied the depth of that. (proportions again) . I really like a square neckline, it's my favorite shape (as opposed to V-neckline: nice, round neckline: just OK, boat or high neckline: serious dislike)  So I copied the square neckline but rounded the edges a bit as that makes it easier to apply the bias binding and looks a little softer. So in my mind I call this the "roundish square neckline" and I have used it a lot over the years. For the binding I wanted a visible binding as this gives a nice finish and emphasizes the neckline - as opposed to sewing a binding and turning to the inside and topstitching. I am not a fan of using bias tape for binding, it seems just a smudge to bulky or stiff for anything other than mid-weight cotton. But I did use it for the armholes as there was nothing left of the dress fabric.

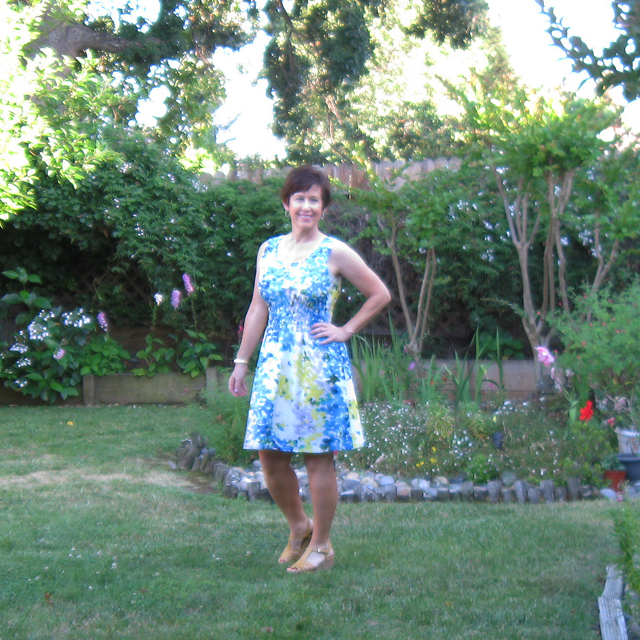
Now one more pic which made me laugh when I saw it on the laptop - what is up with that pose? Mail order catalog model?  Bendable Barbie doll stance?  Didn't you put your Barbie in this exact pose? I always found Barbie kind of annoying, and my sister and I always lost the stupid tiny high heel shoes immediately so ours ran around in ball gowns and bare feet. Our dolls did a lot of swimming since that is what we did all summer in the backyard consequently their Barbie hair was completely fried. Come to think of it, our hair probably was too! Chlorine from the pool and lemon juice to try and create blond highlights. Oh well - it was natural and organic, ha ha.

Vintage dress on me2

I wanted to take some blog photos on Wednesday as it rained most of the day here, to document a dash through the raindrops but it was actually pouring. Crazy!  Oh well the plants liked it. Now today it is over 100˚F here. More crazy! Summer in California. As we all say "at least there's no humidity!"


Happy summer sewing, Beth

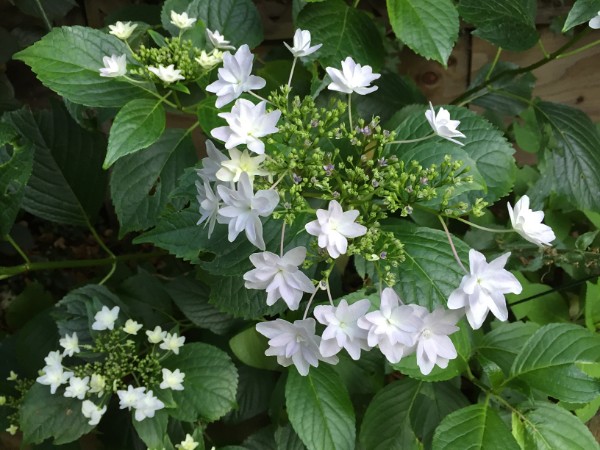
and in the background in this photo above, on the left, is the shooting star hydrangea. It is getting huge and I am so happy. I think my mom bought it for me about 3 years ago, it was in an 8 inch pot and not very big. It must like that spot because this year there are a lot of blooms. Pretty huh? and so nice when the small white flowers dance in the breeze.

Shooting star hydrangea

Tuesday, January 28, 2014

A fun vintage diversion

Last week a very interesting detour into the world of vintage came my way. My sister was working with a client who asked if she knew anyone that could repair the beading on a treasured dress. The owner inherited it from her mother who wore it in the 60's and the now the daughter has worn it as well. But time and maybe some wild dancing took a toll on some of the beadwork. I couldn't resist showing it to you, my sewing and fashion loving friends.
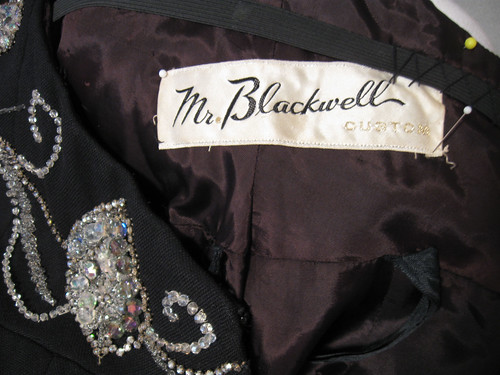
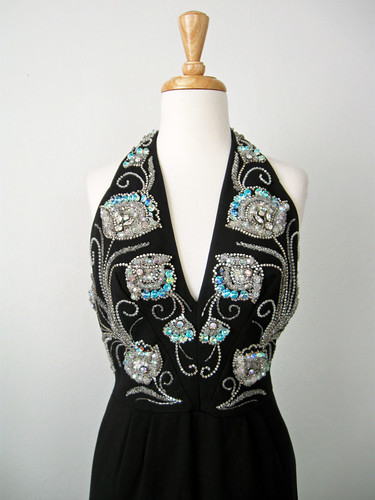
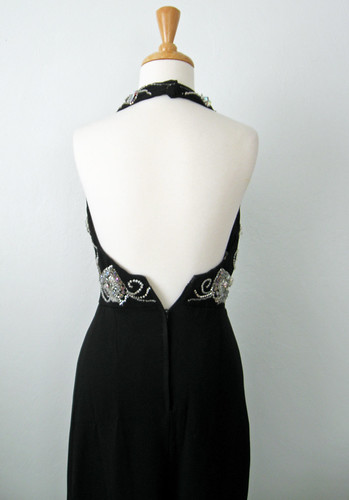
Halter style, full length, wool crepe underlined with cotton batiste and then fully lined in acetate. Elastic waist stay, hand embellished with 7 different types of beads and rhinestones. Designer: Mr Blackwell
Vintage dress front2

Yes, he of the annual "worst-dressed" list. He has now gone to the fashion show in the sky but from the 50's through the 70's he did very well and was known for a sparkly Hollywood glamour. 

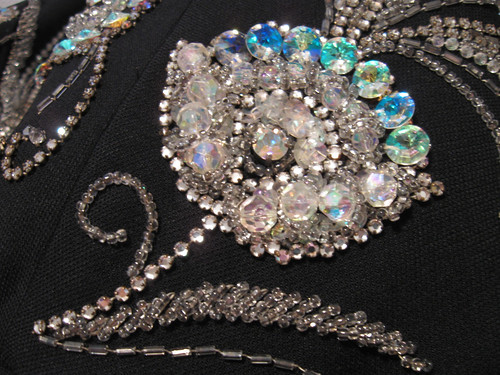
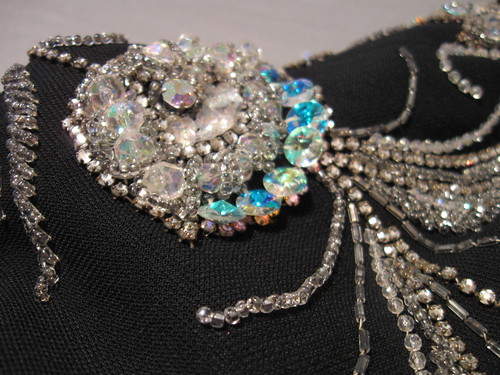
Here is a close up look at the bead motif which appears all aroung the bodice. The beads that appear blue are really not, they are actually more of an aurora borealis type so they catch the light differently based on the angle. There are also strings of rhinestones, round crystals in clear and grey, bugle beads and some smaller clear and grey beads. I don't know anything about beading so I looked at some of my books, got a few tips and gave it a try. Most helpful tip: beeswax on the thread which makes it easier to work with.

bead motif

So what did I fix? A lot of the area that was unravelling was in the back and under the arms which makes sense as that would rub or get snagged on a chair, etc. There sections with some missing beads so I took myself off to Michaels (a big chain craft store, somewhere I try to avoid at all costs) but I knew they had beads etc. I bought a few packs of Swarovski crystal beads and then some glass beads that looked similar to those appearing on my Iphone photo. I couldn't take the dress anywhere - too delicate at this point.

The two swirls on either side of the zipper were missing lots of beads so I filled those in. Also the larger motifs in the back had a lot of broken threads and some missing beads so I stitched those up as well.
This dress is TINY!  Shown here on my smallest dress form which has a 26" waist and look the zipper won't close. One thing I like about this dress is that you can tell it was hand beaded, the various lines and curls are not exactly matching, they differ a few millimeters here and there but the eye doesn't see that on the wearer. So note to all perfectionists - we are human and a bit of wavering is fine.

Vintage dress back

Full length view. Glamorous, huh?  Not that I have an event on the calendar or anything like this in my closet but I would wear it in a heartbeat.

Vintage dress full length

A look at the seaming at the waist and bodice. Very nice shaping achieved with the seams and I always like this type of skirt, fitted and straight with a few small pleats at the waist. A very flattering design. I also repaired those curliques in the center front. 

Vintage dress waist seam

The label inside and the waist stay elastic.

Label MrBlackwell

Of course I had to do a little web searching and found a very similar dress. It must have been from the same collection.  Here is the link if you want to see it:  Dorothea's Closet Vintage Mr. Blackwell and it can be yours for only $950. Please let me know if you buy it, I want to see pictures !

Now I am off to do just a little more on this, when I went to move it today a couple of the large round beads fell off. So I will be giving it another once over. 

motif closeup 1

I hope to finish up the Irish wool jacket this weekend and then maybe some spring sewing. Today I went to the gym in shorts and a sleeveless top. Weird, I tell you. Trite to say it but the weather is weird.
My apologies to all of you in the latest polar vortex. Hang in there, spring is coming to you too!

Beth