When it comes to hems I am slightly obsessed with invisibility - and it is entirely possible with a few extra but easy steps. Nothing new here, this method is available in many sewing texts but I was taking photos all the way through this construction so here is the process.
First step: decide on the sleeve length. Pin hem and then mark the edge with a thread trace, as in photo on the right. No need to press the hem, that comes later.
Second step: apply a strip of fusible interfacing. For this lightweight fabric I used fusible knit interfacing, for a tailored wool jacket I would use a woven weft fusible. For both these steps a sleeve board is invaluable. A necessity (and often available at garage sales, the older ones are so sturdy).
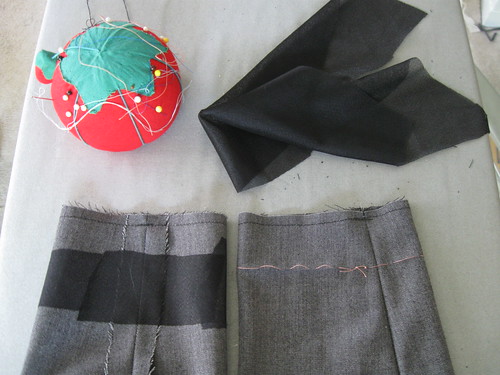
Next step: I hand sew the hem catching just a few threads of the fusible interfacing and not picking up any threads of the actual sleeve fabric. Nice and loose - there should be a tiny bit of play in the thread so that it doesn't pull. I think this is key in hem sewing, the actual hem should have a tiny bit of slack to prevent a stress line across the garment.
.
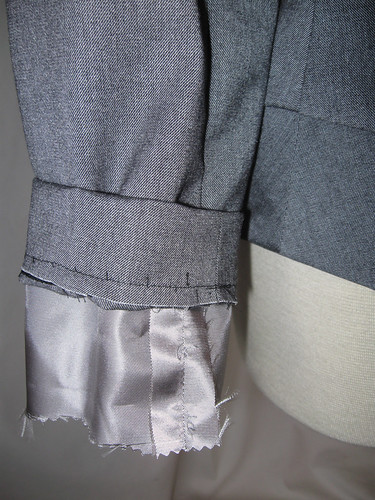

On the right, finished hem, slightly out of focus image but you get the idea. Next step: while the garment is on a hanger or dress form, cut the sleeve lining about 1/2" longer than the finished hem. Careful with the scissors here! Let's just say that scissors + finished garment edge can be a dangerous combo. Moving on...
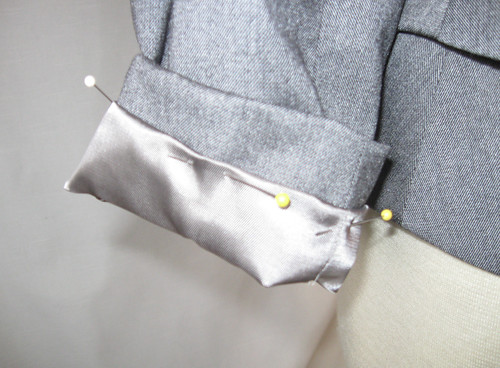
Next step: press under the cut edge of the sleeve lining about 1/4" or so. No need to be super exact. Then turn up sleeve and lining and pin lining to sleeve. By turning up the sleeve and lining this way you get that little bit of ease in the sleeve lining that allows for arm movement. Easier to show here in the photo below.
Next step: stitch the lining to the jacket sleeve. See the photo below, I stitch the lining just below the crease, so it is hidden and retains that bit of ease we added with the folding and pinning.
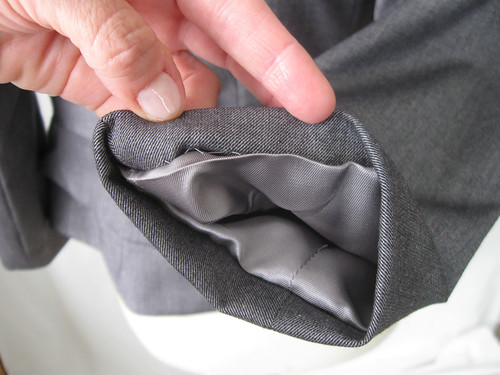
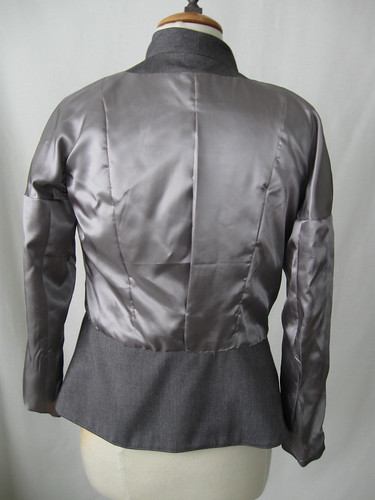
The lining for this jacket was well designed, I thought it fit perfectly which does not always seem to be the case. I actually sewed it in by machine as the pattern instructed (a rarity for me - I usually just hand sew in linings - I like that step) Although the bottom of the lining is hand stitched. The lining was a acetate satin that I had in my lining box - a lucky find of just the right color. Well not really, when I find a good lining on a super sale I buy 5 yards or so and stash it away. (grey, navy, black - always useful.)
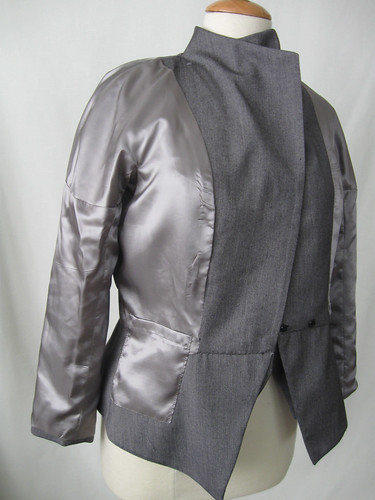
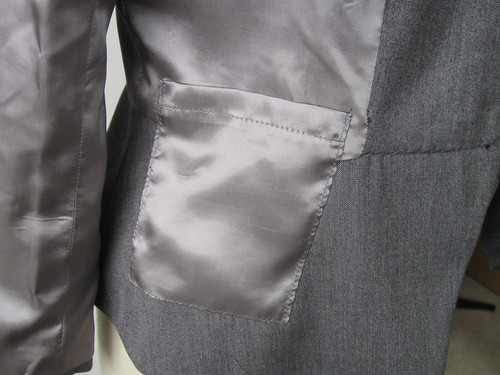
Is that a pocket you see on the lining front? Yes! Once I finished the jacket lining and pinned it in for a check I thought this jacket needed a pocket, for a bit of mad money or business cards. It had to be hand sewed in, usually I would machine sew this type of inner pocket into the lining before it was finished. If you do add this type of pocket - go around the outer edge with your hand stitching twice, with a few random knots. You will be glad you did if you put anything weighty in the pocket, such as the aforementioned phone.
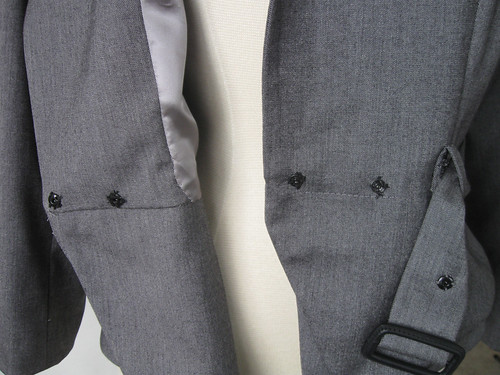
The front closure: This is another reason why I mentioned in the previous post that this jacket should be worn closed and belted. The pattern calls for snaps to close. Not the prettiest method.
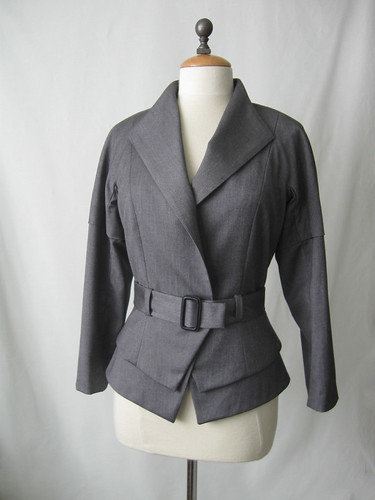
OK - this pattern is DONE! one last look at the finished jacket. Someone mentioned wearing it with other things, and now I am thinking a skirt but I will have to play around with proportions.
Onward to other projects. I am just about finished with a garment refashion (a coat into something else). As I mentioned previously, I remade the Thurlow pants pattern and they are fantastic. Finished a new knit top (New Look 6150, a winner, both versions). And the holidays just around the corner. eeeeeek!
 Here is today's SunnyGal garden photo - a plant given to me by my pal Alice. She has a green thumb and end up with lots of giveaway plants. I need more of these, so pretty. Happy Fall Sewing, Beth


That's REALLY useful to see how you hem your sleeves, Beth. It helps a lot to see examples from a real make, rather than line drawings in a book. Can't wait to see your jersey makes! Say hello to Alice for me!
ReplyDeleteBeth, that's great explanation.. I'm bookmarking it for layer reference. Your jacket is amazing.
ReplyDeleteI just love getting a sneak peek into how you do things. I want to save every little tidbit of advice. And, I want to see your new Thurlows! I still haven't found time to make mine, but I hope to squeeze it in soon.
ReplyDeleteExtremely helpful, thank you! I would feel nervous about the security of the sleeve hem sewn just to the interfacing, but since it is also sewn to the lining it would feel safe to me. Do you have any trouble pulling your marking thread out after it has been fused to interfacing? I've always avoided interfacing over areas with thread tacks and such, but I guess I probably shouldn't have been worried.
ReplyDeleteI know this post is super old, but I just have to say that the way you hem sleeves is the only way that makes sense to me after searching for many bagging methods for lining. Thanks a lot and I am going to do my sleeves this way later on my coat I am making and see how it turns out. I love to hand sew, and like to be able to have more control over hems, and this is easier on my brain! Thanks again!
ReplyDeleteÓtimo muito prático
ReplyDelete