Sunday, August 19, 2012

Garment Clone - tunic top

Sometimes I feel like Goldilocks when it comes to selection of fabric and pattern. Some fabrics are too limp, some fabrics are too bright, and sometimes as Goldilocks found in the story, everything is just right. I just made this tunic top for my mom by copying a tunic top that she bought at Macy's ages ago and has worn many times.  She is one of those people that look really sharp in a bold black and white garment so I was a concerned if a new version could equal the original but she is thrilled with it, and it all comes down to the fabric.

blue tunic front view

Last week I met up with some fellow San Francisco bay area sewing bloggers, a super fun evening. (check out these posts from Shams of Communing with Fabric and Amy of Sew Well).  Even better, I got to meet someone new, Cindy of Cation Designs. I have been reading her blog for a while so it was great to finally talk and hear about her sewing adventures. She made me laugh because I showed a couple of things I have sewn with fabrics purchased at a local thrift store or estate sale. She was amazed at my lucky finds (as am I) and was ready to go shopping with me anytime. While I don't always find something I do get the feeling there is someone who is my shopping doppelganger slowly doling out her donations to the local thrift store I frequent as I now have more than 7 big pieces of yardage waiting to be sewn up.  Everything I have purchased at this thrift store is blue, ranging from dark cobalt to pale sky blue, with a good dollop of turquoise and aqua.  Interesting, huh?  I tell you, my shopping/sewing doppelganger.  Although she is apparently decreasing her stash whereas I am adding to mine.   
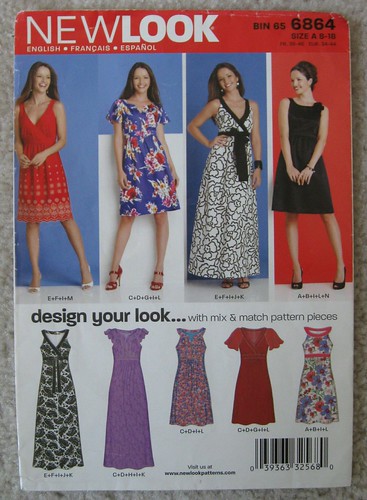
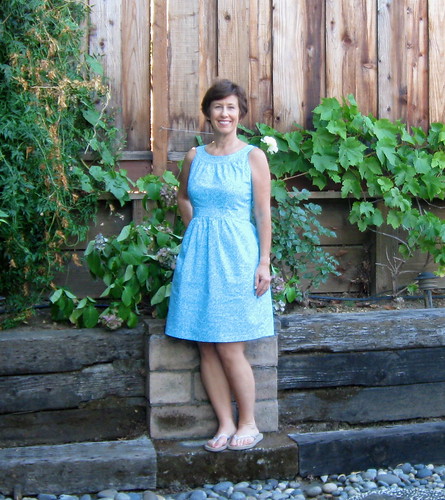
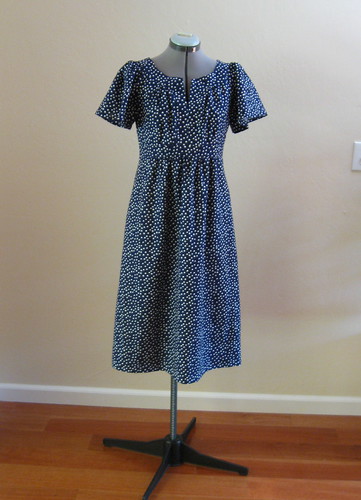
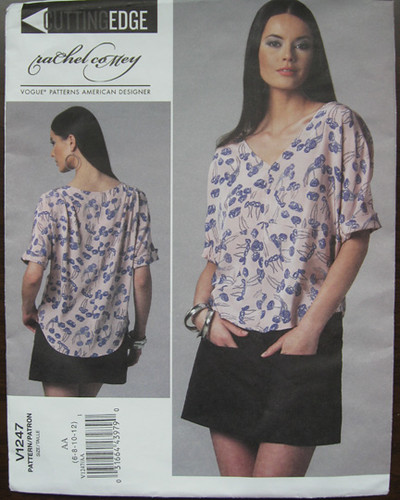
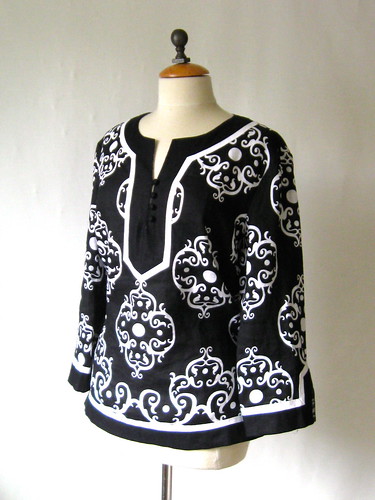
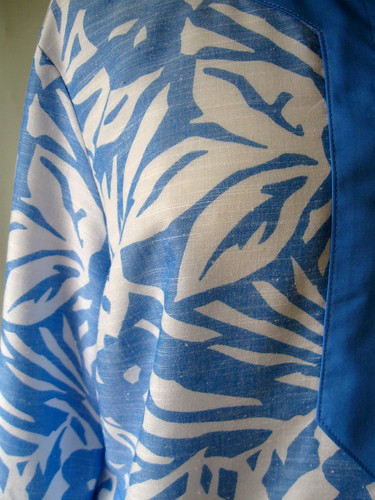
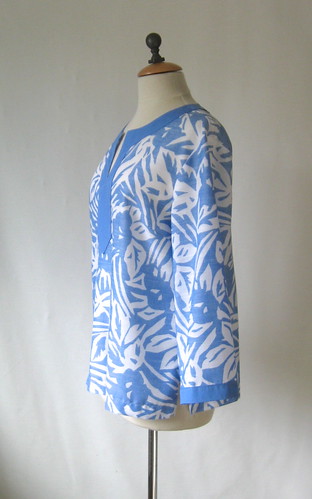
Back to the tunic top.  Fabric content is a mystery, it is 60" wide and has a linen-y texture but is super soft and presses beautifully.  Here is the original black and white tunic top which is 100% linen. It looks great but is just a bit heavy. I do like the white outline on the solid black placket etc. but I didn't have any white fabric that seemed the right weight so I skipped that feature on the blue version.  I also skipped the trim on the bottom because visually it seemed to chop off the look in the blue. 

black white tunic RTW
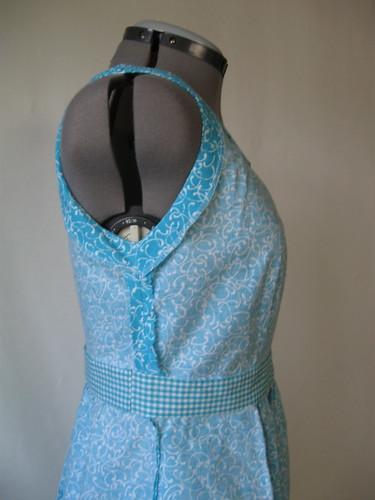
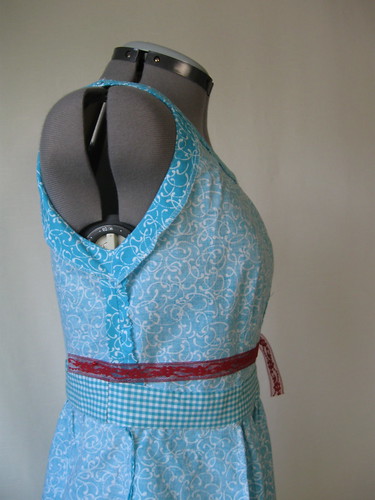
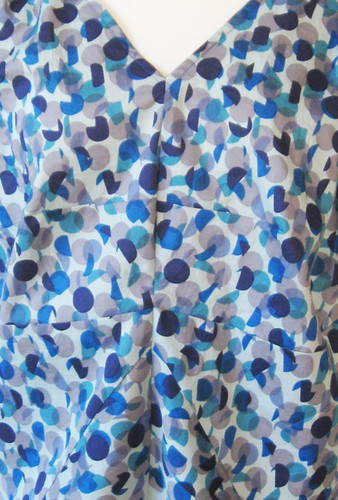
Here is a closer look at the blue fabric. I happened to have the solid blue fabric in my stash, hurrah.
blue tunic fabric close up
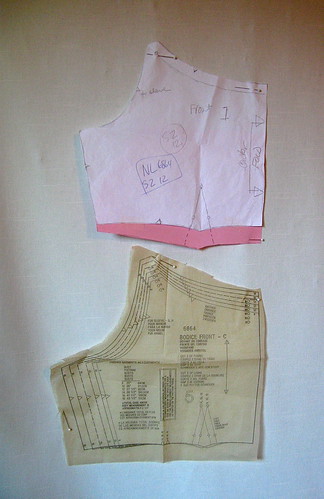
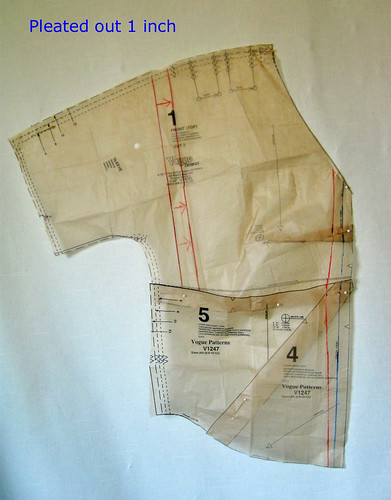
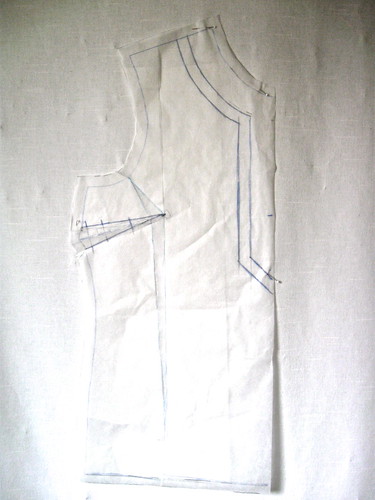
I made the paper pattern by copying the original top, which was quite easy as garment clones go, since it is a relatively simple garment and can be laid flat.  I run a contrast line of basting down the center front and back of the top, and then just trace the seam lines of the garment, adding seam allowances later. I laid the sleeves flat, and traced the front half and back half, and then taped them together, truing up the sleeve cap a bit.  Normally I would pleat in the dart as I pinned the tissue on the garment for tracing but I just couldn't get the paper to cooperate so I traced the front almost flat, and then went back and added a bust dart using the slash and pivot technique. Then I trued up the front side seam to the back. I marked the neckline placket and then retraced that section to make the pattern piece.

pattern piece
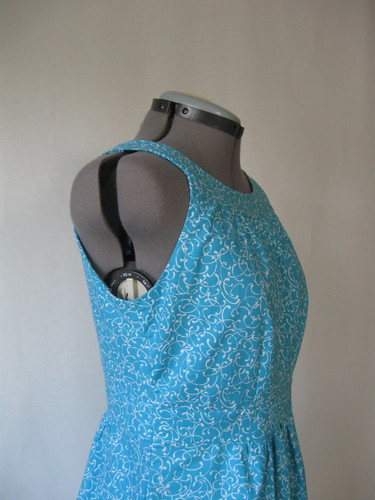
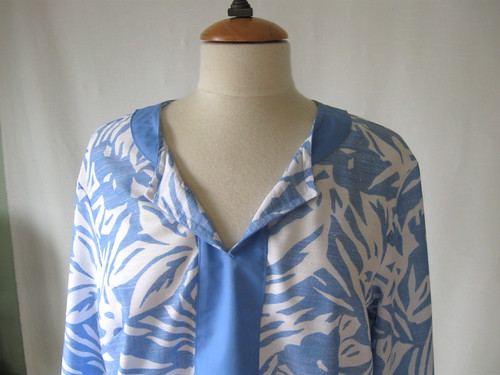
For the placket I did use a lightweight knit interfacing, stay-stitched the seam allowance all around and then turned and pressed. The neckline placket is sewn inside, right side to wrong side, and then flipped outside and top-stitched, so the right side shows. The RTW top was made this way, easy and not bulky.

blue tunic inside neckline

blue tunic side view
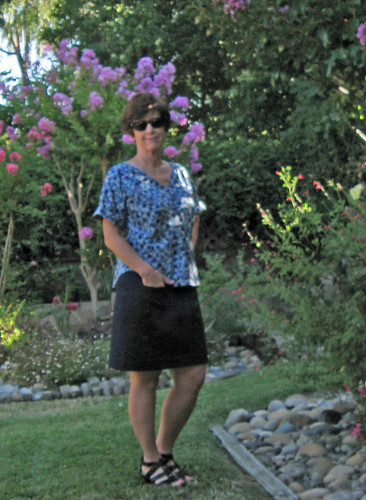
So I gave it to Mom this week and she loves it. another hurrah!  I have enough fabric remaining to make another one - so I might have one as well.  Which might require some pre-event telephoning, to make sure we don't arrive somewhere looking like twins. Could happen :)

Getting back to my thrift store finds, in addition to this tunic top fabric, here are a few other finds which came from the same store.

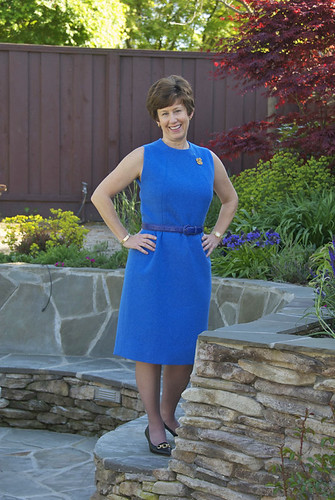
My McCalls vintage look, made with a blue wool tweed. Still have a good 2 yards remaining, so I am thinking a jacket will be made this winter.  

Blue Vintage dress Front, standing


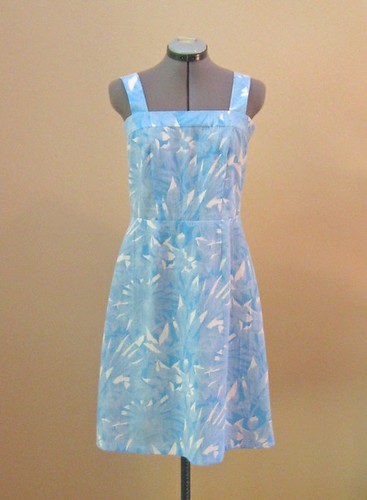
This one is a crinkled cotton in a tropical orchid and palm leaf print.  I made a summer sundress (what else?)  using Butterick 5351. Another good one for our 100 degree days.

                      Bahama2fabricBahama dress front full
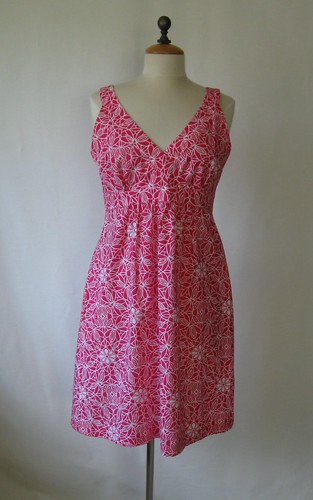
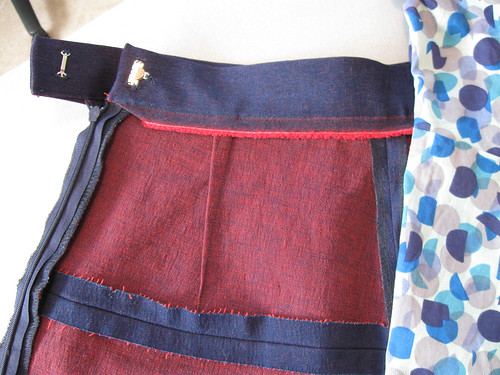
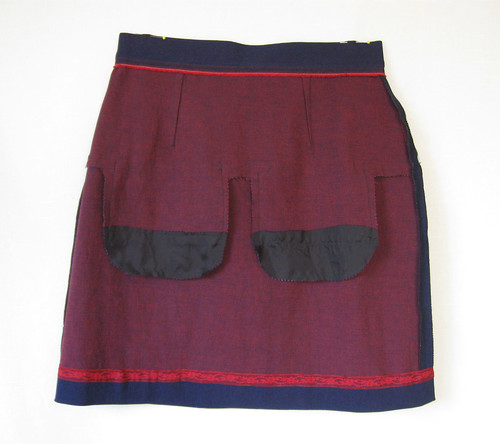
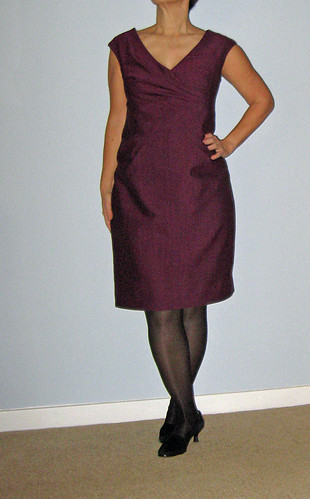
The fabric shown below I found at an estate sale, not my unnamed thrift store, so it is not blue, but one of my other preferred colors - plum or is it purple?  Blog post: Vogue 1117 Michael Kors dress.  Lots of sewing details in that blog post and the previous one if you are interested in this pattern.  

                          Korsdress close upMKdress1

Total investment in these 3 fabrics is less than $ 20.  How I love a fabric bargain and now I feel I must check my local unnamed thrift store weekly in case my shopping doppelganger has made another donation.  You didn't think I was going to drop the name/location of this retail establishment, did you? We couldn't have that, as much as I like you all, dear readers.  Someone might swoop in and take my next piece of blue fabric.

Foxglove purple
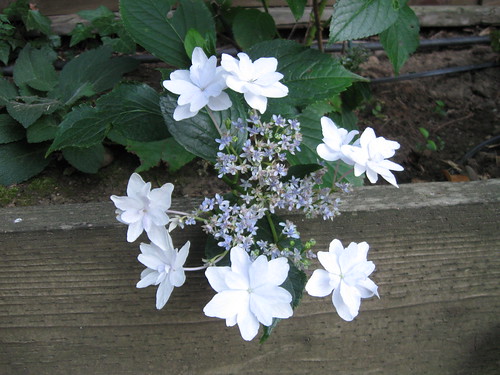
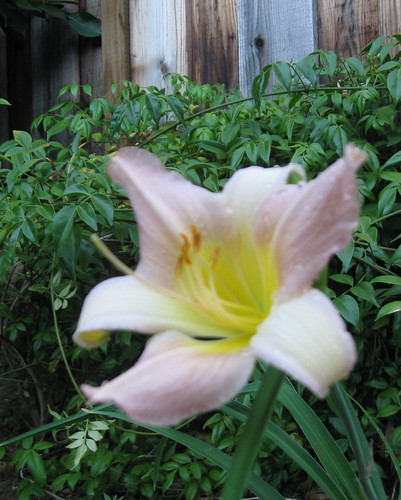
Sunnygal garden photo in shades of purple to compliment the dress above.
Foxglove, a new plant I tried on a whim and it is a winner, expect to see more of these next year.


Happy Summer sewing, Beth

Tuesday, August 14, 2012

New Look 6864 dress fit adjustments

Still hot here in the dog days of August.  My sewing room gets the most sun of any room in the house, and while that is great in the wintertime right now it seems a bit too warm to attempt any daytime sewing.  Combine that with a steam iron and I can use my sewing as a weight loss workout!  So this time of year looking at fabric and pattern websites seems a better idea than sewing.
My previous post was the cotton sundress made from New Look 6874, multiple versions.

                    New Look 6864 patternIMG_0419
As I mentioned I really like this pattern and it can work for a lot of different figures.  Even better it is a great figure flatterer, or should I say, a design that can hide a few figure concerns if you want (tummy, hips).  The only issue I have found is the front bodice can be a bit too short which puts the center band too high, cutting across the bottom of the bustline.  I would say that it needs a full bust adjustment on some women but I have also made this for women who did not need the full bust adjustment and it still needed to be lowered.

When I cut this out I decided to experiment with a shortcut method of altering the bodice front. If I didn't like the adjustment I could recut the piece according to the pattern but it worked out well. On buying the pattern I knew I would use it in various sizes so I traced the size 12 bodice pieces and they have been well used.  Below you can see the addition in pink paper lengthening the front bodice.  More length in the center, about 1 inch,and tapering to 1/2 inch at the side seam.  Math nerds may notice that this changes slightly (very) the finished length (side to side) of the bottom of the bodice. Also the side seam is now longer on the front bodice than the back, where I did not make any change. I will deal with that side seam discrepancy in a later step.
IMG_0487
It might seem that this would make the front band dip too low but this is a pattern where I found the extra length is needed.  A while ago I saw this post by Kathleen Fasanella of the Fashion-Incubator blog that illustrates this perfectly.  Her website is dense with information, a lot targeted at the garment manufacturing industry, but I have learned an amazing amount by reading random posts.  A website that is definitely a time sink, and I mean that as a compliment, so many fantastic explanations. 

Here is the inside of the finished dress, this is an adjustable dress form which is adjusted to my measurements, but the height is one area that confounds me in that one can't change the bodice or hip length.  That would be nice, however I own 4 different forms so no plans to get any others, I can make do. 
I tied a piece of seam lace at the horizontal point to show how much longer my finished front bodice is as compared to the back.  

      IMG_0421IMG_0422
As worn, the center band settles in the right place, and achieves my goal of not having it too high, cutting across the bottom of the bustline which it did in my previous version. The skirt is a bit more puffy in this cotton, in a softer fabric it falls better.

IMG_0466
Lastly, to accomodate the difference in the length of the side seam that I created by adding to the bottom of the front bodice, I just ran a gathering thread for about 3 inches on the front bodice side seam allowances and pulled that up until the side seams matched.  This is a great little adjustment that can be added to a lot of patterns to create a bit of ease in the bodice front, kind of a "mini-full-bust-adjustment".  It doesn't show under the arm and especially with a printed fabric. Now that I am looking at the form I think even she is happier with the extra length in the front bodice, it seems to settle at the right spot. 
IMG_0420

Up next, I have been on a kick to make beachy looking tunics, and finished a few knit tops. I have another one-hit wonder coming up which I am currently re-fashioning, something I have never done but having seen so many inspiring ideas lately I got out my scissors and started slicing.

Here is today's SunnyGal garden photo, I was hankering for one of these hydrangeas last year and my family suprised me with a gift. It is surviving nicely in a shady corner and I expect big things in the next few seasons. 
Stay cool and happy summer sewing.

Shooting star Hydrangea

Thursday, August 9, 2012

New Look 6864 and 102º in the shade

TIme for a sundress because we have a heatwave going on.  Yes it really is over 102º F here at my house this week, and the forecast is saying even hotter tomorrow. At times like this we all console ourselves with the fact that we don't have humidity!
I did say I was going to make some separates, and have finished a couple of tops, but in this weather I like to throw on a cotton dress and sandals so I decided to pull out another of my favorite patterns, New Look 6864. I first made this 2 summers ago and it is still available so it must be a good seller for New Look. Sewn more than 8 times so I have gotten my money's worth. Also I am starting to realize I have a lot of dresses with this same neckline.
IMG_0466
Looking a bit limp and wrinkled after a day of running around in this heat, but not bad considering this fabric is quilting cotton from my stash.  Plus my favorite color, turquoise, photo is a little overexposed so the color is not quite right. Here is the pattern envelope, I guess my version is the one on the right in black.  While I love these multi-version patterns the yardage chart makes me crazy, I think this version was squeezed onto about 1 3/4 yards of 45" fabric. I will do another post with some sewing and fit details, plus some things I noticed when comparing similar New Look and Simplicity patterns. 

New Look 6864 pattern
A better look at the dress on the form.  This is a more accurate version of the color and not so wrinkled.
IMG_0419

Some other versions

                            IMG_0482 IMG_0996

My mom wearing another version, fabric from Hawaii which I made for her to wear at her luau birthday party a few years ago, on another 100º + day, so we are "glowing" a bit. I was running around all day getting ready for the party and got dressed quickly, afterwards I realized we were wearing the "same" dress.  Well, no one but a dedicated pattern peruser (nerd like me) would know that :)

Jackie and Beth

Post to follow (hopefully this weekend) on how I fit  this pattern, I found it has a couple of little quirks that can be adjusted to get the bodice to fit correctly.

IMG_0469Here is today's SunnyGal garden photo - my poor hydrangea that gets its drip irrigation early in the morning but by 5pm it is droopy and gasping for a drink.  If you look a few posts back at my printed silk one-hit-wonder  pictures you will see this same plant looking all lush and lovely with purple blooms.  Oh well, I love hot weather so I can't complain!                                  
Happy Summer Sewing, Beth

Wednesday, August 1, 2012

Vogue 1247 - alterations for fit and style

Thanks for the positive comments on my last post. I think I need to correct the impression I gave on this top, despite calling it a nurse's scrub top - I actually do like it!  I will definitely wear this outfit and the fabric colors are perfect together.  Perhaps I wrote that post after wrestling with the sizing on the top and was cranky. In any case - the alterations for size I was able to do make it totally wearable.

The pattern is Vogue 1247, Rachel Comey skirt and top.  Miniskirt, I should say!  I did add about 6 inches to the length.  You can see my top is a bit less blousy than the model.  See below for some pattern alterations.

Vogue 1247 skirt and top patternVogueskirt and top3

Based on the finished garment measurements printed on the pattern I started with a size 10 instead of my usual Vogue 12.  Even then it seemed awfully big and that the armholes would be too low and wide, so I pleated out 1 inch from the front and back pattern pieces.  Since it is unlikely I will make this again, I drew on the pieces with my fat colored pencils so you can see the changes.

On the left is the front, the with the blouse bottom pieces pinned on so you can see the complete front. I pleated out 1 inch on each piece parallel to the straight of grain line, which will result in a 4 inch total reduction in circumference.   Red lines indicate the vertical pleat. 
V shirt pattern piece frontV shirt pattern piece back

By the way - this pattern calls for french seams throughout.  Nice touch but I had tossed that idea out the window the minute I opened the pattern envelope because it was obvious I would need to change the shape quite a bit for fit . . . and maybe more crankiness. I don't like patterns telling me how to finish the insides.  Oh, very cranky indeed.  When do I say "indeed"?   Moving on.

V1247 top close up front seamWhat else?  Center front and center back seams.  In the photos above, the blue line is the original seam allowance, the red lines are my actual seams so that gave some additional shaping and raised the center V a bit.  I would have left the center front alone except the darts were a bit strange and stuck out in a strange and pointy way.  Not really the look one is going for in a loose and flowy top, strange pointy darts. By tightening the center seam they were much shorter and landed in the right spot.  The only drawback to all these changes is that the center front intersection no longer matched, but I am fine wth that and the very busy print obscures it when worn.


It was very hard to decide which side of the denim to use as the right side. I love the red but the color match of this dot print kind of decided for me.  The red and blue threads combine to make an inky blue denim that almost looks purple, a very cool color and something I will definitely be able to wear year round.  Do you use the selvedge when you make waistbands?  Even if I don't have to I love to be able to cut out the waistband to create a finished edge inside a skirt and in this case it has the cool red fringe.

V1247 skirt waist inside

I did mention that I had a very small piece of fabric to start with, didn't I?  Plus I wanted to add a few inches in length, so something had to be compromised.  It was the cute little pockets which ended up being pieced with lining fabric on the bottom.  It will never show but it does look funny. I feel like this is the photo in some strange sewing caption contest.

V1247 skirt inside
I have some olive green wide wale corduroy in the stash so I think this skirt pattern will reappear in the fall but it is too hot to think about that now. 

DayLilyHere is today's SunnyGal garden photo, not my best photography, it was kind of breezy and all the flowers were moving.  I always wanted to try daylilies, and bought this bulb from a display at the grocery store checkout.  Flowers tempting me everywhere!

Happy sewing, Beth