
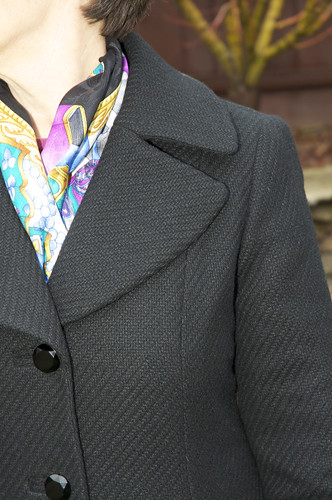
It is that seam and inner corner where the collar and lapel meet that are tricky.
Here are a few notes on construction.
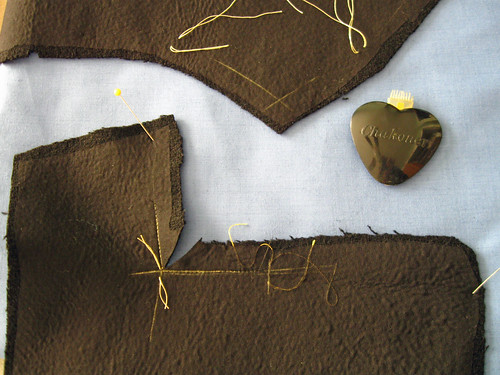
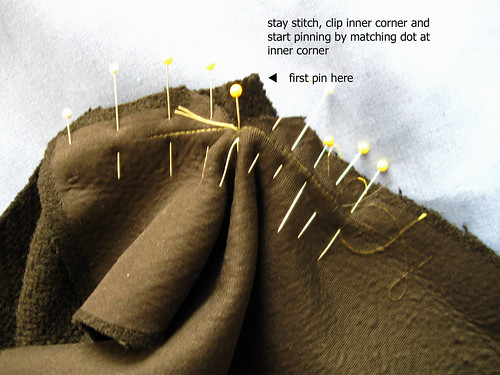
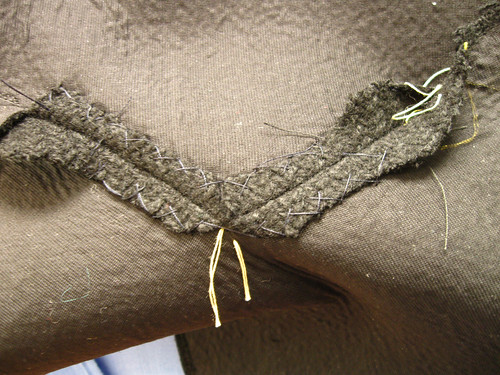
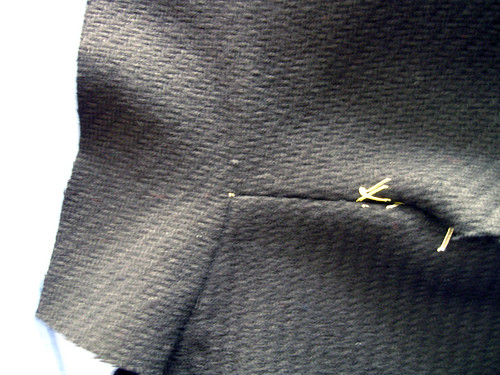
To start I mark the stitching lines on the collar and lapels, being most important to mark the inside and outside corners. You can see the tailor's tacks in yellow thread. The fusible is a bit bubbly and not solidly fused as the fabric is so dimensional, but it was sufficient to create the right amound of structure. The inside corner is clipped to the reinforcing stitching.
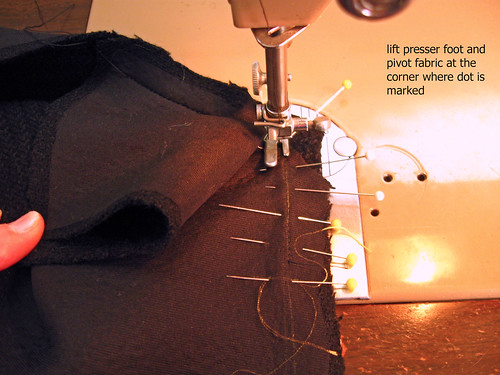
Then stitch between markings being sure to lift the preser foot and pivot at the
inner corner. I have always been one to sew over pins, trying now to break myself of the habit, but for something like this I still do it, at least at the inner corner.
Then it is time to trim, press, and catchstich the seam allowances down. This last step may seem like extra work, but a few minutes of catchstitching really pays off in smooth lapels. Since everything is interfaced, you really can do it very quickly - you are just catching a few threads of the interfacing and no stitches will show on the other side. The tailor's tack is still in the fabric, just at the corner so the anchor pin did its job.
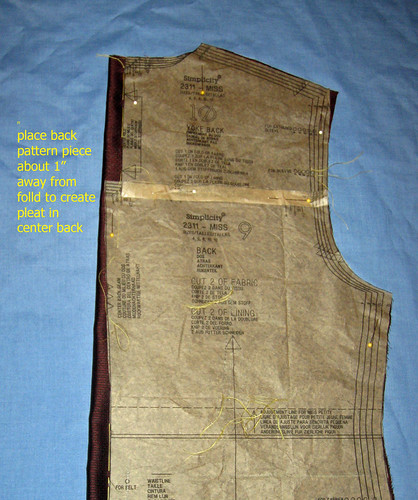
For the lining of this coat, I made some adjustments to the pattern because as designed it had a back yoke and center back seam, which seemed unnecessary for the lining.
To cut out, I pinned those pieces together and then moved them about 3/4" from the fold to create a pleat in the center back of the lining. This is always a good idea for jackets, allows more movement and gives the lining a bit more room so it doesn't pull at the front of the jacket.
I think that is enough on this coat. Time for something new, and preferably quick and easy :)
And here is the only guy doing anything in the garden this week, even though I have plenty I should be doing. He has dug so many holes I should give him the bag of bulbs to plant.
Happy Winter sewing, Beth


Thanks for sharing these detailed pictures, your lapels turned out perfectly.
ReplyDeleteThanks for the detailed explanation! your coat turned out so well.
ReplyDeleteYour title said it all: "Perfection".
ReplyDeleteGreat visuals on that lapel, thanks! For me, it's the collar and easing in the sleeves that are the big worry for me. After that, it's all a downhill coast to the finish.
ReplyDeleteAnd I totally agree with you about catchstitching the seam allowances. I never used to before my wedding gown, but I've done ALL the seams on the winter coat I'm sewing now, and on thick fabrics it makes SUCH a big difference in the finished result.
Thanks for a very clear explanation and illustrations. Your lapels look perfect!
ReplyDeleteNice explanation with pictures... thanks..!!
ReplyDeletecustom pins