
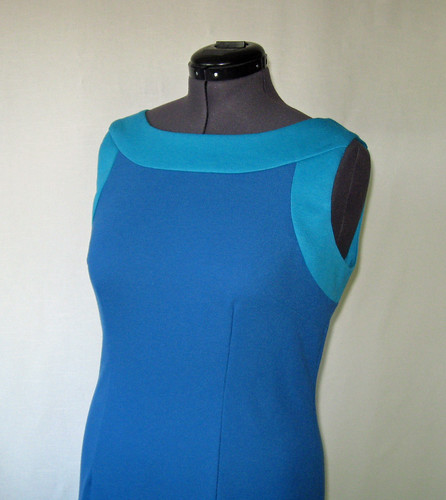
 My dress in black and turquoise was a bit of a dry run because I had a request to make a dress like this in shades of teal/turquoise. I just completed it the other day, and took lots of photos during the patternmaking process, so here is the teal blue version. My details below will show you how to do this style, with a contrast color band around the neck and armhole, but you can do just the neckline or change the width of the bands quite easily. Lots of possibilities.
So here we go, and excuse the photography, I did edit the images as much as possible so you can see the details. I will show the steps to make the pattern, and then my next post will give some sewing details. I have only photographed the back pattern pieces, but the process is the same for the front and back. I suggest using a very simple sheath dress pattern that has a nice fitting neckline. This teal dress and my first version are in rayon-blend ponte knits, which are perfect for this and a good choice for testing this out.
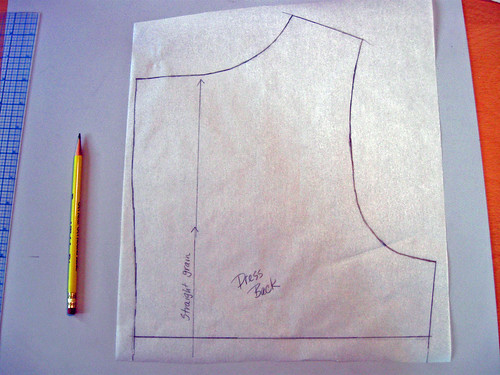
Step 1: Trace your pattern piece. Mark the straight of grain lines. Here I am just working with the upper part of the dress back, and then I will overlay it on the pattern when I cut out. I suggest you use the waistline on the pattern, draw that line horizontally across the pattern and then use the top part you create and the skirt portion of the dress. Does that make sense?
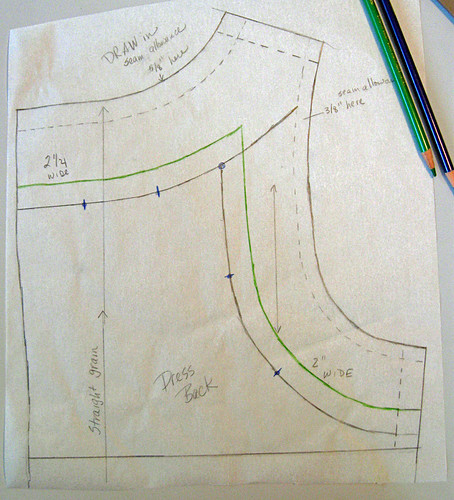
Step 2: Draw in your seam allowances. I find this is really helpful so I can visualize the width of the bands when it is finished.

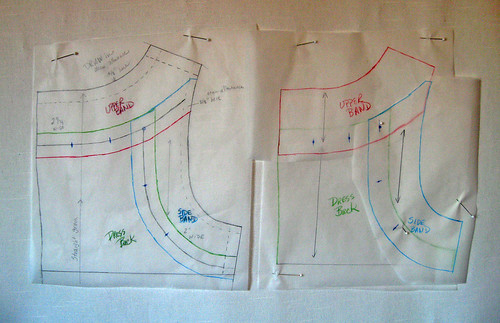
Step 3: Draw in the bands. For this style, do the neckline band first, and then the armhole bands. I decided on 2" wide for the bands, it seemed to create the correct proportion. If you can see on my notes, I adjusted the neckline band to be a smidge wider, 2 1/4 inches, as I didn't want it to end too close to the shoulder seam. Draw in the straight of grain lines on the 2 band pieces (parallel to the original straight of grain line)

Step 4: Draw in the modified dress back, shown outlined in green. In this step,you are drawing the seam allowances, so the back dress piece will be stitched on the black pencil line, and cut out using the green line. At this time I also make some marking dots, which really help when matching the pieces for stitching.
Step 4: Draw in the shapes for the bands. Neckline band is shown in red, and side band is shown in turquoise. So now it looks more like pattern pieces, you can see where they will match and be stitched together.

Step 5: Trace off the separate pattern pieces. Here I am tracing the neck band. Be sure an mark the dots.

Step 6: Trace the remaining pattern pieces. I find it helpful to trace in the colors I used to design the pieces. Colored pencils are my new favorite sewing tool :) Be sure to trace your straight of grain lines on the band pieces.
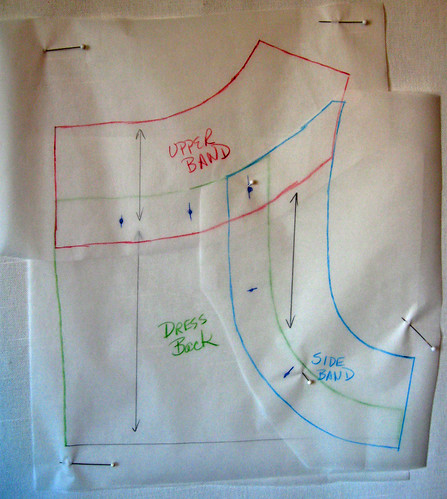
Step 7: Double check your pattern pieces. I overlay them on my Step 4 tracing paper to verify that they fit and match. Here they are side-by-side so you can see the finished pattern pieces.
Step 8: Repeat for dress front.
Give it a try! Next post I will show the steps for sewing.
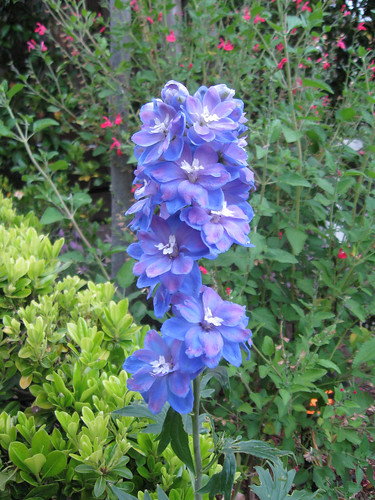
And for this dress in shades of blue, a photo of something new in my garden, Delphinium.
I took this photo around 7pm, when the two tones of blue really pop. It almost doesn't look real, but the flower petals are both blue and purple. Maybe a new color block idea?


Thank you for taking the time to put up these posts. They are very good and I've been toying with this but you've now cemented the technique in my head.
ReplyDeleteThank you for the tutorial/explanation of color blocking. The delphinium is beautiful-I think the colors are pretty close to the dress above.
ReplyDeleteHow generous of you to share your knowledge on how to adopt a pattern into a color-blocked dress. Love the teal and turquoise together and the shades in that delphinium are pretty inspirational too!
ReplyDeleteGorgeous colours you've chosen and many thanks for the tutorial. Love your delphinium photo too.
ReplyDeleteThank you for the very clear tutorial--the different colored lines really help!
ReplyDeleteOne day I am really going to try this. Thank you for this wonderful tutorial.
ReplyDeleteHaha My delphinium looks quite sad compared to your blooming beauty! Great tut on color blocking too; very thorough.
ReplyDelete