
I find sewing for children a nice palate cleanser after a stretch of complex fitting such as my recent pants quest. For the most part, it is choose a size and go with childrens patterns, with some adjustment for height. For this coat I decided to do bound buttonholes, they seemed to go with the fabric. I don't really have a rule for choosing bound or stitched buttonholes, often I do a sample of both on the fabric and see how it looks with the buttons. This may seem counterintuitive but I can get a better result for a coat front with bound buttonholes rather than machine worked, with the machine buttonholes there is always the chance that there will be one little pest that is slightly crooked.
Here is quick overview of my steps to making bound buttonholes.
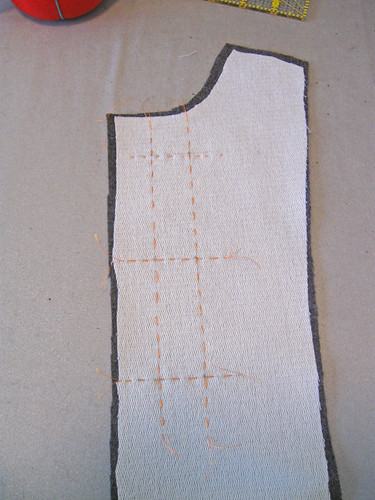
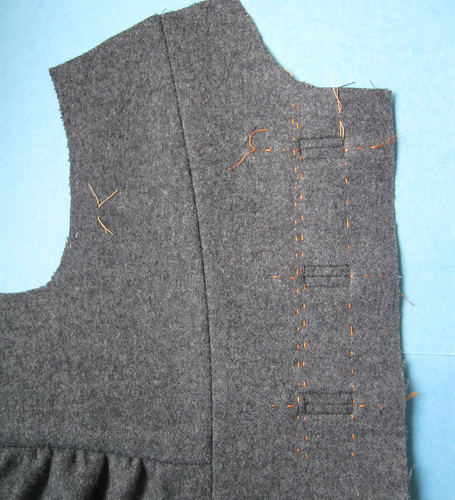
Step 1: on the fused coat front, draw a buttonhole ladder (I use pencil), and then run thread trace through the lines. Here I used orange thread for contrast on the other side with the grey. On the right, the coat front with the thread trace showing. I also went over the horizontal button lines with wax tailors chalk which disappears when ironed.

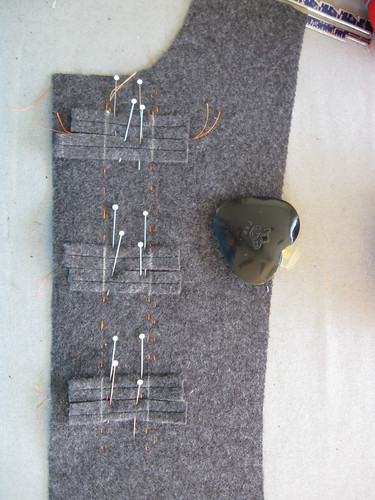
Step 2: (below on left) pin on the buttonhole strips. I didn't show how to make those here, I fold and press a piece of fabric about 1.5" x 6 inches, stitch 1/4" from folded edge, then draw a chalk line 1/2" from fold. Cut precisely at the chalk line, resulting in a strip exactly 1/2" wide with a stitched line down the center. I do several of these and then cut the buttonhole strips, about 1" longer than the planned buttonhole. Here they are pinned on the marked buttonholes. I sew all the stitching in the same direction. For the ends of the stitch lines, I have marked with my yellow chalk marker. Since the thread ladder in orange is there, I lay the clear ruler along the orange ladder and mark across the buttonholes. This way everything stays in line and each is equal to the other.
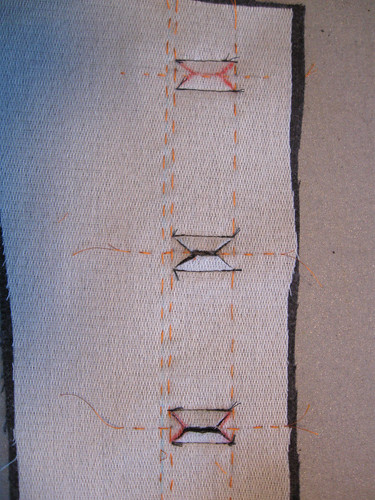
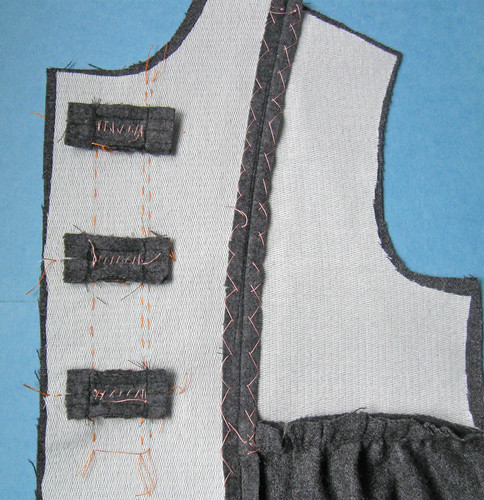
Step 3: (below on right) The moment of truth - cutting the buttonholes. I marked the cutting lines in a red pen so you can see how it is sliced open. I use a sharp scissors, snip the center first, stopping about 1/4" fron the end, and then cutting the sides of the triangle. The most important thing about cutting the buttonholes is to get just to the stitching, literally one thread weave away from your stitching in order to be able to turn that buttonhole and have it be smooth and flat. By the way, when I stitch the buttonholes I do backstitch at the ends, you can see the stitching is doubled, and pull the thread tails to tie knots.
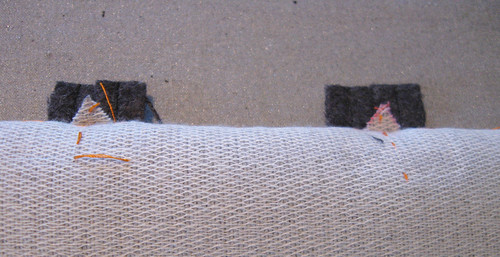
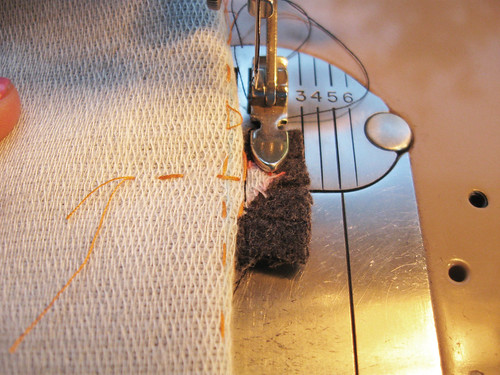
Step 3: Turn the button strips to the right side and smooth them out. Now is the time to sew the little triangles down and secure the buttonhole. If they are cut nicely you should have little triangle flaps like this.
I use my trusty friend, the zipper foot to sew these.
And the buttonholes are done! I do baste them shut on the wrong side, so they don't get wonky during the handling when finishing all the other steps. I did catch stitch down this front princess seam, was a quick step but it keeps the front nice and smooth.
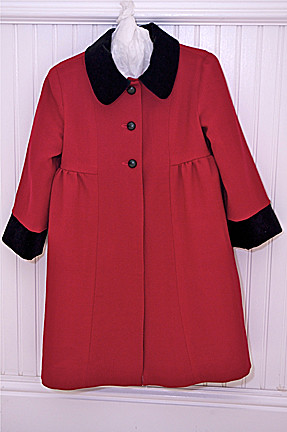
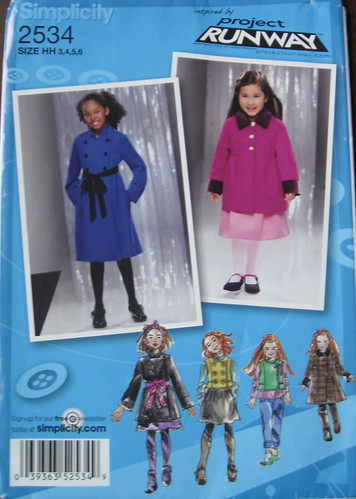
I made this same pattern a few years ago for the same little girl, a red version. This year I looked at the children's coat patterns and this is by far the very cutest one out there (not much choice in this category) plus I already had it, and my little fashionista said it was OK with her.
Onward with some rainy day sewing today. Hope all your winter projects are going along well,
Happy sewing, Beth


You make this look pretty easy-I think I could do that! Thanks, and the coat is sure to look marvelous on the little girl.
ReplyDeleteThe finished buttonholes work brilliantly with both the fabric, and the jacket styling. Never to young to dress little girls with beautiful details...
ReplyDeleteThose buttonholes are so neat! I finished mine yesterday and all I can say is that they look scarier than they actually are, and that I´m glad I´ve learned to make them. That girl is very lucky!
ReplyDeletedarling coat! I like to sew bound buttonholes the same way - it is such a precise method.
ReplyDeleteWell done SunnyGal!
Such a sweet little coat. I really miss sewing for my daughter as a little one. She's 40 now! I still sew for her, but oh, I do love little girls clothes.
ReplyDeleteThis is darling and those bound buttonholes will certainly add to its cache.
ReplyDeleteThank you so much for the howto, I am always a bit reluctant of using those button holes but they look so neat and pretty, I will use them more often now, I am sure about it. (Not for my children though, they don't want buttons, they only want zippers in their coats...)
ReplyDeleteHello Beth, I really enjoyed this post. I have sewn machine-worked buttonholes on coat fabric but find I'm never happy with how they look. The bound buttonholes look perfect.
ReplyDeleteBurda magazine have a some lovely girl's coat patterns in issues from the last few years, I could get the links for you for future reference if you like :-)
Great tips! Whenever I get back to my jacket, I'll definitely refer here!
ReplyDelete