I gave a peek recently at this winter coat at the end of a post and it is nearing the finish line. As I sewed the coat I didn't really take many photographs. A black wool coat is not the best subject for detail photographs and I was really concentrating on progress not documentation. However I have been doing the last steps before hemming and thought the back of a bound buttonhole is worth a look.
Bound buttonholes are my go-to solution on this type of fabric. My Singer buttonhole attachment works really well but the thickness of the finished coat front precludes its use. Also the feed dogs on the attachment tend to shred the fibers a bit, although I have a little trick using a piece of cardstock that I should remember to show one of these days.
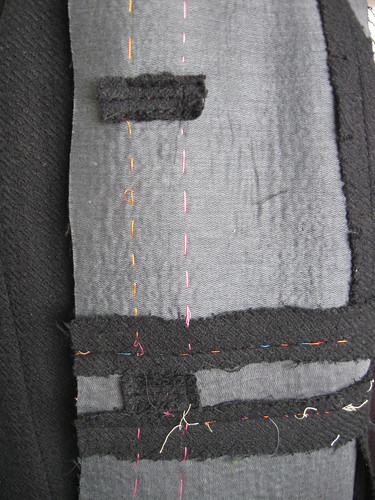
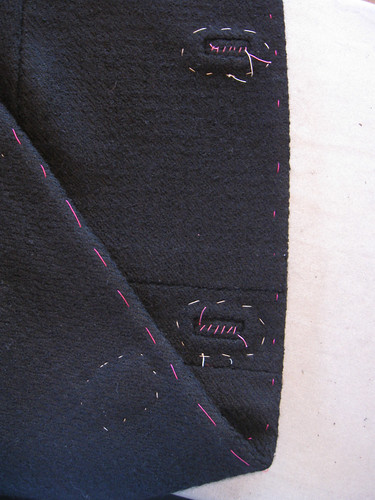
Here is the inside of the coat front, with the bound buttonholes sewn. But not completed! In fact the front is only half the story.
To complete the back here are the steps I use.
- sew the facings to coat front and give them a proper pressing
- baste the garment edge together in a long running stitch (see below in pink silk thread)
- while coat front is flat on the table, baste around each buttonhole, securing the coat front to the coat facing. This is to keep the facing in the right place relative to the coat front and the buttonholes. (see below in white silk thread)
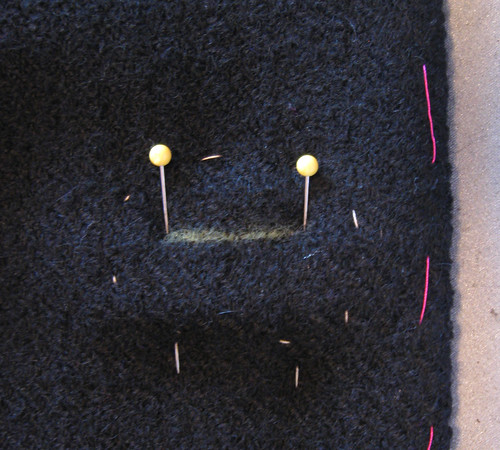
Now to find where I am going to cut, I place pins through the end of each buttonhole and mark with chalk.
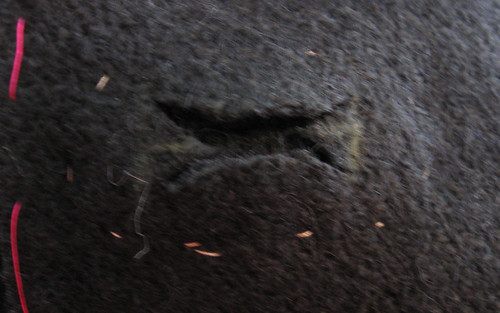
Then I cut along the chalk mark. The actual cut is very similar to the inverted Arrow shaped cut that is done on the actual buttonholes on the garment front. Sorry for the out of focus photo here but you can see the chalk marks and the triangle shape cuts. The most important point here is NOT to cut those buttonhole lips on the front of the garment...which is a bit tricky as the whole thing is sandwiched together with that circle of basting.
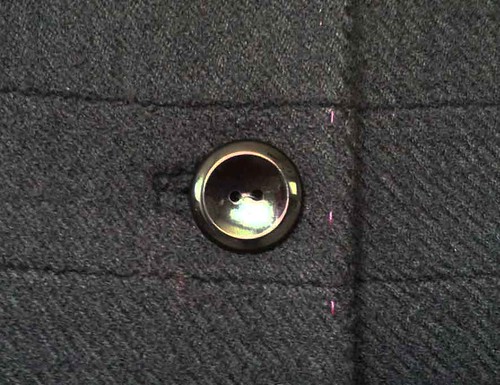
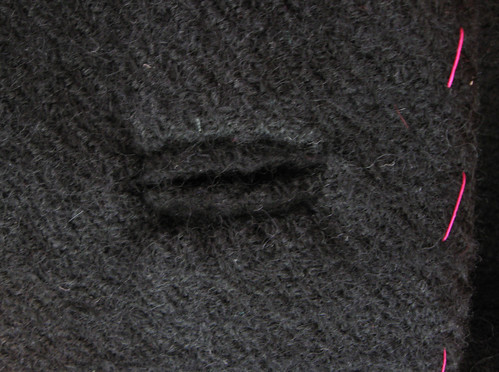
The last step is to tuck those 4 triangle-y bits under and hand stitch all around the edge. It might sound a bit fiddly but it works really well and in this type of fabric the stitches disappear. Here is the finished buttonhole reverse, just needs some steam to smooth everything out.
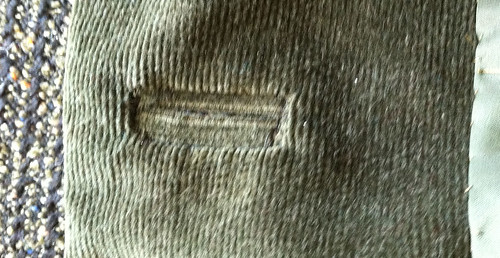
Here is another example, on the olive green corduroy jacket I recently made. It is a little easier to see it and I admit, easier to sew it. The black wool plus fusible interfacing made the fabric a bit bulky and not easy to flip those little quarter inch wide flaps inside.
After all the bound buttonholes are done I like to take a break...or shall I say a sigh of relief? They do make me a bit anxious, despite making them for a good long while. I think because it is so definite - once you make the slice in that coat or jacket front you are commited, no turning back. So time for a small celebration, preferably involving a twist of lemon and some ice cubes tinkling in a glass. You get the picture.
But that is only one side of the coat front, we still have to sew on the buttons. Easy-peasy, right? This is one of those simple tasks that can elevate a coat to perfectly classy or class clown. I know you have tried on a coat in a store and the buttons were sewn on a bit wonky so that the coat front tugged all the wrong ways, ruining the look. Sometimes sewing students have the tendency to sew the buttons on too tightly causing this same problem. Buttons need breathing space :)
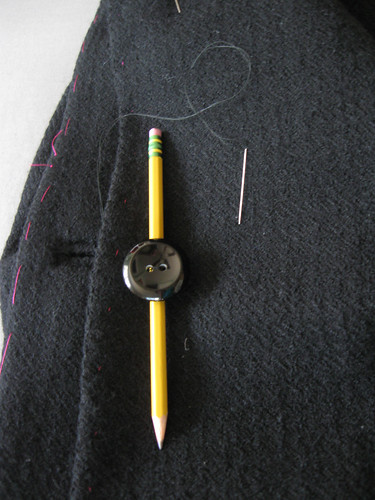
For these large buttons a pencil is the perfect size to use as a spacer. I also have a gizmo which I showed in my corduroy jacket post but I find the pencil works really well too. Prior to hemming I sew the buttons on lightly, with just a few turns of the thread, so that in case they are not exactly right I can easily move. It never fails that there is one rogue button needing to be moved by the teensiest eighth of an inch, but what a difference that makes (see above - button wonkiness).
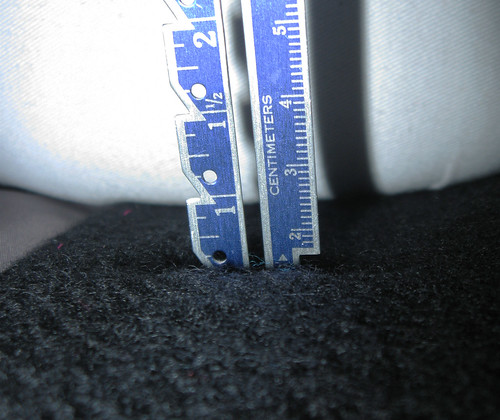
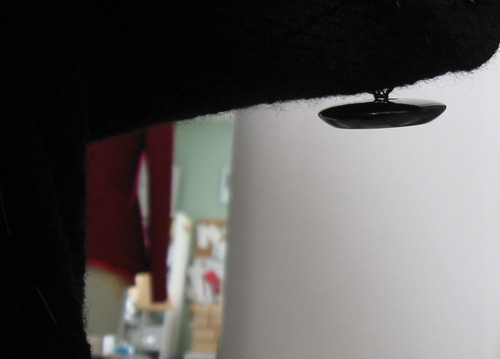
If I haven't convinced you yet that the button needs space, here is proof. That button shank needs to hold the button through almost 1/2 inch of coat front. On the right is the button sewn on, looking like some weird flying saucer, surverying the sewing room. Getting a look at my yet unfinished fuschia wool jacket in the mirror. But really it's just to show that the button thread shank is important.
When I finish this coat I will take lots of photos and give details on the pattern(s) used.
Enough about all things button related. That twist of lemon is calling me.
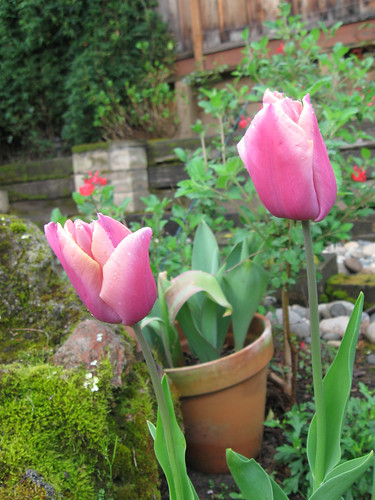
In other important news, we have Tulips ! oooh I love this photo, so green. We need to enjoy it while we can when the brief green season is here.
Happy Spring sewing, Beth



What a wonderfully detailed post, it will be such a beautiful coat!
ReplyDeleteBeautiful work! and such a pleasurable sight to a seamstress' eyes :) I think the facing is the most difficult bit.
ReplyDeleteOhh! They are schmick looking buttonholes to be sure. And great pencil tip- I would never have thought of it!
ReplyDeleteBound buttonhole backs can really strike fear in the heart of a sewist. Your explanation is clear and very understandable. Thanks!
ReplyDeleteOh those button holes look amazing. Your tulips are so pretty.
ReplyDeleteGreat tutorial! I feel as you do. After finishing these buttonholes, I heave a great sigh of relief! Hmmm! A cocktail afterwards!! What a nice idea!
ReplyDeleteI will be making my first gigantic bound buttonhole in a couple of weeks and will refer to your tutorial
ReplyDeleteThank you - this was on the list to do tonight - sewing buttonholes on my DD's coat and using the pencil is brilliant. Love your work and those tulips. Planting mine in May (in Australia) so really looking forward to Spring.
ReplyDeleteI just love the idea of using a pencil as a spacer. I've yet to sew something so thick that it would need this, but now I'm dying to try!! I love stuff like this - no fancy gadgetry needed and you can just use an everyday item to achieve the result. Thank you!
ReplyDeleteps - GORGEOUS tulips. Definitely one of my most favouritist flowers.
A pencil -- great idea for a large button spacer! Such a beautiful coat -- it was a treat to see it in person. Can't wait for the final pics!
ReplyDeleteWhat a great post Beth, and one that I am sure I will be coming back to in future! Can't wait to see the finished coat. Have a great Easter!
ReplyDelete