
Did you see this dress a few months ago when Rachel of House of Pinheiro released her self-drafted dress pattern? I knew immediately that it was a dress for me. A little bit retro reminding me of a 60's style shift dress but with a modern fit and shaping.
Here is some info from Rachel's blog:
The pattern is free, available at one size only in a downloadable PDF format. The finished measurements are: Bust: 95cm Waist: 78.5cm Hips:103cm. The pattern has minimum ease and no seam allowances. Even if you have similar measurements, I advice you making a muslin as the pattern was design for 6ft tall ( 1.81cm)
Don't let the measurements strike fear into your heart - this pattern is quite adaptable and even though I am not 6 feet tall I am quite near a finished dress.
So let's dive into to the alteration details - when I did a casual survey last December asking about blog post topics, fitting and pattern alteration was top of the list by far. So this post is not filled with pretty pictures but for those of you who appreciate a good muslin analysis - get ready for some fun :)
Note that the finished measurements are listed: B: 95cm = 37.4" W: 78.5cm = 31" H:103cm = 40.5"
so these finished measurements are close to what is found on a size 12 Vogue pattern, at least in the ballpark. I was concerned about the 6 Ft. tall part of the equation.

Looking at the tech drawing I thought that in addition to circumference changes - the major issue was the placement of the bust darts and the inside corner of the triangles, you want those to hit at the right spots on the body.
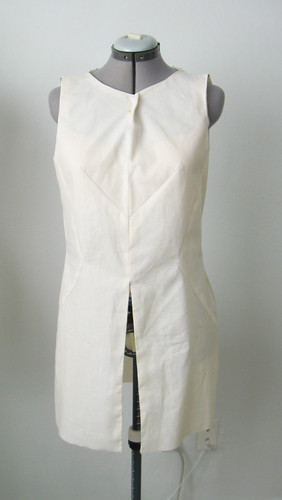
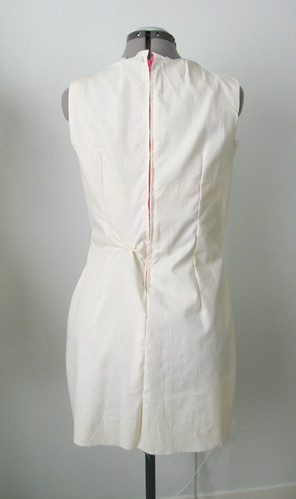
Here is my Muslin Version 1. I made it just as is with the pattern pieces as designed. This is my older adjustable dress form but it actually is the most similar to me in the upper body so it is useful to see how necklines will fit. The first thing that jumps out is that the dress is way too wide across the upper body, shoulders, neckline etc. When I tried it on I thought the bust darts were way too wide, the points ended up too far away from the spot where they should be. The whole center front was too big. I suppose I should have taken a photo but use your imagination. The shaping in the back was a bit off for me, the darts are too long. Also that slit in the lower front is where it was too tight in the hips and I was thinking I could add in the center front bottom half - but only thought that for a minute. Bad idea, as it would have put the skirt off grain and maybe caused other problems. Another issue is the shoulder seams, they kind of wing out from the neckline and gape there also.
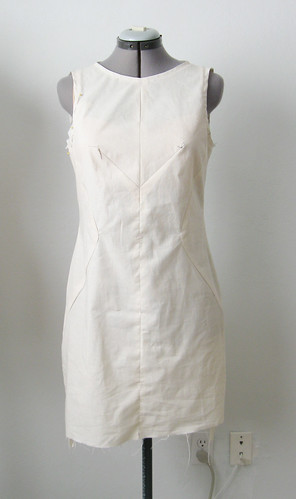
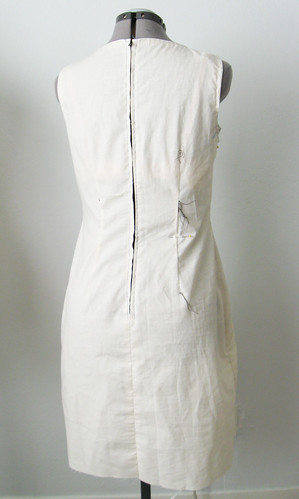
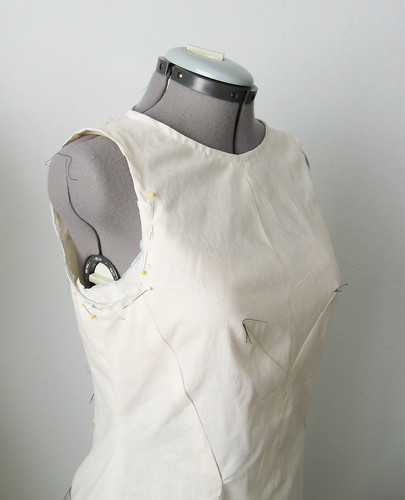
And Muslin Version 2. Look at that nice neckline, no gaping there or at the shoulders. And no wardrobe malfunction down the skirt center front. Back darts repositioned and shortened a bit.
The biggest change is that I actually took out from the center front making the center bust darts shorter and more proportional to my body.
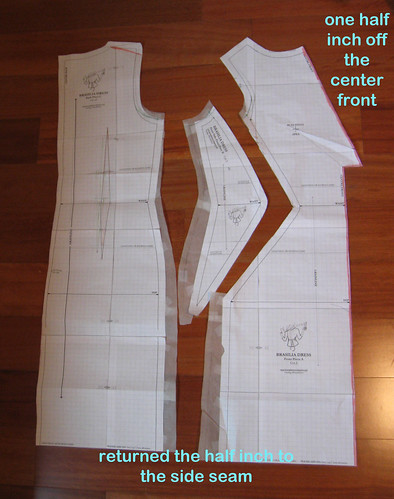
Here are the pattern alteration details.
1. Removed 1/2 inch from the center front piece all the way down that seam (= 1 inch total removal)
2. Added that 1/2 inch back to the side seam and then added a bit more at the waist and hip using a TNT pattern of a fitted dress as a template.
3. Took off 1/2 inch at the shoulder on the back piece only.
4. Raised the armhole about 3/4 inch (this is the main adjustment re: not being 6 ft. tall)
Note that I added a good bit at the hip as I don't like dresses to be super tight, I prefer to have a good 2-3 inches of ease at the hip, particularly in a non-stretch fabric. If I made this in a knit or stretch denim I might make it smaller. It would be super cute in denim. To me everything is good in denim!
Interestingly the waist of this dress was in about the right place, which just goes to show there are a lot of places on the body where you can be short and/or tall and that is why sewing is maddening at times.
In this picture of Version 2 you can see how the neckline is now smooth and laying flat. Also my handy dandy armhole fill-in patch where I pin some scrap piece in place and draw with a pen where I want the bottom of the armhole to be and then translate that back to the paper pattern. Also the remaining threads of my tailor's tacks on the bust darts, not a good look.
Here is that change on the pattern. Slightly tricky as it overlaps the main front piece and the side piece. Also same adjustment is on the back piece, not shown here. And I rummaged through my garage sale fabric finds to come up with this textured turquoise mystery fabric, I like the color but it is not the greatest fabric in the world. All will be revealed in the next post but this may just end up being a test version.

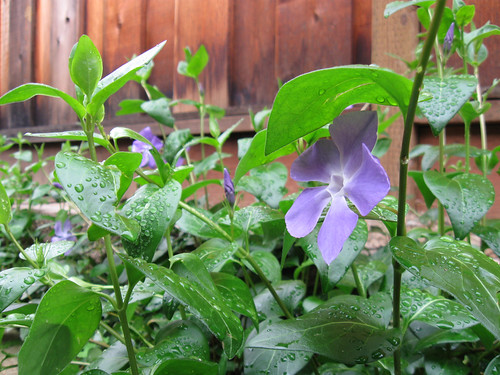
And proof that it rained, just a little bit recently. Some groundcover Vinca that I confess I started with, ehem, cough...cuttings... yes that is what I will call them. This grows everywhere on the trails around here so some stems made their way to my retaining wall. They just flower for a few months but the purple contrast with green is so nice.
Happy almost spring sewing, Beth


De-lurking to say what a lovely dress. I have the same periwinkles too but it will be a whle before they flower here, outside is covered in frost.
ReplyDeleteI still have a long way ahead of me to be able to understand pattern alterations, so this is very interesting. I also want to make this dress but iti is low in my sewing list because of the said alterations...maybe one day!
ReplyDeleteThanks for sharing such a classic and FREE! Pattern. I can't wait to see your finished dress!
ReplyDeleteI had an "ah ha moment" with taking an inch from the front and adding it to the back but I don't understand the back shoulder adjustment because it looks like it is angled...wouldn't the front need to be adjusted for the angle? I hope this is not a dumb question...
ReplyDeleteThanks for your post!
Very interesting and this is a great pattern. I really appreciate the detailed adjustments and look forward to seeing the next version.
ReplyDeleteBeth. Thank you for your testing techniques.
ReplyDeleteI tested my Brasilia with calico and made the read version in stretch woven. Doh. That was my lack of thinking through the Brasilia, as it's designed for stretch woven. However, I now have a Brasilia pattern for wovens and stretch wovens.
It's such a cool 'go-to' dress.
Thank you for the educational post -- seeing your process for determining fit changes is very helpful. Love that armhole fill-in patch! I'm so lazy I just make a guess as to how much to raise the armhole!
ReplyDelete