Monday, June 30, 2014

Summer Blazer Jacket - Vogue 2853 - part 4

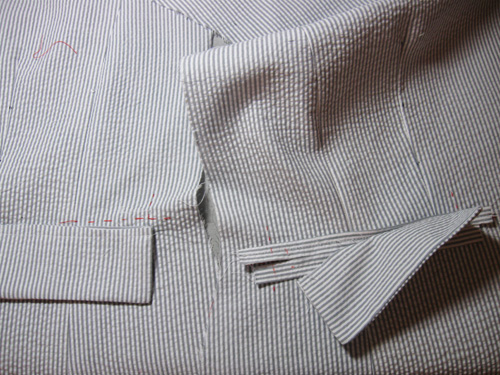
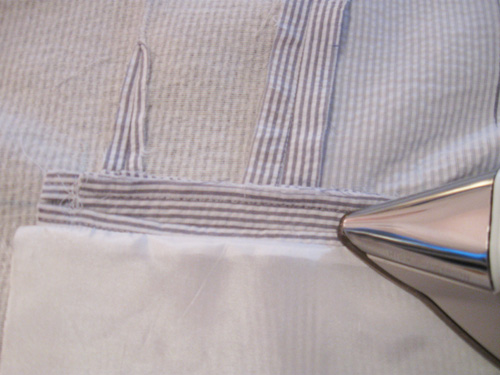
Now that my jacket construction has past the welt pocket stage it is smooth sailing from here on out. OK, that may not be the case but for some reason on anything with welt pockets I always feel that way, once they are done then the garment will come together with no problems. Maybe because if I mess up the welt pockets the whole jacket front is done for.  In any case, time to move on to assembling the jacket body.

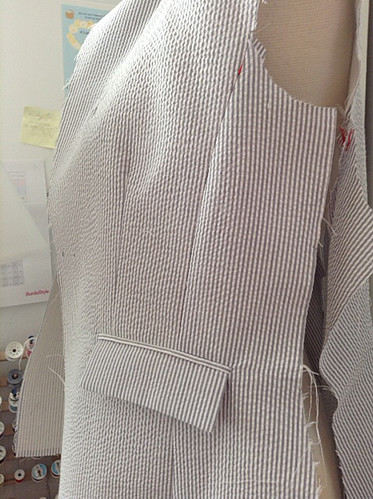
jacket sneak peek


This is meant to be a very lightweight summer jacket, I chose seersucker as it is by nature a bit soft and wrinkly so it won't matter if I toss it around or treat it rather badly on a steamy summer day. This past weekend I did bring the finished jacket to show at the Britex event, then afterwards I searched for a fabric that I could use to make a skirt. Not exactly a match but something complimentary - which was more difficult than expected. I settled on a lightweight grey linen which hopefully will become a floaty bias cut skirt soon. Anyway - by the end of the day this jacket was crumpled in my tote bag and still looked OK when I hung it up later, so mission accomplished for an item that doesn't need careful handling.

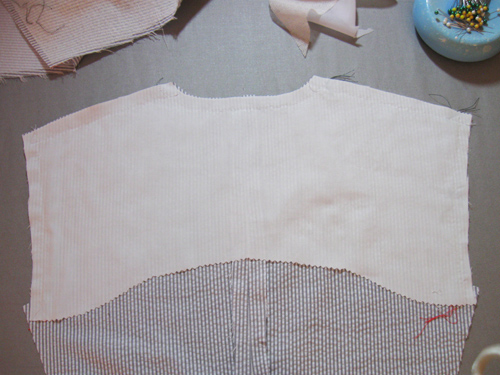
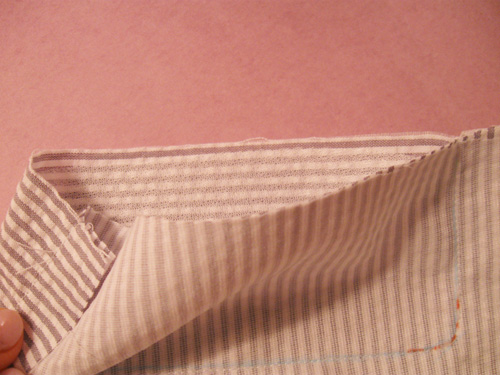
Next step in jacket sewing after the pockets are completed. Put together the back pieces, (center seams, princess seams if any) and then I like to add a back stay. On a wintery wool jacket this is a must, and sometimes the back has fusible interfacing also, but in this case no interfacings on the back pieces but I figured the back stay would help the upper back stay in shape and prevent any see through if I added shoulder pads (which in the end I did not).  I notice now that I took this photo before I added the side back pieces but it didn't matter much on this style. On a very loosely woven wool I might extend the back stay further down the armhole.

back jacket stay

For this one I used some white 50% cotton/50% poly fabric. They sell it at Joann's in the quilting department, it is called Symphony, comes in a lot of color and I use it quite a bit when I want a low cost lining that is cotton-ish but not voile or batiste. For a back stay always use pinking shears on the bottom edge so it doesn't show through the outer layer.

OK, up next, shoulder seams. On well made patterns the back shoulder seam is just a smidge longer than the front shoulder seam and needs to be eased, the back to the front. Which creates just a bit of ease over your back and shoulders. Slightly annoying when matching a plaid or stripe but that is a problem for another day. 

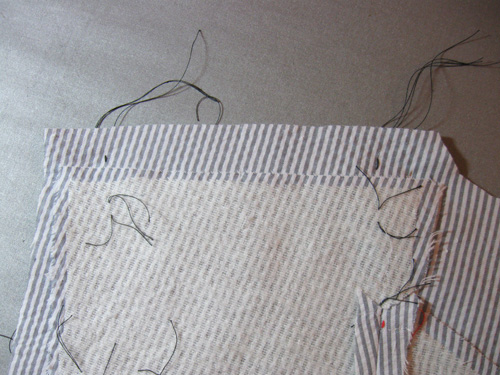
shoulder seam markings
Here are my best friends, the tailor's tacks to show that the back side (which is below) is just a 1/8" or so longer. 
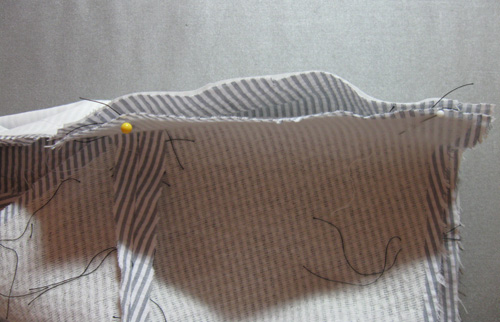
Photographic proof in case you don't believe me :).  Not a huge difference and very ease-able by several different methods. 

shoulder seam differential

Another step which I omitted for this jacket but I recommend for tailored wool is to put some stay tape on that seam. I use the scraps of selvedge from linings since it is strong but thin.
After sewing and a good press open on these shoulder seams it is time for the collar and lapels, which I consider the fun parts. 

Whew it was hot here today, around 101º F but it was just a quick heat wave - perhaps the best kind. Although 4th of July is just around the corner and we have had some doozies in the past, in the 110º F range. Do NOT freak out if you are coming to the San Francisco area for any part of your summer vacay - just more fun with our myriad microclimates. 10 miles from my house the temp is actually lower by 30 degrees!  Always gives we Bay Area residents something to talk about. 

Stay cool!  Beth

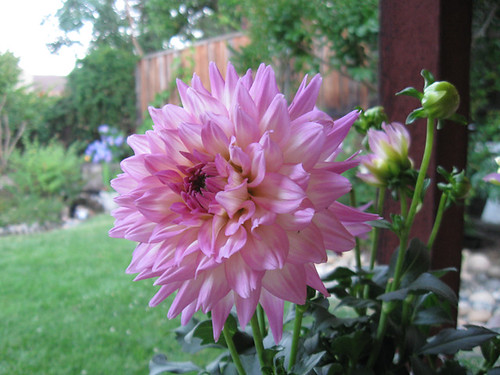
today's SunnyGal garden photo - one of my favorites, a cactus Dahlia.  

dahlia

Thursday, June 26, 2014

Summer Blazer Jacket - Vogue 2853 - Part 3

Onward with my summer blazer jacket. Which is sitting on the dress form waiting for me to sew on a button. Hurray! So today's topic is welt pockets. Or to be more precise, pocket flaps.
You might think that is such a small part of the overall project but I had my camera handy when I was doing them and realized there are quite a few steps I do so here goes.
I am kind of fussy about welt pockets, flapped or not, and have been known to make more than just two pocket flaps so I could get a very nicely matching pair. This time I had all kinds of mishaps, nothing tragic but more funny so you get to see a couple of my mistakes which fortunately were things I could correct.

I will start with the end result and work my way back. Here is the finished pocket with welts and flap
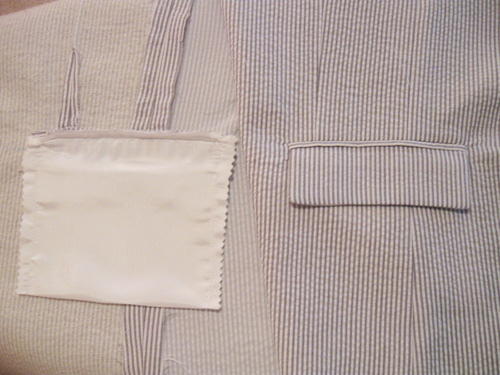
looking ok by my standards. I wanted to show the inside on the left. I just leave the edges raw or pink them but no other treatment, as they will be enclosed in the lining.  Sometimes I round the bottom edge and sometimes not.

pocket inside and out

In my previous post I showed how I outline the pocket in a thread trace, so it is visible on the right side of the jacket front.
Then I make the pocket flaps. I have found the key to good pocket flaps is interfacing, on both sides. Outside garment fabric and also on the reverse (lining side). I use the same interfacing as the side jacket front which is Pro-sheer Elegance.
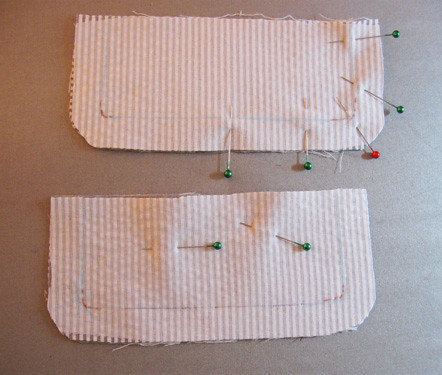
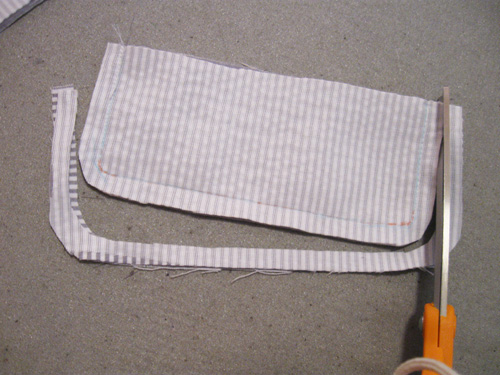
Once I have applied the interfacing it is time to sew the flaps. I have no problem with drawing the stitch line on garment, using a light pencil or chalk. It helps to get the curve just right, and it shows up well on the white interfacing.

draw pocket outline

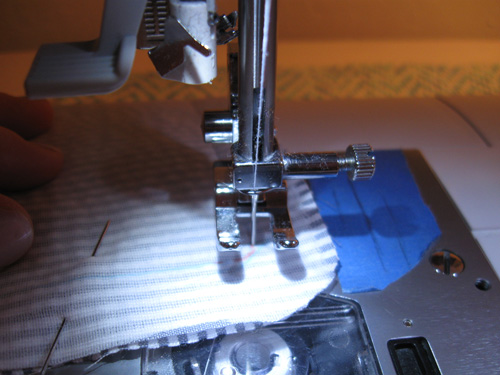
Time to sew, and I lift the presser foot when going around those tight corners, turning the flap just a few degrees with every other stitch, because it is very difficult to turn that corner at without doing that. Also I use a very small stitch length here, which is anothe reason to draw the line, because I want to do it just once! with no unpicking.

pocket flap sewing

Time to trim. The seam allowance is trimmed down to about 1/4 inch for this lightweight cotton. If it were a wool jacket then I would grade the seam allowances.

trim pocket flap edge

Now time to press. And I forgot to take pictures so I made a sample pocket flap from some scrap fabric to show this step. 
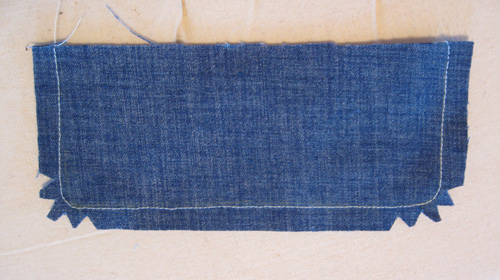
First I cut small pie shape wedges at the corners, so that when the flap is turned right side out the little wedges close up and fill in that curve. Carefully so as not to cut into the stitching.

pocket flap trimming2

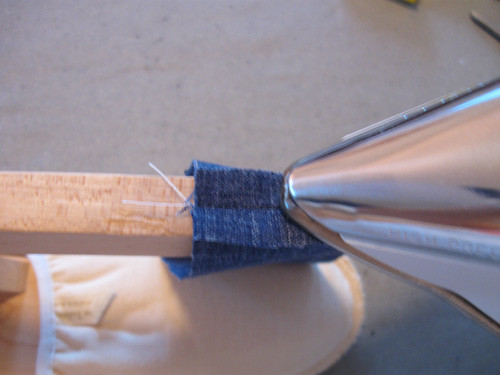
Then the seam allowance is pressed open on the pointy part of the clapper. Press all the way around, this is the key to sharp edges. 

press pocket flap seams

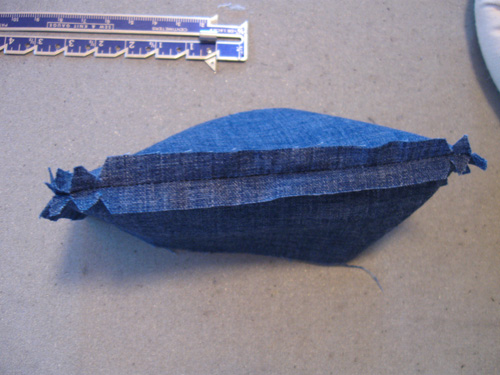
When it is all pressed it should look like this:

finished pocket flap pressed

Then you can turn it right side out and give it a good press.  
And now for my pocket flap flubs. I was being economical (miserly) with fabric and I cut out the pocket flap with the stripes going same direction as the jacket front but for the underside I used some scraps and the strip was going horizontally.
I interfaced everything and sewed them together. And this is what I did. Not sure if you can see in this photo but I have sewn them so the interfacing would be on the visible on the outside of the flap lining. Oops, cut apart and re-sew.  Yes, I did both flaps this way.

pocket flap oops

Flub # 2:  after I sorted that out and re-sewed, pressed etc I sewed the welts and the pocket flaps on the jacket front. Luckily I caught this one after only one side was done. Here I have halfway removed the flap on the right but took a pic for evidence. I have the stripes going the wrong way. I suppose it could have worked but to me it looked off, not how I had intended so the one on the left shows how it should look. And now does. So glad I caught that one before I had finished off that pocket!

pocket flap oops 2

I blame these flubs on TV watching while sewing, which I often do. I started watching Call the Midwife only late last year so I never saw the first season but the last few weeks my local PBS has rebroadcast Season 1, and I have been catching those first episodes. It is a rare show that I actually causes me to put down what I am doing and just watch some scenes.  (also the costuming - fantastic attention to detail).

Ok, last pocket picture. Sew the pocket lining to the bottom welt first, then press down. Otherwise it is enclosed in the pocket and you can't quite get the crisp press that you can before it is all sewn closed.

pocket bag inside

That's all for pockets and flaps. After the welt pockets are done I always feel like it is easy sailing from here on out. 

This Saturday is the event at Britex Fabrics in San Francisco to celebrate their new 4th floor workspace. so that is where I will be, talking about my sewing style and how it has grown and evolved. So I hope to see you there if you are in the bay area, and please introduce yourself, it would be great to meet you!

Beth

Today's SunnyGal garden photo is a small hydrangea that is overshadowed by the big mophead one next to it, but this year is putting out a few more dainty blooms. 


small hydrangea

Monday, June 23, 2014

Fast or Slow Sewing - my latest Craftsy post

My latest post on the Craftsy sewing blog is up today and the topic is Fast or Slow Sewing. I have asked so many stitchers their viewpoint on this lately and on the whole the answers suprised me. If you didn't comment before I would love to hear what you think!

I will be back in the next day or so with a new post on sewing a Summer Blazer jacket.

Here's the link:  Fast or Slow Sewing

Craftsy post 062314

Happy sewing, whether fast or slow,  Beth

Friday, June 20, 2014

Summer Blazer Jacket - Vogue 2853 - Part 2

Ready for more details on sewing a summer blazer? It is just about finished so I will not have more than a week between posts. Although as I mentioned in my previous post - I tend to get sewing fast and sometimes forget to take any process pictures, however I can illustrate the same steps which I have used on other jackets. I have made a lot of jackets!

Onward with this one. After cutting out, the next two important steps are marking the various pieces and applying the interfacing. At this point I do tailor's tacks for all the dots or other indicating marks.

This photo shows the various interfacings I use on a jacket. While the fabric for this one is a lightweight cotton seersucker, the interfacing is just about the same as I use on a winter wool.

collar and lapel interfaced

I read somewhere recently (can't recall where) that the difference between home sewing and ready-to-wear clothes is the amount of interfacing. If you open up a better RTW garment you will see interfacing everywhere,  hems, pockets, almost every seam junction. I agree with this and use a lot of interfacing, about 90% of which is fusible. I love fusible intefacing, it is like magic! Ok slight exaggeration but it is so useful and like seasonings in cooking - I add different ones based on the fabric, and what part of the garment it is. 
For this jacket I interfaced the jacket body front in lightweight weft interfacing. Same on the under collar which you can see in the photo above (top piece with the seam). Weft interfacing is great for tailoring to give body and support. Then I used Sheer Elegance Medium fusible on the upper collar and the upper lapels, and the side front pieces. You can see that I do the tailor's tacks first, while the paper pattern pieces are still attached to the cut fabric. So the thread tailor's tacks do get stuck under the fusible. If I am concentrating I will remember to pull the thread tails away to the edge so I can yank them out easier when finished but I usually don't have trouble removing them. Once in a great while I sew a tricky corner or junction and upon completion there is one stinking thread from a tailor's tack that will not budge so very precise extraction is required. Usually in a very visible spot and in a color that is very distracting. But patience and a tiny tweezers usually do the job.

Now to the pockets. This jacket pattern has a rather tricky welt pocket which incorporates a front vertical dart. I do look at the instructions each time I have used this pattern, just to make sure I don't slice anything before its time. 
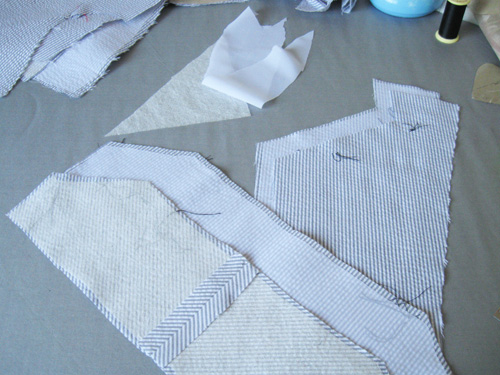
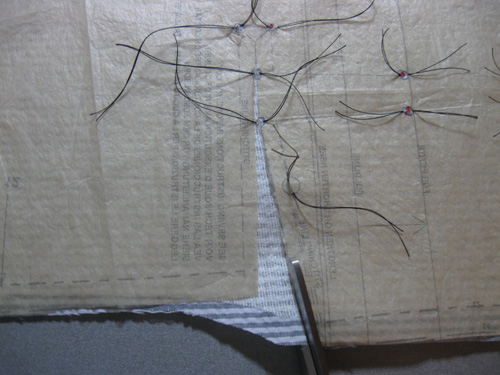
Here you can see that I put the interfacing on the jacket front, then replaced the paper piece, did the thread tailor's tacks and finally cut out the wedge in order to sew the dart and then make the pocket. If you slice this open before interfacing then you have a flippy-floppy piece that might threaten to unravel or get stretched out of shape. By interfacing first then you can make a nice clean slice with the interfacing covering every fiber. 

extra cutting on pocket

Next step is to sew the vertical dart and attach the side front piece (which is also a bit tricky as the center front pieces have a horizontal slice going in them).  To see this pattern piece and the tricky dart/slice feature take a look at this previous post, there is a picture of the front pattern piece.


inside thread trace pocket

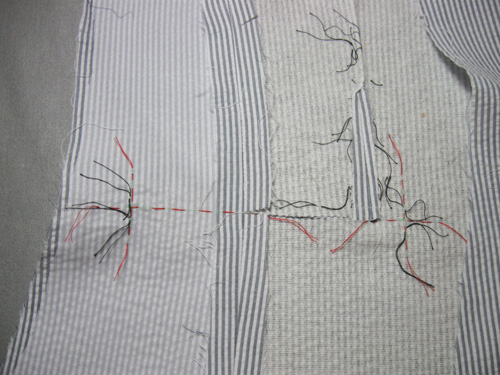
Then I thread trace the welt pocket, both the horizontal line and the vertical lines at the edge, about 2-3 inches for those vertical pieces so when I put the pocket welts on them I can see the end point for stitching. I mark and thread trace on the interfacing side of the jacket but the business side is actually the right side of the fabric, where you will be sewing the pocket welts.

thread trace for pocket

Searching though all my previous posts I don't see one where I took pictures of the welt pocket process, step-by-step but I know there are zillions of tutorials available.

Up next, making the pocket flaps. Yes - a whole post just on pocket flaps. Suprised myself with that one - more involved than I previously realized :)

By the way - some interesting comments on my previous post about pinning vs. pattern weights. Whatever works for you is great. I know a lot of people use a rotary cutter instead of scissors but I will never try the rotary cutter for cutting out a garment. I just can't get the hang of that thing, too clumsy and know I would slice something important like my finger or the center of a pattern piece! So better to stay safe with my nice sharp shears. 

Interfacing info:  I use various fusible interfacings from Fashion Sewing Supply. The top 3 that I most frequently use are the Pro-Weft Supreme, the Pro-Sheer Elegance, and Pro-Tricot Deluxe. 

There is a stack of new patterns waiting to be tried and a few fabrics I want to start on so they can be made into wearable summer garments - however in the summertime is it better to be sewing or out doing things?  Outside in this glorious weather almost always wins! 

Here's hoping you have a glorious Summer Solstice weekend (or autumn in other parts of the globe)!
Beth

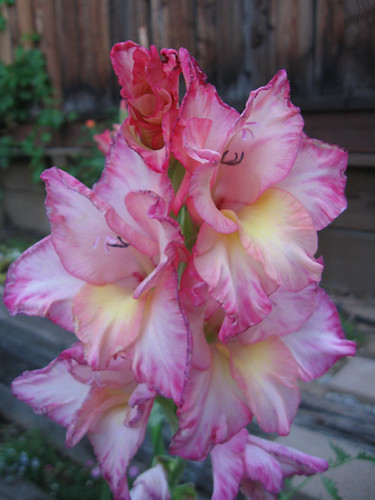
Today's SunnyGal garden photo - gladioli that rebloomed from last year's bulbs. My favorite kind - the repeat performers. 

pink glads

Saturday, June 14, 2014

Summer Blazer Jacket - Vogue 2853 - Part 1

Happy Weekend on this beautiful Saturday morning from here in Northern California. I was just outside giving the tomato plants a little extra water and wow, the weather is glorious. Those plants are shooting up but ripe tomatoes are still weeks away. Time to go to the farmer's market.
I might spend some indoor time in the sewing room but on the whole, it is just too nice outside to stay indoors! However I did get started this past week on my summer blazer jacket which I mentioned in this post.

I had said I would do a step-by-step series of posts on how I make a jacket. You know what I have discovered? It is not easy to remember to document every step! I would be sewing along and realize I did not take pictures of something or other. People who do in-depth tutorials should be given a round of applause - it is a lot of work. In any event, once I got started I decided to show a lot of the techniques I use and then I will link to my previous posts for some additional info on the various steps.

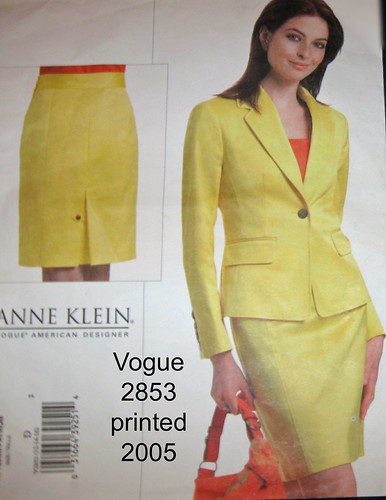
So here we go:  the pattern I am using is Vogue 2853, which is an almost 10 year old pattern that is a traditional blazer with a few twists. The front has some dart seaming that ends at the welt pocket so that is a bit tricky but gives the jacket a nice shape. I have made this twice before, the last time in grey wool plaid.

V2853AK suit

Here is a sneak peek at the jacket. I was ambivalent about this fabric, I had wanted a seersucker which was more blue and this one is grey, but now that it is taking shape I really like the color. It will be a great wardrobe basic. 

jacket sneak peek

Here is how I start on a jacket (or really any sewing project). 

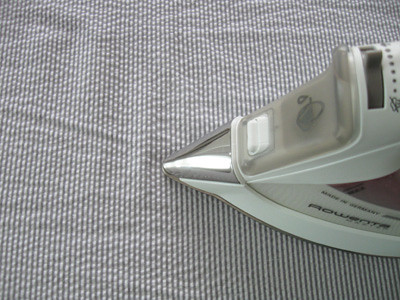
1. Iron the fabric.  I pre-shrink most fabrics, cottons, rayon, even poly blends. For wools I use the steam in the dryer treatment most times. For cottons I wash and tumble dry and then softly fold with hopefully minimal creasing. I don't iron then, instead I iron right before I put the fabric on the cutting table.

Iron the fabric

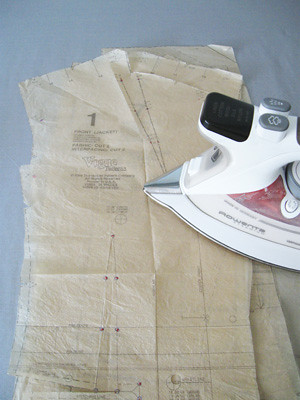
2. Iron the pattern pieces. For some reason I find this very enjoyable. Maybe because paper presses so well. It is important to get all those little creases out  - a few 1/8' wrinkles and crinkles and you have lost some important width and then your pieces won't fit together as they should. Dry iron set on medium.

Iron pattern pieces

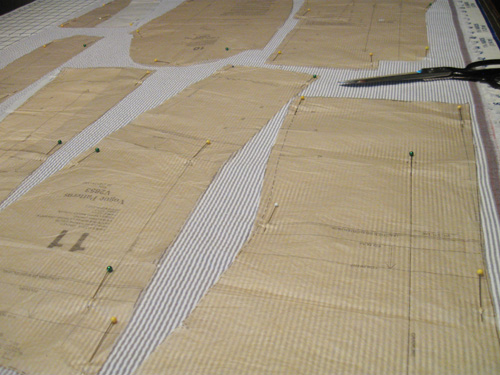
3. Lay out and pin pattern pieces. Oh yeah, I am a mad pinner! I have never used pattern weights, I just don't feel like you would have the proper control with them, plus I think it is important to leave the paper pieces on the fabric until you are ready to sew that piece. That lets you do the markings at a separate time - you know I am a fanatic pattern marker. It may not be visible in this photo but if the amount of yardage permits I like to have all the pattern pieces go in the same direction. It doesn't matter for this fabric but for a lot of fabrics there can be anything from a very serious nap (velvet, corduroy) to a slight difference in sheen or color (wools, some knits) so it is a good habit to get into.

lots of pins

4. Measure to make sure you are on grain. Before you put down a pattern piece, make sure your fabric is folded on grain and the selvedges are lined up. This is SO difficult on many fabrics for a lot of reasons. Some fabrics distort in the wash, some are wrapped on the bolt very crookedly develop a twist that is hard to remove. And another pet peeve - bad cutting at the store. I am probably considered the crazy person at the fabric superstore who trys to get them to refold the fabric before cutting. That is a losing battle that I have given up on, so now I just point out the crookedness of the end and try to make sure they cut the right amount, based on the shortest part of the yardage. Are you with me there? There is a store in San Francisco, Satin Moon Fabrics, where they would actually pull a thread from selvedge to selvedge and cut along that line. It took a few minutes but it was mesmerizing to watch. And of course the cut was perfect!

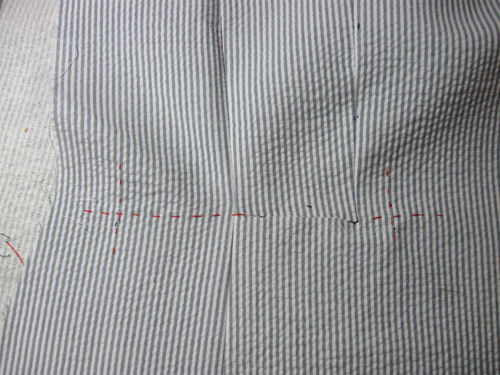
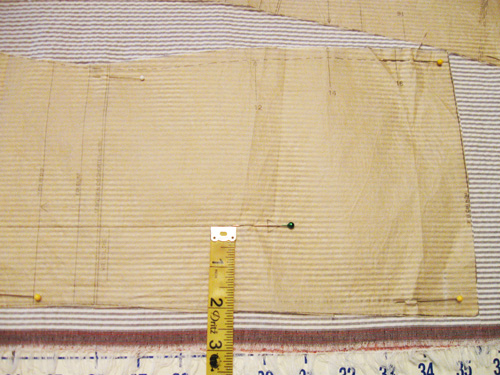
Seersucker is tiny stripes so being on the straight of grain is even more important. Since you can see through the paper pattern pieces you can lay the grain line along a stripe. But I always measure to the edge to make sure. For every pattern piece. Each one !

Straight grain


Ok, that's all for today. Next up, pattern marking and interfacings,

Happy weekend, Beth

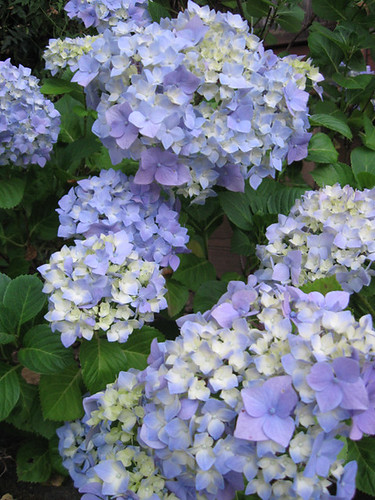
Today's SunnyGal garden photo - oh, the hydrangeas are so nice this time of year. And every one a different color. People ask me how I get the colors to vary - no idea! they are just as they were when I put them in the ground. I think all that advice about fertilizer to change the color is a bit excessive, let 'em do what they want :)

blue hydrangea

Monday, June 9, 2014

One more time: McCalls 6513 knit top

A couple of weeks ago I mentioned that I was planning to sew a lot of repeat patterns this summer and I am sticking to my word. In fact tonight I even cut out my blazer jacket I also mentioned previously, so expect to see posts on that soon.

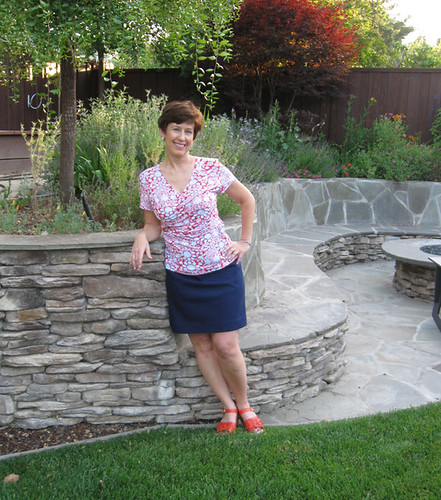
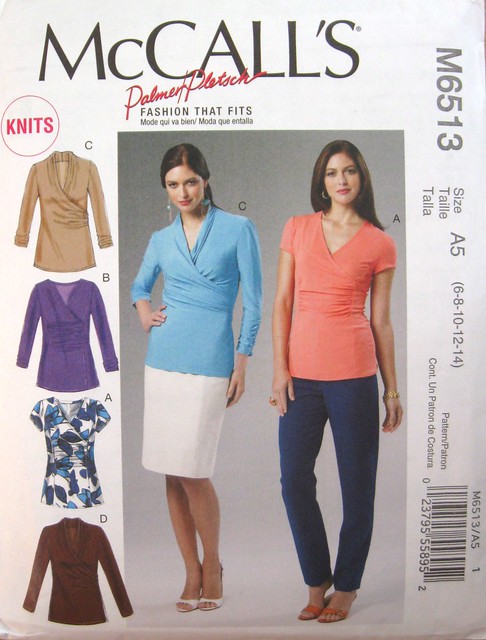
Today's repeat is McCalls 6513 knit top, a Palmer and Pletsch pattern (say that 3 times fast:) with 2 different versions. Previously I have only made the sleeveless v-neck version, not the slightly shawl collar version.

I used a yummy rayon knit jersey from Girl Charlee (where else). It is so soft, feels like lingerie. Of course worn with my most favorite skirt, Vogue 1247.

McCalls tshirt

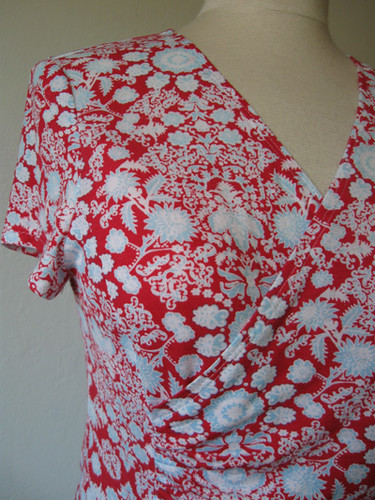
Here is a closer look at the fabric, and the pattern envelope.

Fabric close up   Mc6513 pattern

The first time I made this I was making a sleeveless verision and the armholes were kind of low, so to fix that I just took it up at the shoulders and called it a day. That did serve to move the ruching in the front up a little too high but in the busy print it wasn't really noticeable. When I started on this version I vaguely recalled that issue, but didn't do anything about it. Thus when I gave it a quick baste and try on, same problem, although not as bad since I was going to add the short sleeves. In the end I did a couple of adjustments and made some notes on the pattern. If I make another I will raise the underarm a good one inch for a sleeveless version.

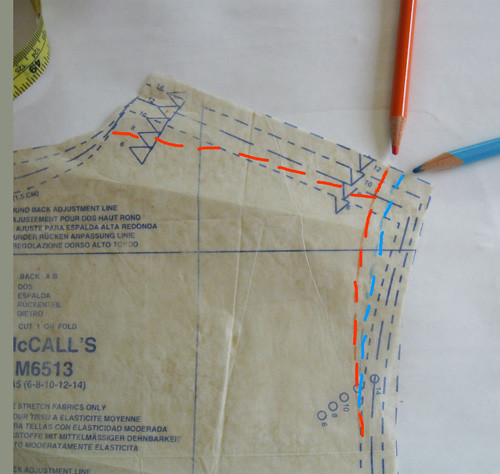
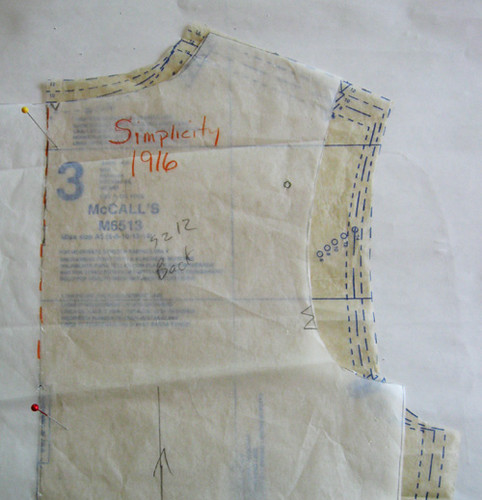
Here is the back pattern piece so you can see the changes. I moved the sleeve cap in about 3/8 inch as the shoulders were too wide. I changed the slope of the shoulder seam so that it took out some at the neckline and raised the v-neck a bit. In the future I will just shorten the front and back bodice about 3 inches below the shoulder seam. Orange pencil, new seam line. Blue pencil, original seam line.

McCalls t-shirt adjustment

My experience with McCalls patterns is that the shoulders and neckline are too wide for me, they always have that gaping neckline. Even more than other pattern companies. So I rarely make McCalls.
As I was putting the pattern pieces away I thought to compare it with another knit wrap top that I really like, which is Simplicity 1916. Similar wrap front but check out the difference in the back pattern piece, both size 12. No wonder the Simplicity fits a little better, or at least closer. The difference in the armhole depth is striking.

comparison of armhole

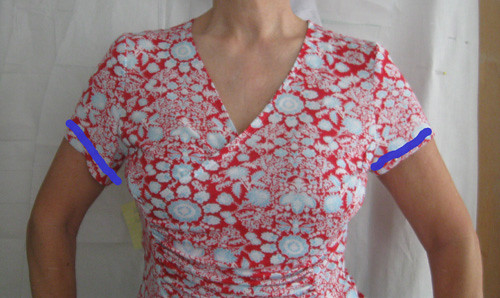
One other adjustment has to do with the sleeve hem. Take a look at this "in process" photo, sleeves unhemmed. I photoshopped the purple line just to emphasize the difference. I have pinned up the sleeve on the photo right with a 5/8 hem on the outer arm and an almost 1.5" hem at the underarm. See how it makes the proportion better? That is partly due to a too low armhole and partly just to sleeve design. But I think these small proportion changes make such a big difference. Pin - baste - look in the mirror, those steps take a few minutes but you will see small adjustments that will result in more satisfaction in your finished make.

tshirt sleeve hem

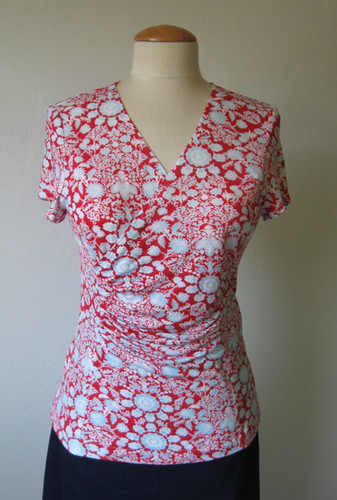
Front and back on the dressform.

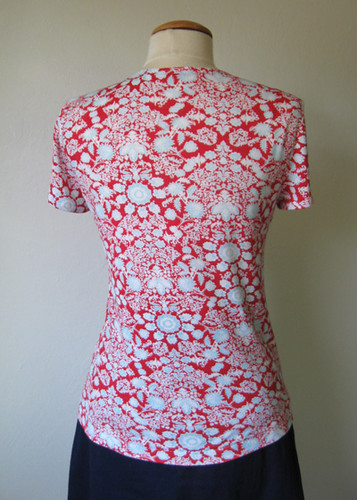
McCalls tshirt red printT-shirt back

Many more pattern repeats coming along this summer. Speaking of summer, it was over 100 degrees F here the last two days. Eeek!  it is only early June. Oh well, the tomato plants are growing like crazy.

Thanks for all the great comments left on my last post with your thoughs on Fast or Slow sewing. I am suprised to note that Slow Sewing seems to predominate. Very interesting.
Winner of the drawing for the sewing books are:

Florencia for the Party Dress book
Klima for the Serger book.
please email me with your mailing address. (note if you click on my profile in the top right corner there is a link to email)

Thanks for participating and stay cool if summer has arrived in your part of the planet!
Beth

Today's SunnyGal garden photo is one of my absolute favorites, a Shooting Star Hydrangea which I put in the ground maybe two years ago. Finally it is putting out a good number of these blooms. Isn't the name perfect?


shooting star hydrangea

Saturday, June 7, 2014

Stripes for Summer

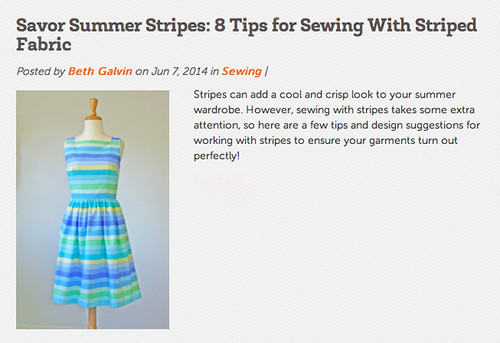
My latest post is up today on the Craftsy sewing blog; sewing stripes for summer. I am obsessed with stripes lately which is funny as I have not been much a stripe sewer previously. Many more plaid than stripe items in my sewing history. But stripes are everywhere lately - probably always have been and I just didn't notice.

Anyway - click over to read some tips on sewing with stripes. Stay tuned because when working on this post I had an idea for another topic, also using stripe, so that one will appear soon. Here's a little hint of what's to come: bias!

Here's the link: Sewing Summer Stripes

Craftsy sewing stripes post

By the way, this dress pictured in the Craftsy post is made with some quilting cotton I bought at Stone Mountain fabrics with a thought about using it to make some cushion covers for my sewing chair. But I never did and then thought - so summery. I think I need to revive my Etsy shop which is dormant lately and sell off some of my samples and test garments. Need to clean out the closet space!

For the blog-anniversary giveaway drawing mentioned in my last post, I will draw the two names tomorrow evening so if you are interested please comment. 

My friend Shams tells me that the Britex event on June 28 is becoming very popular so if you are planning to go you need to register at the Britex website. I look forward to meeting you if you are going to come so be sure to introduce yourself.

Onward to some sewing tomorrow :)  
Beth

Wednesday, June 4, 2014

A giveaway and Random Threads #8

Based on the comments from my last post I think a lot of you are going to give Lekala patterns a try. They have a few other tops that are interesting and based on how the last one fit I wil be ordering more. Plus a top is such a speedy thing to make, and usually provides something I can wear immediately unlike a dress which might need an occasion. And not least, I can order more fabrics from my favorite website, Girl Charlee.

A Giveaway

Hey, guess what? I had a blog anniversary way back in February and I didn't even notice. But it has been 4 + years since I joined the sewing blog world and it has brought me all kinds of new friends, ideas and even opportunities. Thank you all so much for reading. To celebrate the belated milestone I have a couple of giveaways, one for US readers and one for international.
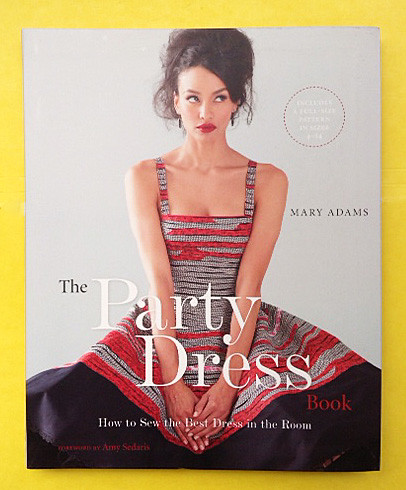
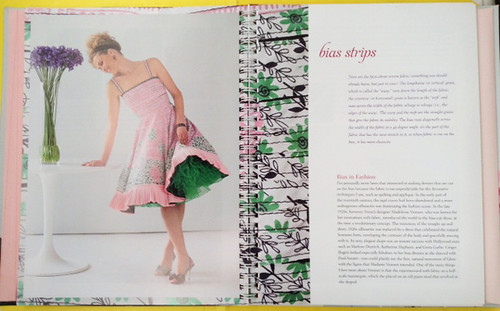
First for the US readers, I found this book at a sale a while back and came across it yesterday. Hopefully someone will need to make a party dress and this will be just the thing, (Lost of weddings coming up right? and as a guest you want to look smashing!) It even has the pattern included.

the party dress book cover
The Party Dress book cover
book example page
an interesting treatment using bias strips


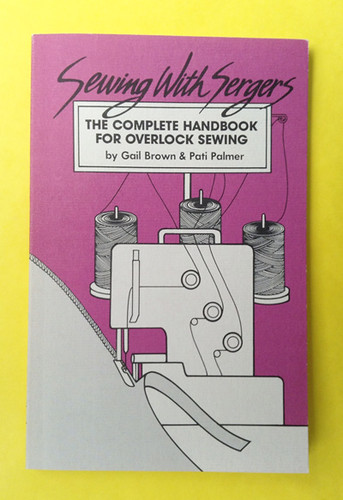
And a slightly smaller (in size and postage) for my international readers is this book, Sewing with Sergers. Another rummage sale find and I always recommend any book by Patti Palmer (of Palmer and Pletsch fitting books) This little book is a great reference for using your serger or learning all about it.  You may recall from my previous comments I am not a serger sewer. Is that a phrase? Really I almost never use it to sew. Only to finish seams and edges, and then rather sparingly. But obviously plenty of you have the hang of construction with your serger or perhaps want to - so this book will help.

Serger paperback book

If you want me to draw your name for one of these books, please leave a comment and tell me your thoughs on Fast or Slow sewing. Do you race to finish projects or savor every stitch? Which garment gets the speedy treatment and what gets the slow and steady? Does it even matter? My ideas on this might suprise you and I will give you my take on the topic soon.  Be sure to mention in your comment if you are in the US or another country. 

Shopping

This must be my week for web shopping, I have ordered so many pairs of shoes in various styles and sizes, most are going back (as I always intended) but I did find a couple of gems in the bunch. Web shoe shopping is one of the greatest inventions ever. OK I exaggerate but you can test them around the house, try on with different dresses, show your friends, get the sisterly opinions (always brutally honest, right?) Plus the magic words "free shipping and returns" (my favorite site is shoebuy.com as they have slightly better prices than Zappos and then constantly email extra discounts once you start ordering). 

In other shopping news I ordered a gravity feed iron from Wawak, which arrived and is still in the box. Slight impulse purchase and now if I use it I will have to find a place to hang the water tank. Also Swedish tracing paper which I have never used before. I can see that it could be useful for making very permanent pattern pieces but otherwise ? plain old tracing paper works fine for me.

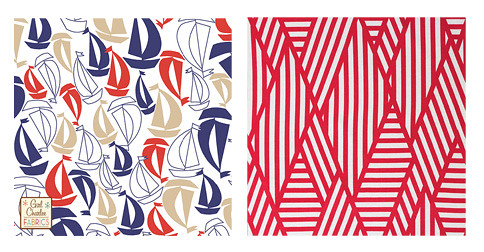
Girl Charlee, to paraphrase the poet Elizabeth Barret Browning, How I love thee, let me count the fabrics. (and don't we know that she probably sewed her own clothes) I could order so many things from them but there is only so much sewing time so I restrained myself and got these two fabrics plus one other which will be sewn up as a gift.  And yes, that red/white one is a repeat but this time I might make a dress. 

girl charlee fabrics rwb

Craftsy Posts

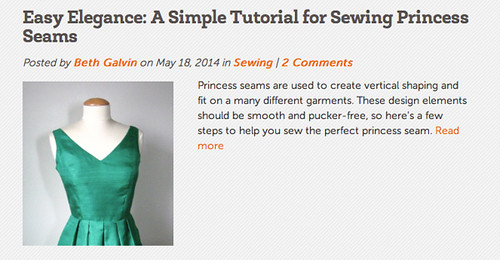
I have had two posts on Craftsy recently so if you are interested in my take and some tips on sewing princess seams or sewing sleeves in jackets here are the links below these images.

Craftsy post princess seams
Sewing Princess Seams
Craftsy post jacket sleeves
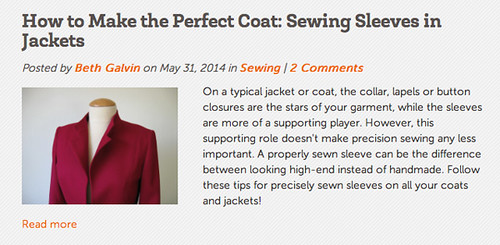
Sewing Sleeves in Jackets


Yep, I said I would start a summer blazer and that project is almost to the top of my list. Lots of other stuff that I had to do these last couple of weeks but I will get to that in June...which is here already!

I look forward to hearing your comments on whether you sew fast or slow. Is it the journey or the destination? ack that sounds very corny but you get the idea.
This time of year the garden is at its best, every thing is lush and blooming, the super summer heat waves have not set in yet and the colors are gorgeous.
Happy sewing, Beth

This penstemon is putting out all kinds of blooms this year, the color is luscious and moves with every breeze.

penstemon 2014