
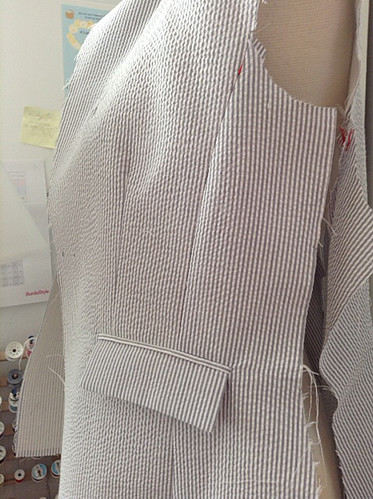
This is meant to be a very lightweight summer jacket, I chose seersucker as it is by nature a bit soft and wrinkly so it won't matter if I toss it around or treat it rather badly on a steamy summer day. This past weekend I did bring the finished jacket to show at the Britex event, then afterwards I searched for a fabric that I could use to make a skirt. Not exactly a match but something complimentary - which was more difficult than expected. I settled on a lightweight grey linen which hopefully will become a floaty bias cut skirt soon. Anyway - by the end of the day this jacket was crumpled in my tote bag and still looked OK when I hung it up later, so mission accomplished for an item that doesn't need careful handling.
Next step in jacket sewing after the pockets are completed. Put together the back pieces, (center seams, princess seams if any) and then I like to add a back stay. On a wintery wool jacket this is a must, and sometimes the back has fusible interfacing also, but in this case no interfacings on the back pieces but I figured the back stay would help the upper back stay in shape and prevent any see through if I added shoulder pads (which in the end I did not). I notice now that I took this photo before I added the side back pieces but it didn't matter much on this style. On a very loosely woven wool I might extend the back stay further down the armhole.
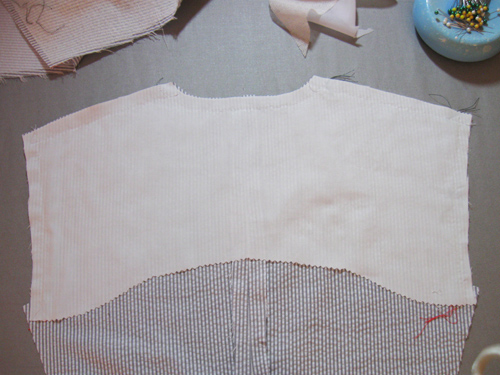
For this one I used some white 50% cotton/50% poly fabric. They sell it at Joann's in the quilting department, it is called Symphony, comes in a lot of color and I use it quite a bit when I want a low cost lining that is cotton-ish but not voile or batiste. For a back stay always use pinking shears on the bottom edge so it doesn't show through the outer layer.
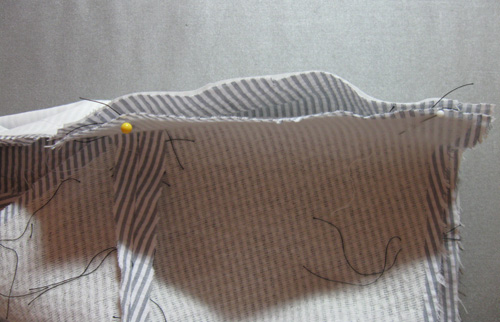
OK, up next, shoulder seams. On well made patterns the back shoulder seam is just a smidge longer than the front shoulder seam and needs to be eased, the back to the front. Which creates just a bit of ease over your back and shoulders. Slightly annoying when matching a plaid or stripe but that is a problem for another day.

Here are my best friends, the tailor's tacks to show that the back side (which is below) is just a 1/8" or so longer.
Photographic proof in case you don't believe me :). Not a huge difference and very ease-able by several different methods.
Another step which I omitted for this jacket but I recommend for tailored wool is to put some stay tape on that seam. I use the scraps of selvedge from linings since it is strong but thin.
After sewing and a good press open on these shoulder seams it is time for the collar and lapels, which I consider the fun parts.
Whew it was hot here today, around 101º F but it was just a quick heat wave - perhaps the best kind. Although 4th of July is just around the corner and we have had some doozies in the past, in the 110º F range. Do NOT freak out if you are coming to the San Francisco area for any part of your summer vacay - just more fun with our myriad microclimates. 10 miles from my house the temp is actually lower by 30 degrees! Always gives we Bay Area residents something to talk about.
Stay cool! Beth
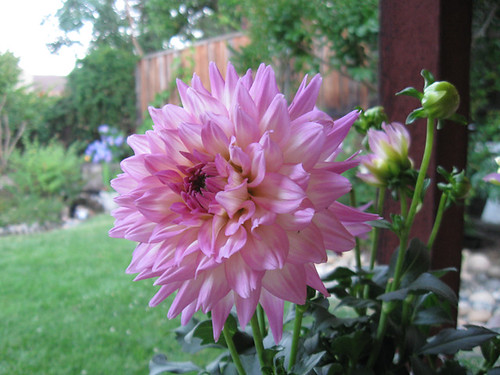
today's SunnyGal garden photo - one of my favorites, a cactus Dahlia.


Thanks so much for all the construction details on this jacket, I really appreciate the information. I agree with you about welt pockets, I just drag my feet on those and then once they are over, I sail right through the project.
ReplyDeleteThis is a great series - I don't feel advanced enough to try a jacket yet but I'm learning so much (the tip on using the selvedges from lining scraps was golden). I want to learn to do a good welt pocket and may try them as back pockets on a pair of shorts. Is any particular fabric more forgiving for a welt pocket virgin?
ReplyDeleteI think denim or a nice cotton, something that doesn't ravel too much and presses crisply. remember to interface!
DeleteReally great information again, thank you! For the stay tape on the shoulder seam, you mean that you stitch the shoulder seam (easing the back) and than restitch stay tape on top ?
ReplyDeleteyes that's how I do it, or sometimes I pin the stay tape on the front and sew it just once.
DeleteI just love seersucker. I can't wait to see this finish then proceed to obsessively copy it.
ReplyDeleteThis is looking really good. Love the fact that it doesn't need much attention to wrinkling.
ReplyDeleteIt is slightly terrifying slicing into the front of a jacket welt pockets, definitely a job to be done before tackling the notched collar just in case it goes wrong! Love the idea of a seersucker jacket for warmer weather.
ReplyDeleteI had to laugh when you said that it's smooth sailing after a successful welt pocket, as it sounds totally like something I'd say. Welt pockets were the bane of my existence, and it was even more terrifying if the fabric was limited and there was no room for error. Happily, with tons of practice, I'm slightly less squeamish these days.
ReplyDelete