
Which meant I wanted to make it wearable - but not invest a lot into it. Also I would be toting it back and forth to the studio so I didn't want to use some precious fabric and have to treat it carefully. Enter the stash sale find. I bought a big piece of mystery fabric (like 5 yards of 60"wide) at the ASG stash sale in early October. It's navy blue, most likely some wool content, but slightly thinner and lighter than I would ordinarily use for a jacket. However it pressed really well, didn't wrinkle and ended up making a not too bad lightweight blazer jacket.
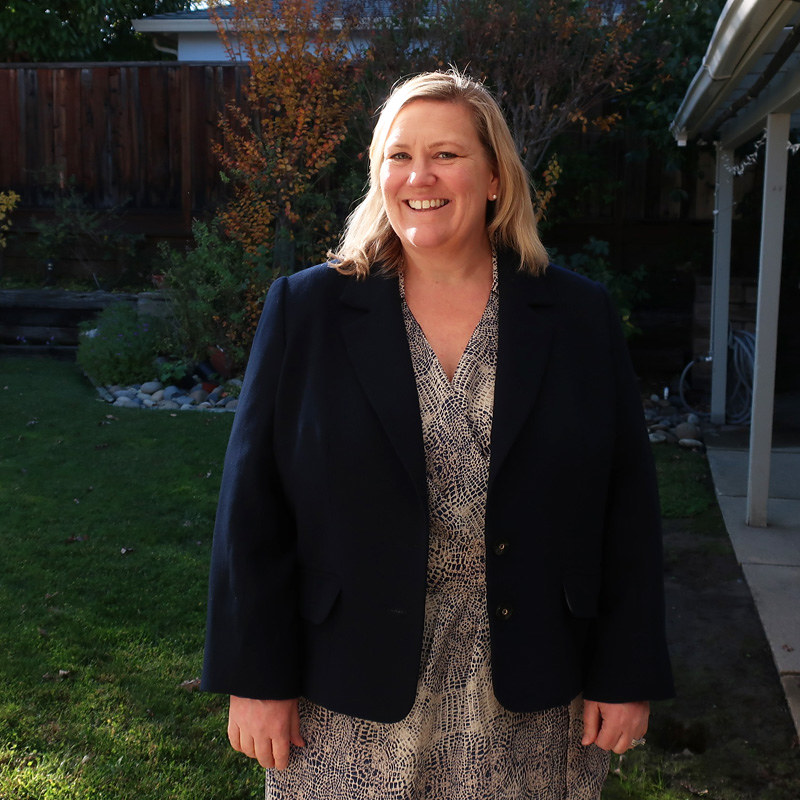
So here is the finished jacket. By the way - keep reading to see the exact pattern piece adjustments for fit.
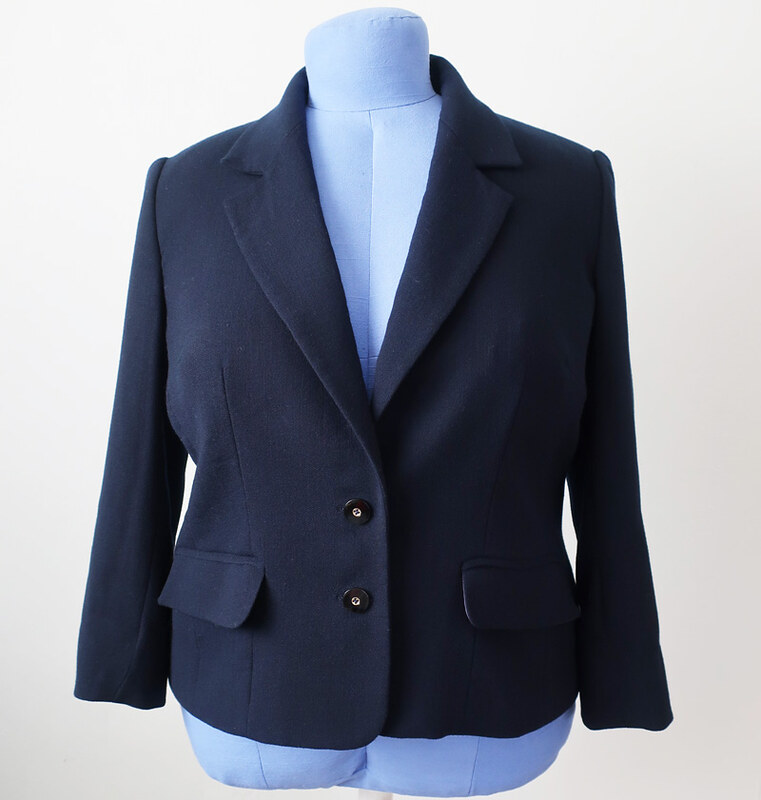
I almost felt like this was a proof of concept jacket for Heather - as I just wanted to get the fit right, and see how the length looked, the size of the pockets etc. All in all it turned out well enough to continue ahead with some wool fabric we bought at Britex, for considerably more than I spent at the stash sale (I think $ 6 for the big piece).
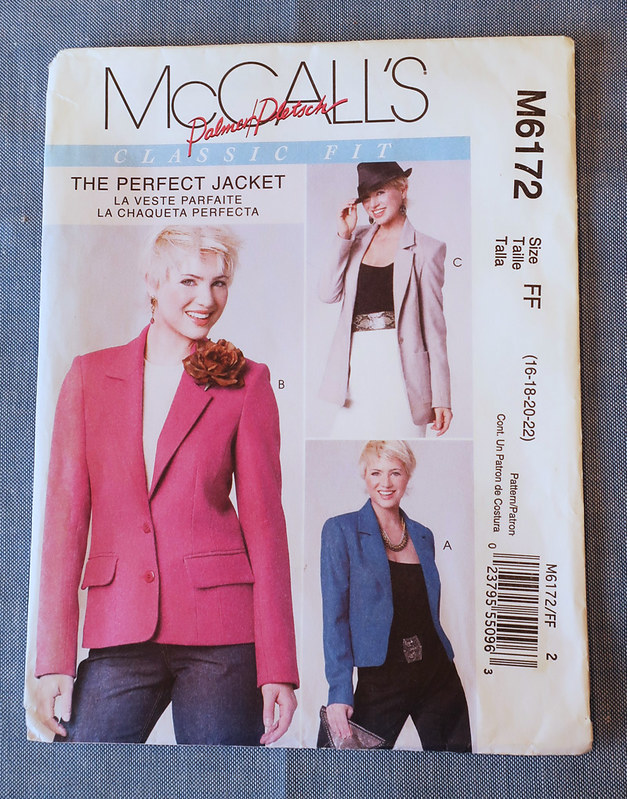
Here's the pattern envelope, it's McCalls 6172 which might still be available, or you can find a copy on eBay. It's one of the Palmer and Pletsch patterns which has all the info on fit adjustments, as well as the lines pre-marked on the pattern pieces to do a full bust adjustment, swayback etc. I have found these patterns to be really easy to use and I think if you were trying to get a grip on pattern fit they are a really good place to start. Manju in the UK has used this pattern and wrote "I think I have found my perfect blazer pattern"and hers fits really well.
When it comes to blazer patterns for myself I have an older Vogue one that I've made I think 4 or 5 times, so when you find a nice one with the classic details it pays to get it to fit perfectly and then sew in different fabrics which change the look entirely.
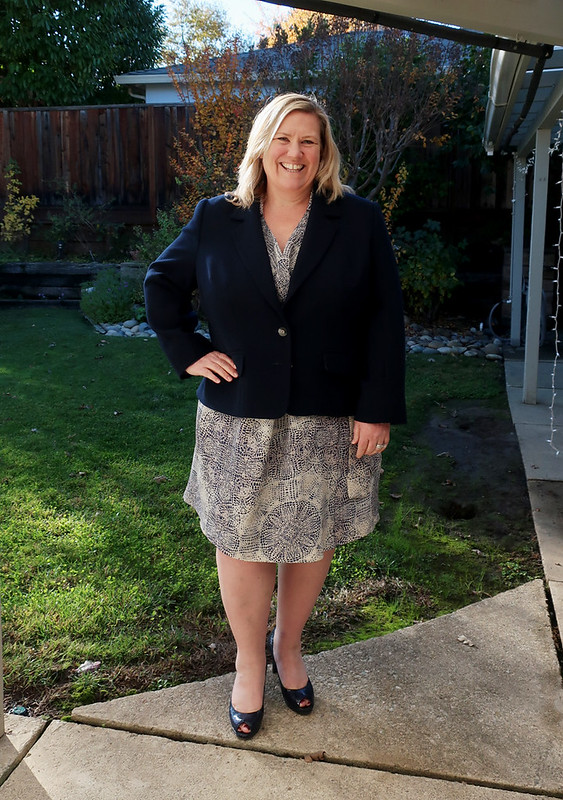
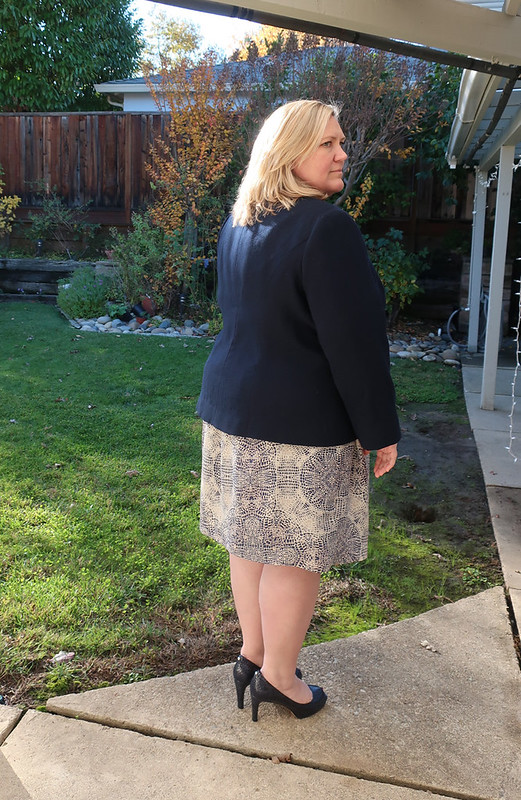
The photos on Heather are not my best, it was late afternoon and I didn't take into account difficulty of photographing dark garment on sunny day, all the details are lost but you can see the fit and proportion are good. She's wearing it over her silk wrap dress and it became an unintentional yet feminine business look. I actually think she will get more wear out of this jacket with a t-shirt or casual cotton top, plus jeans and flats for running around town.
Ok, here's the info many of you are interested in. I did a full bust adjustment on the jacket front, which gave more circumference as well as added length.
To start I usually trace the pattern piece that I'm altering in case it goes awry and I can start again or have it as reference for measurements. This is particularly helpful if you make adjustments on top of initial adjustments, you need to get the pattern pieces to join together and if you've chopped it up a lot it starts to get very confusing.
 On the left, original jacket front. Note that this is an armhole princess seam jacket, so it has a center front, side front, and then side back and center back.
I wanted to add about 1" at the bust, and the pattern has the lines for doing both a standard FBA as well as the "Y" FBA, which you can see is what I did. Either way you end up with a small dart (I think called a Dior dart) in the princess seam which actually gives some nice shaping. So note that there is a bit more room above the bust due to the FBA, and then more length down the center front (the red lines indicated between the marked buttonholes. I also moved the vertical dart over, or at least left the dart leg closer to the side as it was and just moved the other side nearer it. I remarked the end of the pocket as well (since this adjustment added across the front but the pocket doesn't need to grow).
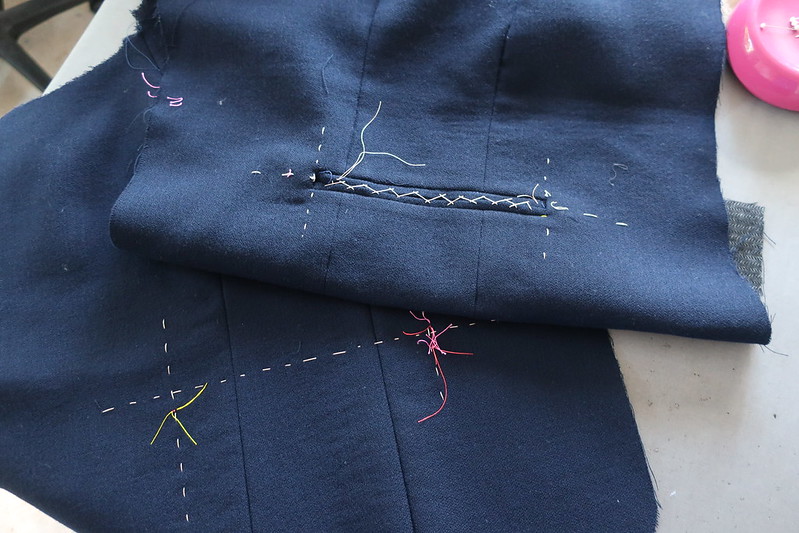
Here's a close up view on the pockets - always the most stressful part of any jacket! and you can see this isn't the most luxurious fabric, but it was fine for this test version.
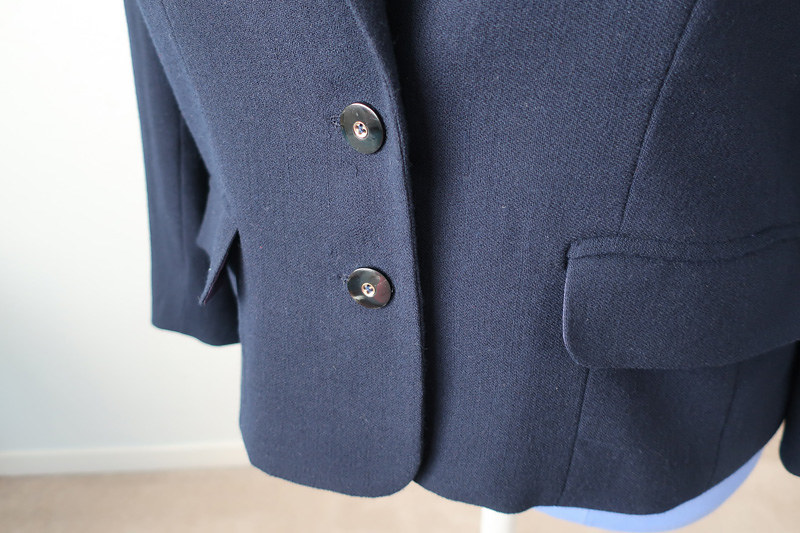
I put lining on the inside of the pocket flap, I just like them to be a bit thinner than two layers of the wool fabric. Every little ridge and bump can show with this type of fabric, particularly as it is a solid color. My next version is a shetland wool with many different color wool fibers and it hides everything :)
Gratuitous inside construction shot! With some white basting thread on the back princess seams as the fit was still being worked out there. For you serger maniacs - note the serger will never touch anything I make that is fully lined - oh no - I think it just makes extra lumps of thread on the seam allowances and is totally unnecessary. A few unravelly bits - learn to deal!
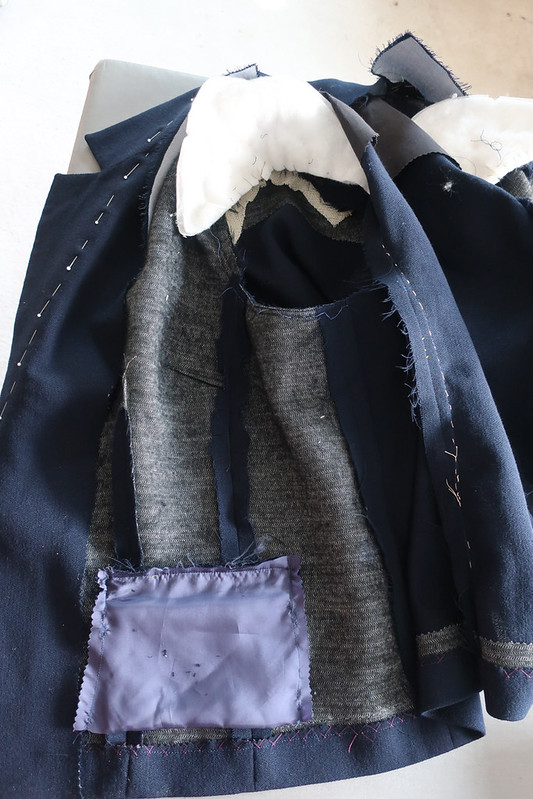
Another quirk of my jacket making - I never use the lining pieces. Too much trouble to get those out of the pattern pieces, I just use the jacket pieces and adapt as needed.
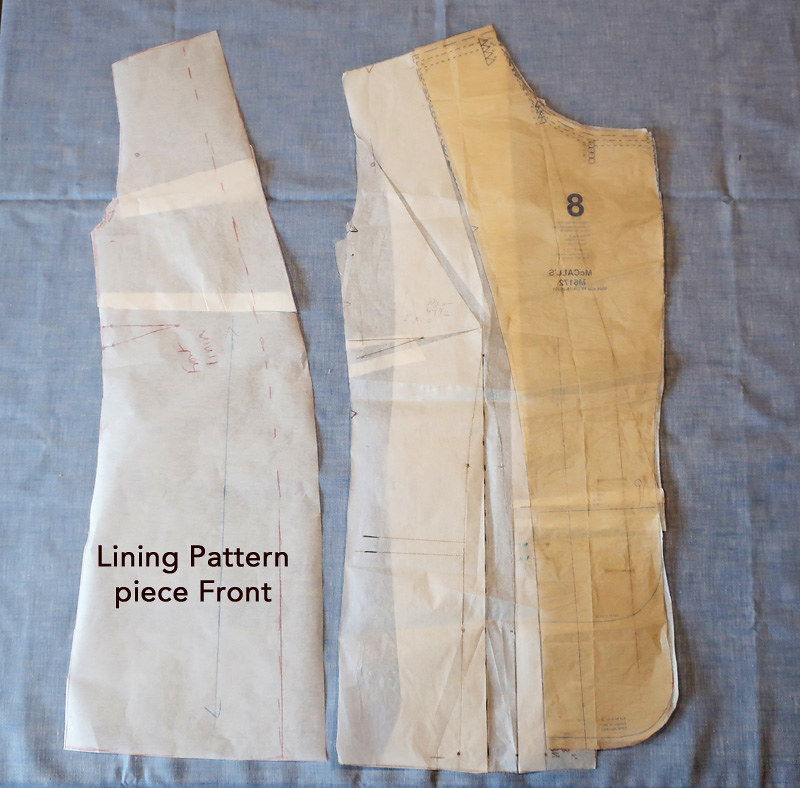
So for the front lining, I overlay the front Facing on the adjusted jacket front, which shows me where the lining would join to the front facing, and then trace a lining piece. Which includes our nice little fitting dart for the win.
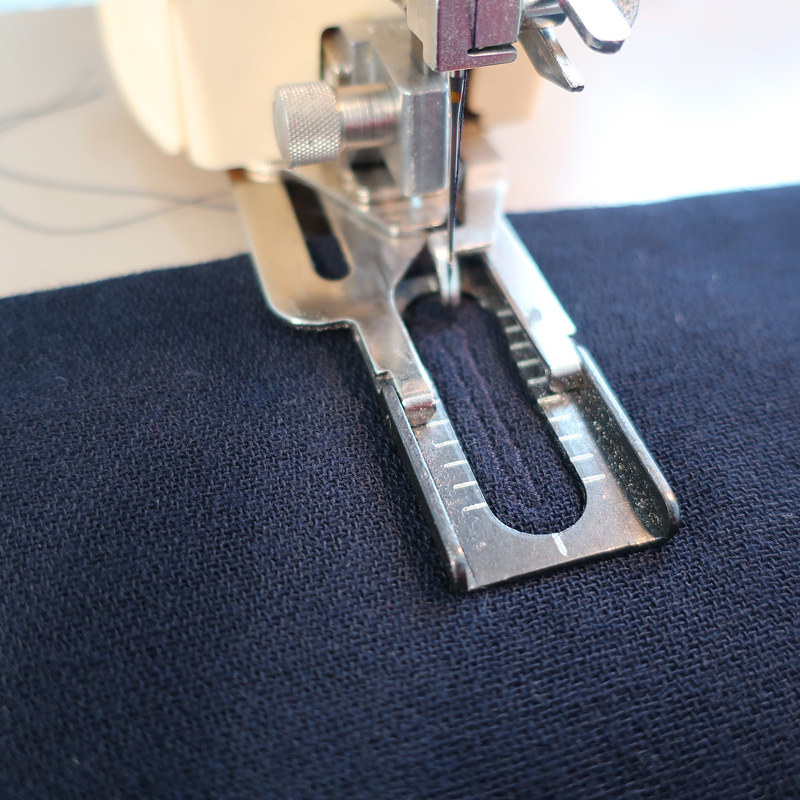
In the interest of speed and also it seems to match a classic blue blazer, I did keyhole buttons on my old Singer sewing machine. (Singer 401 if you're interested, the very best buttonholes). Up close and personal here with the attachment, I think I went around two more times and used a wider stitch for a more substantial buttonhole. That's what I like about this attachment, you can go around multiple times in the exact same place to build up the stitches for a really nice buttonhole.

And then I posted the above image on my Instagram and whew - quite the interest in this gadget. Which I call a button sewing gizmo for lack of a better name. You can see it kind of holds the button in place and raises it up various heights so you can achieve the thread shank which is so necessary on outerwear.
When I first started blogging I did a lot more posts with sewing and fit details. Lately with everything on my plate I find it a bit difficult to take all the photos as I sew and then sit down and write a lengthy post. In the interest of documenting the 2nd version of this pattern I decided to do an Instagram story along each step of the 2nd version I am currently making. And then saving each story to create one long Highlight on my Instagram profile page. It has basically turned it into a somewhat dry movie/slide show that will only appeal to serious sewing nerds - my people! So if you don't do Instagram or have a humongous IG feed and haven't seen any of this but are craving more jacket sewing details, including some of my late night narrations you can see the whole thing. (eek, does anyone like to hear themselves recorded?) The jacket isn't quite finished but it's getting near the home stretch.
I hope I won't regret putting this here - there are some serious weirdos that follow on IG - which for the most part I block. Anyway, go to my home page on IG, it's the Wool jacket highlight.
Forgot about this one - back view. I used the mid-length view on the pattern and didn't change the length at all. I did take it in a bit at the waist in the side back princess seams, probably the same about as I added in the front for the FBA, which then retained the waist shaping.
I might have to try this pattern for myself!
In other sewing news - this upcoming weekend is my Copy Your Garment class - I love this one, where you make a pattern from an existing garment, without taking it apart. Or as Stacey at the studio says "clone your clothes". I think there are just a couple of spots available.
The following weekend is Make Your Own Jeans - 1 pattern/4 styles. I am really impressed with this Megan Nielsen jeans pattern, which I showed in my previous post.
And then lots of other classes in Feb and March - all listed on the Hello Stitch Studio website. Then I need to think about Frocktails in Feb. with Bay Area Sewists. Because I need something to wear, ha ha. Might have to do a deep closet dive to find something that hasn't had many outings.
it's a very rainy here all week so ideal for staying in and finishing up so many projects.
Happy Sewing,
Beth
summer throwback - is it spring yet? I see a few of these petunias in my yard that are surviving and may live to bloom another summer.


That jacket fits her SO beautifully!! I love the classic navy. Always helpful to get those extra details you give! :-)
ReplyDeleteWhen the test garment looks this good the real deal will be breathtaking. Beautiful fit!
ReplyDeleteThe fit! Wonderful!
ReplyDeleteI love all of your construction photos. This looks wonderful on her. Easier to fit than the dress I think! I didn't realize that you were on IG, will have to go and follow you. I tend to only follow sewers on IG.
ReplyDelete