It finally feels like fall here in N. California. Not exactly coat and scarf weather but a slight nip in the air, and some falling leaves. Actually today is a swirl of fallen leaves and a red alert for wind and fire danger but we will cross our fingers and hope for the best. This is the scariest time of year and I don't mean Halloween!
Last week my sewing thoughts turned to long sleeved shirts and I decided to use this beautiful silk crepe de chine fabric. My favorite local sewing store Stone Mountain Fabric has just reopened to the public after being online only during these many months and this silk fabric is the last thing I bought in person there. In fact purchases the very day before we started the first day of lockdown here in California back in March 2020.

I've been doing a lot of preparation lately for my jacket class that starts next week, so I have construction details on the brain and thought I would share some of my silk shirt construction methods with this post. I used to do more detailed posts and would like to do some more this fall and winter. The problem is remembering to take pictures as I sew!
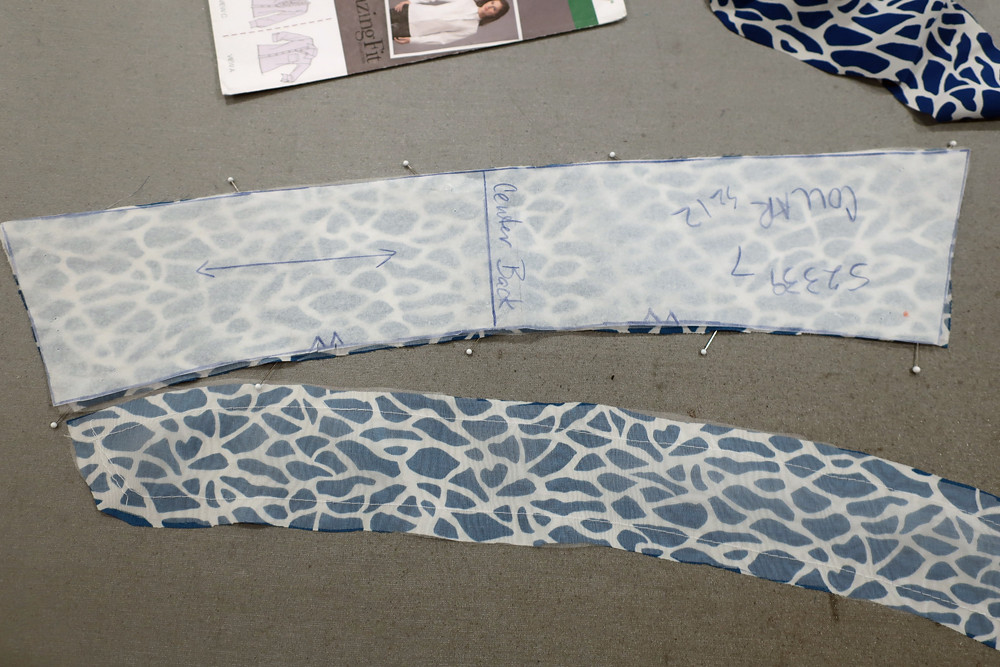
For this shirt I've used the same exact pattern that I use for almost every button front shirt I make. I like the size and shape of the collar and the way it fits across the shoulders, so why try something different when a shirt pattern is just the starting point. I have changed this same pattern up to do a popover placket, gathers instead of darts, hidden buttonhole placket, cut-on faux button band, faced front and tunic top versions so if you check the search bar on the side of the blog you can see many other versions. It's Simplicity 2339 which is an Amazing Fit pattern from around 7 years ago?
To start with I evaluate the fabric and decide which method I will use for the closure at the center front and then which interfacings would give me the shaping I want. For this shirt the fabric was just about the same as
this one, which I wear A LOT and whatever I did was successful so I decided to use those methods. (actually if you look at that post there are some god construction details) However I couldn't remember what I used in the collar/collar stand so I unpicked it a little bit at the center back neckline so I could see into the seams. As it turned out I used a combo of lightweight fusible and silk organza. Also I used facings at the front, so there is no sewn-on button band. Sometimes on a silk shirt I think it looks smoother with facings.
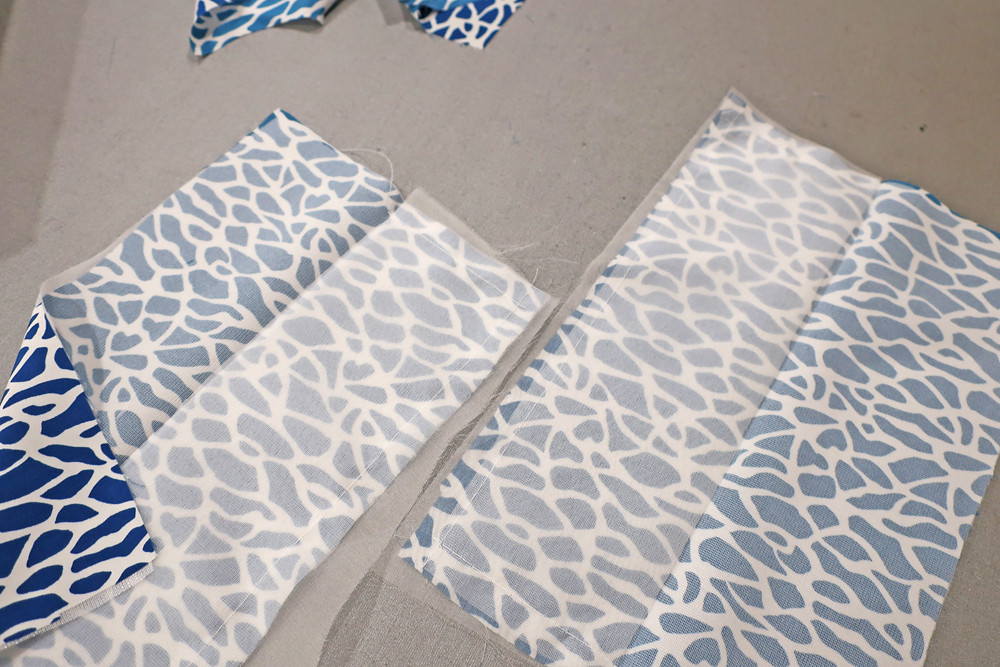
In the photo below I'm getting ready to apply the fusible to the collar, and so I place the fusible on the silk pattern piece, pin it lightly down and then use the paper pattern piece to make sure the shape is retained. Some fabrics just seem to wiggle or change shape and then once you apply the fusible you are stuck with an incorrect shape. I do this a lot with a variety of pattern pieces, particularly V-necklines to make sure they are still the same shape as the paper pattern piece.
I do the same for the collar stand, check the shape before fusing. For the collar stand side with the silk organza, that fabric is quite stable, it stays the same shape as the paper pattern piece so you can use that as the guide when joining that to the fabric.
Next up is taking care of the facings. I like to use the fusible which is in fact a woven fabric to finish the edge of the facing by stitching them right sides together and then flipping over the fusible, clipping the seam and then fusing the rest in place. It is a bit of a fiddly process as you don't want to fuse it crooked, or with a wrinkle so I just move the iron about 1/4" at a time from the seam edge towards the other edge.

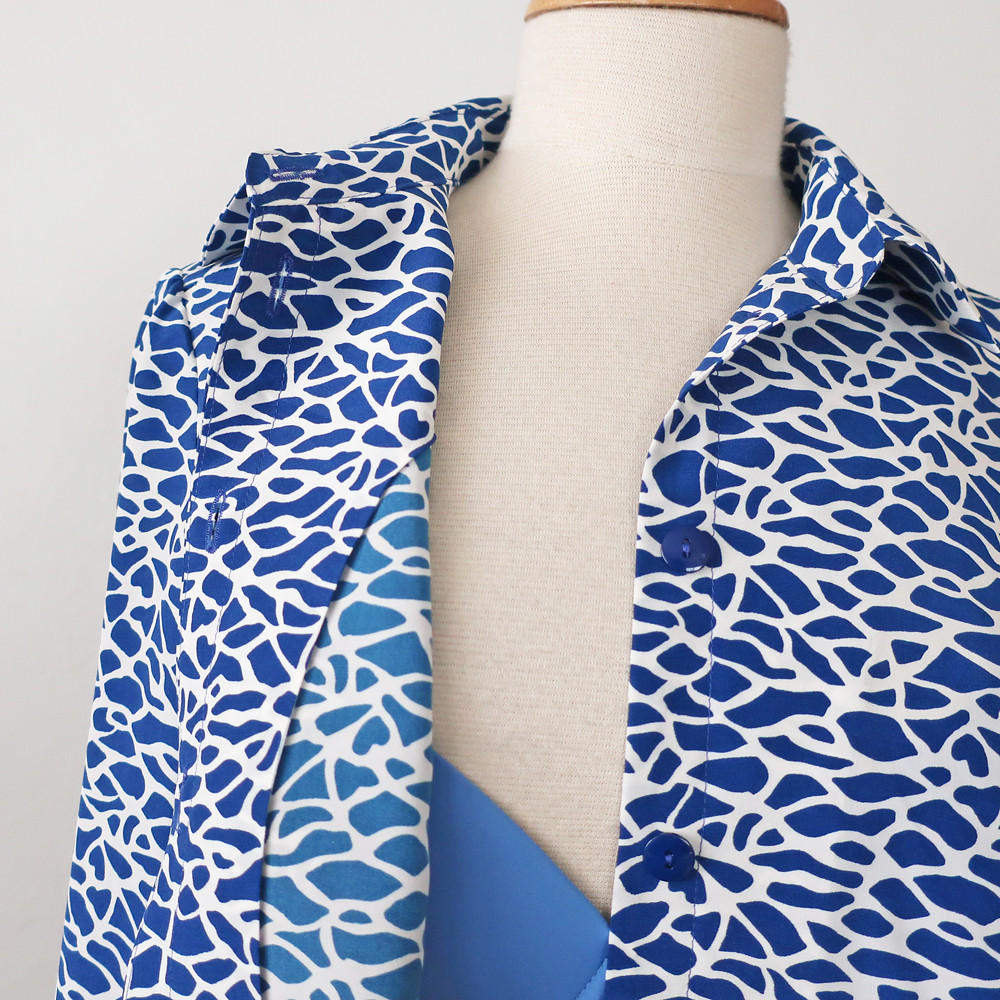
The result is a very clean finished edge inside the shirt, and then you have the facing showing where the neck falls open at the top, so you see the right side of the fabric. This fabric has a distinctive different shade of blue on the wrong side and for a while I was trying to figure out how to use that as an accent but it's not really distinctive enough so I let go of that idea.

I wish I had measured the piece before I started cutting it out, it was probably 1.5 yards of 55" wide fabric. So that's enough for me to make most shirts or tops with some inventive cutting out - however I did have to omit the inner yoke piece in silk. In fact I often use some solid lightweight fabric there anyway so it worked out.

As I was sewing I realized I wanted the seams at the side and in the sleeves to have some nicer seam finishes so I did what I think is a faux french seam, in that I press it open and then press to create two folds which are stitched closed. Perhaps more work than the traditional method of a french seam but I never remember to do it and then have to use this. So often I am just sewing on auto-pilot with something playing in the background. I'm currently watching a variety of British, French and Italian mysteries on Britbox and Mhz channels. And I definitely need the subtitles on the French so that means I pay more attention to the screen than to my sewing :).

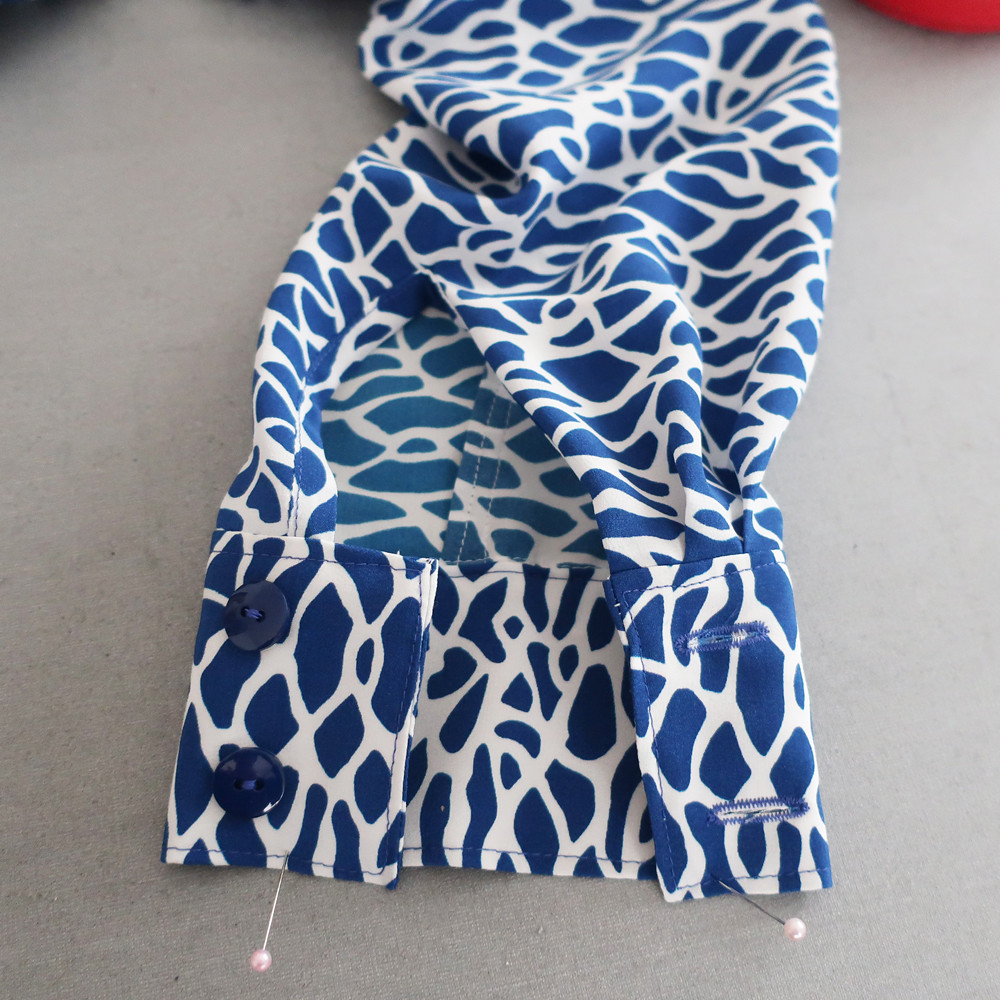
For the cuffs I put both a lightweight fusible and then on one side I put silk organza, that combo gives the cuffs just the right amount of stiffness. I just cut out some "close enough" pieces, baste them on and then trim to match the cuff edge.
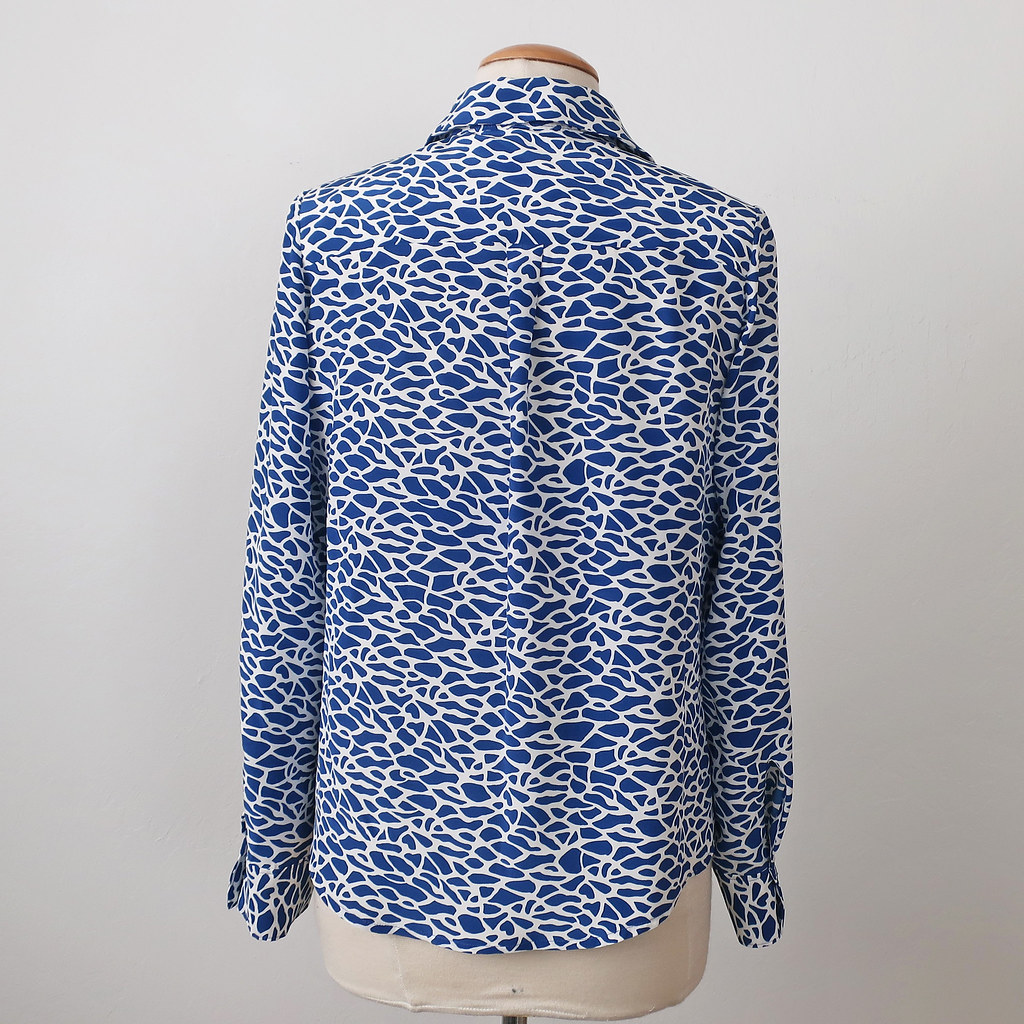

I wanted the back to be loose and flowy so I put a small pleat in the center back.
For the cuffs on these silk shirts I don't do a tower placket, I prefer the continuous binding which is a bit softer.
So that's the latest on my start of fall sewing. I am vowing NOT to make any coats this year, I've made 3 in the past 18 months and the
red coat only had one wear. I plan to wear that all through the holiday season!!
It will be blazer sewing from now to Thanksgiving. We start the Live/Online Jacket Tailoring class next week on Tuesday night. There's still time to register,
here on the Hello Stitch website. It's Tues/Thurs 6-7:30pm so hopefully that works no matter your time zone. And you don't need to have all your supplies for the first class as I will be covering a lot of that information then and you can get your project together after that.
I've now taught a couple of in-person classes at the studio and it was really fun to be there, I think a lot of people either started sewing during the pandemic or decided it was time to learn because we are almost fully booked. In January I think we will have lots more garment sewing classes so I will update when we get the schedule finalized.
I'm looking forward to wearing my new silk shirt, and this is actually how I will probably wear it most of the time, underneath a cashmere sweater.

Happy Sewing,
Beth
For today's garden photo, a closer look at those hydrangeas which were a bright lilac blue earlier in the summer. I tend to leave them on the plants and just see what colors they turn. The other day I saw a floral designer refer to this hydrangea bloom as "antiqued" which is I suppose a fancy name for fading flowers.


When I'm sewing rayon I do regular French seams for straight side seams. But after trimming my honking great (FBA) dart I finish it with a faux French seam exactly like this as, construction wise, its impossible to construct a dart as a proper French seam. Love the clean finish it gives. Great backup for any straight seam too when you decide after the fact.
ReplyDeleteWhat a beautiful shirt. And so beautifully made.
ReplyDeleteThis is beautiful, Beth. I am slowly working on a button down (up?) shirt for my son. I still feel so new to the process, but it's coming along. I'm glad you're still teaching! Maybe I'll be able to come back down for another class eventually. We made jeans in the last class I attended before the pandemic and I still love them! Thanks for all the detailed information. Happy sewing!
ReplyDeleteI love your beautiful blouse. Thanks for the reminder on finishing facings with fusible. I just cut out a woven top with facings and I will use your technique.
ReplyDeleteBonita camisa y está muy bien que compartes tu forma de coser las prendas. BESICOS.
ReplyDelete