Thursday, April 22, 2010

Tulle Time - party dress for Lia

Lia is my fantastic hairstylist and one of my biggest fans.  She wanted a party dress and gave me a clipping out of a magazine with a dress that caught her eye.   After some on-line research, I found this photo to show you.  It is by designer Oscar de la Renta who I have always admired - gorgeous dresses and lots of color in his clothes.


We are using it for inspiration - the features she wanted are;  a bold print, very fitted bodice, and a full skirt with a petticoat underneath.  Lia is very petite yet curvy so she is just right for this style.


I started with making a muslin of the bodice.  The bodice in the photo is in pieces, it looks like about 6 or 8 pieces across the front.  That looked pretty difficult without a pattern, however I wanted something of that effect, so I took a standard princess seam bodice that I have used for other dresses and worked on modifying it.   (New Look 6587)   Cutting the center on the fold,  I added about 4 inches across the center front, and then took 1/4" and 1/8" tucks symmetrically across the front to create a very form fitting bodice.  I also lengthened the bodice by about 5 inches, as I want the skirt to attach just above the hipbones.  For the back I dropped the neckline about 4 inches, creating a square neckline similar to the front.

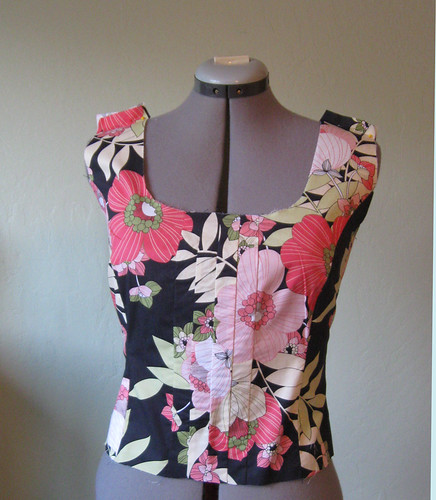
Here is the bodice, sewn up and on the dress form.  
It does not look like much yet.  I did a quick fit check 
on Lia and figured out where to put the zipper and 
attach the skirt.  Once the zipper is in then we are 
committed to the placement of the skirt, etc.  so I 
really wanted to get that right.  I had cut out skirt panels using 2 lengths of the fabric which is 50" 
wide, but that did not seem full enough, so I am 
adding another length and making the skirt a total of
150" circumference.


After the fitting, I took in the seams along the sides and under the bust, plus did an adjustment on the front tucks.  Not sure if you can see it in the photo, but each tuck is sewn deeper starting at about 2" from the top. 
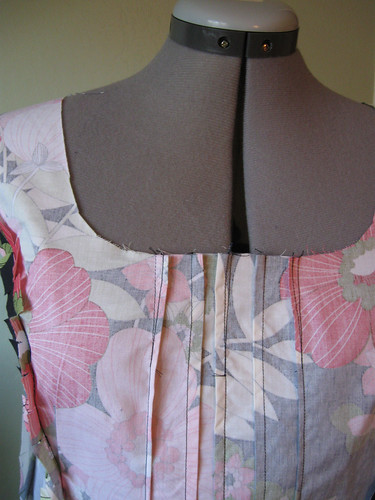

This serves to tighten up the front bodice and keep it from standing away fromthe body across the bust.  Since this photo was taken I have added the bodice lining, so I am interested to see how it fits on her.


Under this very full skirt Lia has requested an attached petticoat of tulle in various colors coordinating with the dress.  Sewing things on in even rows is tedious so I was trying to think how to make it as simple and foolproof as possible.  To that end I cut one width of lining fabric and drew chalk lines 3" apart so I could sew the tulle on evenly, choosing where to place it as I went along.  This worked really well and I can add more tulle/net between the rows once the dress is basted together and we see how it looks.


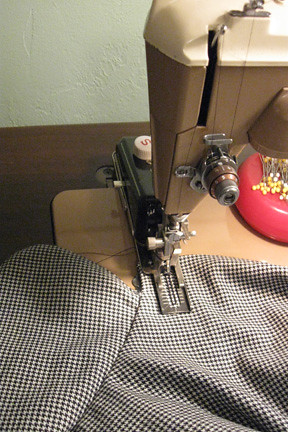
I have not worked with net or tulle in a really long time.  Recently I was playing with my sewing machine attachments, as I have this new book that is a great reference.
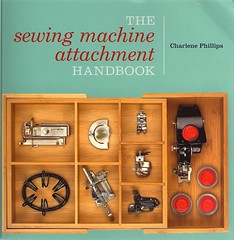

The Sewing Machine Attachment Book by Charlene Phillips
She has a website, The Sew Box,  for the book as well as a shop to order all these attachments for various machines and downloadable instructions on usage and lots of techniques.  I highly recommend, especially if you have an older machine and a box of mystery attachments.  Looking at her website and on Ebay, I know know I have quite a few valuable treasures on my shelf.  
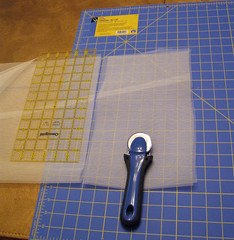

Inspired by this book and my dread of gathering many inches of tulle, I pulled out the gathering foot and gave 
it a try.  Worked line a dream !
First I cut the tulle and net into strips about 10" wide.  
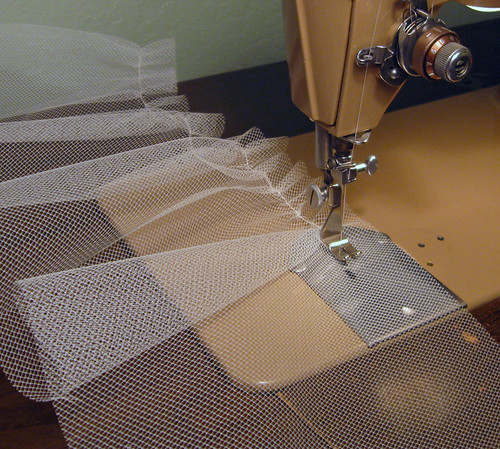


Then I gave it a try on the machine with the gathering foot.  Quite amazing.   I will definitely be using this one again.


There are other gems in my attachment kit, the foot hemmer seems to useful but I have not made a satisfactory hem yet.  The author says practice, practice, practice.
So when I finish this dress . . . 


And today's SunnyGal Garden photo.  
A little blurry on a rainy day - but the color of these camellias is so nice.


Monday, April 12, 2010

Cotton Blouse with variations

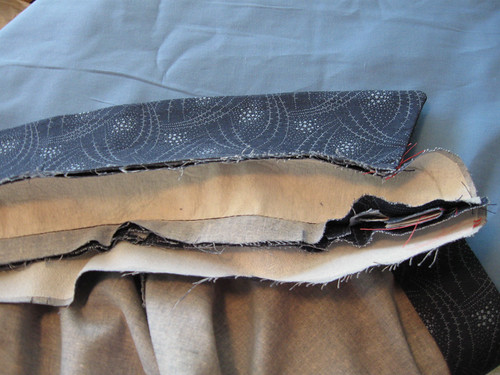
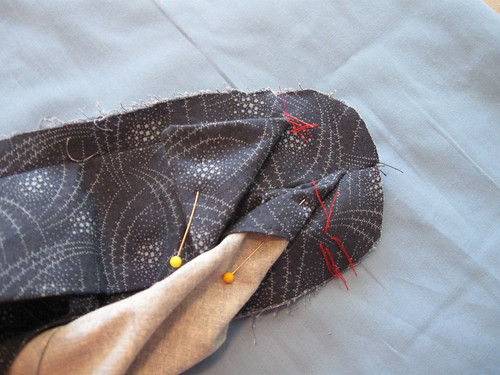
This week's project was a pair of cotton blouses.  Last year I saw a segment on a sewing show on PBS that detailed how to sew a stand collar in a different way than is usually specified in the pattern instructions, and is one of the best construction tips I have ever seen.  (nerd alert :  I use my Tivo search feature to find sewing shows)  Below are a few photos that detail this method.  


Recently I saw a review of some sewing DVD's on a great sewing blog, Very Prarie.  Kristin reviews these DVD's she won in a contest.  Reading her blog I realized that the woman on the DVD, Louise Cutting, is the same person I saw on TV.  So if you are looking for some great sewing instruction and tailoring techniques I bet these are worthwhile.


This method eliminates bulk on the front of the collar where the blouse meets the collar stand and gives a nice smooth edge.


collar with pencilFirst I always use a pencil to mark the sewing 
lines on the collar.  Who cares if there are pencil marks 
on the interfacing, they will be on the inside when 
it is all finished and I like to save myself time and 
eyestrain by sewing along the lines.


Then you attach the two pieces of the collar stand on either side of the blouse neckline and sew them on.  


Next the finished collar is sewn onto one collar stand.

At this point the clever part happens. 
First step,  move the collar and blouse front out of the way, by rolling them away from the sewing area and pinning to hold in place.                   

Then pin the collar stand pieces together and sew just the end of the collar.  The beauty of this method is that you can trim the seam allowances very nicely and turn this section to get a really smooth finish.


At this point you have a finished collar edge and the last step is to finish any trimming needed, and then close up the colar stand by topstitching the collar stand closed.


If you make a lot of collared shirts - I suggest checking out those DVD's or maybe Thread's magazine has covered this method -  I had never seen it before but is really so much better than the directions always given by the pattern companies.  

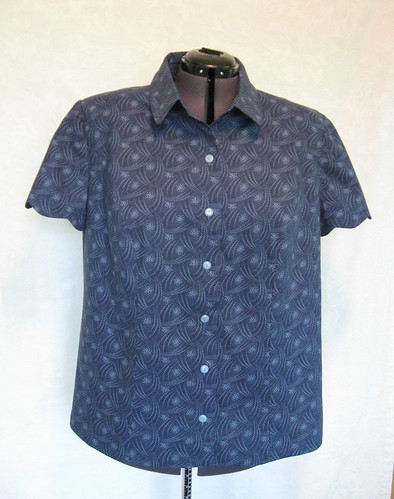
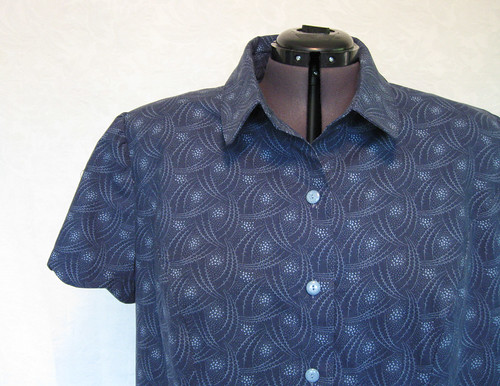
Here are the finished blouses.  McCall's 5673 which I see today shows out of print but perhaps still available.  
First blouse, I added a self facing down the front instead of a front placket, and put a scallop on the sleeve hem.


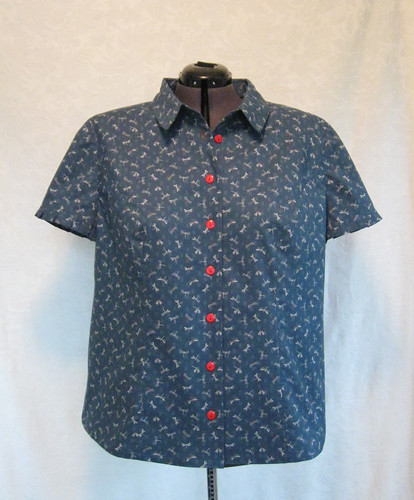
Blouse # 2  in a Japanese cotton, teal blue with a dragonfly print.
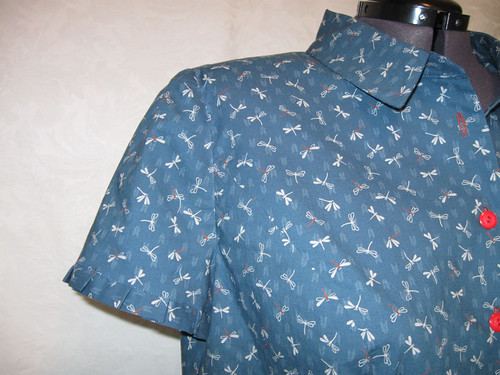
I added a pleated trim on the sleeve hem, and put a box pleat back vent for ease of movement.


Here is a close up of the sleeve trim.  


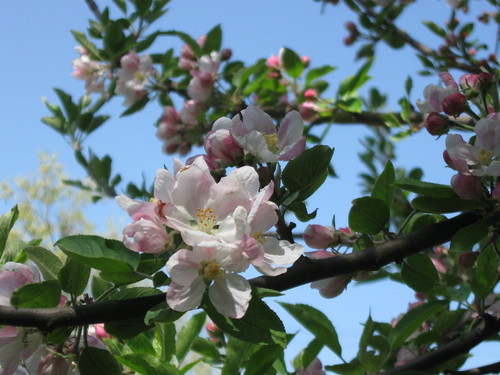
Today's SunnyGal Garden photo:    blossoms from my apple tree.   if it were a video clip you would hear the buzz of hundreds of honeybees,  which is great for the tree and the bees.


Saturday, April 10, 2010

Outdoor bench cushion and pillows

All sewing and no blogging for the past few days.  And some serious gardening going on around here.  After a few good storms things are very green - but the weeds are sprouting so I have been pruning and weeding.   But I did manage to make some new outdoor pillows and a bench cushion for my neighbor Krista.    She has a small wooden bench seat on her porch, with a shaped cushion, so I took off the old cover and used it to make a pattern for the new cover.  

Here are the sad old cushion and pillows.

old pillows


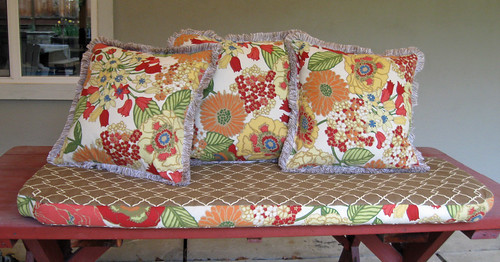
She had most of these fabrics in her stash so with some creative coordinating we came up with a new set of cushion and pillows.  I don’t have a photo of it on the bench, so these before and after shots are on my backyard picnic table.

Here are the finished cushion and pillows.

new pillows

Next up, some cotton blouses, curtains, a party dress.  I need to step away from the computer and focus!  It is supposed to rain tomorrow - so time for an all day sewing session.

Wednesday, March 24, 2010

Suit for a Japanese Wedding Part 2

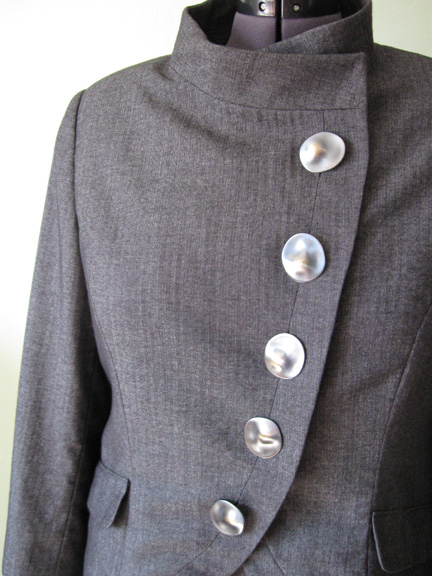
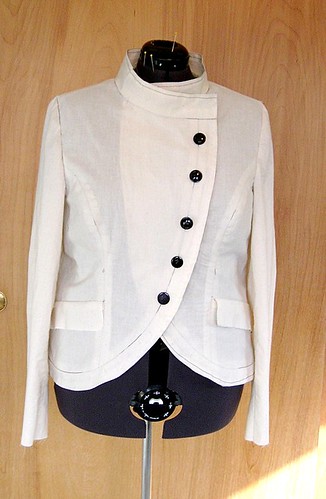
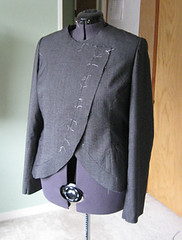
This week I finished the suit that Rita is wearing to her son's wedding in Japan.  Here is the finished jacket and skirt.  As mentioned in the previous post, I used McCall's 5759 for the jacket. While the jacket looks great on Rita, I am not happy with the way it looks on the dress form, the collar sinks a bit and the heavy buttons kind of pull a bit.  The fabric was fantastic to work with.
Hopefully I will get a great photo from the occasion to post.

Rita is an artist and forges metal pieces, so she chose some very unique buttons that are a burnished metal.  This jacket style, with the hidden buttonholes lends itself well to a distinctive button so if anyone has some special buttons they are waiting to use - maybe give this one a try.


Here are a few construction details.  Across the back I put a layer of black muslin which serves to stabilize the shoulders and add a layer so the shoulder pads don't show on the right side of the fabric.  Where the collar and jacket pieces attach, I trimmed and sew down the seam allowances,  also done on the inside collar and jacket facing.
Jacket collar inside


On the inside collar, I did put an extra piece of pellon interfacing on top of the knit fusible interfacing to add a bit more stiffness to the collar.

Collar facing with extra Interfacing

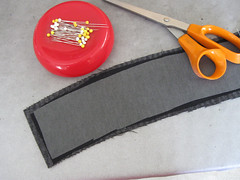
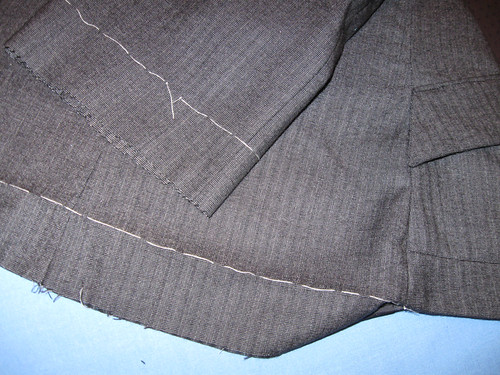
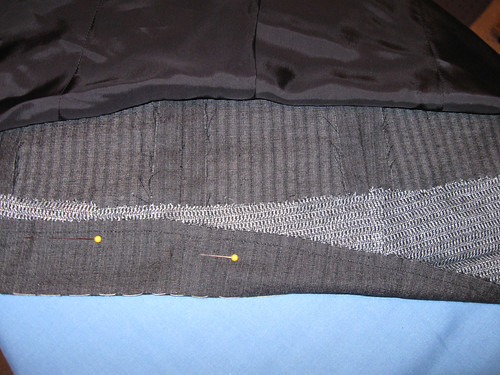
For the hems I pin up and press a sharp line, then run a basting thread along that line to mark the hem.  I press on a 3" wide piece of armo-weft type interfacing along that hem which gives the hem crease a softer turn, and allows the hem stitches to be perfectly hidden.
Rita jacket hem work
Rita hem 2

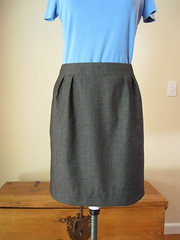
For the skirt I used SImplicity 2451, changing the waistband to make it almost straight across instead of curved, and narrowing the waistband by about 3/4" from the top.  


Rita skirt


and today's SunnyGal garden photo.   


tulips

Tuesday, March 16, 2010

Suit for a Japanese Wedding


This week I am working on a suit for Rita, who is going to Japan later this month for her son’s wedding.  She had a jacket with an asymmetrical front in mind, so I found McCalls 5759.  I saw a few versions of it on Pattern Review and liked the shape.  I am making the version with the stand collar.  We found a beautiful menswear Italian wool suiting and actually are using the wrong side of the fabric.  

I did a fitting muslin, and the lines look good even in muslin - so I am looking forward to seeing it finished.  Here is the muslin front view.

This pattern has a pocket flap but no pocket - what is the use of that?  A faux pocket is worse than no pocket at all.  So I decided to put a welt pocket in, underneath the flap which has a very specific placement and I didn’t want to mess with that.  
Below is the outside of the jacket, marked with red basting thread.  I placed it about 5/8” below the line for the pocket flap so it will be entirely covered.  In the photo you can see my handy Chakoner chalk marker.  It is an incredibly useful tool, makes a super sharp line and the chalk inside seems to last for at least 5 years.  Amazing. 


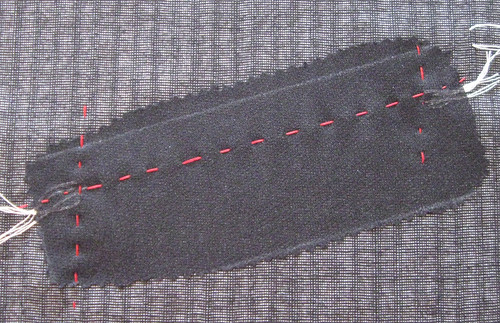
Here is the inside of the jacket, I put a rectangle of fusible interfacing over the target area,  actually I do that step first, then baste the red markings, following lines I have drawn using the tailor tacks to draw the lines.


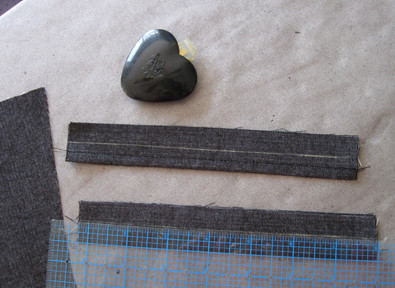
Next I cut and sew the pocket edges.  For this I used straight grain fabric, cut about 3” x 8”.  it is really important to stretch and steam the pieces, to take any of the slack out of the weave.  This wool is very tightly woven but on a tweed or something else this is a really necessary step as the pocket edges will sag or become misshapen during wear and look weird.  For any kind of plaid I like to do the pockets on the bias because it is visually more interesting, but then this stretching step is crucial as the bias cut pieces want to stretch all the more.   The pieces are folded in half, and then I stitch 1/4”  from the folded edge.  

After stitching, I trim the pieces 1/4” from the stitching so they end up being 1/2” wide.

It would be impossible to start with a 1” piece, then fold and stitch accurately, plus you lose that fraction of an inch with the turn of the cloth.  So this method results in very accurate pocket edges ready to go.  I really get annoyed at patterns that have little pieces for the pocket edges,  who are they kidding?  Never gonna work.  

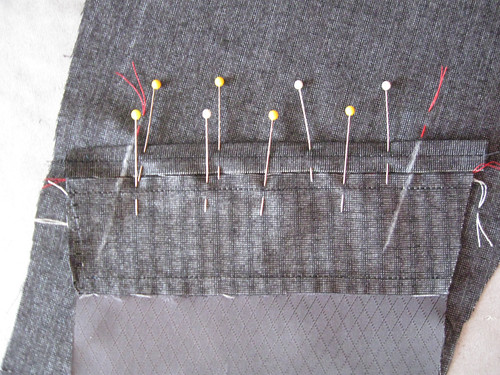
Next I pin the edges onto the jacket.  It is not visible, but the cut edges line up with the red basting threads.  Note I have marked with chalk where the stitching ends.

I sew right on top of the previous stitching, which results in a perfect 1/4” pocket edge.  This photo is kind of upside down, as the pocket lining is on the bottom,

After I sew across the edges, the moment of truth comes when I slash open the pocket, directly in the center, again using the red basting thread as a guide.  About 1/2” from the edge I stop, and then cut diagonally to the edges.  Then push the pocket through the opening, and attach the pocket lining, again along the same stitch line.  Lastly stitch around the pocket, catching the little triangle into the stitching, which secures the two ends of the pocket opening.   
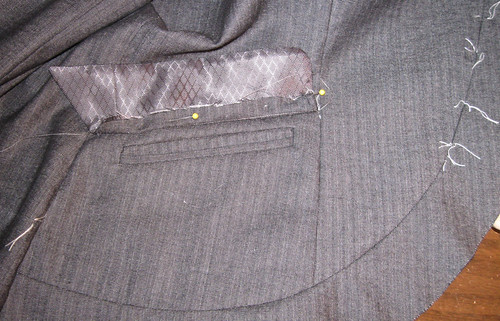
I did a one-welt pocket, so the bottom has a welt and the top is the jacket fabric, sewn to the pocket lining.

Finished pocket - hidden under pocket flap (unfiinished at this time).


Here is the jacket assembled.  Collar is not on yet, but you can see all the tailor's tacks for the hidden buttonholes.   In a few days I will finish this jacket and have more photos.  


and today's SunnyGal Studio garden photo,  some sunny primulas in bloom.


Monday, March 8, 2010

Tailoring Tool Time


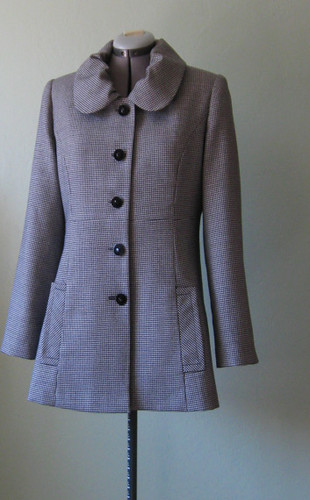
After a winter filled with silk and velvet dresses for my sewing clients it was time for a change.  Taking a cue from one of my favorite sewing blogs The Selfish Seamstress I pulled out a piece of beautiful wool houndstooth and made Simplicity 2812 just for me.

check jacket1resized
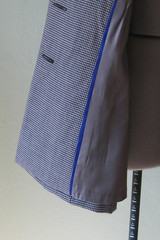
While winter is almost over, I hope to get some wear out of this jacket now and next fall.  Whenever I make a tailored wool garment I always get it about 80% completed and then I can't wait to be FINISHED, so the last few bits, lining and hemming did drag on.  For no good reason I put a sliver of royal blue piping in the front lining.  Color obsessed as I am I felt it needed the zing, even if hidden.
(sometimes I use red satin pocket linings just for fun.)blue trim check jacket


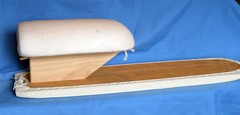
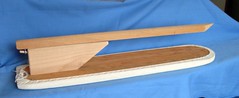
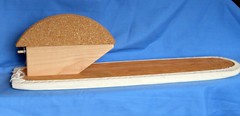
Working on a wool jacket requires pulling out the pressing and shaping tools.  I like using these old school items - I have had this sleeve board with the interchangeble parts for a while.  I am not sure what the components are called, but the pointed wood piece is ideal for pressing open graded seams on collars and the jacket front.
Sleeve board with corner pointSleeve board with round boardSleeve boardSleeve board with round
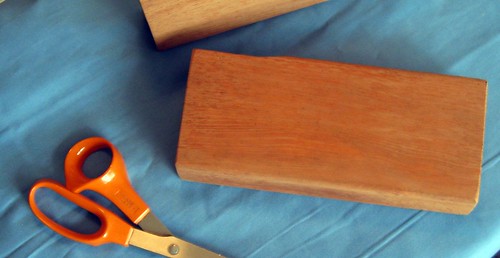
These are my other high tech tools, a pair of wooden "bricks" which I think my dad cut and sanded long ago from some 1" x 3" boards.  Technically they are called clappers, and after a seam is steam pressed open you clap the board on it and press for a good few seconds,  allowing the steam to really get in the fibers and give that wool some muscle memory.
clappers


Here is a close up of the front jacket and facing seam, graded with the facing piece cut closer than the jacket piece,  allowing the turned seam to lay flat and reduce bulk.  Next step is to press open on the sleeve board point, and then finally press jacket front flat.   Pressing the seam open prior to the flat press creates a sharper turn.
grade seam
Inside the sleeve cap I put a sleeve head, made of a 1.75" x 10" bias cut of a woven wool, pressing over 1/2" lengthwise and then hand stitching it very loosely right at the seam allowance, and then pushing it out toward the sleeve cap.  This cushions the top of the sleeve cap and creates a smooth sleeve both front and back.
sleeve head
For the buttonholes I have my fantastic Singer attachment which creates consistent, strong buttonholes with rounded ends.
buttonholerresized


This jacket turned out OK.  Maybe I am not crazy about the collar.  The style is not the issue, but the itchy quotient is high.  I had thought about making the stand collar version and putting black velveteen on the inside, which may have been better in the long run - but this ruffled collar lured me in.
check jacket3psd
So on the remaining chilly days that require a turtleneck sweater I will be wearing my jacket and wishing for spring.

and here is a SunnyGal garden photo - first tulips of the year.red tulips