Friday, June 18, 2021

New spring dress, Burda 07/2015 No. 110

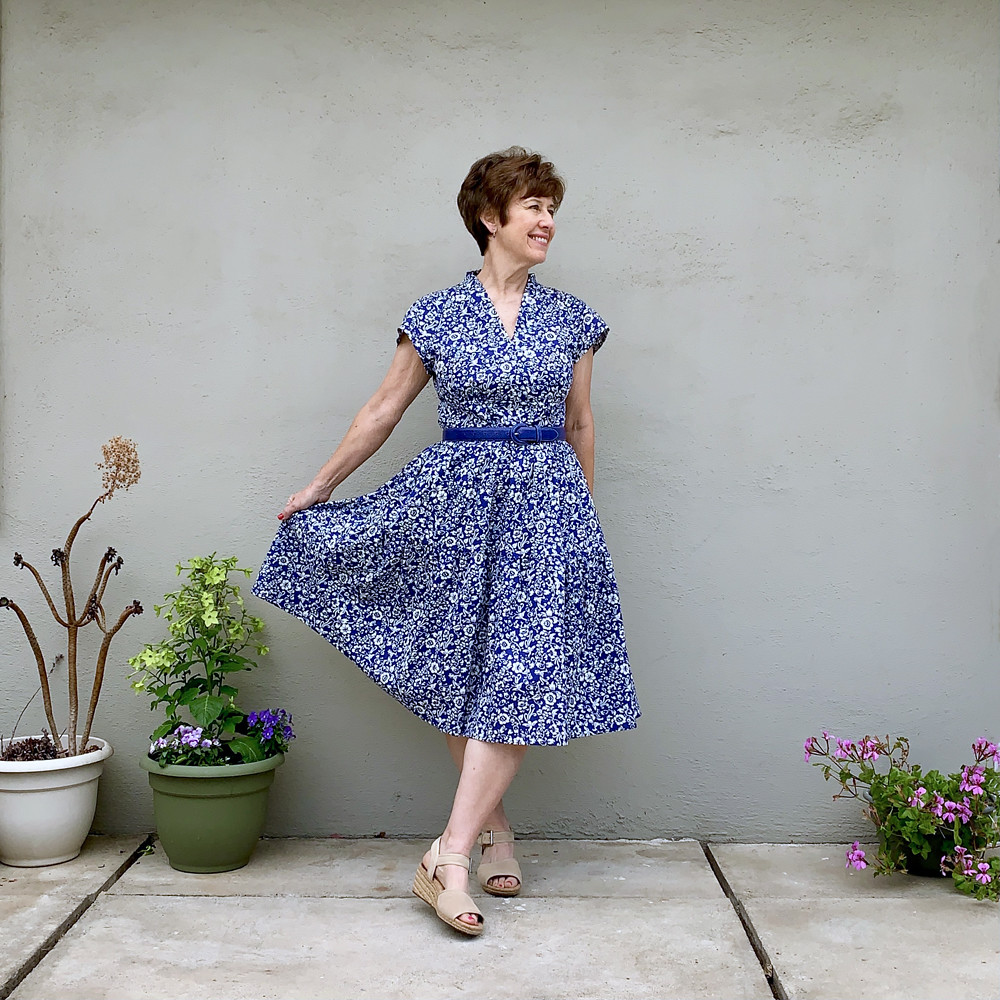
It feels so good to have a new dress finished. In the previous post I showed all kinds of pattern fitting adjustments on this pattern. A lot of my dresses are sleeveless so it's nice to have one with sleeves for a change. I really like this fabric and the color - the fabric was provided to me from Minerva and it comes in a red version too which I might try for a different style. Here's the fabric link. 
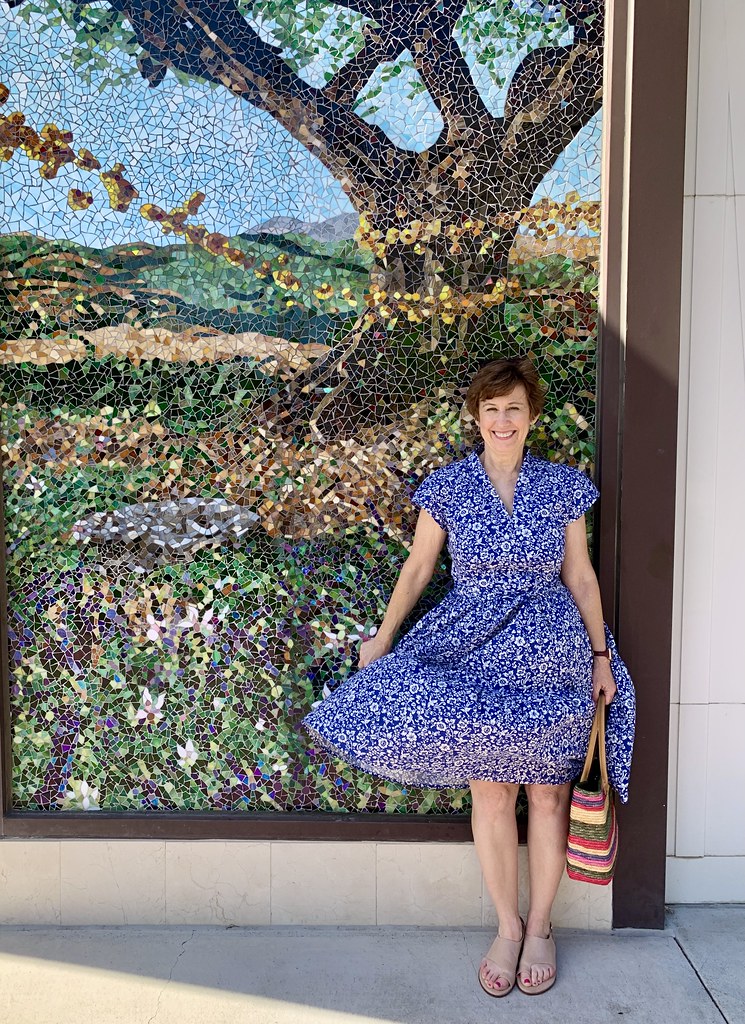
IMG_6215  


That photo encapsulates my mood - I don't want to jinx things but it seems life is getting back to normal and it's so nice to go out with friends to enjoy their company! On a very breezy and sunny afternoon.

The pattern is from an older Burda issue, July 2015. These older Burda issues from the summer months are filled with really cute dresses or tops that suit my wardrobe. I've made a couple of these gems previously, you can see here and here.

Blue poplin dress1

Here's another look at the pattern diagram. I might trace off the #102 dress in the top row as well, perhaps leaving off the sleeves or putting a small cap sleeve but that looks like it would be nice for a lightweight summer fabric as well.
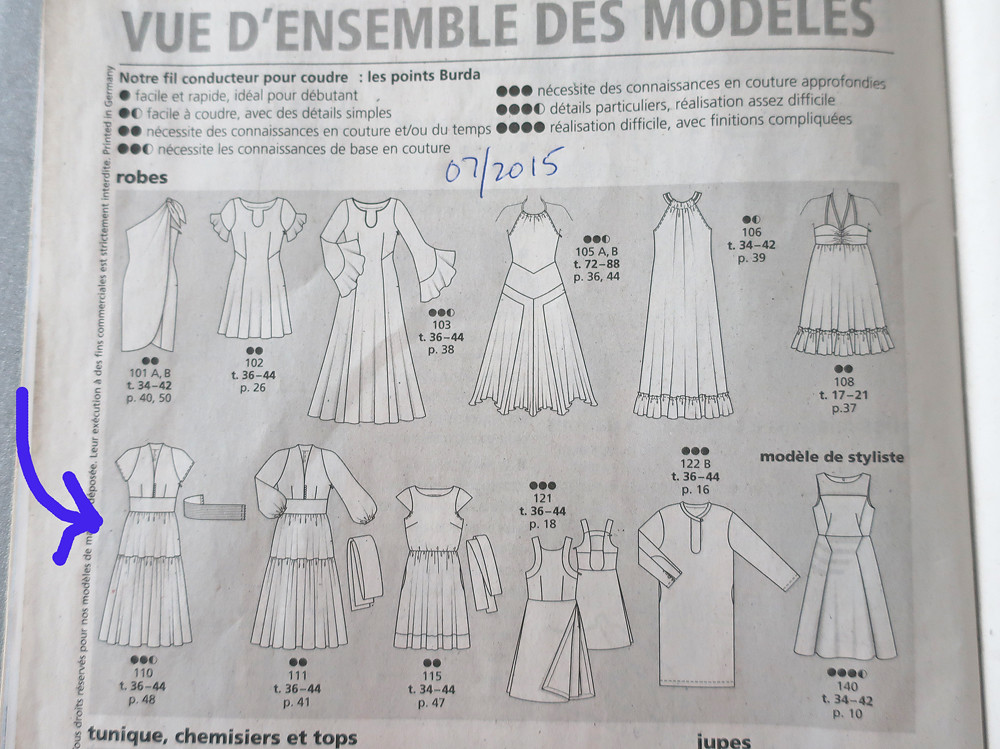
Burda tech drawing July 2015

In the previous post I mentioned that I put in the zipper in the center back, but don't completely sew it, and I wait to finish it until after I attach the skirt. Bobbi commented in my last post that she wondered how I do that. Here's a photo of the back, with the zipper partially sewn in,
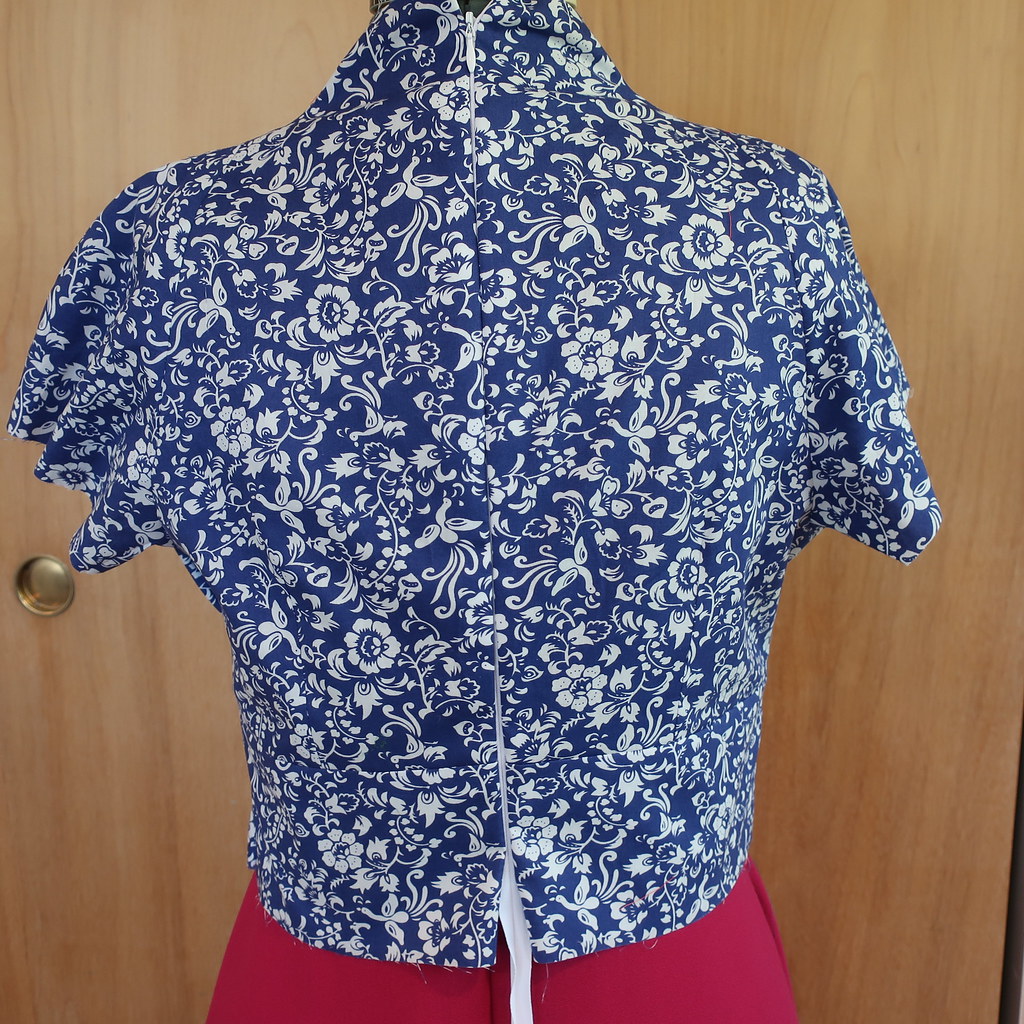
Blue poplin bodice back

If you look at the bottom you can see that the zipper is sewn in the center back seam except for the bottom two or three inches. I then attach the skirt pieces, it could be a style with a basic bodice, or a dress like this with a waistband, but the goal is to be able to move the skirt placement up or down a little before completing the zipper. At this point I try on the bodice, and often use a piece of elastic and some pins to see where I want the seam of the skirt to land on the back bodice. Then I sew on the skirt and sew the remaining portion of the zipper. 
Bluepoplin10

That belt has been in my wardrobe for ages, I bought it as I love that color and it has gone with so many items in my wardrobe. It pays to have a consistent color palette. 


Blue poplin back on form


ACS_0038

They don't show in any of these photos but I did put pockets. And a little confession, the belt fits but it's not super comfortable (let's blame pandemic baking :) So I made a fabric sash belt. The pattern had the option of a kind of pleated waistband or a very long double wrap sash, however I just made a 2 inch wide sash that I could tie in front. And this photo reminds me that while a lot of my plants are doing fine the succulents definitely need some attention, look at that sad spindly thing on the left. 

Poplin dress wc

So that's my most recent finished item, I am currently making some shorts using the Tatjana trousers pattern from Just Patterns. After that I have some smallish pieces of silk so perhaps some summer tops which seem to be the things I get the most use from this time of year. As it was 108º F here yesterday and today a cool and balmy 104º F. hahahah we are melting and it's only June. Trying not to think about August 😅.

Next month I'm doing a slightly different sewing class for my online class offering with Hello Stitch Studio. We have had really great success with the online classes and even when the studio opens back up we will continue to offer them. Some people have said it's the only opportunity they have to fit in a live sewing class, by doing it online. So I'm working on some ideas for fall, and most likely will do a blazer class online starting in October. If all goes well I will do it in person at the studio as well but all the scheduling is still being worked out. My first in-person class will be in September and will be a beginner class, so if you have some friends that admire your sewing or wish they could learn send 'em our way! Oh, now I realize I didn't say what the July class will be, it's going to be a Sew Lab - which is the only name I could think for it. But it will be a "help you with whatever you are working on" class. So deciphering cryptic instructions, troubleshooting fabrics, fitting help, zipper dilemmas, I will answer any and all questions to the best of my ability. 

So that's the latest. We are hoping for a cool down this weekend, to a chilly 90º ha ha.  The bay area is so strange, at the coast it can be 40º lower that here in the inland area, and by yet miles it's only about 18 miles from SF to my house. And it's not officially Summer yet!! Microclimates everywhere. 


IMG_6215

Have a great weekend! Happy Sewing,
Beth

today's garden photo is my newest plant discovery, which is Clarkia. I think it's clarkia amoena. I happened across a 6-pack of these at the plant nursery a few months ago and gave them a try. Oo I hope they seed themselves because they are so nice. And of the 6 plants there were a peachy white combo, pink streaked with rose, white and pink, and then that one luscious rose red. These will definitely have a place in my garden next year, just like fabric I will always choose the bright and colorful. Plus one of the nicknames is Farewell to Spring which seems very appropriate right now. 
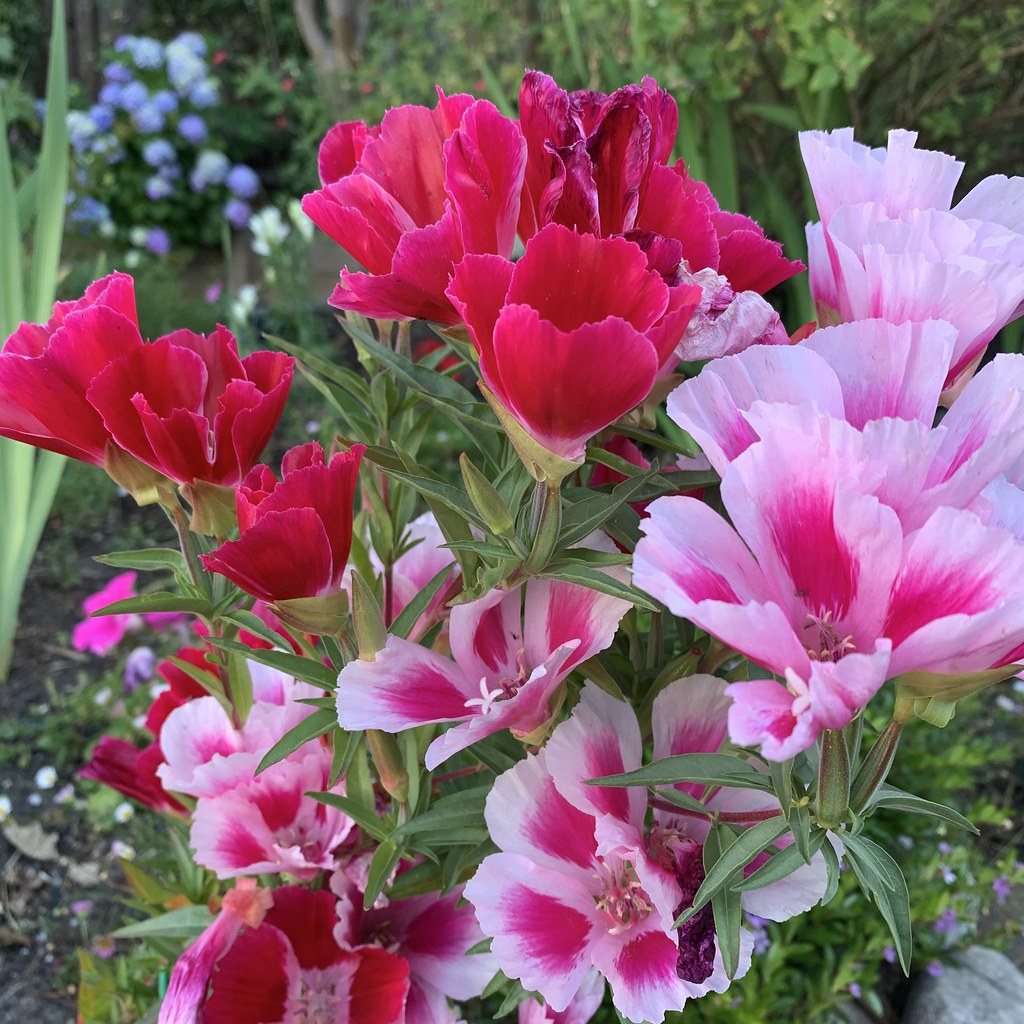
D77B8C7C-1646-4D7E-9F01-BD9AB96F29ED_1_201_a

Friday, June 11, 2021

Fitting the pattern, dress from Burda July 2015 no. 110

It's been ages since I've done the type of post where I show all my pattern fit changes but I have one to show you today. Lately I haven't sewn much of anything that needed some deep scrutiny to evaluate the pattern fit and work on adjustments prior to sewing. I did a couple of dresses last summer which were interesting patterns and that's what attracted me - something to get into during our long long time of stay-at-home during 2020. You can see them here:  red sateen Vogue dress and vintage look Burda dress. Otherwise my sewing the last few months has been doing samples and preparing for online classes. 

However this dress design is something I always noticed when I looked through the Burdastyle website, or it occasionally pops up in my Instagram feed - and I think hmm, I should track down that pattern and sew it up. Combine that with the tiered skirt trend this year and it was the perfect pattern to use with a length of fabric I received from Minerva.com. I chose the fabric with a vague idea of this type of dress, and then one day was looking through some older Burda magazines and realized that I had this pattern in one of them.  Here's a link to the fabric if you are interested. It comes in red as well. 

Here's a look at the work in progress, I think I adjusted the waist height a bit after this photo, and it might just be basted together. But I love this fabric, it was perfect for this type of dress. 

2D302054-A234-4DE4-B5EE-544CCFBA556B

Burda mag dress 2015

Here's a look at the pattern in the magazine, it had several views, the long sleeve, the short sleeve I sewed and then also a top version. I skipped the various belt options and can you believe I have that blue belt in my wardrobe, what a perfect match. 

Burda tech drawing July 2015

This issue (which happens to be in French) has lots of really cute things and you can expect to see another of these patterns. 

Let's talk pattern adjustments. I made size 38 in the shoulders, sleeves, neckline, and graded out a bit in the waist to fit. Once I tried it on I could see that I needed more length over the bust, which moved the midriff part to the right place, but it was also too roomy at the center front. I cut it open horizontally across the center front to see how much more length was needed, plus I pinched out some width down the vertical seam.

Muslin no. 1

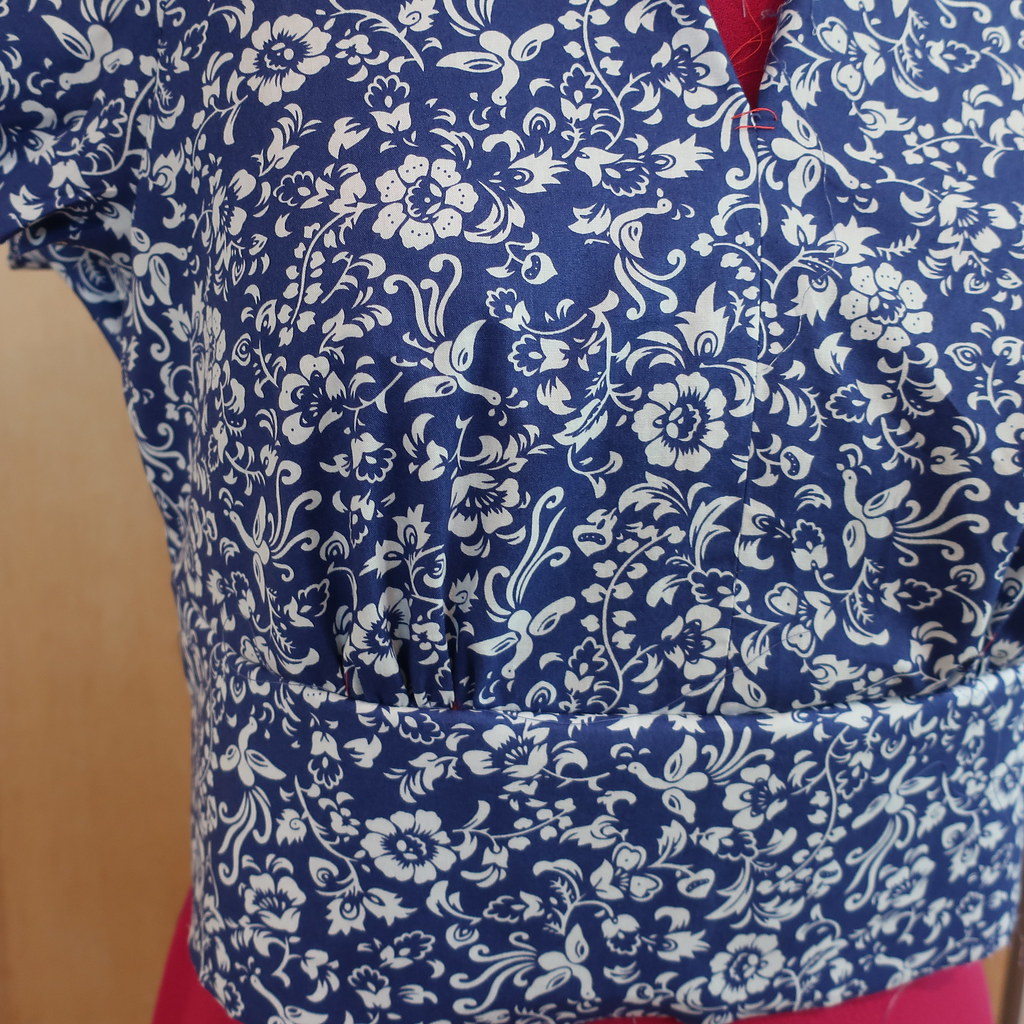
Here is the second test version, much better. At this point I decided to change the vertical bust darts to gathers. I like that look on a dress with a midriff band. I marked on the center where I wanted the seam to begin as it was too low (or I am not tall enough :) 

Muslin No. 2

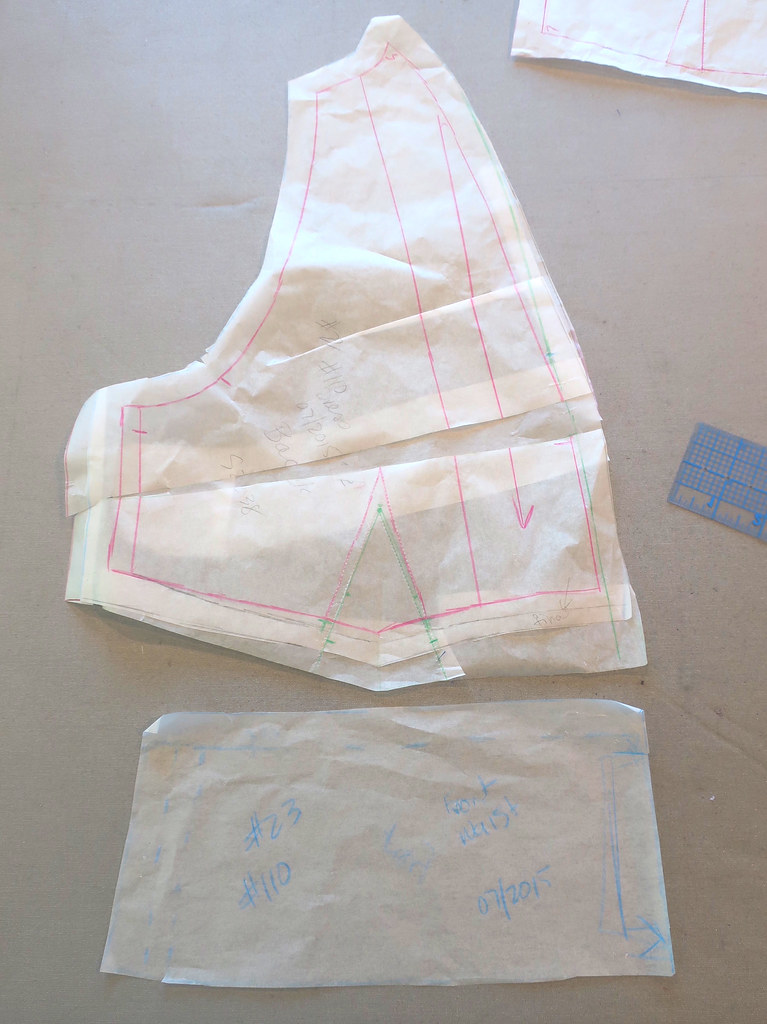
Here are my paper pattern pieces for the front. I didn't change out the dart markings, just gathered the space between the dart legs when I sewed it up. Also note some of the extra length I decided to add to the bottom edge, that way I could take some away if it turned out to be too long. 

Burda final pattern pieces

Here's the 2nd test version on one of my dress forms. This one is kind of old, someone gave it to me a while ago and I padded it up to match me as the shoulders on it are quite small and it resembles me a lot more than some of the other types. I keep that lightweight wool crepe dress on the form because I don't like looking at the dials and the various odd bits of padding that are under it, plus that dress bodice fits just how I like. Also the neckline depth, width, and the location of the waist seam are ideal for comparing other patterns. As you can see if you look closely I even have the center front marked with a thread trace so I often tissue fit other patterns on top of this form. However I always do a final fit and adjust side seams on myself, as every fabric differs.  Here's a closer look at that wool dress. 

Muslin No. 2 on form


Once I had the fitting worked out it was just onto sewing. I put lightweight interfacing on the center back seam and put in an invisible zipper. 

Interfacing on back seam


Blue poplin bodice back

Then I sewed the top half of the dress, put in the invisible zipper but left it unattached about 2" from the bottom in preparation of adding the skirt later. I often do dresses this way as I like to adjust where the waist seam is, and also I can fit the top on me without dealing with the skirt portion. 

So that's where I will leave this - next time I will post the finished dress which I actually have worn on an outing. Yay! going out of the house!!


Blue poplin bodice close up

Other projects I have going on now:  I'm halfway through my online jeans class via Hello Stitch Studio, and next month will be a shorter offering. I'm doing a Sew Lab where you can join in to ask questions and get help with your projects. And after that I think we will be scheduling in-person classes. So exciting to get back to that!

Happy Sewing and stay well,
Beth

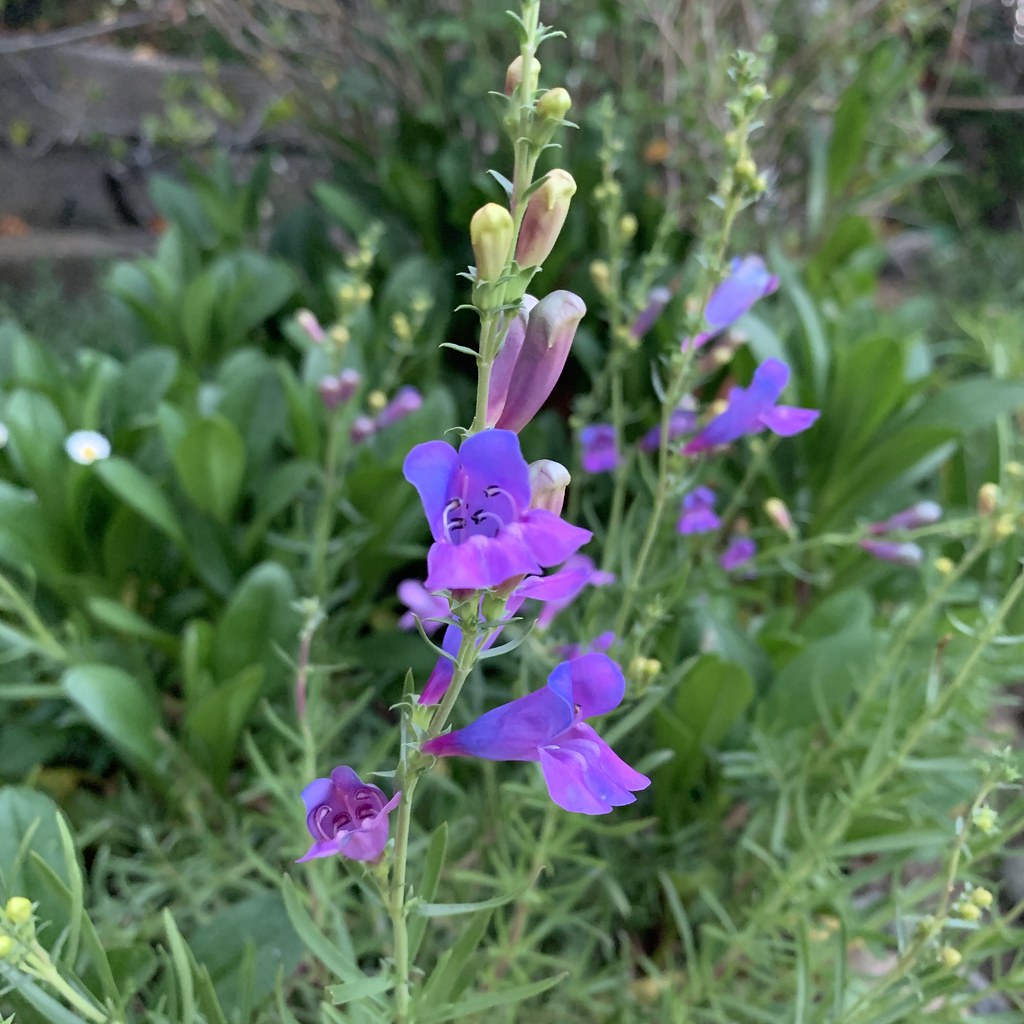
Today's garden photo is this purple penstemon which caught my eye at the nursery. I love the colors but I think it is an early bloomer and the flowers may be gone. Will have to do my research better in the future as I like things that put on a show for a while. But the color is lovely.


Untitled

Thursday, May 20, 2021

Burda 6429 top in silk charmeuse

A friend mentioned to me the other day that she hadn't seen a new blog post is a while and that is definitely true. Here in the bay area people have generally adhered to the health guidelines and so our chances for socialization have been few and far between. Contact has been limited to close family or friends that we have chosen to have in our "pod".  The normal times of meeting for drinks, a group dinner at a restaurant or going to meetings of various organizations all seem like the far distant past. However the uptake on vaccines is also very high here, most everyone I know has received it so we are coming out of our hibernation and it feels really strange, but in a good way. 

So that's a long way around to say that my interest in making new things for my personal wardrobe had reached a low ebb. Anything I sewed in the last 12 months has mostly languished in the closet waiting for the opportunity to be out and about. Wearing things for Zoom meetings just doesn't have the same effect and I might get some odd looks if I sat down for a video chat wearing my red wool coat. (actually I wore it once just before the lockdown - in fact to the last large social gathering for a very long time). In the last few months I've been occupied with doing online classes. It's become evident that teaching online is no walk in the park - I would say they are a LOT more work than in person and I'm looking forward to getting back to those for many reasons.

But I have made myself a new silk top. This is a Burda envelope pattern, 6429.

Green silk top 1

And now you can see the state of this corner of my garden. The roses are doing OK as well as all the California native plants which tolerate low water but oh that lawn...it should be nice and green now in May but we had about 40% of normal rainfall this past winter. Very worrying. But back to sewing.

I had a gift card from my last birthday for Fashion Fabrics Club, a website that I periodically order from and have mostly very good luck with. If you hunt around on their website you can find some real bargains. This is called hammered silk charmeuse, so it had a pebbly texture. I have another piece of this fabric in purple but I think I will save that until next winter. This color was very discounted and when it first arrived I wasn't sure about it, too much like avocado green, a color I don't wear (but yumm I love to eat avocados, I must go through 3 a week). 

It seemed like the ideal fabric for this pattern which I was wanting to try. Another contender for the category of "tops that look nice on computer screens".  I made the view on the right, the one without the waist seam. 

Burda 6429 pattern env

If you look closely at the technical drawing you can see that the sleeve seam is quite close to the neckline, only about an inch away. You attach the sleeve into the armhole as normal, but then you run a row of stitching inside which attaches the sleeve head further towards the center. 

Green silk top front

I neglected to take a picture on the dress form of the back view which I think is really nice. The pattern calls for a zipper and I basted it in, but then realized that I could easily get it over my head without so removed it. 
The slight trouble with silk charmeuse is that the sheen and texture of the fabric do show some wrinkles, I think they are noticeable on the dress form but not at all in real life where you are moving all the time. 

Green silk top back


silk top green 2

For a long time I didn't like this type of sleeve but now I do. It needs just the right fabric and probably an open neckline to balance out the coverage of the sleeve. 


Green silk top side

As for fit adjustments, I made a Burda size 38 at the neck and shoulders and graded out a bit at the side seams. I like silk tops to be a bit roomy and flowy. I think I made it shorter by about 4 inches. Now that it's finished I think the neckline is a bit wide for me, I always have this problem with tops with that shape of neckline. If I make it again I will pinch out about 1/4' on either side of center of the neckline. To make it stay in place I added some strap keepers which I just make out of some ribbon and small snaps. My hot tip for adding strap keepers is to sew one side of the snap on the garment, then sew the other part of the snap on the ribbon, then snap it shut and only then attach the end of the ribbon to the garment. Then you get it to just the right length.

Green silk shoulder snaps


Green silk top closeup

Now that I've sewn it up I do like the color, a green top that matches my green eyes. (yeah, mine are green but if only my eyes were that color!) 

Soon to be posted: I've just finished a dress that is from an older Burda magazine - I find such gems in the past issues I wish I had more of them but it's probably better from a storage perspective that I don't. 

Up next at Hello Stitch - my online class for June is Sewing Jeans. It's a month long class, meeting two nights a week. Jeans may seem daunting but they go together quite easily. For this class we suggest the Megan Nielsen Ash jeans pattern (stretch denim) which I have made in a variety of fabrics with various degrees of stretch and it works for any of them. Or you can use a different pattern if you already own one. 


Green silk top walking

So that's the latest - now that summer is on its way and lockdown is phasing out my sewing spark has returned. I just traced some shorts from the recent Burda so I guess that will be one of next projects, along with the jeans..

Happy Spring sewing,
Beth

Today's garden photo, the blossoms are just about gone and now we have tiny little oranges, but oh the fragrance when the orange tree is flowering is just heavenly.

Orange blossom

Saturday, April 24, 2021

Plaid wool coat with a Patrones pattern

Spring is trying to arrive here in N. California and as I said in my previous post, I've finished another coat that will have to hibernate until next fall. 

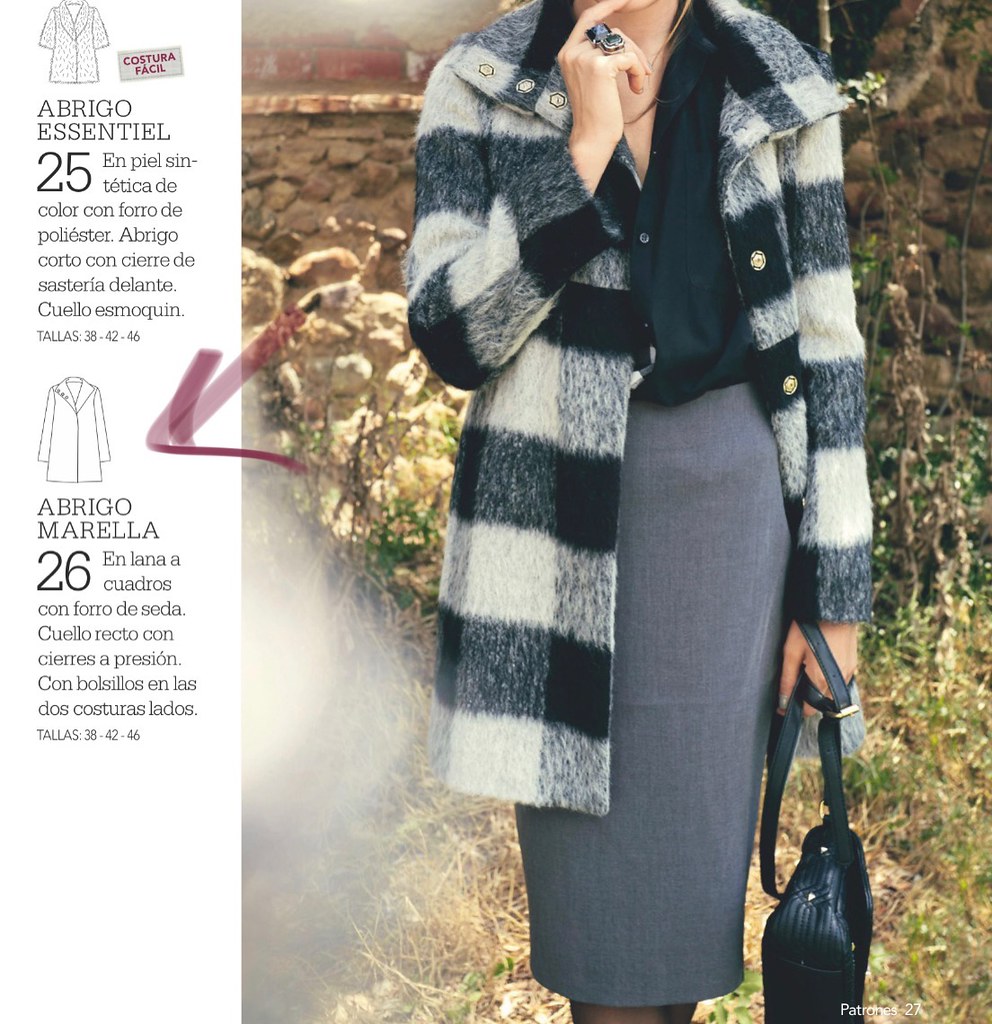
Combining a plaid fabric for outerwear can be a bit of a tricky thing to get right and I think this simple coat pattern worked for this fabric. As I mentioned in the previous post, this plaid is both uneven and unbalanced so I wanted a pattern that had very few seams. I received this fabric from Minerva and I have posted on their site here, but as usual I like to post everything to the blog.


Plaid patrones coat1

When I saw this fabric on the Minerva website I didn't think the plaid was as large as it turned out to be. So that meant a bit of a rethink on what to make with it. Originally I had planned for a jacket but I thought the large scale didn't suit the pattern I had in mind. That's what sent me looking for a simple coat pattern. Also this fabric is definitely the right weight for a coat and perhaps a bit too much for the type of jacket I like to wear. 

Plaid coat front 7

I think for a coat like this it's all about the plaid matching, if it didn't match then I would consider the thing unwearable.  My previous post has all the details on the pattern used which is from the Spanish sewing magazine Patrones Issue 402, pattern 26.  Last summer I first tried this pattern magazine, which is actually available as an app for iPhone or iPad. Here's the link to that post if you are interested in learning about Patrones. 

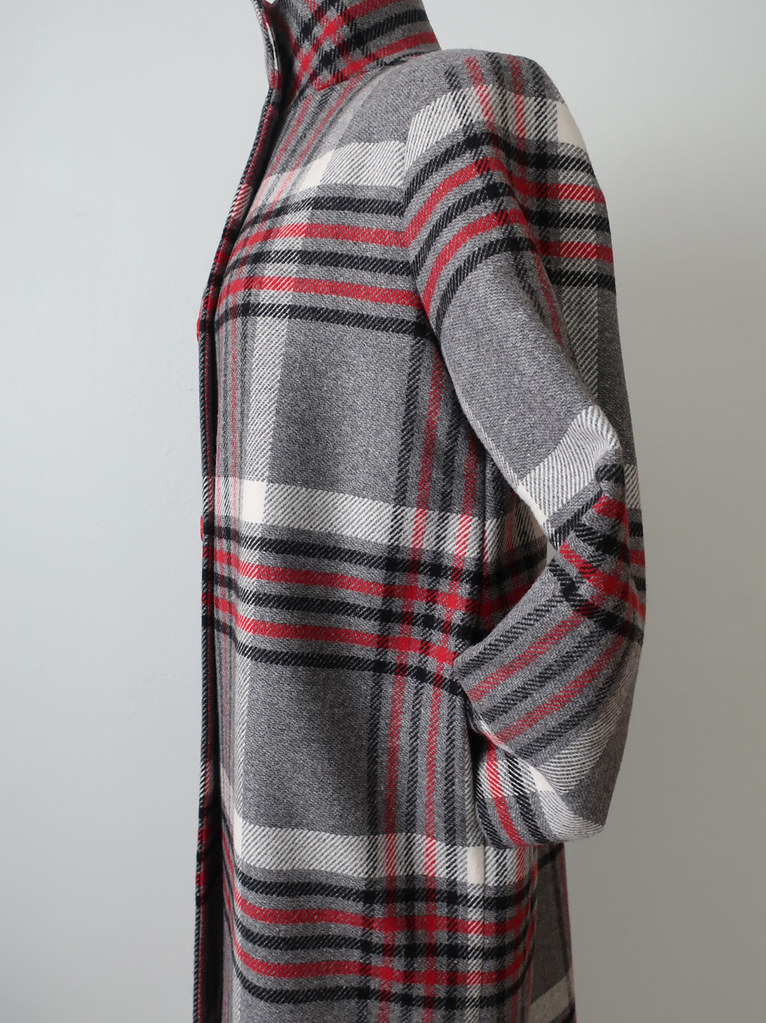
Plaid coat side view

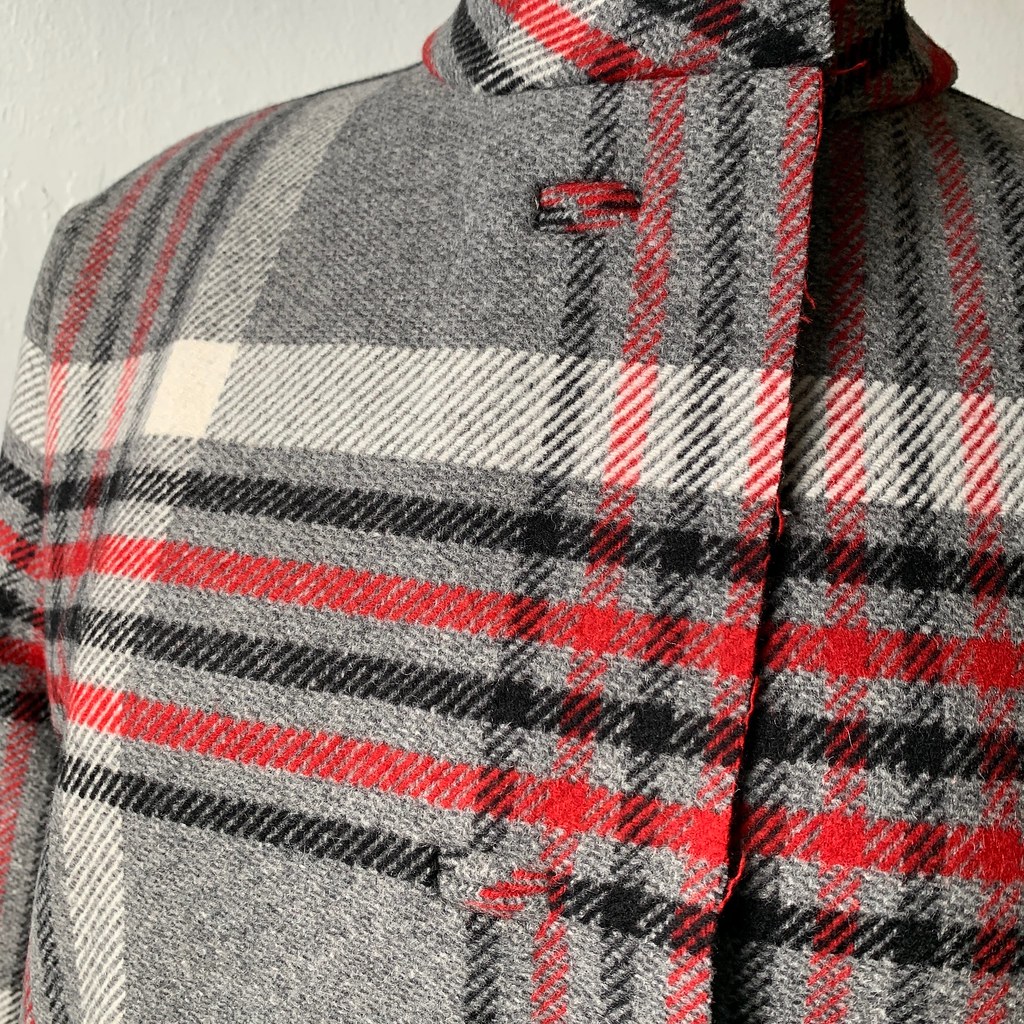
I really wanted the facing to match exactly as well, which you can see in this picture below. When you wear a coat like this it's often open and unbuttoned, so the facing shows a lot. 
Plaid coat front 6

However with this large plaid I barely had enough fabric to cut all the outer pieces and the facings needed a bit of help. I had to piece the facing at the bottom edge. I find that doing piecing weirdly satisfying. It's a pattern puzzle that's fun to solve - or at least I think so. Also piecing is a strange looking word, I checked the spelling and that seems correct but it still looks odd to me.  But the piecing is just about tolerable. 

Plaid coat piecing in front facing


Plaid coat inside lining

The lining is something that I received in a stash of fabric and linings that was given to me a few months ago. I get offered a lot of fabric and usually don't accept but this sounded intriguing as it was from a former instructor of fashion design. As it turned out I took a couple of bins which had a bunch of lovely wool crepes (which you will see sewn up next fall) some great linings, a lot of interfacing (always welcome) and quite a few patternmaking books plus teaching materials. Score! This red lining was ideal for this coat. 
 
plaid coat belted on me

I took these pictures a while ago on a very gray day, which turned to sunshine for the last few weeks. Meaning no coat wearing for me, although it's supposed to rain a little bit tomorrow and that will be our last for a while. 

Plaid coat back on me


Plaid coat 2

I kind of wanted to make a tie belt of the same fabric to give the coat some shaping but didn't have any to spare. With a belt it does give a bit more shaping although I probably wouldn't wear it with that, too much trouble to deal with a belt. 

So that's a wrap on my winter sewing - definitely time to think Spring! 
We have a couple of live/online classes on the calendar for the next couple of months, here are the links to sign up. Note we call it the Hello Stitch Garment Sewing Club - but you don't have to take each month's class. However the sewing camaraderie we've developed has been great, with lots of people jumping in and out depending on their availability and interest. The other night we were talking about meeting up in person for some fabric shopping! very exciting :) Things are finally feeling better here in N. California, businesses and schools are opening back up, people are getting vaccinated and I think we will have a much better summer than the previous one. 

Classes for May and June:
Sew Crop Pants  4:30-6pm Starts May 11  
Sew the Kalle Shirt or Shirtdress  7-8:30pm Starts May 11  (by the way - you can sew any shirtdress you would like if you prefer a different pattern) 

Hello Stitch has a lot of other really interesting classes online as well, embroidery, quilting, paper arts, here's the link.  I think after the pandemic problems are over, the live+online learning habit might continue. It will be interesting to see. 

Today I need to get outside and work on my hanging flower baskets, which have been neglected all winter, and of course more weeding. Tomorrow it's supposed to rain so I will plan on some sewing, I started a silk top in a color I'm not so sure about (grass green) but it may work out. 

Plaid coat unbuttoned1

Happy Spring Sewing,
Beth

Today's garden photo, a lone red tulip which survived the gopher attack. Honestly, most years that center island is filled with tulips but this year my little nemesis has caused some serious damage all over the garden. So I just had a few tulips and now I'm investigating more gopher resistant plants! 

Untitled

Thursday, April 1, 2021

Some jumpsuits for friends and the beginning of a new coat

Oops I've done it again, sewn up a nice winter coat as our weather changes to sunshine and no layers required. If I look back on the blog I seem to have done this a few times. Note to self, make the coat before November. Yeah, that's not going to happen as it is still quite hot here then so I couldn't deal with sewing a wool coat. Consequently I have another one that I may keep for next winter or pass on to a friend. That seems to be the theme of my pandemic sewing, which is just as well since my closets are bursting and I don't need anything. But there are so many interesting patterns and beautiful fabric that I want to sew up. 
I will get to the coat in a minute - this will be the first of two posts about it as it had a few interesting details. But what I have been busy sewing lately are a couple of different jumpsuits in anticipation of my April sewing class with Hello Stitch Studio. For this class we're doing coveralls. I think that is a great catch-all term for what are variously called boiler suits, flight suits, and jumpsuits. They all have a bit of a mechanic's workwear look and I had to be convinced a little, but now I'm fully on board. However I haven't made one for myself. (see above paragraph re: bursting closets) 

So to familiarize myself with these patterns I sewed the Merchant and Mills Thelma Boilersuit for Stacey, one of the owners of Hello Stitch. 

IMG_5724

What a great style, it has just the right amount of ease to be comfortable and plenty of pockets to carry everything. I did puzzle a bit over the instructions but that's why I sew up things before my class so I can explain the construction details. 
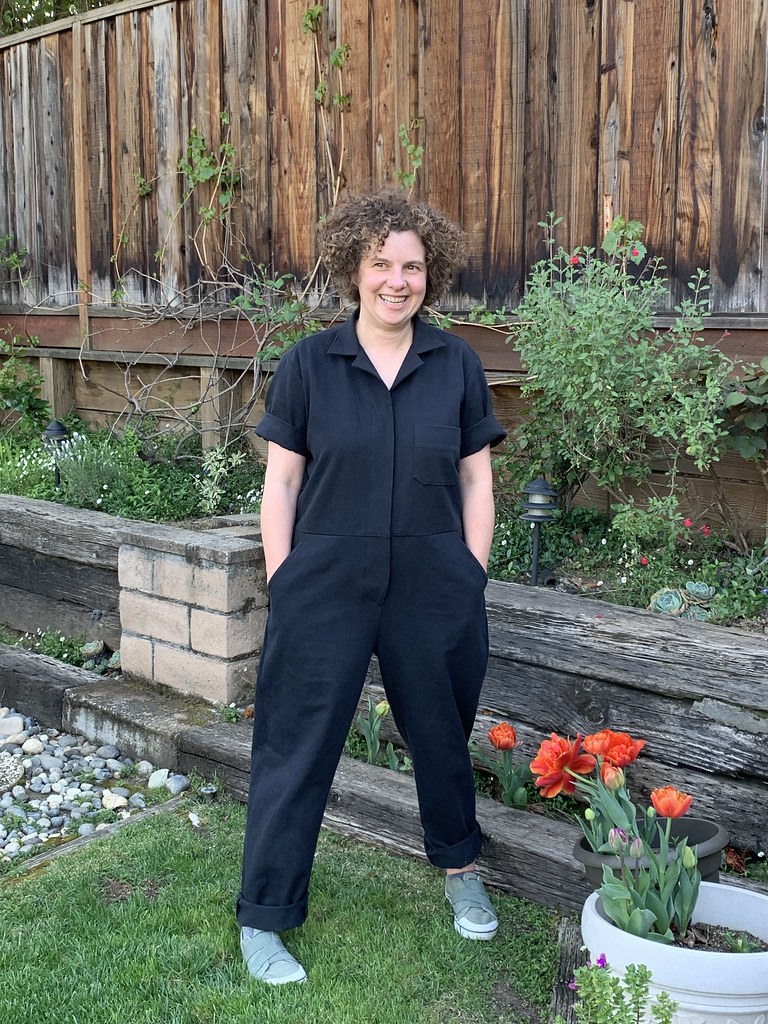
Not to be content with making one coverall, I managed another one for my friend Halnya (@zigzagstitching on IG). This is the Blanca Flightsuit from Closet Core Patterns, in a mystery fabric which came in the big stash of fabrics an estate clean-out gave me earlier this year. 

IMG_5731

Both these patterns have some clever details and some opportunities to learn new skills (hidden buttonhole placket, center front zipper with placket, both a bit tricky!)  
So if you are interested in making a coverall style jumpsuit the class starts next Tues. April April 6, 7pm. for four weeks. By the way - if you aren't interested in this specific type of jumpsuit but want to join in the class anyway that's fine, on Thursdays we sew together, check progress, I answer questions and troubleshoot how things are going. Plus we all get to have some sewing conversation with fellow fabric lovers. 
By the way, for both these garments I chose a size based on their measurements and the fit was nice so I think these styles have a bit of wiggle room and fit is not such an issue  - although I have some ideas about construction allowing you to fit as you go. 
Back to the coat. When I saw this fabric choice as a Minerva Ambassador I was really excited as I've seen a lot of very cool fashion-y plaid coats this past winter and wanted to try one. The slight trouble with plaid outerwear is that you have to choose your coordinating outfit kind of carefully, but I thought that the grey/red/black combo would work out with things I like to wear in the winter. Note I received this fabric from Minerva.com in exchange for sewing it up and posting about it. 
Here's a look at the fabric and a bit about how I match the plaid. This step was cutting out the coat front facings. I like the facings to match the plaid lines exactly as the outer part, and fortunately I had enough fabric to do so with a tiny adjustment which you will see later. For big stripes like this I draw them on my pattern pieces and it really helps to get everything lined up. I generally choose one dominant stripe and use that as my guide line, so here I used the white line. 

Matching plaid on facing patrones coat

Note that this is an uneven plaid - meaning it is not symmetrical so you have to approach it carefully and decide where you want the prominent lines plus how you can lay it out so it doesn't look unbalanced on the back, for example. 
Here's another look at the plaid matching.  I think this was matching at the side seams, front and back. Also for coats I often put a cut-on extension on the pocket area so that you don't see the pocket lining, so much easier than sewing something on. 

matching side seams Patr coat


This is the pattern I used, it's from Patrones digital app, I will have to look up which issue it's from. But my main goal was to use a pattern with minimal seaming and thus simple pattern matching. 
 
IMG_5348


I did a good rummage through my button box and found these 4 red buttons, which were entirely suitable. If I was running out shopping for every little thing these day I might have chosen some larger buttons but these are just fine and had the added bonus of being right there in my stash!

IMG_5347

That's a test buttonhole, extra large but I was trying to see if doing it on the bias was noticeable. I decided it was so I went with that. 
Since I took the photos as I went I'm just going to include all the bound buttonhole process photos for those who like details. 
1. Thread ladder
IMG_5346

2. Pin welts on outside of coat, mark stitch end with chalk
Buttonhole patr coat 3

3. Stitch on right side, turn and press
buttonhole patr coat4

4. later when facing is attached I slice open the facing, turn in edges and hand stitch to rectangle of buttonhole on that side. (I don't use the "window" method)
buttonhole patr coat 5

Here's a look at the coat in progress, with buttonholes mostly done but before I attached the facing.

IMG_5351

So that's what I've been up to. Spring has definitely arrived, time to get out the sandals although we all wish it would rain again - it's going to be a very dry summer. 
Perhaps my next project will be a spring dress for meeeeeeee! I have my first vaccine and with the next one a couple of weeks away I think this summer will be a big improvement over last year. 

Happy Sewing and stay well. 
Beth

today's garden photo, I don't think much of azaleas, as they bloom for a short while and then they are done - but oh when they do, the color is fantastic. 

azalea