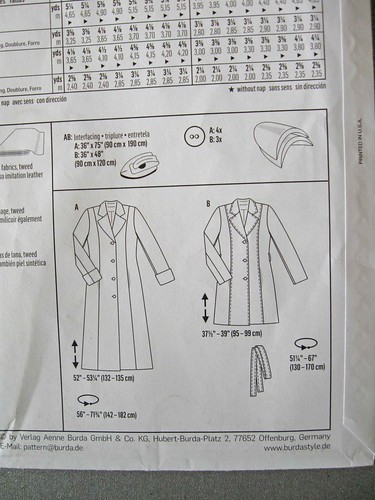
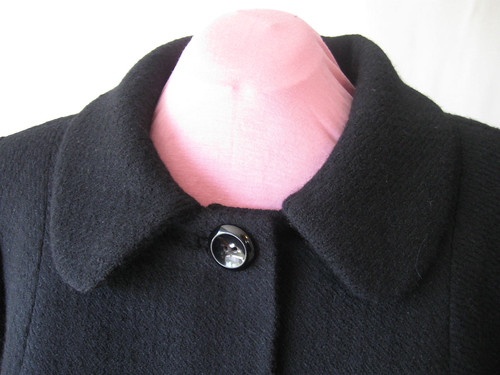
I used Burda 7169 for the most part with a few significant changes. Note that this is a collar+lapel style and I wanted to make a peter pan style collar with the center front continuing up to the top.

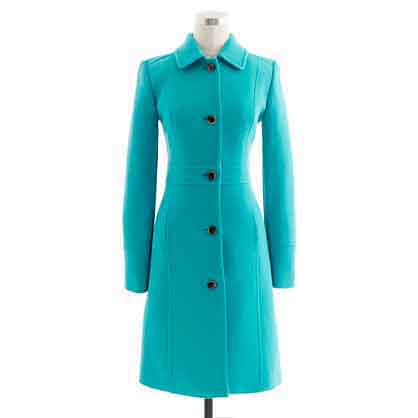
I did find a Simplicity pattern that was almost an exact match for the inspiration style, which was a coat from J. Crew, their Lady Day Coat, pictured here on the right.

To prepare my first muslin, I started to fit the Simplicity pattern but about half way through that I decided that the fit would never be right. The Burda pattern is a plus size pattern and I have realized this past year that for fitted garments on someone who is well endowed, (well, ok, busty) the plus size patterns are a really good place to start. I think they kind of save you from having to do a complete overhaul on the pattern, with the cascading changes to the armhole, sleeve etc and then your standard size pattern is a confusing mess. By starting with a plus size pattern where the bust measurement is near your own I think the pain of fitting is reduced considerably. Although I do recommend choosing the pattern by your high bust measurement, not the full bust. (my friend Shams who writes the Communing with Fabric blog has a page on resources for fitting the busty figure).
Now for some editorial comments - women with plus size figures are not usually 6 feet tall. The fitting difficulty is compounded by the pattern designers (and for that matter RTW clothing) as things get taller as the bust/waist/hip measures increase. Adding another level of difficulty for the beginner/intermediate sewer and making the wearer look like they are drowning in fabric. I know I mentioned a few weeks back that I would do some posts on plus size fitting and I plan to get there soon, probably in May. With all that said, there are still plenty of pattern alterations to do no matter what size range is the starting point but I think the possibility of success is greater. There are some very good Simplicity plus size patterns and if you can look past the styling the basics are workable to convert into a variety of styles. (Simplicity 2917, a nice fitting princess seam dress can be modified to make almost anything).
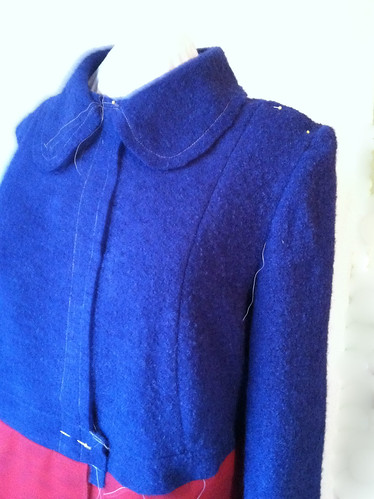
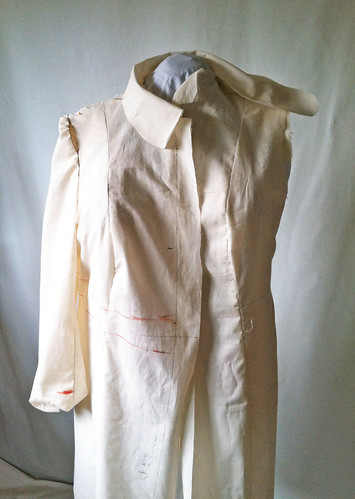
Muslins...this stage of the project is not very pretty! First one in cotton, trying to work out the collar and figure out the placement of the waistband. Final one on the right, I decided I needed to try out the top half of the coat in a like fabric, so I used this hideous mystery blend boucle that was a very similar weight to the actual coat fabric. Also by the time I had finished the body of the coat I had altered my pattern pieces so much that I had NO idea what size sleeve to use. I had not cut out the sleeves as I knew that it would be fitted last and be affected by all the fitting changes. In the end I just guessed but used about a 1.5 inch seam allowance on the sleeve cap to allow for adjustment.
The fabric for this coat came from Britex Fabrics in San Francisco. Heather went shopping in January and as it happened they had a stock of coating fabrics from J.Crew, which were on sale that day. Talk about luck. We bought the buttons there as well on another shopping excursion. I am happy with the collar, that is the only pattern piece I used from the Simplicity, but modified it to fit the neck opening.
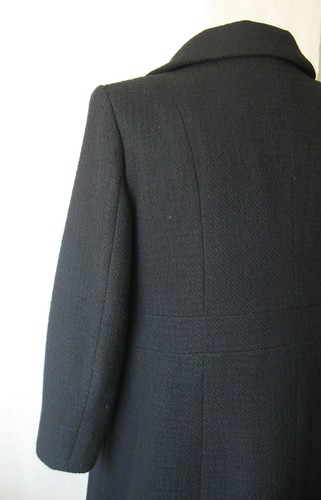
Photographing black garments is really a challenge but in this one above you can see the princess and waist seaming, and the 2-piece sleeve which is a sign of a good coat pattern - and helpful for fitting.
The inside is never seen but the interfacing is what makes a coat like this. Hidden under that lovely wool are interfacings from Fashion Sewing Supply - the are fantastic and all I use these days. Along the center fronts and the under collar I used Pro-Tailor Deluxe fusible (which Pam tells me they no longer have, Pro-Weft is equivalent). For the upper collar and the coat facings I used Pro-Sheer Elegance fusible. On the hems I used Pro-Weft fusible.
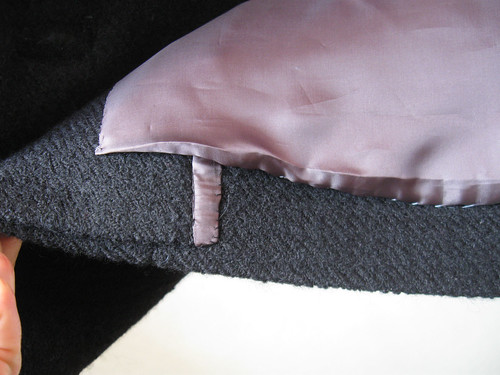
Lastly, the lining. I used a Bemberg ambiance lining in a charcoal grey. I encased the facing edge in a little bit of lining as this fabric is very prone to unravel, and pressed in a half inch pleat in the lining hem to allow for movement.
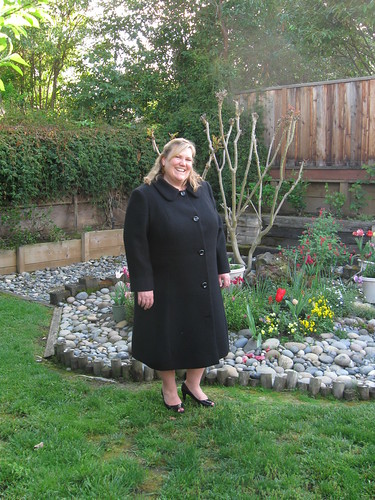
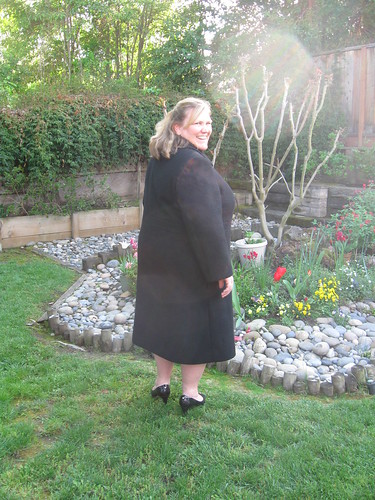
One last photo of Heather wearing her coat. Who doesn't get a little goofy during photo sessions and try the over the shoulder pose? We do. For a look at all the photos of this project, here is a link to my Flickr set with all the photos.
Previous posts on this coat: bound buttonholes and coat modeled by Heather.
It is so windy here today that some of my tulips have had their blooms blown right off, but I did see this one the other afternoon when I was outside with my camera. In those grab-bags of bulbs found on the sale rack at the garden center are some real gems and this is one of those ruffle edge ones. Like fabric !
Happy Spring Sewing, Beth



Beautiful work!
ReplyDeleteBundana
@ http://www.bundana.blogspot.co.uk
Heather has a gorgeous custom fit beauty of a coat and I bet she feels so good about that. Great work!
ReplyDeleteFascinating read Beth, and look forward to hearing your words of wisdom on plus size fitting. And that tulip is very pretty!
ReplyDeleteYou are so professional! The result is amazing and she looks very happy with her new coat. I have that simplicity pattern, maybe next winter? All I can think right now is colours and Spring, just like your tulips!
ReplyDeleteSuch beautiful sewing - all your preplanning and care for detail really paid off in this coat for Heather! This coat will be worn for years ... J
ReplyDeleteWow, how gorgeous! I love the style, the fit and the beautiful fabric. Lucky Heather!
ReplyDeleteAlso, what a nice touch at the lower edge of the facing. I must remember that.
ReplyDeleteI love this coat -- the details are so much more beautiful in person. Your tulip is so pretty! My hydrangeas look like they are coming back this year -- so excited! However, the hibiscus are gone so I'll have to find new flowers to plant.
ReplyDelete