
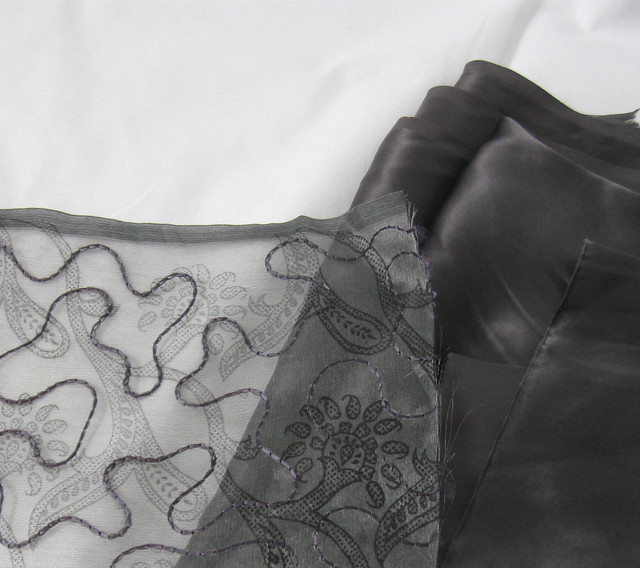
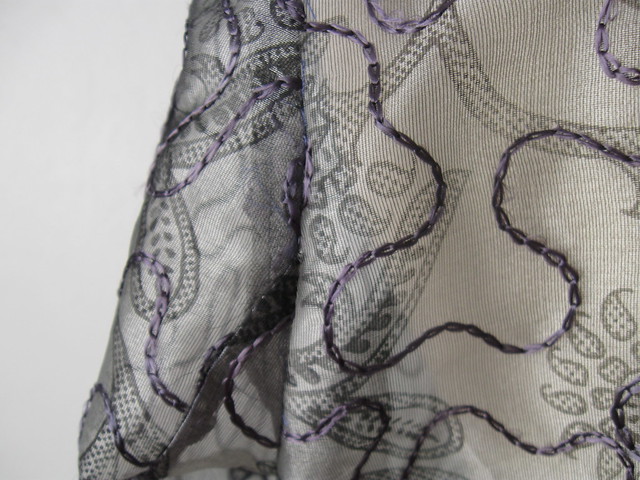
Vogue pattern 8089 is out of print but I see it pop up on blogs and Pattern Review once in a while so I think a lot of people have it in a drawer somewhere. It has a lot of potential, style-wise and could be made into a lingerie piece, a lightweight linen wrap style, or even a lined and quilted version. I was making this for my sewing client who brought me these beautiful silks, an embroidered organza for the jacket and silk charmeuse for the pants.
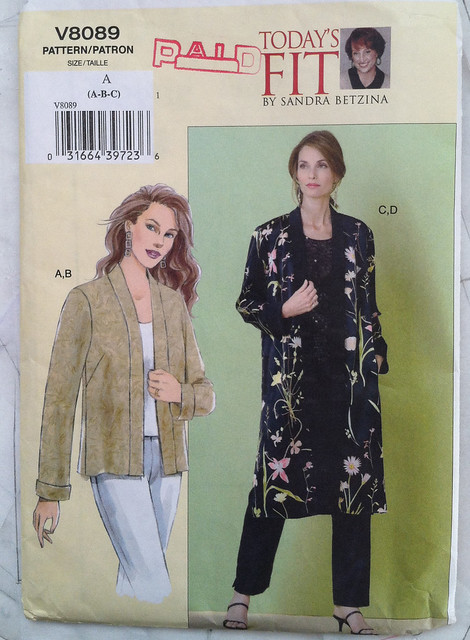
The pattern envelope and the technical drawing.
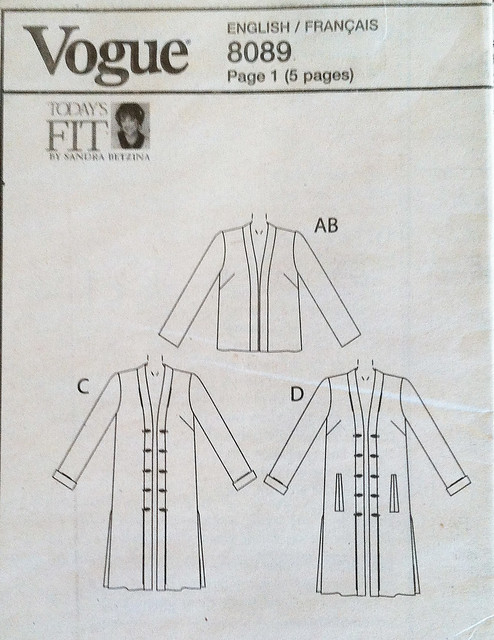
You can see from that drawing that the shape is really boxy and calls for 1/2" shoulder pads which I omitted. My quick verdict on this pattern: it turns out well but needs more adjustment than I expected.
Ready for some details? Sandra Betzina for Vogue patterns have her own sizing system so I made a muslin based on the wearer's measurements (High B 36" B35" W 30.5" H 38.5") using the pattern size C. Which is virtually an exact match for her so you would think that would turn out well, right? Nope. I have made 3 of these Vogue Today's Fit patterns and had a lot of adjusting on each of them but I can't say that they have any one issue, there were different issues on all of them.
This photo is not the greatest as I was taking the pins out of this muslin before tossing it in the trash and then realized that it would be a good visual. The most glaring adjustment is that big vertical pleat down the jacket front. I had pinned that out on the body and then I mark where my pins are using a Sharpie marker or pencil. You can see it is a bit wonky, not the same amount pleated out from top to bottom but that is OK, I just pin it and mark, then deal with it later on the flat pattern piece. I put some blue pieces of paper at the top to indicate where I added at the shoulder, even though the wearer is about 5'3" she has a longish torso, in particular the upper section, which I dealt with before I even made this muslin and will show the detail in the next photo.
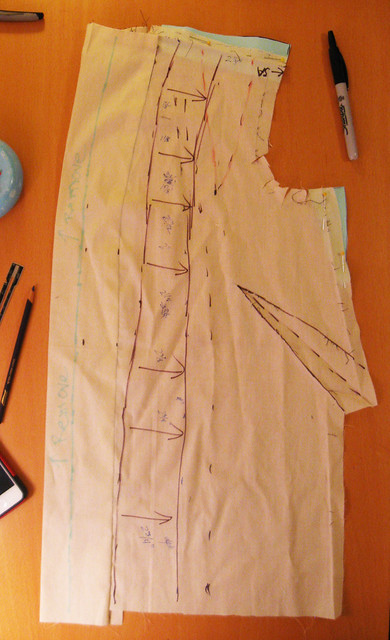
Another big change on this pattern which unfortunately is difficult to see in the photo above, I reduced the width of the neck/front band by about 1.25 inches. As designed it is really wide, almost 3 inches and looks very odd. Final band is about 1.75" and proportionally looks better.

- Lowered bust by 1" (horizontal 1" addition both front and back)
- Reduce width of front pattern piece, about 1.5" (vertical tuck front). Note what that does to the shoulder seam.
- Reduce width of back pattern piece to match front, vertical tuck. Also affects shoulder seam on back.
- Build shoulder seam back up on both front and back to make up for the vertical tucks.
- Add another .5" height on front shoulder seam based on muslin fitting.
- Armhole adjustment. See the original shape of the armhole. I think any pattern where the front armhole has that very sharp curve is problemmatic, and on most people causes it to feel very tight across the chest or even the arms. If you make a top/dress/jacket with sleeves and it seems to fit but feels like your armhole is strangling you, take a look at the pattern and see if the angle of the armhole is as this original shown above. If you make that addition it will give you a lot more room and be more comfortable. If you do that then what about the sleeve? You can baste in the sleeve to test and then either adjust the ease a bit or possibly remove a bit at the underseam.

The last adjustment was to add a little bit of a gusset to the underarm to add a bit more mobility, comfort and reduce the strain on this sheer fabric. If you look at the front and back pattern pieces above you can see there is a small triangle wedge added at the top of the side seam both front and back. I added .5" tapering to zero about 3" down. Correspondingly, I split the under sleeve at the center dot, added 1" in width and tapered that to zero at the wrist. It really doesn't make the sleeve much bigger below the elbow but adds a the needed bit of space at the underarm. In total there is a 1" wide diamond of extra fabric under the arm which disappears when the arm is down but just adds to the ease and keeps this sheer and delicate fabric from ripping when you reach for something. You see this feature on a lot of vintage patterns, often it is a sewn on gusset but for a small addition you can use this method. Note tt does not make up for a sleeve that is too tight across the bicep - for that you need to slash and spread the actual sleeve piece.
To test out all these adjustments before I cut into that pricey silk I made a final (hopefully) muslin using some garage-sale find fabric that was very similar weight. (unusable for anything else despite the pretty color due to fade marks). Look at that lovely arm-shaped sleeve :) Good thing I made this version as the sleeves needed a good 2 inches in length and I would not have been happy had I cut them out too short!

So it is all finished in time for holiday wearing. Here is a tiny sneak peek of the finished jacket. I did french seams throughout (what else could be done with this sheer fabric?) but due to it's crispy organza deliciousness they were the easiest french seams I have ever done.
I hope these pattern fitting details are helpful and I will try to do more with my next projects. I think it's time for something fun and casual, I need a quick and easy result. Although I saw this post recently and now I want some plaid wool shorts too!


Was that aqua jacket your muslin??? It is beautiful.
ReplyDeleteThank you - a really useful post. It was interesting to see the changes that you made in the armhole shape - I think I'll be trying that soon!
ReplyDeleteSuper interesting and helpful post. Thank you so much for guiding us through your steps.
ReplyDeleteI find I usually adjust the sleeve on patterns. The sleeve cap is frequently too tall for my tastes... I don't like a puffy sleeve. It always makes me think of Dynasty and the 80's. Thanks for showing your process!
ReplyDeleteThank you for sharing all these details! I love underarm gussets - they're common in handknit fisherman ganseys that are made with very little ease, and it's a fun trick to knit them in.
ReplyDeleteDid I read correctly that your client has a high bust of 36 and a full bust of 35"?
ReplyDeleteA lovely result, especially the sleeve.