
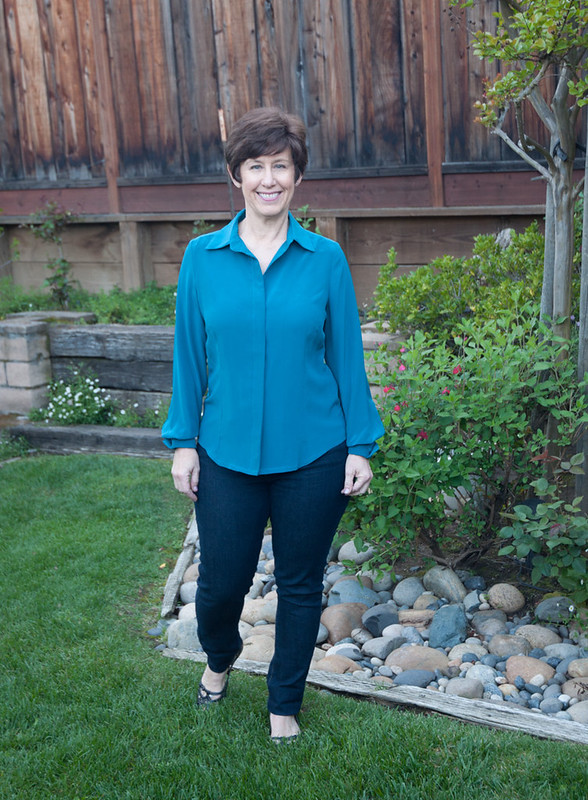
This is my 8th version of this pattern, Simplicity 2339, an Amazing fit pattern. The one with the hideous version on the envelope.

I really like these Amazing fit patterns although the more recent ones have seemed a bit wacky - like they used up all the really nice basic ideas in the beginning and now are just adding peplums or other details to previously existing patterns. (but on the the other hand isn't that the case with all patterns?)
Anyway - if you can figure out what size to make for your shoulders and work your way down with fit (usually taking out some ease) then I think they are really useful as basic patterns.
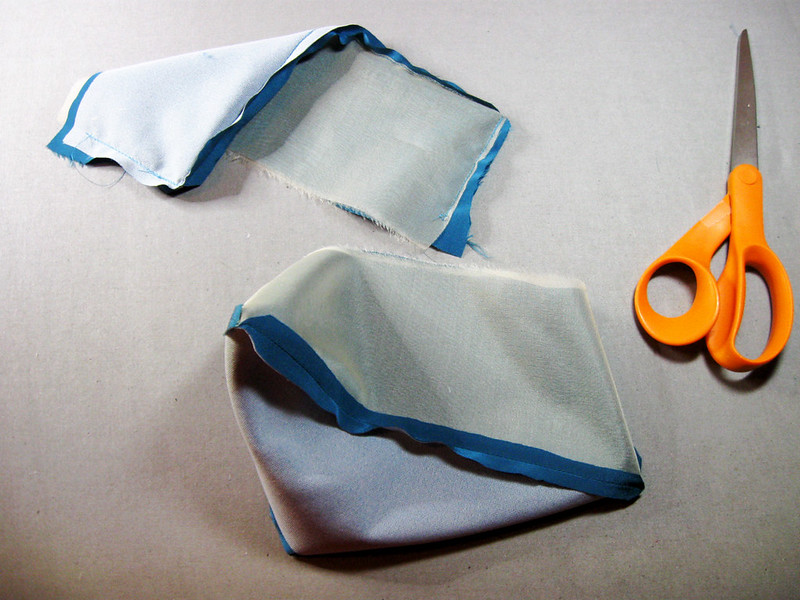
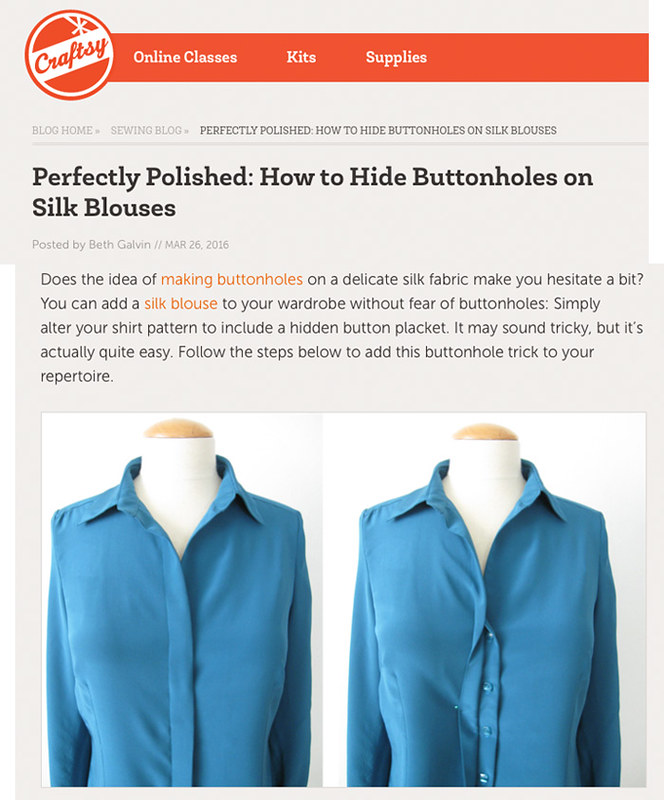
Back to this shirt pattern - I have never made it as designed - with the button band sewn on as a separate piece. Every time I have fiddled with the front to change the placket. This version is the biggest change, with this hidden buttonhole placket. Today on the Craftsy blog there is my step-by-step post on how to create this placket. It takes a lot of photos to explain it so instead of adding them all here I will just link to that post. Plus it is color-coded! (Ok don't laugh if you look at it and please let me know if it makes sense)
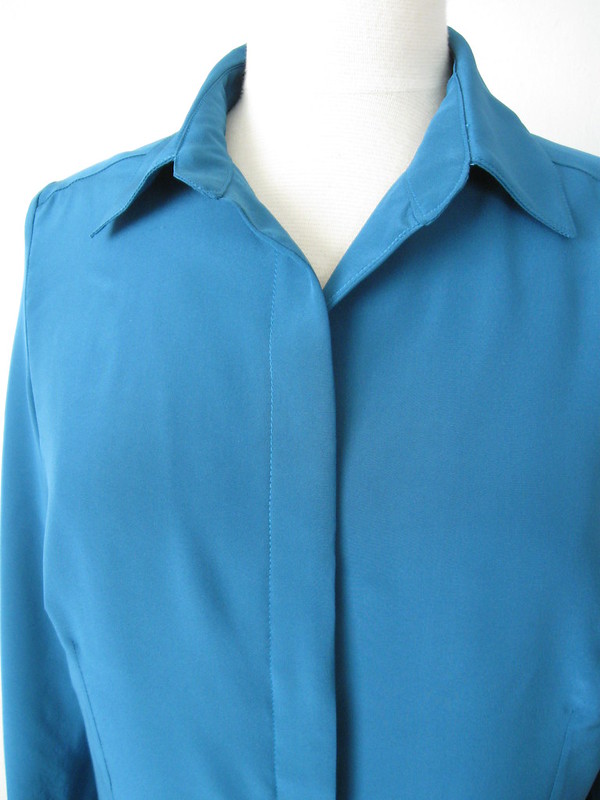
Every time I look at this I just feel relief that any potential buttonhole mishap in this delicate fabric is hidden from view. Plus the sleek front seems right with silk crepe de chine.
A few other construction details, and how rewarding is it to press silk? Am I weird to enjoy this? It is just so satisfying to get that nice crisp crease on a silk fabric. Of course sometimes the iron is in the wrong place and you create a crease where it is not wanted but in a nice silk fabric it usually presses out again. I bought this fabric at Fabric Outlet on Mission St. in San Francisco during one of their 40% off sales. By the way, Tanya did a great post recently on fabric shopping in the bay area, here is the link. Check it out if you are traveling this way.
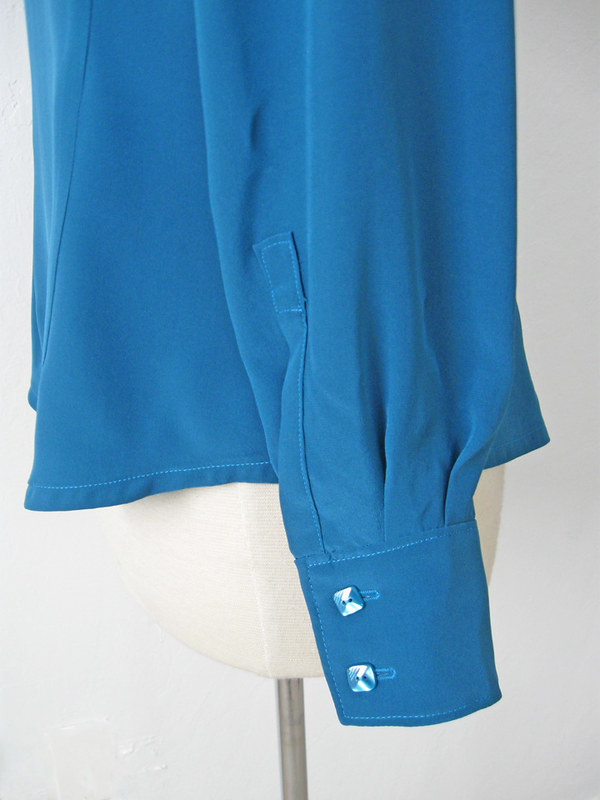
I had these buttons in my button box. Score! I have no idea what I bought them for but I had 12 so perfect quantity for cuffs and center front. Plus they are square which is a detail I like. Also I finally figured out (sort of) my stupid buttonhole foot on my modern Singer machine. Although I still prefer the vintage attachment on my slant needle 1950's Singers but sadly it is not working properly (things don't seem to do as well after you drop them on the floor from height).
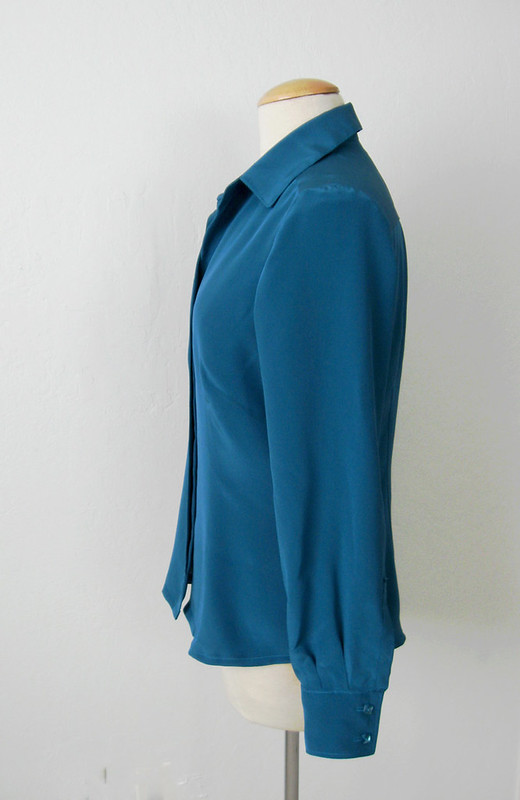
There are a few different ways to do cuffs, such as attach from the inside and topstitch down on the outside, plus the reverse of that. I like to attach right sides together and then press in place, lastly stitching all around the cuff to enclose the inside. Though before I get there I press the seams open using my pressing stand.
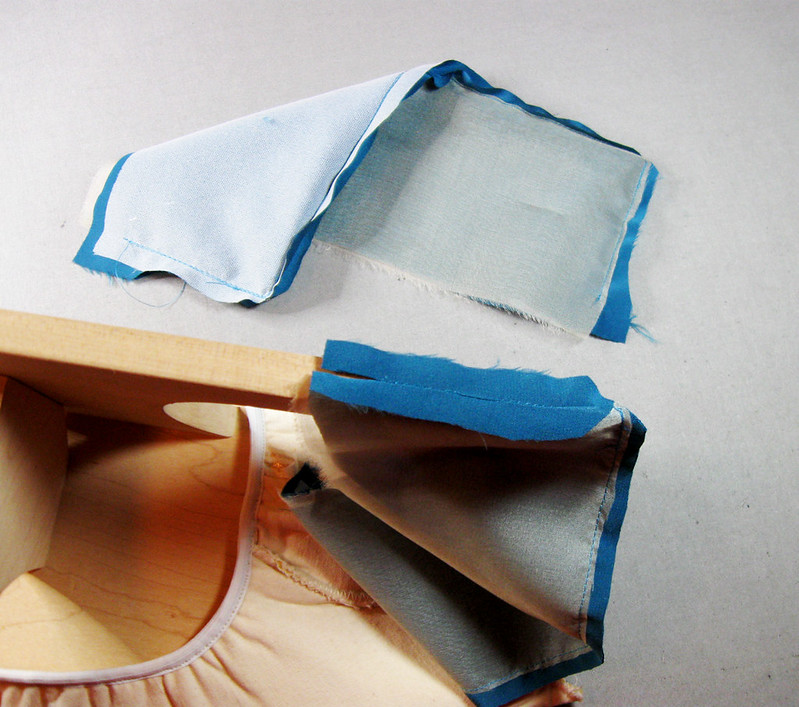
This is the same technique I use on lapels, collars etc. Press the seam open and then flip over and press on the edge - it is the way to get the sharpest edge possible.
Looking at this photo I see that I used 2 types of interfacing in these cuffs, a lightweight fusible on one side and then silk organza on the other side as they seemed a bit wimpy with only the fusible.
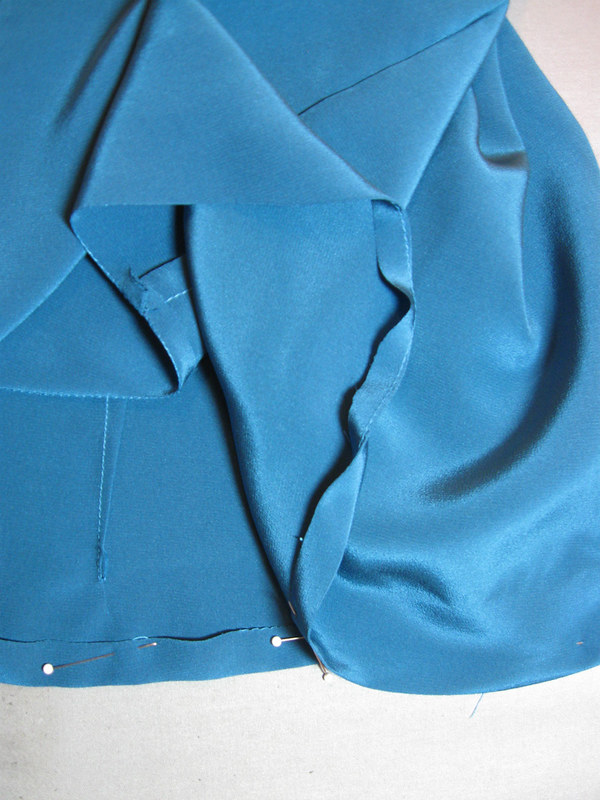
For the hem I stitched about 1/4" from the edge, which makes it easier to press and then turned and pressed again about 3/8".
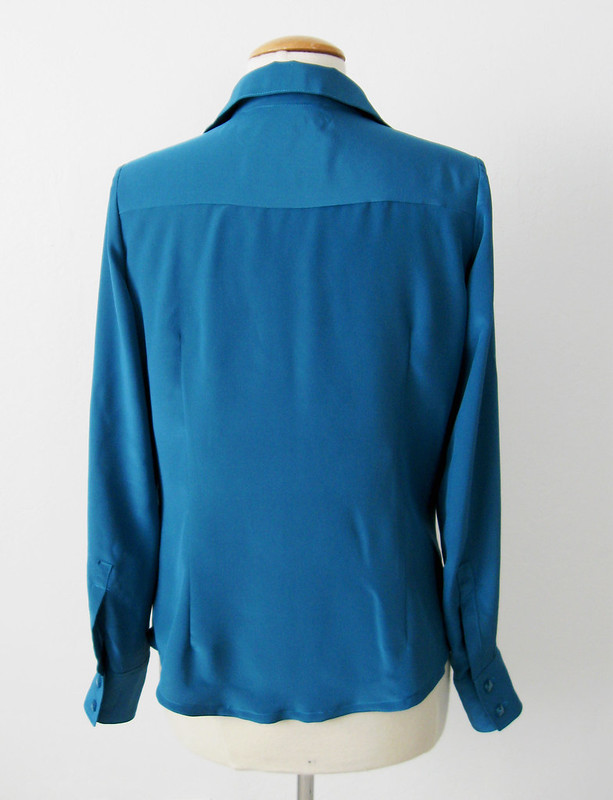
Typically I don't get that worked up about inside finishing but with a silk shirt it is nice to do french seams and there are really only the side seams and the sleeve seams to do that way so it did. I have narrowed the sleeves on this pattern a good about - like 1.5' as they seemed way to big around the arm for my liking. The shirt seemed too long when I tried it on so I cut off a bit of length and now wondering it is a smidge too short. And the other silk one I thought was too long! I am like Goldilocks - when will it be just right?
Here is the link to the post on Craftsy. I just noticed that I didn't show the hidden buttonholes :) but you can see them in the photo below.
So all in all, I think this is my new favorite colors. Plus I have some wool in this shade with a black pencil stripe plaid which will probably make an appearance in the fall for some type of jacket.

Up next - I am sewing up a dress using fabric I designed on myfabricdesigns.com. I'm far from being an artist but it is interesting and of course you can choose the colors you like - prepare for some eye-searing fabrics in the next months. Although the first one is not crazy at all and came out really nicely, quite lovely and sewing up into a spring dress. Although not in time for Easter - which may be rainy but we are not complaining! Check out all that greenery behind me - the roses are loving it.
Happy Easter to all,
Beth
another gorgeous tulip appeared this week. I think I planted a few irises as well but they have yet to appear.


"Things don't seem to do as well after you drop them on the floor from height," said me, about every electronic I've ever owned. Including the computer I'm typing on right now.
ReplyDeleteThis silk blouse is really beautiful. I'm so impressed with how tidy it is. And I like the craftsy tutorial. I'm really afraid of button holes still, and a hidden placket is a good solution. I'd only seen Suzy Furrer's method in a craftsy class, which doesn't use a facing at all. Yours is good to keep in mind for coats -- the original reason I'd bought her class. But my feeble brain was having a hard time figuring out how to deal with the added placket in a faced/lined situation.
It really does look lovely on you Beth. I am sure Simplicity would sell a lot more of this pattern if they put your version on the cover!
ReplyDeleteBeautiful blouse, Beth and that is one of my favourite colours. The hidden button placket really adds a classy look.
ReplyDeleteGorgeous blouse and love the hidden placket.
ReplyDeleteOh, I love this color! So nice on you! The tutorial is really clear, and the color coded pieces are helpful , I will try this hidden placket .Thank you.
ReplyDeletePerfect! That's all I can say.
ReplyDeleteStunning--such beautiful attention to detail. And that color looks fabulous on you.
ReplyDeleteJust finished looking at your post on the Craftsy blog, and I must say that is the best tutorial method I have ever seen......love the color coding and your instructions are really well written.
ReplyDeleteGorgeous blouse! I worked hard last summer on fitting a princess seam blouse, and found that while I love it in cottons, I'm not so happy with the 2 silk ones I made. I just don't like the princess seam in silk, so it's back to the drawing board. Hope you'll make some more blouses! And btw, and not to brag but as a mini-review, I don't fear buttonholes--my Pfaff 7530 does just great.
ReplyDeleteLove the colour and I am sure the silk feels wonderful to wear. Thanks for the Craftsy tutorial.
ReplyDeleteI love the blouse! I just read through the tutorial, and I absolutely love that you used the different colors of fabric. That is extremely helpful for beginners like me! I haven't made a button-front blouse yet, but there is one on my (long, long) list of planned projects, so I bookmarked your Craftsy post!
ReplyDeleteBeth, this blouse looks amazing on you and the color is spot on. The hidden placket instructions are very clear and quite different from what I have seen before. Have you ever tried to attach cuffs in one go as Kathleen from Fashion Incubator shows it in her tutorials? It worked quite well for me!
ReplyDeleteThat's such a beautiful blouse and a lovely color on you. The hidden placket and unique buttons on the cuffs really make it a standout.
ReplyDeleteBeautiful! And I love the hidden button placket. I'm intrigued by your comment about choosing the right shoulder size and then working your way down. I've been shirt making like crazy lately trying to figure out my issues with shoulder fit. Do any pattern companies list shoulder measurements? Or how do you even measure your shoulders? How do you know you are choosing the right size? I've found I'm so much more confused about shoulders now than I ever was before :)-
ReplyDeleteThis is a beautiful blouse and I love the color. The fit is amazing!
ReplyDeleteI really like this blouse Beth! You did an awesome job on the fit and the hidden button placket! I am definitely partial to the color blue, so you know I love the color of your fabric too! Beautiful work!
ReplyDelete