

So after a good look at the accumulation, and knowing I was going to New York with the high likelihood that I would buy some fabric there, I decided to see what exactly was taking up space. You know what takes up a lot of space? Wool coating fabric. No matter how you fold that stuff it is bulky. And I still had a large piece of this green wool coating - previous used in part on my Tri-Color Coat. This realization combined with a Burda pattern release where I fell hard for the idea of a peacoat. Here's the Burda pattern that grabbed me, Burda Detachable Fur Collar Coat 10/2016 # 119. So I promptly purchased that downloadable PDF from their website and got to work making a muslin.
Which was OK, but just not quite my thing.
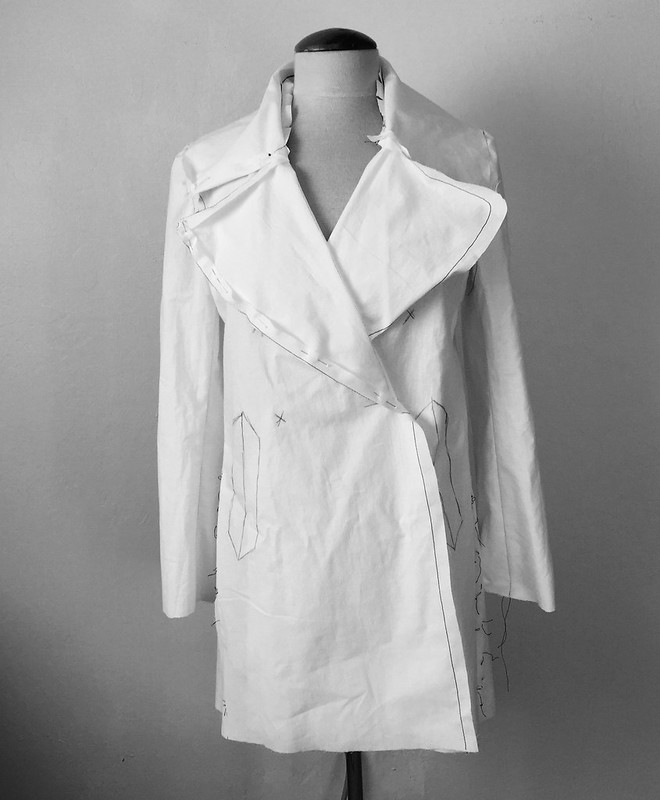
I did like the welt pockets that give it a casual peacoat look, and the lapels, while large are proportional and just right for this style. But I am just not a fan of double breasted coats. In theory I like them, they look so sharp and stylish, but wearing, I always feel like there is too much fabric, particularly when it is not buttoned. Also this coat has a princess seam side panel, so no actual side seam and that makes fitting just a little bit more work.
Anyway - I was looking at it on my dress form and though, hmmmmm, very similar to another pattern I have already made - which fits perfectly - my black wool coat. Which I made at the end of 2010. It pays to keep good patterns!
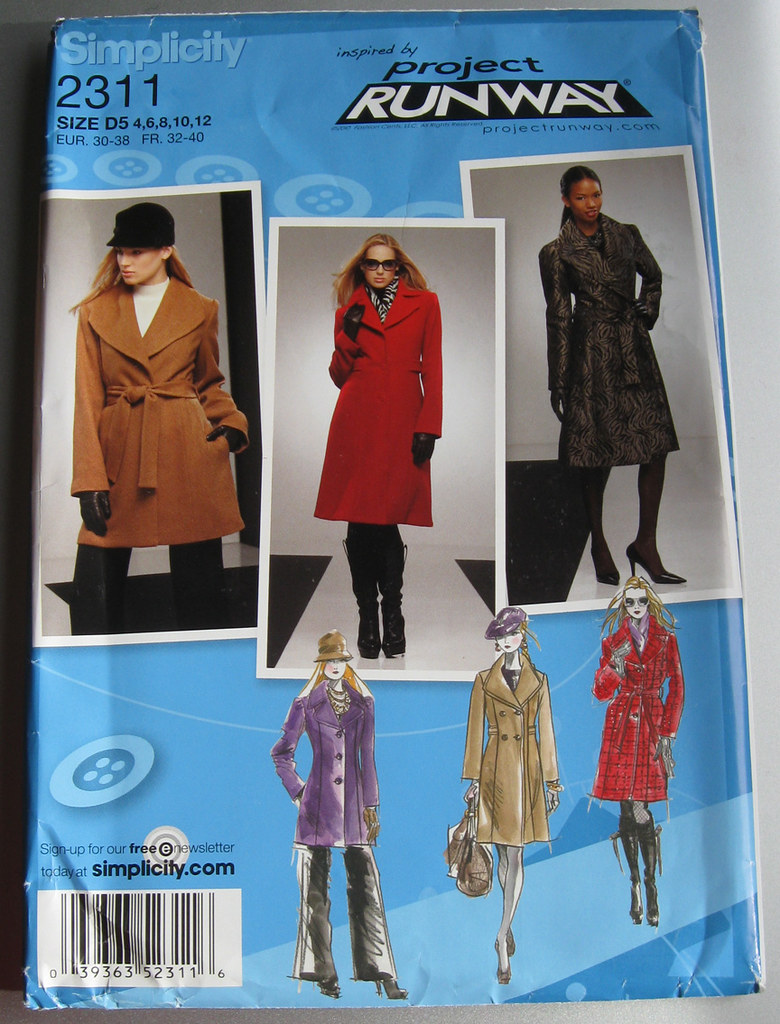
Here's the pattern I used, Simplicity 2311. I mentioned this pattern on Instagram a while ago saying that it was discontinued, but Simplicity commented that it was still available. I think it is a really good pattern. with a lot of options in the envelope (you know I love a pattern with multiple views).
Onward to sewing details. I happened to take a lot of photos while sewing this one - so this is for all of you who like to see the construction details up close :) That is the beauty of sewing a pattern repeat: no fitting, just sewing.
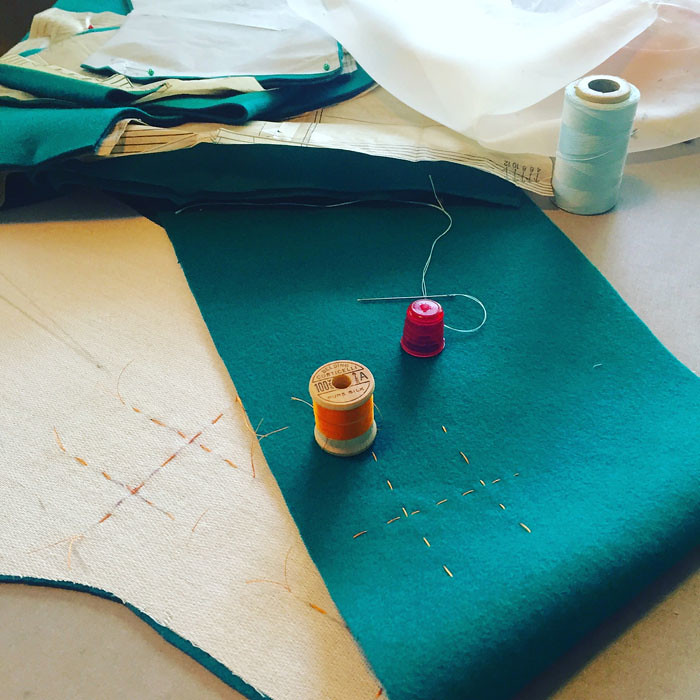
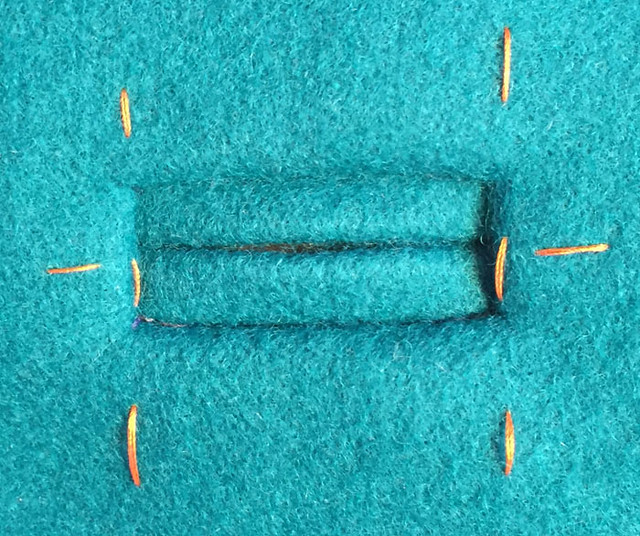
First up - buttonholes. Well actually first up is cutting out, doing all the pattern markings with tailor's tacks, applying the interfacing and then it's time to get down to actual sewing.
As you can see, I love being able to mark on the inside of coats or other wool garment that have interfacing, you can use a lead pencil and it is so easy to see. The dart in the top left corner is marked in pencil, actually connecting the dots of the tailor's tacks. Then I mark the placement of the buttonholes with pencil on the interfacing side. Then use silk thread to do a thread trace of the actual buttonhole. The vertical lines are just as important as the horizontal, as they keep the buttonholes in a line down the front of the garment.
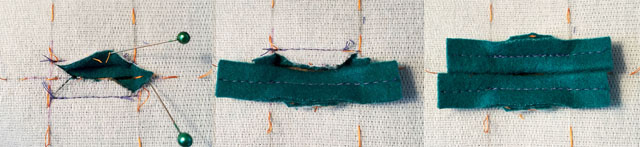
Next I place the buttonhole welts on the right side of the fabric. I tend to use 1/4" wide welts on thick coating fabric, mostly because they look proportional and also because I can't seem to make them any narrower in thick fabric like this.
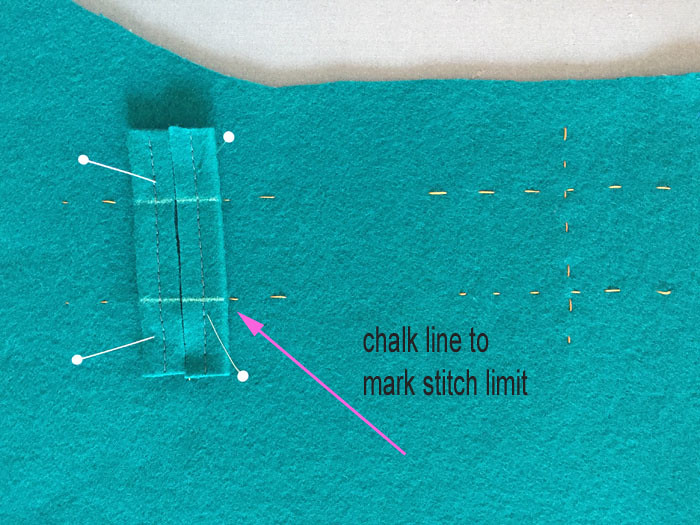
This is where the vertical lines come into play. Using them I run a trace of chalk perpendicular to the stitch line, which tells me where to start and stop stitching.
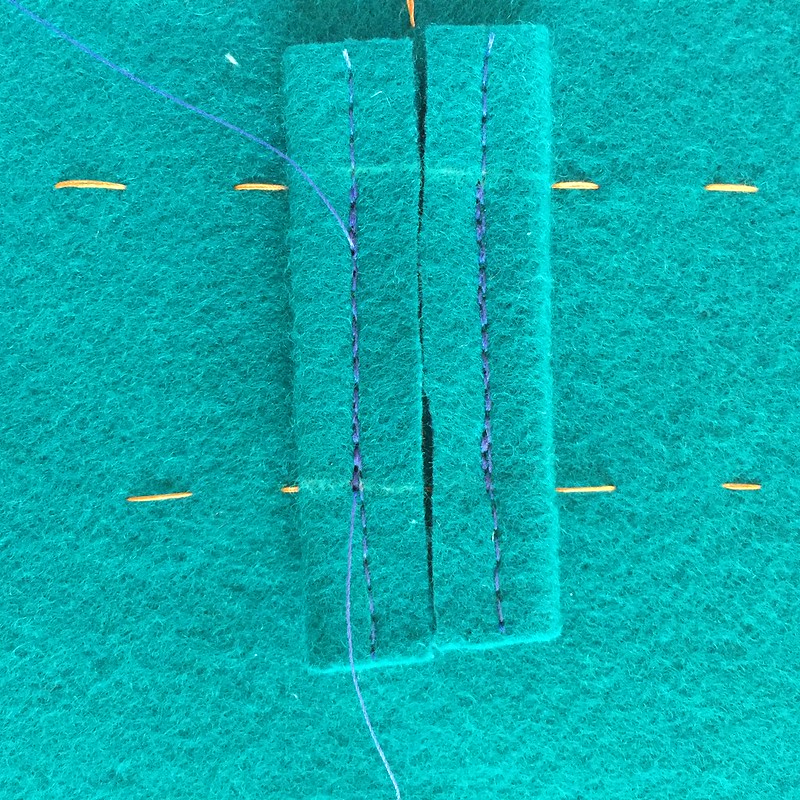
There it is, stitching in a purple-blue thread so I could actually see what I was doing. OH yes, make it easy on my eyeballs and use a thread shade just a bit different than your fabric for spots that are fussy and the stitching won't show - so much easier to see what is what.
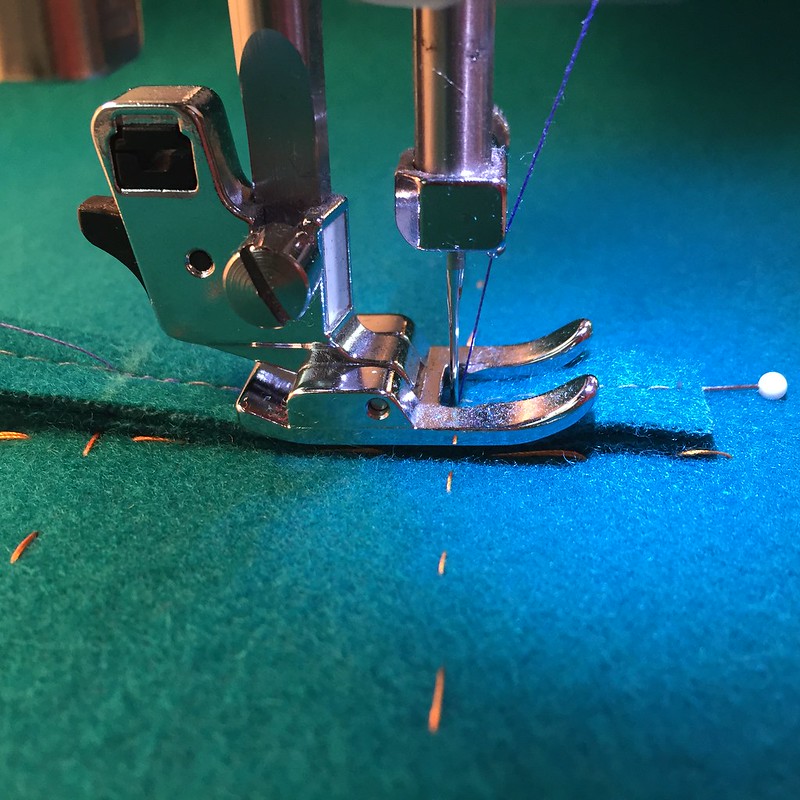
Gratuitous presser foot shot. Also - I count the stitches. WHAT? Yep I do. So the needle goes in, and I stitch forward 3, back 3, then forward counting until I get to the end, then back 3. And if all goes well than each buttonhole will be the exact number of stitches.
Here is the backside of the buttonhole.
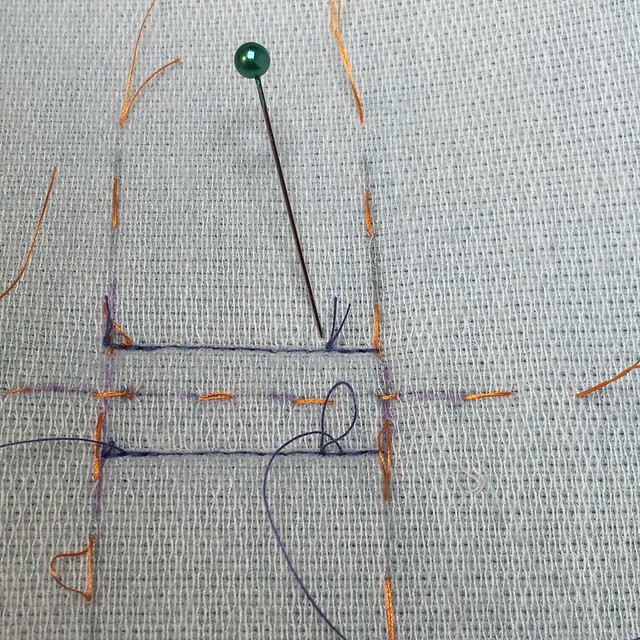
Where I pull the threads to the wrong side and tie a knot. Necessary? I dunno. Just the way I was taught so I do it. Plus there are little sewing tasks that give pleasure, and for some reason I like to tie knots. In fact I have to keep myself from doing it in unnecessary places!
OK, just a few more views of this buttonhole. And yes, I do draw the slice. Which I do with a sharp scissors - it is so important to get those little triangles the right size.
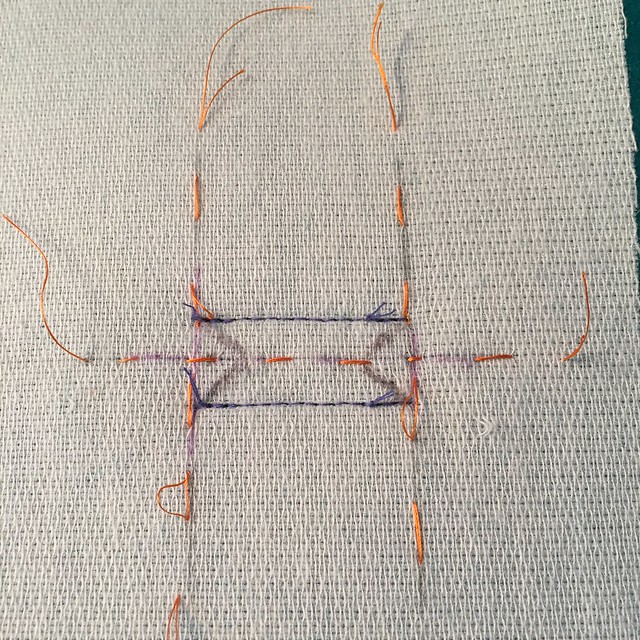
As with any thick fabric it is a bit fiddly to flip the welts inside, but a good press and steam gets them nice and flat.
All done! well almost. The facing isn't sewn on so that step where you attach the facings to the buttonhole is still to come but that is a lot later in the process.
Onward to other parts of the coat. The two sides of this fabric seem indistinguishable but I don't want to risk it, so I mark all the wrong sides with tailors' wax chalk.
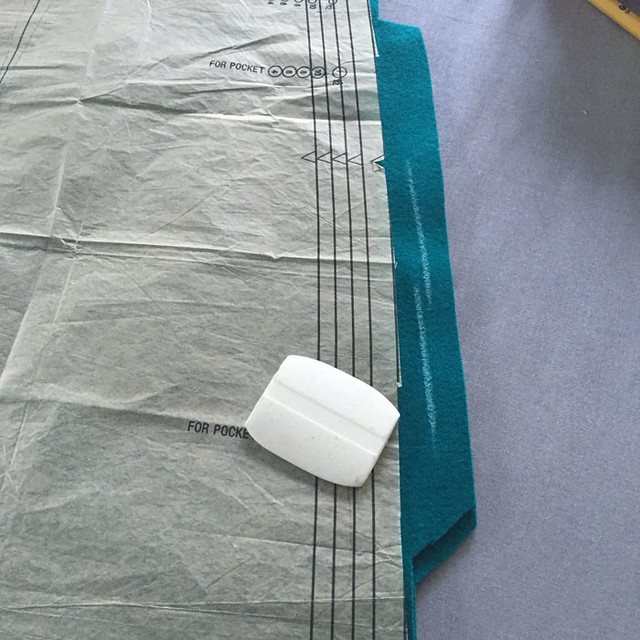
Also I can't stand it when I can see the pocket lining on a side seam, it's one of those things that once I see it I can't look anywhere else and it spoils the garment for me. Ditto for novelty linings - I've seen lots of garments on blogs etc with printed or contrast linings and think, oh cute! But when I sew something, particularly a coat I want the lining to disappear. So I extend the pocket seam allowance at the pocket placement and then the pocket lining starts about 1" further into the pocket. That lining will never peek out.
As for the inside of the buttonholes - jumping ahead in the construction, typically I would slice the facing open over the buttonhole. Yes I boldly slice (after basting the facing in a little square around the periphery of the buttonhole so it stays in place and oriented over the buttonhole exactly. And then just flip the fabric inside and hand stitch. Which was impossible in this thick fabric. So I hand stitched the first one and didn't really like the result. For numbers 2 and 3 I machine stitched in the ditch around the buttonhole and trimmed away the fabric. Much better. I should have done that with the first one but oh well. And defied my usual rule of making test and practice buttonholes.
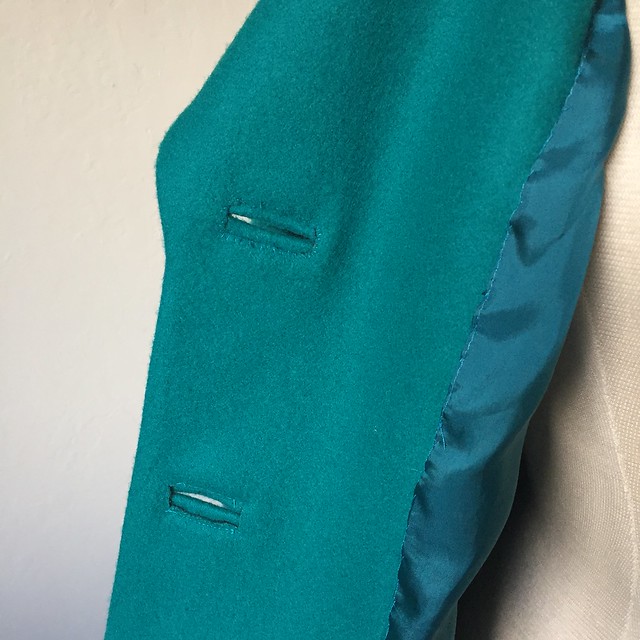
So not my neatest finish but workable and if anyone is close enough to examine my stitching I would probably give them a swift kick. Unless I invite you to scrutinize - which I probably would at some sewing meet-up where we all compare notes and details.
By the way - the buttons I bought at Stone Mountain - my go-to spot for buttons. Aren't they a perfect match and just enough detail to add a little something extra to the coat.
Next up, the collar and lapel. Which I will reserve for the subsequent post as this one is getting a bit long.
By the way - even though I moan and groan about the end of summer and not liking the fall patterns, I have quite a few finished items so lots of blog posts for the rest of this year. And with some rain returning the weather is cooperating for some sitting down with my laptop and a cup of coffee.
By the way - over the weekend I planted about 100 tulip and daffodil bulbs. As I do it I think "one for me and one for the squirrels" my garden nemesis! (nemeses?) anyway I hope to see them in springtime. The bulbs - not the squirrels.
More to come on this coat, collar, lapels, extra interfacing, trimming. All the fun stuff.
And my shipment from Kashi at Metro Textiles in New York arrived this week, so now I have to decide which of my latest fabric purchases I will start with.
Happy almost Halloween sewing. I make a solemn vow each year never to enter Joann Fabrics the week prior to Halloween - it is downright scary in there with the costume sewers and the fleece. Oh the fleece - who buys it? what do they make? It is an avalanche of fleece. And most of it feels so plastic-y. Eek.
Beth
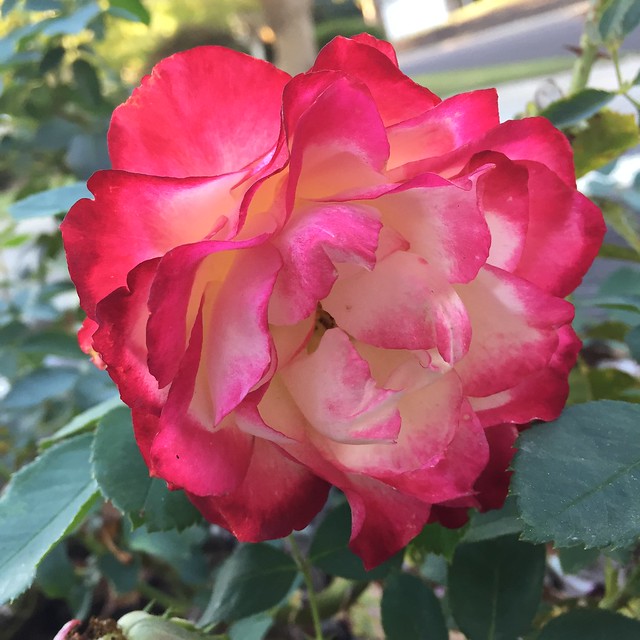
Today's garden photo, despite the change in the weather still a few rose blooms struggling to appear.


Your work is always impeccable! Another stunning piece. I am mulling over that Burda peacoat too, but very confused by their welt instructions; I can't figure out if that pointed shaping is achieved with topstitching, or are the welts actually that shape.
ReplyDeleteI so enjoyed your post today. Wool coats are so fun to make. I live in FL and remain undecided whether I should make a wool coat for those rare cold days or trips up north. I love the details of your post. Great instructions and pictures. I look forward to your posts.
ReplyDeleteBeautiful! (of course) Thank-you - I needed that - one more little push to get moving on doing something about winter coat sewing. It's not such a big deal once you get going, I know, but it seems such an onerous task when there are much easier/faster projects on hand.
ReplyDeleteI adore bound buttonholes but after getting decent ones for my first wool coat, the facings look so sad. The tutorial had me use silk organza to face, which was fine but it peeks out and why I didn't just think to tack it first is beyond me. I've seen other people make an actual machine-sewn buttonhole on the facing, what do you think of that technique?
ReplyDeleteThis color is so stunning and having patterns that are sure fire winners make life so much easier!
Oh, and I used to whine about the Project Runway patterns because the envelope back is hopelessly confusing but I have never sewn a PR pattern that I didn't love, so there's that :)
As always, the coat is impeccable! Gorgeous. Buttonholes are so visible in a plain fabric and yours are just perfect. I do love the buttons. It's so hard to find just the right button.
ReplyDeleteAnother beautiful coat, Beth! What a great pattern--so much potential all in one little envelope. And thanks for the close look at your bound buttonhole process, too! Counting stitches may sound silly but it makes perfect sense for this application; you definitely gave me some more things to think about, for sure.
ReplyDeleteAnd I have to sheepishly raise my hand as one of those people who does occasionally buy the fleece at Joann's. =/ In my defense, I use it to make enormous stuffed sharks so the fleece becomes something pretty spectacular in the end! But there's definitely a weird internal conflict as a garment sewer going up to the cutting counter with 3 bolts of fleece and being legit excited about it, LOL! So just pretend that everyone you see buying fleece is making giant stuffed sharks out of it! =)
-Abbey
What a beautiful coat, Beth! The color suits you so well. I was admiring it at Wine & Cheese With Kashi and wondering if it was in your blog archives... Even better to read about it now!
ReplyDeleteWell that looks absolutely fabulous and I love the rich colour. I think the muslin looks pretty good too, but I agree with you about double breasted coats, they look lovely buttoned up, but I often wear my jackets and coats open and then they just go lopsided.
ReplyDeleteWhat perfect buttons! The whole coat is lovely.
ReplyDeleteIt's a lovely coat and thank you so much for the construction/sewing tips I do like the way you do things.
ReplyDeleteWonderful work, Beth! This is why I LOVE reading your blog.....for all the details on sewing tips and techniques. I have learned so much from your blog. Thank you! I have a couple coat patterns and fabrics sitting on my shelf also waiting to become my own masterpieces, thanks to your teaching. Hope your day is blessed!
ReplyDeleteAlso, I went to New York this past July and toured McCall's Patterns (on my bucket list as my mother designed for them for about 20 years) and went to Mood Fabrics, B&J Fabrics among others. My sweet husband gave me a 2 day sewing trip in New York at the end of our vacation. I had a blast walking down Fashion Avenue, stopping for coffees to get recharged, taking pictures of the garment district statues of the garment worker as well as the needle and button (iconic landmarks of the garment district) and I am quite certain I bought the exact same navy wool jersey you purchased and showed a picture of in your post on visiting NYC. Looks like you had a blast as well!
Perfection, gorgeous color and look forward to the final shot. I do like your idea of counting stitches on the bound buttonholes. Can always learn a thing or two from you. Enjoy your blog!
ReplyDeleteYou have elevated the pattern to haute couture status. Totally gorgeous - colour and workmanship.
ReplyDeleteThanks for your tips too - always valuable, even for experienced sewers.
Beautiful colour and perfect buttons, looking forward to reading the lapels and more ;o)
ReplyDeleteWhat a wondeful colour! Beautiful workmanship as usual :)
ReplyDeleteBeautiful coat, and beautiful color wool! I recently took a Master Tailoring class from Susan Widawski, and am planning on embarking on my first wool coat in a lo-o-o-o-o-o-ng time soon! So much satisfaction from making a quality garment that lasts, right?
ReplyDeleteGorgeous! I'm looking forward to all the posts on this beauty. I love bound buttonholes. When I was taught to sew back in the 60s, they were on all of the jackets and coats made by my mom and aunts.
ReplyDeleteWOW! What a stylish coat! I LOVE it, especially the color is beautiful. Thank you for sharing the details and your beautiful garden photo.
ReplyDeleteGorgeous coat, especially the color and buttons.
ReplyDeletehello what kind of interfacing did you use for this coat
ReplyDeleteHi Beth! Beautiful coat and the color is stunning on you! I ditto Tosha's question, what interfacings did you use for the body and the collar? I find interfacing to be so daunting, trying to get the correct weight and hand. Any link or recommendation would be so very much appreciated!! Kindly, Sandra
ReplyDeleteI have yet to sew welt buttonholes. They are beautiful.
ReplyDelete