A downside of having the flu was that I certainly couldn't go out and buy buttons, so I boldly just made them and figured I would find an appropriately sized button later. Which might turn out to be easier said than done...I did stop by Stone Mountain on Sunday but didn't see anything that looked good with this coat. I have a specific thing in mind which is often trouble when shopping. In any case
the buttonholes are done. I chose a dimension that I thought looked good with the proportions of the coat. They are 1 1/8" wide and the welts are 1/4" wide.
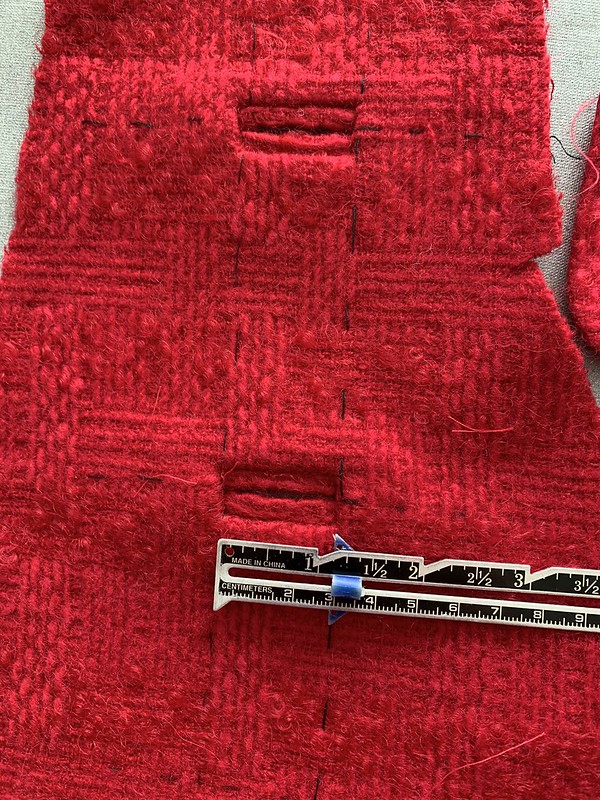
Shown above is my tester. I always do two of them, spaced the distance apart that I'm planning for the coat or jacket so I can see proportions, how they look when completed. I'm a bit of a Goldilocks when it comes to details like this, never use the markings on the pattern and just play around with spacing until it looks juuuuuust right.
With a coat like this with a waist seam you have to take that into consideration, and also the collar area. So I start just under the collar, and also decide where near the waist I want a button, and then work my way from there.
Once I've decided spacing, then it's time to mark the buttonholes. I do it very similarly to a welt pocket, additionally creating what I call a thread ladder so the placement is even from the edge all the way down. Note I've marked the edge seam allowance stitch line, which is 5/8" in from the edge, and then the second red line is the coat center front. The buttonholes should cross over the center front a bit, between 1/8" and 1/4". Depends on the size of button and the thickness of fabric.

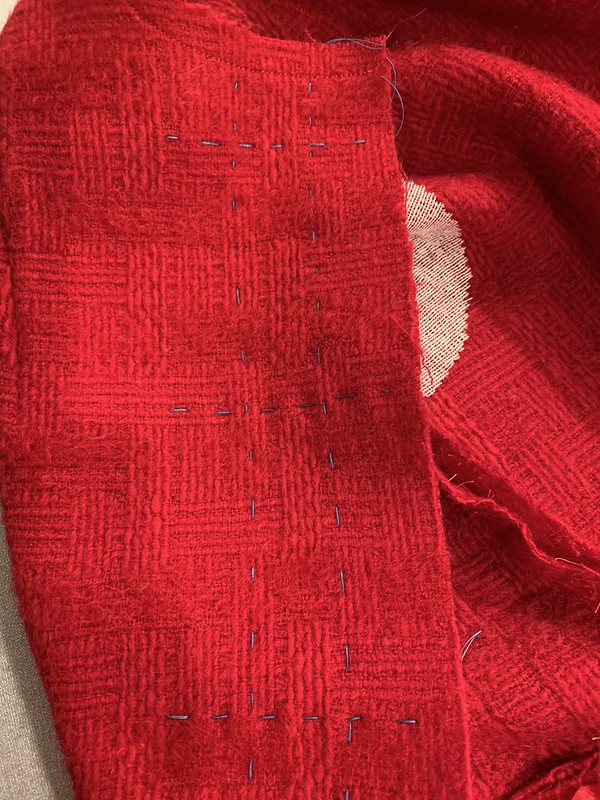
Once it is marked in pencil or chalk on the inside I go over each line with a thread trace. Using a very contrast-y thread color. This is going to be used on the right side so that's why the contrast is important. Mostly I use silk thread for this as it pulls out so easily. No knots, just running stitch along the lines.
Shown below, this is what you see on the right side, the blue thread ladder which makes it possible to place all the buttonholes accurately and evenly.
Next step is placing the welt pieces across the button placement marking. I neglected to take a picture when I sewed the welts. I've found that it's easier to start with a length of fabric, about 1.5" wide, press in half with a good crease, then stitch 1/4" in from the folded edge, and then use the rotary cutter to trim the other side so the finished welt is precisely 1/2" wide.
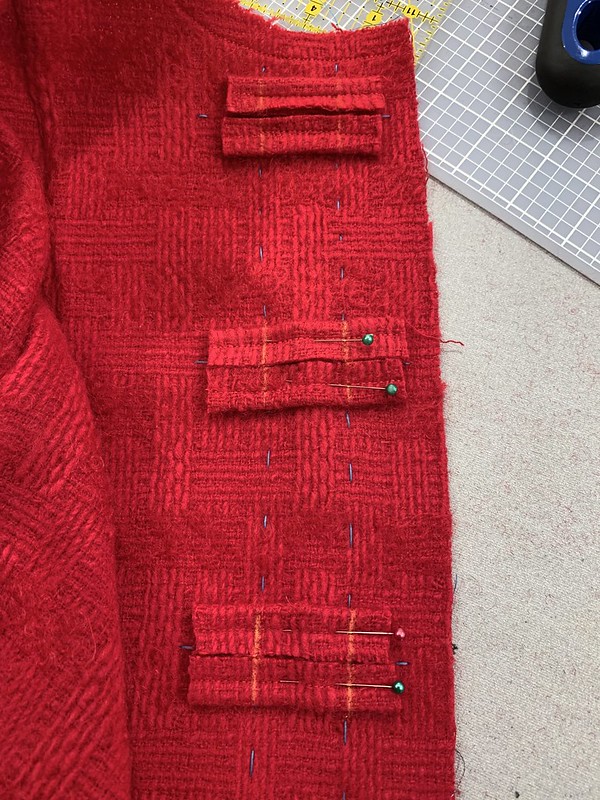
The welt pieces are placed across the button markings, and then the ladder part of the thread trace is used to make the chalk marks which show where to start/stop stitching the welts.

Then I stitch them down, right on top of the existing stitching, reversing at the ends and then tying off the threads in knots. (which may not be necessary but that's how I started doing it so I continue :)
Also I've found that using the open toe foot on my modern sewing machine is really helpful, the regular foot has a bit of plastic in the center that while clear, doesn't really let you see where the needle is going. On my old Singers I do love the straight stitch foot, you can always see exactly where you are stitching.
Next it's time to boldly cut open the buttonholes. I say boldly but I really mean carefully and precisely!
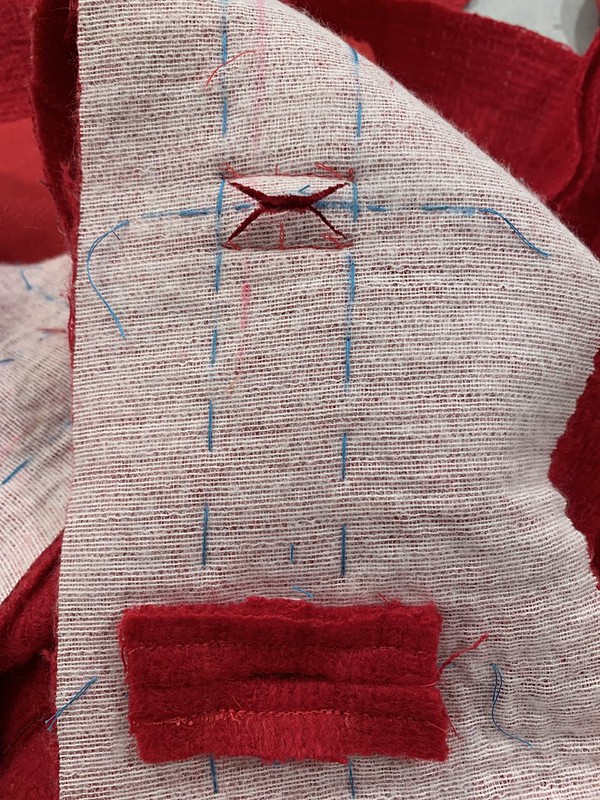
They are cut just like a welt pocket, but in miniature. It's extremely important to make those little triangles big enough so that you can stitch them down at the sides of the buttonhole. I tend to mentally divide the length of the buttonhole into thirds and then have each triangle a third of the total length. With tightly woven fabrics you have to cut very accurately all the way to the stitching, with loosely woven fabrics such as this one it's better to cut where it looks correct, and then flip it over and see how it looks on the right side. Because the loosely woven fabric tends to unravel a bit so it's best not to overdo the cuts. At this point I give it a good press on the wrong side and would probably trim off the ends a bit although not necessary at this point.
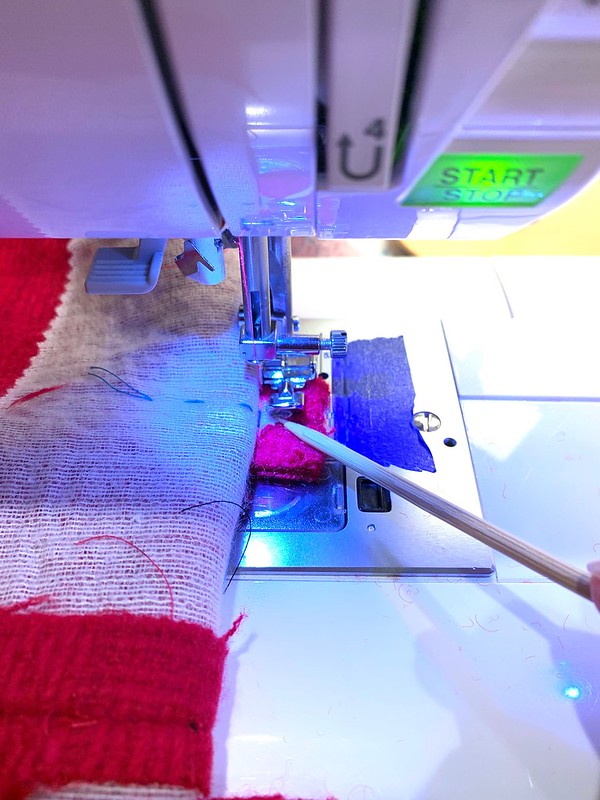
They were all finished, pressed, basted shut and I was feeling pretty satisfied with myself when I realized that I hadn't sewn down the edges. Duh! I blame the remnants of being sick for my brain fog. But fortunately I did remember, see below. A wooden kitchen skewer makes a good tool for holding that little triangle bit in place as you stitch, with the zipper foot to get close to the edge.
Ready for more? Now it's time to deal with the facing at the back of the buttonhole. I don't like the windowpane method, it seems like extra work plus how can you get it to match exactly to the buttonholes in the coat or jacket front? I see a lot of people using this method but I prefer to cut and hand stitch the facing.
Here's the coat with the collar sewn on, and the facing attached. But before I trimmed the seam edge along the front and on the collar.

So here is how I do the back. Once the front facing is pressed I might baste that edge with silk thread just to keep that crease (which I did here). Then the most important step is to baste around each buttonhole so that the facing is locked against the buttonhole and can't shift. (yellow thread circles below). This is the right side of the coat. Button welts are basted shut also.

Then the fun (ha!) begins.
From the right side I poke a pin through each corner of the buttonhole. Then I snip a similar triangle cut on the facing, which will be turned under and hand stitched. Of course at this stage it's really important NOT to cut the button welts.
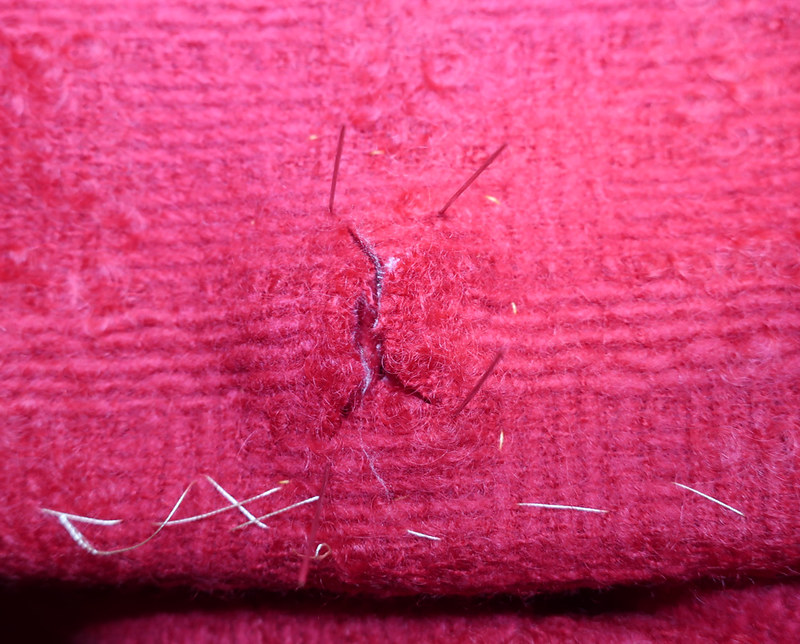
Once the facing is cut open I slip the four edges inside and hand stitch them down to the edges of the buttonhole. In this thick and loosely woven fabric the hand sewing doesn't show. I think hand sewing is something you get better at with practice, like anything else, over time you learn how loose or tight to pull the thread, a lot depends on the fabric you are working on. Also how to bury the stitches so they don't really show.

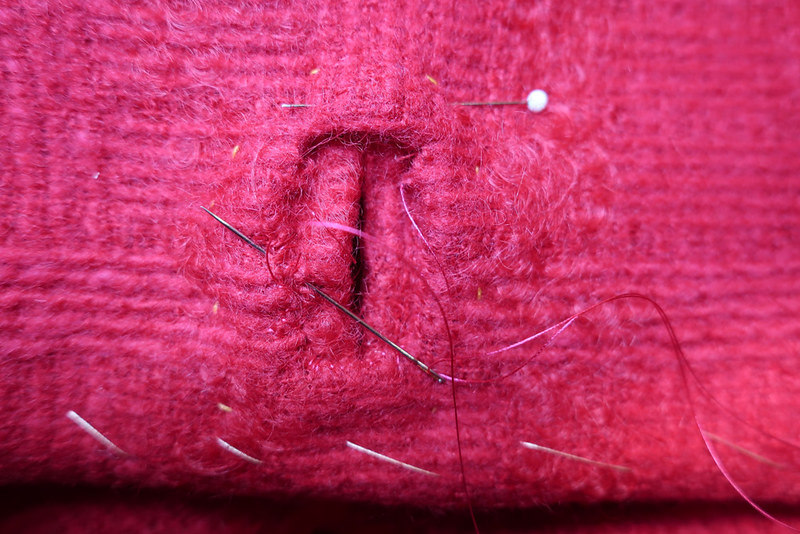
Here's another look. I think in this one the three sides but not the top are sewn. By the way it makes me crazy how every photo has a different color.
Once it's finished the sewing is robust and then with a good press it is nice and smooth.
So that's the latest on my red coat. This might be more than anyone wanted to know about bound buttonholes but since I took all the photos I figures I might as well write it up.
Another result of my being stuck in the house is that I rummaged through my lining stash and came up with this pink satin which is a perfect weight for a coat. And a bold color choice but I think that now I like it.
As usual, I kind of free-form the lining, using the coat pattern pieces, and trim away at the front in order to match it up with the facings. Hand stitched in as the facing is tacked down already. Plus I'm a hand stitched lining fan.

That's Part 2 of this coat, onward to finishing the hem tonight and then time to move on to other things. In fact I also stitched up a pair of Ash jeans yesterday as I teach a class this upcoming weekend at Hello Stitch and wanted to refresh my tired brain on the zipper fly construction. Which always comes out perfect with that Ash jeans pattern/instructions.
Happy Sewing,
Beth
Today's garden photo is a throwback to 2018 when this red rose was in bloom. I just looked at it today and it has all kinds of new growth so I'm hoping for some great blooms again this year.


Excellent tutorial. I don't like the windowpane method for the facing either. This works much better. It's a good refresher for me. I was planning on a coat this year but didn't get to it. When i first learned to make bound buttonholes the instructions were to make the lips a scant 1/8". So hard to make them all the same with that measurement, at least for me. I like the wider lips especially for a coat; it's a statement. Love the pink lining.
ReplyDeleteThanks Beth for your clear explanation and excellent close up photos.
ReplyDeleteAmazing work. Thanks for the great photos and excellent description.
ReplyDelete