
So I will jump ahead a little bit and show you this coat in progress. Last week I was still stuck in the house recovering from the flu (quite a persistent bug!) but I'm finally feeling better after 2 weeks. But being stuck at home meant I could work on this a little bit each day, in between naps and Netflix.
I'm going to break up this project into several blog posts. It's been a while since I made a coat and I ended up taking a lot of photos during construction. So in this post I'll review some fit and construction things, then in the next post it will be all about the bound buttonholes. And after that I'll finish it and find an opportunity to take some pictures of me wearing it.

The color is just so beautiful, it's my ideal color of a red coat. And I will be ready next December to put this into heavy rotation for the holidays.
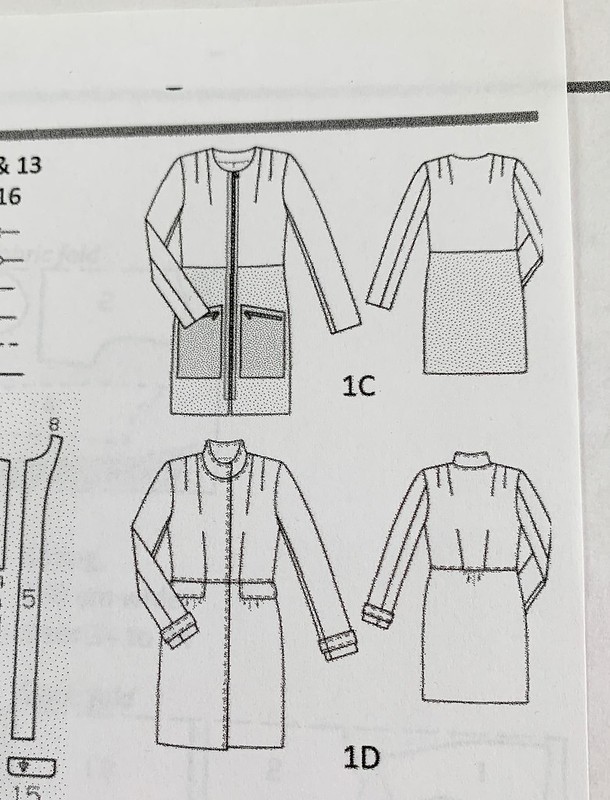
Sometime last year I kept looking at this pattern on the Burda website so I finally bought the PDF pattern and even printed it out. They had some very cute Burda Easy patterns on the old website, I also have a dress that I planned to make last summer but never got around to it. I don't know if this has a pattern number, but due to my strong dislike of zippers in wool coats I was only ever going to make the 1D version. Plus collarless, also not my favorite. I actually don't think this is all that simple, with that many darts and a center front separating zipper - that is not in the easy category!
This color blocked dress lives on this dress form which I have adjusted and padded to mimic my measurements. It's really useful to use as a comparison for all kinds of patterns, particularly ones with a waist seam as I can see where the seam falls as compared to the dress. This is my go-to method for starting with pattern fitting. I prep the pattern pieces in my size (in Burda it's 38, in Vogue etc. it's 12)
and then I grade out as needed in the waist and hip. Then I pin in the darts, pin together any seams (such as princess seams), pin the front and back together at the shoulder and then put it over the form and see how it lines up. I also put it on myself and do the same checks. Granted that the dress on the form is a fitted dress but that's kind of good, as I can see how things line up, how much ease I want in what I'm sewing, how wide the shoulders are and also where the waist and bust line up on the paper versus the dress on the form.
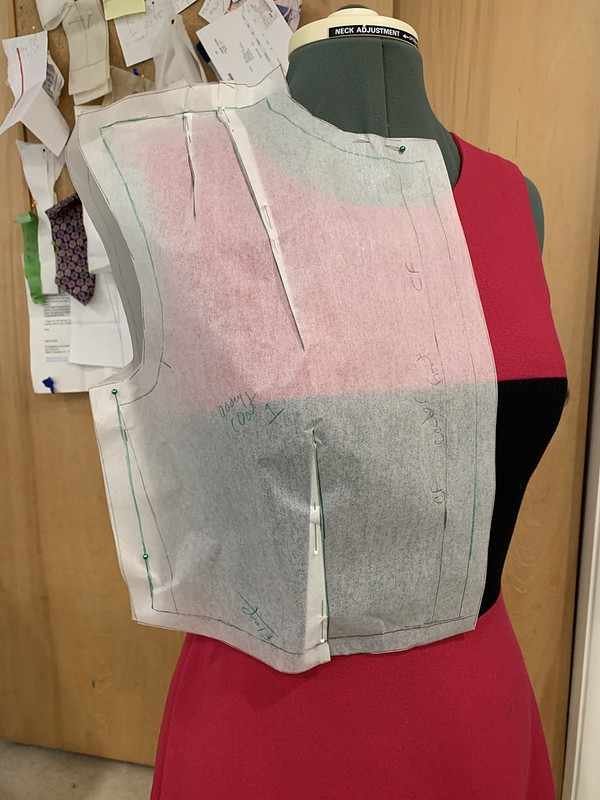
You might not be able to see it but the waist seam on the pattern piece is above the one on the dress, and I thought it might need a bit of length, so I made another comparison.
This is a coat I made a few years ago, which is probably a better comparison than a dress for a new coat. While the paper pattern was a bit awkward over the coat it showed me that the waist dart might need to be lowered a bit. I decided to split the front horizontally and give it about 1/2" more length, and rebel that I am, I didn't adjust the back. I decided that I could make the front and back side seams fit as needed with some easing and steam. Which worked but I'm getting a bit ahead. I also added another 1/2" in length to the whole bodice at the bottom, both on the front and back pattern pieces but ended up removing that when I sewed it. Fundamentally I just created a 1" seam allowance on the bottom of the bodice pieces to use as adjustment area. On a lot of outerwear I use 1" seam allowances instead of altering the pattern as I like to see how things fit as I go along and a 1" seam allowance on several seams gives me enough room for adjustments I might need.
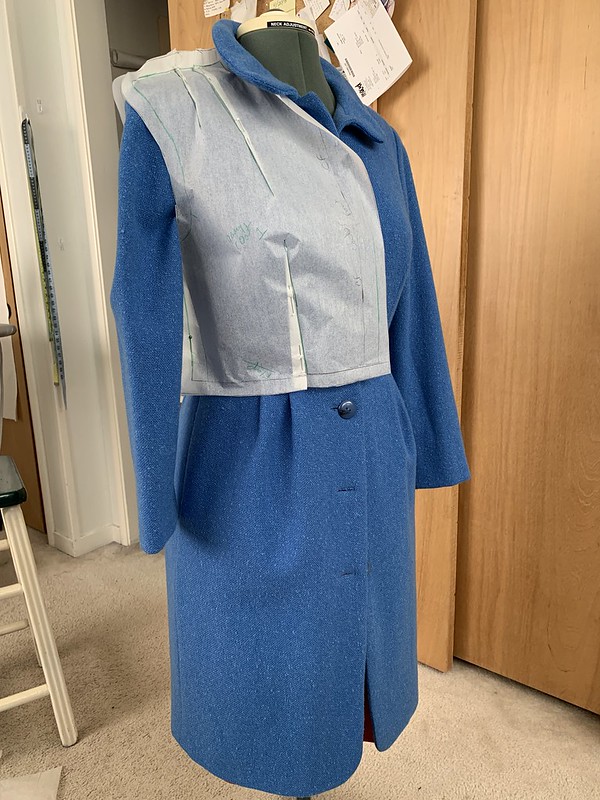
I also added 1" seam allowances on the side seams for more fit insurance. I think looking at the pattern pieces over the blue coat deceived my eye and I thought it would be too small. That turned out to be quite wrong.
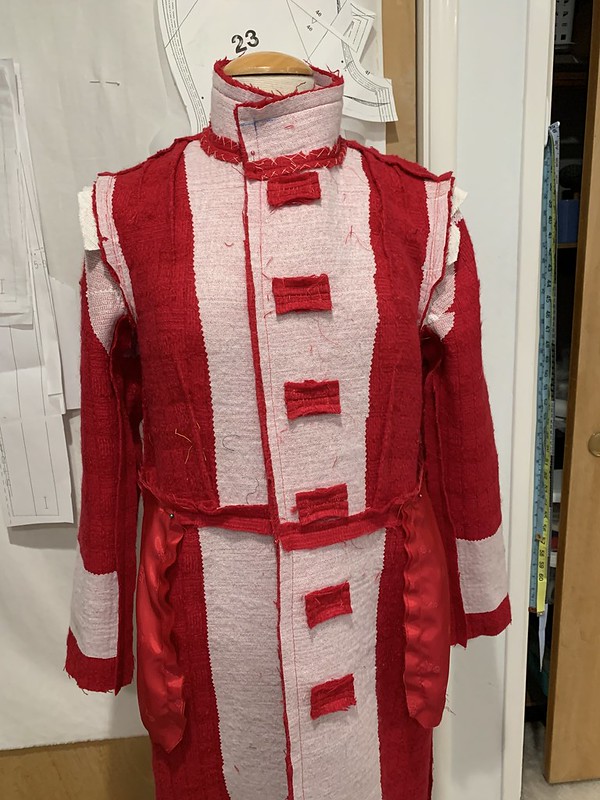
Time to baste! As I have made a number of coats over the past few years I find that I can hand baste them together so much quicker and with more control than sewing on the machine. So I basted the skirt pieces to the upper pieces and also basted the side seams so I could try it on for size. Note the interfacing is not yet applied to the bottom front, but it will be the same as the upper, it's the Pro-Weft Supreme Lightweight from Fashion Sewing Supply.

With this preliminary try on I could see that I overdid it with adding to the side seams, so I seamed it in about 2" in the side seams. Once I decide on the side seams I mark with chalk, and while still basted together I cut away the excess. In this instance I left the side seams at 3/4". Now I could take it apart and still know that when I sew the sides together the seam allowance is a steady 3/4" all over.

I sewed the sleeves and hand basted them on as well for a better idea of fit in the shoulders and around the bust. I pinned in some shoulder pads and tried it on, it seemed way too wide in the shoulders for the style. I also compared the width across the back to the blue coat and it was at least 1.5 inches wider. So I moved in the entire armhole by 1/2", also taking off that 1/2" at the top of the side seam. That maintains the armhole as the same - just shifting the entire thing toward the center.

In the above photo there is just one pocket flap, since that seam is hand basted I just put it on one side to see abut the placement. The skirt has some small gathers which are covered by the pocket flap. Which is a fake pocket! I did put pockets in the side seams, because a coat needs pockets. The blue spots on the bottom of the skirt portion are pieces of painter's tape, which I sometimes use to distinguish right and wrong side. With this fabric I couldn't really tell a difference, but I always want to use all the same side so as I'm cutting out I either mark with wax chalk or put a piece of the blue tape.
Also no topstitching as shown in the pattern diagram. Everyone has their preference and I don't like the look of topstitching on wool, plus on this fabric it wouldn't even show. But to me it looks too casual. Another thing to notice - this is a plaid! (go back to the first photo) A lot of work for a plaid that isn't really multiple colors but the line pattern was all I could see as I prepared to cut it out and I knew it had to line up or it would make me crazy. I'm quite happy so far with how that detail has turned out.
So here is where I will leave it. Pockets sewn on, side seams finished, sleeves and sleeve heads attached, bound buttonholes still need some more detail work, collar needs trimming and grading, and then onto the lining.
Next post will be more than you may want to know about bound buttonholes!
My plan is to buy some buttons tomorrow - oh yes - I made the buttonholes not having any buttons but I was stuck at home so I just went for it and I'm sure I will find something nice. Next weekend is our Bay Area Sewists Frocktails event so if I get the buttons I will have a new coat to wear - even though coat weather is rapidly departing the bay area. You know I love summer but I wish it would rain (a lot) before our winter ends.
Happy Sewing,
Beth
Reaching back a few months to this lovely little flower on one of my succulents. Which are getting more and more space in the garden.


I always learn something from your posts. This time I notice that you use pinking shears on the edge of interfacings to help them blend in less noticeable. Thanks and I love, love your red coat.
ReplyDeleteI made a coat using Allison Smith's class and was unhappy with the amount of or rather lack of interfacing. I think it only called for interfacing on the facings. I understand pinking the interfacing, I've done it too, but why not interface the entire front? I have used the Threads series of articles on Armani tailoring and used that for jackets, but coats have always been puzzling to me. How much interfacing and where to put it. How much tailoring do I really need to do. I am never quite sure how much to use.
ReplyDeleteI cannot wait for the post on bound buttonholes! Maybe single welt pockets next? :)
ReplyDeleteYour strategy of taking a well-fitting dress and using it to pad out a dress form is straight-up genius.
thanks for the info!
ReplyDelete