
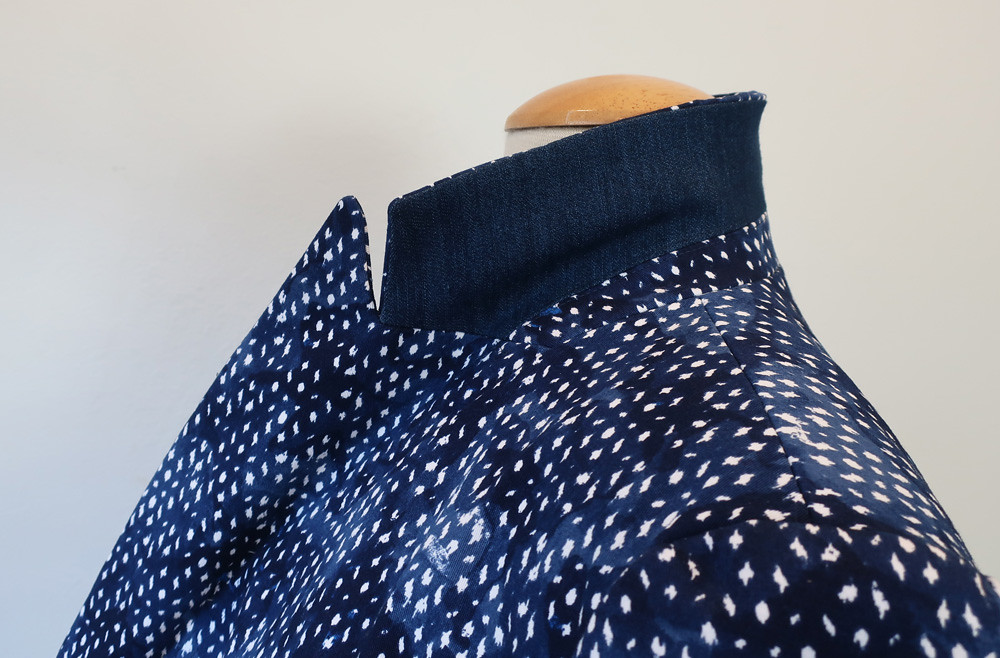
Let's get to the most important feature of this jacket, that pointed lapel. Time to confess that I actually was quite concerned with how it would look. Sometimes turning a crisp corner is an elusive goal but whew! this turned out great. Very happy with that pointy edge. Also I'm kind of getting into doing the old-school type of blog posts filled with sewing details and close up views. As long as we are stuck at home I will try to continue - it's nice to think about what I might do on autopilot but might be very interesting to people who are ready to try some of these techniques or garments.
Of course working with denim is a plus in this case, it does press well and is not quite a thick as perhaps a wool might be. Although I have definite plans to make this pattern again in the fall in a wool. You know me, once I get a jacket pattern I like I will repeat in a different fabric for a new look.
So how to get that crisp corner? Planning and preparation, leaving nothing to chance. First up, I had marked the roll line and the dart with the wax tracing paper. Note that this pattern has the lapel roll line marked on the pattern piece, can I say hurrah! I get so annoyed with a lot of modern patterns that don't include this detail. The line is indicated, so I stitched some cotton stay tape along the line, tightening it up ever so slightly. To do that I place it, mark the ends and then shift the bottom about 1/4" and then distribute that ease along the whole length. You can see my little red pencil marks at the bottom where I've shifted it. The top red mark intersects with the 5/8" stitch line.

Next, in order to incorporate that skinny dart that hides below the lapel, first the under collar and the collar stand need to be stitched together. I find it such a time saver to draw my stitch lines in, then I can match the intersection points for the seam lines and everything goes together perfectly. That is the beauty of having interfacing on it - you can draw with pencil right on it and it will never be seen. Another thing to note is that I always mark the center of each pattern piece and use those as an extra little match position, I do this on everything. Dresses, shirts, jackets, tops. If it has a center I mark it.
It makes pinning on facings or collars that much easier. You can see I don't mark the entire stitch line, just the edges where there are corners or pivots.
Here's how the collar and jacket body match up. The intersection marked at the lower corner of the collar stand matches up to the two dots on the dart which are brought together. On looking at this photo I though they were sewn continuously but in fact not, below this is the dart pinned together.
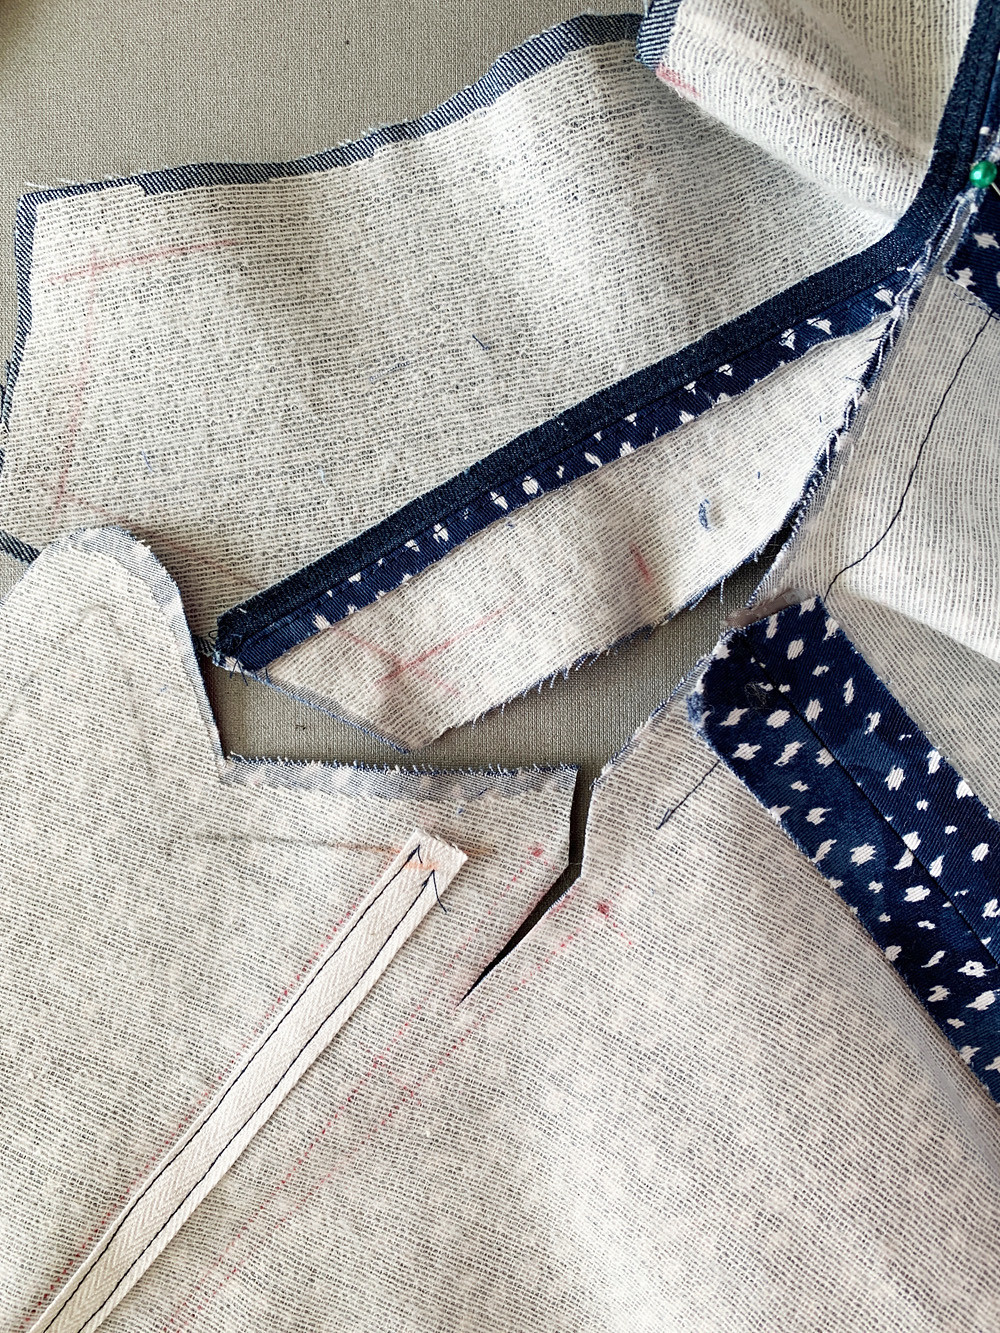

So the collar is sewn on, then the dart is sewn up. Lastly the remaining edge of the collar is attached.
The image on the left is a bit of repeat, but it's interesting to see it side by side with the collar and lapel completely stitched. And you can see that all my stitch lines are penciled on which makes sewing it so much easier. I do shorten the stitch length quite a bit for that peak lapel which makes it easier to turn that small sharp corner.

Once it is all sewn then the trimming commences. The ONLY way to get a nice crisp lapel is to seriously trim the seam allowances and press. Looking through my photos I didn't take pictures at that stage but you can look at this previous blog post and see some good details on this step.
Here's one more thing I took a few photos of, and it's actually a step that precedes the collar. Before the collar you much stitch the front and back together at the shoulder seams. There is a bit of ease built in to that seam with the back being larger than the front. I find in my classes that this always stumps people and they want to trim it off, but no! it's there on purpose to give extra room and shaping across the back.
My photo cut off the outer edge but they are lined up (where the armhole is) so that means there is a scant 1/4" of differential at the inner neck. They need to be matched up there - at the stitching line as indicated in this photo. Which makes the back longer but that is eased to match the front.

I find the easiest way to match is to bend the sides toward the front, it makes them marry up well and then I pin to distribute the ease. Jacket patterns usually tell you to add some stay tape on this seam but I like to use the selvedge of bemberg or silk as it is quite stable but adds no bulk, plus presses perfectly. So save your selvedges to use for ultra thin stay tape. The photo on the right shows it stitched and the jacket back curve which will match the body and shoulder area.

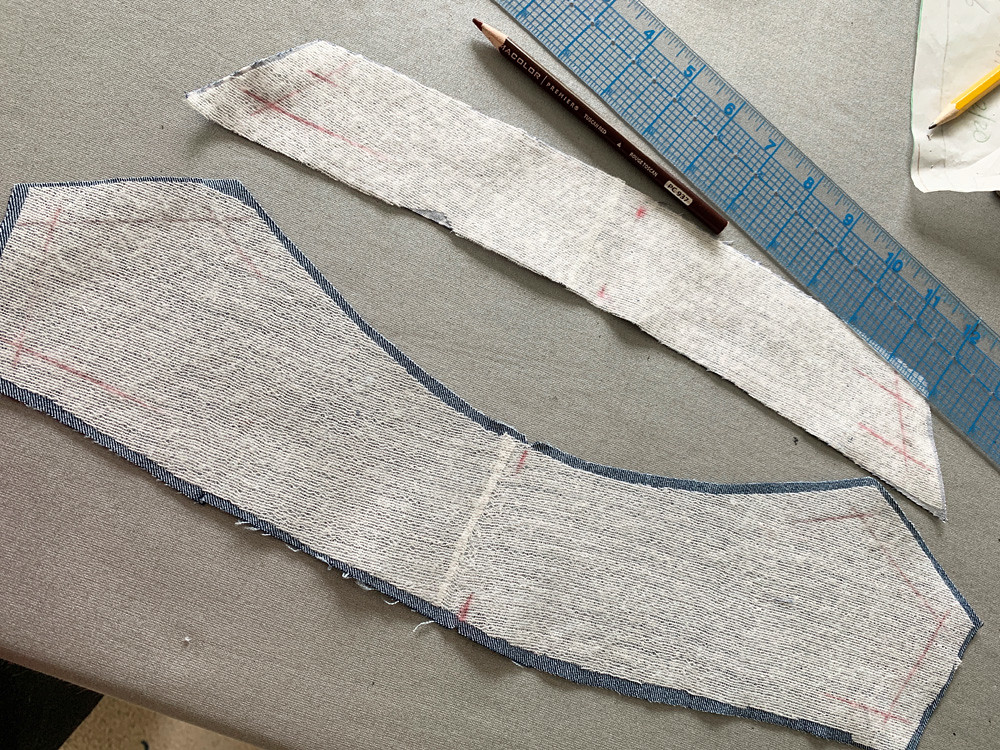
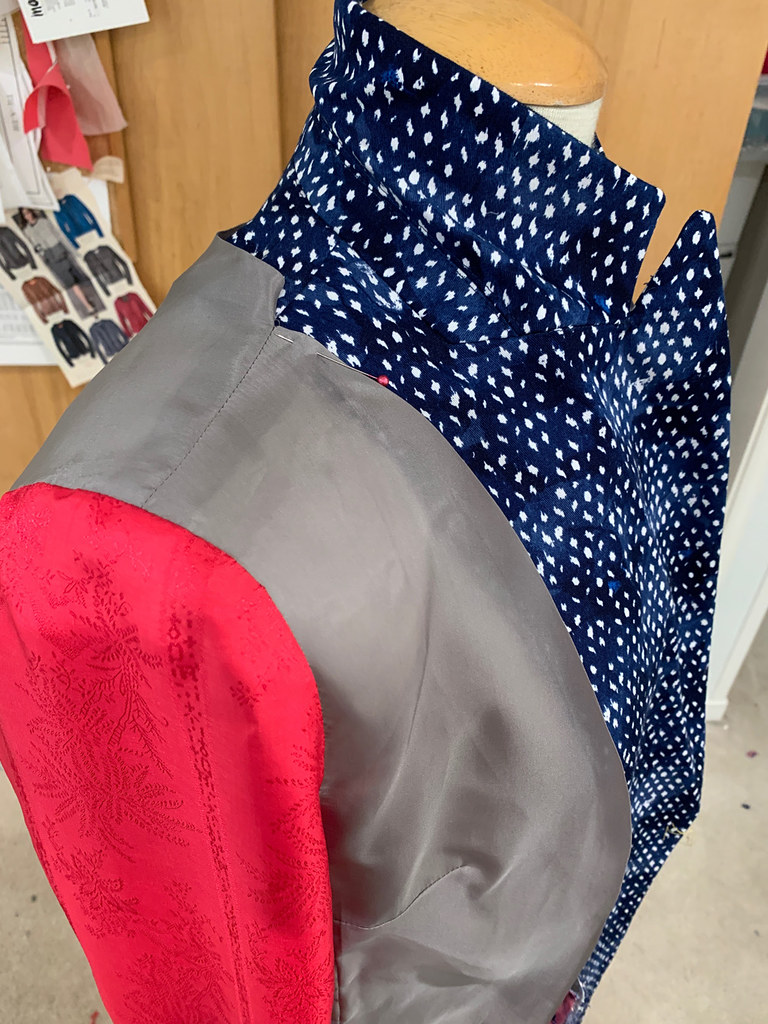
For the under collar I used a scrap of some solid denim from my stash, it added some visual interest to the jacket and as I was also cutting out jeans from this print denim I was really short on fabric. In fact I think I would have had to piece the under collar with a seam had I not used the contrast fabric.

That's how the finished collar plus dart looks, this is before pressing. But it is a nicely designed pattern and that dart points right into the seam of the collar stand.
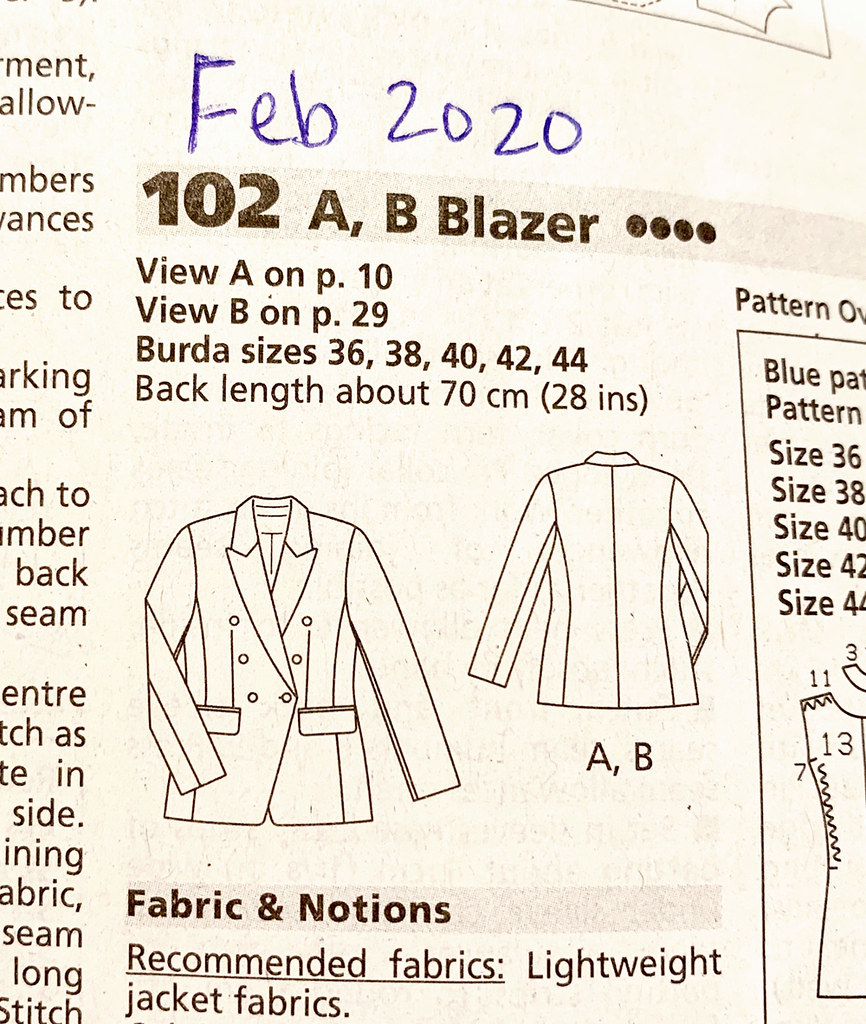
Just as a reminder, here is the drawing for this pattern. My previous post is about doing the muslin and checking the fit before I started sewing.
Another sneak peek and getting ahead of myself, this is what lockdown lining looks like.
Who am I kidding? I can't attribute that to staying in and not shopping - that is my standard modus operandi for linings. Raid the lining bin and come up with something that is reasonably coordinating. More than one color, sure. A print, almost never! Anyway I had an idea of rolling up the sleeves on this jacket which called for a nice scarlett lining.
Last look at my finished collar and lapel. I put a piece of printer paper under it so that it could be seen. I do love this wacky fabric but the details disappear.

Next up, I will show you the finished jacket and then put it away until probably late September - it's far too hot for jacket wearing around here now.
In other sewing, I've finished a dress from a DKNY pattern that I was a bit lukewarm on while sewing, despite loving the pattern and the style, the I finished it, put it on and I love it! Thankfully I have way more sewing successes than fails, but I do have a couple of fails to show you as well. Mostly due to choosing pattern styles that I just don't think suit me at all. Next up I'm sewing a sundress as it is definitely sundress weather around here, and a jumpsuit.
This morning I helped my mom make plum jam, and we had to laugh as it never fails that the jam making day is over 100℉. Very hot work! Of course around here the plums are ripe in July so of course it will be in the 100's. Anyway - I always have more respect for those pioneer women who did all these things in long dresses, wood stoves and of course no air conditioning!
Happy Summer Sewing, Beth
Today's garden photo, this gorgeous gardenia. Every year I get worried about the gardenias which have probably been here maybe a few decades? I don't like to prune them because I don't want to lose even one of these fragrant blooms. They are putting on a show right now and the fragrance is beautiful.


I love it!!!! Thank you for the detail! I have to sew this one this fall!
ReplyDeleteI'm too short and large busted to wear a double breasted jacket, but all the construction details are transferrable, and really helpful. I switched from subscription to website download before the new website last year, and now, even if I wanted to change my mind an Australian subscription is prohibitive (over $300 and more than 3x dearer than before) so a Pinterest overview of each magazine would be great (please post link), as the new website doesn't seem to have magazine collections anymore.
ReplyDeleteHi Karey, yes the US website doesn't have the monthly overview, however I look at the Russian website where they post all the collections including the tech drawings. If you look in the comments of my post of a few weeks ago about how I use Burda magazines, there is the link to that webpage.
DeleteIt is so good to see a jacket pattern with the details of this pattern.
ReplyDeleteThat is a very smart jacket and a really helpful discussion of how to sew that sort of lapel. I'm sure I've seen Burda instructions that have you sew the collar stand attachment seam and that dart all in one pass, which was an interesting idea to me. It seems possible that it could be neater and even easier. I haven't recently used a pattern that would require that, but might try next time I do. Clearly you didn't do that here - was there a specific reason for that? Would the seam allowances have got in the way? Interested to hear your thoughts on that.
ReplyDeleteI recall looking at it and seeing that there is a slight angle, plus seam allowances in the way so you can't really sew the dart and collar seam all in one.
DeleteThat collar looks amazing and it is so good to read your blog. I have one question though, I thought it was best practice to cut the undercollar on the bias with a seam at CB, do you ever do this and if so when?
ReplyDeleteThanks for the kind words :) This pattern didn't have the collar cut on the bias which surprised me but I went with it and it seemed to work fine. Ordinarily most jacket patterns of this type do have the under collar cut on the bias, some with a seam and some without.
DeleteGorgeous work!! I've made a few different Burda blazers and I've generally been happy with the patterns.
ReplyDeleteI really appreciate your detailed sewing notes! I won't be making this particular pattern, but learned a lot for other future projects. Also -- I'm an experienced sewist, but I exclaimed out loud at your comment about the ease that's built into the back shoulder seam. I don't know how many times I've been frustrated by shoulder seams (in an otherwise well-drafted pattern) that didn't match up ��. Many thanks!
ReplyDeleteWe really enjoy your blog. If you want to get some information about Japanese men's fashion, you can visit our online store Kidoriman Review. Here you will get information about every new fashion going on in Japan.
ReplyDelete