Monday, May 27, 2019

Random Threads # 36: practice, being brave, and sewing indie

All weekend I've been meaning to sit down and write a blog post, but it's been a weird holiday around  here. In the sense that it doesn't feel like Memorial Day, the weather has been cold and rainy (more snow in Tahoe!) and every is a little bit grumpy waiting for summer to start.

So I thought I might have something seasonal (meaning springtime) to blog about but many things are in process and I'm not in the mood to do photos. However my notebook page for random threads has a number of entries so onward with that.

Ban the seam ripper! Is that crazy to say? It took me a while to comprehend that in the UK it's seems to be referred to as the unpicker, which maybe is a slightly gentler word. Below is an array of items I use to undo a seam, in descending order of use. I explain below the image.

seam rippers

Small scissors or thread snips will always be my implement of choice, I find that snipping the stitches, then gently pulling apart the two fabric pieces, then snipping again and so on is as fast as using a seam ripper and far less traumatic on the fabric. I unpick a lot of seams when I teach my classes, often helping people out after they are at their wit's end. I totally understand the frustration of making a sewing mistake and then having to remove, and then removing itself is a tricky operation so I like to help people out and get it over and done with so they can get back to the project itself.
Second choice and often first depending on the fabric is the razor blade, works great on denim and other stronger fabrics. It takes practice but once you get the hang of it then it's really quick. Third, I might use the curved blade thing, this works for small spaces where you are extracting just a few stitches. Lastly I might use the seam ripper but I find you have to pull too hard to break the threads and often can poke a hole in the fabric. Anyway - try to snip instead of rip and see how it goes :)

Practice makes.....proficient: You always hear the saying practice makes perfect, and it's understandable that has become a common phrase, but somewhere I read recently that practice doesn't necessarily make perfect but it makes you proficient, defined as competent or skilled. I like the thesaurus words even better: competent, masterly, adept, adroit, deft, dextrous. I think becoming adept at something is such a good goal, learning how to do something almost like second nature. Not having to think about it, and relying on yourself and your skill to do it right every time. Sewing has so many of these tasks to learn, and granted it does take time but one day you put in a zipper or sew a collar and didn't even think twice about it, you don't look at the instructions or stress about the outcome, you just do it and then perhaps realize you have become proficient at that skill. Such a good feeling!

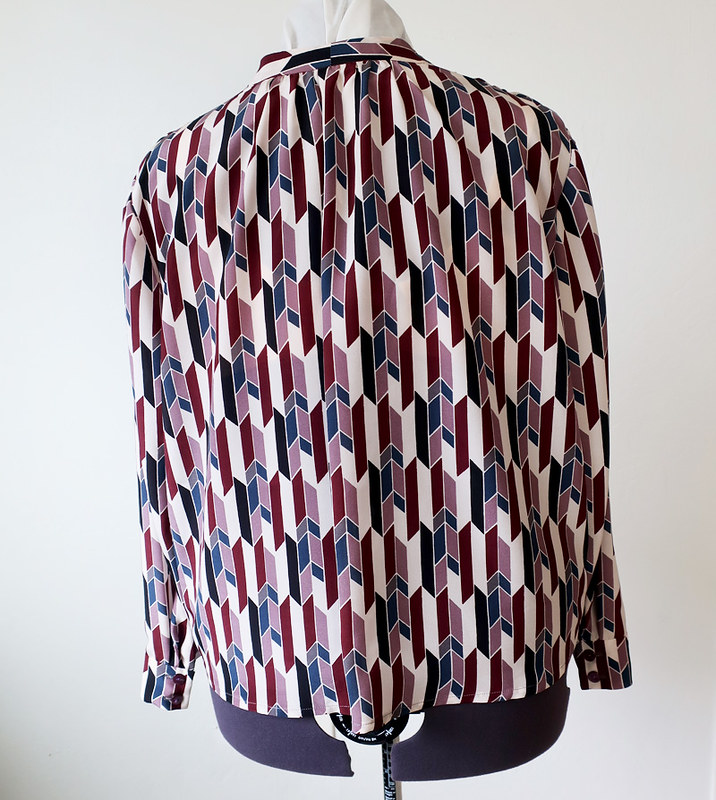
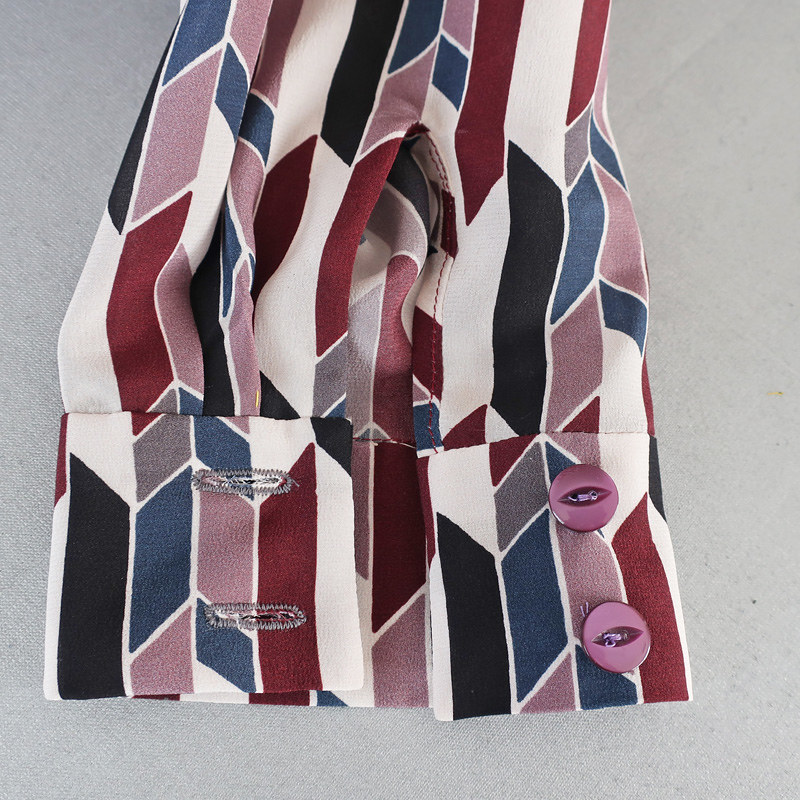
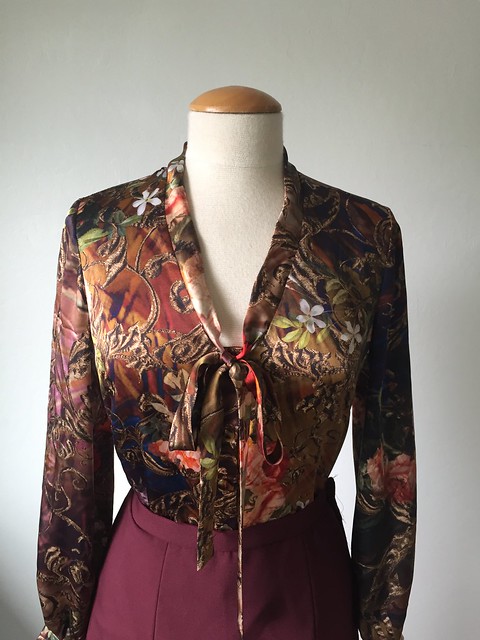
Sew Brave - how do you define that? I really like reading the Sewcialists blog . Because of that I've come across people and ideas that I might not have encountered, and I'm really impressed with the way writers have shared their perspectives. The topic in May has been Sew Brave, to discuss pushing out of your comfort zone and talking about sewing a pattern, fabric or style that scares you. The various posts got me thinking about this and trying to come up with my own Sew Brave moment. I don't really have any things that might scare me about sewing, granted my sewing life started early and I got most of the scary things out of the way long ago, as my high school and college wardrobe would show if it had been documented on social media as it would be today. A lot of pattern/fabric pairing mistakes and misguided style choices along the way but as we alway (sarcastically) said in my family "it's a learning experience".  So my current Sew Brave moments might be when I cut into ultra-expensive fabrics. Almost always when sewing for someone else - those $ 400 pieces of fabric make you really measure twice before cutting once but after a while it just becomes another fabric. So far I've had great success, fingers crossed for luck, now that I've said it aloud I would not be surprised to make a big boo boo in the next year. Hope not!  This silk blouse and skirt pictured below are something I sewed for a client, she bought both fabrics in NY so not something you can just run back and get some more! Also that print placement was a challenge, blog post on that outfit is here.
IMG_3983

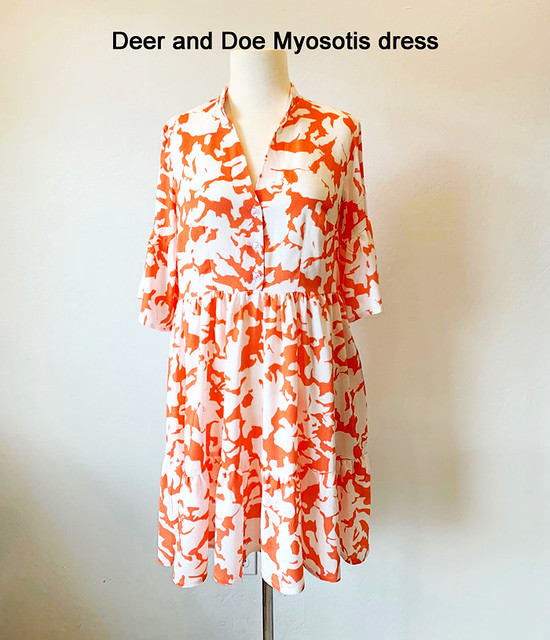
Sewing Indie patterns: That's not something I do all that much, I always find things I want to sew in Vogue patterns, Simplicity, New Look, Burda Magazine etc. But recently I've been sewing up some samples as we mostly do classes at Hello Stitch Studio based around popular indie patterns. We've found that a lot of people already have the pattern, or have seen versions on IG etc so they want to make the same items, which is understandable. Plus all the patterns are available at Stone Mountain Fabrics which is nearby. I'm always looking for something complex or new to me so I tend to stick with Burda/Vogue etc. But it's been fun to make some of these patterns, and I've had both pleasant surprises and some small frustrations in doing so. On the plus side, some of the styles are unexpectedly appealing.

True bias class samplesDeer and Doe dress class sample

I recently sewed these to prepare for the upcoming classes. I made the straps wider on the Ogden cami as that was a request from a few people, and it's a pretty easy change to make I will detail in class. In all the samples I make I choose my size based on the pattern envelope info, just because it's easy to sew my size and then try on to see how they fit. (also selfish sewing) The pleasant surprise of the bunch is how much I like the Emerson pants, I will definitely be repeating those soon. The Mysotis dress is a good item for learning how to do darts, plus sleeves. It's not really my style but I have a few pattern hack ideas that I will try to do before the class.
And then, ta da! The Zadie jumpsuit, which I sewed in some free fabric that Stacey from the studio gave me and turns out I really like this pattern, along with a zillion other stitchers! Although I will do a few fit adjustments on my next version and I think I will make it sleeveless or some other changes. Stay tuned!  On the not so good side, I cannot get used to the variety of seam allowances on various indie patterns, I'm a 5/8" automaton and have to really concentrate not to use that.

zadie jumpsuit 2

It was absolutely pouring the day I ran outside to take these photos - where is our spring??

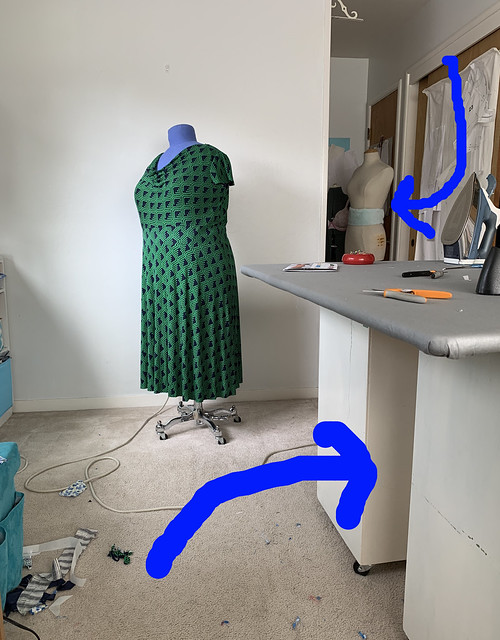
My sewing worktable - I keep saying that I will show more details on this homemade item which  me and Craftsman drill created it a few years ago. Here's a completely keeping it real view of part of my sewing space featuring a dress in progress for Heather (Vogue 8787 and fabric from Girl Charlee, will blog when finished).  Anyway - sewing table in the foreground, along with power strip cords, many fabric scraps that I let fall to the floor, and the more interesting detail in the background, my low-tech way of adjusting dress forms with strategically wrapped towels or padded bras to add circumference. Works find and costs nothing, score! Anyway, I will take some 360 video and post in my Instagram story this week.
IMG_0611


So those are my random thoughts for today, and I already have a few jotted down for the next thrilling installment. Including my opinion on a very popular dress pattern, something about it really bugs me so stay tuned and see :)

Coming up at Hello Stitch Studio, the aforementioned classes on the Emerson Pants, Ogden Cami, Myosotis dress, and the Zadie Jumpsuit. I think the next Fit Lab class is full (spaces available in the morning session which is pattern adjustment skills) and my Jacket Workshop in September is almost full (yay!!!)  All my classes at Hello Stitch Studio in Berkeley can be found here. 

Up next, I started a denim skirt yesterday, from a recent Burda magazine and I can tell it will be a summer staple. Other than that I haven't been super motivated to sew for myself as the weather is so weird but hopefully summer shift dress season will arrive soon. ugh, how boring to talk about the weather but it really affects both mood and sewing mojo, right?

Happy Spring Sewing, Beth

today's garden photo, this coral color rose was a weakling in one spot, then I moved it to a better location and wow the shade of these roses are electric on a sunny day. This one was just about to open but I liked the sunshine streaking through the petal.

coral rose 2019


Wednesday, May 15, 2019

Tie back top, Burdastyle 02/2018 #120 and what about our Burda subscriptions?

Many times I open my closet doors and look through the options, searching mostly in vain for a cute top to wear with my latest jacket creation. Why don't I make more simple tops? They are so useful for mixing and matching with things I want to wear. They take relatively small amounts of fabric and are quick to sew. A new resolution - sew tops this summer. Actually I have a lot of sleeveless tops, but there are times when a bit of sleeve is more comfortable.

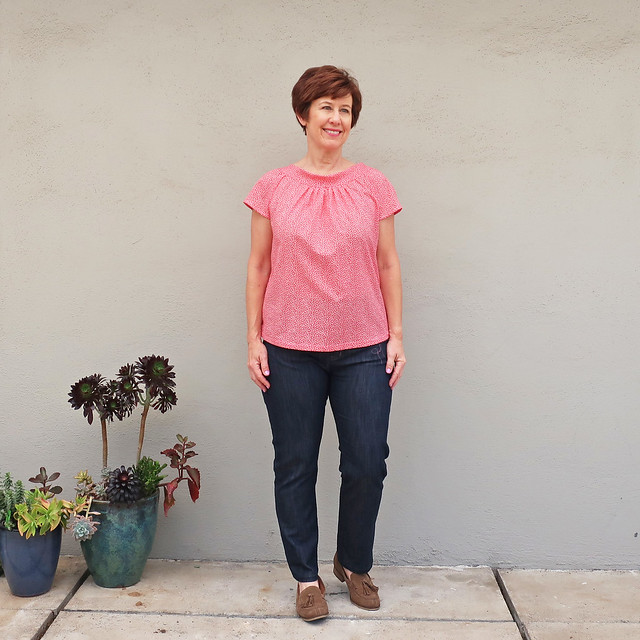
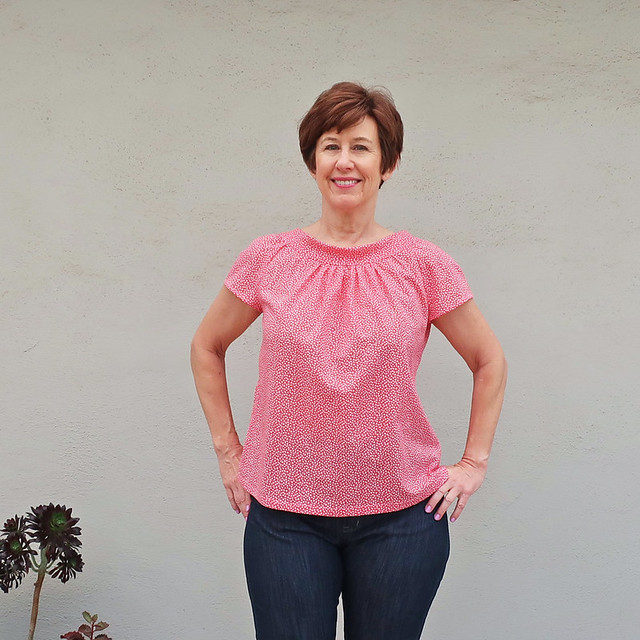
With all that said, here is my latest top, from Burda Magazine February 2018 #120. I traced this ages ago and the other night decided to sew it up.

red tie back top 1

I used some cotton fabric I bought at some rummage sale or other, as I just wanted to see if I liked the style. Verdict: I do like it! and will find some nice silk to make another one.

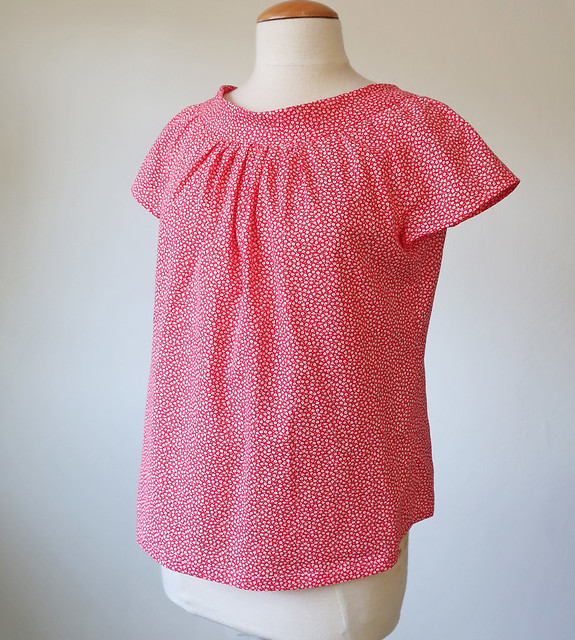
This top is more interesting from the back as it has a slightly low v-shape with a tie at the center back. I thought that the tie was a continuation of the neck band which would take more fabric but rather cleverly the neck back is a circle and you leave a small gap at the center back where you can slip in another piece to create the tie.


tie back top bow

Here's a look at the images and tech drawing from the magazine. In their text they mentioned using a fabric with a matte on one side and shine on the other to create a contrast between the neck bank and the top. I like that idea, particularly in a solid color.

Burdastyle 2-2018-120 drawing

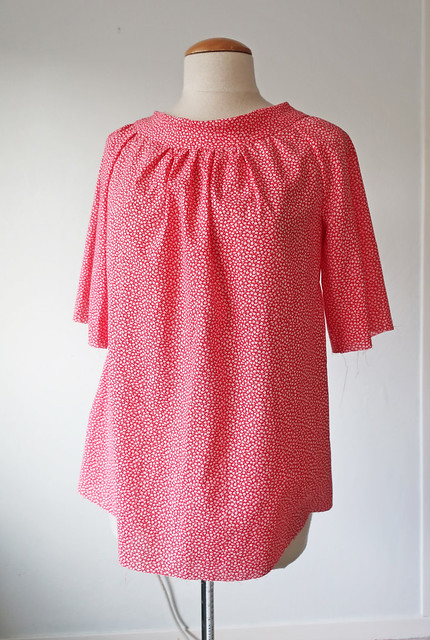
You can spot the difference between my version and the magazine one - short sleeves. The sleeves look ok in the photo, perhaps make it coordinate with the pencil skirt but in real life I can't stand those elbow length sleeves. For one thing I would only wear this blouse in warm weather and then longer sleeves are too much. But more importantly, when you try to put a jacket or anything over that type of sleeve they just bunch up and are impossible to smooth out. So that sleeve length had to go.


tie back top with longer sleeve


I did cut it out with the longer sleeves but got rid of them right away.  Much better shorter I think. By the way those are my Ash Jeans (2nd pair). That was a lucky fabric pick at a Bay Area Sewists Meetup swap last year.

tie back top 4


I sewed the neck band on the top and then hand stitched the inside edge. I didn't press it all all which I think gives it the soft roll and lets the bias drape a little bit.


tie back top front2

I made a size 38 which is my usual size in Burda and took it in a bit on the sides as it was roomy. This is a super quick sew as the sleeves are raglan sleeves with a dart detail on the shoulder to create shaping, this is the 2nd shirt from Burda with that detail that I've sewn, the previous one is here. 

Almost forgot, back view on me. I think this top could be really nice in a wide variety of fabrics, silk, rayon, poly, even a lightweight knit.

red tie back top 2

I think this top will look really nice with white jeans, so I'm looking forward to white denim weather - which we DO NOT have today, as we are getting a weird May heavy rainstorm. I guess I should be happy that the garden will get another good watering :)

Now to the 2nd topic in my blog post title - What is happening with my Burda subscription??
GLP News, which was the distributor through which I and everyone else in the US had a subscription, has closed their doors. Like, they are gone! and supposedly transferring subscriptions to another distributor. I HOPE SO! Because of course I want my magazines and patterns but also because the subscription is $90 per year and I renewed in January. So a fair chunk of change that I don't want to lose. I am a bit mystified by the business practices of Burda in the US. They have a really active website and email subscription list and yet you can't get the magazine from them which seems counterintuitive.

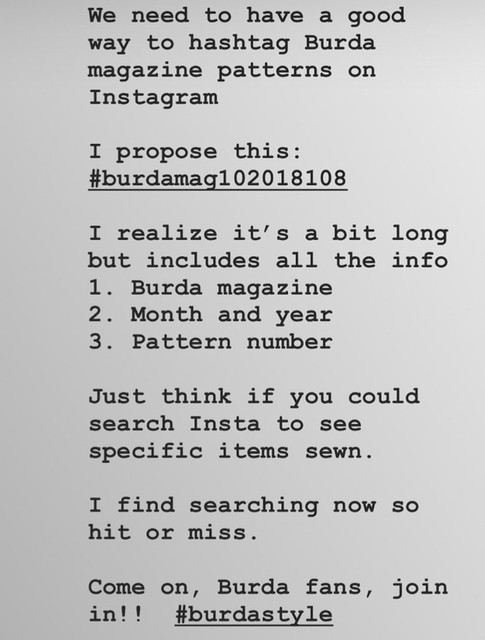
My other Burda topic I've been thinking about is their hashtag problem. Oh yeah, it's a problem. Consider that the success of a lot of indie patterns is partly due to the share-ability on social media of a pattern with a name. It's quite easy to share and search a pattern that has a name and of course just to recall it. Patterns with numbers are also not too difficult to share, for example #V1247 (the best skirt pattern ever, the Vogue Rachel Comey skirt and top pattern). So Vogue, McCalls, Simplicity etc can use the hashtag of the pattern company first letter and then the pattern number, such as #S2311
(both my green jacket and my black coat).

With all that in mind I've tried to come up with a hashtag for Burda magazine patterns. The problem is indicating all the info, i.e. Month/Year/Pattern number.

Here's what I posted on my Instagram story when I shared pictures of my recently sewn pink wool jacket.   Which was from the Burda October 2018 issue, pattern 108.  Or as shown below,
#BurdaMag102018108

breaking that down, it shows Burda Mag, then the month 10, then the year 2018, then the pattern number 108.

IMG_0405

So for this bowtie back neckline blouse I've blogged about today, the hashtag would be
#BurdaMag022018120

Yes, all this is a bit long but it would be so useful!  I look at the #burdastyle hashtag all the time. People from all over the world are sharing their Burda magazine creations, and so often they're not mentioning what the pattern is or even what month or year. It drives me crazy!

Perhaps this is a solution in search of a problem but I'm going to go back and put the hashtag on all my Instagram posts where I sewed a Burda magazine pattern, and I think I will message some people to see if they will do it as well. When I posted in my story I did get a few replies from people who said they would do the same.

That's my rant for the day :)  now back to sewing.

Up next, I just finished sewing a few examples for my upcoming classes at Hello Stitch, in my previous post I listed all the classes that are scheduled for summer (scroll down to the bottom of the post for all the info). Last night I made a Zadie jumpsuit and I'm on board with that pattern! The sample I made is a bit long in the torso for me and is actually meant to be an example to show at the studio, but I will be making another version for myself in a print. I like to wear the item when I teach the class, that's kind of fun.

I think I might start on a new pattern soon, Vogue 9357, so I can be ready when the sun finally returns with a new summer dress.

Happy Sewing, Beth

Here's today's garden photo - well two actually. This time of year is the most lush and flowery around here, before the dry heat of summer really sets in. And you know I like to match my flower photo to my sewing.  The first is a Salvia, Hot Lips, and the second is a rose that might be called Cherry Parfait.

red and white salvia 2019

Pink rose 2019


Wednesday, May 8, 2019

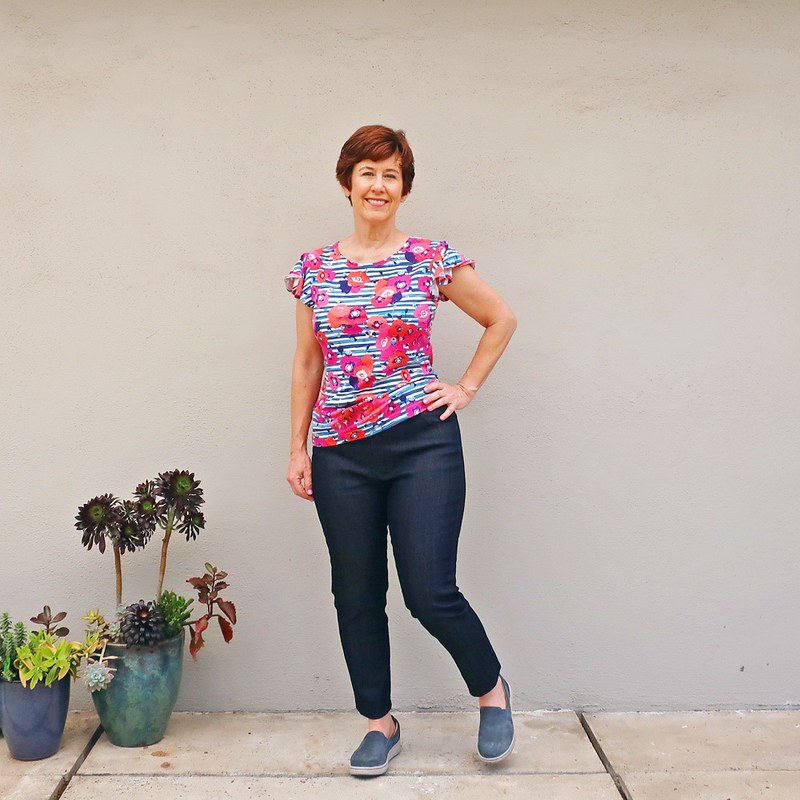
Ash Jeans again: 3rd pair in sparkly denim

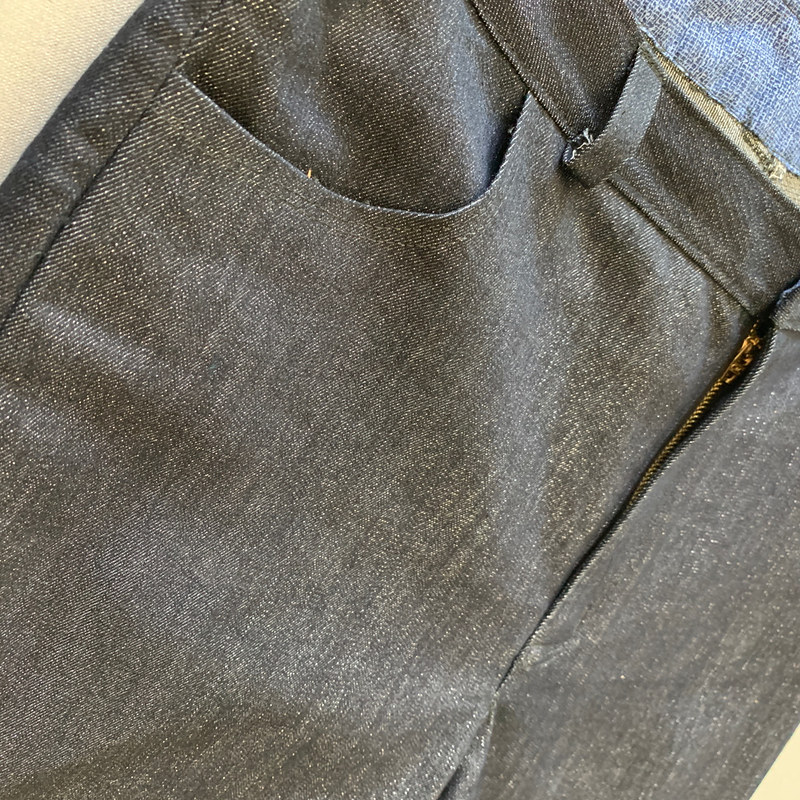
This sewing project was one of those "I don't really need it but why not?" items where you are in a fabric store and see something slightly ridiculous and yet buy it anyway. For me it was this sparkly denim which I bought at Joann's one day, as it had a nice weight and suitable stretch, plus a subtle silver shimmer. Or can jeans that sparkle be considered subtle? Since you can't really see the shimmer in photos I will say yes.

ACS_0015

I cut them out fully intending to make the cropped wide leg version on the pattern envelope, which is one of the 4 options on the Megan Nielsen Ash jeans. (the last view shown in the diagrams).

Denim metallic Ash jeans

However I am tempted to say, in honor of May the 4th (Star Wars day) that THESE are not the wide leg jeans you are looking for. If you get it, you get it...and on a slightly meandering note, I saw the original movie as it opened that first summer in the theater. Try to imagine how thrilling that movie was before it was everywhere in our culture. It had everything, adventure, romance, good vs. evil, humor, inspiration and young Harrison Ford! And we had to wait 3 years! for each sequel to find out what happened next. I still love that original trilogy (and have never seen any of the subsequent ones :)

Back to sewing, I did cut these out using the pattern pieces for the wide leg version. And basted them together for a try-on. And decided noooooooooo. Everyone has their pet peeve about how things look on themselves, for me it is things that make me look extra short in the bottom half. As I'm not tall to begin with, and kind of short in the leg half, I don't need clothes that make my bum look even closer to the ground.
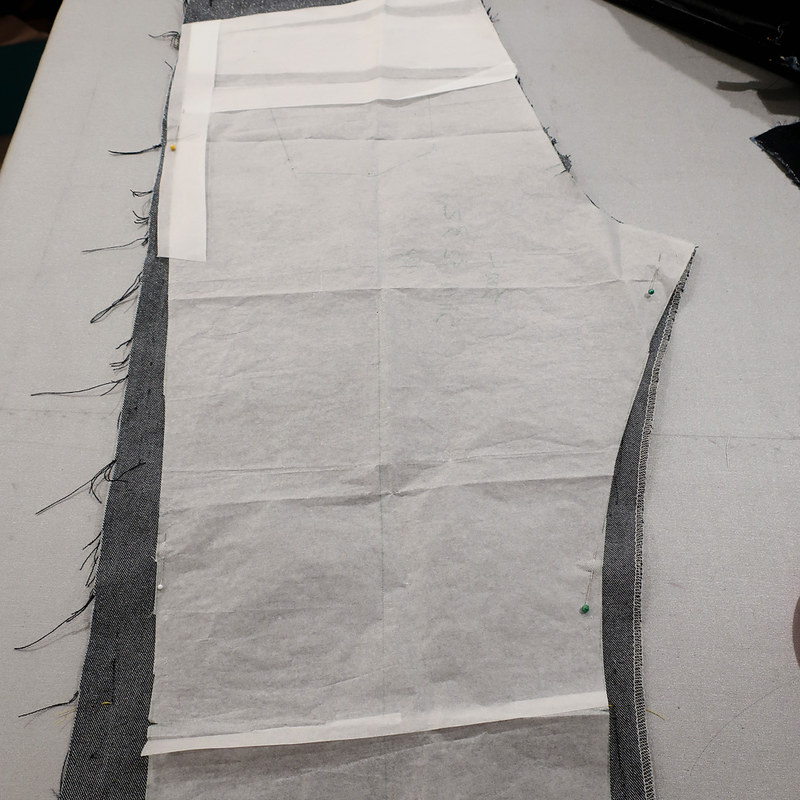
So I took out my pattern pieces from the slim leg Ash jeans and overlaid them on the legs and recut them to that shape. Below is the back pattern piece, you can see how much narrower the slim leg is. And not just in the outside seam, but also starting at the inner thigh and continuing down to the ankle.
I didn't get a photo that showed the whole pattern piece but you get the idea.

Ash jeans wide leg conversion

The yokes were already sewn on the backs and the pockets and zipper were all done in the front, so it was a quick bit of work to unbaste and then restitch after I had trimmed them down to the slim leg.

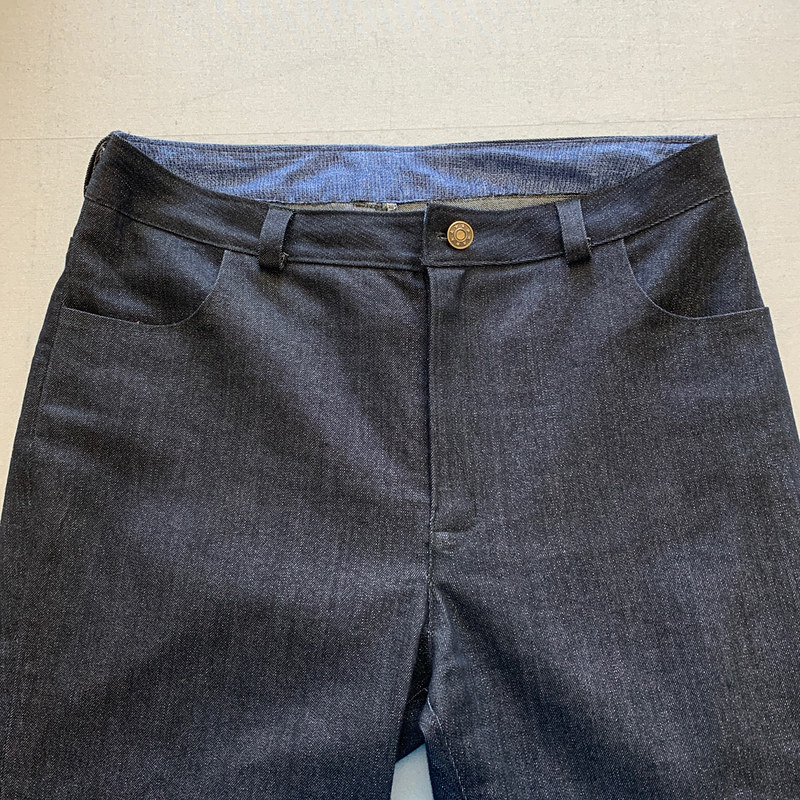
Sparkle jeans waist view

Not the best looking photo but I wanted you to see how high these jeans come up on me. I did raise the waist all the way around 1/2" since I'm long in the rise. I bought the Dawn jeans pattern which is described as a high-rise jean so I'll be interested to see how the rise is on that.


Ash jeans front pockets outside

The whole time I was sewing these I thought the denim was black with a bit of sparkle, and I used black thread for both construction and topstitching.

I like the pockets to continue all across the center front of the jeans, I think some call this a waist stay, or I in RTW jeans I've seen it called tummy control. Whatever it is I think it keeps the front from stretching out, and also it keeps the pocket bags from creeping out which drives me crazy.

I'll be showing how to do this in my Jeans class at Hello Stitch Studio which is coming up in June, it's two Saturdays June 1 and June 8. I think this Ash jeans pattern is so good, the fit and shaping are really nice. As I mentioned before I made the first pair back in January and I used my hip measurement to choose the size. I took them in at the waist but the rest of the jeans are according to the pattern and I really am happy with the fit. This is probably the most suitable denim I've used, as the other two versions were sewn with denim I got at fabric swaps and a little skimpy on the stretch amount although they worked out ok.

Ash jeans inside pockets

You can see that I rummaged around in my scrap box for some cottons to use as the pocket bags and the waistband inside. I don't really get too worked up about the insides and don't care if they match. They don't show! use up scraps!  I put plain woven cotton for the inside waistband instead of the denim as I felt it was the tiniest bit rough and also got quite hot when I ironed it, possibly due to the metallic component. So I didn't want that touching my skin around the waist. Also using a non-stretch for the waistband seems to work well for me.

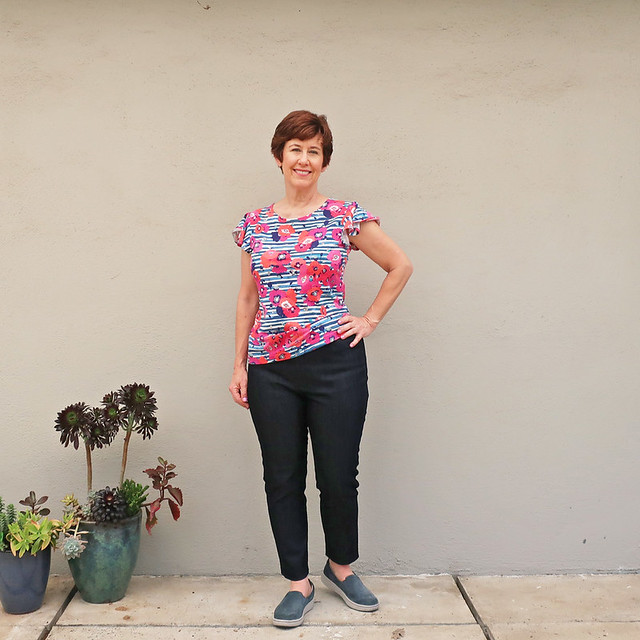
And here's how I realized these jeans were actually blue and not black.

Jeans with stripe shirt

I put them on with this silk top which is a black/white/green print. And took some photos. Staring at the pictures it was obvious that the denim was blue. Oh well. And the silver loafers are maybe too much with the sparkle jeans....Funny how you see things in photos that you don't notice in the mirror.

Close up view and the sparkles are evident?  Also looks like black denim, right? This is in my super bright in the daytime sewing room.

Ash  jeans close up zipper front


Sparkle jeans 3

So that's the latest on my Ash jeans. I probably have about 10 pairs of blue denim RTW jeans in my closet, various other colors also and now 3 pairs of Ash jeans. I fully intend to make the Dawn jeans and them it's time to make some shorts maybe? No more jeans for a while. Plus once our summer heat kicks in I rarely even put ON jeans until sometimes mid-Sept or even later.

For May I have a bit of a break in my schedule of teaching classes, as this month has a lot of weekend holidays and other stuff on the calendar so we don't have as many classes. Although we just did a weekday class last Thursday and it sold out immediately so based on that we have a couple more weekday classes now scheduled (Wrap dress and Lander pants classes).

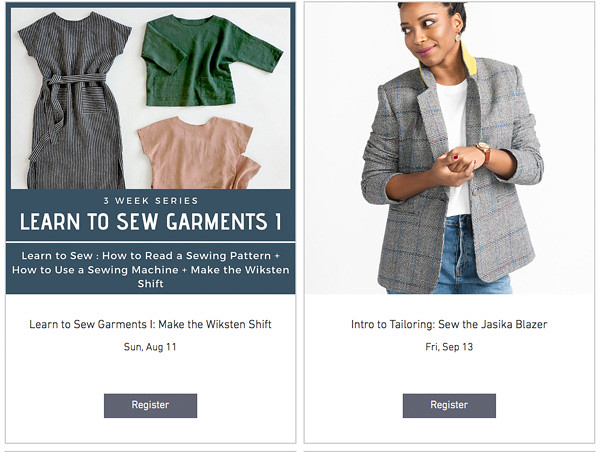
Instead of listing my upcoming classes, here's a screen grab to show you what's on the calendar for June - Aug. There are just a couple of spots remaining in the Fitting class on June 22 and we won't have another scheduled until the fall so if you are interested jump on that. Here's the link to the class page.

Register or see more information for my 
Garment Sewing Classes at Hello Stitch Studio

HS classes this summer composite

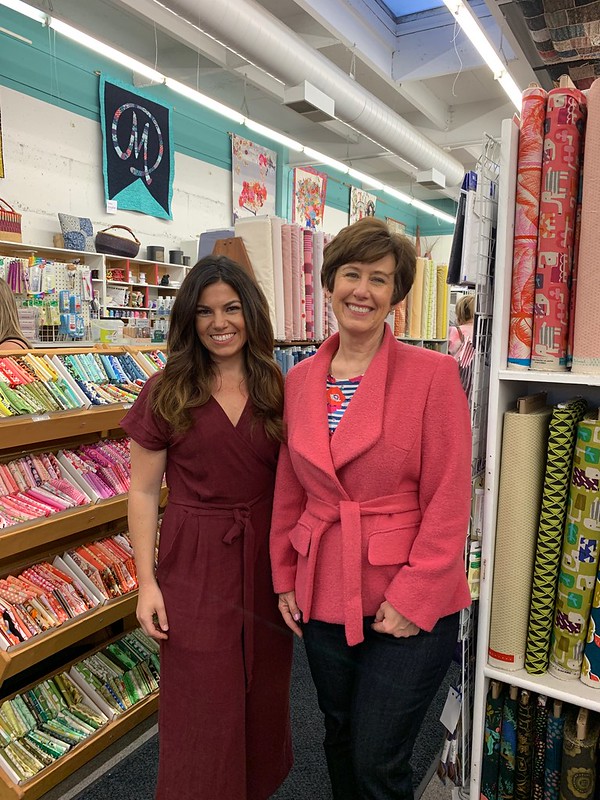
Did you see what class is there in the last image? Yes, the Zadie jumpsuit! I'm very excited to make that, I just got the pattern and will be sewing up a sample in the next month or so. And I didn't think it would work on a height-challenged person :) but I ran into Kristin at the Stone Mountain Fabrics 38th Anniversary party on Friday night.

Stone Mountain anniversary event

Kristin, who I met in a few of my classes, said her Zadie was hot off the sewing machine, just finished the night before. It looks so cute on her! so now I'm ready to try one for myself. It looks like
we are the only ones there but the place was packed with so many stitchers - a really fun event and great to see everyone. The sewing community in the bay area is really lively!

And looking ahead to August and September, check this out. I'm doing another beginner series based around the new Wiksten dress pattern (which I believe is going to be back in stock in the next month or so) and then my Jacket Weekend workshop is official. The class registration is live on the Hello Stitch Website.

Classes in Aug and Sept

The jacket workshop will be a 3-day class (afternoon on Friday and then Sat/Sun). The new Jasika Blazer pattern is a good option but if you already have a jacket or coat pattern that you want to do that's fine with me. I will be showing a lot of techniques and demonstrations on how I do things, including what parts of the instructions I ignore and go my own way :) all my thoughts on interfacings and a faster way to make the lining. Plus whatever else I think of in the next few months. While this class isn't until Sept. we have had registrations the day it was listed so I think we will have a great group. If you have any questions on this please email me. 

That's the latest on my Ash jeans, now onward to some summer dresses. I have a couple of things picked out from the last two Burdas and I need to get going on those. 

Happy Spring Sewing, Beth

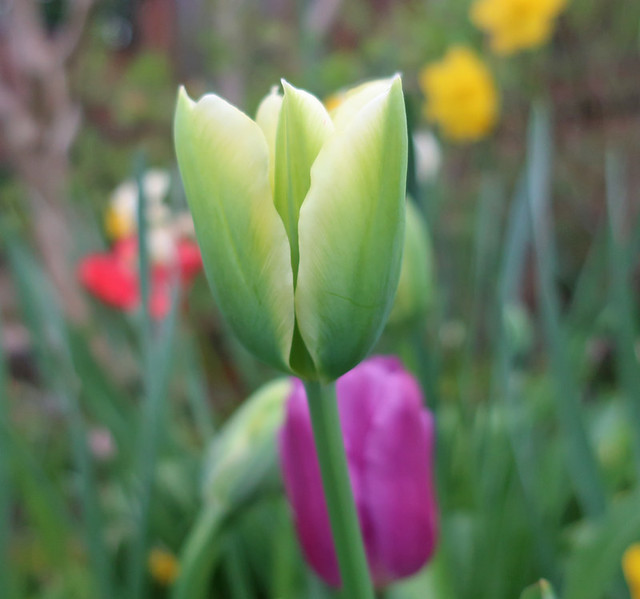
Today's garden photo, I was so pleased with these bicolor tulips that I planted in the fall and promptly forgot were there. They've finished blooming now but the colors were so pretty. 

IMG_1434


Saturday, April 27, 2019

Vogue 1412 Rebecca Taylor top in silk crepe de chine from Britex

Sometimes I wonder if I can sew a pattern as is - meaning without changing the design in some detail, whether large or small. There is always some feature or detail that I modify, redesign, leave off, or just ever so slightly tweak to suit my personal taste. When I sew pattens that are going to be examples at Hello Stitch I do mostly sew the pattern as is, and find it is so quick! Not changing things means I can just sew like the wind, without pausing to contemplate the design and get bogged down in some tiny detail. However when I make things for Heather, it is a collaboration and often she shows me an item in ready-to-wear that she likes and wants to recreate in her specific fabric. Mostly it is a collection of details, a collar here, or a skirt there that add up to a particular feeling in a garment.
So lately we have been trying to work through the collection of blouse weight silks she bought at Britex last fall. They mostly coordinate with the 2 blazer jackets I made for her in the winter, using McCalls 6172 which you can see here and here.

This blouse is Vogue 1412 by designer Rebecca Taylor. Here it probably looks just like the version on the pattern envelope but I did make a substantial change, in that it now buttons down the center front. The pattern is designed as a popover, which goes over the head and has no opening at the center front.

silk blouse front on form

V1412 Vogue blouse pattern env

I sewed View B which has gathers at the shoulder and center back neckline. The front V-neck does have some buttons but it is all one piece across the front and then a fold creates the overlap which is buttoned. I can't even remember if it actually opens in the pattern instructions. OK I just looked at them and you do make a working buttonhole closure there but the front is cut on the fold so I think it is just a lot of work for not a real opening. In any case, Heather likes a top that actually opens at the front instead of pulling over the head, and she wanted a hidden buttonhole closure. Well as you might know I LOVE a hidden buttonhole front shirt so that was a challenge I was ready to accept.

Here it is in the finished version and then I'll show you how I got there.


Silk blouse hidden buttonhole

Here's the technical drawing for this pattern. It has two completely different tops in the pattern, which is one of the things I love about Vogue patterns (and this applies to Simplicity, McCalls and New Look as well). Often there are multiple garments in one pattern envelope, sometimes an outfit and sometimes just more than one garment. In any case, for this one I was making ViewB.


Vogue 1412 line drawing

Here's the image of the pattern piece from the instruction sheet. It's pattern piece 10 for the front, and it is cut on a single layer and then marked with the fold/pleat lines. However it did have the center front marked so I used that as a starting point to figure out how to change it up.

Vogue top pattern piece


First I cut the piece 10 in half keeping track of where the center front line was, as that would be where the buttonholes would be.
Then I added seam allowance from the garment edge. Lastly I adjusted the neckline facing (piece 12) which I made continue as a long facing for the center front edge. I changed the grainline on that as well, cutting it on the straight grain of the long section (ignoring the existing grain line).

Vogue silk top facing adjustment

For pattern size alterations, I did add a bit on the side seams and added length which would have been taken up with a dart, but in trying on a sample garment I determined that a dart was not needed, there was adequate fullness due to the shoulder gathers. (which pattern making-wise is really a bust dart manipulated into shoulder gathers, I just looked through my old posts and I thought I had done a post on this but I guess not, so that will go on the to-do list).
The bust dart was removed on the final version, but I did add 1/2' in extra width vertically that you can see above, just a tiny insurance policy for a full bust.

Here is the hidden buttonhole closure after I made the buttonholes. Actually I sewed them before I attached the facing, they go on the facing and then that facing is sewn to the shirt front, stopping and starting where the opening is to allow it to button. I've done a number of posts that show this and how to do it, the best one if you want to se  it step by step is this post where I changed the coat closure to have the hidden buttonholes.  I also wrote a post on the Craftsy sewing blog (now Bluprint) and all those articles and tutorials are still there. Here's the link to that post, complete with a color-coded example which makes it easier to follow.


silk blouse placket detail

The one thing that kind of stopped me in my tracks was the final line of stitching that closes up the buttonhole closure and attaches it securely to the shirt front.
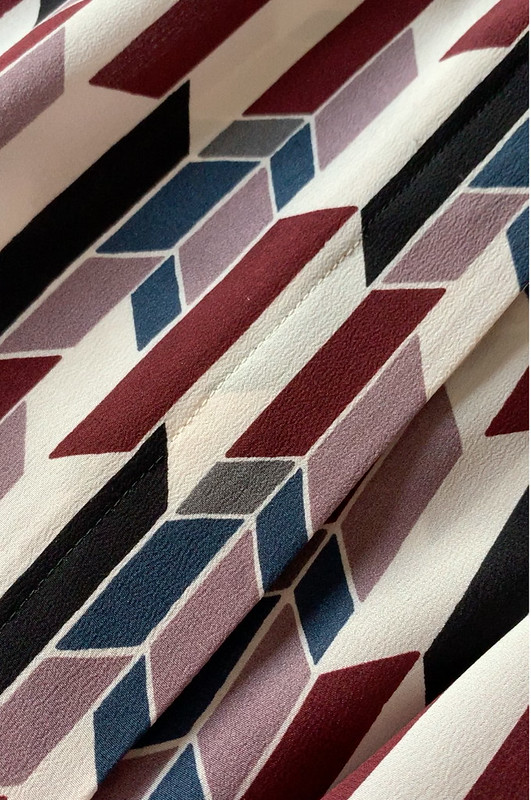
While I was happy with the way the print aligned across the front (it's not really a stripe or a plaid but the print has something of a horizontal and vertical pattern), I noticed that where I needed to sew down the buttonhole placket was right in the middle of a row of black and cream segments. So using either black or white thread, or one of the other colors would have been noticeable in a way that I didn't like.
To solve that issue I changed the thread on each segment from black to cream, and then back again. It was about 8 changes and it was accomplished about 10 minutes, so not all that much trouble and worth it to get this look. If you examine closely you can see the cream color thread and the black thread. I pulled the tails through and knotted each one so it would stay stitched in place. Yeah, kind of fussy but I was happy with it.

silk blouse stitching colors

Back view of this top. I really like how the front neck section continues and you seam it in the center back to create the back of the collar.  With all this gathering the pattern really requires a very flowy and soft fabric, so silk crepe de chine is ideal and a lightweight rayon woven would be great as well.
And I notice - all my dress forms are so crooked! I think because I'm moving them all the time and am not particularly gentle so perhaps the insides get bent a bit.

Silk blouse back view

The way the top of the center front curves meant that I couldn't get the top button as close as I would like to the top so I put a tiny snap there to keep it shut.  Since the buttons are hidden I used some that matched well enough for the center closure.

Silk blouse snap

For the sleeve cuffs I found 4 other buttons in my stash that coordinated a bit better, and I used grey thread for the buttonholes to make it mostly neutral. I made the buttonholes on my Singer Quantum machine, and they are just OK. Nothing will make buttonholes as well as my old Singer 404 which I could have busted out for this but didn't.  On a soft silk blouse I like to use the continues bias binding in self fabric for the cuff opening.

silk blouse button cuff


Silk blouse front neckline


Silk blouse side view

So that's the latest on this Vogue pattern. I so appreciate the emails and comments I receive here and on Instagram saying that you like reading about things I sew for Heather so I will certainly continue. This summer might be about the pattern repeats for her as we have a few things in mind that will reuse patterns. After going to the trouble to fit a pattern I always want to reuse it and see how I can make it look differently by changing up the fabric or styling.

Up next at Hello Stitch, tomorrow will be my Lander pants class (again, I think this is the 5th session?) and we are doing some new classes this summer, including two others that use True Bias patterns (Ogden cami top on Sat. June 2 and Emerson Pants on Sat. June 29). With the Mother's day and Memorial day weekend in May we don't have as many classes scheduled that month. And then some new ones in June, July and August. Here's the link to the Garment Sewing Classes page where these are all listed. Most all of our classes are selling out so if you are interested sign up soon!

May 4:                          Copy a Garment Class, a few spots still available.
June 1 and June 8:        Make your own Jeans, Ash jeans pattern
June 2:                          Sew the Ogden Cami
June 9:                          Knit T-shirt class
June 22:                        Fit Lab: morning, pattern fitting basics, measuring, common adjustments
                                                   afternoon, fit your own pattern
June 29:                        True Bias Emerson pants class, a wide leg pant that works as culottes or shorts
July 14                          Deer and Doe Myosotis Dress, including learn to set in a sleeve
July 28:                         Zadie Jumpsuit from Paper Theory (I'm looking forward to trying this one)

Update:  Jacket weekend workshop will be the weekend of Sept 14-15 and we will be making the Jasika Blazer from Closet Case Patterns (however as usual if you have a different jacket blazer pattern you want to do that is OK with me).

What have I been sewing? I just finished another pair of Ash jeans from Megan Nielsen patterns, in a questionable sparkly denim which I will show you soon. Although I will confess I've been wearing them plenty. I want to sew up that ruffle hem dress from the Burda mag and then I just got some great striped cotton for a new T-shirt (Girl Charlee fabric, which I have had great luck with as long as I stick to the cotton/lycra jerseys).

Time to get outside now on this gorgeous spring Saturday. The tomatoes are planted, the roses are blooming and if I could just get the drip irrigation to work properly all would be right with my garden world (the perpetual spring problem!).

Happy Sewing, Beth

This yellow one wins the race for the first rose bloom in my garden. Since I took this picture there are plenty of other blooms as well. They do best this time of year, once the July heat arrives they get a bit tired, as well all do 😊.

yellow rose 2019


Friday, April 12, 2019

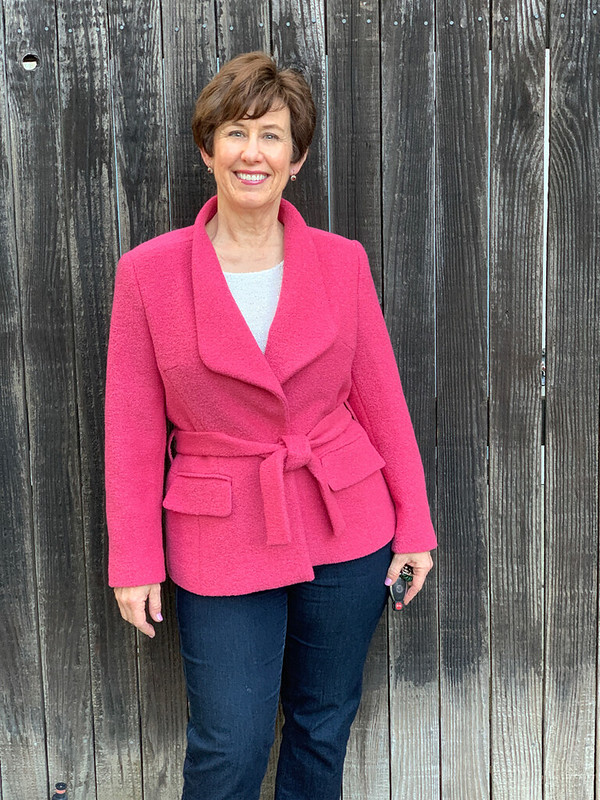
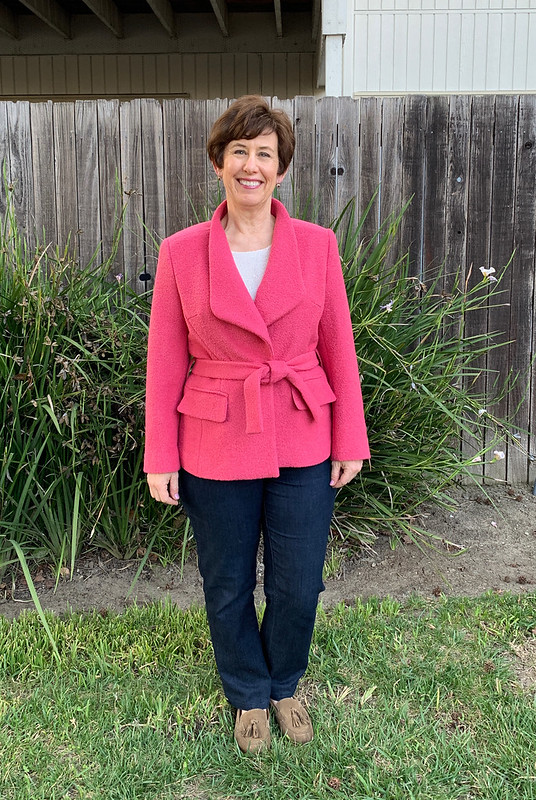
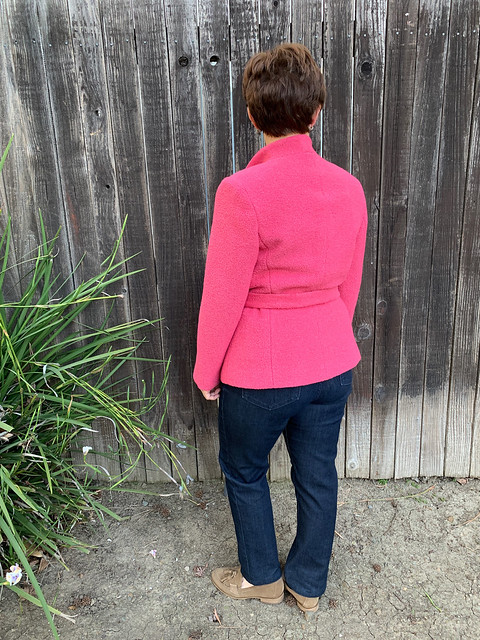
Think PINK: Burda Jacket 10/2018 # 108 in pink wool boucle

This spring I have repeated something that I've done a few times in recent memory, that being I've sewn up a wool coat or jacket that will not get any wear until next fall. I just finished this Burda jacket from their October 2018 issue, it's # 108.

PINK JACKET 1a

I've been wanting to make this jacket since that issue arrived in my mailbox. Despite the fact that it has a belt. Coats or jackets with belts and I just don't get along. I often walk around with a jacket open, not buttoned up so what happens to the belt, it just hangs there. But despite those misgivings I loved the collar/lapel arrangement on this pattern. Perhaps also the photo in the magazine was shown in cherry red, so appealing to me.
I went on a hunt for some suitable fabric. And also to find a color that didn't already exist in my wardrobe. I wanted a solid color and so around Valentine's day there was a extra 10% on the Mood Fabrics website on all things pink. So this wool boucle jumped into my cart. My regret is that I didn't buy about 1/2 yard more, as I have about 5/8 yard remaining and if I had one yard remaining I could have made a cute 60's style sheath dress to wear with my jacket. Now that would be committing to this color, right? But I will work on finding something to pair with that remnant and come up with a use for it.

Pink Jacket on form 2

I have so many projects going on right now that I didn't do any photos during construction - but if you want jacket sewing details look at any of my previous posts, I've made 3 blazers in the last couple of months!

I did take this one during some late night sewing, and had to ask @geopri123 about the pocket construction as it wasn't quite apparent to me, and of course the Burda instructions are a bit cryptic. Actually the Burda instructions are generally OK, but where the fall down is that they give names to the pattern pieces or various components that don't quite make sense. Perhaps it's the translation. In any case she gave me some info and they came out fine.

Burda jacket pocket


PINK JACKET 3

I think the belt is a bit bulky, but I didn't get around to making an actual belt with a buckle. I found a nice buckle in my stash so when autumn arrives I will make that and be ready to wear this when the chilly weather returns.

Here are the images from Burda. I just can't with those big snaps, I think they ruin the look of the lapel.

Burda Pink jacket pattern

But that means the belt is definitely needed to keep it closed.
Sewing note - I added 2" in length to this jacket. My tendency is to have jacket stop well below my hipbone, perhaps because I have a long rise (despite being a short person) a lot of jacket pattern seem too short to me. So I add length which I can always remove if not needed.


Pink jacket belt carrier

I didn't use the pocket welt pieces for the pockets, just cut my own but after I did the first one I realized that they would have been a lot easier to sew if I had made them a bit wider, like 3/8" instead of my usual 1/4" wide. That boucle is a bit thicker than other wools.


pink jacket 5


Pink jacket on form1

See above, that tie belt is just too bulky and regretfully I tied it a bit sloppily when I took the outdoor pictures. On the plus side, the color of the jacket is pretty much exact in the outdoor photos so you can see how bright it is. I think it is more of a coral pink than a true pink. I started a top to go with this jacket in a white/pink print fabric and ended up not liking my super bold sleeves - so it will be revised into a sleeveless top. Which I will probably wear more anyway! I still have the a navy blue/pink rayon woven I bought at Stone Mountain for a top to go with this and I won't mess that up.

So that's the latest on my bold pink jacket. As I mentioned at the top of the post, I've sewn up a wool item just as our spring weather warms up twice before.
First with this blue wool coat from the Burda Style Book, and second with this Burda Shawl collar coat . Hmmm, perhaps a theme here, I find the Burda outerwear so nice that I covet these patterns and make them up whenever the mood strikes me. Note to self - sew fall things in the fall. The problem with sewing fall things here in N.Calif. is that it is quite hot in Sept. and often into October so I never want to be sewing warm fabrics then. Perhaps my clever plan to sew them in spring and then put away to be ready for fall is genius! ha ha.


PINK JACKET 2


In other news, lots of new classes coming on the calendar at Hello Stitch Studio.  Culottes, a jumpsuit, dresses, a cami top, jeans and more. We are focusing on specific patterns for the classes and choosing ones that come in a full range of sizes. Hope to see you in a class soon.

Jacket Weekend Workshop - definitely in the plans. Either in mid Sept. (9/13-15) or mid Oct. (10/18-20)  Email me if you are interested and want more details. We will decide on the date soon. I'm now leaning towards the September date plus that is a gorgeous time to visit the Bay Area! P.S. planning on using the new Closet Case Jasika blazer pattern although if you already have a jacket pattern picked out I'm fine with that.

Up next, I made a couple of Tamarack jackets so I will blog about those. Yes, me doing some quilting. Spoiler - I find it a bit tedious, but they look good. And then onto spring, and starting my cropped wide leg Ash jeans,

Happy Spring Sewing,
Beth

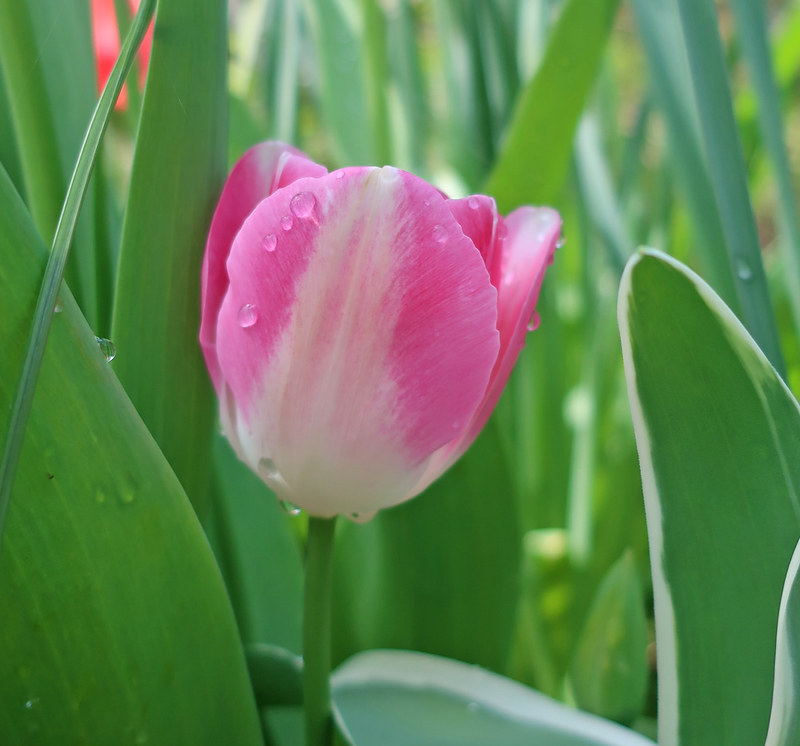
Of course it had to be a pink tulip for today's garden photo to go with my pink jacket. These striped tulips have been such a pleasant surprise after I forgot that I planted them. That's the thing about gardening, some delightful surprises can appear.

IMG_1426