Wednesday, February 19, 2020

Red plaid wool coat Part 2, bound buttonholes and other details

Onward with my red wool coat that I started in the previous post. I need to finish it the next day or so as this upcoming weekend we have the Bay Area Frocktails event and I might as well wear it then. Because winter is fleeing fast, it's barely coat weather anymore. Just days of sunshine, which might sound nice and it is, but as usual we need the rain.

A downside of having the flu was that I certainly couldn't go out and buy buttons, so I boldly just made them and figured I would find an appropriately sized button later. Which might turn out to be easier said than done...I did stop by Stone Mountain on Sunday but didn't see anything that looked good with this coat. I have a specific thing in mind which is often trouble when shopping. In any case
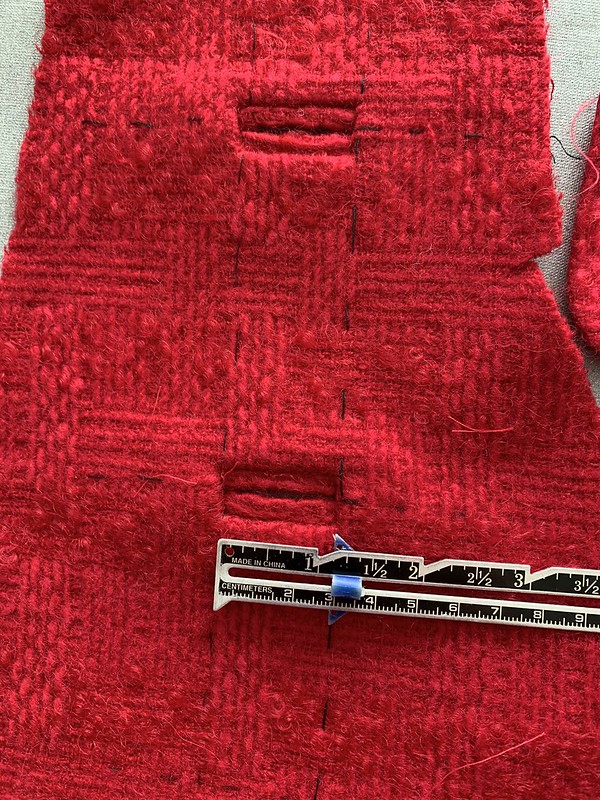
the buttonholes are done. I chose a dimension that I thought looked good with the proportions of the coat. They are 1 1/8" wide and the welts are 1/4" wide.
IMG_1989

Shown above is my tester. I always do two of them, spaced the distance apart that I'm planning for the coat or jacket so I can see proportions, how they look when completed. I'm a bit of a Goldilocks when it comes to details like this, never use the markings on the pattern and just play around with spacing until it looks juuuuuust right.

With a coat like this with a waist seam you have to take that into consideration, and also the collar area. So I start just under the collar, and also decide where near the waist I want a button, and then work my way from there.

Once I've decided spacing, then it's time to mark the buttonholes. I do it very similarly to a welt pocket, additionally creating what I call a thread ladder so the placement is even from the edge all the way down. Note I've marked the edge seam allowance stitch line, which is 5/8" in from the edge, and then the second red line is the coat center front. The buttonholes should cross over the center front a bit, between 1/8" and 1/4". Depends on the size of button and the thickness of fabric.

IMG_1990

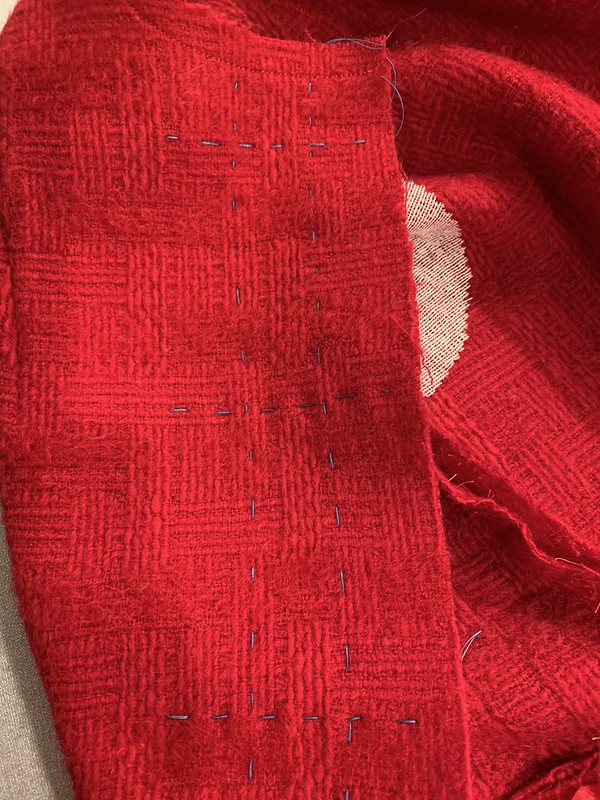
Once it is marked in pencil or chalk on the inside I go over each line with a thread trace. Using a very contrast-y thread color. This is going to be used on the right side so that's why the contrast is important. Mostly I use silk thread for this as it pulls out so easily. No knots, just running stitch along the lines.

Shown below, this is what you see on the right side, the blue thread ladder which makes it possible to place all the buttonholes accurately and evenly.
IMG_1991


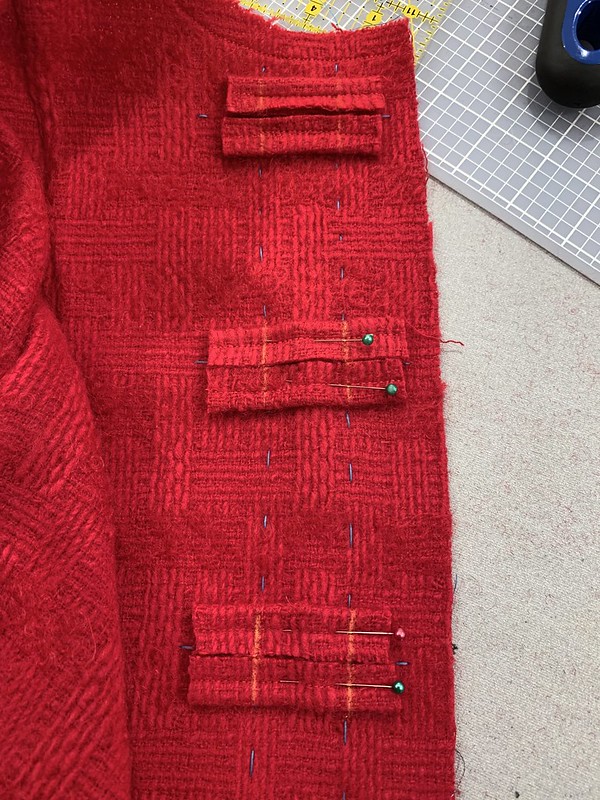
Next step is placing the welt pieces across the button placement marking. I neglected to take a picture when I sewed the welts. I've found that it's easier to start with a length of fabric, about 1.5" wide, press in half with a good crease, then stitch 1/4" in from the folded edge, and then use the rotary cutter to trim the other side so the finished welt is precisely 1/2" wide.
IMG_1992

The welt pieces are placed across the button markings, and then the ladder part of the thread trace is used to make the chalk marks which show where to start/stop stitching the welts.


IMG_1993

Then I stitch them down, right on top of the existing stitching, reversing at the ends and then tying off the threads in knots. (which may not be necessary but that's how I started doing it so I continue :)
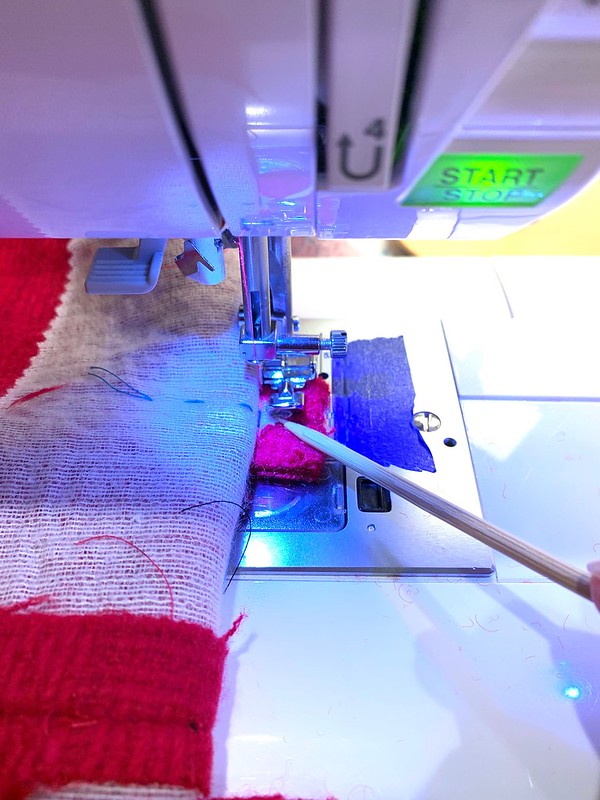
Also I've found that using the open toe foot on my modern sewing machine is really helpful, the regular foot has a bit of plastic in the center that while clear, doesn't really let you see where the needle is going. On my old Singers I do love the straight stitch foot, you can always see exactly where you are stitching.

Next it's time to boldly cut open the buttonholes. I say boldly but I really mean carefully and precisely!

IMG_1994

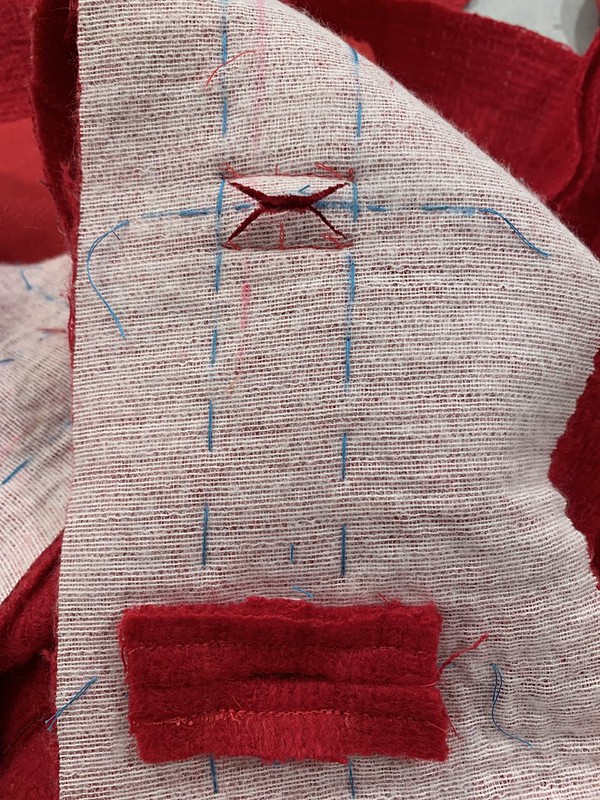
They are cut just like a welt pocket, but in miniature. It's extremely important to make those little triangles big enough so that you can stitch them down at the sides of the buttonhole. I tend to mentally divide the length of the buttonhole into thirds and then have each triangle a third of the total length. With tightly woven fabrics you have to cut very accurately all the way to the stitching, with loosely woven fabrics such as this one it's better to cut where it looks correct, and then flip it over and see how it looks on the right side. Because the loosely woven fabric tends to unravel a bit so it's best not to overdo the cuts. At this point I give it a good press on the wrong side and would probably trim off the ends a bit although not necessary at this point.

They were all finished, pressed, basted shut and I was feeling pretty satisfied with myself when I realized that I hadn't sewn down the edges. Duh! I blame the remnants of being sick for my brain fog. But fortunately I did remember, see below. A wooden kitchen skewer makes a good tool for holding that little triangle bit in place as you stitch, with the zipper foot to get close to the edge.
IMG_1998


Ready for more?  Now it's time to deal with the facing at the back of the buttonhole. I don't like the windowpane method, it seems like extra work plus how can you get it to match exactly to the buttonholes in the coat or jacket front? I see a lot of people using this method but I prefer to cut and hand stitch the facing.

Here's the coat with the collar sewn on, and the facing attached. But before I trimmed the seam edge along the front and on the collar.

IMG_2003

So here is how I do the back. Once the front facing is pressed I might baste that edge with silk thread just to keep that crease (which I did here).  Then the most important step is to baste around each buttonhole so that the facing is locked against the buttonhole and can't shift. (yellow thread circles below). This is the right side of the coat. Button welts are basted shut also.

Red wool buttonhole2

Then the fun (ha!) begins.
From the right side I poke a pin through each corner of the buttonhole. Then I snip a similar triangle cut on the facing, which will be turned under and hand stitched. Of course at this stage it's really important NOT to cut the button welts.
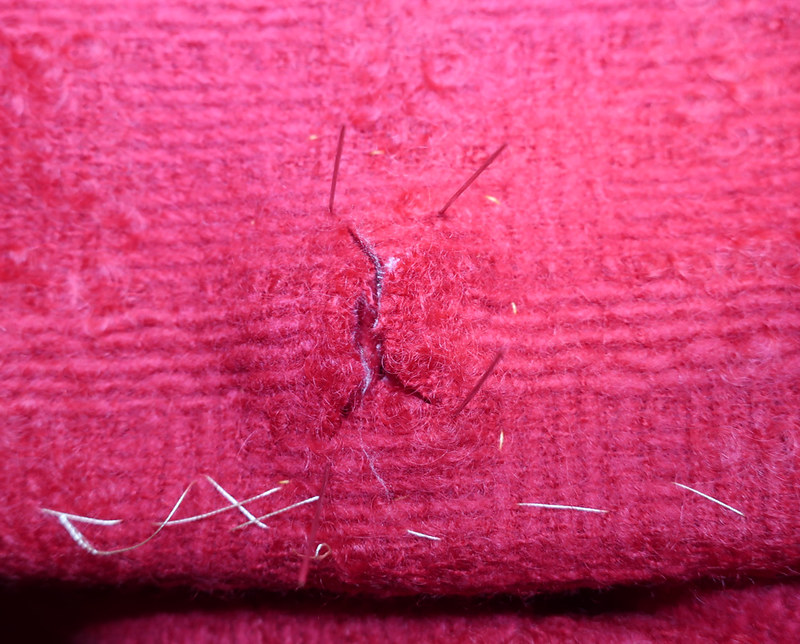
Red wool buttonhole4

Once the facing is cut open I slip the four edges inside and hand stitch them down to the edges of the buttonhole. In this thick and loosely woven fabric the hand sewing doesn't show. I think hand sewing is something you get better at with practice, like anything else, over time you learn how loose or tight to pull the thread, a lot depends on the fabric you are working on. Also how to bury the stitches so they don't really show.

Red wool buttonhole5

Here's another look.  I think in this one the three sides but not the top are sewn. By the way it makes me crazy how every photo has a different color.
Once it's finished the sewing is robust and then with a good press it is nice and smooth.
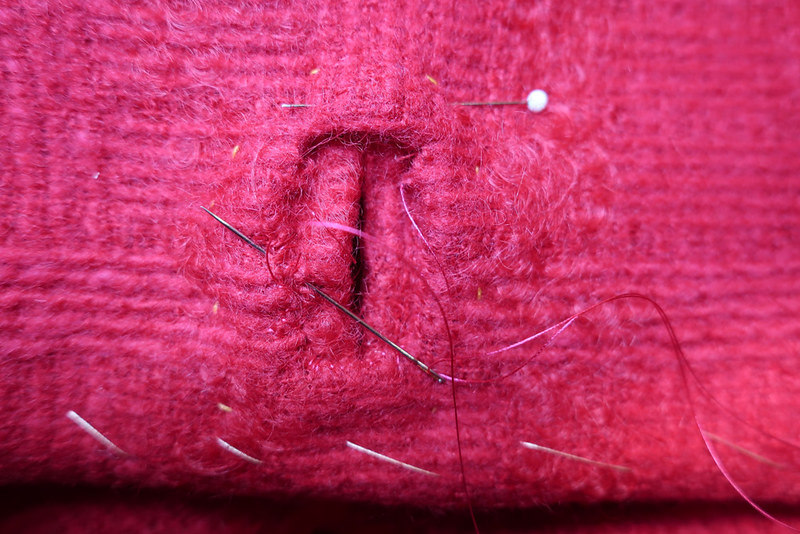
Red wool buttonhole 1

So that's the latest on my red coat. This might be more than anyone wanted to know about bound buttonholes but since I took all the photos I figures I might as well write it up.

Another result of my being stuck in the house is that I rummaged through my lining stash and came up with this pink satin which is a perfect weight for a coat. And a bold color choice but I think that now I like it.

As usual, I kind of free-form the lining, using the coat pattern pieces, and trim away at the front in order to match it up with the facings. Hand stitched in as the facing is tacked down already. Plus I'm a  hand stitched lining fan.

Red wool coat lining1

That's Part 2 of this coat, onward to finishing the hem tonight and then time to move on to other things. In fact I also stitched up a pair of Ash jeans yesterday as I teach a class this upcoming weekend at Hello Stitch and wanted to refresh my tired brain on the zipper fly construction. Which always comes out perfect with that Ash jeans pattern/instructions.

Happy Sewing,
Beth

Today's garden photo is a throwback to 2018 when this red rose was in bloom. I just looked at it today and it has all kinds of new growth so I'm hoping for some great blooms again this year.

IMG_0167


Saturday, February 15, 2020

Red plaid wool coat Part 1, preparation and fitting

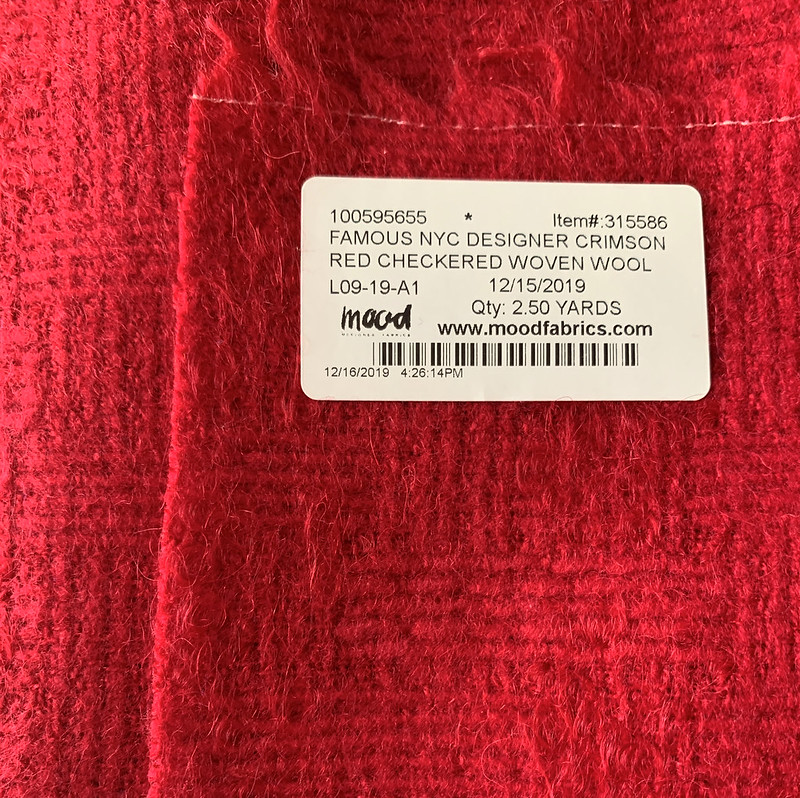
Right around Christmas I ordered a couple of different wools from Mood Fabrics. I think I got an email that they had wools on sale, and I had been eyeing both of these fabrics for a few weeks, ever since I got swatches of both of them a few months previous. Any time I order from Mood I take advantage of the free swatches, even if I'm not really interested in the specific fabric it's nice to see them in person and compare to the online description, color etc. I think for some quantity of $ spent you get a free swatch, and then also for your orders you get points, so I had about $ 25 worth of points to use toward the cost of the order. In any case, it was a little holiday present to myself 😊.

So I will jump ahead a little bit and show you this coat in progress. Last week I was still stuck in the house recovering from the flu (quite a persistent bug!) but I'm finally feeling better after 2 weeks. But being stuck at home meant I could work on this a little bit each day, in between naps and Netflix.

I'm going to break up this project into several blog posts. It's been a while since I made a coat and I ended up taking a lot of photos during construction. So in this post I'll review some fit and construction things, then in the next post it will be all about the bound buttonholes. And after that I'll finish it and find an opportunity to take some pictures of me wearing it.

IMG_1995

The color is just so beautiful, it's my ideal color of a red coat. And I will be ready next December to put this into heavy rotation for the holidays.

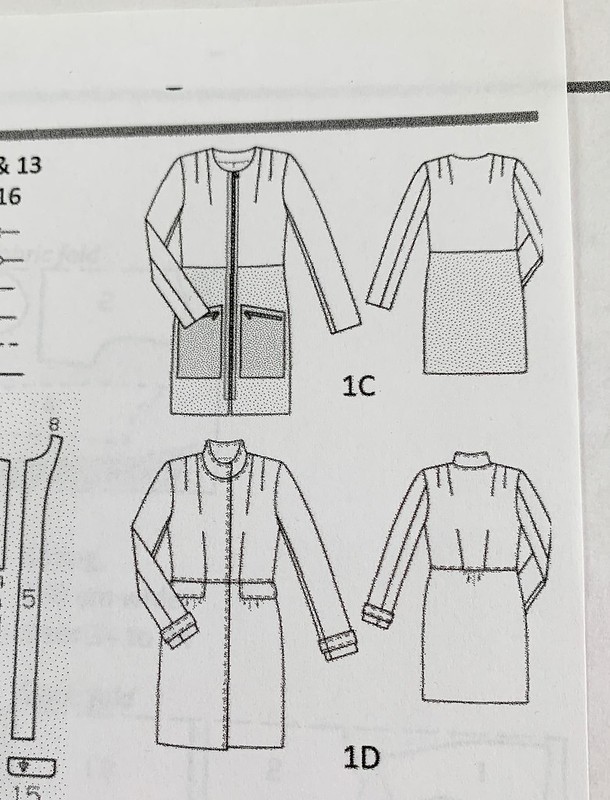
Sometime last year I kept looking at this pattern on the Burda website so I finally bought the PDF pattern and even printed it out. They had some very cute Burda Easy patterns on the old website, I also have a dress that I planned to make last summer but never got around to it. I don't know if this has a pattern number, but due to my strong dislike of zippers in wool coats I was only ever going to make the 1D version. Plus collarless, also not my favorite. I actually don't think this is all that simple, with that many darts and a center front separating zipper  - that is not in the easy category!

IMG_1980


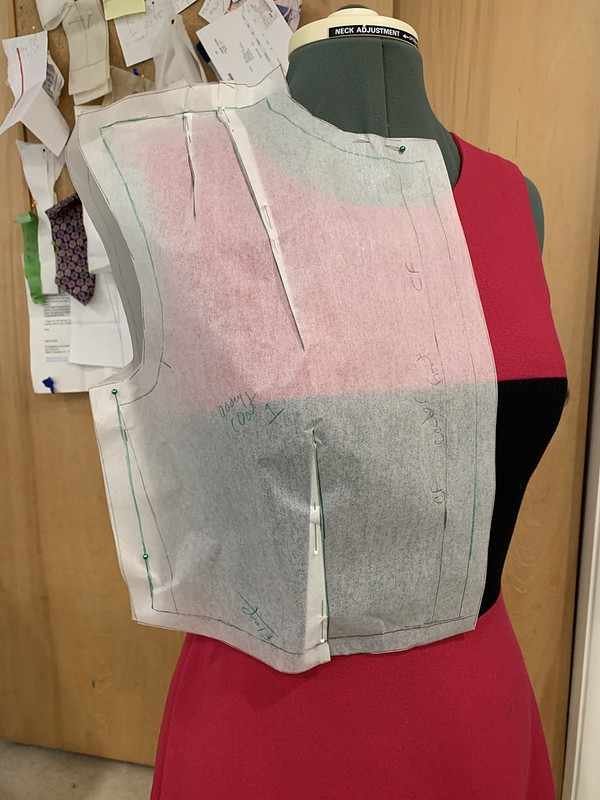
This color blocked dress lives on this dress form which I have adjusted and padded to mimic my measurements. It's really useful to use as a comparison for all kinds of patterns, particularly ones with a waist seam as I can see where the seam falls as compared to the dress. This is my go-to method for starting with pattern fitting. I prep the pattern pieces in my size (in Burda it's 38, in Vogue etc. it's 12)
and then I grade out as needed in the waist and hip. Then I pin in the darts, pin together any seams (such as princess seams), pin the front and back together at the shoulder and then put it over the form and see how it lines up. I also put it on myself and do the same checks. Granted that the dress on the form is a fitted dress but that's kind of good, as I can see how things line up, how much ease I want in what I'm sewing, how wide the shoulders are and also where the waist and bust line up on the paper versus the dress on the form.

Coat pattern waistline

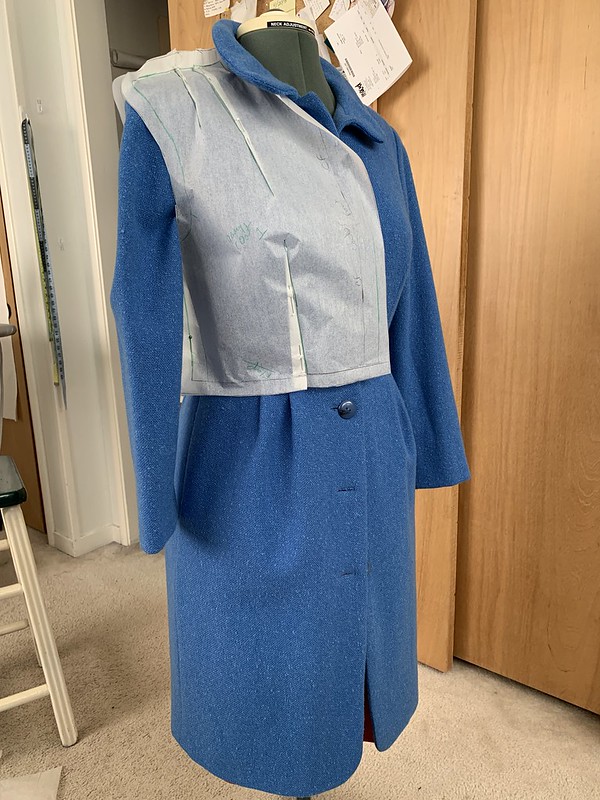
You might not be able to see it but the waist seam on the pattern piece is above the one on the dress, and I thought it might need a bit of length, so I  made another comparison.

This is a coat I made a few years ago, which is probably a better comparison than a dress for a new coat. While the paper pattern was a bit awkward over the coat it showed me that the waist dart might need to be lowered a bit. I decided to split the front horizontally and give it about 1/2" more length, and rebel that I am, I didn't adjust the back. I decided that I could make the front and back side seams fit as needed with some easing and steam. Which worked but I'm getting a bit ahead.  I also added another 1/2" in length to the whole bodice at the bottom, both on the front and back pattern pieces but ended up removing that when I sewed it. Fundamentally I just created a 1" seam allowance on the bottom of the bodice pieces to use as adjustment area. On a lot of outerwear I use 1" seam allowances instead of altering the pattern as I like to see how things fit as I go along and a 1" seam allowance on several seams gives me enough room for adjustments I might need.

IMG_1981

I also added 1" seam allowances on the side seams for more fit insurance. I think looking at the pattern pieces over the blue coat deceived my eye and I thought it would be too small. That turned out to be quite wrong.

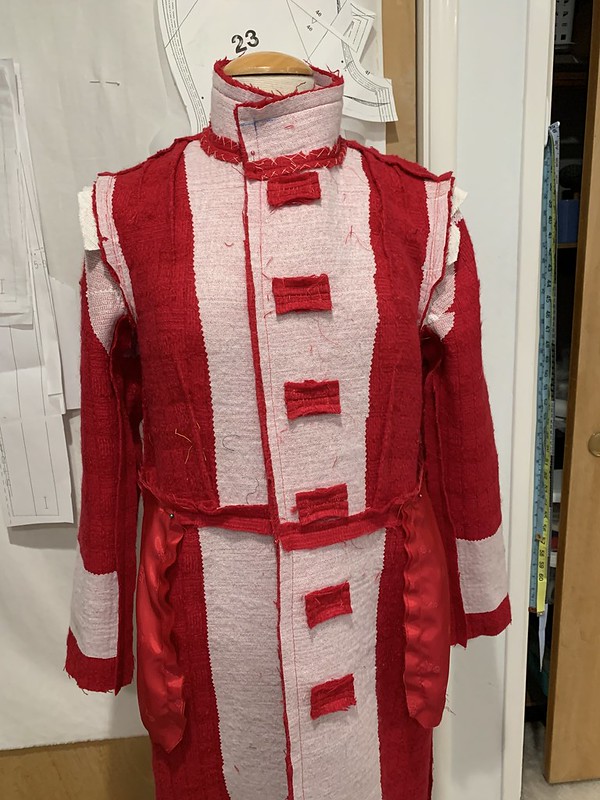
Time to baste! As I have made a number of coats over the past few years I find that I can hand baste them together so much quicker and with more control than sewing on the machine. So I basted the skirt pieces to the upper pieces and also basted the side seams so I could try it on for size. Note the interfacing is not yet applied to the bottom front, but it will be the same as the upper, it's the Pro-Weft Supreme Lightweight from Fashion Sewing Supply.

IMG_1985

With this preliminary try on I could see that I overdid it with adding to the side seams, so I seamed it in about 2" in the side seams. Once I decide on the side seams I mark with chalk, and while still basted together I cut away the excess. In this instance I left the side seams at 3/4".  Now I could take it apart and still know that when I sew the sides together the seam allowance is a steady 3/4" all over.

IMG_1986

I sewed the sleeves and hand basted them on as well for a better idea of fit in the shoulders and around the bust. I pinned in some shoulder pads and tried it on, it seemed way too wide in the shoulders for the style. I also compared the width across the back to the blue coat and it was at least 1.5 inches wider. So I moved in the entire armhole by 1/2", also taking off that 1/2" at the top of the side seam. That maintains the armhole as the same - just shifting the entire thing toward the center.

IMG_1988

In the above photo there is just one pocket flap, since that seam is hand basted I just put it on one side to see abut the placement. The skirt has some small gathers which are covered by the pocket flap. Which is a fake pocket! I did put pockets in the side seams, because a coat needs pockets.  The blue spots on the bottom of the skirt portion are pieces of painter's tape, which I sometimes use to distinguish right and wrong side. With this fabric I couldn't really tell a difference, but I always want to use all the same side so as I'm cutting out I either mark with wax chalk or put a piece of the blue tape.

Also no topstitching as shown in the pattern diagram. Everyone has their preference and I don't like the look of topstitching on wool, plus on this fabric it wouldn't even show. But to me it looks too casual. Another thing to notice - this is a plaid! (go back to the first photo) A lot of work for a plaid that isn't really multiple colors but the line pattern was all I could see as I prepared to cut it out and I knew it had to line up or it would make me crazy. I'm quite happy so far with how that detail has turned out.

So here is where I will leave it. Pockets sewn on, side seams finished, sleeves and sleeve heads attached, bound buttonholes still need some more detail work, collar needs trimming and grading, and then onto the lining.

Next post will be more than you may want to know about bound buttonholes!

IMG_2002


My plan is to buy some buttons tomorrow - oh yes - I made the buttonholes not having any buttons but I was stuck at home so I just went for it and I'm sure I will find something nice. Next weekend is our Bay Area Sewists Frocktails event so if I get the buttons I will have a new coat to wear - even though coat weather is rapidly departing the bay area. You know I love summer but I wish it would rain (a lot) before our winter ends.

Happy Sewing,
Beth

Reaching back a few months to this lovely little flower on one of my succulents. Which are getting more and more space in the garden.

flowers on succulent

Sunday, February 9, 2020

Sew the Precious - Silk Crepe shirt

Is it spring yet? My February has started off at rock bottom as I caught the flu and have been mostly horizontal for the last week. After hearing about it on the news for months I thought it unlikely I would get sick, as I practically shriek and jump away when next to someone who coughs. But alas the germs got me, shall I blame the gym in January? why not. Anyway - an imposed rest for the last week and I'm finally feeling human again.

This post is heavy on sewing details and techniques and lacking any photos of me wearing this shirt - that will have to wait until I'm feeling better, plus I have a skirt in the works that goes with this so it will wait for the the full outfit.

Purple dot silk fabric

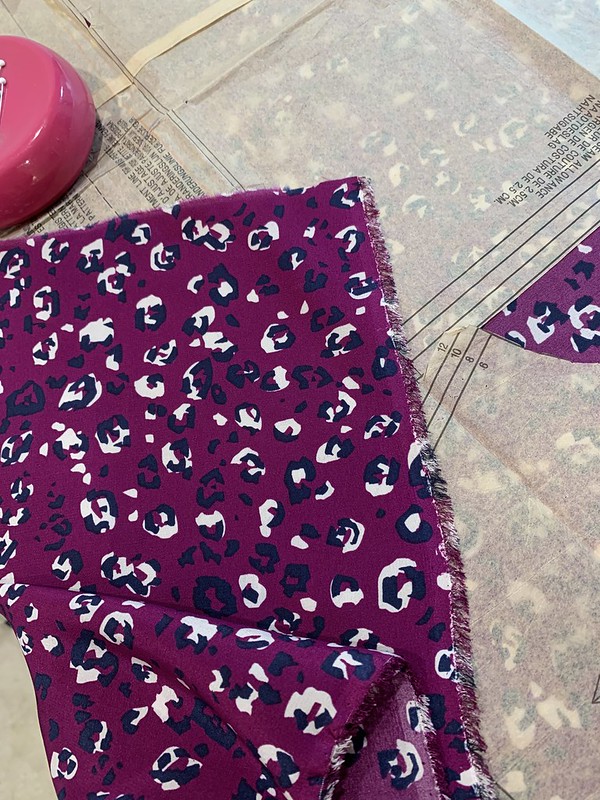
The last thing I had finished was a silk crepe de chine shirt in a purple leopard-y print. I would call this fabric "my precious" as I bought it over a year ago at Stone Mountain with not a real idea of what I would make but I just loved the color and feel of the fabric. I think at the time I had the idea of making a Bondi dress for my summer vacation but made this version instead, and set the silk aside, knowing I would wear it more often if it was a shirt or top.

Purple dot shirt front

The purple/magenta color is something I really like and the spots in white and navy blue make it so interesting. They still have this fabric at Stone Mountain - as you will see further down in this post.

So once I decided to make a shirt, after a few experiments with other patterns I returned to my favorite Simplicity 2339, which may be going on upwards of 20 uses of this pattern. I think a shirt is a shirt, and if this is the silhouette and detail I want then it's best to use a pattern that I know fits me perfectly.  Also when people say that standard tissue paper patterns are not very strong I just shake my head - I think they last forever - or at least a good long time. Although with this pattern I have modified it for various changes (covered button placket, popover version, darts rotated to gathers, etc) so I do have some pieces copied over onto other papers.)

Let's talk about yardage. Once I unfolded this fabric I saw that previous me only purchased 1.5 yards of this fabric which is 54" wide. Even for my bargainous nature that is a bit skimpy to make anything other than a sleeveless top or a very simple dress (which was my original plan).

Purple dot grainline change

Consequently I had to do a bit of creative cutting to get a long sleeve blouse out of 1.5 yards. Note the collar stand laid out at that jaunty angle. Not exactly on grain - but I figured with interfacing it would be stable enough to work, and it was.

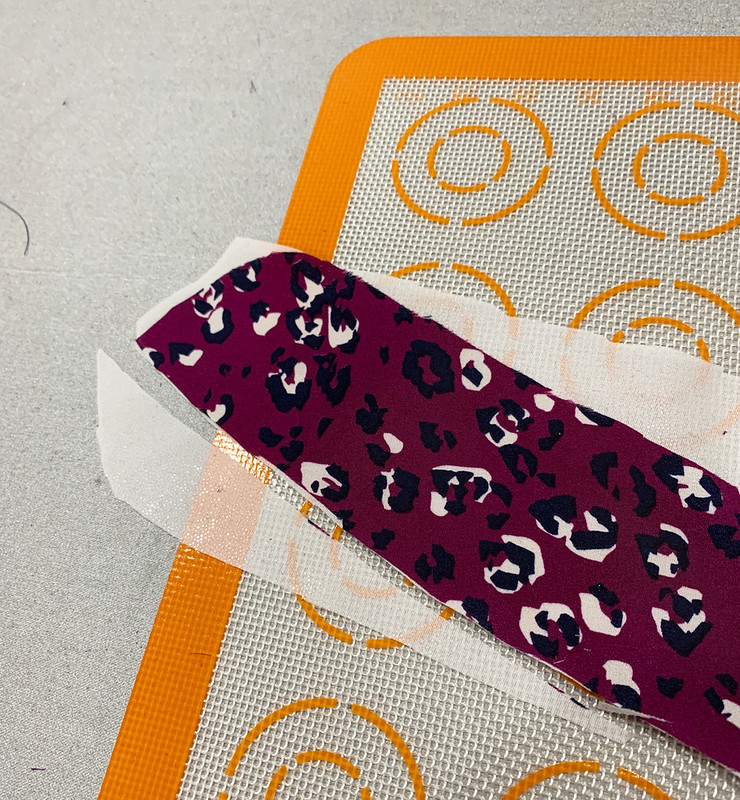
Speaking of interfacing, this is the new-to-me method I read about in Threads magazine, and it works so well. Particularly for small pieces. You can cut out an interfacing piece in the general shape, and on the right grain, then place over the fabric piece on top of a silicone baking mat. Press/steam away and then trim the excess. The part of the interfacing that is overlapping to the mat does not stick at all. In fact it doesn't even seem to melt. So a win in terms of less precise cutting and placement of interfacing, and no sticky bits that just peek over the edge of your fabric and adhere to your pressing surface.

Purple dot band on mat before trim

Purple dot band pressing on mat

I trim it with scissors but I suppose if you are a wizard with a rotary cutter it would be a quick task. I think of all the things that make scissors dull the worst culprit is interfacing, so I do all cutting of interfacing with a specific scissors so as not to dull my nice ones. Paper I think has no effect on scissors but interfacing is a menace!

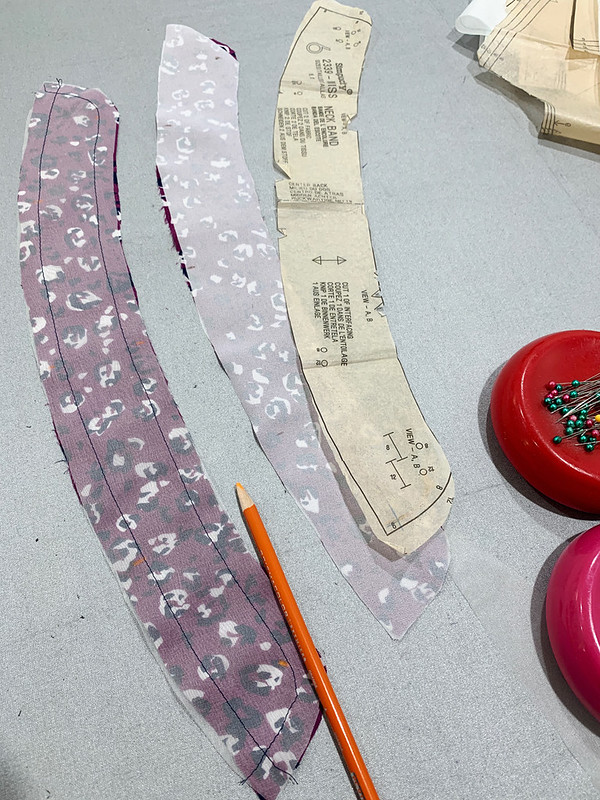
Lastly, I always use the paper pattern piece to verify the shape of my pattern pieces (usually I do this as I lay down the item prior to placing the interfacing on top. But I didn't take a photo of it that way - hopefully you get the idea. You would be surprised how much pieces distort with handling and it's just a bit of insurance to maintain the right shapes.


Purple dot collar bands

For silk shirts like this I have concluded that 2 types of interfacing work well, one one side I put a lightweight fusible (usually the Couture weight Sheer Elegance from Fashion Sewing Supply) and on the other side I use silk organza. Same for these three parts, collar, collar stand, and cuffs. On the button band just the fusible, no organza as I think it would be a bit too stiff, whereas I want some stiffness in those other three spots.

Another interfacing technique I use is to enclose the edge of a facing by sewing the interfacing and flipping it over, then fusing it. It's a bit of a tricky maneuver but I did take some photos and write about it in this old post. 

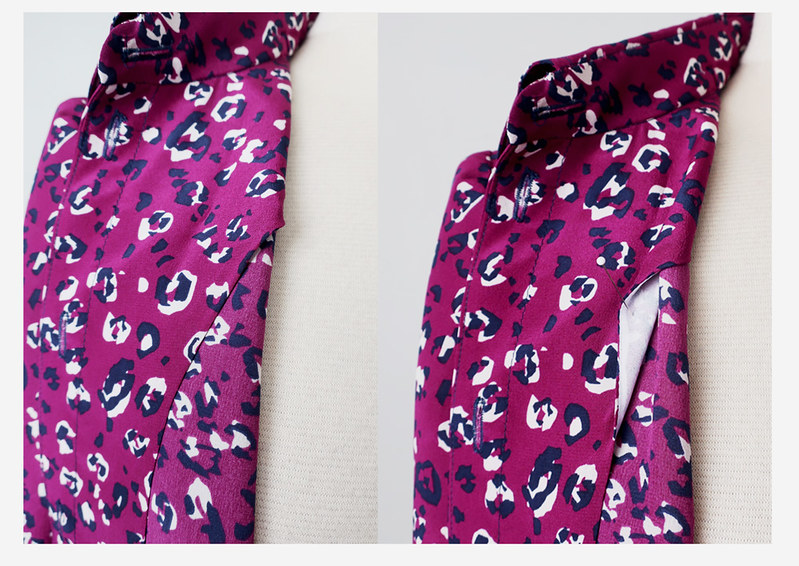
If you look closely at the edge of the shirt front facing you can see that the interfacing and the fusible are stitched together to make a completely clean finish. I love to use this on silk shirts and tops. But you have to clip the seam, and then carefully press that first 1/4" down to get it smooth and flat, then pressing the rest is not too bad.

Purple dot facing 3

Purple dot collar construction

There are a couple of ways to sew the collar stand to the shirt, and I prefer to do it this way which is a bit fiddly but I think the end comes out nicer. I wrote an article for the Craftsy website which is still alive on the Bluprint website with color-coded details on how to do the collar/stand with both methods and I still think it's one of the best I wrote! (along with my favorite one, the hidden buttonhole closure :)

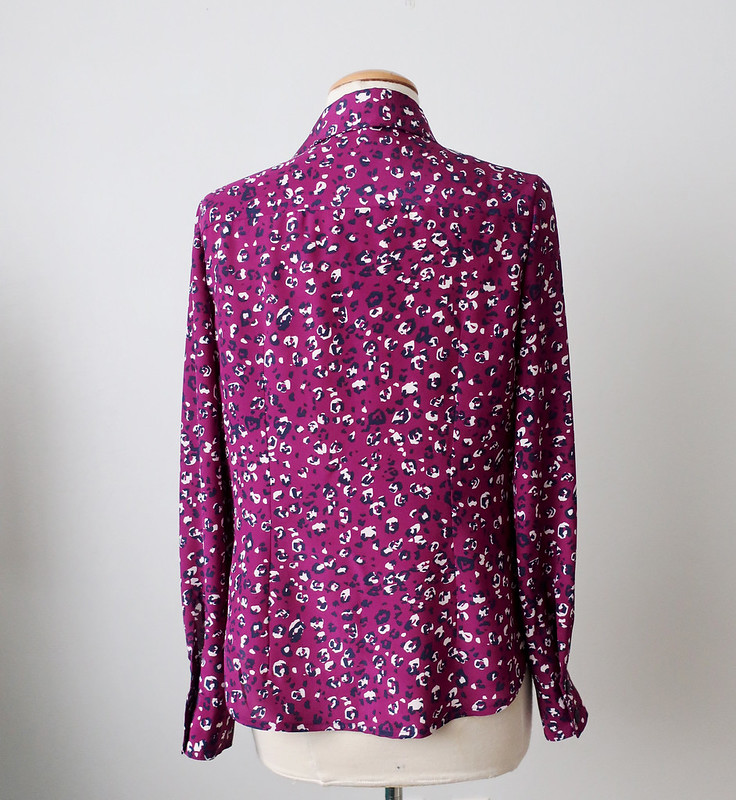
Purple dot shirt back on form

Onward to cuffs and buttons. I bought these buttons at Stone Mountain, they had the right about of blue to go with the shirt. I had a number of dark blue buttons in my stash, but they were all too shiny or too bright so for once I was patient and waited to finish until I could buy some nice buttons that complemented the fabric.


Purple dot close up cuff buttons

When I do cuffs on a silk blouse I most always sew a continuous lap which you can just see peeking out there. I think it looks more elegant on silk fabric.

I never use a cuff pattern, I just decide how wide I want it to be, and how long depending on the thickness of the fabric. Then I cut rectangles, interface, and add silk organza to make it a bit more structured.

Purple dot cuffs 1


Purple dot cuffs 2

The fusible keeps the seam allowances from showing through and the silk adds a bit of rigidity, you can see that cuff can stand up a bit on it's own there.

Lastly, how do I know they still have this fabric at Stone Mountain?

Purple dot sq with bow

Because when I went in to buy the buttons I succumbed to my urge to have a nice fat bow to wear with this blouse, so I bought another 1/4 yard which was used in it's entirety to make this fluffy bow.

Another silk blouse in my wardrobe - I think this will get worn a lot with all my purple and blue items. A little more costly than my usual sewing lately - not a remnant in sight. About $ 50 if you total fabric, buttons and interfacings. Considering I'm still wearing the first silk charmeuse shirt that I sewed from this pattern in 2011, I think it will get plenty of wear and use in my wardrobe.

So that's the latest - this weekend I've felt a lot better and started on a very cheery and suitably February red coat which I hope to complete to wear to Frocktails later this month. Plus I might start on some corduroy jeans as a warm up for my jeans class in a couple of weeks. And try to get outside to check what's survived the winter in the garden and even do a bit of prep for spring!

Happy Sewing
Beth

Today's garden photo is a pink camellia. These are so common around here in older houses, I think garden design has moved on to more interesting things but there are a few remaining at my place. This is pretty but it's so messy and I think this might be the year that it gets the chop to make space for something different.

pink camelia 2020


Friday, January 24, 2020

Plaid flannel shirt and a fabric flub

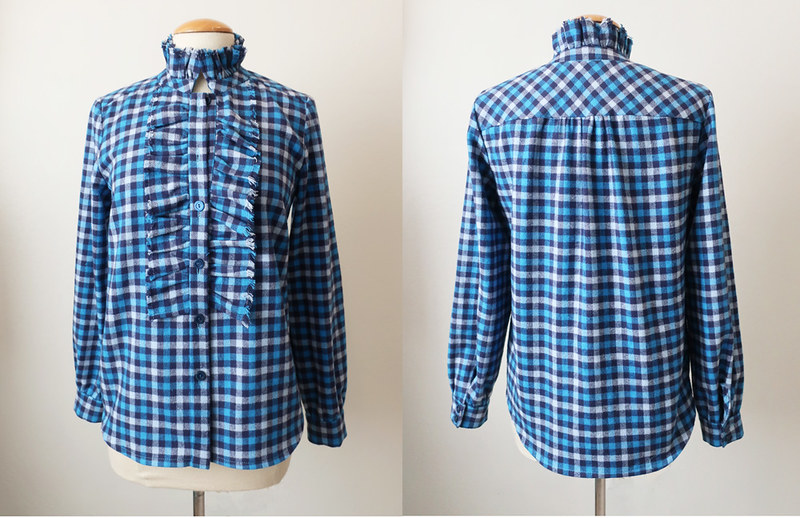
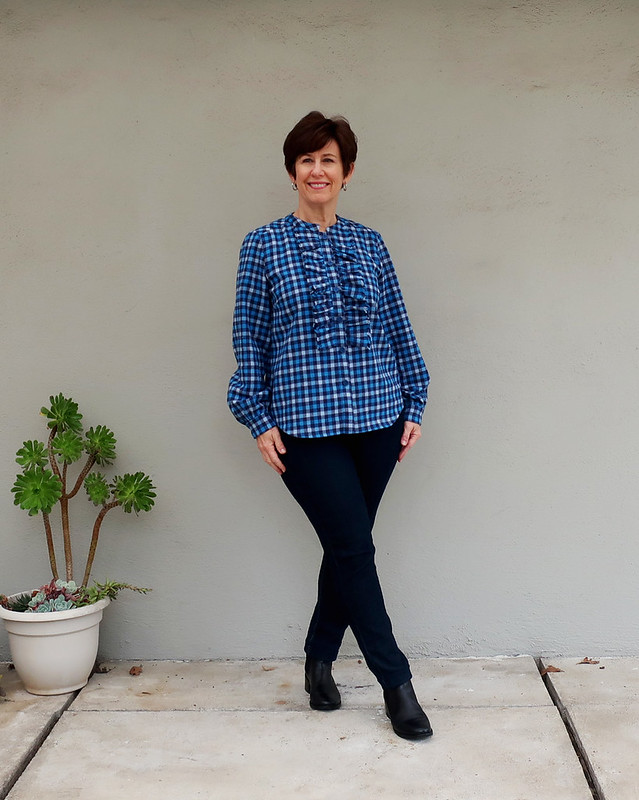
Organizing my fabric stash can be blamed for this fabric pairing which didn't turn out quite how I expected. Along with a lot of other people I decided to reorganize my fabric, see what I actually had accumulated and perhaps get rid of some stuff. To my surprise I found this plaid flannel which I think was purchased last year at the same time, at Joann's when they had one of their typical super discount days. I do like the colors and it's really soft and cozy, however I think my pattern choice took me in the wrong direction. But I have rescued it somewhat and I will wear it.

This is the final version but it started out with a bit more ruffle than you see.

plaid flanned shirt 2


Plaid flannel with neck ruffle1

This is how it looked on it's first "finish". I got the bright idea to use the fabric selvedge on the edge of the ruffle parts, so they didn't need hemming or finishing. Which was fine, but this fabric is quite thick so not really suitable for this pattern. The recommended fabrics are things like chiffon, silk, etc. lightweight fabrics that will gather softly.  While we are here let's not mention my wonky edge on the back where you can see the white stripe of the lower back peeking of the yoke bottom. I didn't notice the misalignment until it was all finished and I took the pictures. At that point I thought about opening the yoke and fixing that but at this point I am done. And maybe it's fine to have some imperfections (especially in the back where I don't have to see them :)


Here's the pattern photo, this is Burda December 2019 # 101.  Her hair is obscuring the neck ruffle detail (grrr, why with the poses that don't permit us to see details?). but it sure looks like a lightweight fabric, perhaps a voile.
Burda blouse Dec 2019

Anyway I tried it on and just was annoyed by the neck ruffle, it wasn't really itchy but kind of poking my neck if that makes sense. Also the front ruffle makes the front a bit stiff - not a deal breaker but noticeable.  So yesterday I just got out my snippy scissors and opened up the top seam of that neck band, removing the neck ruffle. I call those my snippy scissors - they probably have a real name but I cannot sew without them - I have about 5 pairs, all that type of squeeze snip. The new ones are super sharp, almost too sharp but I've learned to be more careful. I never use a seam ripper but just snip the threads with those if I have to remove stitching.

plaid flannel removing ruffle

And then once the ruffle was removed I pulled out all the stray threads with what I think is called a "self-locking forceps or hemostat"  Also indispensable  - can't sew without that either. (If I ever lose the 2 pairs that I have I will order more, there seem to be lots on Amazon.)  Then I hand stitched the top back closed, with a little artful adjustment at the center front. Which I'm not 100% pleased with but I've had enough with this shirt.


plain flannel close up front


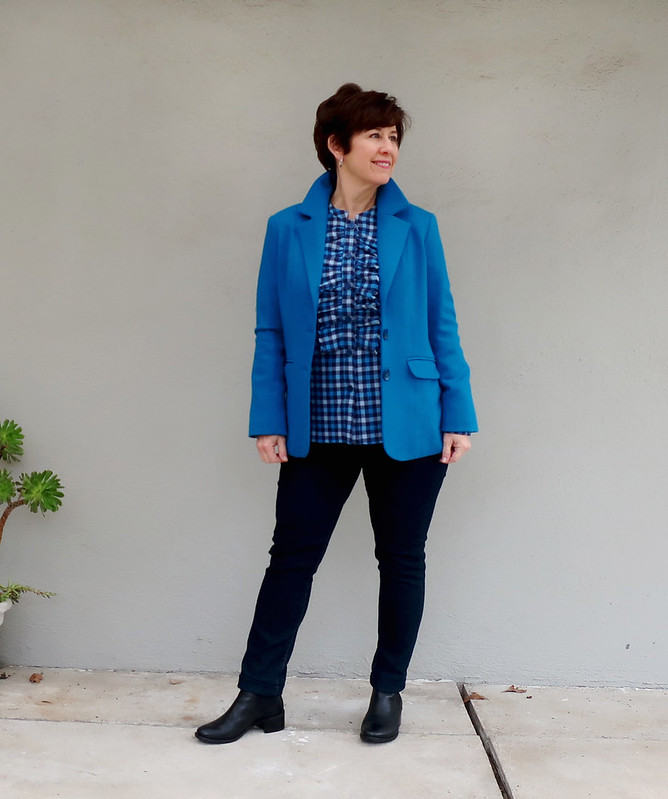
plaid flannel shirt with blazer

Now that I've taken the neck ruffle off it's way more comfortable to wear, feels like a tunic top really. Plus it coordinates with my new blazer so there is that.

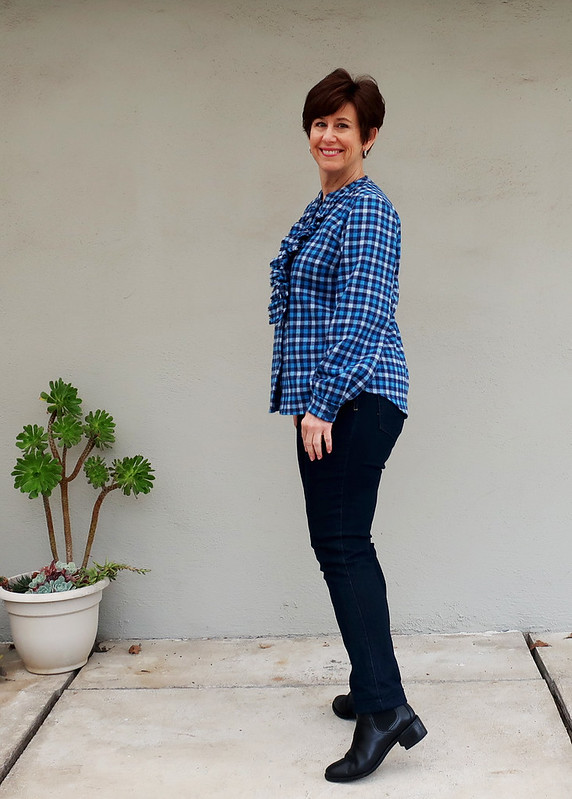
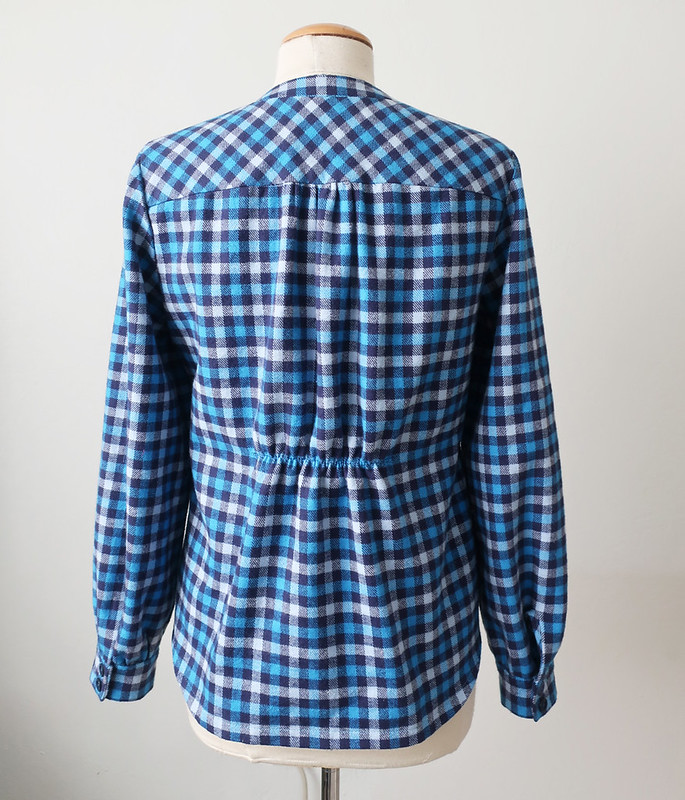
The other change I made was to add a strip of elastic at the waist in the back. It seemed really shapeless and due to the fabric didn't have the flowy look that might be better for a shirt like this. So I added the elastic to give a bit of shaping. I also took it in at the side seams about an inch at the waist tapering out to zero at the hip for a more fitted shirt.


plaid flannel shirt side view
plaid flanned back1

I gathered the sleeves into the cuffs which are a bit wider than the pattern specified. I never use pattern pieces for cuffs, I just make what feels right for the style and fabric. The sleeves are a bit long for my ultra short arms but I like cuffed sleeves to be on the long side, sometimes I wear with turned back cuffs.

plaid flannel shirt 4


plaid flanned button cuff

And buttons - they seem to be making me crazy lately. As I've mentioned they used to stock a nice selection at Joann's but now it's so may plastic-y crafty buttons. What do people do with those, glue them in scrapbooks or something? sheesh. Anyway, I needed 10 buttons and I had 9 matching. The one on the bottom is one of those 9 and then I just rummaged until I found a reasonably similar blue button, sewed it on and called it a day. I don't care that much about one small button and it's certainly not worth making a shopping trip for that. Plus use up what you have! that is definitely one of my sewing mottos.

So that's one fabric out of the stash - not the best result but hey - it's wearable and it's warm! Up next I'm finishing that lovely silk shirt shown at the end of my previous post and then I think I will make a coat. I haven't made a coat for myself in a few years and I have some gorgeous cherry red wool from Mood that needs to be a coat by February!


Red wool from Mood

Next weekend is my Jacket Tailoring Workshop Fri pm and Sat/Sun. Which is always fun for me and I look forward to seeing what people make. Although we didn't know when we scheduled it that the SF 49'ers would be playing in the Super Bowl on Sunday!!  Being on the west coast the game starts late so I likely see most of it.

plaid flannel shirt 3

Happy January Sewing,
Beth

spring is coming - the first daffodil appeared this week 😀

First daffodil 2020


Monday, January 20, 2020

Shirt fit details: Vogue 9029

Lately I've sewing only from my Burda magazines, but I do have quite a stash of envelope patterns. Some used frequently, and others never even opened. I got a copy of Vogue 9029  at a Bay Area Sewists pattern swap, and decided to give that a try. Actually this was a bit of an audition for some silk fabric that I've had since the spring. I wanted to see if a different blouse pattern might be good and while I didn't end up using this Vogue pattern for the silk I will probably return to it in the future, with a few fit adjustments.

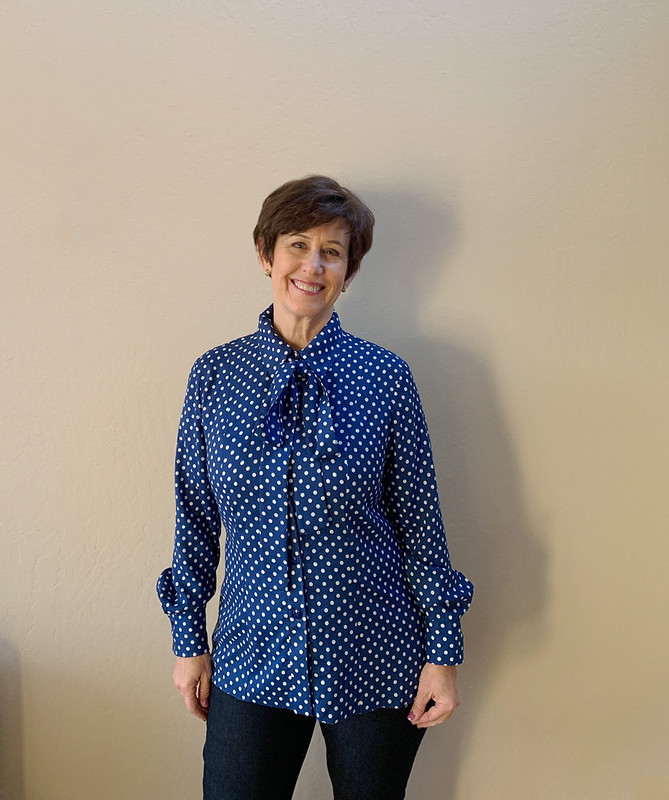
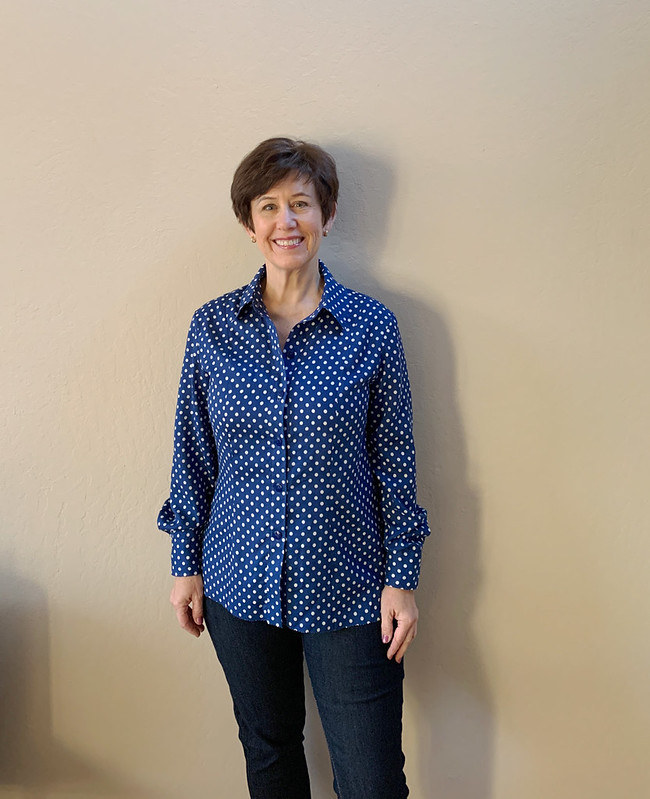
As befits a test garment, not exactly very interesting photos but sufficient to talk about the details of this pattern. It has shoulder princess seams front and back, a sewn on button band, collar stand and collar. The pattern also has options for ruffles on the cuffs, a ruffle along the button band, and a tie bow in place of the collar and stand.

dot shirt 4

I used some nice weight cotton that I have no idea the origin, perhaps I bought it at an ASG sale last year? in any case it was about 2.5 yards so enough for a shirt.

Here's a look at the pattern details.

Vogue 9029 pattern envelope


I started with a size 12 in the neck and shoulders which is my usual size in Vogue patterns and then graded out at the waist and hip to fit my measurements.

V9029 pattern adj

Here is the pattern piece for the side front. Note that the pattern lists the finished garment measurements on the pattern piece. On any Vogue/McCalls pattern these numbers are on the front piece, or if it is a multiple piece front (such as on princess seams) it usually is on the side front. I find them SO useful, particularly with princess seams, you can just see at a glance the circumferences. Occasionally I've measured them to check and they are accurate (note you have to deduct seam allowance from each pattern piece to get the finished garment measurement which is tedious so I just tend to believe them :)
Another note -and something I repeat in my sewing classes, these measurements are based on accurate sewing of the seam allowance. So in a multi seam garment if your stitching wobbles around and the seam allowance is not consistent you can gain or lose circumference. A change of 1/4" multiplied by several seams is a big difference. Ok that's enough lecturing.

Looking at the finished measurements and not wanting a body skimming shirt I added ONLY at the side seam of the Front Side and Back Side pieces. Giving myself about an extra 2" circumference at the hip. For myself I find the fit will usually be fine in the upper body so I just sew all seams as size 12 and add this fit insurance on the side seam only. If I were substantially adjusting a pattern, say adding 5-6 inches in various places then I would distribute that among the various seams but for this type of garment and this amount of difference I find for myself this method works. And makes the sewing SO much easier.

dot shirt 2

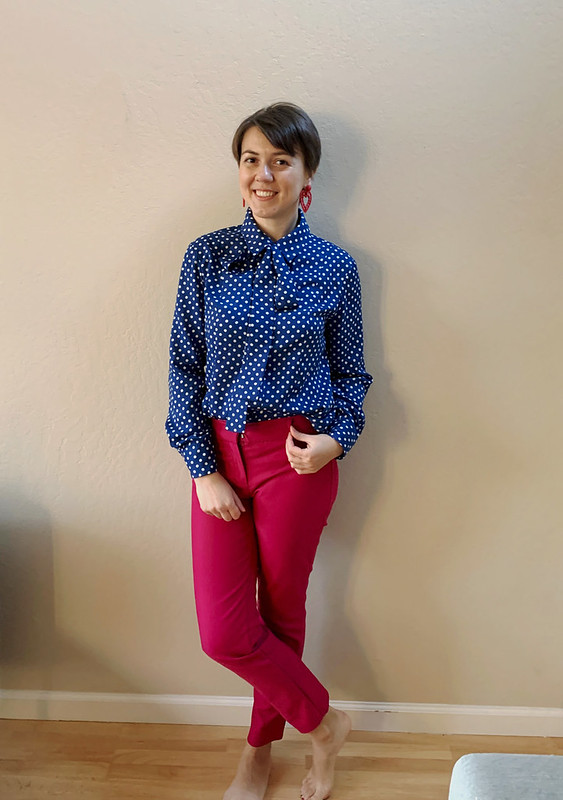
Fit-wise that worked out fine. You might be able to see that I haven't hemmed this shirt, plus the sleeves are a bit long. As I was making it I decided I didn't need another blue/white polka dot shirt as I already have this one so I decided to leave it partially finished and give it to a friend who could hem etc. to fit her. By the way I don't think I am a shirt with bow person, I always feel a bit silly with shirts like this even though I like the idea of them.

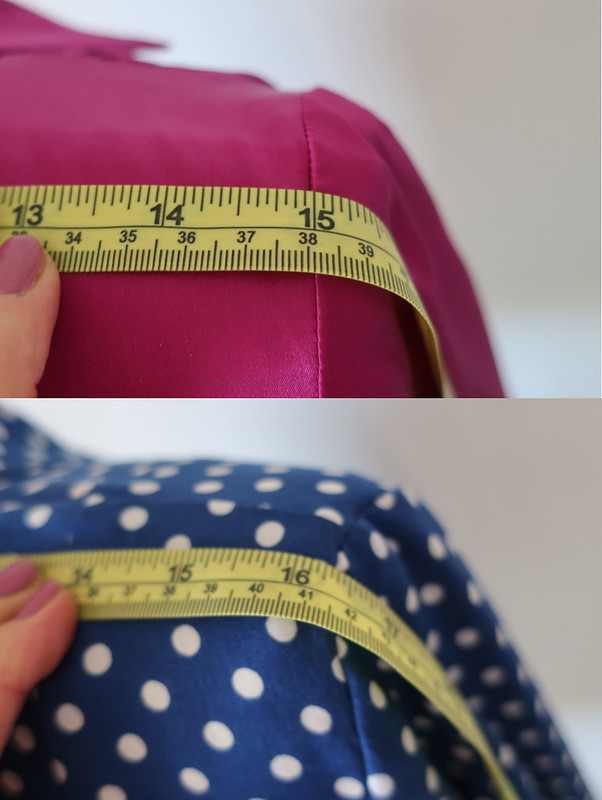
Back to fit analysis: the issue I had with this pattern is the width of the shoulders. Looking at the photo above, and as soon as I tried it on I felt the shoulders were too wide and the armhole seam wasn't in the right place for me.


shoulder width comparison 2

Comparing it to another shirt which has a fit I like, I found that the distance from sleeve to sleeve across the back was 1.25" wider in the Vogue pattern. The bright pink shirt is this one from last winter. For that shirt I used my Simplicity 2339, a pattern that is going on maybe 20 uses? Bargain!!
Anyway - it is so interesting to compare shapes and measurements on what look like very similar items.

And here are the two shirts both on the same dress form. The pink shirt is stretch silk charmeuse and I don't think that ever photographs well - but it is dreamy to wear.
Shirts Shoulder width comparison 3


See, now that I've pointed it out you can see that the sleeve seam is falling off my shoulders. I mean it's not the worst fitting issue but something that I noticed and not a big deal to adjust for the next version.

dot shirt 1


Dot shirt front and back on form

Front back view, this pattern has potential and I think I will adjust the shoulder width and sew it again one of these days. Plus this fabric is such a nice shade of blue.


dot shirt collar and bow

And here is my friend Halyna (who is @zigzagstitching on IG) wearing this shirt which I had to remind her needed hemming - she was ready to wear it immediately as she is crazy for polka dots.

H in dot shirt

So that's the latest on this pattern, which I will return to one of these days. Perhaps in a cotton lawn in the spring.

And what about "my precious" which is this silk from Stone Mountain that I've been hoarding in search of the perfect shirt pattern. I cut it out this weekend using my trusty Simplicity 2339 😊. And have a bit of a saga even with that variable in the mix. More on that in a future post.

Untitled

Happy Sewing,
Beth

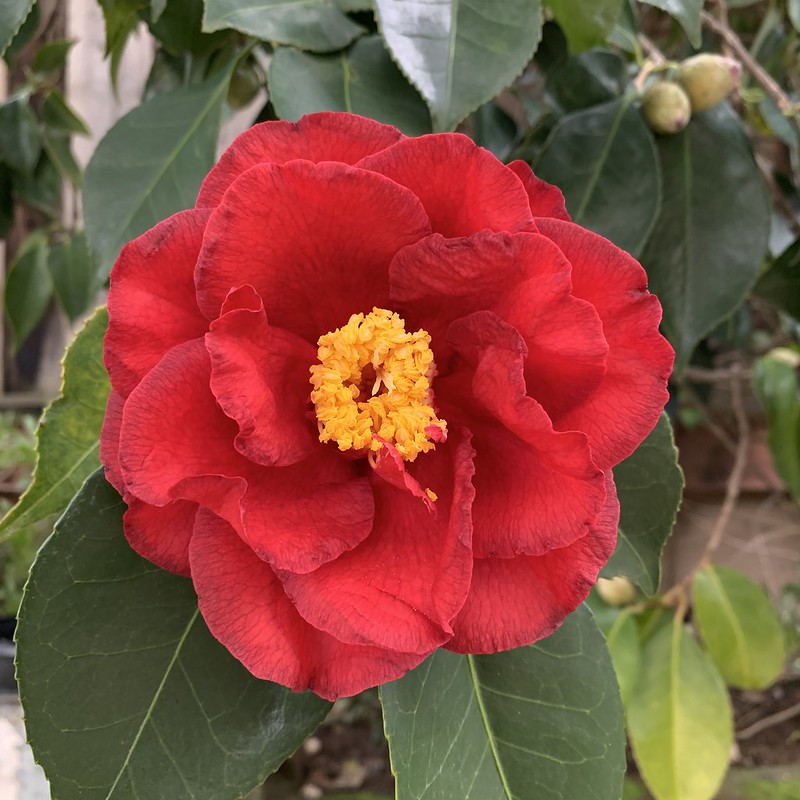
today's garden photo - we have a new bloom! The messy camellias which sort of annoy me most of the year are starting to put out these luscious flowers. The color is so lush and velvety. And they are so messy when the flowers fall.  At least the bees love then, full of sticky nectar.

Untitled