Showing posts sorted by relevance for query liberty. Sort by date Show all posts

Friday, October 19, 2018

Liberty cotton/silk for a new shirt

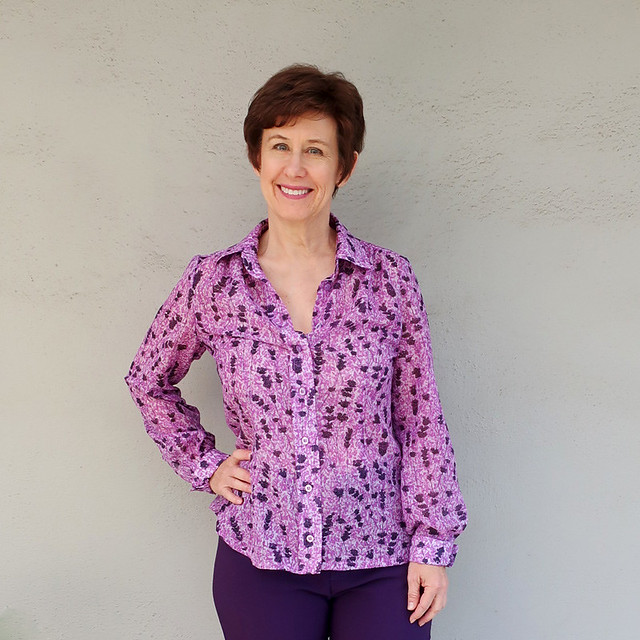
One of these days I'm going to use a different shirt pattern, but not this week. In fact I just rummaged around my pattern file and found a Burda tracing that I did last winter - which I scrapped mid-project due to the wrong fabric. That one became this top which I wear all the time. So I will try that Burda next but for this fabric my old standby of Simplicity 2339. And this might be version number 15? I've lost count but after all a button front shirt doesn't really change so why reinvent.

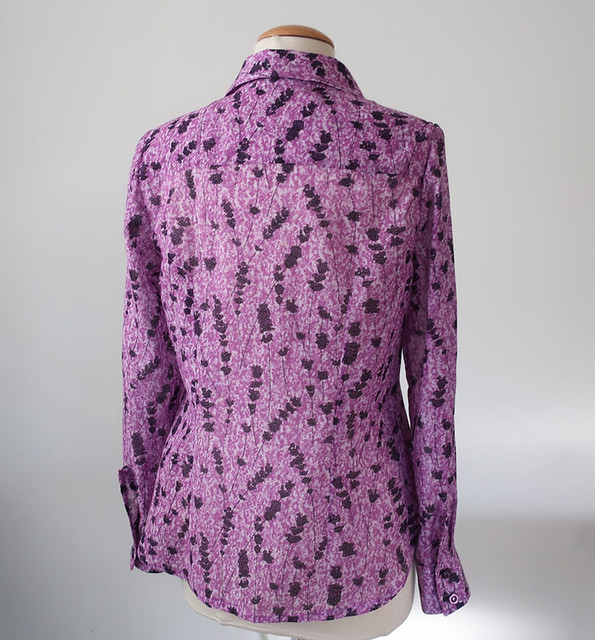
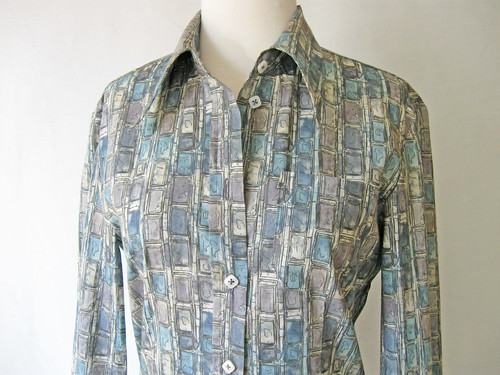
The novelty in this shirt comes entirely from the fabric, which is a 70%cotton/30% silk voile Liberty of London fabric. It's so light and lovely to wear, it feels like a feather. 

Purple shirt 9
So n
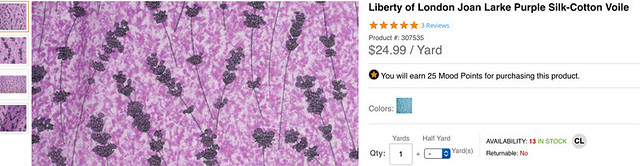
I sewed a shirt for someone else using this fabric which I found on the Mood website. and after completing that I had about 3/4 yard remaining. Since it's 52" wide that's a substantial amount. So I ordered another 1 yard so as to have enough to make a shirt for myself 😍 Because purple, right?
And lavender print. So garden-y.

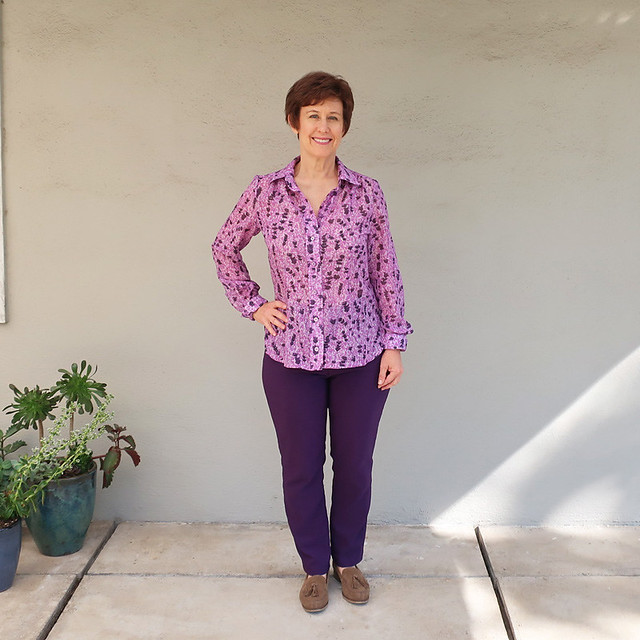
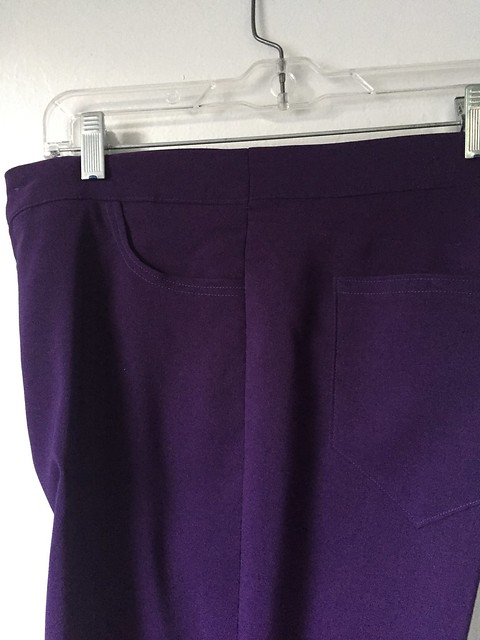
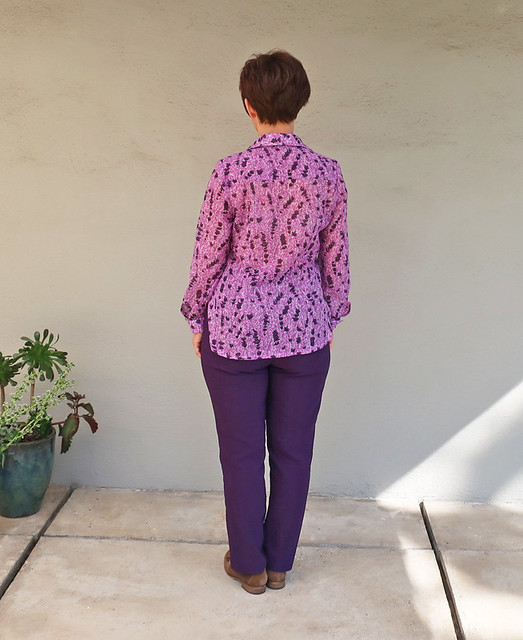
I had made these purple jeans late last spring, and they didn't get a lot of wear in the summer as they are a stretch bengaline (I think - at least they are some type of stretch woven, stretchier than stretch denim but not a knit. I classify them as bengaline because I received a swatch of the same type from Style Arc a long time ago and it was labeled with that name.) A very good fabric for pants, but a rayon-nylon-lycra so a bit too clammy for my summers here. But just right for fall and winter so I've been wearing them a lot. I like jeans that aren't jeans - in all kinds of colors. The pattern is my own, I made a pattern from a pair of jeans I own which fit just right. I should do a post about pants copying, one of these days. It's a good learning experience.

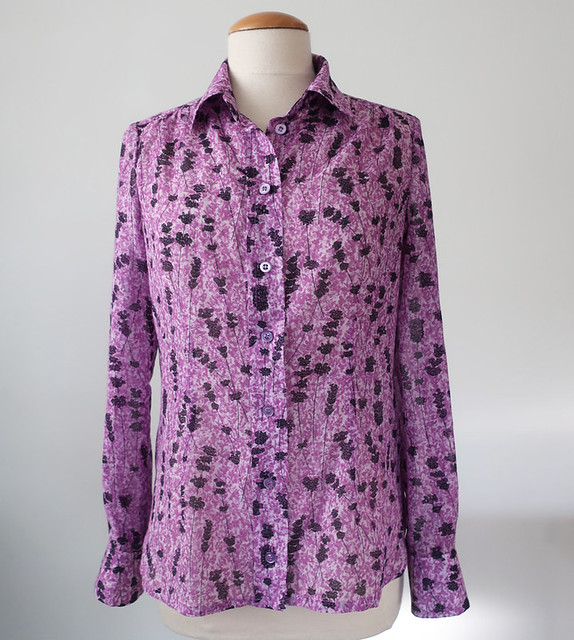
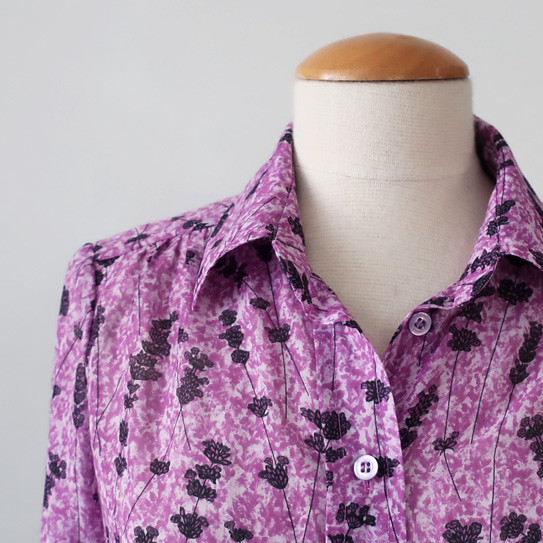
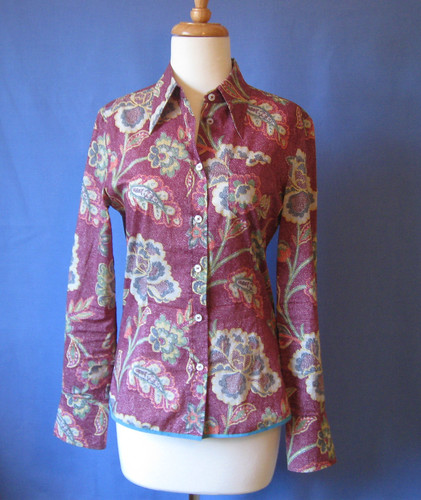
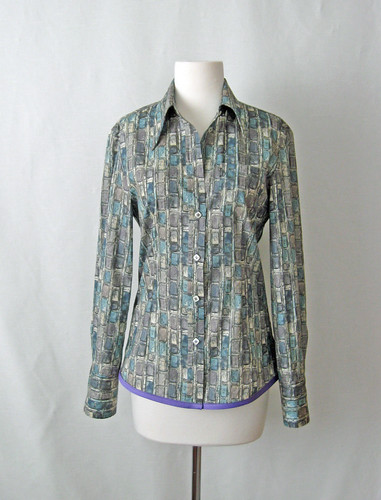
So now I have a shirt to wear with my purple jeans. Here's a better look on the dress form.

purple liberty shirt front

Based on my usual miserly tendencies when it comes to fabric spending, this was a bit of a splurge for me. So in total I paid more than $ 40 for the fabric. More than my typical $ 5 - 10 yard!

Fabric liberty voile

I'm not a big spender when I comes to fabric and I don't really like to have a bunch around that is not specifically for projects but I'm glad I bought this as I just love the color and the lavender pattern makes me smile. Here's a closer look at the fabric of the jeans. I didn't do a bunch of topstitching on this fabric - topstitching doesn't look as it does on denim and I figured it was a timesaver to skip it.

purple pants

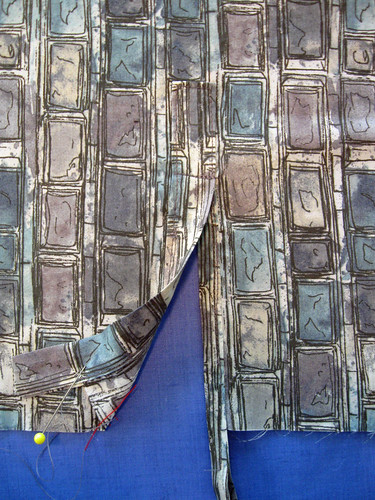
Here's a closer look at the front placket. I did the placket method I devised (which I copied from a RTW shirt) which is a continuous placket where a small pleat encloses the raw edges. If you look to the left of the buttonholes the shirt is actually all one piece, not a sewn on button band.

purple liberty shirt close up2

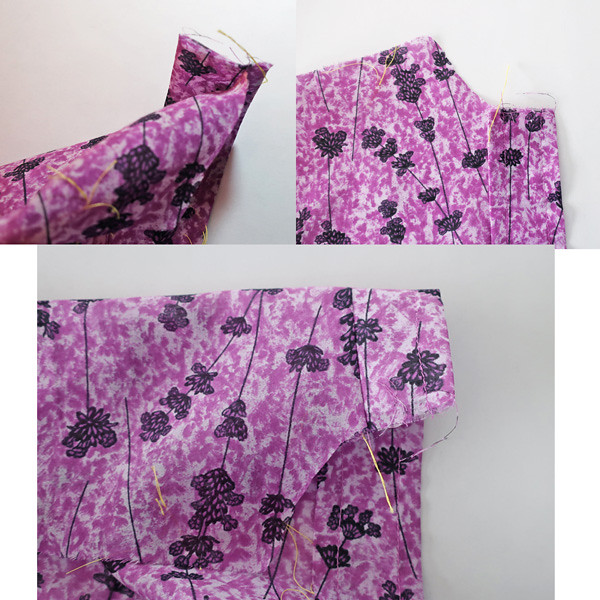
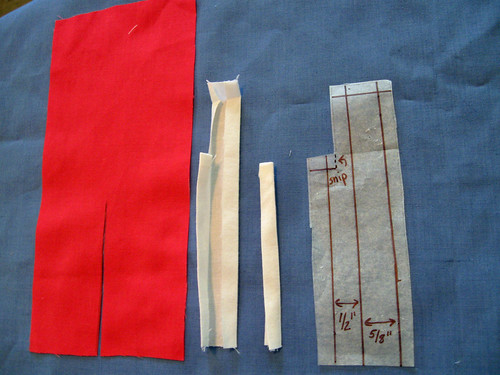
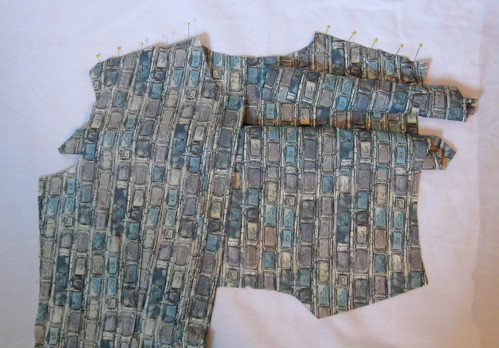
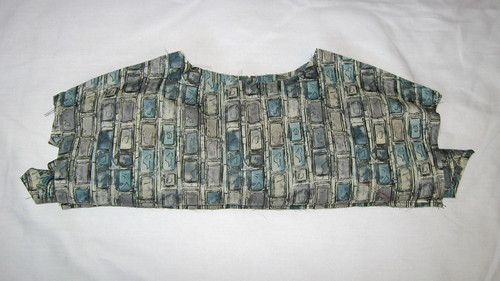
Here's a look at the components during construction. If you are really interested in this modification to a shirt front I did a step-by-step photo guide in this blog post.

purple shirt front placket examples

purple liberty shirt back view on form
purple shirt 12


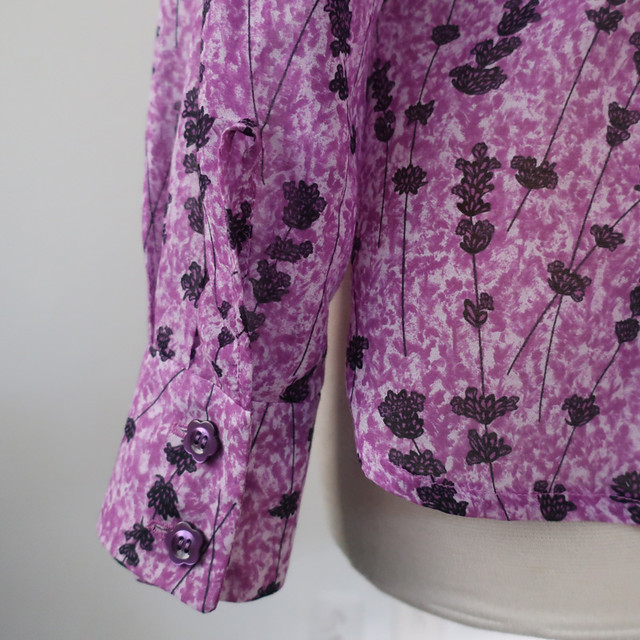
purple shirt cuff

This fabric is so soft so I thought that a placket would be a bit tricky and I opted for a bias binding on the cuff opening. I think with every fabric you have to evaluate how it will work with various techniques or design features and be willing to adjust accordingly.


purple shirt 11

So that's it for my light as a feather shirt. I think I need a dark purple coat now for winter:)

Up next, I am finishing a few things for Heather including that silk wrap dress which I talked about in my last post on fitting. And if I do say so myself - it is going to be gorgeous!!

My jacket/coat tailoring weekend workshop at Hello Stitch is coming up on Nov 3-4 so if you have wanted to sew a jacket I hope you can make it. You will spend a weekend seeing me demonstrate all my tips, plus hang out in Berkeley and meet some great people who are as wild about sewing as you are. sign up here.     Also upcoming is another session of Sew the Lander pants, and a kimono jacket class. Look at the Garment Sewing page on HelloStitchStudio.

I have some vague plans for another wool coat or jacket for myself but nothing firm at this time. Plus our weather has still been no-jacket-required so not really conducive to wintery sewing. Not complain ing about that! Still wearing shorts when out in the garden, planting bulbs under the watchful eye of the squirrels.

Happy almost Halloween sewing, Beth

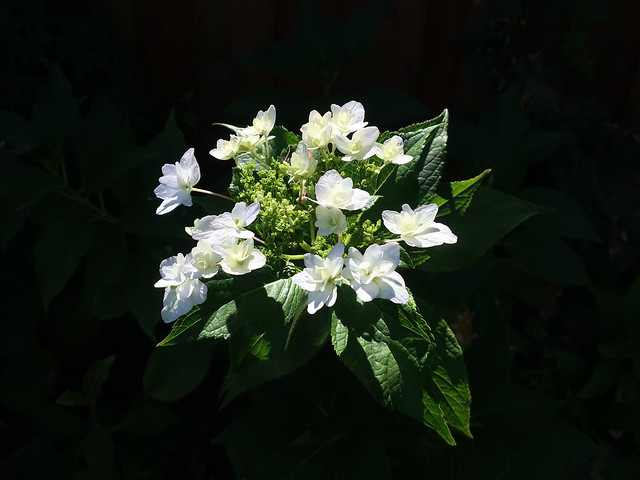
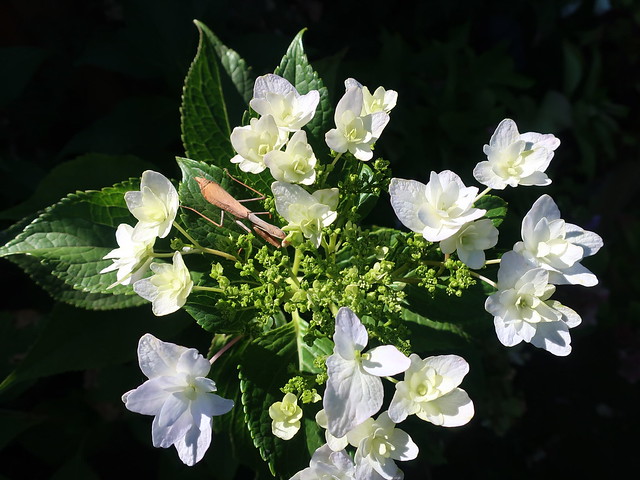
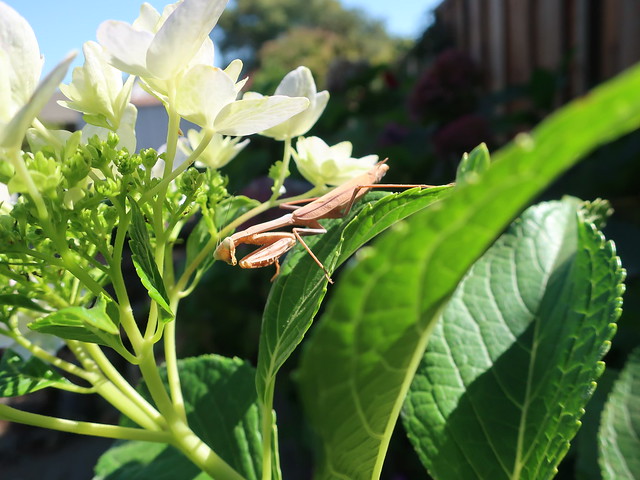
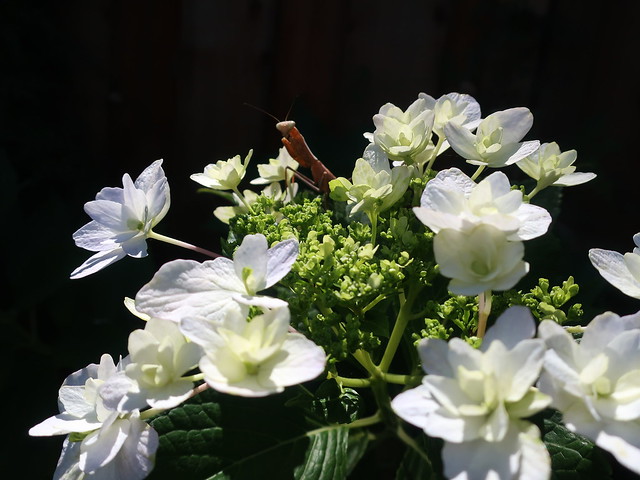
Today's garden photos. Multiple photos because this was one of those magical moments. I went to take some pics of the shooting star hydrangea that had put out a magnificent bloom. And didn't even notice the visitor until I looked at the image on the screen of my camera. Glad I caught that and was able to take a few more. There's something about praying mantis, they seem to have so much personality.

IMG_0507
IMG_0508
IMG_0510

white hydrag3

Saturday, September 24, 2011

Shirt Sleeve Placket - up close look

This week I am catching up on projects I set aside in July.  I cut out and started sewing the Liberty of London cotton shirt which is based on an existing garment, posted about here and here. I rarely make shirts, in fact there are a few categories of clothing I never make for myself.  These include jeans, t-shirts, almost any kind of button front blouse or shirt, swimwear, shorts, and gym wear.  There are only so many sewing hours in a week, and being someone that for the most part has made all my dresses, suits, jackets and coats it is a pleasure to walk into a store and select a pair of jeans or a shirt to wear immediately. To tell the truth, shirts are something I should tackle.  I could make a silk blouse for a fraction of the price in the department store.  Perhaps I will, since I have now shed my fear of plackets.
I think I had a bad experience once upon a time with plackets, plus they are so fiddly, consequently I have often avoided them.  With this blouse project, there was no avoiding, so I did some playing around with placket samples and now I have a fool proof placket that looks good inside and out.
This is not an original idea but a recreation of the menswear style shirt plackets I found among the examples hanging in my closet, with a healthy dose of tips from my various sewing books.


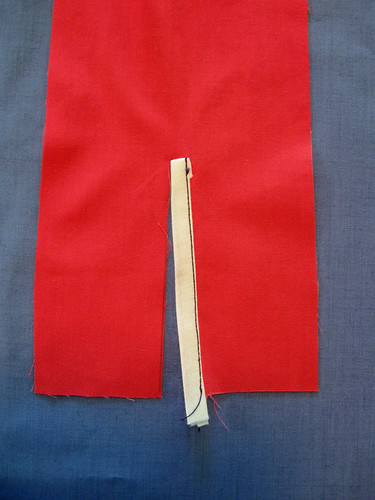
To start, create the placket pattern.  This is a case where I don't use the pattern pieces that came witth the pattern, but draw up my own. (Of course for this project I made the pattern myself so no envelope pattern piece to ignore). Below is a sample, in muslin and the sleeve in quilting cotton, so you can see the components.  Make the placket pattern piece longer than the opening you want in the sleeve, you can cut the excess off after sewing.  The widths are noted, then the solid lines add 1/4" to the placket and are also the fold lines.  The smaller white piece starts as1" wide, fold in 1/4" each long edge, and then fold in half, plus fold back top edge 1/4".


Sample placket 3
I think that some placket fear stems from the fact that you have to slash the sleeve to create the placket.  No good can come from slashing.  OK, an exaggeration, but how many times has the slash maneuver gone wrong.  Don't get me started.  The saying - measure twice but cut once - really applies to the slash. I think also on this slash, in fact on the whole placket, it is really important to work on both sides at the same time, having them on your worktable as mirror images, so that you end up with a right and a left.  No fun to create lovely left sleeve and then another perfect left sleeve, aaargh.  


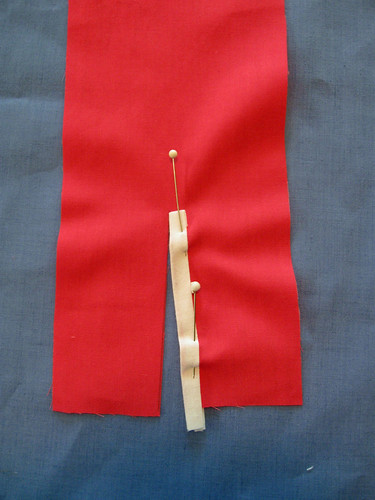
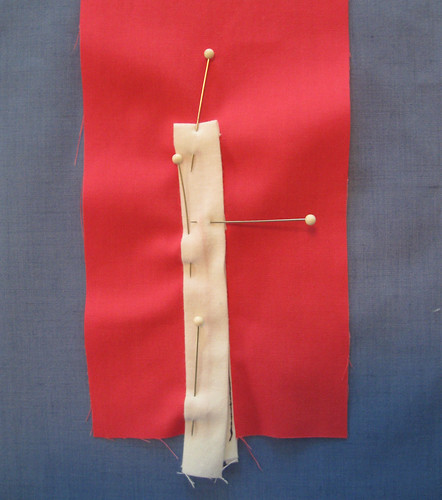
First sewing step is to apply the under placket piece, rather like a tiny seam binding. Shown below, pinned and sewn. The folded edge of this little piece is at the top of the slash, and creates a nice finish. 


Sample placket 4Sample Placket 5

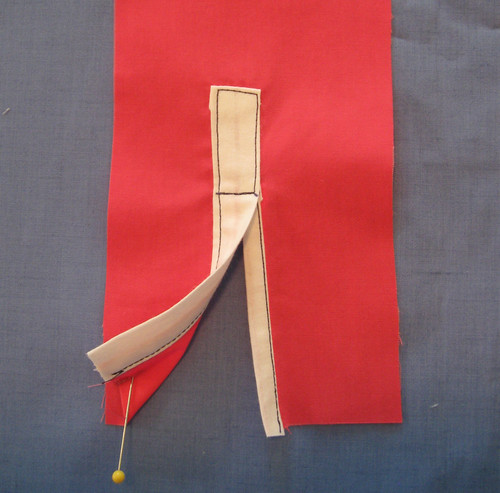
Next step is to apply the upper placket piece. I neglected to take a photo of the inside, to show that the shorter side of the folded placket is matching the top folded edge of the under placket piece. The horizontal pin marks the point where the stitching will be horizontal to catch the two sides of the placket and stitch off the top of the slash point. 


Sample Placket 6

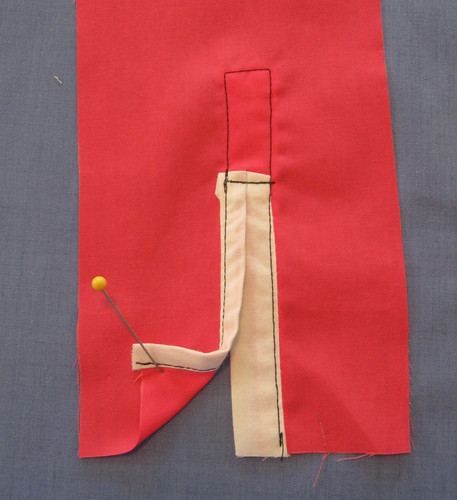
After stitching, this would end up as the left sleeve.  Please ignore my slightly wobbly stitching.  
Sample placket 7Sample Placket 8

A look at the finished placket in the Liberty cotton fabric.  It disappears which is just what I want in a sleeve placket. By using the measurements noted above, the placket pieces overlap and keep the sleeve bottom measurement as it was before it was slashed.


Liberty shirt placket

Back to the sewing room, lots to finish today.  And tomorrow a fabric shopping excursion to Stone Mountain fabrics with fellow blogger Jean of J.Kaori Designs.  Looking forward to that!

Candycane dahlia
Things in the SunnyGal garden are looking a little dreary, we are at the very dry end of summer and nothing new is blooming.  A few dahlias are still bringing a bit of color. Here is a dahlia I bought years ago in a pot and have divided many times.  I always think it would be so nice if it bloomed at Christmastime as it is peppermint candy cane colors.   


Happy start of fall sewing,
Beth

Sunday, July 3, 2011

Patternmaking - Copying a favorite blouse - the result

Looking in the dictionary, there are a few definitions listed under the word "clone", such as to make an identical copy, or something designed to simulate the exactly the operation of another, typically more expensive item.   I like that second definition, particularly as applied to clothing.  After all, a lot of my sewing is inspired by things I have seen in stores or magazines and would never be able to bring myself to purchase.  (such as a $ 2000 coat or an Armani tuxedo style suit).   So the part about simulating the operation of another item,  that sounds about right.  Typically a more expensive item, definitely, as refers to my own wardrobe.


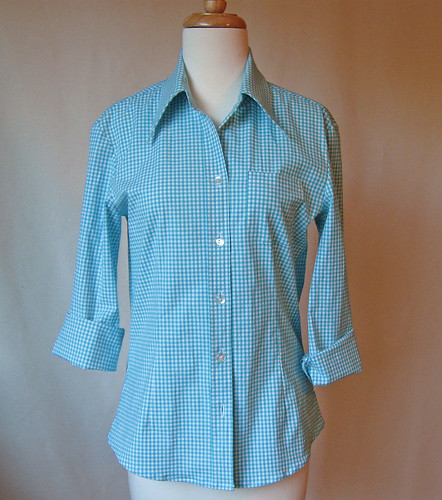
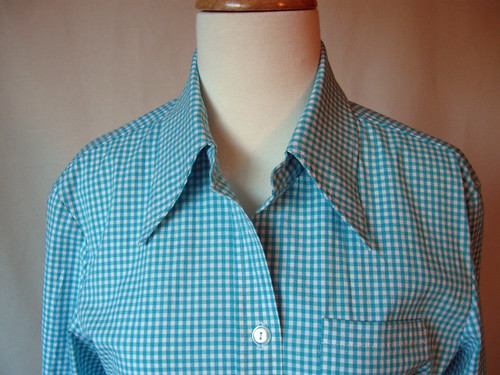
Gingham shirt front fullThe result at right of my first go in a long time at cloning a blouse  Here is that post : 
making  a pattern from the existing blouse.  


As they say on the radio, this was a test, I repeat, only a test.   I skipped adding the cuffs for the test version.


The real blouse will be made from Liberty cotton purchased in the shop in London.  


I was set to cut it out from a scrap of bedsheets, but then thought - with just a bit of care I can sew the whole thing. I was planning to go through all the steps, collar, placket etc. so better to use some real fabric.  I had this turquoise gingham so that became a summer shirt.


Blouse front original This is the original blouse which I copied.


Here is a look at the collar.  A while ago I did a post about collars and collar stands, and a really great method I saw on a PBS tv show with Louise Cutting (who often writes in Threads magazine)  If you are interested here is the link  Cotton blouse with variations.
Gingham shirt close front

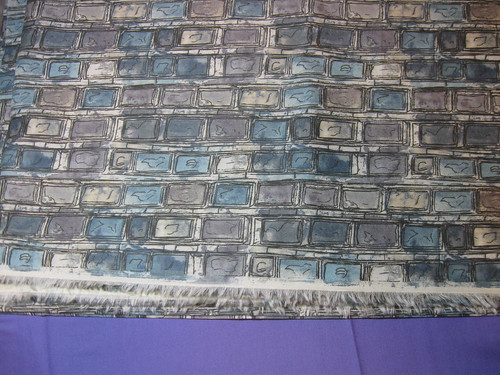
I am really happy with the way this turned out, and am crossing my fingers that I get the same result when I cut into that expensive Liberty fabric.  Here is a peek at it.  The purple at the bottom is for a bias trim along the hemline.

Blouse fabric choice

If you are interesting in cloning a garment that you have, I do recommend the book I mentioned in my last post:  Patternmaking for a Perfect Fit by Steffani Lincecum.  very helpful.

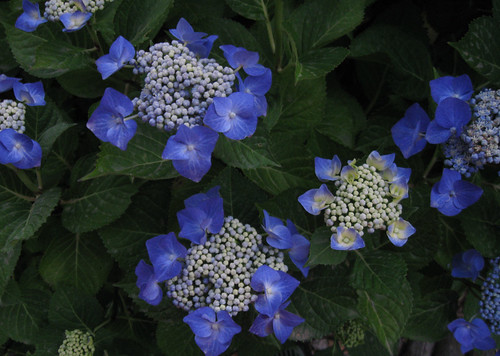
Here is today's Sunnygal Garden photo, this Hydrangea is right by my front door, and is really not my favorite, I like the mophead type better.  As it happens this one is huge - almost crowding out the other shrubs in that area.  Good thing it puts out a lot of blooms or I might have to take defensive action.  No mercy here for plants that are not performers!

and to those celebrating Independence Day, July 4 - have a great one! 
Beth
Hydrangea blue white june11

Saturday, October 27, 2018

New Look 6560 top in Liberty cotton

What do we call if it you intend to make a wearable muslin but end up making the real thing? Also will I ever overcome my aversion to organization and labeling so that I actually know what is what in my fabric stash? Someone may have an answer to the first question but the second question probably has no answer.

In any case all's well that ends well for this project. I sewed a top for my friend Alice, in a roundabout way.

teal top on A1

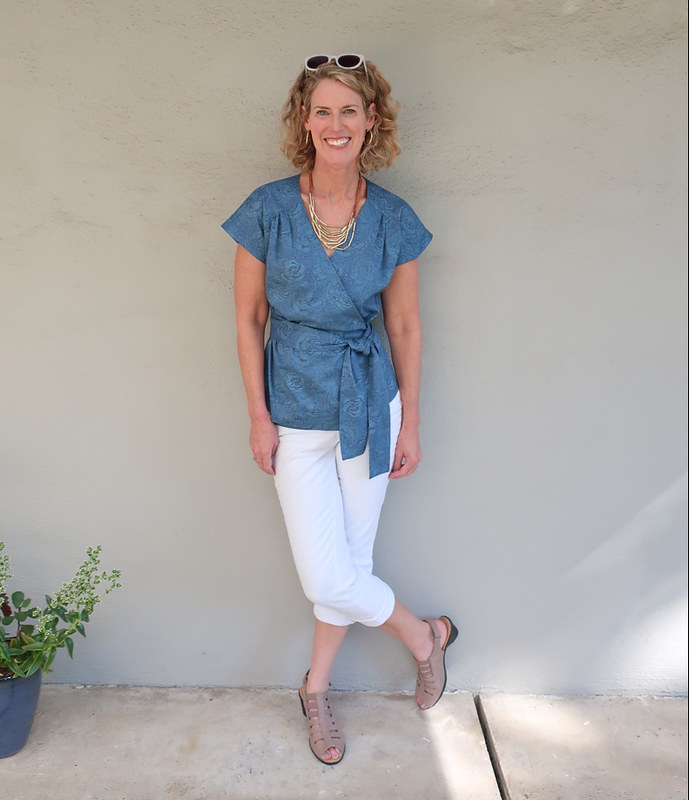
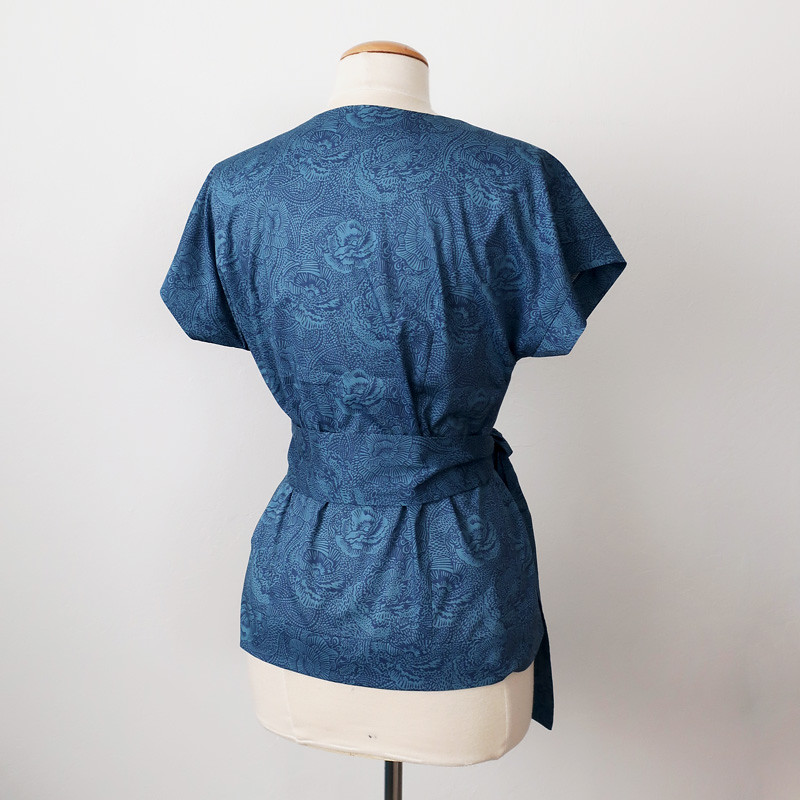
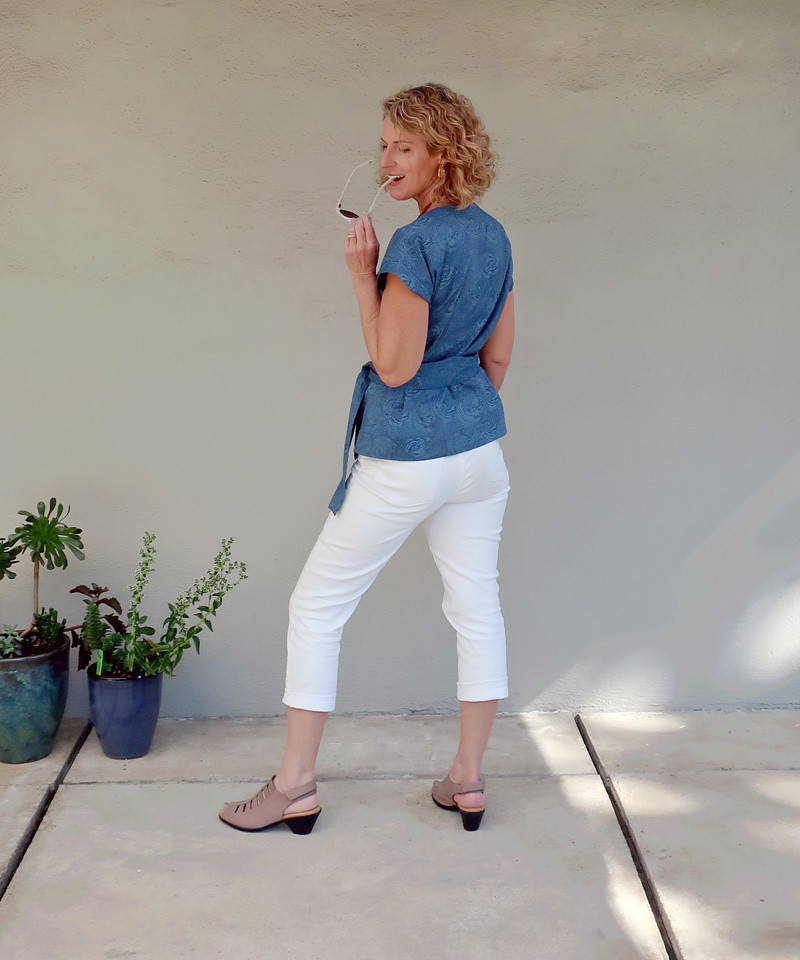
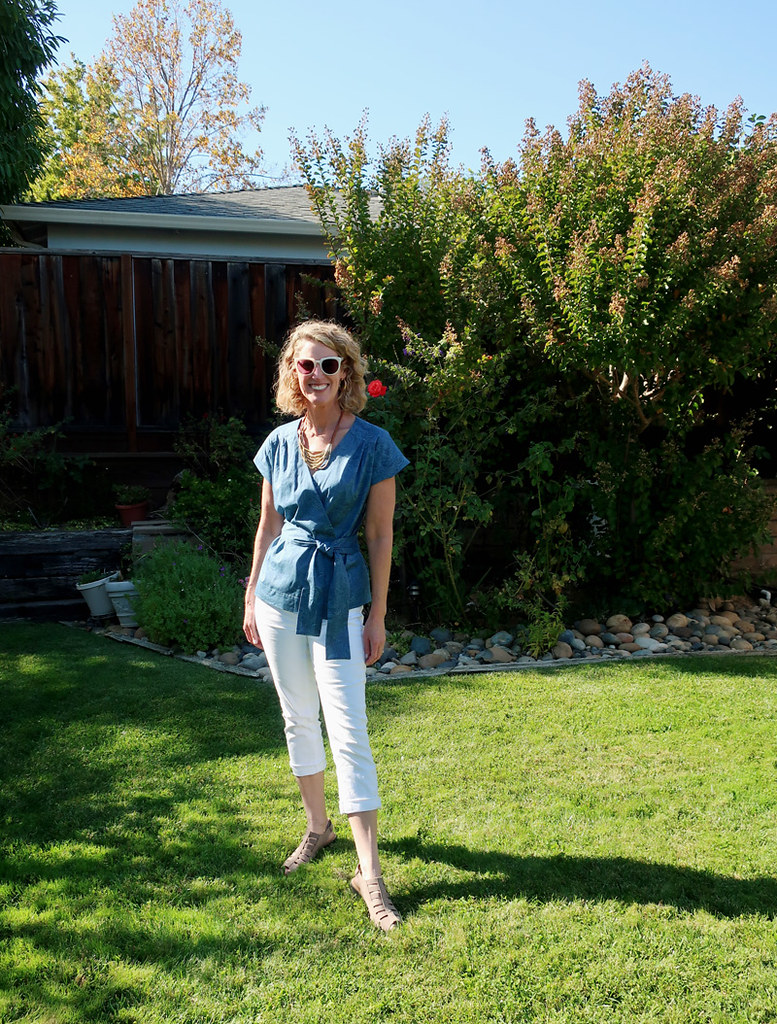
Take a look at that lovely blue fabric - which she said she bought at Mood NY on our trip there a couple of years ago and she thinks was Liberty cotton. Ok, if you say so 😊.  Because I went to try  to this pattern for her, as an audition for a different fabric of hers which has been living in my stash (a solid color cotton/silk sateen which a luxurious sheen which we bought who knows where, also teal color).  So I bought this New Look pattern which ticks a number of boxes for her, style-wise. Wrap top, cut on sleeves, V-neck. And decided to give it a try.

Some late night rummaging in my spare bedroom fabric closet and I came up with this. A couple of yards and I thought "oh that's nice - I wonder where it came from, probably one of my $2 fabric finds or a swap sale." And if I use this and make it for real (meaning reasonable nice finishing with all facings etc.) then she can wear it.

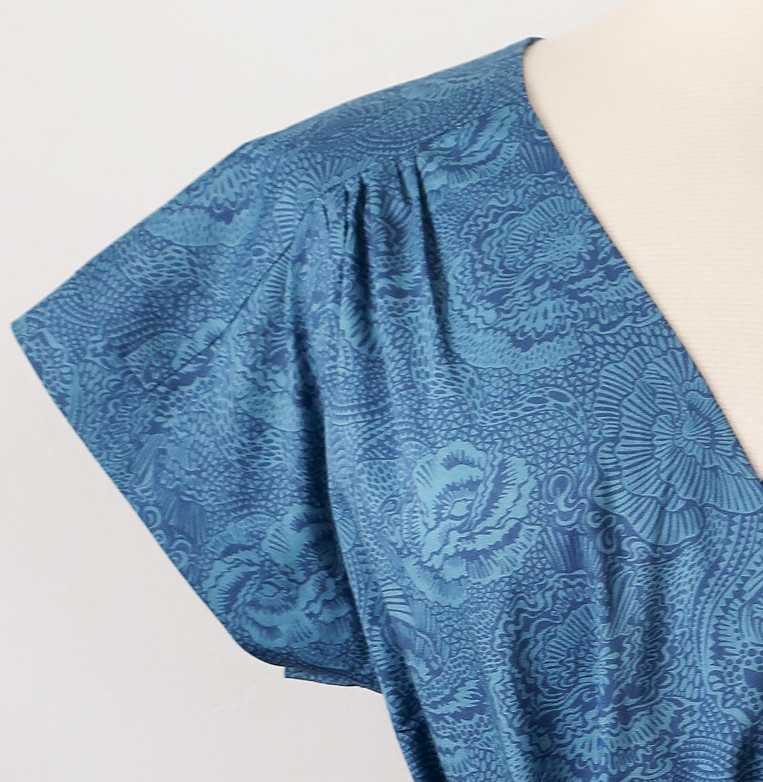
A close up look at this very nice fabric.

teal cotton fabric closeup


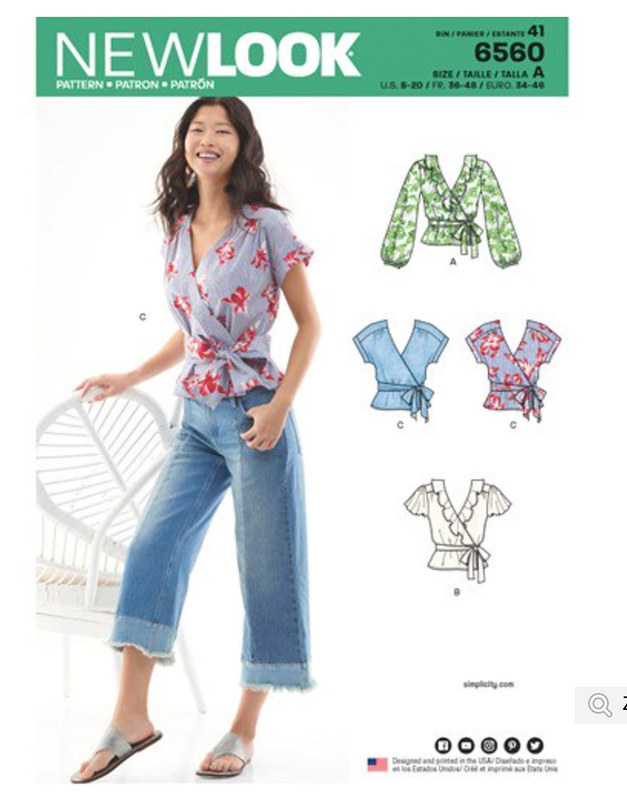
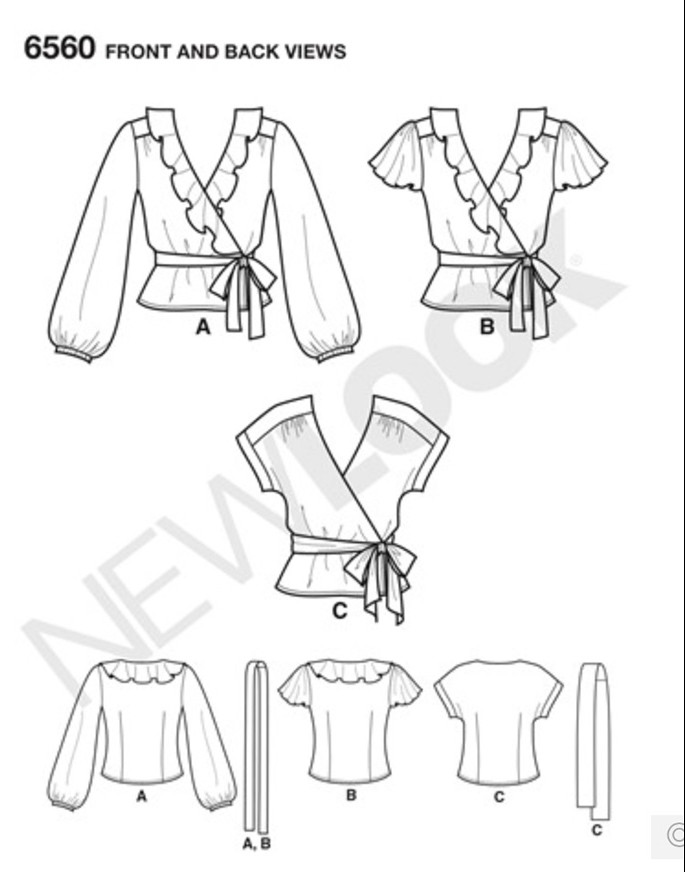
Here's the pattern.  I made view C, same as shown on the model. I also like the long sleeve version which has a set-in sleeve although I could do without the neck ruffle which in combination with the sleeves is making it veer into pirate costume shirt territory.

NL6560 pattern photo


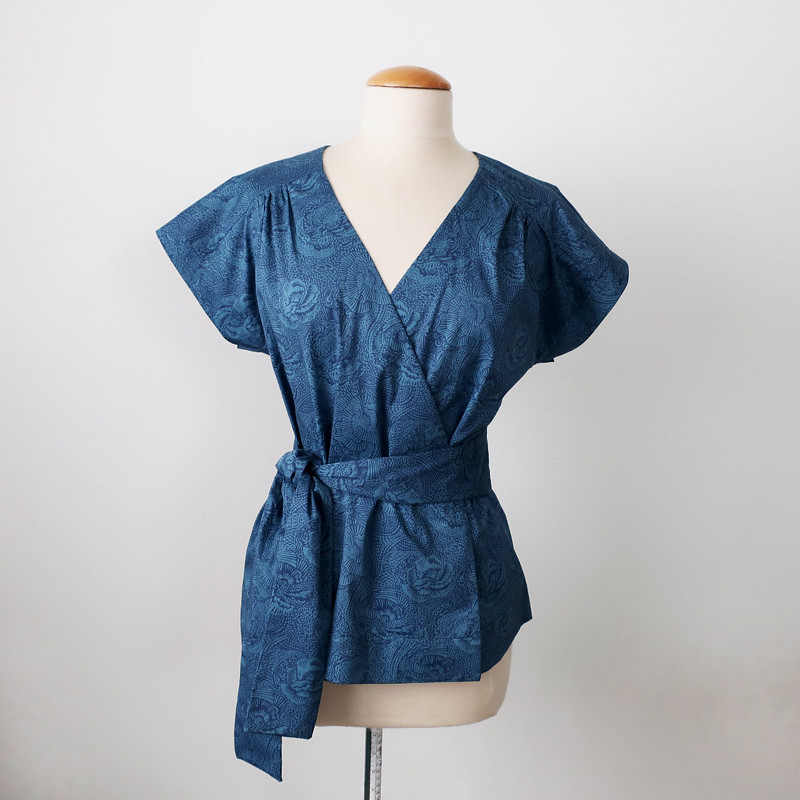
Here's a look on the dress form.

teal cotton wrap top

If you look extra closely you might be able to see that I added a 2" band around the bottom of this top  as it is definitely on the short side. Alice is quite tall but I tried it on as I was sewing it (of course) and thought it was short on me as well. I think that is part of the style but it seemed out of proportion for a top these days. Fortunately I had enough fabric to add that band which also gave a nice hem finish.


teal top on A2

teal cotton wrap top back

teal top on A back view

NL6560 tech drawing

Conclusion - super easy top which is great for a woven fabric you have lingering in your stash.  Check the length if you don't like tops on the shorter side.


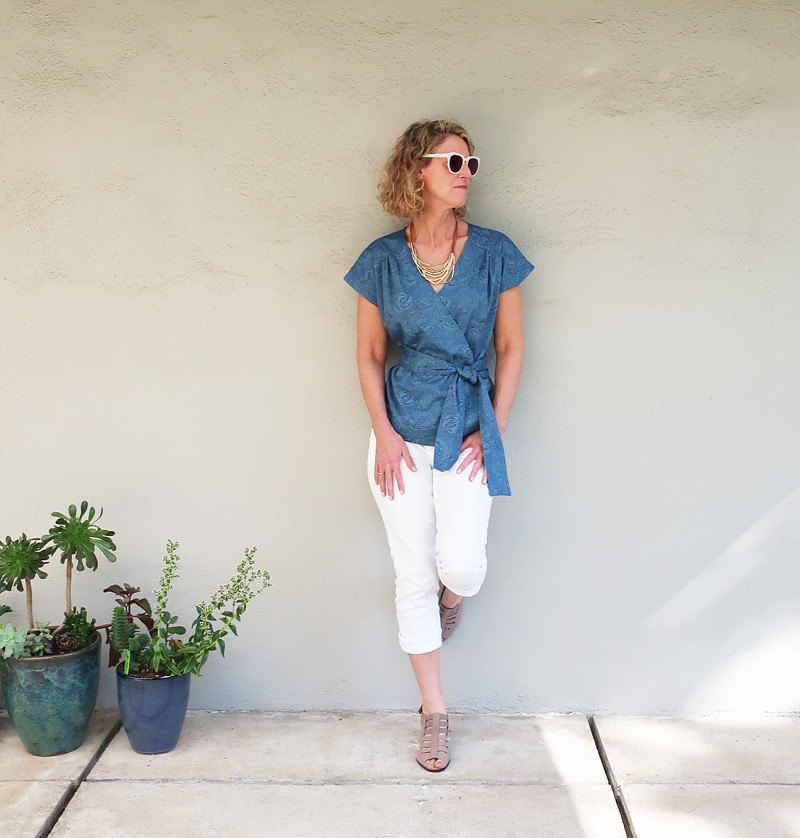
teal top on A in sunshine

And still we have sunshine and weather worthy of white jeans! Not complaining, other than the fact that we (always and forever it seems) need rain. And it's too warm to wear a wool coat!.

But that doesn't mean you shouldn't make a coat or jacket with me next weekend, at my Coat/Jacket construction weekend class at Hello Stitch. I know for a fact that some people who are allergic to wool are making heavy cotton or corduroy jackets. All kinds of tips and tricks and construction details apply to any coat or jacket. Here's the link to register. 

What else am I working on? I am on the home stretch for Heather's silk wrap dress Vogue 8784 which will have a full blog post when I can take some photos of her wearing.

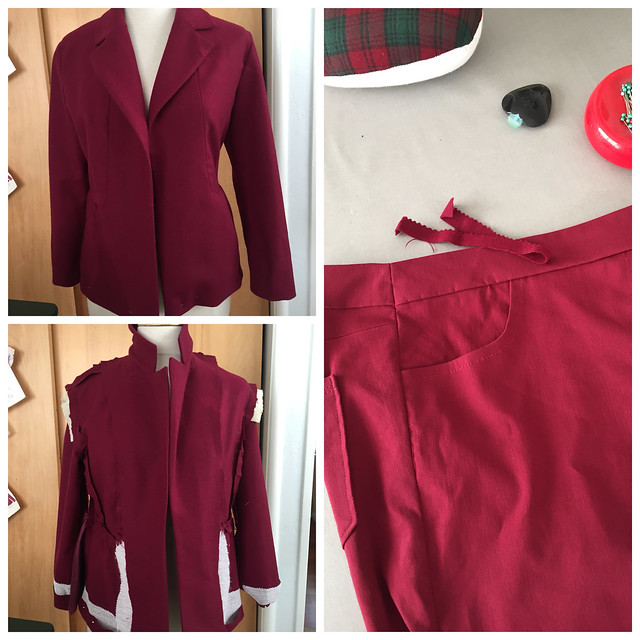
And I found a jacket in the closet in my sewing room - which I vaguely recall starting last winter for a previous session of my jacket class, and I guess spring intervened so I put it away unfinished. But now I sewed up a pair of stretch cotton jeans (using my own pattern copied from RTW jeans) and the color of jacket and jeans are an amazing match. Too suit-y? I will have to finish it after next weekend and see.

merlot jacket inside and out with jeans

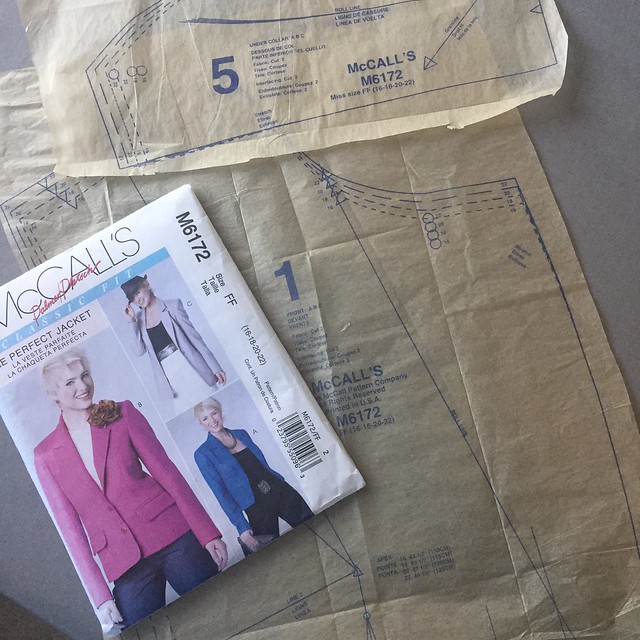
By the way, in my class I will be demoing a lot of construction on a blazer jacket. I chose this pattern as it has a lot of details which are great to learn, such as welt pockets, lining, numerous darts, setting in a jacket sleeve etc.
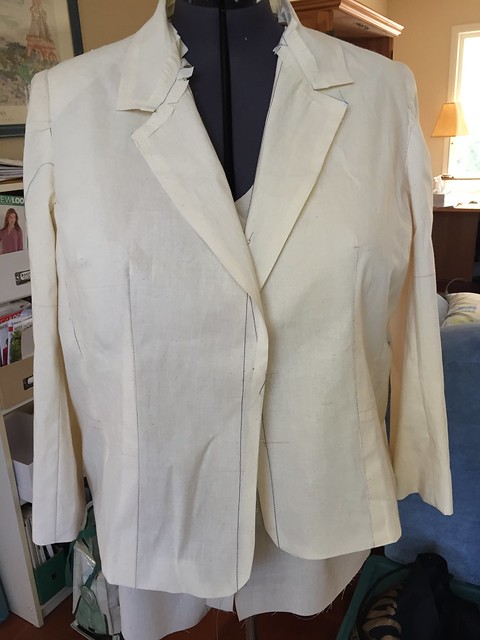
I made a muslin to test style and fit for Heather - so will be making a wearable muslin in a solid navy wool as a practice run for sewing up the wine color tweed she recently bought at Britex.

IMG_4420 Jacket muslin for H

And then it will be on to some selfish sewing  - my Burda magazines have been piling up and I've seen a few really cute things I want to do. Plus it would be fun to participate in the #sewfrosting on IG which means I need to decide on something slightly frivolous and fun.

While the sunshine holds up I will get out in the garden tomorrow - the battle with the squirrels and my tulip bulbs is continuing. And if you notice in the first photo, I'm really getting into succulents which are very satisfying - they are so easy to propagate.

Happy almost Halloween sewing,  Beth

today's garden photo, there are still have a few roses around, some years we've had blooms up until Christmas.

IMG_0540

Thursday, October 4, 2018

Random Threads # 33: hand sewing, 1 yard wonders, and inside the garment

Time for another Random Threads post where I write about stuff that has made it's way to my notebook page. This week everyone is ready for fall and winter sewing, and exclaiming happily that it's the best time of year. Oh no, I beg to differ - the best sewing time of year for me is springtime when we can push away the layers and get started on fun floral and floaty fabrics, plus shorts and sandals (my preferred daily uniform)  But I will concede that the change of season does mean it's time to sew a jacket or two. What a mass of contradictions I am - when it comes to wardrobe I love to make jackets but only want to wear summer dresses. Oh well....


In retail news - look what I saw on the shelf at Joann's.  They have these magazines which I thought were only available in the UK. At least that's where I've seen various people post about them.
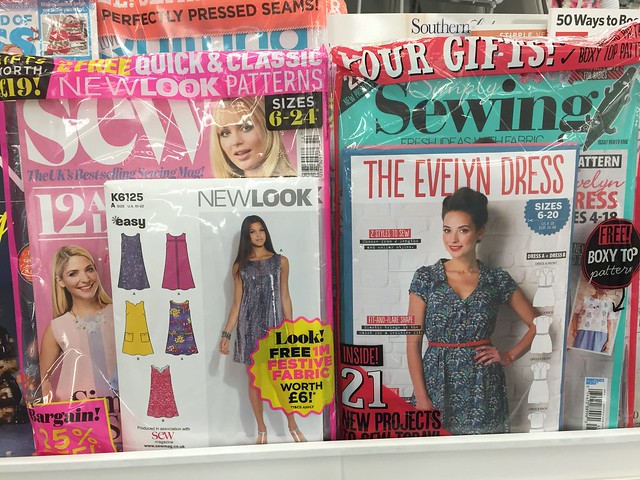
IMG_4405

And note the values mentioned in British pounds. I didn't buy either of them and couldn't find what they were being sold for. I'm guessing around $10-12. They both had 2 patterns so if I come across a future issue with patterns inside that I'm interested it perhaps I will buy one just to check it out. Any recommendations on magazine content between the two choices?

I think most everyone listens to podcasts while they sew, at least some of the time. It's like someone invented a perfect medium for those of us who sew. I do watch tv or movies a lot when I sew also, but really it's more like listening than watching, so podcasts are ideal. Plus so many interesting subjects out there. I particularly like history podcasts as well as my bi-monthly dose of How Did This Get Made? where they review bad movies, so funny!
This month one of my favorite podcasts, 99% Invisible, is doing a series on clothing. So far they have discussed kid's clothes, plaid (or tartan) and pockets. Super interesting and I can't wait to hear what the next topic will be. If you like design, inventions, history, or quirky facts then this is the podcast for you. Also it is made in Oakland - #bayarealife and the host's voice is so soothing but not sleepy. I had the habit of listening to a lot of news, politics and current events podcasts but I have to step away from that genre for my sanity!  although still loyal to Pod Save America 😊

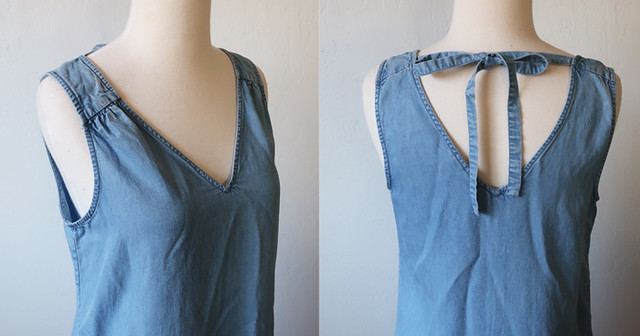
A little RTW inspiration.  One of my friends asked me to take up the hem a bit as she is quite short and it was too long for her. Cute, huh?
denim tank dress

I think it's from The Gap? or somewhere similar. So simple, a V-neck chambray dress, with shoulder yokes and a tiny bit of gathering which take the place of a bust dart, and then the low v-neck in the back. Plus the tie element to keep it from falling off your shoulders. I really liked it and took pictures to remember this for next summer. Would work as a top or a dress. Someone remind me when May arrives to do this one!

Which brings me to the next topic, do you have any qualms about copying RTW? or recreating a sewing pattern and making it up on your own? I have no qualms about either, as I think fashion is so repetitive, there are not really any new ideas per se. A garment design or a sewing pattern is a compilation of various elements which all exist already. I can't remember where but I saw a discussion about someone wanting to make their own version of a pattern because the one available was not in the person's size range, and whether that would be problematic. I don't see any problem with that, and I venture to say that with a bit of searching the same pattern could probably be found in any size range. Perhaps an out of print or sort-of vintage. I love the IG @paperbagwaist as she shows how a current style can be found in a pattern. Her tag line is "There's a pattern for that!" and I couldn't agree more. This is where the line drawings are so helpful. It also makes me smile to see how many of the current garments she pairs with '70's and 80's patterns. I need to rummage through that box of old patterns in my spare bedroom to see what gems might be hidden in there!

Speaking of patterns - why are there so many sweatshirt patterns? File that under things I don't get. If I'm going to sew something it's not going to be a sweatshirt. I can see doing it for variety and utility but there are so many patterns for the same thing.  I suppose it's like t-shirts, a lot of patterns and you can choose the pattern company that suits you best.

1 Yard wonders: a silly but catchy description of these dresses. For the last few dresses that I made this summer I happened to mention that I made them from 1 yard of fabric and got a few comments that people were surprised at this.
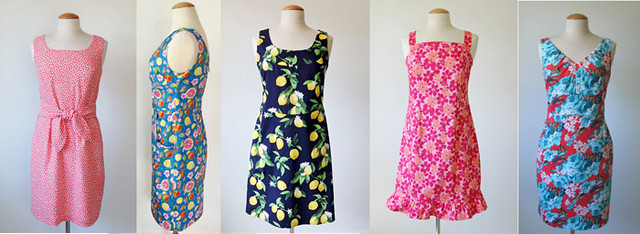
1 yard dresses

I think all these dresses were sewn with 1 yard of fabric. Note that this is for 60" wide fabric. And these are all sleeveless dresses. Sometimes maybe 1 yard plus whatever extra gets thrown in with the cutting out at generous places. For me a relatively straight skirted dress is a length of about 35" from neck to hemline but most dresses aren't continuous pieces in that length. My hip measure is 42" so that means each front and back skirt piece is approximately 22" wide. You can see that if you fold the fabric with selvedges towards the center you can get the skirt pieces cut out with plenty of fabric remaining to cut out the bodice pieces.  The dress in the 2nd and 5th photo are my beloved Butterick 5455. The first dress is a recent Burda magazine pattern, the middle one is a older Burda magazine pattern which I just made last month, and the 4th one is a Marfy pattern.  I really enjoy the pattern puzzle of squeezing a pattern onto a small piece of fabric, although 1 yard is not small for me (note I'm relatively short and the fabric is 60" wide).

Someone else asked "why shoulder princess seams" on a recent project which was a dress which I made for my muse, Heather. I have started calling her my muse as I think more lately about what I can make for her - always on the lookout for a pattern that suits her shape and her lifestyle. We have a great symbiotic relationship - I like making more formal and business-y clothes and she needs them for her job and her life. I certainly don't need any more things like that in my wardrobe so it's fun to do them for her. Anyway - back to shoulder princess seams. If you look at that post linked here you will see that I used a basic Simplicity armhole princess seam pattern but changed it to shoulder princess seams. I find they offer more adjustability over the bust, as well as being able to narrow the shoulders. Rather like this example.
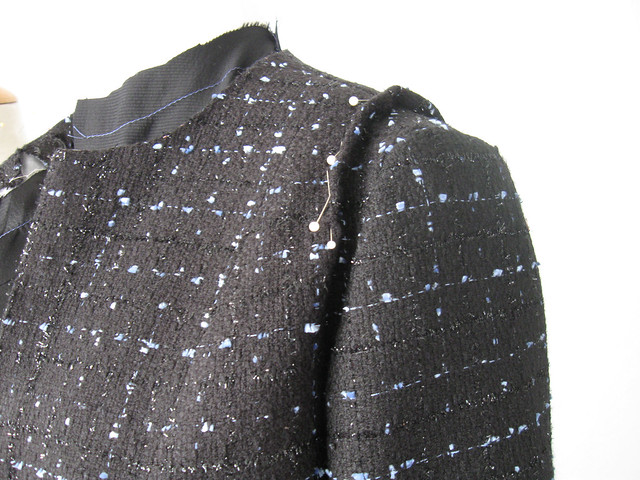
shoulder seam change

I find that women who are full busted and need more room in the chest don't necessarily also have width in the upper chest. In fact often to fit the bust then the neck and shoulders are swimming on them. So a shoulder princess seam gives you the opportunity to narrow that area and have a nicer and more comfortable fit. Of course you need to start with the right size (use high bust measure) and also add a bit on the shoulder seam. Because when you narrow the princess seam you will probably need a bit of extra seam allowance on the shoulder seam to get everything smooth.

Inside the garment - do you care how it looks? I am constantly amazed at how much people stress over how the inside of the garment looks. Also a lot of people seem to get a great deal of pleasure over the inside, be it a cute fabric used for the lining or facings, or contrast seam binding covering every seam. While I want my garments to wear and wash well, the more important feature to me and the reason for every sewing technique I use is that they look perfect (or as near as I can get) from the outside!!! Now that I've been teaching a lot of classes I think that the slight fixation on how the inside looks could be due to the fact that when you are making a garment you are looking at the inside, and that's the focus of your attention. So a relatively new sewer sees the seam allowances and compares to their store bought clothes and wants them to be similar. But accurate sewing and good pressing at every step will do far more for the final result than worrying about the seam finishes. Admittedly it is fun to do a lovely french seam and a nice tidy row of serger stitches looks good and wears well but suggest thinking about the outside more than the inside.

Hand sewing - love it or hate it? I guess this goes along with feelings about the inside of the garment. I happen to like hand sewing and don't have any issue with visible hand sewing on the inside. In fact I kind of like seeing it.
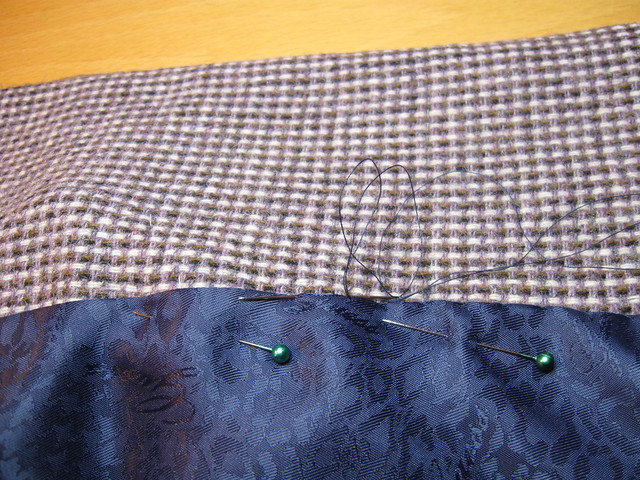
saler sewing in lining closeup

Her I sewed the lining into the jacket by hand.  This fabric hides a lot which in a solid color would probably show more. The thing about hand sewing is like anything else, it takes practice to get it just right. It gives you a different type of control than when you sew by machine so I think that's why I like to use it, for hems, putting in linings. etc. Anyway, give some hand sewing a try and you might really enjoy the feeling of needle and thread in your hand.

That's all of my topics today, I didn't even mention the new fall patterns, because I haven't seen anything that really jumped out at me at first look. Which if history is any guide in about a month I will have a couple of things I absolutely must make!

Up next, I just finished a blouse in Liberty cotton/silk lawn, it's quite nice but I don't get the fuss about Liberty. More in that upcoming post. And then onwards to jacket and coat making. A new wool jacket for me (OK I did see a pattern in my Oct. Burda I must sew) and a blazer jacket for Heather.
My weekend coat/jacket making class at Hello Stitch on Nov 3-4 is filling up,  here's the link. We have the last Pattern Fitting class for 2018 coming up on Oct. 14, with a few spots still open. In December we added another Lander Pants class as well as a Kimono jacket - here's the page for all the classes at Hello Stitch Studio.  

Happy October Sewing,  Beth

Today's garden photo, another dahlia before the summer weather ends.
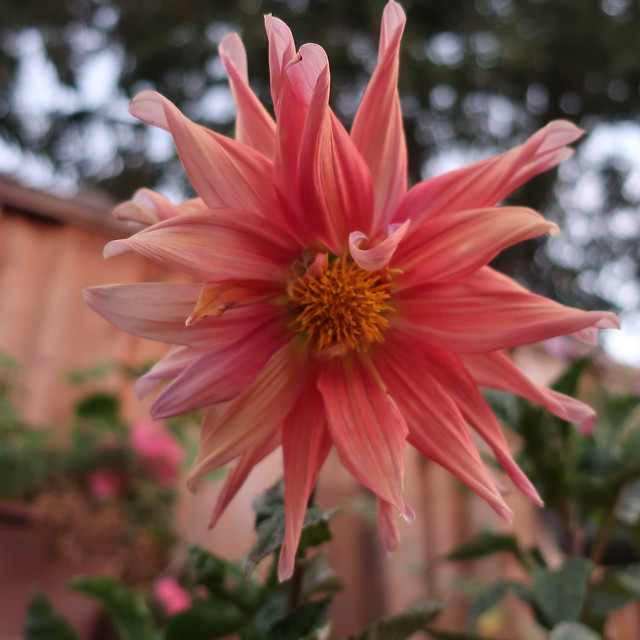
IMG_0380

Wednesday, October 12, 2011

Seeking the perfect shirt - first try with McCall 5522

After my last project, the women's shirt made from Liberty of London cotton fabric, I have it in my head to make myself a silk blouse or two.  I have a couple of purchased blouses in silk charmeuse which has a touch of lycra and they feel good to wear.  So I figured I should test out a pattern, or two or three, until I find something just right to use before I cut into some lovely silk.


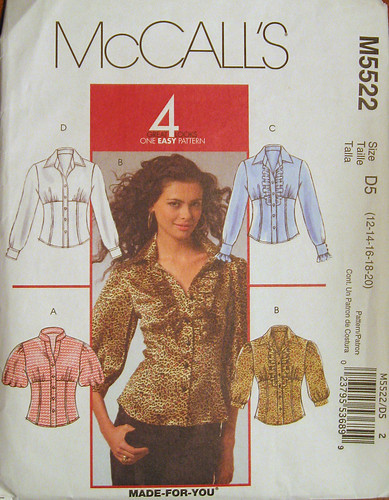
This is my first test with McCall's 5522 which I think is out of print but probably available.
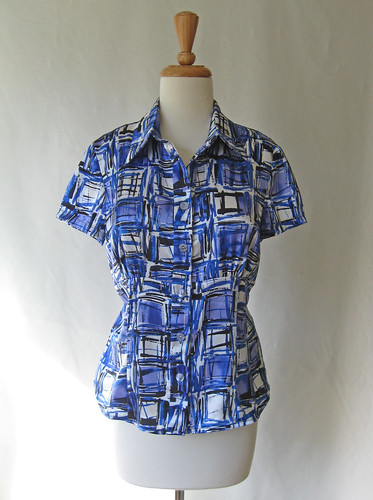
The fabric I bought last summer at Joann's, turned out to be a "what was I thinking" but usable. I was distracted by the colors and the geometric print, less than enamored with the slippery shiny poly-ness of it.  But it makes a good stand in as a test fabric for a silk charmeuse shirt.


Blue poly blouse_1


M5522 pattern envelopeHere is the pattern envelope, you can't really see the seaming in this print, but it has quite a few pattern pieces.  I liked that it has a stand collar, and the collar itself is a nice shape.  I am not so crazy about that underbust seam and the princess seam below. Perhaps in a cotton lawn or a sheer georgette fabric it might work out better. But then probably not something I would wear.   I had very little fabric, so made do with short sleeves.  Maybe because there is no stretch in this fabric, and I am getting very used to having a touch of Lycra in almost every fabric, but it seems a tiny bit tight across the upper back.  I think I will try another shirt pattern, probably one with a darted front and more easy fit will be better for charmeuse.
For the collar I used a technique that I posted about some time ago, which was a new to me method for attaching the collar and stand to the shirt. It worked like a dream and I have used every since.  Here is that post., shown on a cotton shirt I made for someone else.

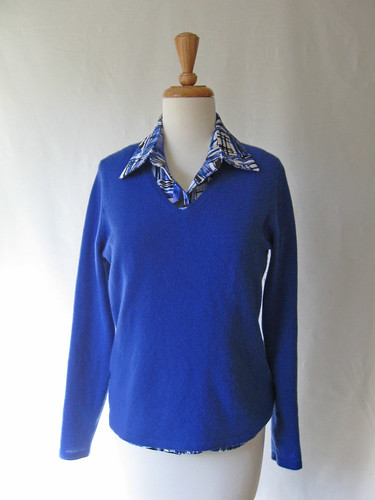
This is how I will wear it this winter, sort of a homage to my dear dad, who was a cashmere sweater and saddle shoes kind of guy. Not a fancy dresser, mostly a traditionalist, with a liking for Harris tweed, freshly polished shoes and someone who really noticed the fabrics in clothes.  I happened to have the perfect color cashmere sweater in my drawer- now where are my saddle shoes?

Blue poly blouse with sweater

Saturday, October 8, 2011

Liberty of London shirt - finished

I just realized today that I hadn't posted any pictures of the finished blouse.  I made this blouse for someone who bought the fabric when traveling in London earlier this year. To recreate her blouse, I made a pattern from a ready-to-wear shirt she had, and then made a test version in gingham.  After that I had my unexpected break from sewing - so this one has been in the works for a while.  Here is the finished blouse. This fabric is a dream to work with, so crisp and yet lightweight.  Now I see why these cottons are famous.


Liberty_blouse_done_1

I just noticed in the blog post title I called it a shirt, yet in previous posts I called it a blouse.
Which is it?  Is there a difference?  I always think of a shirt as a button-down or menswear style, with no darts.   Now I have to do some research on that.  Any ideas?  How do you distinguish between a shirt and a blouse?

Inside is all french seams except for the armholes which I serged.  The back yoke is clean finished on the inside, with no seams showing.  Difficult to see in the photo below as the fabric  is very similar inside and out, but a nice way to do a shirt which has a back yoke.
Liberty_blouse_done_insideLiberty_blouse_yoke_1Liberty_blouse_yoke_2

To do this, you sew the yoke facing to the yoke along the bottom seam, and then lay it open on that seam, as in the photo above right.   then roll the fronts and back of the blouse up, and sew the yoke shoulder seams.  Then you pull the front and backs through the center, basically turning the yoke right side out, and viola, your yoke is enclosed and no seams are showing inside.  Another 3-dimensional puzzle for sewers.  There are a lot of those in garment making, aren't there?


Another view, of the collar and the front pocket, where I matched the stripe effect so it disappears into the print.

Liberty_blouse_done_3

All in all, I am glad to have made a blouse and/or shirt, it has been years.  Inspired by this project  I just made one for myself, different pattern, which I will post soon.


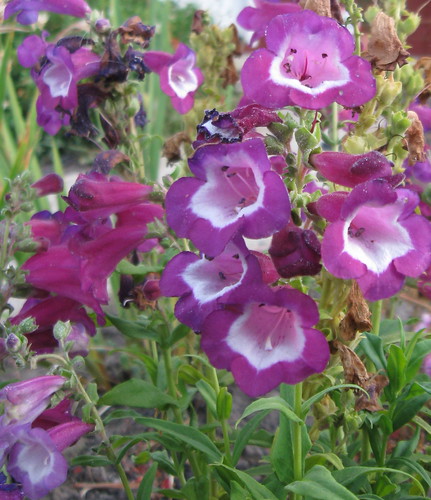
IMG_2109Today's garden photo, a penstemon which is still flowering, and the hummingbirds are still coming around to enjoy its purpley goodness. 


Happy October sewing,
Beth