Friday, November 27, 2015

Burda Tri-Color coat 12/2012 # 138, part 1

A few autumn leaves, a couple of frosty nights and my sewing mojo is back. With a chill in the air coat season is finally here!
Do you ever have a pattern that have not bought but keep returning to? Over and over again, thinking about, wondering what fabrics might work, evaluating if it right for your wardrobe? This BurdaStyle pattern is from 2012 and I have probably been looking at it since then. I don't get the magazine but I always take a quick peek at their emails showcasing the new pattern collections so maybe I first saw it there.
Recently someone gave me a gorgeous piece of wool coating and I wanted to use it for something really special. Here is the link to the pattern page.
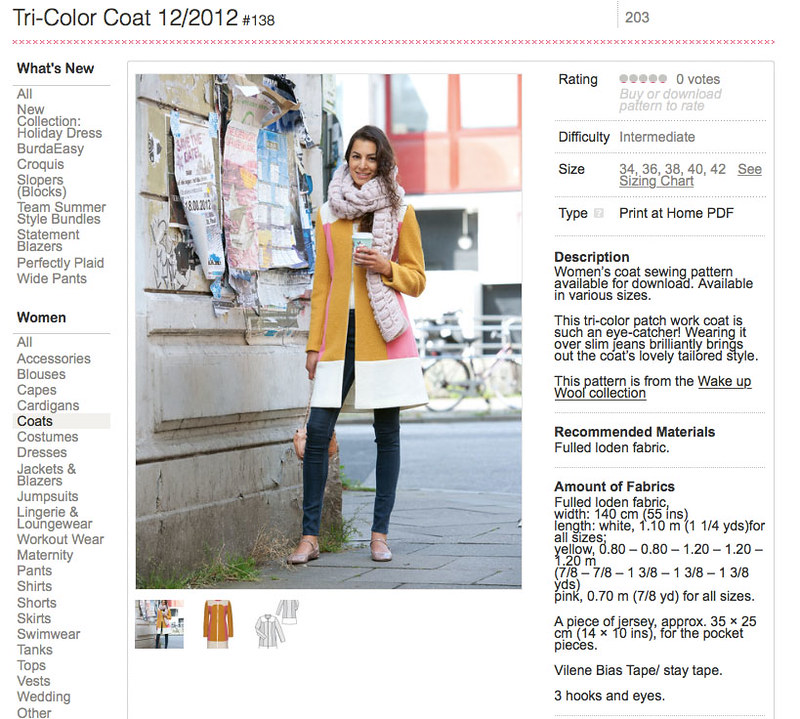
Burda coat page

The gigantic scarf is obscuring the collar details but fortunately they show it in the other image. And this pattern led me to a discovery that may be well known to you but something I never noticed before. More on that in a minute.

Back to the fabric. That beautiful green wool was given to me, it is a perfect weight of coating fabric. Already pre-shrunk and sealed up in a bag - thus you can see a few wrinkles which pressed out perfectly. I started thinking about combinations for the tricolor coat and remembered that I had a very heavy wool coating in my stash which - wait for it - I bought at some rummage sale or something like  that. It is a 4 yard piece of super dark navy blue wool coating. Just sitting in my stash until needed :)
And I probably paid under $10 for that. So....two fabrics ready and one more needed.
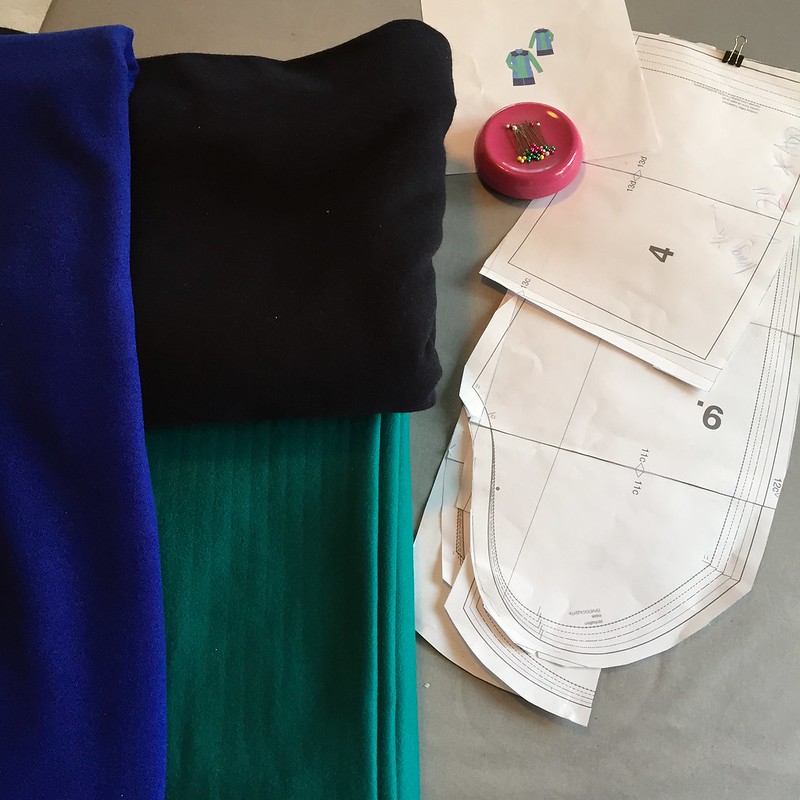
Tricolor coat pics

This is where my silly little discovery happened. I often do a screen capture of the technical drawing image from pattern websites, either to save for a blog post, or to print out and color in with pencils, just to play around with fabric options. This time I had the drawing open in Photoshop and clicked on the paint bucket tool, filled in on the coat and to my surprise it just filled in one section. So I changed color and filled in the other sections. As with so many features in Photoshop (and many many other programs) trial and error or happy accident or crazily frustrated random clicking results in some new epiphany. (or possible erasure of an hour's worth of work but we won't focus on that now). So this may be a well known feature of the technical drawings but it was news to me. And what a perfect pattern to play with this feature.
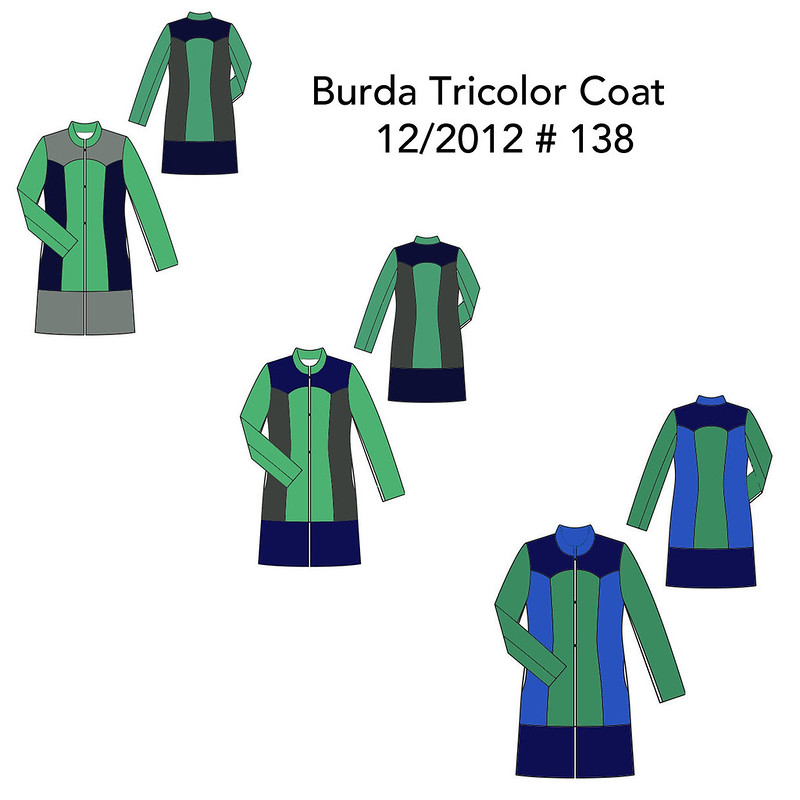

coat color idea2

I was thinking grey for the third color but my newly found coloring tool helped me decide on something a bit brighter (oh what a surprise, when do I choose the understated). Although the grey is nice and I could imagine this coat in shades of all grey - that would be very sharp looking. So something in the sapphire blue was the winner. Which I didn't have so I had to order fabric. Fortunately I found a perfect choice at Gorgeous Fabrics, a wool coating for about $ 23 yard. Just needed one yard so in the shopping basket it went and you can see it above.

I did make a muslin of this pattern before I cut out my nice wools. Using some scraps of various things and not doing the colors in the same array as the pattern, but I just wanted to check the fit and length. I cut out the Burda size 40 with about an inch added at the hip on the side seams and the fit is spot on. Can I take a minute to rave about the Burda sleeves? I have now made a few Burda jackets and so far their sleeves are really great. Although long! which I guess is better than too short.
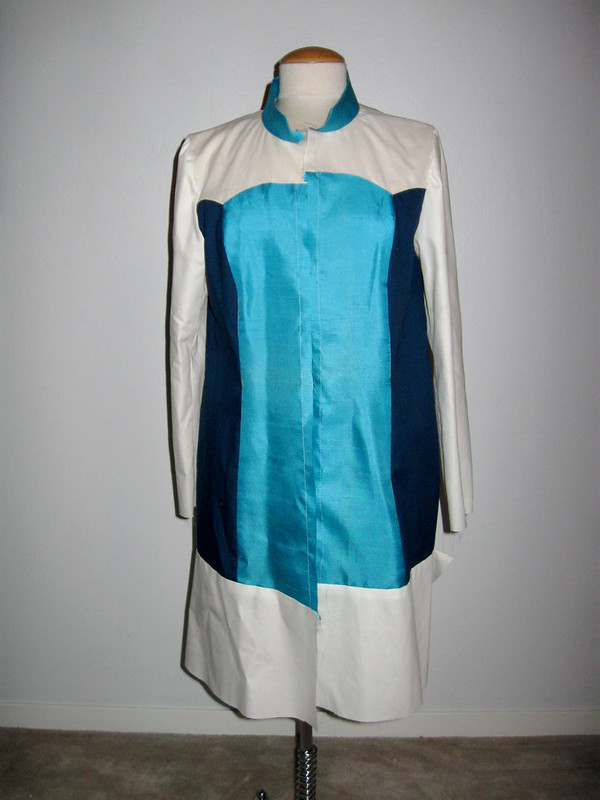
tricolor test muslin

Sewing this coat I have taken a lot of photos - so expect a few more process posts along the way.
Here is the first on my sewing process. When it comes to linings, whether in the jacket or coat, or just the pockets, I am not a fan of novelty linings. Inside jeans or shorts it looks cute to have some contrasting cotton and that's a good way to use up scraps, but when it comes to any "serious" coat (defining serious as something I put a LOT of work into and intend to last years) I want the pockets to disappear, or be hidden and have no chance of peeking out.
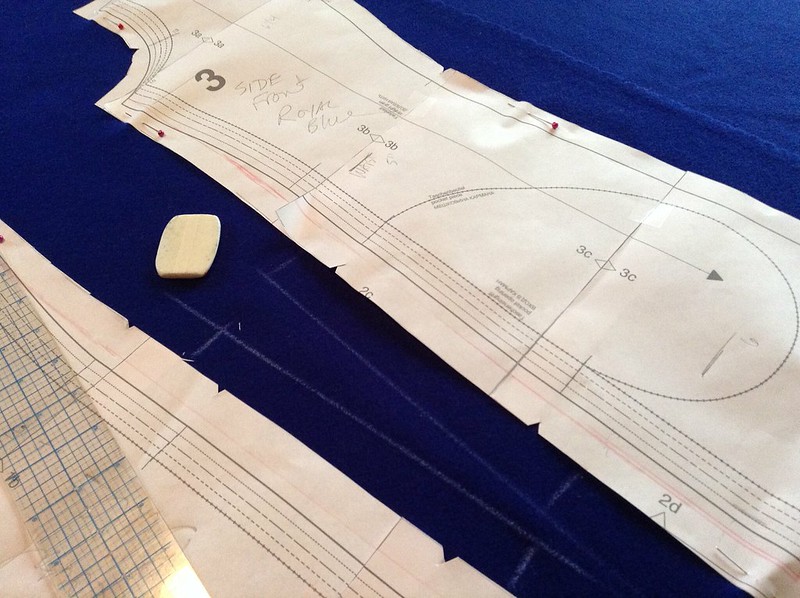
Pocket seam allowance

So for the pockets which are in the side seams on this coat, I add an extra section of fabric and then sew the pocket bag onto that, which serves to have the coating fabric extend about 1.5 inches into the pocket so the pocket lining stays hidden. Although I did use a dark navy for the pocket lining so it is not very visible anyway.
Sewing process item #2, interfacing. While all these wools are quite thick and this design doesn't need much support (no lapel or traditional collar) the 3 fabrics were slightly different in weight and thickness. I wanted them to all behave the same way so the method to achieve that is interfacing. Also my muslin test showed me that sewing those curvy junctions was very tricky and needed some stabilization.  More on this in my next post but for starters I pulled out all kinds of interfacing and did some tests.
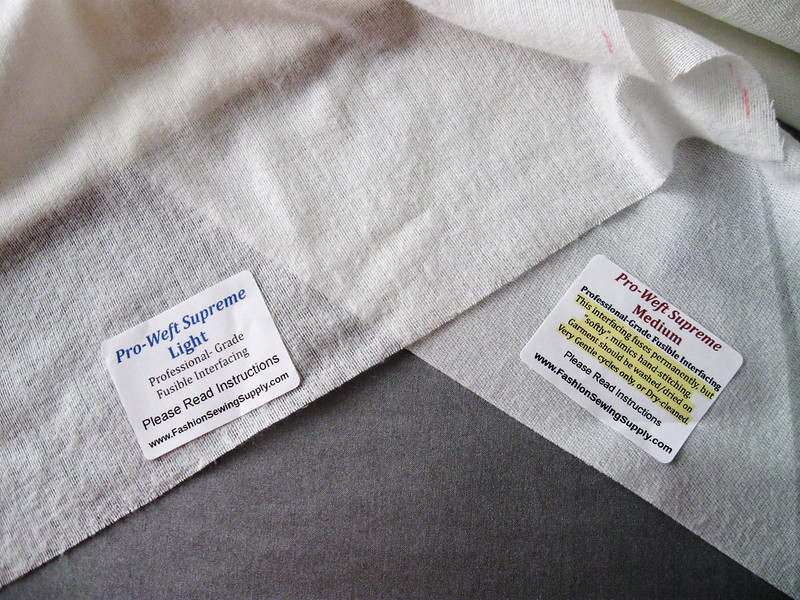
interfacing choices

I always do tests on my fabric and interfacing combos, not just applying the interfacing but then stitching the fabrics together in various combinations to see how they go together. Sometimes I am surprised at what works so the test is always worth the few minutes it takes. For most wools I use this Pro-weft interfacing from Fashion Sewing Supply (note I just got an email this morning they are having a sale, 15% off.

Here is the sample I played around with, front and back.
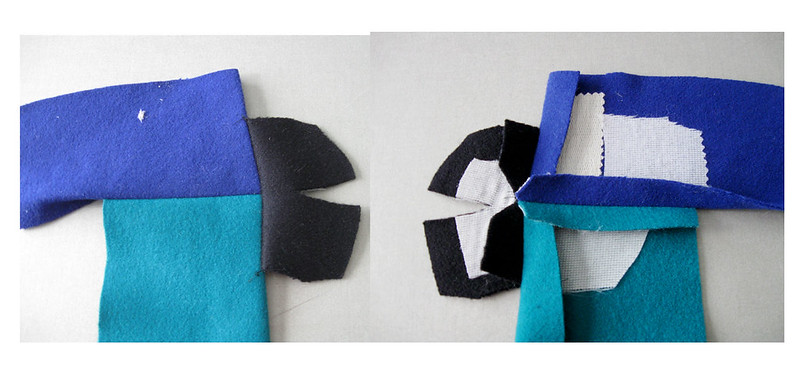
seam interfacing comparison

I tried to create a section that matched the pattern where the 3 colors were joined together, and also included a curve, which I had to snip, making it look like some kind of abstract art face or something. But you can see that the various weights of interfacing applied, then I stitch the pieces together, including where there is interfacing because you want to see how the interfacing does in the seam as well as in the body of the garment. I ended up using several different weights of the pro-weft as well as some knit interfacing in other sections which I will show in a subsequent post. And that image on the left includes a little speck of interfacing on the blue section - something about this wool coating catches every little spare thread or speck of interfacing, which I noticed here on this test and had to be really careful of when I did apply to the real pattern pieces. Also late night interfacing - of course I fused a big piece to my press cloth because it was glue side up. Which is a good indication that it is too late to be sewing and time to turn out the lights, unplug the iron and get some sleep. Also - yay for fusing to the press cloth and not the iron. Thank you Mr. Press Cloth for always being there :).

And now a little sneak peek of the coat in progress.  Lots more details to come for readers who comment that they love to see the in-process sewing and technical details.
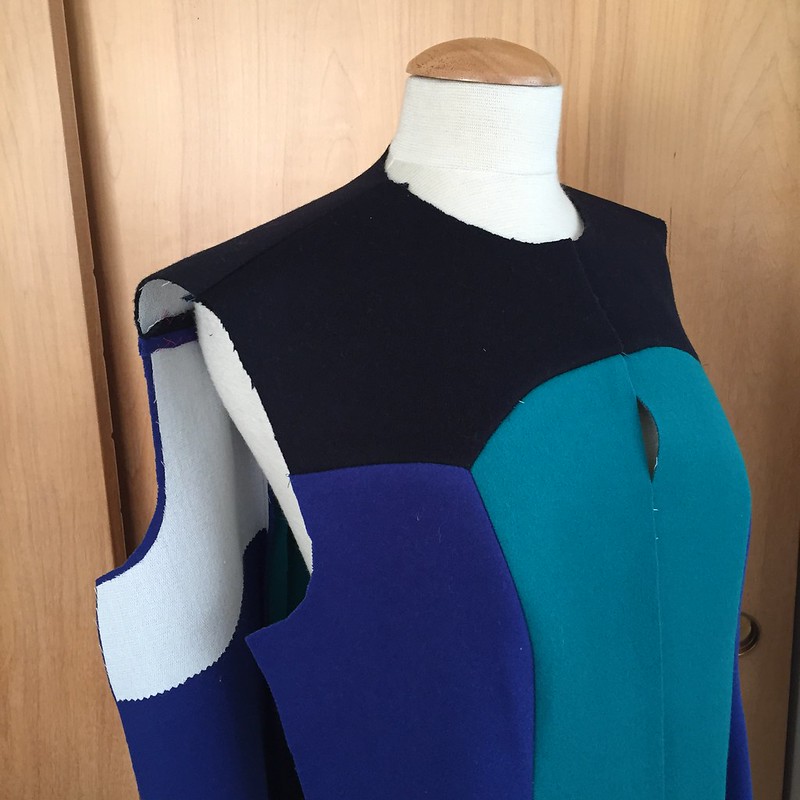
Tricolor coat pics

This morning I got some Christmas shopping done, so civilized with my cup of coffee and my laptop. Unfortunately the "one for them and one for me" habit is hard to avoid. Oh well.....

Now off to the gym and then perhaps some garden work is in order. Or I could stay inside and sew. Decisions, decisions. Oh who am I kidding, I will probably sew.

Happy Thanksgiving weekend and wishing everyone delicious leftovers  - one of the best parts of this great holiday
Beth

Thursday, November 19, 2015

Buried treasure, Simplicity 2152 skirt

Do you ever rummage around in your closet and find something you completely forgot about? I can confess I do it fairly often. A slight drawback of sewing a lot means that many things get worn a bit when new then shoved to the back of the closet with something new taking up my attention.

However when it comes to UFO's - unfinished objects - in my sewing, I just never have them. Does that sound impossible? Kind of snobby? Believe me, in the rest of my life I have plenty of unfinished objects, tasks and to do lists. (That garden shed is not cleaning itself - despite my thinking about it regularly). But sewing  - I finish almost everything I start. If I am not liking the look of something, due to color, or maybe the shape is all wrong for me, I generally finish the item and then either give it to a friend or donate to the charity shop.

But the other day I was moving something in the sewing room closet and came across that rarest of items, an unfinished object. An almost finished black wool skirt. With pockets! a potential wardrobe workhorse! Which was really great for many reasons, the primary one was that I was just about to cut out a black wool skirt. Eek. So after a few moments of mental fog I remembered that I started last spring, just as it was really heating up around here, decided to set it aside to finish in the fall, and promptly forgot completely about it.

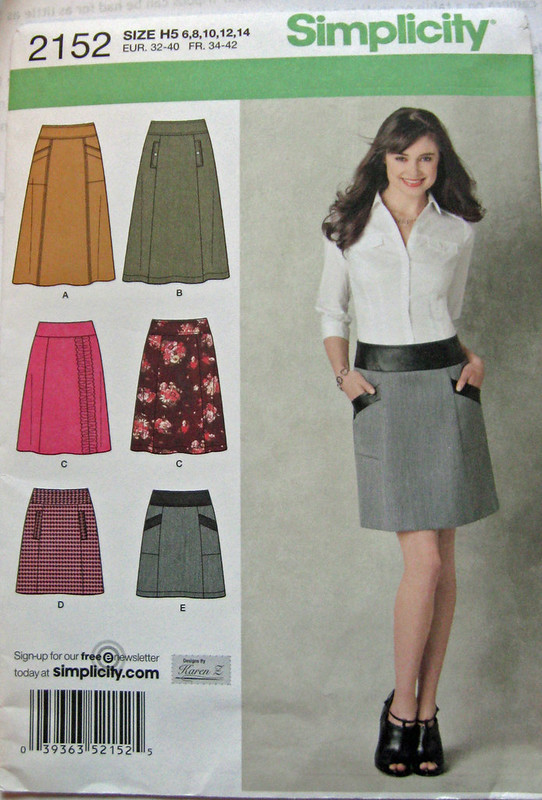
Such a great pattern, super quick to sew, very easy to fit and has nice pockets that are a snap.

S2152 pattern

I never even noticed the View D where the pockets are vertical. might have to try that.
Never mind, mental fog again. I did make that version but it was a bit of an improvisation as I reused the pocket welts from the existing coat when I did the coat refashion into a skirt and jacket.  That blue outfit is SO warm. Which I guess is what you get when you make a skirt/jacket out of a thick boucle wool coat.

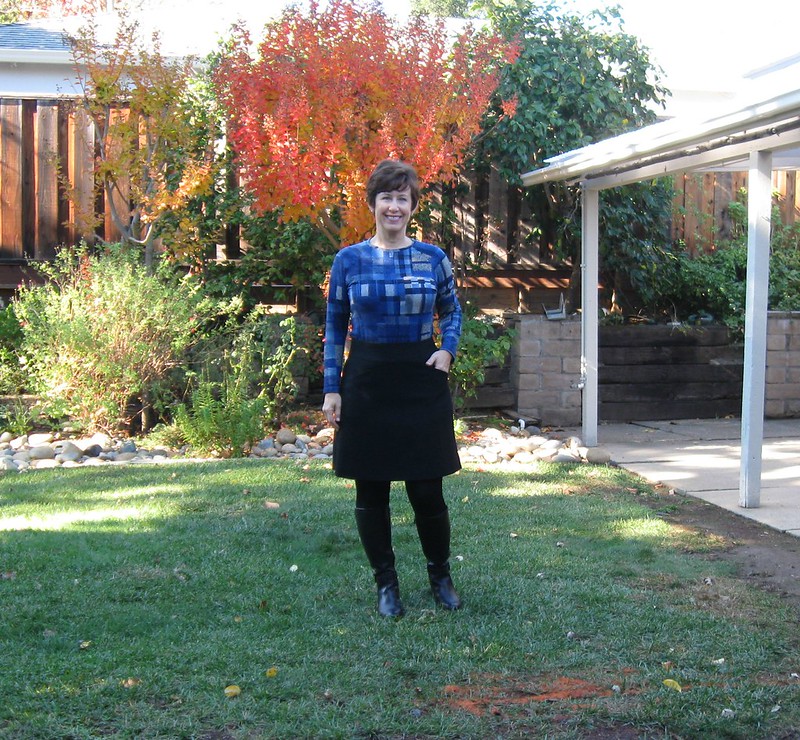
Anyway - back to the current version. Not really exciting I suppose but as I said, a wardrobe workhorse and perfect to wear with black boots and tights.

black skirt on me

What is happening, I look rather linebacker-y here? I should give some thought to the Better Pictures Project by Gillian which is such a great idea. but I probably won't :) So sometimes I can achieve nice photos taken in lovely lighting and sometimes we get crappy timer photos as I am rushing off to do something else. Hey I'd rather be sewing.....hmm idea....who wants to buy a bumper sticker?  Aside - does anyone still do bumper stickers, they were a staple of my childhood but I don't see them as often anymore - I think those window cling thingies or the license plate holders have surpassed them. The political campaign ones are occasionally spotted. T-shirts have overtaken bumper stickers as the means to wear one's motto, I suppose. (my personal fav - life's a beach).

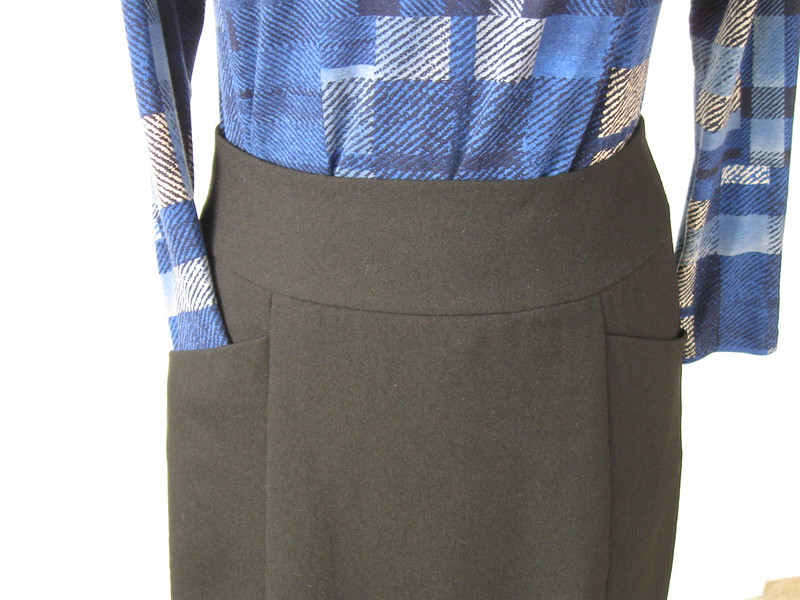
Back to sewing, view of pockets and waistband.

black skirt on form front

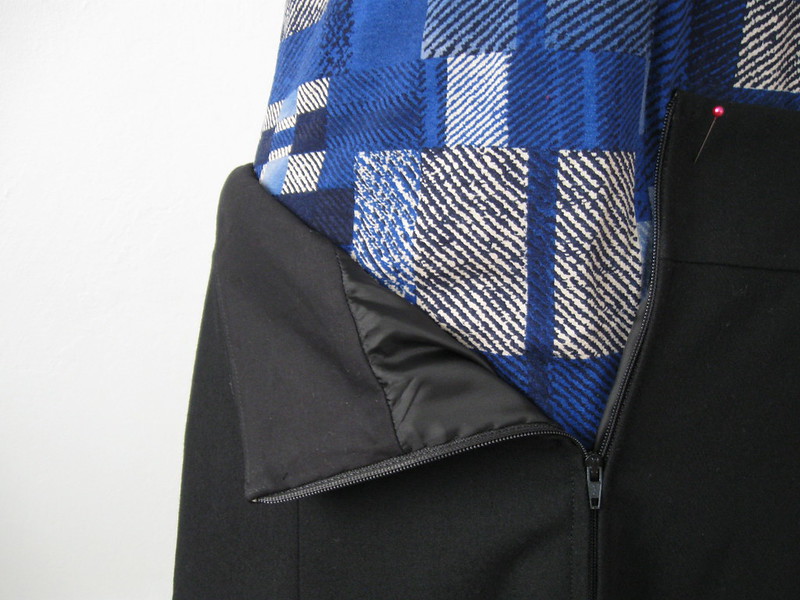
and inside view. I used a regular zipper for a change. (What a breeze to sew in a nice old fashioned regular zipper). This photo below is more accurate for the color of this black wool,  the one above is a bit overexposed.


skirt zipper and lining

When I pulled the skirt out of the closet the lining was attached but I hadn't hemmed the skirt or lining and also the lining needed to be attached at the zipper. I used a plain black cotton for the waistband inside, and then a bemberg rayon for the rest. Because I don't like itchy wool on the inside but if I use lining there then you have the proverbial spinning skirt. You KNOW just what I mean. How you are going through your day and realize that your center back zipper is somewhere east or west of where it should be. Because the slippery nature of the inside of the skirt lets it move around. So using a cotton there just gives it a tiny bit of grippy-ness that tends to keep it properly located.

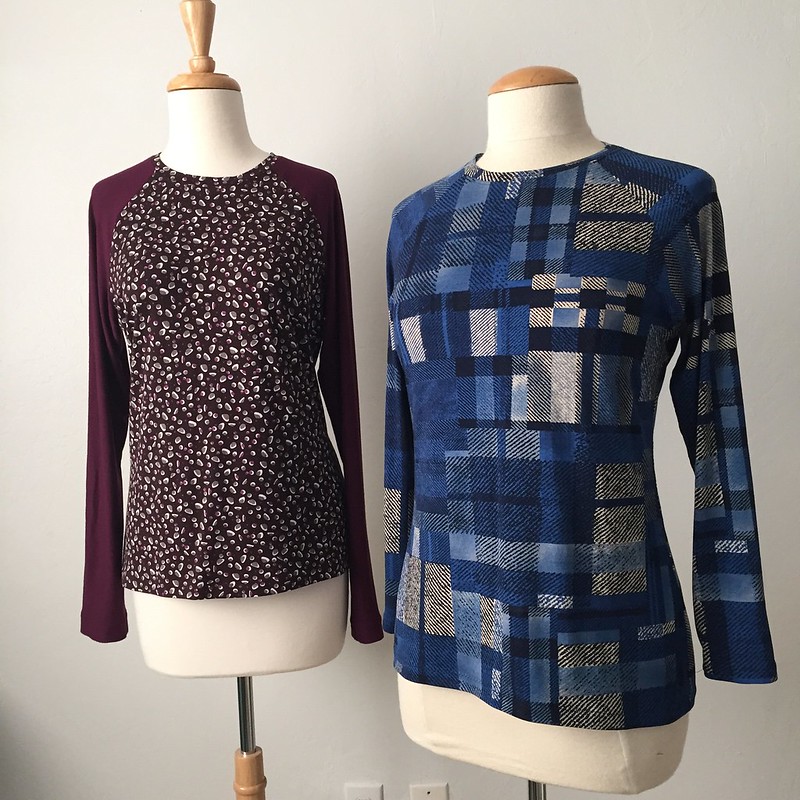
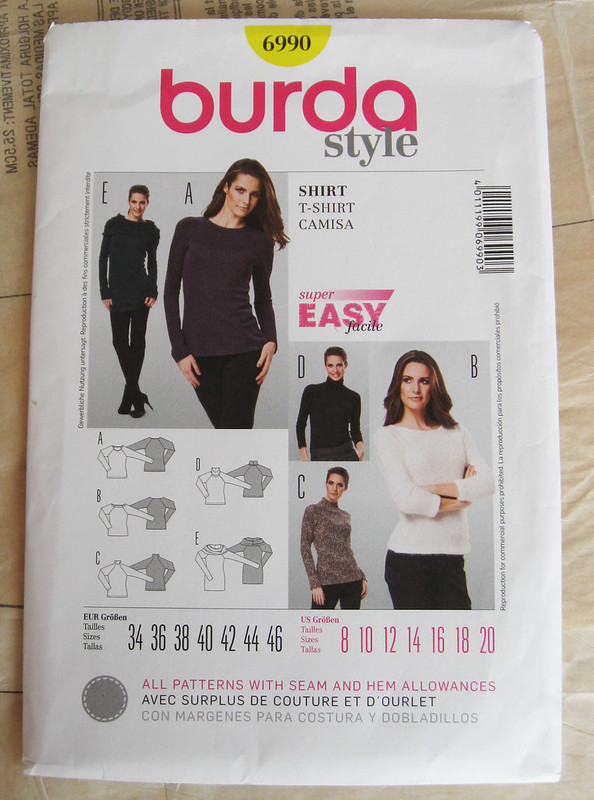
What about the t-shirt you are asking? Or maybe you aren't..... It is my favorite long sleeve t-shirt pattern, Burda 6990.

Raglan tees

A look at the pattern envelope. I LOVE this pattern. So easy to make, fits like a dream and it is perfect for using up scraps of various knits. As demonstrated by the one on the left. All remnants for the WIN!
The blue one is a remnant I bought at Stone Mountain (if you go there check their remnants sections, some nice finds in there). Although I am not 100% about the pattern placement but with 1.3 yards you get what you get. And I keep saying I will make the other versions on this pattern, like that big dramatic cowl version, but so far I have not gotten to it.

Burda 6990 envelope

So that is the latest on UFOs and scrap sewing. I have been really busy lately plus some construction/remodel stuff which is now all completed and we are all ready for the rain to arrive. The weather forecasters keep promising but so far not much.

I can report that it is quasi coat weather now. My shorts are all put away and I am planning on sewing a coat. Because there is a pattern that has been haunting me for at least two winters and someone just gave me some fantastic fabric that they didn't want to use, and wanted it "to go to a good home". So nice! Which means that I have to use it well. Stay tuned for coat sewing and tailoring to bust out here soon. I have all kinds of resolve to pound it out over Thanksgiving weekend.
Plus I have 2 silk blouses in the works (well patterns adjusted and matching thread obtained if that counts as in the works).

Speaking of coat patterns - everyone is talking about coats, pinning coats, sewing coats. So I think a Pattern Whisperer post on coats is overdue. Because I am a maniac about fit I think it will be patterns that have lots of options for adjustment to get a good fit. Any interest?

happy autumnal* sewing, Beth

* I have always liked that word, autumnal. even though I could do without autumn
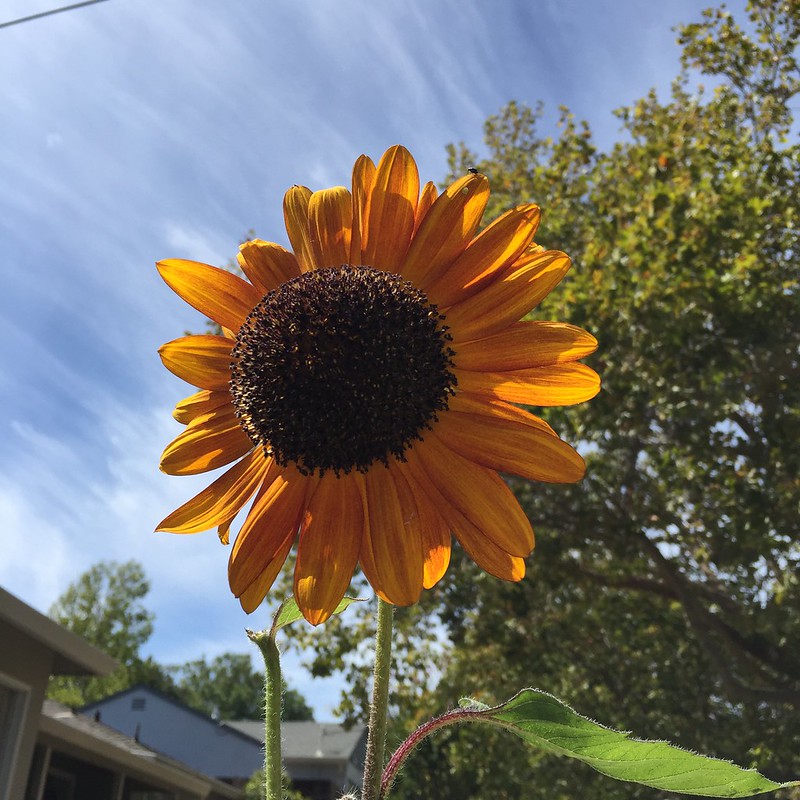
For today's garden photo, a very autumnal coloration of sunflower, which bloomed at the end of summer.

Red sunflower

Wednesday, November 4, 2015

Vogue 9032 has improved my attitude about pants

As evidenced by the many many muslins I have sewn over the past couple of years, fitting pants is one category where I had almost admitted defeat. And I'm not quite sure why.  We all have figure quirks, mine being no more or less exceptional than anyone else's. But for some reason I just have trouble with pants.

I think the fact that I can usually go into most any store and with a bit of effort find a pair of pants that fits quite well is also a factor. Why deal with fitting etc when I can find pretty much whatever I need via retail. But it did nag at me, and of course if you want something specific it is never to be found when shopping for just that item. So pants fitting, I have persevered and thanks to Vogue 9032 I think my luck has improved.

By the way - I did have reasonable success with the Sewaholic pants pattern but I do like the idea of the back princess seam on pants which allows for that extra bit of fitting if needed.
OK - enough talking, you want to see some results, right?

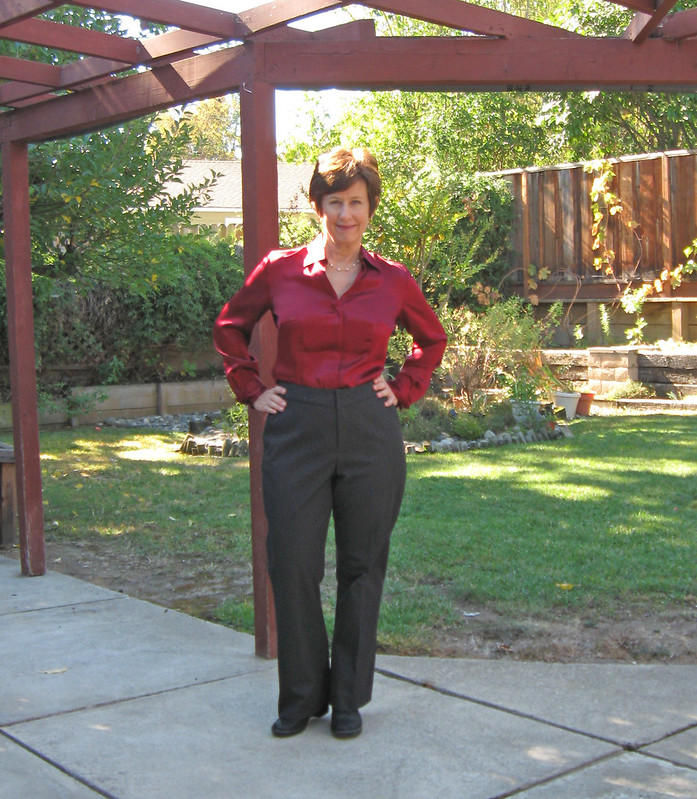
Vogue 9032 Pants front view 1

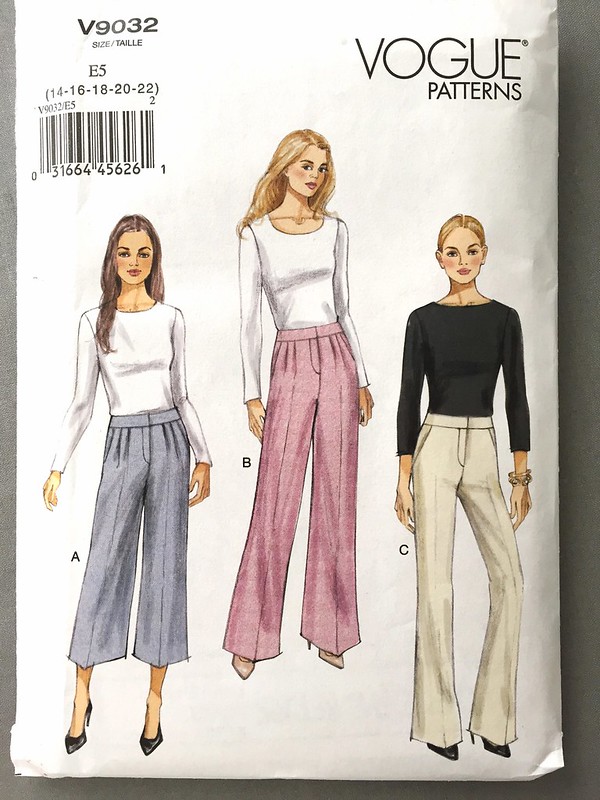
These are wearable but not particularly noteworthy. I just wanted to see if I could get this pattern to work, as it was designed so a basic trouser. I used the version C which is a flat front, slant pocket and more fitted leg. Although I shortened the pants by 3 inches, and did that at the knee so that took away a bit of the slight bootcut look. I think when I make them next (oh yeah, there will be another version) I will adjust the length both above and below the knee so that the leg shaping will remain. I might make them a bit more fitted in the leg as well but I think that is something you can do once the pants are machine basted together but that fit depends so much on the fabric choice.

Vogue 9032 pants pattern


Basting - my secret weapon. Perhaps a bit overdramatic but I mostly machine baste everything I sew. It takes just a few minutes, stitch, hop up, quick try on, a few pins on seams here and there, re-stitch, try on again, until satisfied. Then I go back to my pattern pieces, mark up my corrected seam lines, and happily put those pattern pieces away for next time (which may or may not ever arrive). Then I "for real" stitch up any seams that were basted, trim excessive seam allowances and press press press. Sometimes after pressing the fit might need one more little tweak. Because when trying on something, and pin-fitting a garment cut with intentionally large seam allowances all that bulk can get in the way of pin fitting, and once trimmed away there still might be a tiny adjustment. Probably on a dress bodice I would be super fussy but pants need room to be active so not as critical.

Adjustments made on this pattern:

  • Raised the center back. Despite being on the short side (5'3") I have a super long waist-to-hip length measurement (10.5")  More proof of my claim that body length in the various segments is just as important as body circumference. I guess this is commonly called long waisted - but really it is long-hipped?  Or I would like to invent a new acronym, as we use FBA for full-bust-adjustment. I need the LBA (I hesitate to write it, but here goes...the long butt adjustment). If you try on pants or jeans in the store and you see that tiny 2 or 3 inch zipper and know in your heart that those pants  - even if they fit and zip are basically like wearing a bikini in terms of where they hit on your torso - then you too might need the LBA. Just to show that there in infinite variation in the species, my sister can try on the same pair of pants and the waist could be over her belly-button and verging on old man pants pulled up to the ribcage. Interesting huh? and this is why we sew!!!    Anyway - I raised the back about 2 inches in the center and tapered to actually lowering 1/2 in in the center front. It was OK but is still a work in progress. They feel too high in the front and could possibly be about 1/2' lower in the back and still be comfortable.
  • Took in the back waist at the center about 1" total
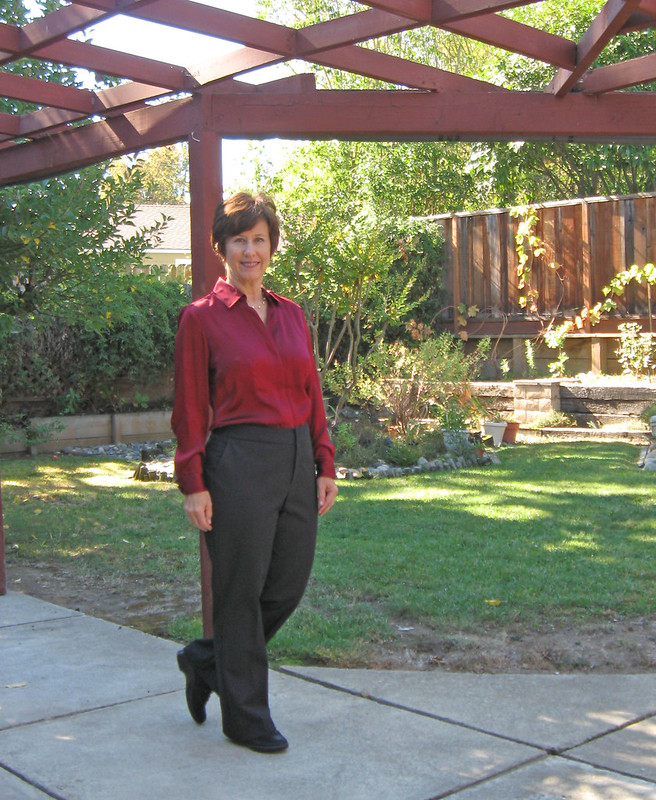
  • Added small darts on each back side piece. I could have taken the center back in more or even the princess seams but it would have made those seams too close together and look weird. It might look weird anyway but I will not be likely to tuck in a shirt. I mostly wear sweaters or knot tops. But I am wearing a silk blouse so you can see the whole pants front. 
  • made the waistband about 3/8" wider. It just looked kind of skimpy.
  • Added a seam in the center back of the waistband. For adjustment. Seems like a no-brainer but a lot of women's pants and pants patterns don't have this. I suppose for esthetic reasons but for sewing reasons totally necessary. This pattern does have seams in the waistband at the side seams, and I did take it in a bit there. Basically I fit my hip measurement and then adjust the waist. 
  • All kinds of scooping and changing of the seat, which is also something that will need further experimentation.
  • Fish-eye dart in upper thigh back. Since this pant has a seam running down the center of each leg there is the opportunity to remove some of that bagging under the seat which seems inevitable. I took out about an inch at the center tapering to zero at the side seam and inseam. I'm pretty happy with that and figure if I took out any more there would be no walking or sitting room in the back of the pants.
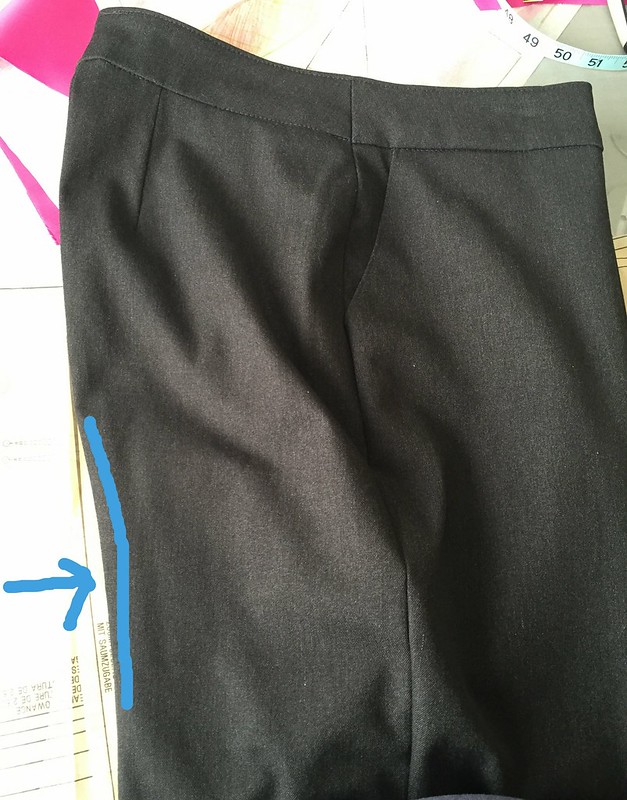
  • More adjustments with that back seam. I took it in under the bum about an inch. See this photo below. The pants are done but I just drew that blue line to indicate where I took the seam in.


Pants

I really like this fabric and have no idea where I got it but a vague idea that I ordered it from Emma One Sock a long time ago. Its a really high quality stretch woven, probably has some cotton, maybe rayon, lycra, who knows. But it is a nice useful grey shade.

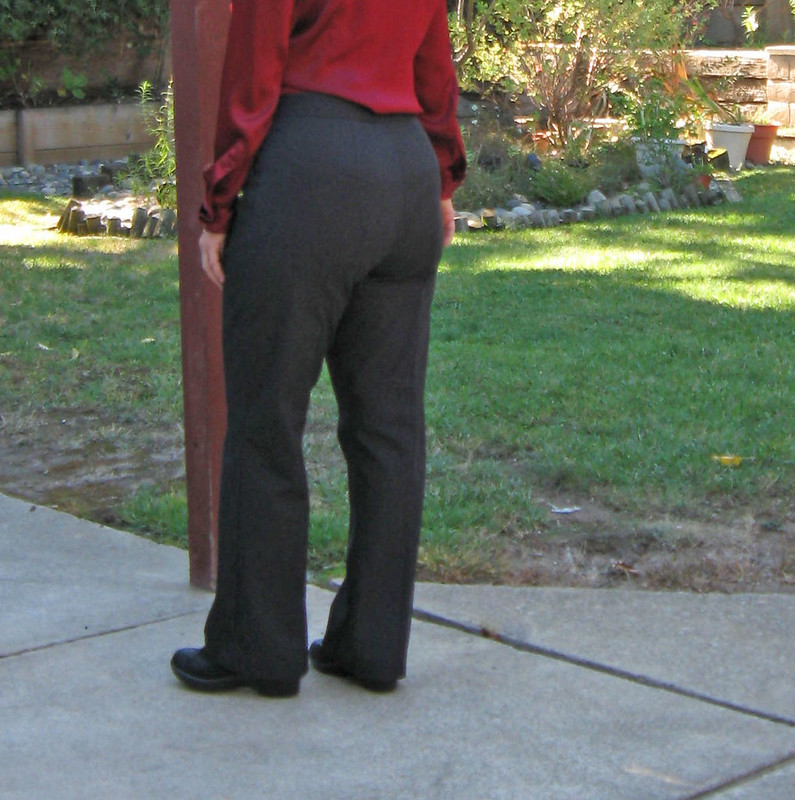
Here's the back view. Which I am kind of self-conscious and really don't like seeing however in the interest of pants fitting science...  Yes that backside needs some pockets or something to break up the expanse. Next version. Plus I like having back welt pockets.

Vogue 9032 pants back

If you look at pants long enough you start to see all kinds of wrinkles etc so its best to get them to fit and then move on - literally. No matter how you fit, once you move the fabric will do what it wants and create folds, wrinkles etc. Some are just the nature of the garment and I need to give it a rest. Seeing this photo they might be a bit short but I always have to decide with my pants - flats or heels so I think this pair is more for flats.  Also looking at this the front waist could be slightly lower, but I was trying to make kind of a basic trouser and then figured I could play with that later.

Vogue 9032 pants

The garden is looking terrible, this is the low ebb, nothing  blooming, water rationing in full force, however if I took this today you would see a pile of supplies and tools on the lawn. The patio cover is being redone and the whole wood frame painted to match the house in a pale sage green. Why was it red? I think some previous owner had a can of that paint. Having an older house means finding out all kinds of oddball stuff that previous owners did when they remodeled or repaired. Don't get me started on the irrigation system - it is still working on a wing and a prayer.

So onward to more pants! I have some dark purple stretch woven that I think is bengaline? which I bought a while ago at Joann's of all places (a nice fabric hiding in plain sight among all the crap).

Yesterday someone gave me a giant piece of gorgeous wool coating which I am going to use to make a pattern I have been thinking about for two years. I am so excited! Stay tuned for more tailoring in the near future.
Right now I am finishing up two dresses for my friend Heather from her haul of Mood fabrics. I just cut out a fuchsia wool knit that is the dreamiest fabric. Details to follow.

It was actually chilly today - real coat weather - sort of. I did see some people in shorts and flip flops. Actually we see that 12 months of the year here. I get cold just looking at them!

Happy Fall Sewing, Beth