Wednesday, May 30, 2018

McCalls 7549 color blocked cropped jacket in double sided fabric

When it comes to planning what to sew, to summarize, I don't. Meaning I don't really plan, I just go where my mood takes me. Sure I have a vague idea that I might need some new knit tops, or want a certain color of denim skirt. But mostly I just go with what fabric I find or a pattern that catches my eye. I suppose I do have the luxury of sewing for a good long time, so I have plenty of coats and jackets to wear as well as all the summer dresses a person could need. But desire for an item, that is a different story. There is always something fun to discover around the next sewing corner, an inspiration from the web or another stitcher. So while I sew according to my whimsy, I am very strict with myself when it comes to two things. 1) finishing projects and 2) blogging things I have sewn in the order I sew them.

Kind of goofy, huh? If I have sewn something, and then completed something else, I have to blog items in the order they were sewn. Even if I have been wearing both all the time. A strange self-imposed order to my typical sewing abandon. So today I am doing a blog post on an item that I am really happy with but was as yet un-blogged. Despite finishing it ages ago - before other stuff that I have recently blogged. To the point that it was like a pebble in my shoe! Silly but there it is. Perhaps because I actually took quite a while to finish this. I started it around Thanksgiving and finally completed it in March. Only because so many other obligations pushed it aside. And now a wool jacket that will be put away until fall!

blue wool jacket side view

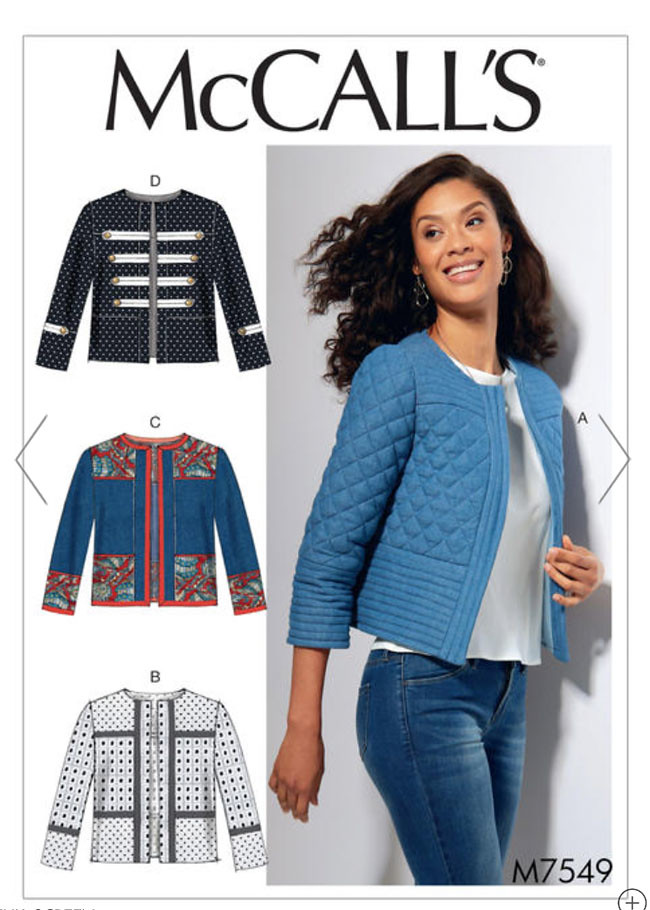
Stay tuned if you like sewing details, pattern matching and design changes because this project had it all. It started with this wool which I bought at Mood Fabrics in NY back in Oct 2016. I really love the color and the fact that it is actually two sided, so it is one fabric which appears as dots on one side and then lines on the other. But I wanted to sew a jacket that could use a lot of both sides of the fabric, not just a small amount like edging of one side and the rest as the other. I saw this pattern from McCalls and strangely I have seen very few versions sewn up. If you look in Instagram there are a few (very cute) versions and a couple of people made it more than once. It's a really easy pattern and a great choice for a first jacket - not hard to sew but a lot of interesting options.

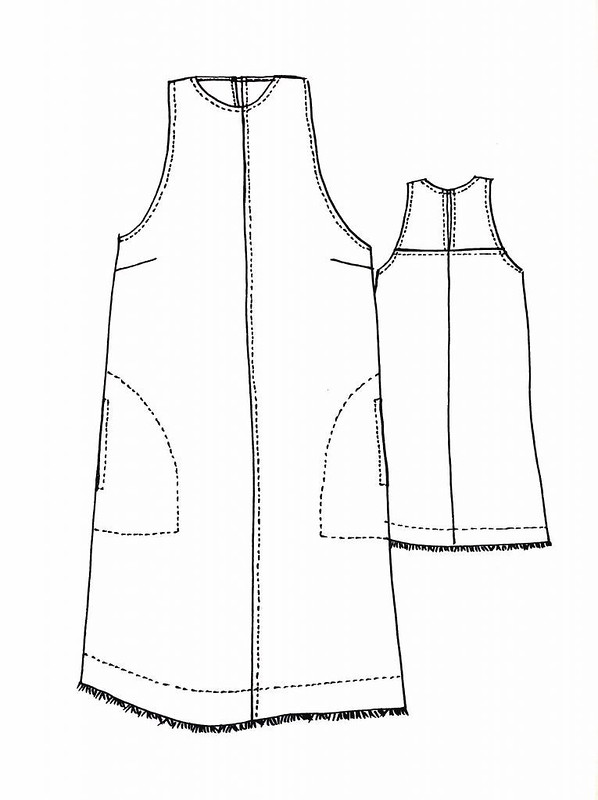
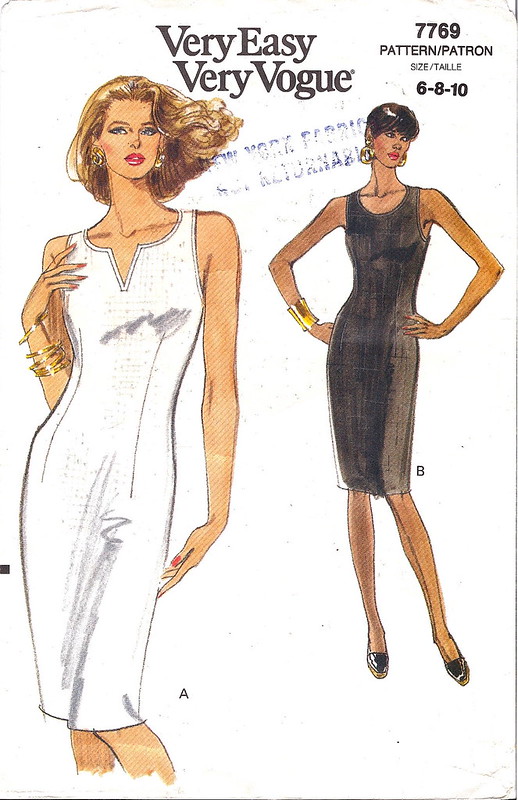
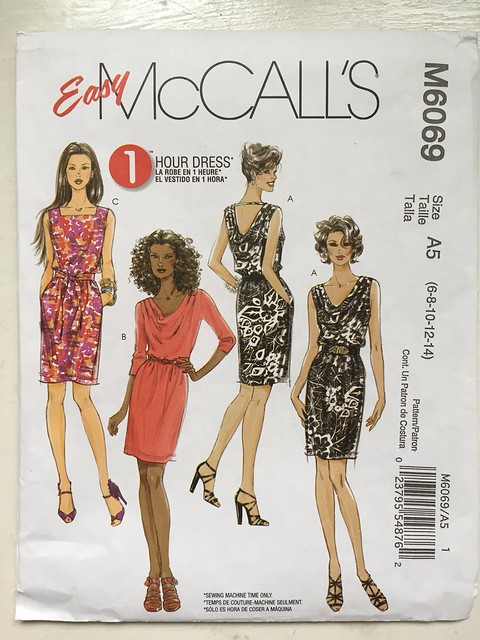
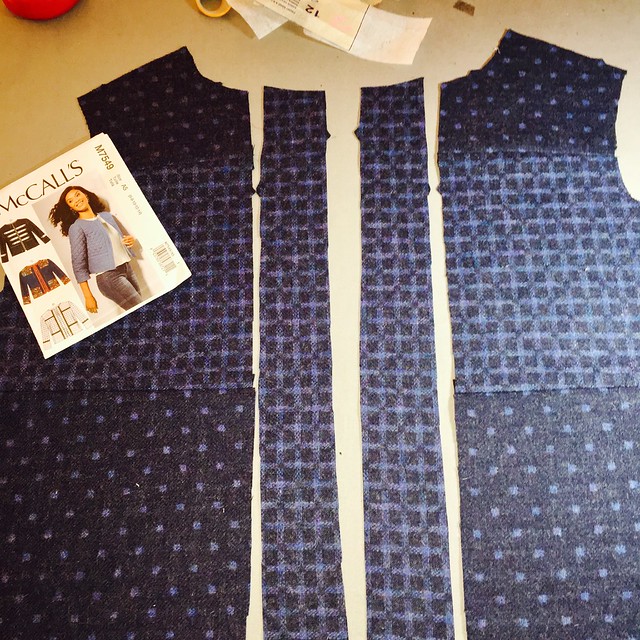
Back to the beginning, when I saw this pattern I figured it would work for the wool, and started playing around with the fabric placement. Here's the pattern envelope.

M7549 pattern envelope jacket

In order to decide how to place the fabric, the dots and lines which give a different shade of blue, I copied the technical drawing from the McCalls website, and then painted in the colors in Photoshop to see how it would look. I've also done this by printing out the page and just drawing with colored pencils or sharpie pens. You would be amazed at how much of an idea you can get on a tech drawing once you add some color and pattern.
I will show some more examples of this next time I do a Random Threads post.

coat color test 2

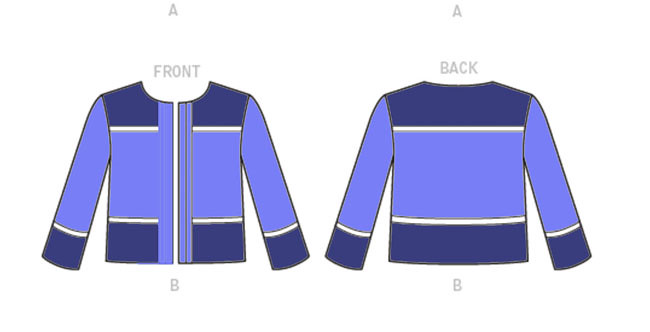
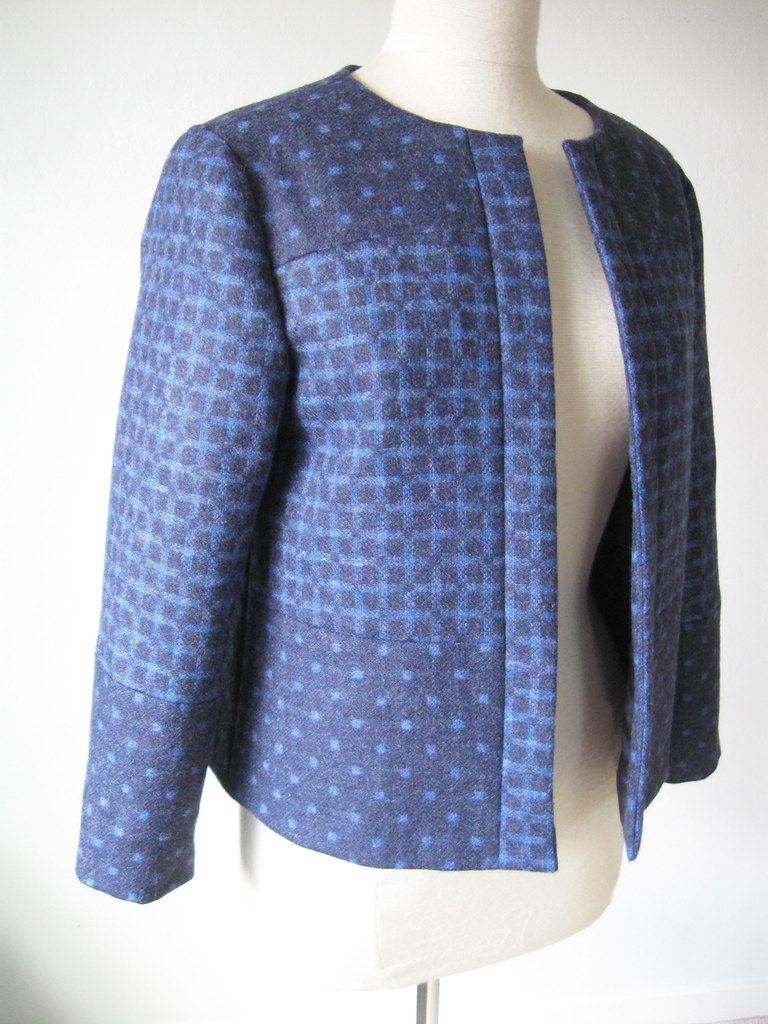
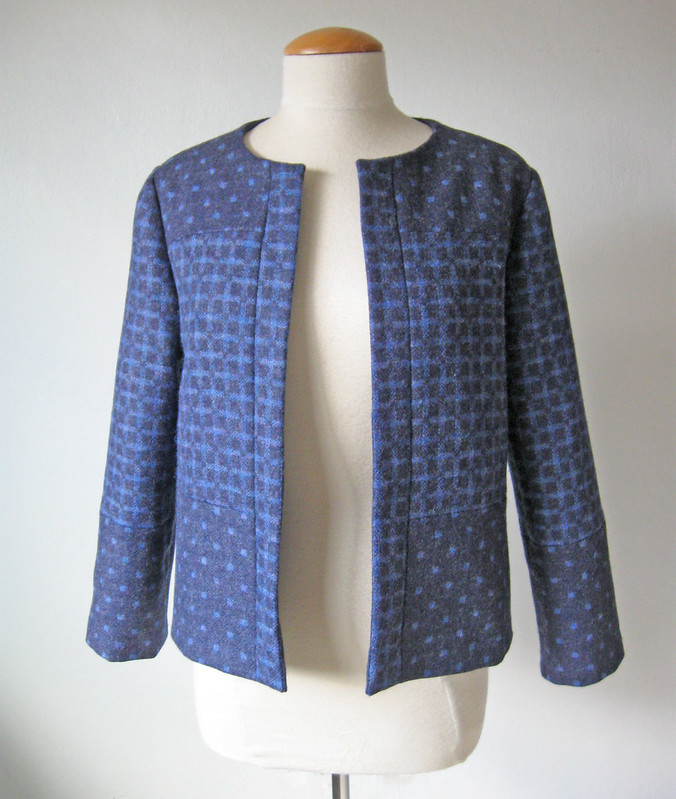
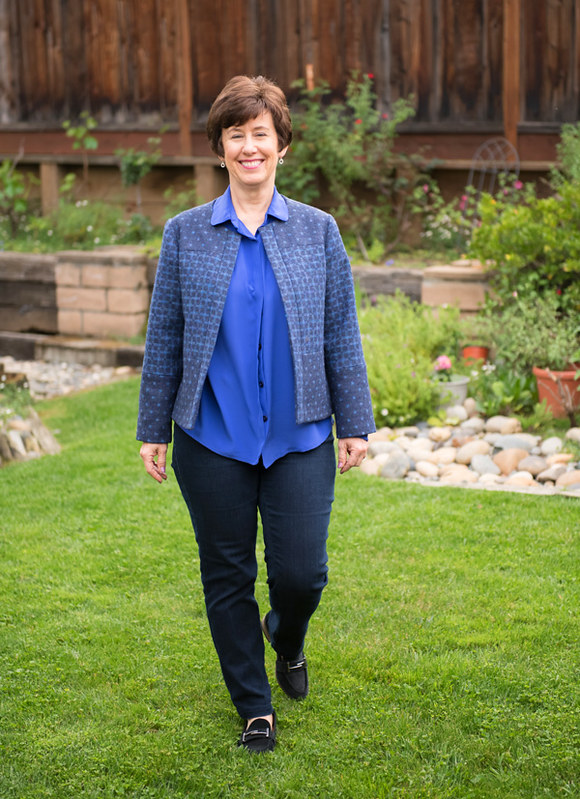
Here's a nice look at the jacket so you can see how it compares to my color sketch. Not bad for getting the idea.

Front angle view blue 2side jacket

But before I got to that point there were a few hurdles. Like making a test version just to see if I liked the shape. To tell the truth this jacket has two features I am not really a fan of, those being no collar and cropped length. But I am trying to sew new shapes and silhouettes so I figured I would give it a try. With my precious precious fabric!

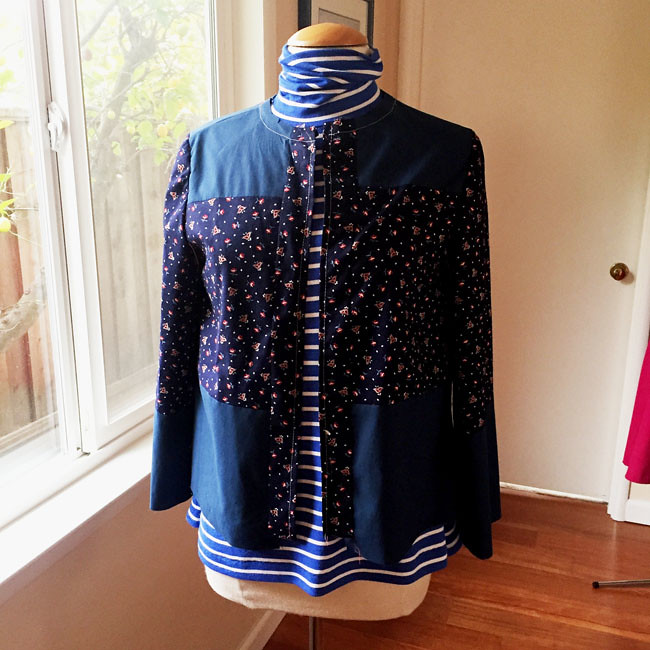
Warning! Do not laugh at my hideous test garment which used up scraps and quilting cotton. Hey at least it gave me the idea of how the various elements would look, and the fit was spot on.

test muslin for wool jacket

Onward to cutting out where it turned into quite the sewing puzzle, in that it was a bit confusing to keep straight which side I wanted as the right side for each section. So I put the image in my photos and referred often as I was stitching it up.

IMG_3544

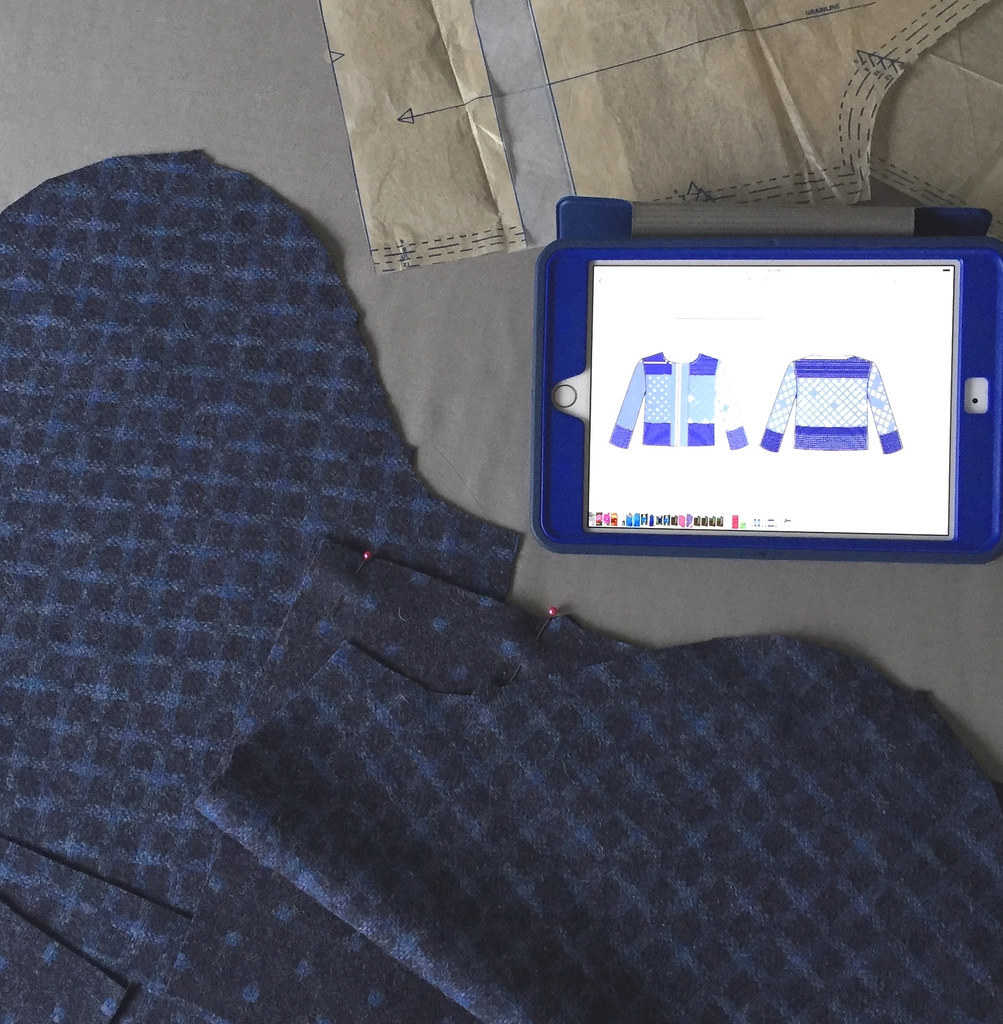
This fabric quality is Gorgeous with a capital G. The type of wool that sews like a dream. You can see the dots on one side (they are really little squares are made by the intersection of the lines on the other side.

IMG_0601
Pattern changes: I knew I wanted the overall jacket to be longer than designed. The pattern version is very short, at least for me, probably landing about 1 to 2 inches below my waist. I added about 1" to the center sections, and then added also at the hemline. I lengthen the bottom section of the sleeve to be a regular long sleeve instead of a mid-wrist length.

IMG_3546

This photo I took to show how much shaping there is in the jacket, what looks like a boxy front has a noticeable curve which becomes sort of a bust dart, or at least bust shaping. In the last Garment Copy class I taught one of the students had a top with this feature, and it was striped which helpfully showed us how much shaping was incorporated in what looked like rectangular pieces.

Next obsession on this journey - pattern matching.

IMG_3547 
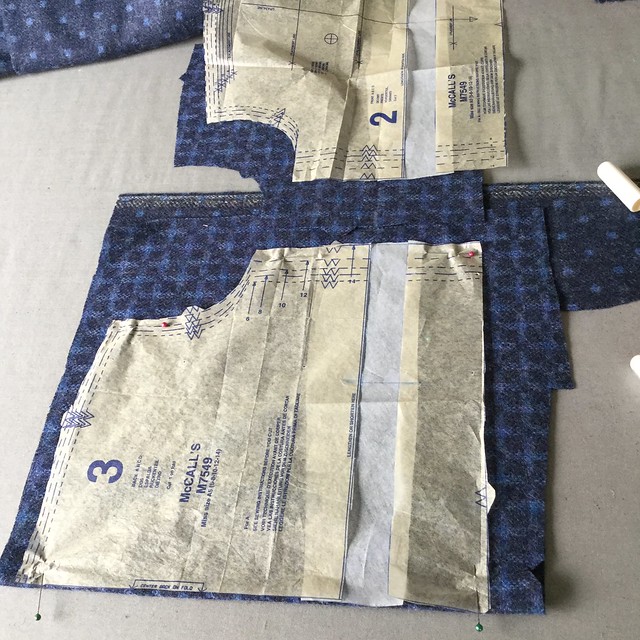
I set aside the remaining fabric as I decided to cut out the front bands later, once I sewed up the front and then I could match the lines precisely.


IMG_3571

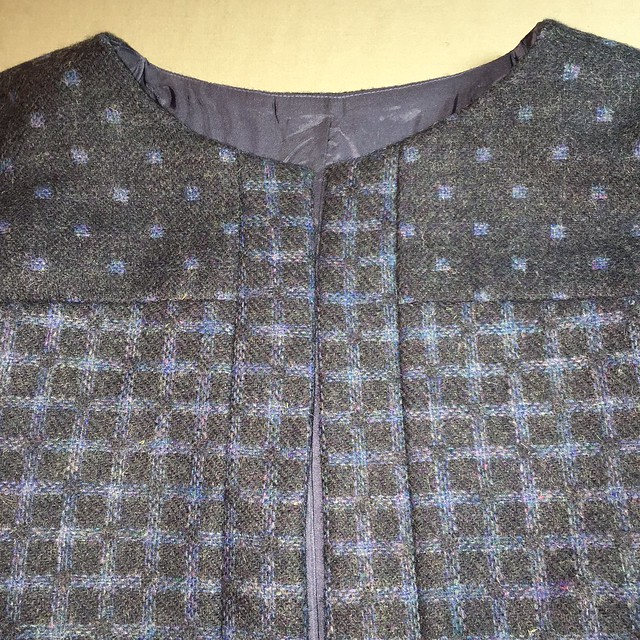
Sewing satisfaction! Actually the dots lined up as well because the other side is the lines which aligns with the bands when I pinned it together to sew.

Interfacing info.

IMG_3567

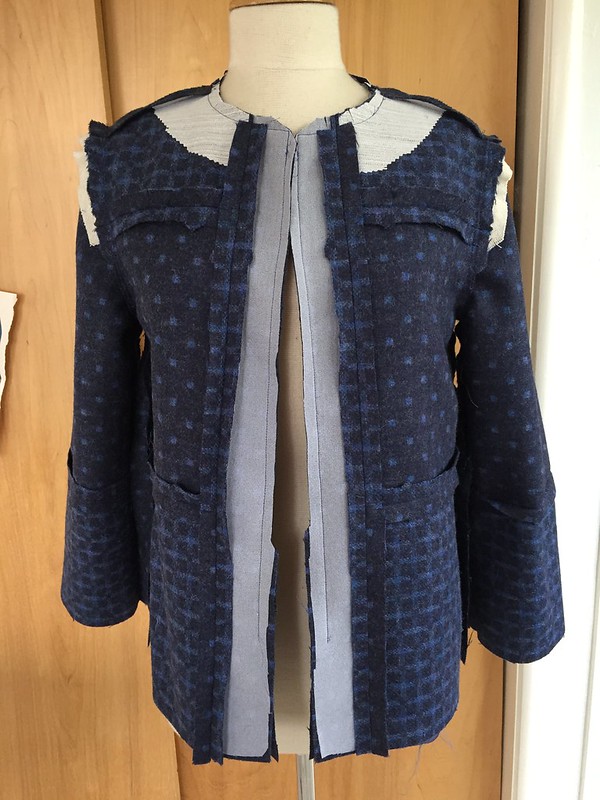
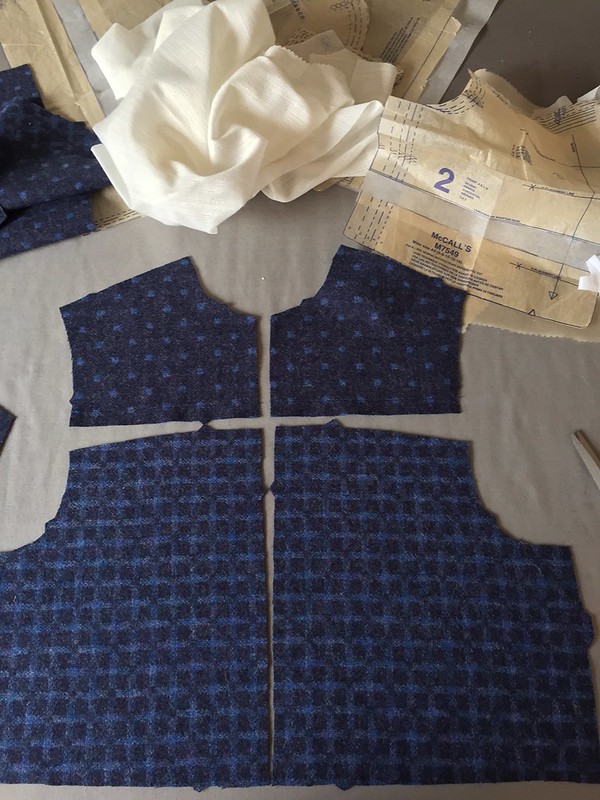
I never look at the pattern instructions when it comes to interfacing but do my own thing. Which usually means more interfacing. On this one I put weft fusible around the neckline, and the top of the sleeves. the front bands have the medium weight Sheer Elegance interfacing on the outer  band and then more on the inner side which you can see in the next picture.

IMG_3568

I put interfacing on the top of the band as well as on the lining fabric which is sewn to the neckline, as I think it needs some oomph to make a structured neckline and sharp corners at the top.
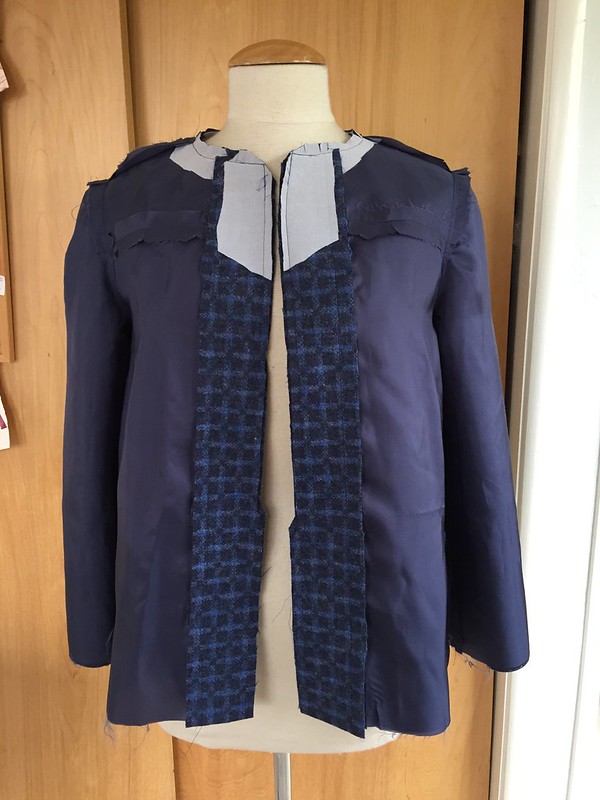
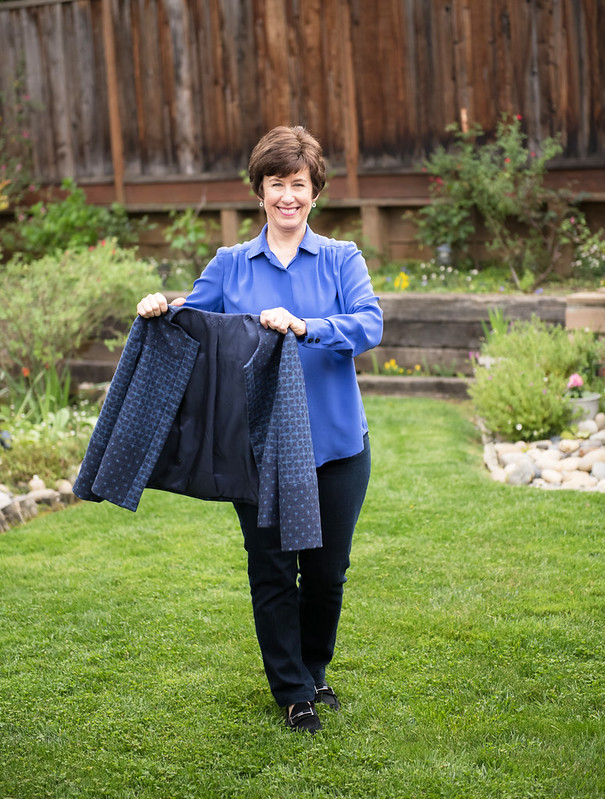
I attached the lining by machine stitching at the neckline and down the front edges, but then did the sleeve hem and bottom hem by hand. Because I'm not a fan of bagging the lining - even though in this jacket it would have been fine. Prefer the control of hand stitching the lining and it seems just as quick to me.

More sewing satisfaction :)  so happy with how the sleeve pattern lined up with the jacket body.

blue wool 2side sleeve plaid

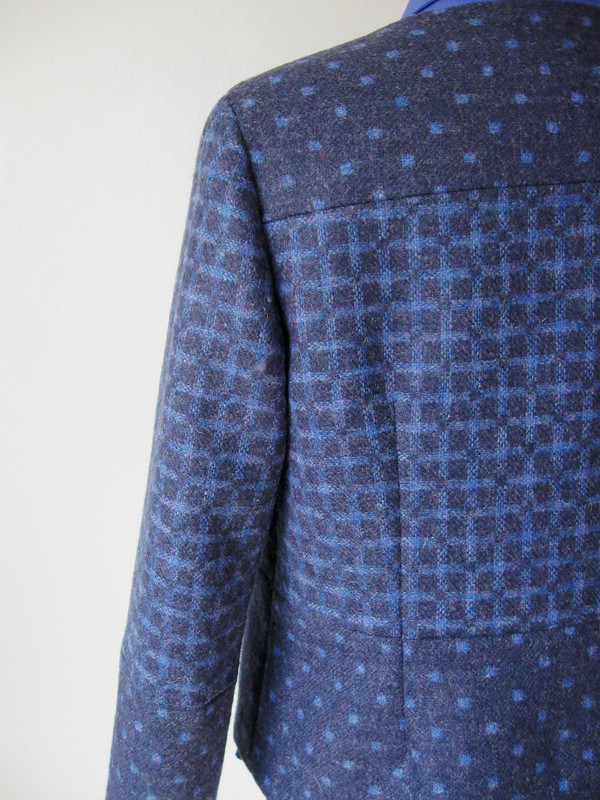
And yes, I did add a vertical dart in the back. It might take away a bit from the style, but I thought it looked terrible on me without any shaping. Stuck out in a weird and boxy way so I just added vertical darts.

Back blue wool 2side jacket

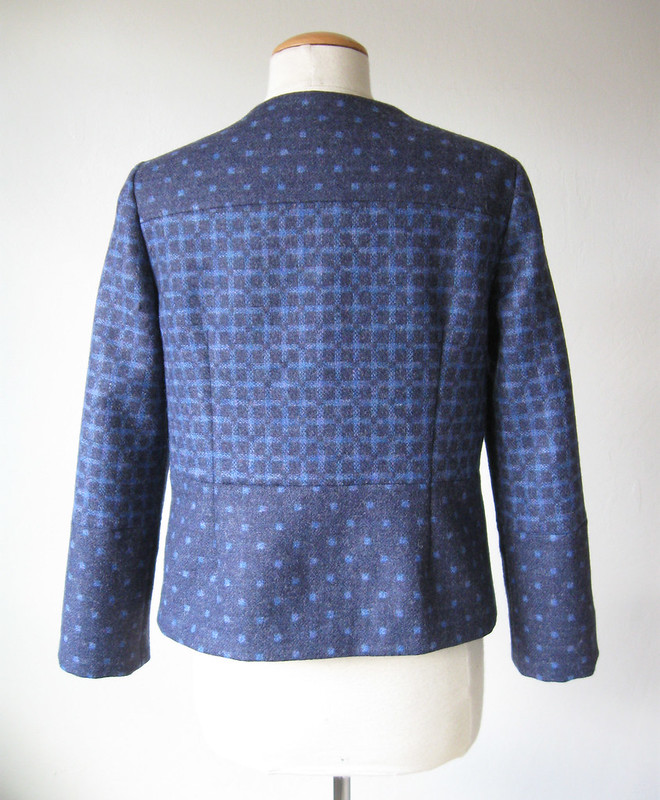
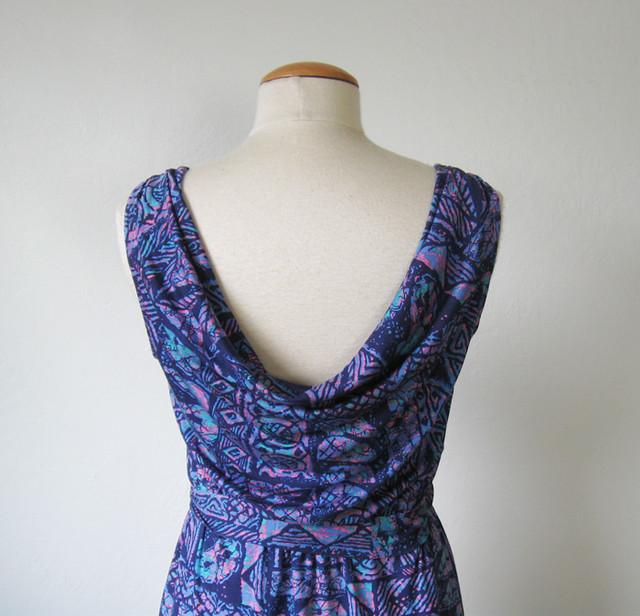
It looks a little loose in the back but that is the dress form (who has very upright posture!) when worn it conforms better to the shape of my back.

blue silk blouse with jacket lining

blue wool 2side with blouse

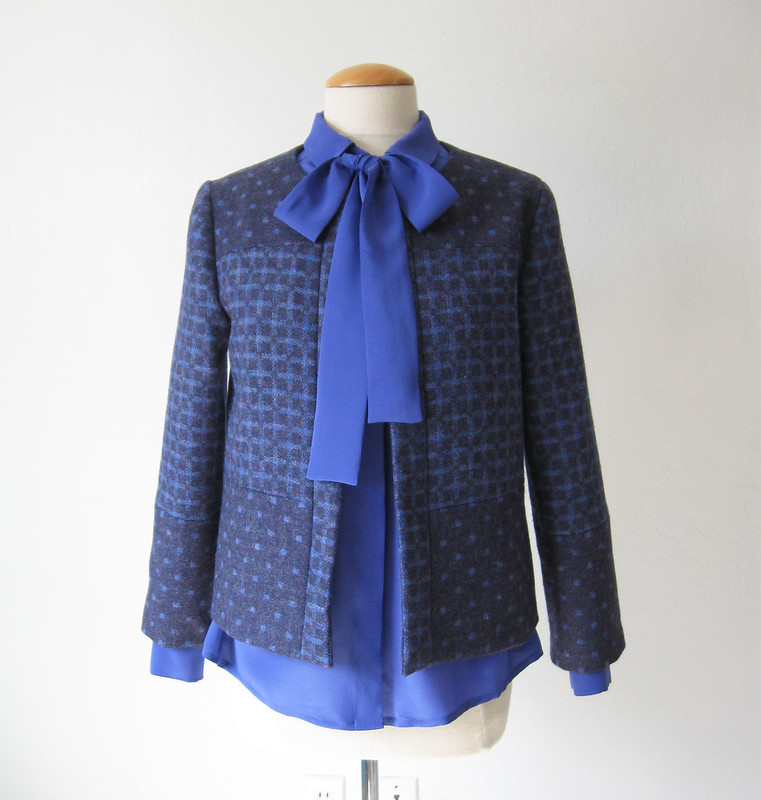
I showed those pictures previously - here or in Instagram but I am repeating as the outfit is complete! Here's the link to the silk blouse post. And I think next winter I will wear the jacket with blouse and bow. It's such a beautiful color.


front blue 2-side on form

I have enough fabric remaining to make a skirt but that might just be too much! although I held up the dot side to the jacket and it looked quite good. Maybe a mini skirt worn with boots and a turtleneck? A project for the fall when wool wearing weather returns.

blue wool jacket front view

Now I'm striding onward to the next project 😀.

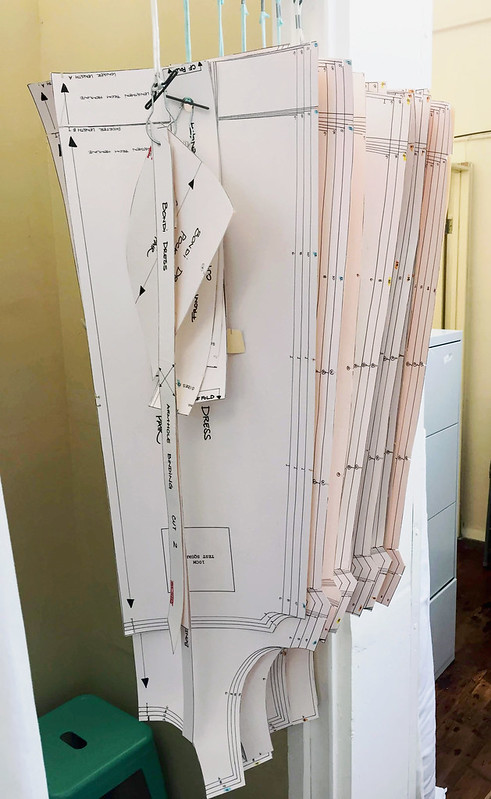
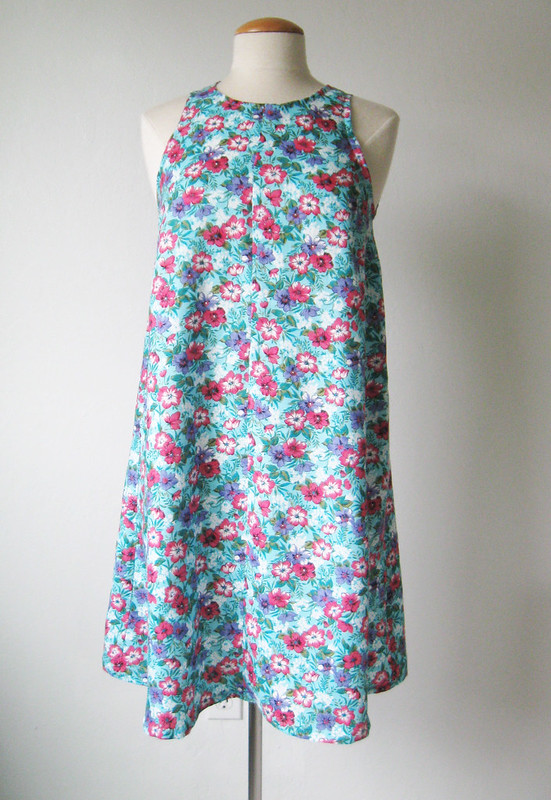
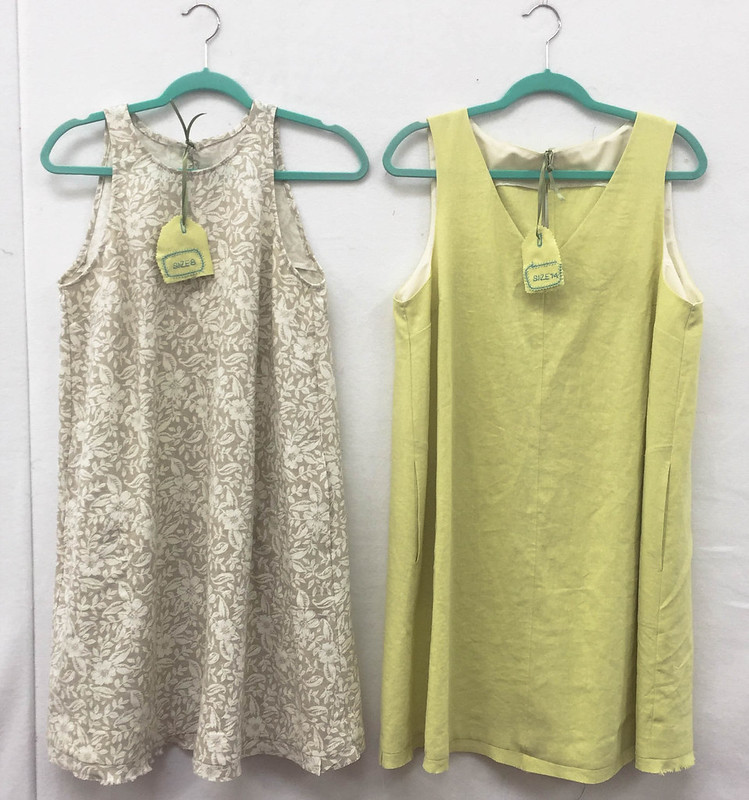
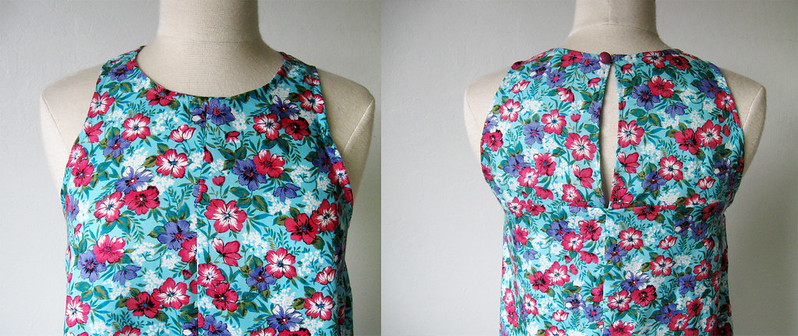
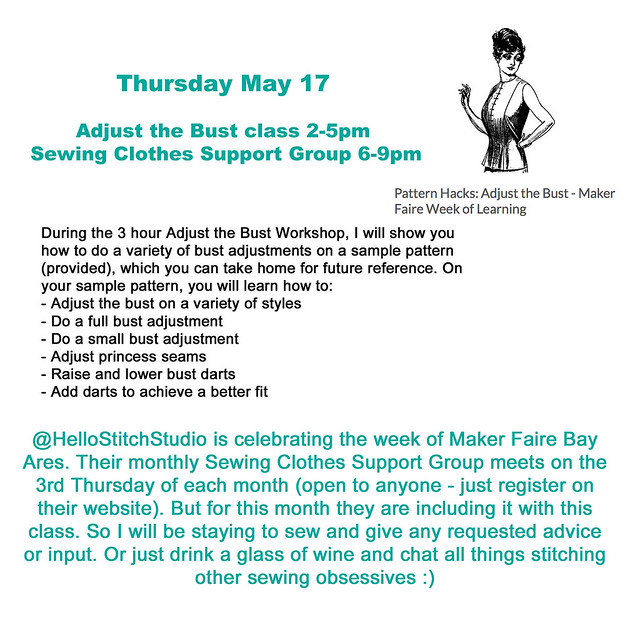
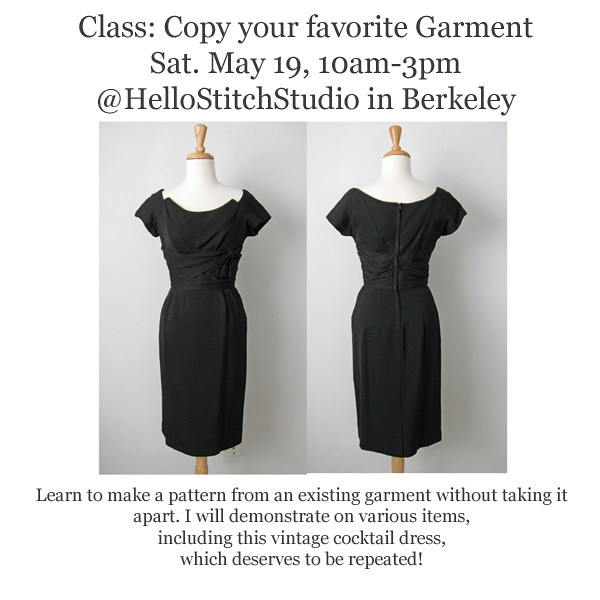
Which this weekend is two days of classes at Hello Stitch Studio, on Sat. we have the Bondi dress, and on Sunday our Pattern Fitting and Adjustment class (I think the Fit Lab portion might be full - but there is space in the classroom session, and we repeat this class regularly so check back).

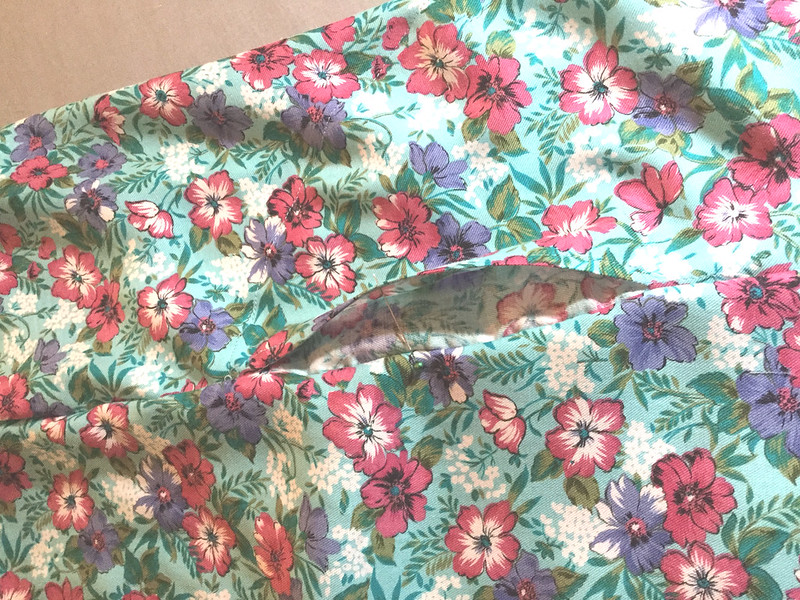
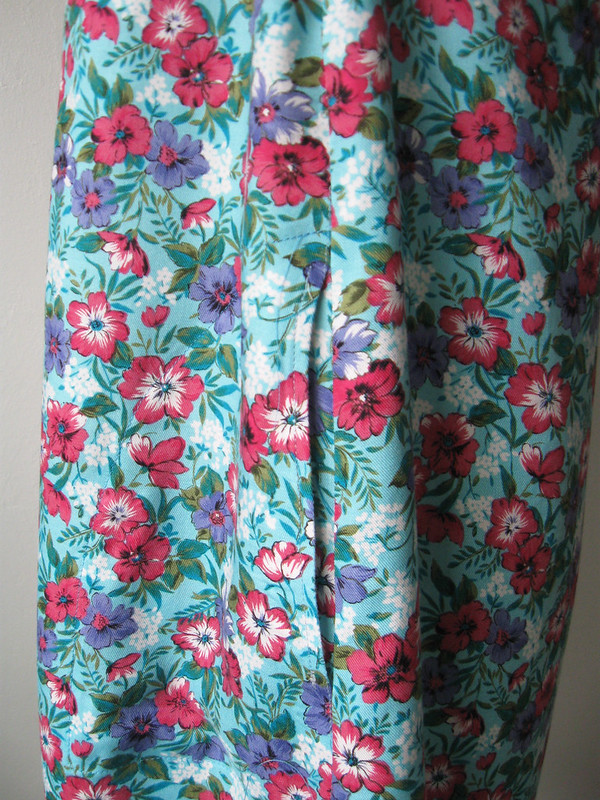
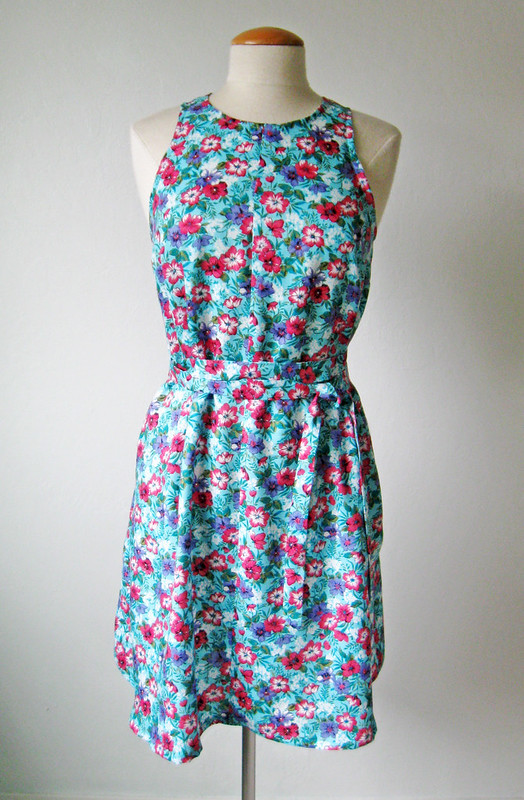
I recently indulged in the ruffle trend so I have a summer silk top to share, and a dress with a strategically placed opening which is far cuter than I expected. Plus a Random Threads soon.

Happy almost summer sewing,
Beth

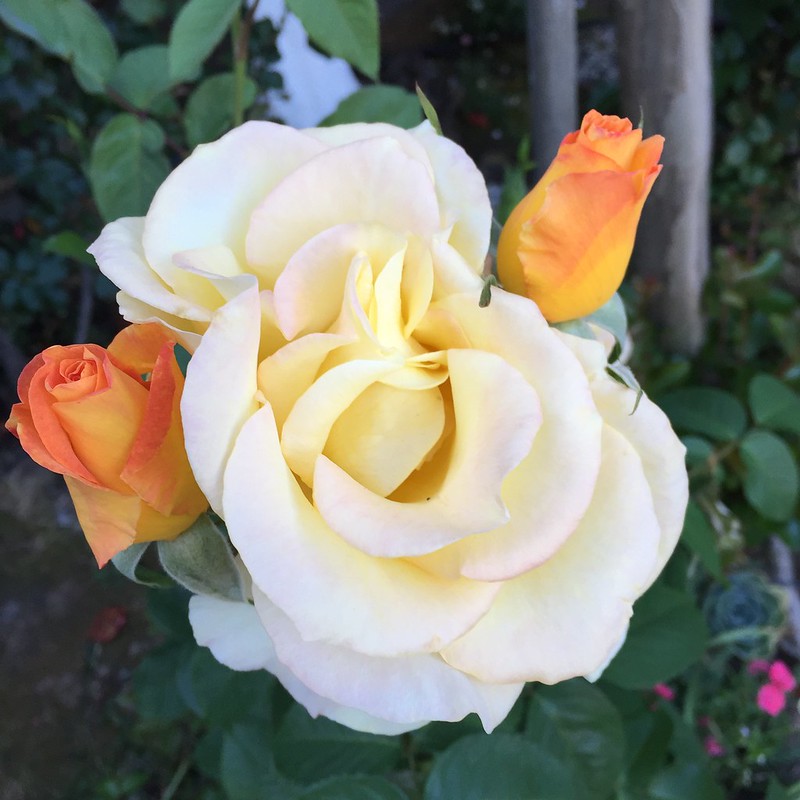
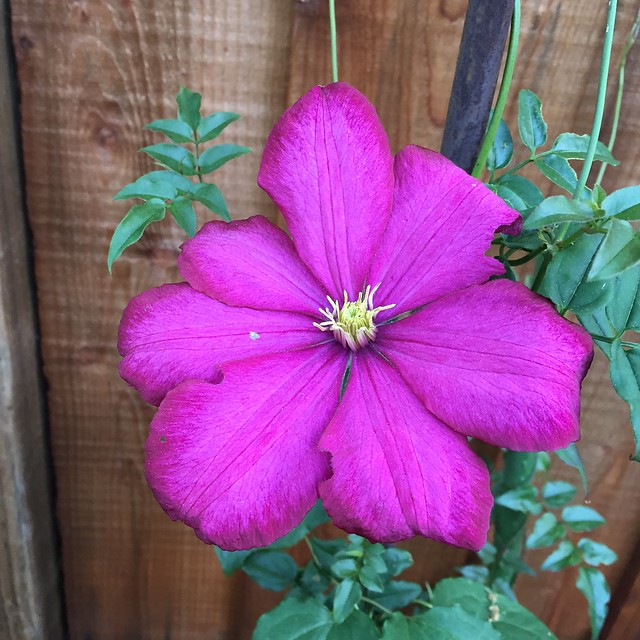
Today's garden photo, a pink snapdragon with some purple-blue pansies in the background.

IMG_3803

SaveSave

Friday, May 25, 2018

Bondi dress from Tessuti patterns

How could I resist a dress named after a beach? When it comes to nature a sunny ocean beach is my favorite spot. Plus this dress is a great summer basic, I love the shaping of the neckline and shoulders and it works in so many fabrics.

Bondi dress 1

We were looking for a versatile pattern to use at Hello Stitch Studio for a dressmaking class and Stacey, one of the owners saw this pattern and loved it. Which was great as we were planning to make one in each size!

I think this dress is really versatile. With a little pattern hacking you could change up the neckline (I made one sample with a V-neck) and yesterday I sewed a tie belt which works with this lightweight rayon fabric.

Bondi dress wth belt 2

Sewing and pattern details: I used a woven rayon fabric that I had in my stash. I must have bought it at some kind of tag sale - maybe at the local ASG stash sale that they have 2 times per year. It had a piece of paper pinned onto it that said 45" wide 3 yards and was serged on the cut ends. Nice when I find a remnant that is ready for the pre-shrinking like that. Irresistible as it is a sort of tropical floral in my favorite colors. Super soft and great drape as well, which I think works nicely for this pattern.

Here's the line drawing for the Bondi dress pattern which is from Tessuti Fabrics in Australia.

Bondi dress line drawing

This is the first Tessuti pattern that I have sewn. They are a great choice for beginners or any level as they are mostly simple shapes that show off the fabrics, not a lot of fitting and I found the instructions to be very good.
For our class the pattern is included when you register, you will receive the PDF of the pattern and the instructions to keep, but perhaps the best part - you don't have to print it out because it is already done at the studio! So you can trace out your size. How do you know which size? Because between myself and the studio owners, we have sewn a Bondi dress in each size so you can try them on, figure out which size to make and trace away :) Here's a link to the next session of the class (Sat. June 2) . If it is full then I believe we are scheduling it again before the summer is too far gone.

bondi dress pattern pieces

The pattern pieces are on sturdy tagboard and they have large tracing paper at the studio so this might be the easiest tracing project ever. Which was not ready when I made a couple of the sizes 🙁 so I had to trace for myself. On the positive side - we had the patterns printed at PDF Plotting which was great, super fast service, and quite economical, especially if you have multiple patterns printed in one order. Although recently someone told me about a copy shop here in my town that is equally good and local - so instant gratification! Now if I could just drop off my Burda magazine sheets for them to trace out I would be a happy girl!!


Bondi dress front on form

I made a size 10, and the neckline etc. was just right. I took it in just about 1/2" on each size above the bust dart as the armhole was a bit gaping on me, but otherwise no adjustment. I was thinking of making the size 12 for me but last weekend I tried on the various ones at the studio and realized the 10 would be better. So a win for the try-on system.

Here are a couple of the samples at the studio. Left, size 8, made as pattern indicates, and on the right, in a soft linen from Stone Mountain, the size 14 with the neckline changed to a V-neck and the shoulder edge brought out to a more standard sleeveless dress placement. (also on that one I did an all-in-one facing instead of a bias binding, so that's an option as well.)

Bondi dress examples

Closer look at the neckline on my dress. I love this back yoke detail and the simple closure. Time to confess - I don't make the bias loop for the button - I sew a piece of 1/8" elastic as a loop. So much easier!

Bondi closeup front and back on form

More true confessions - I do make sewing mistakes, usually one per project and on this one I sewed the pockets on backwards, i.e. with the wrong side of the fabric facing outwards. The pocket design on this dress is clever so that you have a stitched on pocket on the front of the dress but that means you need to have the right side of the fabric on the wrong side of the front inside. Makes no difference in the green linen version above as both sides of the fabric are the same but in a print...

Pocket mistake Bondi dress

Late night sewing fail. Oh well, unstitched and did it the right way.

Bondi dress pocket closeup

Bondi dress belt on form

For the tie I just cut up some remnants and stitched together to make a long tie, about 1" wide. Didn't really pay attention to the length, and found that it goes around my waist twice with room to tie which works well in this soft fabric. I think in a linen it wouldn't work as well with a waist tie. This look reminds me of the Sway dress from Papercut Patterns which I have always liked.


Bondi dress back view

Back view. Just FYI, for a bra I tried one that I have where the straps can be changed to an X in the back and it worked perfectly. Although there is probably a peek of strap at the opening in the center back yoke. Which I think is better than the straps sticking out at the shoulders (ugh that makes me crazy to see that).

So that's the latest on my Bondi dress. Pattern love!

Bondi dress with belt 4

After these pictures were taken I looked at the thermometer on the patio and it said 59℉. Yep, it was a bit brisk for a sundress. The weather is weird, people. But you know that. In any case, we are supposed to have a nice warm up this long weekend, which is Memorial Day, so a bit of sewing, some garden work, a sewing student tomorrow, a plant sale on Sunday, plus dinner reservations and a holiday get-together. I had better step away from my laptop and get moving!

Upcoming classes at Hello Stitch Studio: 
Sat. June 2:       Bondi dress class mentioned above
Sat. June 12:     Sewing Pattern Alteration and Fit Lab
Thurs. June 14:  How to read a sewing pattern 6-9pm. *I love to do this class - and it's not just for beginners  - it's a great way to discuss sewing patterns, find out about what makes a pattern good/not good, how to match the right fabrics to a pattern, how to choose your size and all kinds of other details before you sew a stitch. (p.s. this one is post-workday so I think we will include a happy hour element to the class 🍷
Sat. June 16:     Pencil skirt  (two session class)
Sat. June 16:     Sewing with Knits, Basic T-shirt
Sat. July 14:     Pants clinic: Diagnose your fit issues.
Tues. July 17:   Button front shirt class (two session) any shirt pattern
Sun. July 22:    Copy your favorite garment.  (we just did this one last weekend and it was So Much Fun! and a few people emailed that they couldn't make that date so here's another session)

and one more that's not on the website but will be soon:  Pattern Hacks, (Sat. July 28) where I will show how to use the patterns you already have and create new necklines, add or move darts, change sleeves, mix and match two different patterns and generally have fun with hacking up your existing patterns.

Happy Weekend Sewing,
Beth

for today's garden photo - May means rose season, as you can see in the photos above, most of my rose bushes are blooming like mad. Which is lovely and means I have an abundance both outside and in the house. We have to enjoy them now because they get a bit tired in the August heat, particularly that yellow one. But today's rose is one that blooms all summer long, and might be 30 years old? no idea as it was here way before me. I would love to know which variety it is. I think maybe Mr. Lincoln. (for you rosarians, I think it is a hybrid tea, canes are about 3-4 feet long and then stems grow anywhere from 2-5 feet long, and puts out either single flowers or a cluster on the stem. I probably have that nomenclature all wrong but you can get the idea. Also it has a lovely rose fragrance and the blooms last at least 2 weeks often longer).

IMG_3786


Tuesday, May 15, 2018

Tropical shift dress - my Akris knockoff

Do you like to do a bit of comparison shopping? Looking at the seriously expensive designer clothes to see what fabrics they use, to check out interesting and unusual details of pockets, zippers and trim? Like most of us who are interested clothes and fashion I look at a few websites for inspiration but don't really spend much time doing that. So my pinterest boards are not really full of ideas - very occasionally I put something there - mostly sewing patterns and once in a while a dress or sewing idea. But maybe two or three times a year I go into the Nieman Marcus or Nordstrom store in my local town and practically paw the designer garments. Despite being in suburbia they have a large selection and I especially like to see tailored pieces and interesting dresses and jackets or coats. A few weeks ago I saw a dress where I really liked the shape but the fabric didn't appeal.

And that is the beauty of sewing your own clothes, you can take ideas and inspiration from things you see all over but make something in the fabric or color you want. Or you can make your own version at a fraction of the cost.  I saw a dress from Akris Punto for $ 1390 (I erroneously referred to it as Prada on my IG but it was Akris) and decided to use that idea to make my own version.

blue ruffle dress front view


Here is the inspiration dress that I saw in the store. I thought it was silk, but looking at the website today I see that it's a rayon blend. For a mere $ 1390!


Tropical shift dress papaya


Maybe I'm smiling because my version cost me about $ 8. I bought this blue tropical print fabric upstairs at Stone Mountain, so it was $ 3.50 per yard? I think around that and I bought 2 yards not really knowing what I would use it for, but flowers and palm trees on a bright blue background. You know I couldn't pass that up, especially at that price. It's a cotton poplin with a touch of lycra so it has just the right amount of body for this dress and the hem ruffle.


Blue dress with ruffle1 (1)


blue ruffle dress neckline

Closer look at the fabric. For this dress I used my TNT pattern, something I have been using for a very long time. As I purchased this pattern when it was new.

Which I know because it has the stamp on it from New York Fabrics, a store that used to be around when I was a teenager. And spent many happy hours there after I got my driver's license and could go on my own on a weekend to shop without having to beg one of my parents to take me there. Also the patterns used to come in a 3 size range instead of the multi-size of today with perhaps 6 sizes or even all the sizes in one envelope.

Vogue 7769 pattern envelope - favorite pattern

I have used this pattern as is, modified it for other things, used just the top half as a bodice, used the neckline shape as a template, used the armhole shape as my ideal,  and added/changed the darts as needed for various styles. I have had more than my money's worth out of this one and it is the only pattern in my stash that is copied onto thick paper and hangs in the closet ready for repeated use. Shall I mention the pattern publication date? It's.......1990. Yes I was surprised to see that. So I've been using this pattern for 28 years. I wonder if anyone can top this? not just a pattern that you have kept for a long time - but a pattern that you have been using for this long. Somehow I bet Carolyn (of Handmade by Carolyn blog) or Tany (of Couture et Tricot blog) might have something that is still in current rotation.


blue ruffle dress back view

Back view, looking a bit wrinkly on the form. Although this dress was perfect on vacation, that bit of lycra in cotton fabrics is so nice - the wrinkles are minimal and fall out on the hanger.


blue dress with ruffle2 (1)

And here I'm standing in front of one of my favorite stores in Hawaii. This is one where I do tend to pin a lot of their looks, Tori Richard. This is kind of my ideal clothing range, beachy, vibrant colors and tropical prints. Plus recently I have bought a few of their fabrics so I am really happy to have found them. (Listed as famous Hawaiian designer fabric, hint hint). My previous post dress is one of their fabrics - I think.

Sewing details - I made an all-in-one neckline and armhole facing for this dress, similar to what I did on this dress. Although no lining, not really needed. And cut it out about 2" above my knee length, then played around with ruffle depth and amount, just improvised until I liked how the ruffle looked.
I had a few random compliments from strangers as I was walking around which is always nice, so this dress/fabric combo must be a winner.

Why is this girl smiling? Could it be the tropical drinks? quite likely. Could it be the incredible re-use of a perfect TNT pattern? probably. Could it be the bargain fabric find? Definitely. Or just the Aloha spirit. Yes to all of those options.

Blue ruffle dress in bar 3


And now home from vacation and back to real life. Until the next time.

Some spots still available in my Fitting Class: Adjust the Bust this Thursday 2-5pm at Hello Stitch Studio in Berkeley. This Thursday's class is part of the Maker Faire Bay Area celebration, so if you sign up for the class their monthly Sewing Clothes Support Group session from 6-9pm is included. I'm going to stay for that and be available to answer general sewing and fitting questions so bring all kinds of projects to share, discuss and get some progress made. And have a bit of happy hour fun with some fellow stitch fanatics :)

On Saturday we have the Copy your Favorite Garment class which is one of my favorite things to do and to teach. I show a variety of methods in this class so you can learn which one is best for different  garment styles. How about recreating a favorite pair of pants? I think this is where learning this technique really pays off - I copied a pair of jeans and now I'm turning that into my TNT pants and jeans pattern.  The class is Sat. May 19, 10am - 3pm. The class is half demo/lecture and then after that I will help you with making the pattern from your own garment that you have brought.

From 4-6pm that same day (Sat. May 19) is my Zipper Confidence class, so if you have been struggling with zippers register here.

Note that all the classes at Hello Stitch come with an extra hour of studio time so you could use that to cut out things on their large tables or perhaps hem a bunch of knits on their coverstitch machine. And a 20% discount coupon for Stone Mountain is included when you register.

Upcoming schedule:
Sat. June 2:  Sew the Bondi dress from Tessuti patterns  - register here. I'm just about to make another one for myself in a print. This pattern is such a perfect summer dress with great pockets and lots of options for personalization or pattern hacking.

register here for any of these classes or to get more info.
Sun June 3: Sewing Pattern Alteration - Tissue Fitting and Fit lab. register here.
Sat. June 16 and 23: Pencil Skirt
Sat. June 16: Sewing with Knits - Basic T-shirt
Sat. June 23: Garment sewing - Easy Tank top
Sat. July 14: Pants Clinic - Diagnose your fit issues - Pant pattern fitting

Also in June and July we will have a couple of weekday evening classes which are not listed on the website yet but will be soon. If you're in the bay area and interested in a class but can't make it to what is scheduled or have something else in mind please email me and let me know. We're flexible and want to do classes that will work out for your schedule.

Now back to what's on my sewing table - a few things that are in progress and so many great summer fabrics piled up in my spare bedroom which I want to sew up and wear Right Now!

Happy May Sewing, 
Beth

Today's garden photo - this is the time of year when there are so many to choose from. And who doesn't like that. I think May is my very best garden month, or maybe June. We shall see next month. 

But for now it's all about the roses!

IMG_3785


Wednesday, May 9, 2018

McCalls 6069 knit dress with draped back

Let's do a slight detour in my my blogging order, since it is Me Made May and it seems only right to post something that I am wearing this week. Plus I love the colors in fabric.

A while ago I saw Allison in Hong Kong post a dress she made with this pattern and I had to have it. It seemed to be out of print but I found a copy on eBay and ordered it - even though it was still winter and the time to wear it would be more than a few weeks away. It's McCalls 6069.


IMG_3677

It says a 1 hour dress - not quite. And I am a fast stitcher! However I did a make a few changes to the design - what else is new.

For some reason I'm not a big fan of front cowl necklines, I always feel messy in them. Although in this version I am wishing I did the cowl front and back as it would have been a very pretty and dramatic look. Oh well, didn't think about that at the time. Also I had a minimal amount of fabric to work with.

IMG_3683

Because I found it on the remnant shelf at Stone Mountain Fabrics in Berkeley and it was about 1 and 1/3 yards so not much available. Plus cowl necklines with a built in facing do take a bit of fabric. I'm not 100% positive but I think this is a fabric from one of my favorite clothing lines, Tori Richard of Hawaii. They make great casual but elegant resort style clothing for both men and women. And their fabrics are such pretty colors. I have never found the fabrics in Hawaii for sale but lately I've found some remnants and bolts of fabrics that I recognize from stalking their website for inspiration. So of course I made a dress to wear on a Hawaiian vacation.

IMG_3536

On the same day I found two other remnants, a nice linen in hot pink, no idea for that, and a golden metallic black denim which might be used with a recent Burda mag pattern.

And here's the finished dress, with the change I made to the front. Once I cut it out and sewed up the square neckline I didn't like it at all. I really like square necklines but it just didn't seem to go with a knit fabric or the cowl neck in the back. I stitched it up and tried it on, and decided to treat the front like a scoop neck t-shirt.

knit dress front view

Here's a look at the neckline. I tried on the bodice as you see it in the picture above, when it was just the top half of the dress, and marked with a pin the place where I wanted the center of the scoop to dip down to. Then I folded the front in half at the center and drew a round neckline, cutting off the extra but leaving 1/4" so I could attach the binding. Which I sewed on just like a t-shirt and then just reattached the front to the back at the shoulders. The armholes also have a binding turned to the inside and stitched.

knit dress front neckband

Knit dress on form front

I made a tie sash as the pattern had but didn't wear it. I actually think I made the elastic a bit too snug, and I'm going to undo the elastic, put a buttonhole in the center front and then make it into a drawstring with elastic instead.

But this dress is all about the back view! Perfect vacation dress that scrunches up to nothing in my suitcase.

knit dress back view

Which came out perfectly. Ages ago I saw a woman wearing a dress very similar to this, except it didn't have any waist, just a straight knit dress but with a very low cowl back. I remember taking a picture of it on my phone - and that was about 3 phones ago. (a pink Treo - loved that little phone!) It looked so interesting, I might have to try that style hack as well.


knit dress side view 2

knit dress back drape close up


So that's the latest on my 1-hour knit dress (more like 3 or 4 hours). But a winner for my vacation and the summer ahead.

What's next on my calendar? Lots of classes at Hello Stitch Studio in Berkeley. I have to miss meeting Gertie this Thursday May 8 but she is having a book signing and talk that evening at the studio if you are interested.

Here's some details on upcoming classes for this month:

~~~~~~~~~~~~~~~~~~~~~~~~~~~~~~~~~~~~~~~~~~~~~~~~~~~~~~~~~~~~~~~~~~~~~~
Adj the bust
~~~~~~~~~~~~~~~~~~~~~~~~~~~~~~~~~~~~~~~~~~~~~~~~~~~~~~~~~~~~~~~~~~~~~~

copy vintage dress
~~~~~~~~~~~~~~~~~~~~~~~~~~~~~~~~~~~~~~~~~~~~~~~~~~~~~~~~~~~~~~~~~~~~~~

More classes in May and June:

Sat. June 2:    Sew the Bondi Dress
Sun. Jun 3:    Sewing pattern alteration and Fit Lab
Sat. June 16:  Sew a Pencil Skirt (2 session class)
Sat. June 16:  Knit T-shirt (2 session class)
Sat. June 23:  Garment Sewing, Easy Tank Top
Sat. July 14:  Pants Clinic, Diagnose your Fit Issues

Also upcoming classes not on the calendar yet are a button front shirt class, and some vintage style sewing. Sign up on the hellostitchstudio.com website for their newsletter to get all the updates.

~~~~~~~~~~~~~~~~~~~~~~~~~~~~~~~~~~~~~~~~~~~~~~~~~~~~~~~~~~~~~~~~~~~~~~

Plenty of things to post on the blog and then after my time in Hawaii I will get back to sewing some of the gorgeous fabrics from Britex that my friend Heather bought last month.

Aloha, and happy sewing, 
Beth

today's garden photo, I think a passion flower vine that only puts out one bloom at a time, but it is a stunner of a color.

IMG_3783

SaveSave