Showing posts with label placket. Show all posts

Sunday, March 4, 2018

Flannel shirt with popover placket

Are you watching the Academy Awards? As I write this blog post I'm watching it and thanks to the DVR we recorded and then can skip through all the commercials - a necessity. Being in the same time zone makes it convenient cocktail hour viewing :)  Some fantastic dresses this year and lots of great colors.

By the way - update on the drawing for some patterns I did in a recent post. Last week I posted the names drawn and none of the 3 people contacted me. Strange! and unfortunate for them. Never happened before. So it's been a full week and I think it's time to draw new names, which I did. Details at the bottom of this post.

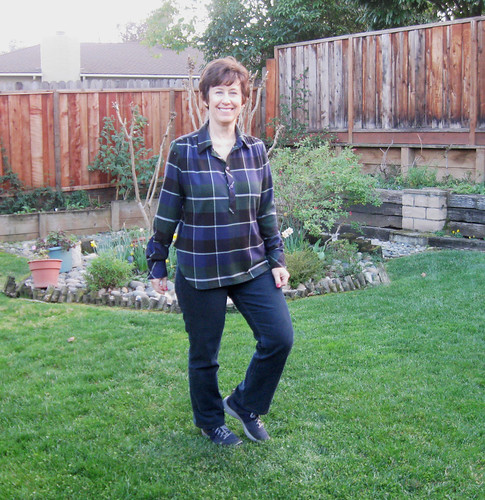
Here's something I started back in January and while it has a few flaws it's warm and nice to wear in what passes for a cold snap around here.
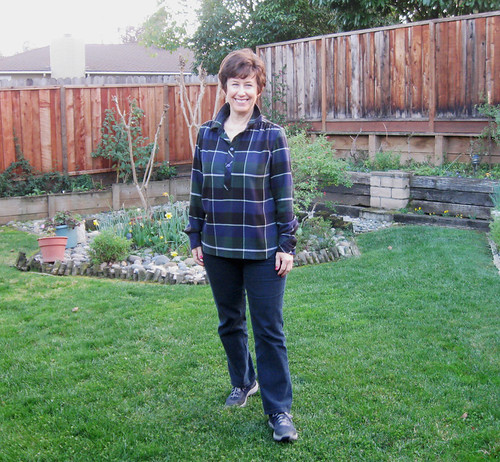
navy blue plaid flannel shirt2

A new flannel shirt is something I've been wanting and I happened to see this fabric at Joann's one day, it was on a super discount but surprisingly soft and good quality.

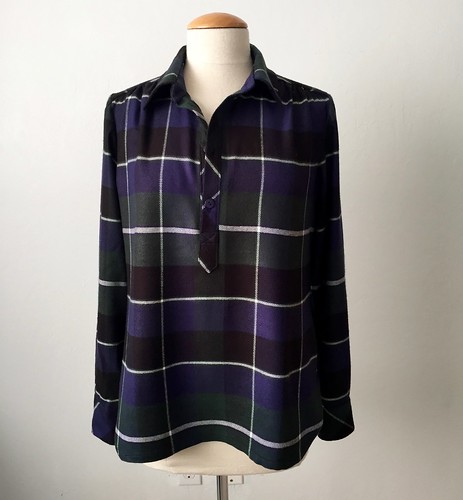
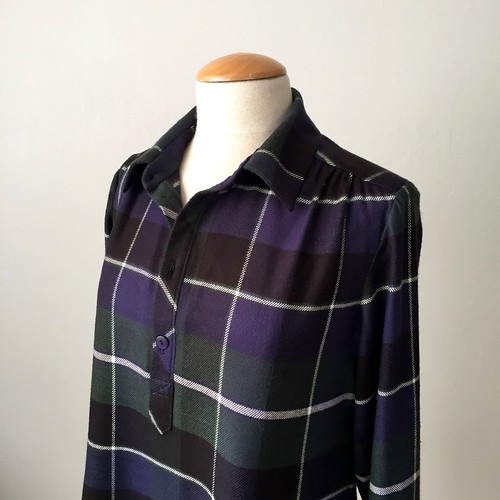
I decided to make it a popover shirt with a loose shape. For all shirts I start with my basic shirt pattern and modify it to change the details. For some reason I thought the placket would be nice on the bias - however after it was done I can see that the plaid is kind of big and it doesn't really look great. I think matching the plaid and cutting on the straight grain would have been much better. Oh well, all done.
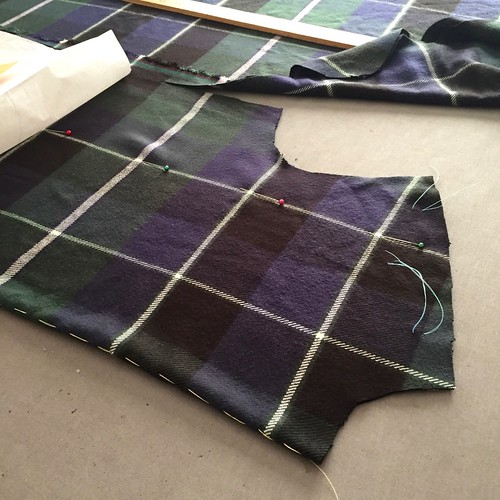
IMG_3284


IMG_3291

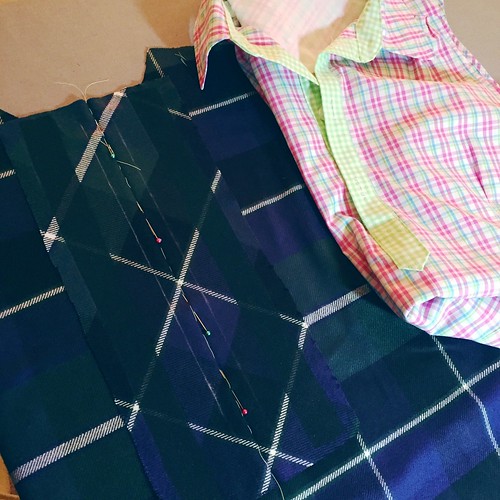
Here's the placket piece stitched on the front of the shirt. I put the pink shirt next to it to show what it looks like when finished. A while ago I did step-by-step instruction on the Craftsy blog, here's the link .

IMG_3290

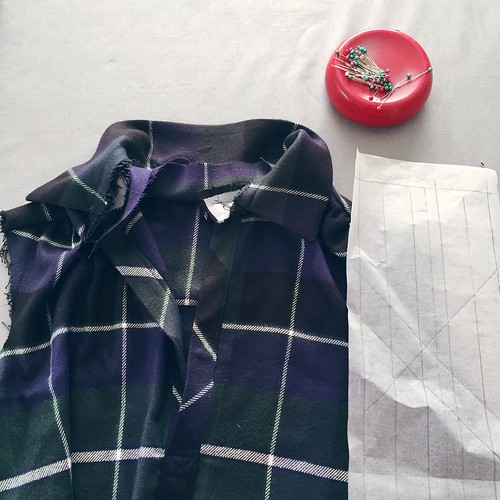
Placket finished, and the collar band attached. That's the placket pattern piece.
IMG_3304

Oh, that would look better if the placket was matching the plaid all the way across.....
IMG_3307

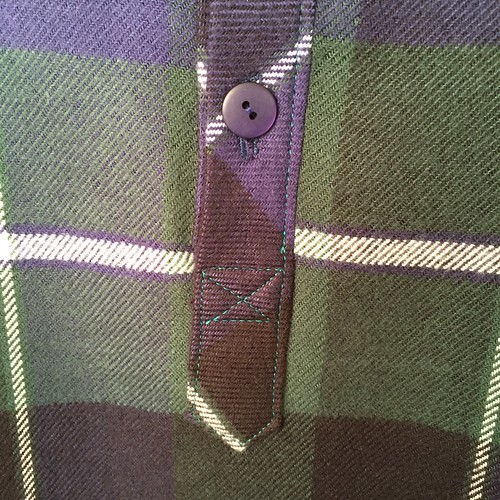
and I even messed up the alignment a bit at the bottom. Although the stitching came out quite well. I blame sewing while sick! I should have just stayed on the couch watching movies.

IMG_3309

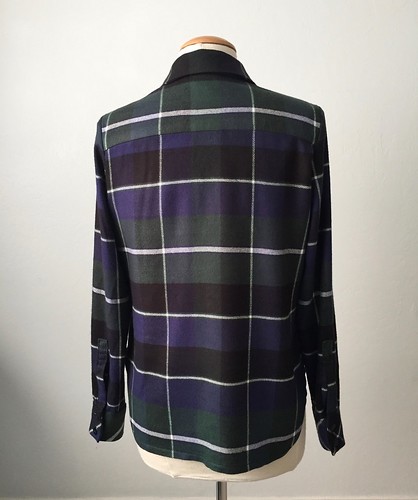
But reasonable matching across the yoke. That's the part I should have put on the bias, which I usually do with plaids.
IMG_3306

Sleeve matching is OK, although there are thin and thick white stripes and that is also not lined up but now I'm nitpicking, right?

So onward to better projects. Which are so numerous, slightly getting out of hand the number of things I have in various stages. And I used to be a one sewing project at a time person - not any more.

Drawing update:    Here are the two new names I drew for people who are outside the US. Please email me and select 2 patterns from Vogue or McCalls or Butterick. You can pick mix and match or both of the same brand. Just patterns that are currently available in their catalog. Please email me (email button near my picture at the upper right under my profile picture)

Kate  in the Netherlands

Eme Asterisco in Spain

And for the Pauline Alice trouser pattern

Annie in the US

Hope to hear from each of you.

And now I have to dash - time to get some of the aforementioned projects finished. And possibly get some stuff done in the garden - but I am a weather wimp - the temperatures are in the 40's-50's ℉ which for us is positively arctic and too cold for me to get out there for weeding and planting. I know - so wimpy! Although when it is 110℉ in the shade in July I might miss it.
navy blue plaid flannel shirt

Next up I will circle back to that gorgeous blue wool Burda cocktail dress I made for my friend Heather, and then I feel a Random Threads coming on :)

Happy Sewing, Beth

and despite all my moaning and groaning about winter (my apologies to those of you in the snow zone) but look what I saw today in the flower bed. Yep, the first tulip and what a gorgeous color.

first tulip


Sunday, June 19, 2016

Shirt trick - how to make a popover shirt pattern

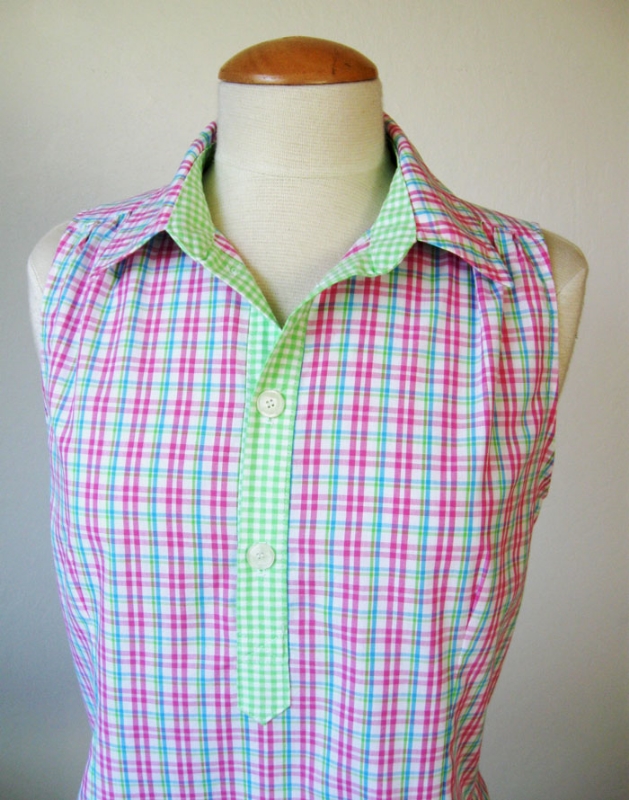
This is one of those items that was inspired by ready to wear  - I keep seeing this type of shirt everywhere this year, in different fabrics and styles. So I played around with the idea of adapting an existing shirt pattern and came up with something I am very happy with. I did promise a couple of weeks ago that details would follow so here they are. In fact I wrote a how-to post for Craftsy so the link is included below.

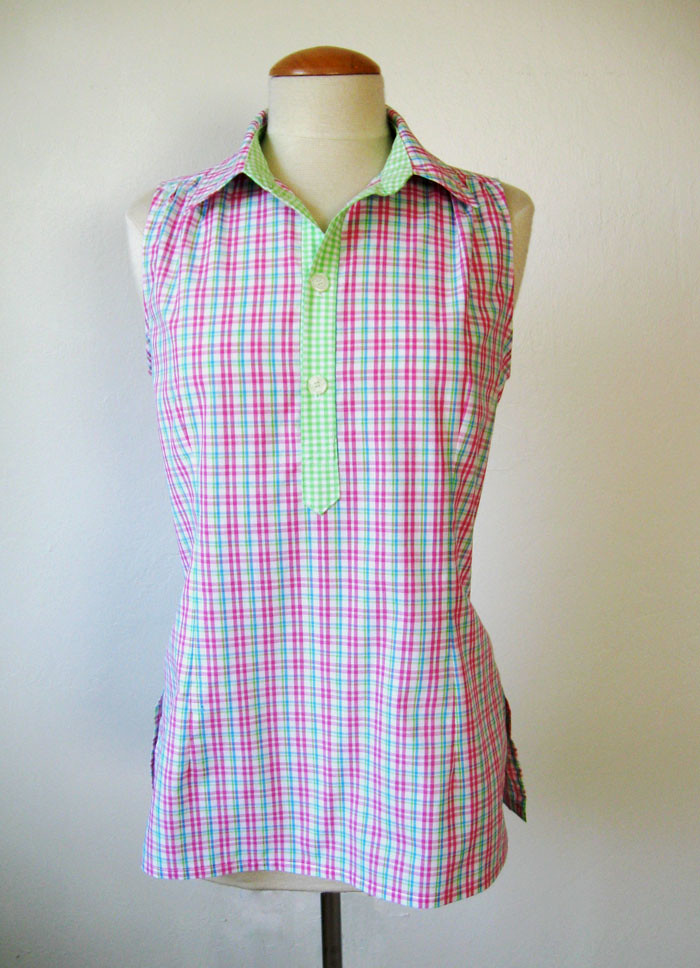
pink placket top close up on form

I used my basic shirt pattern which is Simplicity 2339. This is the definition of a TNT pattern as I have now used it at least 12 times since I started blogging.

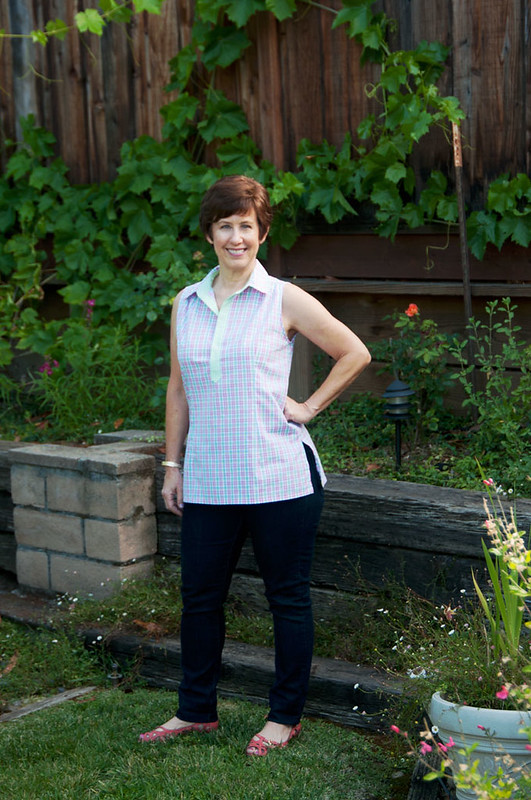
Here is the top on me - and I see in the pic that the buttons are done up a little wonky making that slight crease near the bottom of the placket - which I swear is not there in real life. Oh well, I am not blinking or making some weird face, so the picture will have to do.


pinkplaid placket top on me

I got this fabric at Joann fabrics, I was just looking for a fabric to make this shirt as I was writing a post for Craftsy, and wanted something that would show up in photos, be easy to press etc. And didn't cost much! I had a couple of suitable fabrics in my stash but actually I didn't want to devote them to this shirt, so instead I bought this with a coupon for about $ 8.00. And then decided it needed the contrast placket, and found that contrast gingham at Stone Mountain.


Craftsy popover blog link photo

Here is the link to the How-To post on Craftsy. It is kind of long so I won't repeat it here, they also made it a downloadable PDF which you can print or save.


pink placket top on form side view of collar

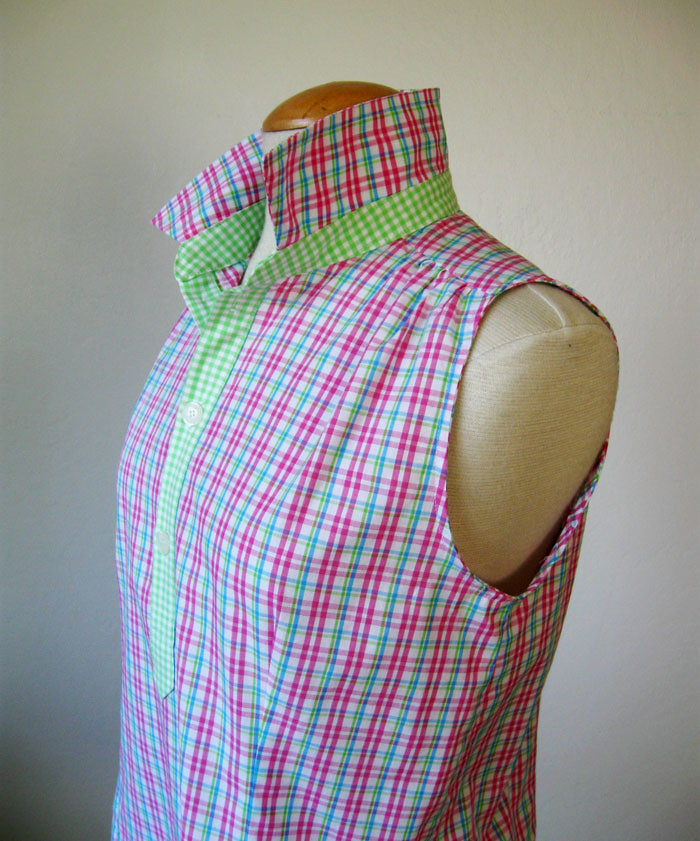
Changes made on the pattern, I used the version with the horizontal bust dart rotated to pleats at the shoulder (my first version here and the Craftsy post with pattern work details here). I also cut in the shoulders a bit for the sleeveless version, there is a good visual for that here on my recent post for the first version of the popover shirt.

This fabric is actually really nice - there is an occasional winner among the mostly not so great yardage at Joanns.

Ok back to the placket. Which I know is not the reinvention of the wheel but it is nice to be able to adapt any shirt pattern to add this feature. Also if you don't like button up shirts because they strain across the bust despite fitting well - this is a option to consider. I could see doing the placket kind of short - just enough to get it over your head and then putting a zipper in the side seam. Which you may think sounds like a lot of trouble but in order to get a well fitting shirt that is comfortable AND stays closed over the bustline might be totally worth it. I am going to make a shirtdress version for my friend Heather with just this technique. (it was her that made this clever observation :)

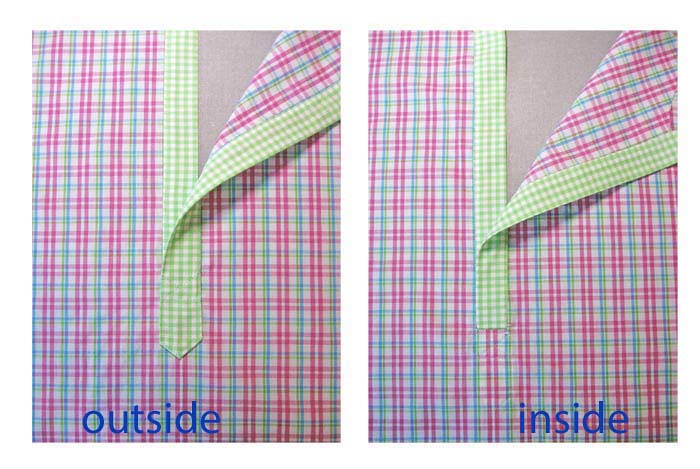
Placket inside and outside view before buttonholes. This fabric pressed so crisply and was really easy to sew. Also the small plaid was good to keep everything straight, so that is a plus.
final view side by side with text placket

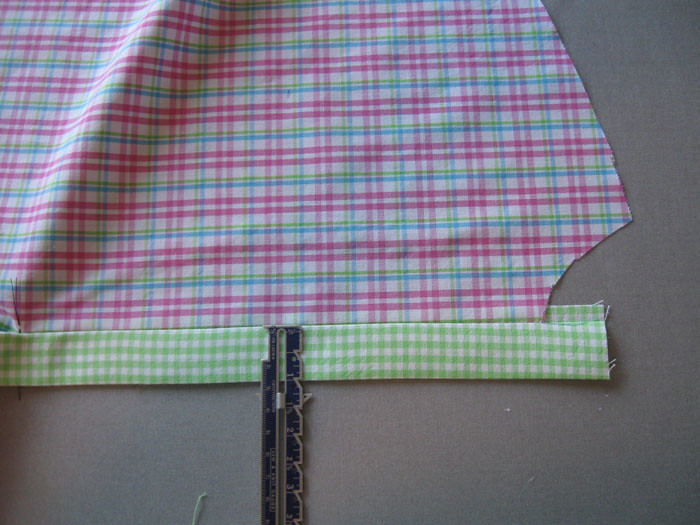
Here are a couple more sewing tips that didn't make it into the Craftsy post. I decide on the width of the placket, usually just the same as the finished width of the button band if the pattern has one. Which is typically 1 inch so I suggest you go with that. When I fold the placket back I don't make markings where I will fold it under, I measure it once sewn and create a 1 inch wide placket, and then tuck the remainder under and topstitch. I find if you press that 1/4" seam allowance previously then due to the turn of the cloth (which is small I admit in this thin fabric but you would be surprised how much it affects the result) then you get a even width in the placket. 

measure placket width

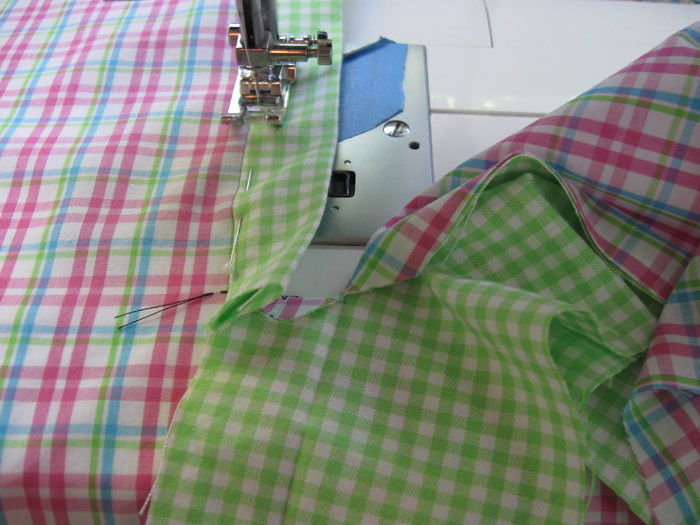
Sewing the placket down, start with the under side placket. Note my tailor's tack there. I use them on everything, not just on jacket tailoring projects. And stitch on the right side of the placket, so you get a nice straight edge. If you look at the Craftsy post this will make sense (I hope).

sewing one side of placket

More sewing details. It always surprises me but one of my most frequently pinned posts on Pinterest is this one on how I sew collars. That is from my early days of blogging - small photos and if I had known it would be read so many times I might have done it differently (better :).

But that is the method I use to get the round part of the collar stand to be flat and have no extra bulk. Although there are a couple of different ways to attach the collar and I am planning one of these days to try another method I saw in a shirt making book. So here is the final step once the band is complete attached to the shirt, the last step is to close up the top of the band - in this case by stitching all around the band.

finish sewing collar pink plaid

More shirt pictures. I made this one more of a tunic length, with side openings at the hem. I included the vertical darts both front and back, I think they give this pattern nice shaping.


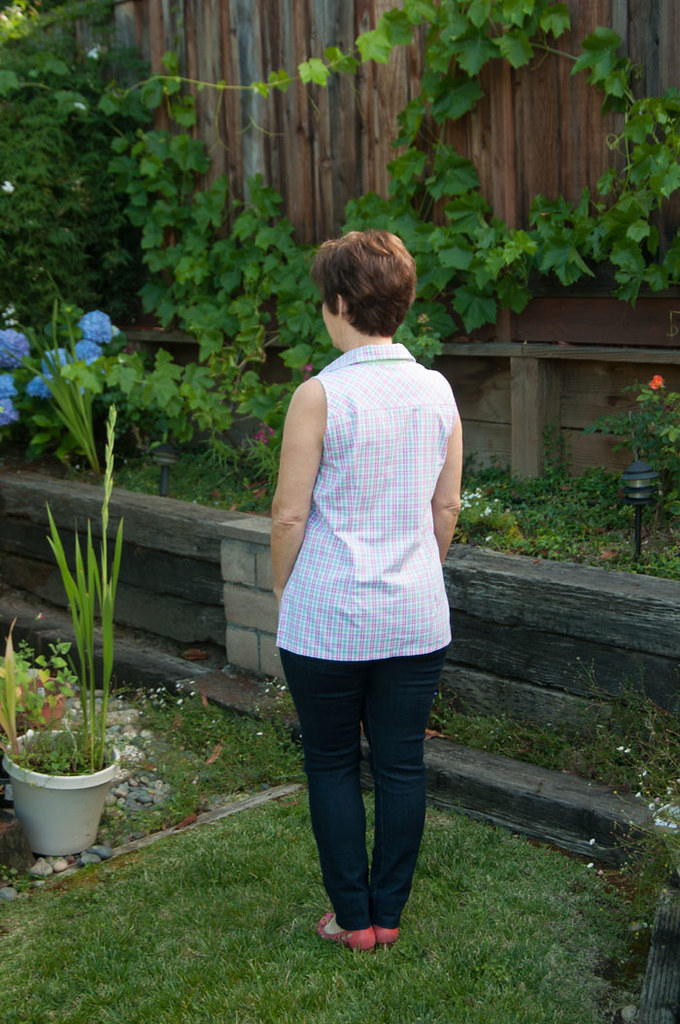
pinkplaid placket top back on me

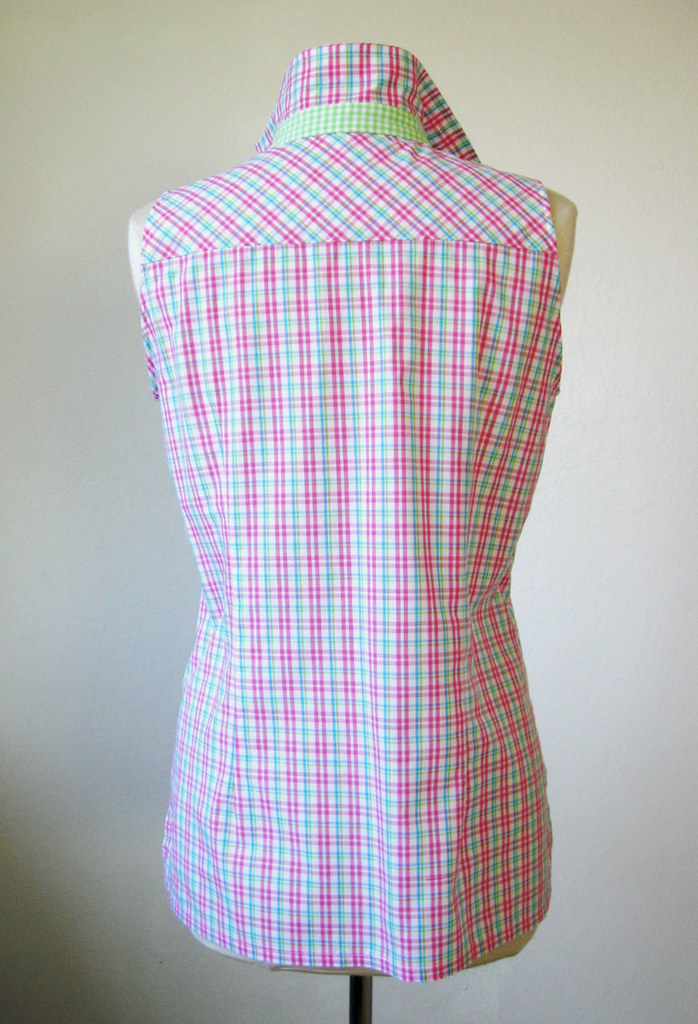
I did the back yoke on the bias because I just can't resist that with a plaid. Plus it looks cute and then there is no need pattern match the yoke to the back.

pink plaid top back view on form

pink plaid placket top on form front

This would also work on a knit top - that would be a great way to make a collared shirt in a knit fabric with the placket. Mental note for the future!

Someone saw this shirt on my dress form and commented that it looked like something to wear to a picnic. I do see that.  No picnics here today but it is Father's day so I am cooking. Also it is supposed to be heading towards 100˚F which is great for the tomatoes but less good for sitting outside on the patio at cocktail hour. Oh well....time for the air conditioning, which I almost never turn on except when guests are coming over in the summertime. (not entirely true - when sewing on a deadline on a hot afternoon I do use it then as well. Sewing is steamy work, right?)

And thank you everyone for the nice comments on my previous posts. A lot of people weighed in on the question of posting the same images on Instagram and the blog and don't mind (prefer actually) seeing the pictures repeated. Or don't do IG so seeing the photos here is new. In any case - I plan to continue blogging and will always go into more detail here so stay tuned. Thanks for reading!

Happy Summer Sewing,
Beth

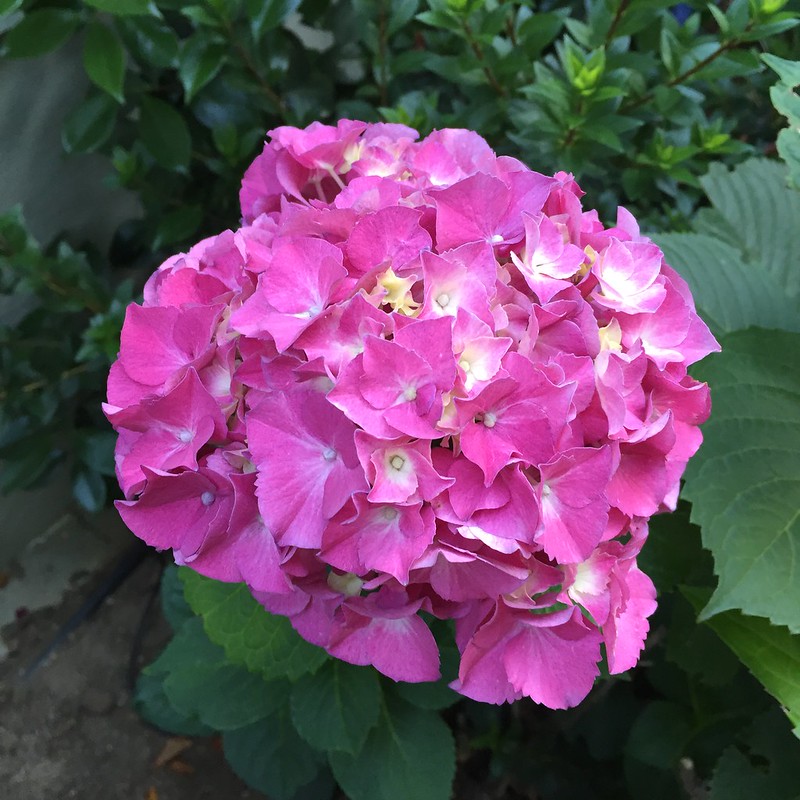
Today's garden photo - a pink hydrangea that has remained pink - someone asked me what I put on these to keep the colors. Answer - nothing. I do fertilize all the hydrangeas and gardenias with fertilizer for acid loving plants (when I remember to do so) but otherwise they have to produce on their own.


Pink hydrangea

Saturday, September 24, 2011

Shirt Sleeve Placket - up close look

This week I am catching up on projects I set aside in July.  I cut out and started sewing the Liberty of London cotton shirt which is based on an existing garment, posted about here and here. I rarely make shirts, in fact there are a few categories of clothing I never make for myself.  These include jeans, t-shirts, almost any kind of button front blouse or shirt, swimwear, shorts, and gym wear.  There are only so many sewing hours in a week, and being someone that for the most part has made all my dresses, suits, jackets and coats it is a pleasure to walk into a store and select a pair of jeans or a shirt to wear immediately. To tell the truth, shirts are something I should tackle.  I could make a silk blouse for a fraction of the price in the department store.  Perhaps I will, since I have now shed my fear of plackets.
I think I had a bad experience once upon a time with plackets, plus they are so fiddly, consequently I have often avoided them.  With this blouse project, there was no avoiding, so I did some playing around with placket samples and now I have a fool proof placket that looks good inside and out.
This is not an original idea but a recreation of the menswear style shirt plackets I found among the examples hanging in my closet, with a healthy dose of tips from my various sewing books.


To start, create the placket pattern.  This is a case where I don't use the pattern pieces that came witth the pattern, but draw up my own. (Of course for this project I made the pattern myself so no envelope pattern piece to ignore). Below is a sample, in muslin and the sleeve in quilting cotton, so you can see the components.  Make the placket pattern piece longer than the opening you want in the sleeve, you can cut the excess off after sewing.  The widths are noted, then the solid lines add 1/4" to the placket and are also the fold lines.  The smaller white piece starts as1" wide, fold in 1/4" each long edge, and then fold in half, plus fold back top edge 1/4".


Sample placket 3
I think that some placket fear stems from the fact that you have to slash the sleeve to create the placket.  No good can come from slashing.  OK, an exaggeration, but how many times has the slash maneuver gone wrong.  Don't get me started.  The saying - measure twice but cut once - really applies to the slash. I think also on this slash, in fact on the whole placket, it is really important to work on both sides at the same time, having them on your worktable as mirror images, so that you end up with a right and a left.  No fun to create lovely left sleeve and then another perfect left sleeve, aaargh.  


First sewing step is to apply the under placket piece, rather like a tiny seam binding. Shown below, pinned and sewn. The folded edge of this little piece is at the top of the slash, and creates a nice finish. 


Sample placket 4Sample Placket 5

Next step is to apply the upper placket piece. I neglected to take a photo of the inside, to show that the shorter side of the folded placket is matching the top folded edge of the under placket piece. The horizontal pin marks the point where the stitching will be horizontal to catch the two sides of the placket and stitch off the top of the slash point. 


Sample Placket 6

After stitching, this would end up as the left sleeve.  Please ignore my slightly wobbly stitching.  
Sample placket 7Sample Placket 8

A look at the finished placket in the Liberty cotton fabric.  It disappears which is just what I want in a sleeve placket. By using the measurements noted above, the placket pieces overlap and keep the sleeve bottom measurement as it was before it was slashed.


Liberty shirt placket

Back to the sewing room, lots to finish today.  And tomorrow a fabric shopping excursion to Stone Mountain fabrics with fellow blogger Jean of J.Kaori Designs.  Looking forward to that!

Candycane dahlia
Things in the SunnyGal garden are looking a little dreary, we are at the very dry end of summer and nothing new is blooming.  A few dahlias are still bringing a bit of color. Here is a dahlia I bought years ago in a pot and have divided many times.  I always think it would be so nice if it bloomed at Christmastime as it is peppermint candy cane colors.   


Happy start of fall sewing,
Beth