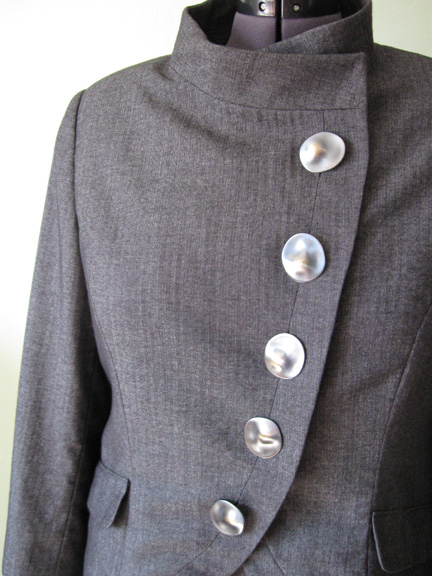
January settled in gloomy and rainy here in Northern California. OK, not like other parts of the country - but it wasn’t sunny. Perfect weather for some serious sewing, however I really didn’t have any projects on deck. Until my good friend and neighbor Cathy said she needed something to wear to a meeting. She was being inaugurated as this year’s president of the San Francisco Professional Food Society. Cathy has her own company which manufactures kits for making gourmet chocolate truffles and other goodies at home. www.thetrufflekit.com She wanted a business look, something she can wear again on other occasions and also as separates. We had the idea of a suit in mind, but nothing specific. We shopped for fabric and inspiration at my favorite fabric store, Stone Mountain and Daughter in Berkeley CA, which is filled with fantastic silks, wools, cottons and so many other interesting choices that I have to be very disciplined when I step in the door. We checked out all the wools and found a plum colored wool crepe. She chose Vogue 1037, a Badgley Mischka suit with pretty portrait collar and three-quarter sleeves. She needed the suit for the meeting on Wednesday - so time was short.
I couldn’t start until Sunday - and then I went into speed mode. Making a tailored suit in about 3 days is definitely fast, but a nice challenge for a rainy week.
The pattern was one of their designer series - but not as difficult as some of their advanced patterns. I did a flat pattern measurement and cut out a size 16 jacket (which probably compares to a size 10 or 12 in a department store - more on this topic in a future post). The princess seams made it simple to make adjustments on the body after the jacket was basted together. The instructions called for lining all the jacket body pieces with fusible knit interfacing, which I did. I am not sure it was entirely necessary, in most wool jackets I use armo-weft fusible interfacing on the jacket and undercollar, and then fusible knit on the jacket front facings and upper collar. However since this was a different style - more like a 2 piece dress than a tailored jacket, I went with their instructions.
I have noticed that some fusible knit interfacing behaves better than others, perhaps it is the brand and I will be doing a test on some of the yardage I have on my shelf. I had to press and steam much more than I expected to get it to fuse properly. If you miss a little spot it can leave a slight bubble impression on the right side of the wool, which has to be repressed. I did get it all fused up and just about gave myself a steam facial in the process. The benefit of the fusible interfacing is that it gives the wool crepe a great weight and body, so that the jacket holds its shape nicely and doesn’t wrinkle at all.
Next I did the welt pockets with flap. For any welt pocket I never look at the pattern instructions, nor use their ridiculous little pattern pieces. I learned to make a welt pocket from Sandra Betzina at The Sewing Workshop in San Francisco some years ago and have used this method more times than I can count.
Next time I do one I will take photos and post. Suffice it to say that almost the LAST step is slicing open the pocket. I have seen a lot of instructions that call for cutting the pocket slit before applying the welt pieces, and that sounds dangerous and could lead to needing a new jacket front piece if it didn’t go well. Or at least a larger pocket than one planned to have. Possibly eliminating the need for a handbag but that is another story.
Once the welt pockets are done on any jacket I feel that I am home free. So the rest was just sew - sew - sew as fast as my little fingers could move. I made the lining from the jacket pieces instead of using the lining pieces in the pattern envelope as I was too lazy to pull them out and the jacket pieces were still at hand. Then I sewed the lining together, turned the jacket inside out on the dress form, and applied the lining, trimming as I pinned to give it the correct shape. Then hand sewed the lining in, and did the buttonholes with my handy-dandy Singer buttonhole attachment. Noisy little bugger but whew it makes great buttonholes. Maybe I could become a sewing hoarder as I bought 2 more of these gizmos last year at a garage sale for a couple of bucks which was a deal as I had seen them on Ebay for upwards of $ 20.
Next I sewed up the skirt. For this I used Simplicity 2564 which has no darts and a shaped waistband. This style is a lot smoother, falls over the waist and hips very nicely. The skirt included with the Vogue 1037 is a very traditional (shall I say old-fashioned) skirt, with front and back darts. So on a whim I used the different skirt pattern and Cathy was really happy with it.
Suit finished by Wednesday morning, with not that many minutes to spare.
She looked great and now has a nice suit that is ready for a lot of occasions.