Friday, August 25, 2017

Charlie Caftan in Silk Charmeuse

There are certain fabrics that say luxury to me. Perhaps top of that list is silk charmeuse. It just feels so luscious when you wear it, like a gossamer but has that substance and depth of color that is found in silk.  I just clicked the dictionary to make sure I spelled charmeuse correctly, and it says "from French: feminine of charmeur, "charmer" to charm".  Well that seems apt, it is a feminine and charming fabric that can be sewed up into so many different things.

But when your friend goes shopping at Mood and brings back a stack of very disparate fabrics some of them get set aside until inspiration strikes. Thus this very bold silk charmeuse print was purchased by my friend Heather in July of 2015, but we could not come up with an ides of what to make with it. It really is a panel print, which repeats about every 5 feet, and had a 2" geometric border on either selvedge that I didn't use. There are some good size pieces remaining which might make perfect sleeve linings for a hidden touch of whimsy in a plain coat or jacket.

But one day I happened to be showing her some various patterns online and she caught a glimpse of the Charlie Caftan pattern and said "that's it!"

silk caftan H front view2

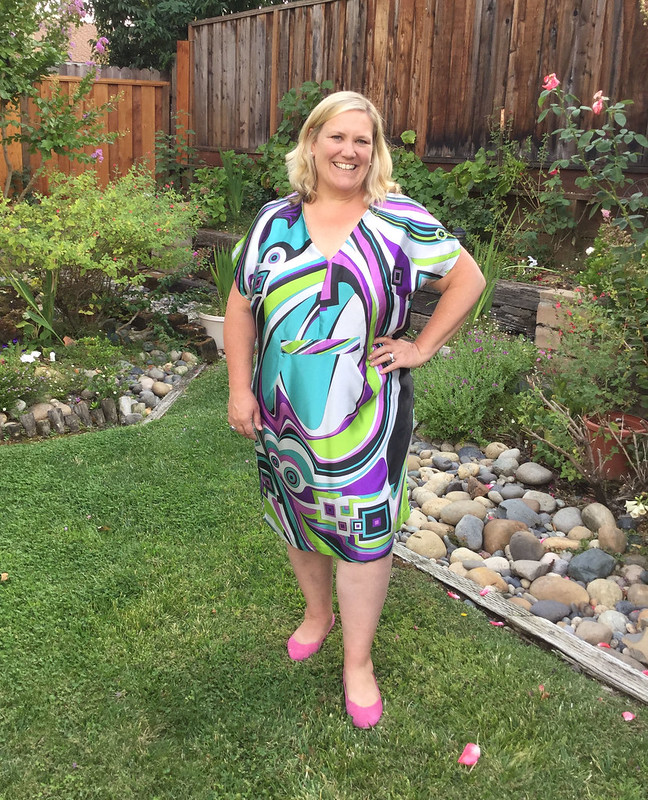
A bold choice but I think she was right. It turned out perfectly for lounging around at home or perhaps wearing during cocktail hour at some beachy resort. (doesn't that sound great and we all wish were there at said resort right now!)

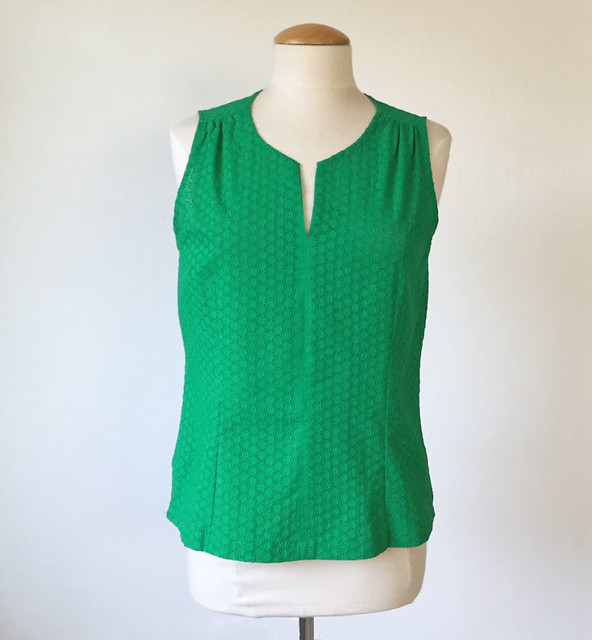
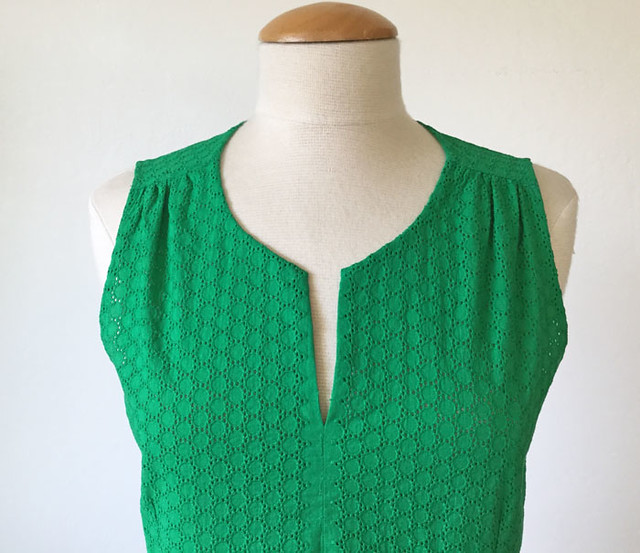
We will have to make do with photos in my backyard but you get the idea. The caftan is definitely loose fitting and doesn't have a lot of shaping. Before I cut into this unique fabric I made a muslin using an old sheet. Which very much resembled a hospital gown. And needed some additional shaping for sure.


silk caftan H side view

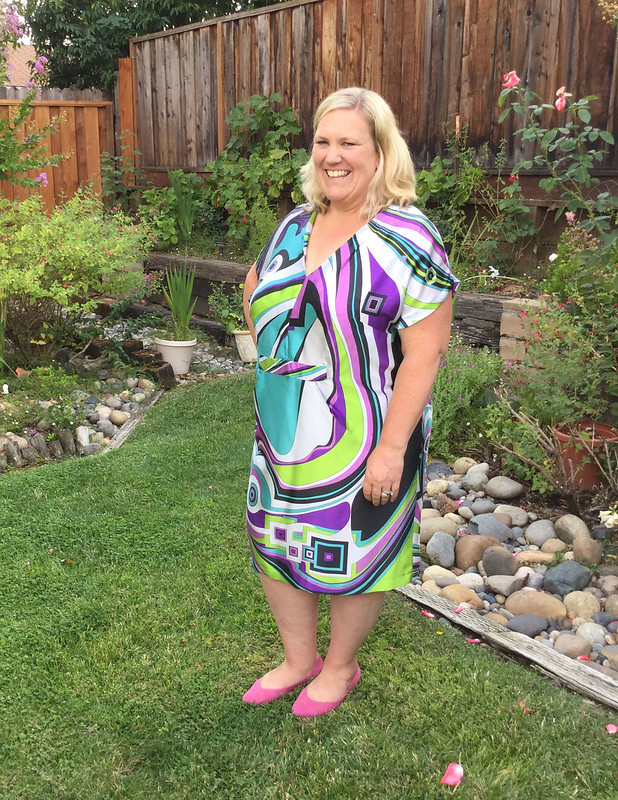
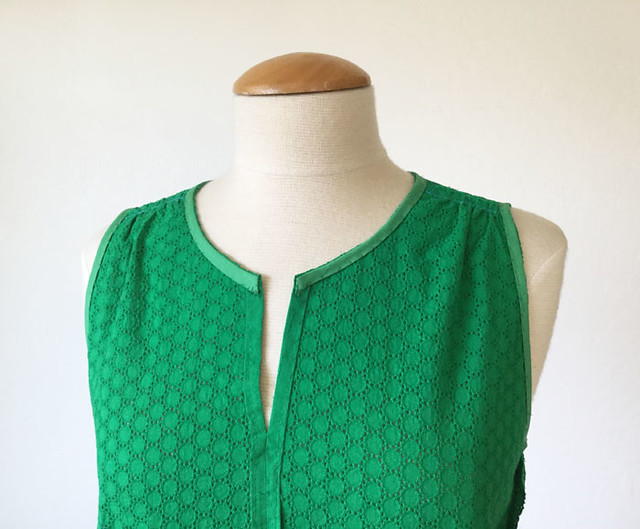
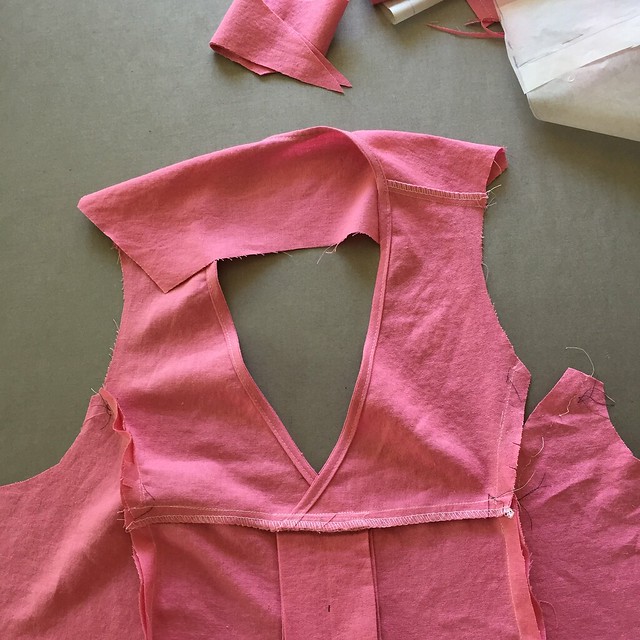
On the slightly side view you can see some shaping which I achieved by adding a bust dart. It's not difficult to do on this pattern but if you have a full bust or just want it to be a little less block-y here's what I did.


Caftan pattern pattern alterations copy

This is the order that I made these adjustments, and if you are interested I suggest you make a first muslin, work out the dart and then you will be good to go.


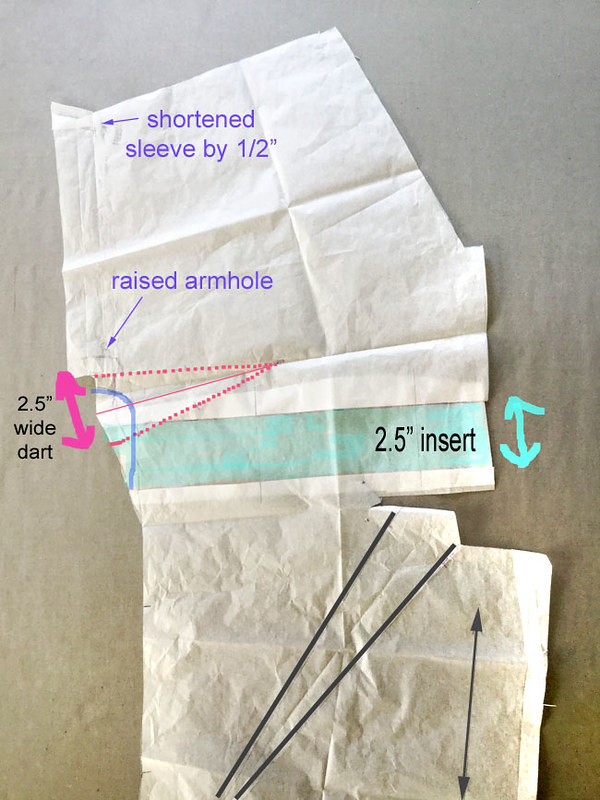
  1. Sliced pattern horizontally perpendicular to the center bodice seam. I added 2.5" of length which is shown by the aqua section.
  2. Created a bust dart, shown in pink. I made the width of the dart equal to the amount I added in the horizontal section, so that the front would stay matched to the back. I ignored the arm opening when adding the dart, deciding to adjust that later.
  3. Note that the dart points upwards slightly. I marked the bust apex on my first muslin (the one with no adjustments, and angled the dart from that point downwards slightly to the side seam. (Few things bug me more than completely horizontal darts - to my eye they look jarring and like something on a kid's crayon drawing). 
  4. Armhole opening - the blue line drawn through the side seam is the original pattern, the sleeve opening was quite low (and is even lower on the other version in the pattern envelope) So with the dart and just for comfort I raised that about 1 inch. 
  5. Shortened the sleeve by 1/2". It's not really a sleeve, more of a cut-on sleeve but in any case it seemed a bit long. Note if you shorten the sleeve you have to adjust the hem allowance, see that angle at the outer edge, it needs that for the turn back of the hem.  Same change on the back piece. 
  6. No other changes except I lengthen the dress by two inches. It is very mini to start with so if you don't want a mini you might have to add. What is mini on tall people is knee length on the rest of us :).  I outlined the front pleat here in black but I didn't make any changes to any other portion of the pattern. 
Here's a look at the pattern piece before adjustment, you can see the bodice area is going to be a bit square-ish which is fine if you don't need any shaping.

pattern view caftan


Charlie Caftan pattern envelope image

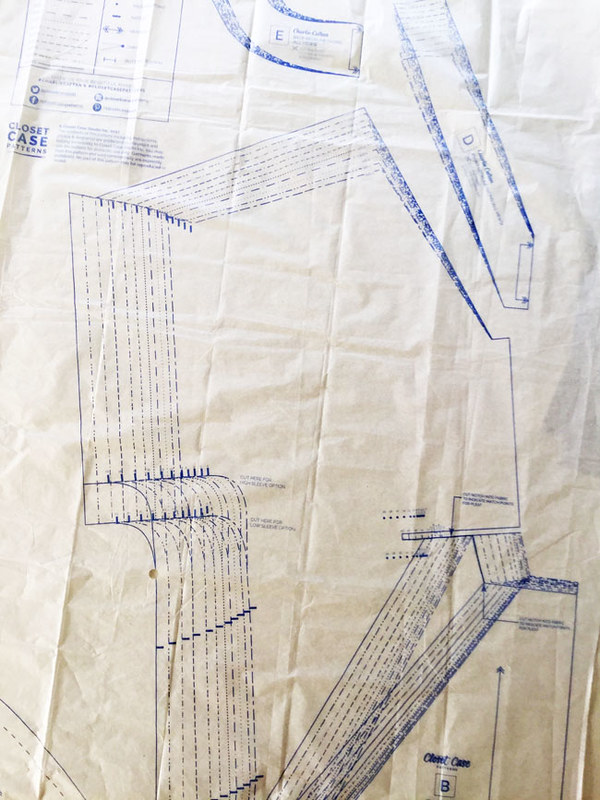
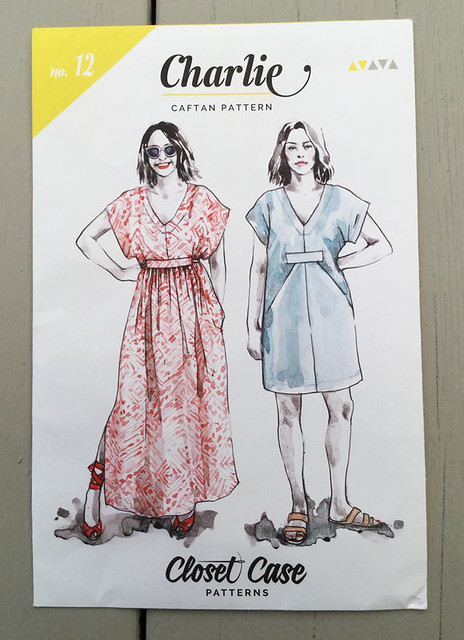
Here's the pattern in case you haven't seen this one. This is the first Closet Case pattern I have sewn and I don't really have any feedback - didn't really look at the cutting layout or instructions except to check how I was doing the pleat in the front. A pattern with this many sizes is both beneficial in that the size range is wide but distinguishing between all those lines gets a little hard to see. I found the same thing on Sewaholic and Jalie patterns but I suppose that is the trade off for getting all the sizes.

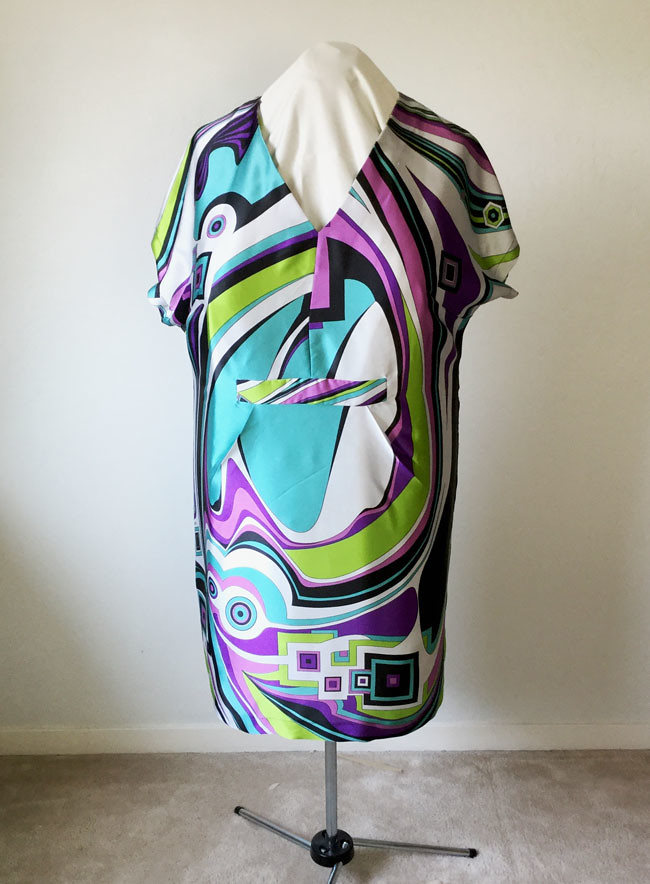
Here's a look a the dress on the form so the bust dart is visible, but not really noticeable, if that makes sense. It does it's job but is not really obvious. Also note the dart point is a good 2 inches away from the bust point, another pet peeve, bust darts that are too long and end up looking a bit headlight-y.

bodice close up silk caftan


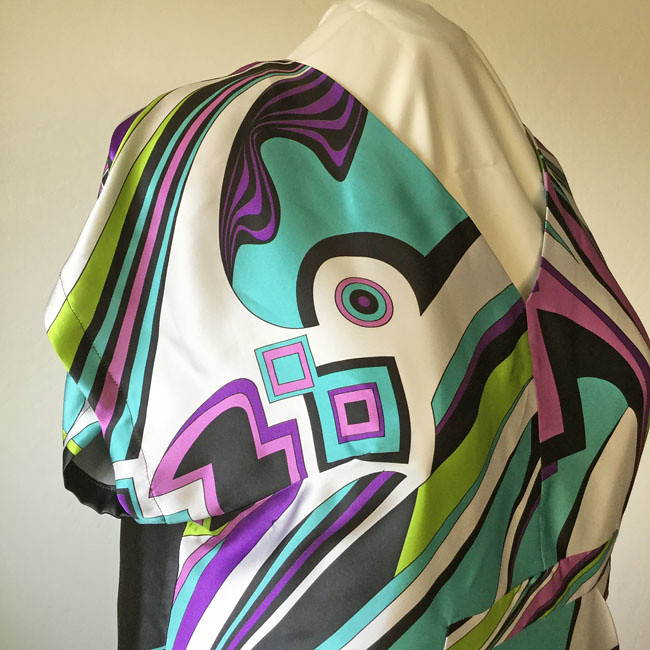
A look on the dress form. This is one of those garments that look so much better when worn than on the form. You can see the fabric a bit of a puzzle, and I didn't want any bullseye effects so I was really careful with the print placement. As it happens the busy part with the squares is across the bottom so that worked well.

silk caftan front on formsilk caftan back on form

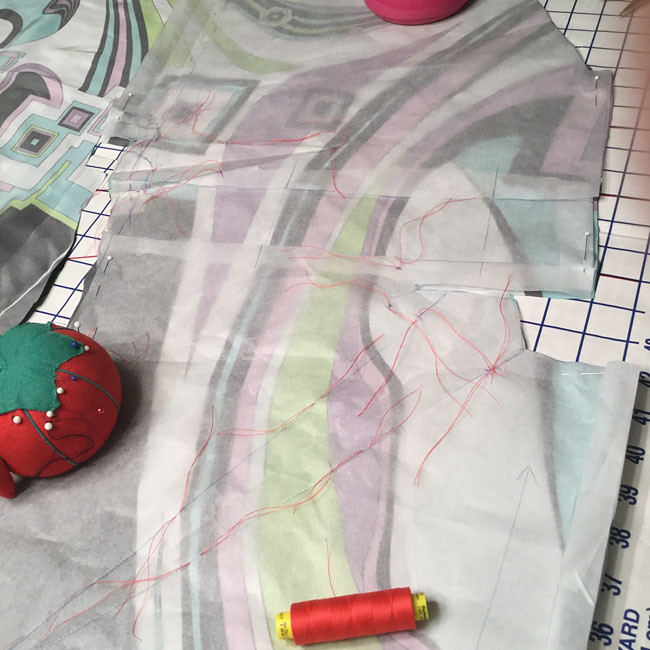
Sewing detail,actually cutting details, I cut everything out in one layer and did all the marks with tailor's tacks on each piece before I picked up the pattern piece to move it and cut the mirror image. It might seem like extra work but actually when everything is flat it is easier to mark rather than move the pieces and then have to lay flat, try to match up two pieces and do the markings.

silk caftan cutting out

I am so glad to get this fabric sewn up and a glamorous version of the caftan was a perfect idea.


silk caften H front view

Now I just need to make a dent in some of the fabrics I brought back from Mood in October of 2016! I have a few ideas percolating and autumn is approaching.

Up next, some late entries to the summer sundress wardrobe,  plus doing some pattern testing for a coat for which seems crazy as it is supposed to be over 100˚F for the next 7 days in a row. !!! Oh well I need to enjoy it because summer is on the way out. But we will hang on until October here in N.California and pretend we have endless summer. Well, we almost do 😎 thank goodness, I couldn't live in the frozen tundra (talking to you, Minnesota).

Happy end of summer sewing, 
Beth

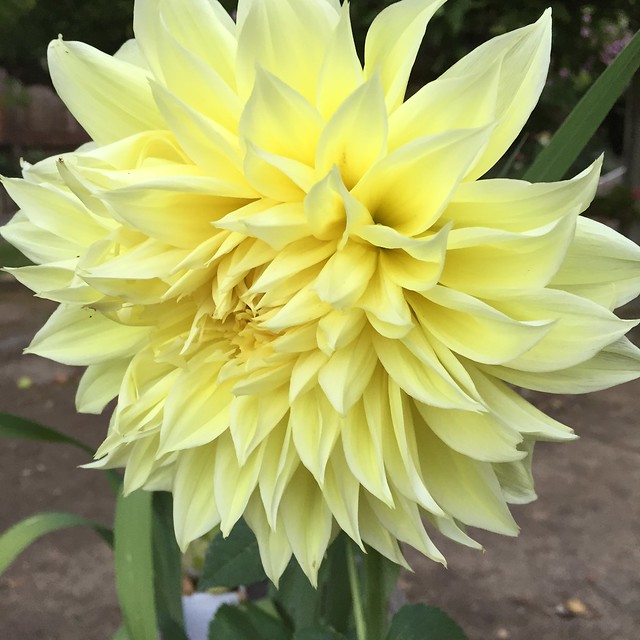
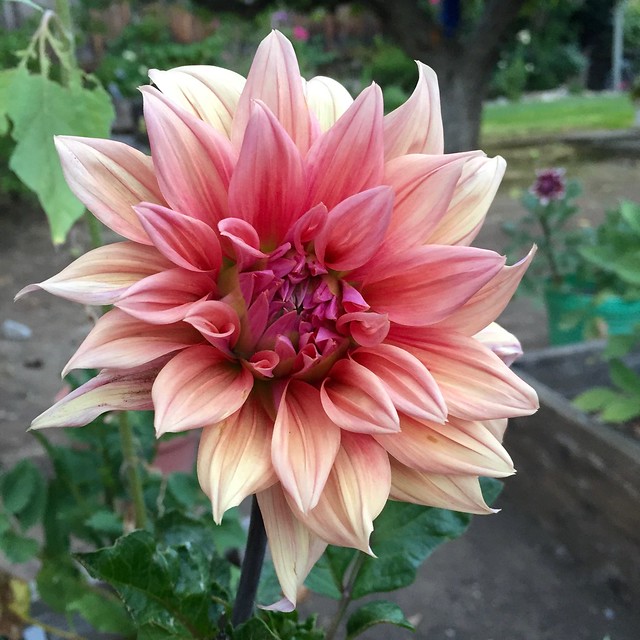
today's garden photo, a yellow dinner plate dahlia. Not quite a dinner plate, but a good 8" across. 
Plus plenty of blooms - this one is a keeper. 

IMG_2926


Thursday, August 17, 2017

Pattern Whisperer returns, Jacket making class details, and a new eyelet top

Topics for Today:
-- The Pattern Whisperer returns!
-- more details on what I will cover in my upcoming jacket weekend class
-- a new eyelet top from an old pattern

Hey everyone - you really like those Random Threads posts!! Which I knew but that last post certainly had a lot of commenters - so fun to read what everyone said. After all, sewing can be a solitary sport and sometimes late at night with seam ripper in hand we can all wonder if our fellow stitchers have the same observations, pet peeves or just laugh at the same things. The answer seems to be yes.
I will try to do a Random Threads at least once a month, which shouldn't be too difficult as I always have something to wonder and/or grumble about.

Onward to another popular topic - Pattern Whisperer. My first pattern whisperer was a very specific post for one person, my subsequent ones have be more general pattern recommendations but let's go back to the beginning. Not this week but perhaps later in September I will open it up and choose a couple of people to make specific pattern recommendations. By then we will be heading into holiday/festive season sewing so think party dress, check your stash and prepare to make your case as to why you should be pattern whispered. Stay tuned and wait for that post.

Sewing Class: Jacket Essentials
We have scheduled a Weekend Intensive Class for Jacket/Coat making at Hello Stitch Studio in Berkeley, Sat. Sept 30 and Sun. Oct 1. Each day's session will be from 10 am-4 pm with open studio time until 8:00 pm so you can continue working on your project. Lunch and snacks are included. I think it will be really fun and a great way to spend a weekend with other stitch enthusiasts, plus you will have a great new jacket or coat ready for fall.
I've had a few questions on what I will cover so thought I would talk about my plans here.

Firstly, I have selected a few coat and jacket patterns that don't require a huge amount of fitting, yet have interesting collars, pockets and buttonholes so we can review loads of techniques. The goal of the class is to learn to work with coat and jacket weight fabrics, use plenty of fusible interfacing for modern tailoring and be able to tackle all the ins and out of pressing, clipping, welt pockets or buttonholes and adding the lining. So I am recommending these patterns (or something similar if you already have a pattern) that you can sew up in your chosen size - with maybe some minor fit changes such as grading between sizes or adding some length.

Looking around I found these two fantastic ones from a pattern company that I have always wanted to try: Waffle patterns.

Waffle Bamboo coat

This is their Bamboo coat pattern. The version with collar/lapel is great for learning to do that construction and the proportions of both designs look so ideal to me. Plus welt pockets and set in sleeves.  I see on their website that they are having a special 15 euros (no idea how long it will be on) for the actual paper pattern printed on large format paper and that includes the shipping. For a coat it would be nice to skip the printing and taping! This would sew up well in so many different types and weights of wool fabrics, from lightweight to full-on coating.

Another option from Waffle is the Yuzu jacket pattern.

Waffle Yuzu coat

A cocoon shape with raglan sleeves and pocket options. She also has a free pattern download to add a hood which looks very cozy.

Butterick 6423
B6423 coat Butterick Lisette

This one is also a loose fit coat with cool pockets that are a feature of the front seaming. Also that big collar reminds me of my Burda jacket with the portrait collar that feels very glamorous to wear on a cold winter day.

Even though these three patterns are quite different they all share some features that I want to demonstrate in the class, based around using various types of fusible interfacing, how to apply, which to choose, where to put it and on and on. Also pressing is one of my favorite things to do (yes, sewing nerd here) but it makes SUCH a difference in how the garment turns out. I am guessing if you have seen a coat or jacket somewhere in sewing world and thought it was nice but something wasn't quite right - I will bet money that the issue would be pressing during construction.

I plan to do lots of demos and have some hands-on practice of things like welt pockets or bound buttonholes, trimming/clipping and hand stitching techniques.

So if you are in the area I hope to see you in September for a weekend of jacket making fun. Actually we have lots of classes scheduled for Sept. and October. I am really thrilled that people are signing up for additional classes after taking their first one, that makes me feel great. We have the button front shirt class again at the end of Oct......

So, speaking of button front shirts, I have once again use my trusty Simplicity 2339 which is an Amazing Fit pattern (out of print, boo hoo) that I use to make any and all shirts. This pattern is getting quite ragged, but I think I could make it in my sleep. But sometimes I use the pattern as a jumping off point to make a different type of woven shirt.

green eyelet top1

It must be Taco Tuesday if I am standing in front of a Mexican restaurant. Why, yes it was 😋. Is this a California thing? It could be every day as far as I am concerned. Side note: I heard a news story that the price of avocados possibly may double due to the after effects of our long drought - so I will have to start setting aside some mad money for my avocado addiction. I eat a LOT of them, so delicious.

I bought this fabric at Joann's on one of those whims where it was super extra double coupon discounted (not the accurate term but you get my drift) so a couple of yard for less than $ 10. It is SO hard to find nice eyelet in interesting colors. Then I thought why-oh-why did I get something I really don't need. Enter the super simple sleeveless top derived from my Simplicity shirt pattern.


green eyelet top front on form

Sewing details:  the bust darts are turned into shoulder gathers, I included the waist darts as this fabric is a bit stiff and needs help in shaping, the neckline was just me winging it with my french curve ruler and then I used the selvedge edge of the fabric where there is no embroidery as a design detail down the center front as well as the edge finish on the inside.

Which you can see below.

The binding is some cotton fabric I found after a deep rummage in my cotton scraps box, enough to make the bias strips needed. I stitched it on and then hand sewed the edge for both the neck and armholes.

green eyelet top inside view

green eyelet top close up

Not bad, huh? I kinda like it although I wish the fabric was a little bit softer. But the color is one of my favorites, and I have wanted an eyelet summer top ever since I made this one. Also this top looks nice with my Mirambell skirt.

So that's the scoop. Funny how I make a new top like this and end up wearing it many times in a row, such as last night (meeting up with my Italian speaking pals for conversazione, which could also be called Wine Wednesday, ha!)

And on to the next thing. I have been sewing up a storm for other people, squeezing in a few projects for myself and am waiting to reveal a thrift store refashion that hopefully will be a success.

Happy Summer Sewing,
Beth

Today's garden photo, this one is a bit of a thrill as I have tried with Clematis several times to no avail, but this year I planted another one and look, a flower! OK only one but it is in a pot and rather spindly. However I can move it when the frost hits and hopefully baby it through the winter. But that color, love it!


clematis


Friday, August 4, 2017

Random Threads # 28

Hey it's been quite a while since the last Random Threads post - my notebook page is filled up with topics to discuss.

What have I been up to? Teaching classes at Hello Stitch Studio - each class takes a bit of thought beforehand, sewing up samples to illustrate various techniques or just to work out how to demonstrate things. This week I had a class on sewing button front shirts which I cleverly combined (ha ha) with writing a post for Craftsy on the topic: how to attach the collar. Some sewing for others, which I don't do for a lot of people, just a few that I enjoy working with. A little pattern testing for my favorite indie pattern designer (Pauline Alice patterns). Some planning for fall sewing - including making up a sample jacket for an upcoming class. Jacket weekend! I am often asked about doing a class for sewing jackets so check it out on the Hello Stitch website if you are interested.

Which brings me to my first topic - How long does it take you to cut something out? I realize that I've been sewing for ages plus I am one of those people who do things fast whether it is washing the dishes or reading a book, or walking through a store. But I am realizing that the cutting out part of making a garment takes a good chunk of time. And it doesn't need to! Mostly I try to get people to be less tentative with the scissors. Tiny half inch snips are going to take forever when cutting a long center back seam. Trust your coordination and use the whole scissors. Get sharp scissors, pin enough so the pattern piece doesn't shift but not every 3 inches. Relax, breathe. Cutting out should be less painful. Also my last tip - before the first cut, step back, look it over, review all the pieces and then proceed with confidence. Does cutting out stress you out?

Ready to Wear isn't perfect either.  A friend of mine bought a dress that needed shortening, so I had her stand still while I marked the hem all around. I usually run a thread trace around where I have put the line of pins so I can remove the pins, have a temporary but stable hem indicator, and then I can hem it whenever without concern that the pins will come out.

uneven hem on blue dress

Granted that few of us are perfectly evenly built, most of us have a higher hip or lower shoulder that affects the hem. When I looked at the two side seams I had pinned up so much more on one side. It made me question my work and it seemed that I was drastically folding up one side seam more than the other. For some reason I thought - check the side seams and look, one side seam is about 3/4" longer than the other. On a $ 500 dress! Mystery solved and my ego stroked about my own precise sewing :)

Sewing verbiage around the world. My fellow Americans, does it sound strange to you when you read that something has an "elasticated" waist? That sounds so weird to me. I would say elastic waist. Don't get me started on the phrase "my make". I know it's popular but it makes me want to tear my hair out. I love the Great British Baking show and they say "bring your bakes" to the table. So has this verb into noun conversion taken over the UK?  Reading blogs written by people all over the world is great fun but when I stumble across one of these weird to me grammatical constructions I stop short and gnash my teeth momentarily. Probably silly I know but just one of those pet peeves. I am imagining a UK reader of sewing blogs with a pet peeve along the lines of "those annoying Yanks boasting about their 10 for $ 10 pattern sales" Or maybe we have some grammar quirk that gets under their skin. Just for curiosity I would love to know what American idioms annoy you on a sewing blog.

An interesting life: Lucy Spector, one of the founding owners of Britex Fabrics in San Francisco passed away recently and the San Francisco Chronicle had a long obituary on her. She had such an interesting life and great style. If you like to read about successful women in business when that was more of a rarity check it out.

When I make a mistake it usually is a whopper: as evidenced by this picture.

pink linen dress yoke mistake

The story here is that I was making a pattern from an existing dress for a sewing client. The pattern making turned out very well especially considering it was a complicated dress with lots of pieces (actually more pieces can be easier to reproduce). So I was feeling very pleased wth myself and started sewing up a test version in this bubblegum pink cotton? linen? unidentified fabric in my stash that was a good candidate for this type of dress. And thought, I will sew it for real with serging and everything in case someone wants it. The dress has a front and back yoke where the body pieces attach. So you can see that I cleverly attached the dress front to the yoke front not even noticing that the back yoke had a lovely 360˚ twist - no that is not a design feature. aaarrrgh!! Had to detach the dress front including undoing that serging, untwist and start again. Better to discover it now rather than later I guess:)

Here are three things that I don't care about: Wardrobe planning - inspiration boards - sewing basics. These often go together and if I see articles or blog posts I am likely to pass them by. Do you find these topics interesting? The sewing or wardrobe pieces are typically so....well, basic. These often go with a new pattern release that is super simple (perhaps you know which pattern company I might be referring to) and I think "after all that navel gazing THAT is the new pattern you came up with? For $ 18???"  As I often say - I am not the target market for this type of clothing but really, semi-new stitchers - stretch yourself a little and find some patterns with an interesting details. And no, a split hem detail on a top does not indicate an interesting detail.  Is that enough from your grumpy sewing correspondent? Because...

The Mood Fabrics blog shows some truly odd stuff - I DO NOT mean the Mood Sewing Network, which showcases a lot of great home sewers who are very accomplished and choose really nice fabrics, sew up stuff I want and inspire me to shop the Mood website. But they have another blog, which you can click to on the bottom of their store website, Mood Sewciety, more of a DIY with fabrics and I find the stuff they show seriously questionable. The stuff rarely fits, the sewing is sloppy and who are they inspiring with that?   On a different note - I have ordered a few things from Mood this summer and they have all been great.

More notches! I don't know where I found this blog but she posts some interesting things and her point of view is as a trained pattern designer and dressmaker. She mostly does children's wear and tries a number of PDF patterns but her comments and critiques on those patterns also apply to anyone designing and selling patterns. Her recent post "Why are pattern notches missing in PDF patterns?" was really interesting and explains some things I have been wondering. These past few months I had been sewing a number of indie patterns and hmmmm....I'm not all that impressed. Sometimes the instructions, which are designed to handhold someone learning the new construction techniques are really wordy, more confusing than a good diagram with arrows and steps indicated. (large, please. Tiny, pale, cute, slightly cartoonish diagrams help nobody even though they may look stylish or match your brand esthetic).

Wearing something which strays from your typical style: a few people commented on my last blog post and on Instagram that my most recent sewing project, the Mirambell skirt from Pauline Alice patterns was an unusual style for me. While it is black, a color I rarely sew or wear, the silhouette seemed like something I have sewn quite a few times before. I wonder what it was that seemed different? The full skirt? Here's an example of that style which I've made although this one is a bit eye-searing. Or this one, the first Bootstrap Fashion pattern that I sewed. I've been trying to expand my sewing choices and sew different shapes or even colors with some mixed success. My preliminary finding is that if I am lukewarm on a color no matter how nicely a garment turns out I will not be excited to wear it.

That's all for today, I covered almost all my topics. I saw a couple of new things that I will save for a future post, including new Fall pattern releases from Vogue and Simplicity. (quick comment - Vogue some interesting stuff but not a thing that makes me want to buy it now in the heat of summer. Simplicity, a couple of really good coat patterns that I might recommend when it gets closer to coat time).

Sneak peek of something I just finished, I'm on an eyelet kick this summer.

green eyelet top

We're hopefully at the tail end of another 100˚F heat wave here - although when I drive over to Hello Stitch which is about 15 min. from my house the temperature can be a good 20˚F lower. The bay area summer! a mystery to visitors and bring a sweatshirt because it is cold by the ocean (in the best possible way :).

So I am not thinking about fall sewing, we have a good 2 more months of summery weather ahead. How about you?

Happy summer sewing, and stay cool!  
Beth

I'm off to swim now and disregard my garden which must fend for itself in these lazy summer days. Fortunately the dahlias do their own thing and always surprise me with the color of the blooms. I plant them but don't label so what comes up in each spot is a very pleasant surprise.


sunset pink dahlia

SaveSaveSaveSave