Showing posts with label refashion. Show all posts

Saturday, October 1, 2016

How to change the neckline, summer top New Look 6374

When the end of the year arrives and I do a bit of sewing analysis, I think it might turn out that this is the year of tops. Based on finding a couple of really great tunic style top patterns as well as some t-shirt patterns that will reappear, I've added more tops to my wardrobe and found them really useful. Separates are always on my mental to-do list, so quick, so gratifying, such a small amount of fabric needed. But I get distracted by some clever new jacket pattern or a pretty dress.

Anyway - this is not a particularly noteworthy top other than the fact that I have worn it a lot since sewing it up.
Or should I say refashioning it up!
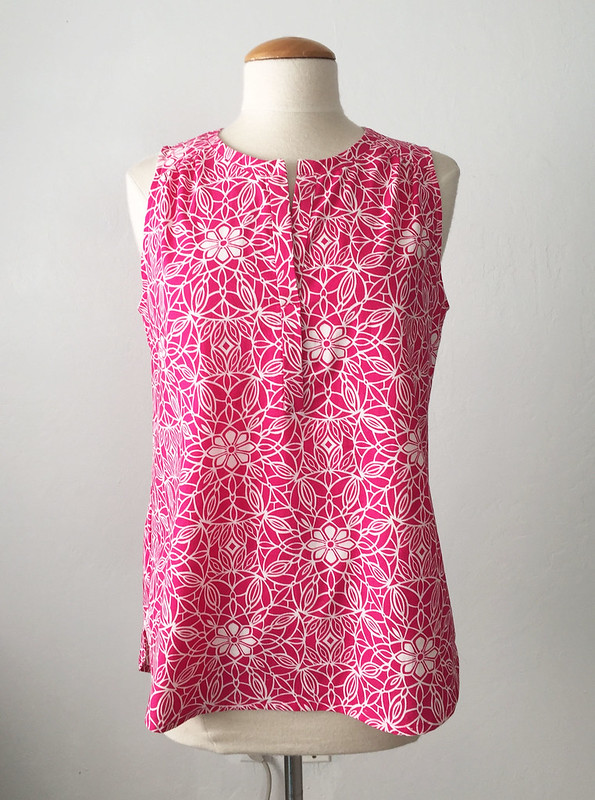

Pink top front NL6374

This top is New Look 6374, which I first made in a really nice silk that started life as a panel print and I did some fabric cutting geometry to get make it. Recently I did a big closet clean out and took a lot of stuff I no longer wear to the charity shop, and this dress was among the items. Not worn at all this summer and I figured it was time to move on, however I always liked the fabric which is just a plain woven cotton. So I retrieved it from the bags and decided to see if I could salvage a top or something out of it. The dress is New Look 6864 which is a dress pattern from about 6 years ago, with many bodice versions and I have used that pattern at least 8 times.
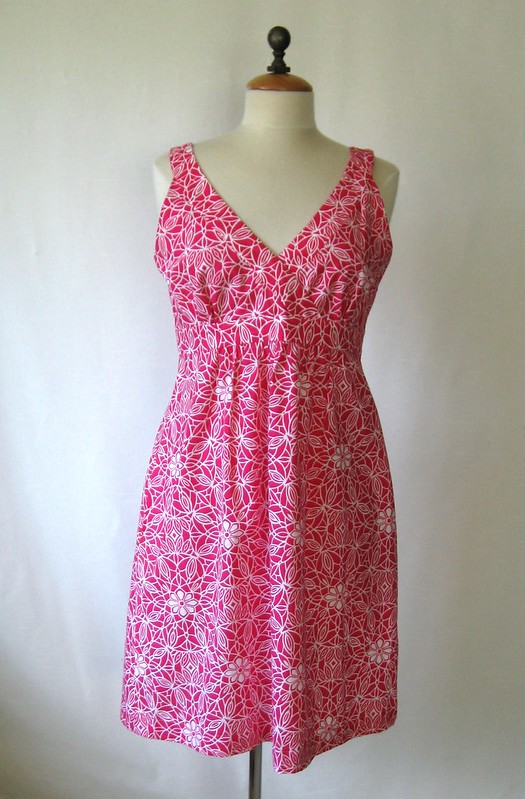
IMG_0482

I removed the zipper, and detached the skirt so that provided the fabric for the shirt front and back. The back yoke needed to be seamed, and the center back seam of the skirt remained on the shirt.
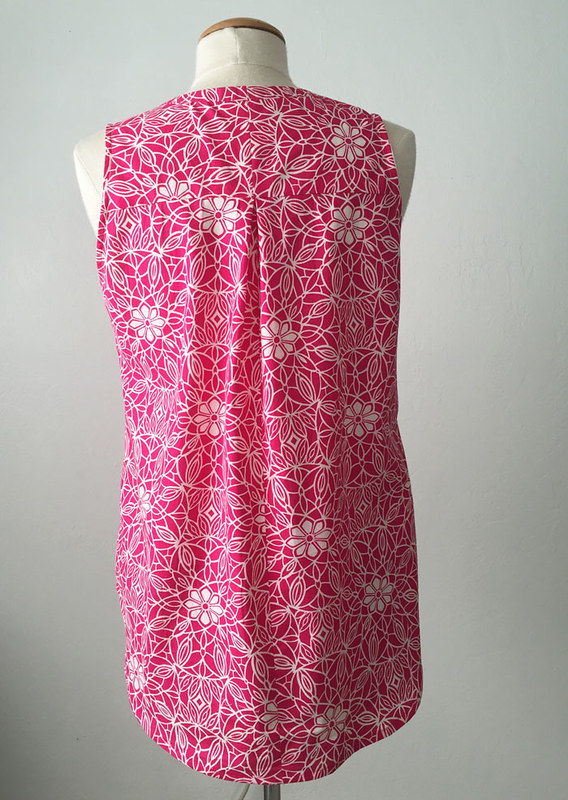
pink top NL6374

The main thing I wanted to try with this version of the pattern is to change up the neckline. The pattern has a mandarin collar style, although it is on the narrow side. It worked OK for the silk version but I think in a long sleeve winter version I might make it a bit taller. But this is definitely a summer version so I wanted no collar and a slightly more open neckline. Here is a look at the two tops side by side so you can see the change in the neckline.
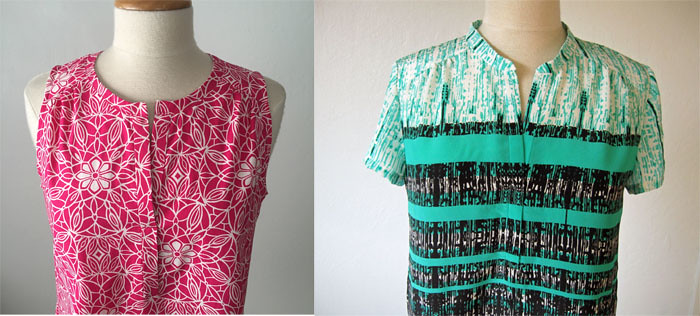

pink and green top comparison

To create the neckline and the facing edge, which is rounded, I created a band or facing piece by determining where to have the neckline finish, and then working backwards to reduce the shirt body and add a band. Then I added the seam allowanced (3/8" in this case). Note that in the center front of the neckband I have added the amount that will be there once the placket is sewn on to the center from of the top.
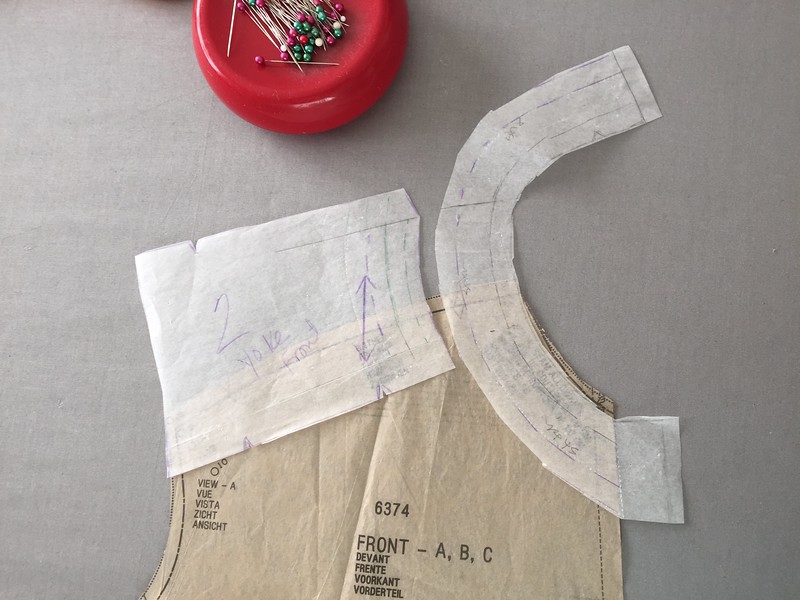
N6374 pattern adj

It seemed I was home free with this design but as it turned out I had to do a lot of fiddling to get the remaining parts cut out of the remaining fabric, even using some of the curved neckband of the original dress to make this new neckband.
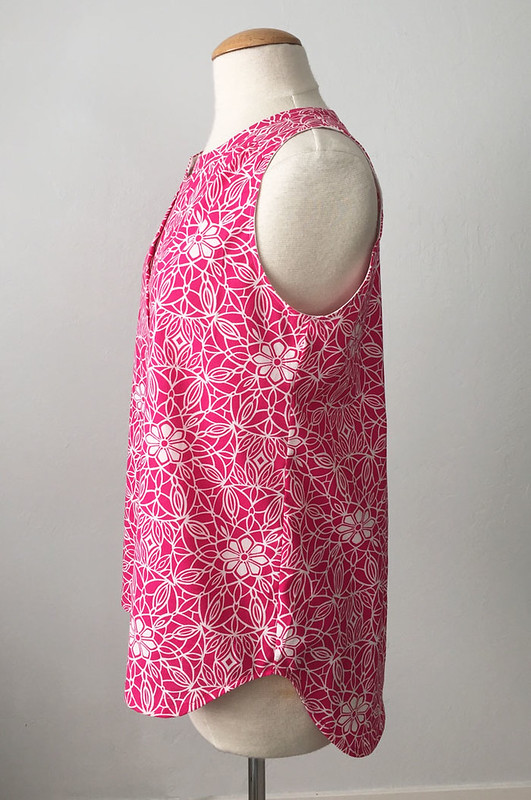
pink top side NL6374

Bias tape for the armholes, and of course I moved in the top of the shoulder about 1.25" to create that cut-in shoulder look that I like.

Not very satisfying sewing room mirror shot is all I can manage to show off this top. Which I popped on for a photo only as I was getting ready to go out yesterday morning to meet a friend for coffee. It looks a lot better with white jeans and sandals then with dark jeans and my hiking sneakers. At least you can tell it was super sunny yesterday. Rumor has it we might get some rain on Sunday - we can only hope!
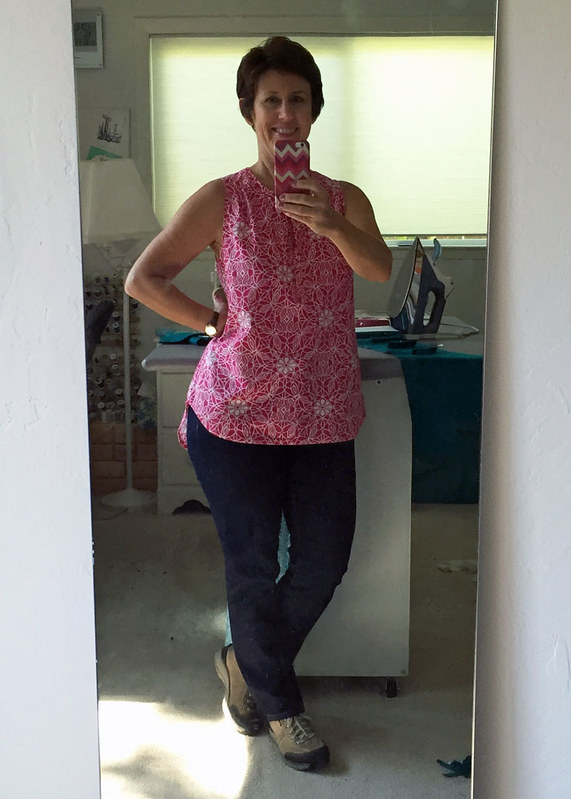
pink NL top on me


In other news, I have written a few more Craftsy posts that you might like to read.

While I lean towards facings, when it comes to certain types of garments or fabrics then a bias binding is the way to go. Here is the link if you want to read my take on this topic.

Binding vs facings image

This one is near and dear to my heart, pattern markings! Here's the link. On this topic I want to say to all pattern designers - traditional or indie - USE MORE! More is better! I think that more information that is printed on the pattern the better. Perhaps with the development of multi-size patterns the issues of adding a lot pattern markings becomes more challenging and I understand that. But when I look at some older patterns, they were a wealth of information. Including my personal pattern mania - the collar roll line on a coat or jacket. Which has sadly all but disappeared on any patterns. But I will write about that in an upcoming post as I am deep into a tailored jacket right now and taking lots of pics.
Decode pattern markings link image


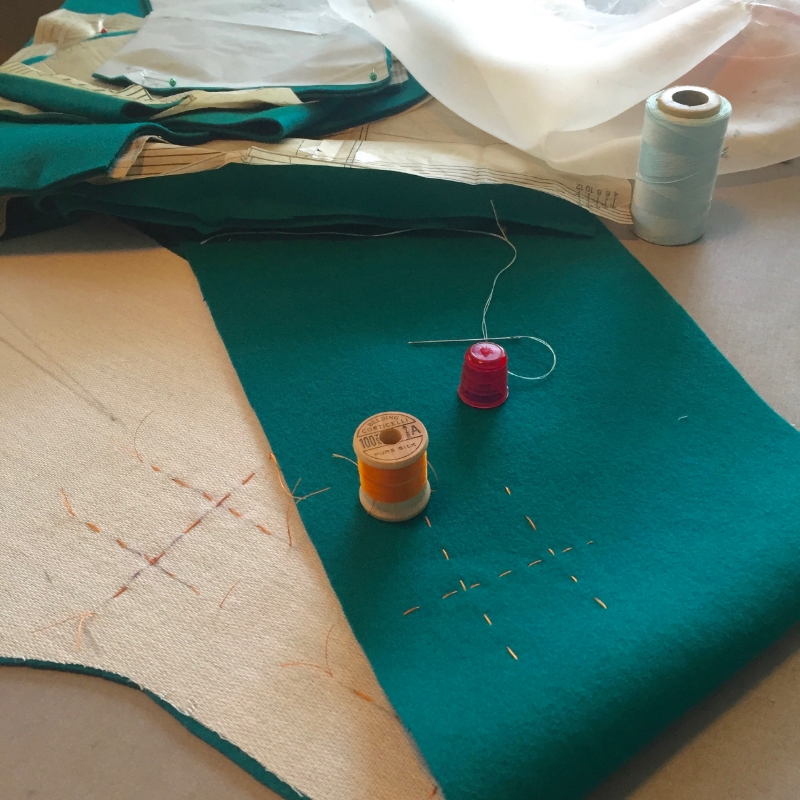
Sneak peek of my latest project in process. Wool fabric, silk basting thread, bound buttonhole markings, it must be a fall jacket. Yep - sewing interest in autumnal projects is awake and I now have a good list of stuff to sew in the next couple of months.
IMG_1739

I can't believe it is October already - although from the Halloween junk for sale in the stores I would believe you if you said that was tomorrow. I plan to stay away from the big fabric stores for the rest of the month - having no need to buy fleece of any sort (who buys that much fleece? that always amazes me the inventory of fleece).
Maybe even some deferred garden work tomorrow. Depends on the weather I guess :)

Happy weekend sewing, Beth

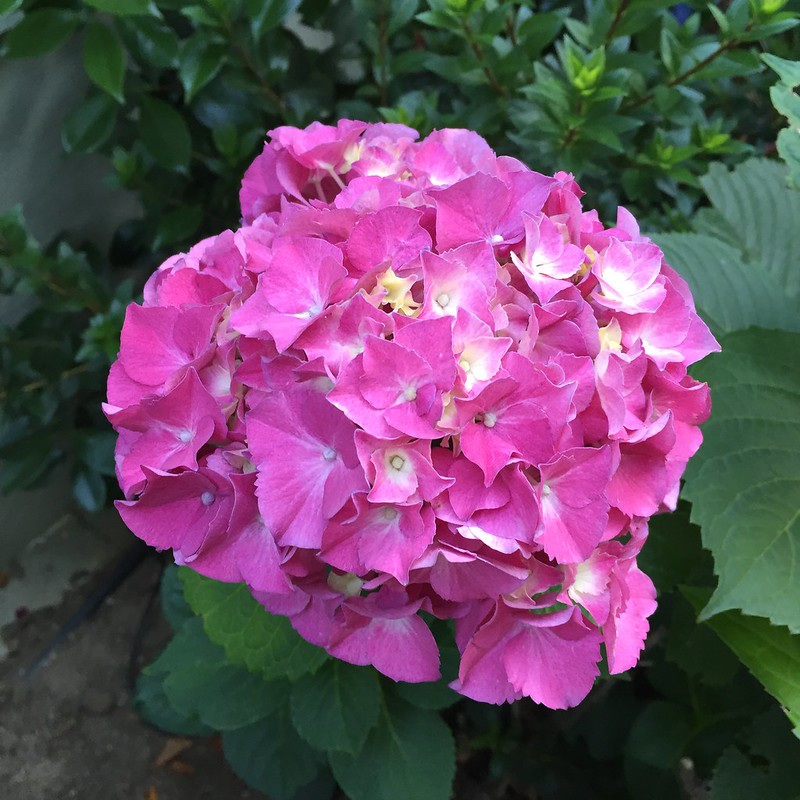
Here's a hydrangea from May. They are so faded and colorless now, but the colors were glorious this past spring.
IMG_1316

Monday, December 2, 2013

A very very holiday refashion - Yes Virginia, you can remove those gigantic shoulder pads

Lurking in the back of my closet are a few more refashion possibilities and since December is here this one seemed the best candidate for a quick update. While I don't recall making this specifically as a holiday item, could this be any more aggressively Christmas-y? I think it was Pendleton wool and probably sewn by me in the 90's based on the pattern and the humongous shoulder pads.

It does not pay to dwell on our fashion choices from a previous decade! Perhaps if this had aged gracefully for 40 or 50 years it would become delightfully vintage, but looking at it today all I see is old-man golfer or stereotype country club character from a movie. Also I buttoned it a bit wonky on the form but indeed the plaids do match across the front and all the way around. I had started to take the sleeves off as you might be able to see on the left, then remembered to take this picture.

holiday jacket before
I started playing around with the proportions and pinned up the hem plus extracted those gigantic shoulder pads and it was looking better already. I removed both sleeves and reduced the top shoulder seam from zero at the neck to about 3/4 inch off the front and back at the outside. That is a big reduction! It was interesting to open up something I had made a while ago, I had done a lot of hand stitching plus taping the lapel and collar roll line. Check out that crease in the collar, and I will bet you will find that on the pattern pieces the roll line is marked. Thank you, Vogue patterns in 1990-something! And why don't you do that anymore??? The result was a lovely turn of the collar and a perfect fit around the neckline.

holiday jacket phase oneplaid jacket sleeve removed

Because I keep everything...well not everything but a lot of patterns, here is the pattern envelope. Which I found after a very short search (amazing, that I found it.  Why can't I find the lining which I just bought last week? chalk it up to the mystery of the fabric closet) And why it has a stamp from a bank is another mystery.

holiday jacket pattern envelope

To refashion this jacket I decided to "harvest" the fabric from the sleeves and add a peplum detail in the back, and then update the look with contrast sleeves. I am not entirely sure it is successful but I do like the back detail. I have that other jacket with the contrast sleeves which is one of my most popular makes, blogged here, so I thought it might work. The fabric for the sleeves is bengaline  - at least that is what the label said. Not a fabric I am familiar with. I cut the sleeves on the cross-grain as the stretch is vertical on that fabric, not horizontal (selvedge to selvedge) as is typical. 

Holiday jacket frontholiday jacket back 1

To tell the truth it was a bit tight across the hips, so the gathered detail is a trendy way to make a bit more room over the backside. Sneaky huh? Also I like the look of bias plaid and then I didn't have to match that section to the side seams.

A look at the insides, I had used armo-weft fusible on the front, knit fusible around the welt pocket and on the upper lapel. I reused the sleeve heads in the new sleeves. The lining was completely removed to do these changes so it was certainly fun to have a fully complete lining to pick up and sew back in, with a slight adjustment in the center back to accomodate the gathered section.

plaid jacket inside plaid jacket lining

Since it is now December I figured it was time to start wearing this jacket which will have a very short shelf life (and I went to a holiday lunch today). So here it is, a side view so you can see the back detail.

And what is that in my hand? A tulip bulb, which I found right there on the retaining wall. Just recently planted by me and then dug up by the evil masterminds also known as squirrels. My nemesis. Nemeses? because they run around in a pack. Curse you, squirrels. Why am I smiling? because I have devised a plan to thwart them, to be revealed...

Plaid jacket on me2

Happy Holiday sewing, Beth

P.S. If the title of this blog post is confusing to any readers, perhaps those outside of the US, I will direct you to this Wikipedia entry which explains the origin of the phrase "Yes, Virginia, there is a Santa Claus" and then hope you will excuse me for twisting that sentence into a blog post title.

Friday, November 1, 2013

Struck with a passion for refashion and I need some suggestions

Merci beaucoup for all the great comments on my faux french jacket. I wore it today when took a shopping trip over to Stone Mountain in hopes of finding something to make a top but didn't see anything that grabbed me. I am about to start on a similar jacket for a sewing client using the same pattern but the look will be very different, more on that soon.

Recently I got together with my neighborhood friends for a clothing swap. Great way to clean out the closet of some no longer worn items and maybe get something new. Of course I intended to come away with nothing but more space in my closet but instead I got 3 pairs of pants, including some black jeans. Yeah! No shopping or trying on in stores, just a fun get together (drinks involved and lots of encouragement). In preparation for swapping I did a closet clean out and came across some items that I never wear but seem like they might be good candidates for some refashioning. So I am looking for suggestions, please chime in.
First up is this suit I made about 9 years ago, pattern date is 2004. Dates back to my former life of tedious meetings negotiating with ambitious people all trying to outsmart each other. Yikes, could it be any more serious?
Business executive nun?  Tweedy schoolmarm or librarian? (no offense to any of these lovely vocations). What was I thinking? Although I didn't run around with the jacket all buttoned up like that of course. Wore it with a silk top, nice heels etc. I don't like black but this fabric tempted me to try it.

black white suit
                                        black white suit skirtBlack white suit jacket
Separately the pieces have potential. I played around with the skirt and I think that changed into a pencil skirt instead of the A-line I would wear it this winter. It even has a hidden inside pocket at the waist for my mad money and business cards. Prepared, just like a boy scout! Looking at the technical drawing I can see why this jacket fits so well, it avoids the issue I often have of too wide across the top with the front shoulder and back neckline darts. Also I see that I used a size 10 instead of a 12 so I am definitely going to try that on my next Vogue and save some narrow shoulder alteration. A very nice shape I might revisit. It's the little puny collar that bugs me.  What about lopping that off and changing it to a V-neckline? or some other kind of collar.  Ideas welcome.

bl-wh jacket closeup
            V7947 pattern envV7947 tech drawing

Item # 2:  faux fur coat in deep emerald green.  Yes this one is a bit wacky but I have worn it enough to justify making this - maybe 17 years ago?  OK, now you can see that I keep almost everything I make (at least in the coat or jacket category, I do let go some dresses/skirts etc that are past their prime)

green faux fur front

It is a very nice quality of faux fur, despite the color, which actually looks near black at night. The big shawl collar is so cosy. Just imagine wearing for a long car ride home from a party on a late winter night - like having a blanket to snuggle into. Having other coats now I never wear this but hate to part with it. What about a long tunic type vest, maybe with a soft black leather belt for a closure?  Suggestions please!

Item # 3:  men's cashmere overcoat. This one is quite a find. My sister called me one Saturday morning, she was at the local thrift store which was having a 50% off everything sale. She is quite the one for finding expensive handbags among the array of worn out vinyl or cloth bags. So she said, do you want a men's cashmere coat for $ 20? Her words were "I think you can make something with this...maybe for me"  After my initial confusion as to what it was I said yes, absolutely, buy it! I figured it would be in a sorry state but this is what brought home. It seems to have been never worn, or so we thought until we found $ 5 and change in the pockets. But believe me I have lived here all my life and do not know any men who wear overcoats  - it is just not cold enough for that here. The label is Dillards which I believe is in Texas? or somewhere back east. It is labeled 100% cashmere and very luscious. There are few seams which means lots of fabric but do I dare cut it up?  So I am very much wanting to refashion it into some type of jacket for my sister but still giving it thought and welcome yours.

Black cashmere coat front
Those are my potential refashion projects, the second and third are quite daunting and would take a lot of commitment.  If you have any ideas or style suggestions please leave a comment and let me know your thoughts.

Happy weekend sewing and enjoy the extra hour of sleep,  Beth

Wednesday, November 14, 2012

Coat Refashion part 2: making the skirt

If you have been reading this blog then you know that bright blue is one of my favorite colors so the idea to take a favorite wool coat and refashion into some new pieces was very appealing. Originally made with a Burda pattern, my wool boucle coat was well worn in its early years but had dropped out of the regular wardrobe rotation long ago, probably due to the linebacker style shoulder pads and just being displaced by something more recent.  Not to mention that I don't exactly live in an artic zone - so coat wearing days are not that frequent.
As mentioned in the previous post, doing a bit of analysis on the coat showed that it had more than enough fabric to make a skirt and with some judicious pattern piece placement (say that three times fast) I could squeeze out part of a jacket too. This skirt became all about the pockets since they were pre-made.  Didn't notice when I took this photo but it is not quite straight on center, but you can better see the pocket welts which are on both side front sections. Pattern is Simplicity 2152. This version has a center front seam because I could not find a wide piece to use for the center panel, so I cut that on the center back seam.  Call it a design detail.

Skirt 2 showing pocket and seaming
To review, here is what I started with, front and back of this coat. Lots of fabric there. I did find one little hole up by the neck, drat those moths, but I repaired it with some fusible on the wrong side of the fabric. 

         Blue swing coat original lookBlue coat back view
This weird looking image is the coat laid out on the floor after the sleeves had been removed. Which I did using the razor blade method. Very fast and perfect for this fuzzy fabric. I have only seen one other sewing blogger use this method, the very talented Bunny of La Sewista.  I would say practice and chose your battles carefully if you want to go that route. I wield a straight blade like you use in a wallpaper scraper.
Blue coat with sleeves removed
The inside of the skirt once it is assembled, featuring those pre-made pockets.
Skirt from coat inside the pockets
Skirt side view, plus the reused coat lining. Strange fading on that lining fabric, it almost looked dyed that way but it was just how it was after being stashed away for a long while.  Looks like I need to finish stitching it down along the zip. Which is a navy invisible zip - because that's what I had in the zipper box.  A no new notions garment! With the fuzzy boucle it really does disappear. You can see the waist facing is blue cotton, I like the waistband area to be cotton so it doesn't twirl around as you wear it. 
                 Skirt inside with reused coat liningSkirt side view
Shown on the left, I used portions of the sleeves to make the skirt waist band pieces. The remaining sleeve fabric went to make the side panels for the Style Art jacket . . .more on that to follow. When I have a waistband or facing and I want to cut it out not using a fold I just make a tracing and tape it to the original piece as I have done here. Very handy if you are a fabric miser like I am and trying to use less than the suggested fabric requirement - which I generally treat as only a suggestion.

Blue coat sleeve used for skirt waistbandSkirt back view
One last step is the hem. I did put the bottom of the skirt at the jacket hem in case there was a mark or line which actually disappeared with some steaming (thank you nice quality wool fabric!) but I left the original interfacing from the coat hem there to give the skirt hem some shaping and softness. I just saw a comment from Trena (The Slapdash Sewist) on my grey jacket sleeve hemming post and she asked if there were any problems pulling out the tracing thread once the fusible is ironed on. That is more an issue with tailors tacks - those pesky threads can be stubborn to pull out but these thread traces on hems are very light, mostly on the right side of the garment and I just yank them out. If it lifts up the fusible a bit when it gets pressed again the glue remelts and it seems fine. I cut a bias strip from some remaining lining and put a binding on the hem, kind of a thick one but I wanted as little as possible of that potentially itchy fabric getting near me. The white is the fusible armo weft that was on the original coat hem.
Skirt hemSkirt hem finished
I am really happy with my new blue skirt, call me crazy but this afternoon I bought some blue tights to go with.  Will try to take some photos tomorrow.

Perhaps it is time for a little moratoriam on blue in my wardrobe?  I do have some really weird blue multi-color sweater knit fabric I found at where else - the thrift store which is a perfect match but no rush on that.  How about magenta? I have a small piece of wool and plan to remake the most wearable skirt in the world (Vogue 1247).

Now that I have finished this skirt I see refashioning possibilities everywhere, no old coat or dress is safe so I may be revisiting some more of my long abandoned coats, who knows?

Happy refashioning, Beth


Tuesday, November 13, 2012

Coat Refashion: preserving the pockets

For at least a year I have been looking at a well-loved coat in my closet that I no longer wear, trying to decide if I should keep or donate. For some reason I couldn't part with it, the color is so nice and it seemed wrong to divest myself of a well-fitting coat.  A few interesting articles about waste in the garment industry and no-scrap cutting plus the push of a contest on Pattern Review gave me just the motivation needed to take scissors to this blue boucle.

So this swing coat became a skirt and one half of a jacket. A skirt with pre-made welt pockets!  If only all welt pockets were this way, ha ha, that would speed up construction considerably. Half a jacket because that was all I could squeeze out of the original coat, so I used some wool plaid in a complementary color I had, which I bought - where else - at an estate sale.  

Blue swing coat original look
Skirt made from blue coat

Jacket plus skirt

This little jacket is a Style Arc pattern, the Audrey Jacket. The most recent issue of Threads magazine has an article about mixed materials so it was timely to use the plaid on the jacket although I am not sure it is entirely successful. The skirt is Simplicity 2152 which I previously made here. It is a great skirt pattern, quite easy to fit on the fly and I added a center front seam in order to cut it out from the coat.
Do you want details?  I think you do based on the great comments on my previous posts about the grey Vogue 1143 jacket, comments which I appreciate very much.  Often I see tutorials and think that the info is already available in sewing books but what I have come to realize is that blogs are like example problems in a math class.  You may know the drill but it is really helpful to see a technique applied in multiple ways.  Or am I overthinking it?  Let me know.  In any case, I took photos of this process so here you are, a look at the "vintage" inside and outside of this coat. 
The pattern (Burda - maybe one of the few Burdas I have ever made) had a stand collar and a clever and easy to make hidden buttonhole placket, one of those details I really like. Here you can see the lining, it used to be the matching blue but has faded to a streaky watercolor-ish lilac now.  


Blue coat hidden buttonhole closureBlue coat inside front

And that very re-usable welt pocket.  That was definitely going to make an appearance on the skirt and it was actually easier to incorporate it than to try and cut around it.  Here is the pattern envelope, which is long gone from my files but I found this image on the Vintage Patterns Wiki after searching on Etsy for Burda swing coat pattern. I am constantly amazed at what I find on Etsy with simple searches.  

IMG_0193Blue coat welt pocket


I am crazy about this new skirt, perfect for winter but I am still on the fence about the jacket. As designed the collar is a bit high so I have not put in the buttonholes, still thinking about reducing the height of it. Also I don't really plan to wear them together, might be a bit too much.
Next post: some details on construction for the skirt and the jacket plus a better look at my lovely pre-made pockets :)  Can you tell how excited I was to reuse those pockets? 
Happy sewing, Beth

Monday, September 3, 2012

One Hit Wonder # 3, Refashioned and wearable

Time to revisit my sometime series of One-Hit Wonders, which are dresses I worked hard to make for a special occasion, wore one time and then put in the closet, never to be worn again.  In this instance I knew I loved this fabric too much for it to be shut away. Consequently I did some refashioning and now am more than happy with the result.

Pink green dress

A double treat to wear my "new" dress, for my birthday dinner, on vacation.  I originally made this dress in July of 2010, to wear to a wedding. (that seems to be a pattern for my one-hit wonders,  see the previous ones here and here.)  I think I have mentioned that when Karen was in California sewing with me she was wowed by my collection of super-bright floral dresses. Being a fan of the colorful and floral, she urged me to revisit them and this one had the most possibilities for refashioning.  Actually the refashioning is pretty subtle, but makes it so much more wearable, or at least suitcase packable!

The original dress has the same bodice, but I took off the skirt and cut it down considerably. The skirt on the first version was 120 inches in circumference, with 1 inch pleats at the waist. Very heavy in this cotton sateen. At the time I was going for a retro early 60's technicolor movie style, and it was OK, but a bit too much in retrospect. Removing the skirt I changed it to a much narrower straight skirt, slightly gathered at the waist. It may be difficult to see, but I left the center front of the skirt flat, and then started the gathers near bodice princess seam. I like this look on a dress which makes a gathered skirt look a bit sleeker. I cut the pockets off the first version and restitched them into the new side seams on this, total recycling for this project :)

Pinkgreen front view original pink green dress on form

Lastly, this dress seemed to need a belt so I used one of my belt kits (purchased from A Fashionable Stitch, so glad she has these as I used to find them all the time locally but now they are very scarce). On the left is the fabric covered buckle, half finished so you can see how it looks once you get the fabric stuck on. These are really easy to make, if you have never tried one give it a go. I suggest a very thin fabric (cotton or something similar) for a first try.  On the right is my Singer buttonhole maker which I use to make the eyelets. The smallest template makes a 1/4 inch buttonhole. OK, it is not circular, but it is fine with me and very sturdy.

pink belt bucklepink green belt buttonhole

Not having made one in ages, I made a slight boo-boo on the the little tongue-y thing which is sticking out a smidge too long, but after a few minutes with the pliers and not wanting to snap it off I decided it was just fine.  When I make belts I put the little loop on the buckle side of the belt, stitched in place as the end of the belt always wants to stick out and this makes it look more finished.

pink green dress belt

To see how full the skirt is on the first versionand all my other one-hit wonders see this set.  I used New Look 6457 for the bodice, and here is a previous blog post featuring this same pattern. 

No actual sewing for me for a while, but I was busy in July and August so I have a few blog posts coming up on completed projects, including a few knits (starting to see the possibilities - and instant gratification sewing with knits provides).

The grand finale to my one-hit wonders is coming up soon and you don't want to miss that. Floral, tulle, piping, shoulder pads. . . and you are asking why I don't wear it more often? ha ha. Wait and see!

Summer is not really over but it kind of seems like it on this weekend.  Time for thinking about winter projects?   Say it isn't so, at least not here in the 50th state :) 

Happy Labor day and/or unofficial end of summer sewing to all,  Beth