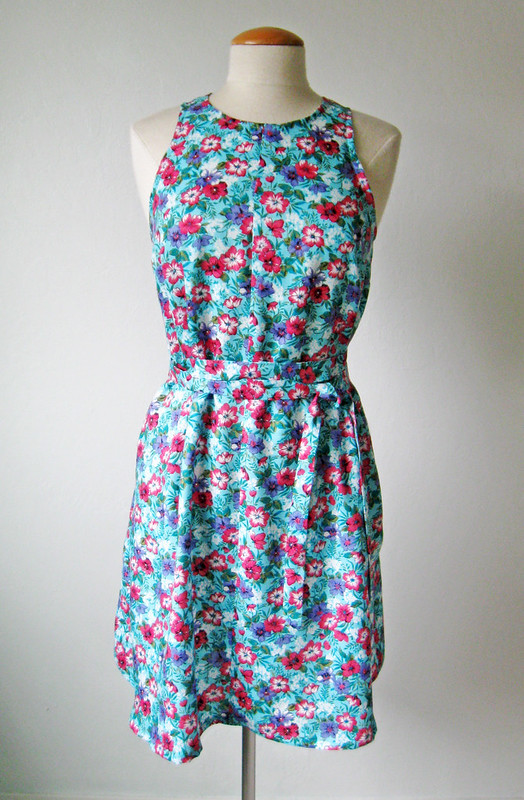
Showing posts with label Hello Stitch Studio. Show all posts

Tuesday, October 15, 2019

Meeting up with international sewing friends and some upcoming class updates

All summer long I was looking forward to my relaxing vacation and one day I received a message from Yoshimi who is a long time sewing friend that I actually had never met in person. She said she and Carolyn were coming to San Francisco and New York so we could all meet up. For a split second I had the thought that they would be here when I was away, but fortunately they arrived the day I returned! Does that ever happen to you? A few weeks go by with nothing much happening and then everything at once and you have to make choices, which never fails to mean that you miss something fun. But this worked out and I was able to get together with them a couple of times while they were here.
Interestingly they were two of the first people whose blogs I started reading ages ago and I'm in awe of both their talents - they both are sewing wizards as well as fantastic knitters, a skill I admire all the more because I can't seem to learn it.
First up we met over at Stone Mountain in Berkeley for some shopping. They were staying in SF near Shams who had met Yoshimi previously when she traveled in Japan They arrived before me and it was so surreal to walk around a stack of fabric and see Carolyn looking at the linens.
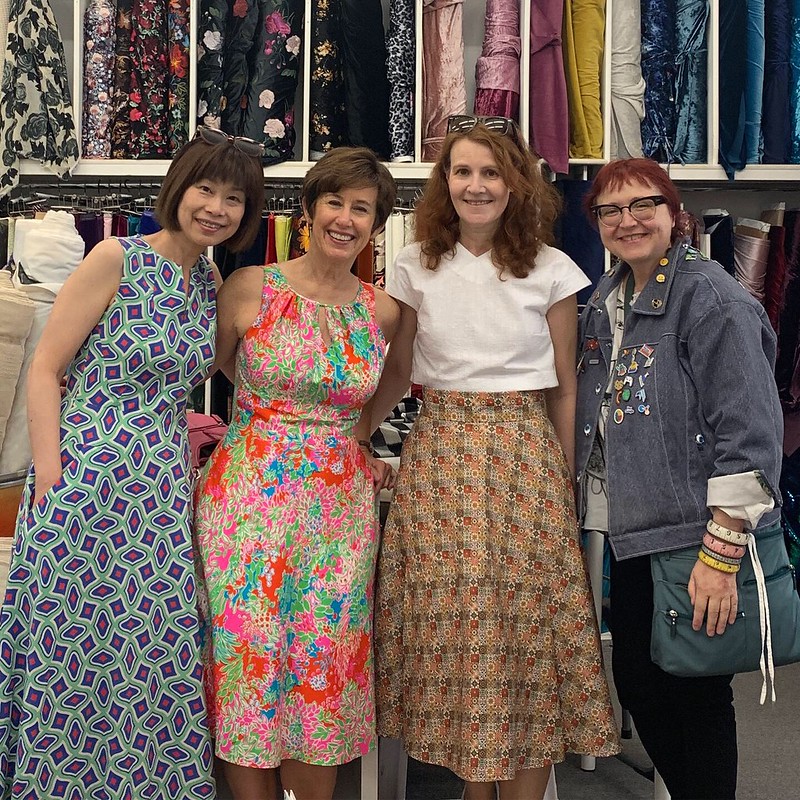
intl sewing meetup

We're all wearing our handmade wardrobes - Yoshimi and Carolyn's are Vogue patterns and my dress is a old Butterick pattern that I always think I should make again, and the silk twill fabric I bought at Stone Mountain so it seemed fitting to wear it :)
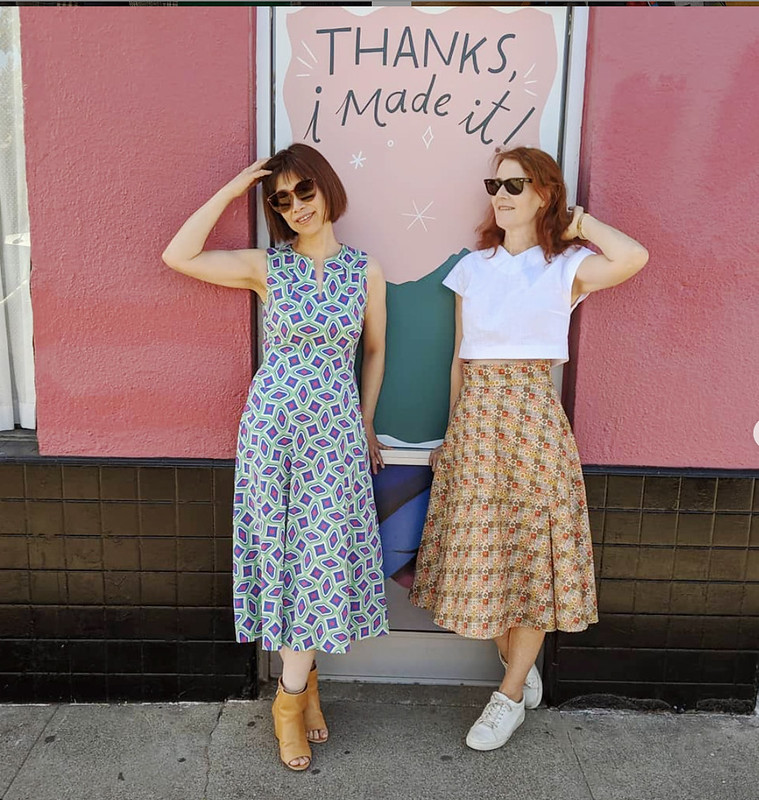
C and Y at shop

They are both so delightful and it was a thrill to meet and talk. It was great to see Shams again as it's been quite a while since I've seen here also. As we were leaving the store I remembered the photo spot which they found very useful. And I will include this one to show that striking the right pose is not easy and Carolyn is doing the "gaze thoughtfully into the distance which showing your outfit to best advantage" while I am looking like I fear a bird may drop something on my dress 😉.

B and C at shop

That was Sunday, on Monday they had perfect weather in SF and saw a lot of the city, renting bikes (intrepid with all the hills!) riding across the Golden Gate Bridge and doing all the stuff that I never do unless I have out of town visitors.
On Tuesday evening I met them in the city for dinner and unfortunately Shams wasn't feeling well so she could make it, but Yoshimi, Carolyn and I had a lovely dinner together and as Carolyn said we never run out of things to talk about. I'm already thinking I need to get my 2020 travel plans organized and take a trip to someplace that's not a tropical beach.

One last thing - which is the cutest sewing item I've ever seen. Yoshimi gave me this present which looks like a lipstick but is a tiny pincushion. I think if I ever go to Japan I will need an empty suitcase!
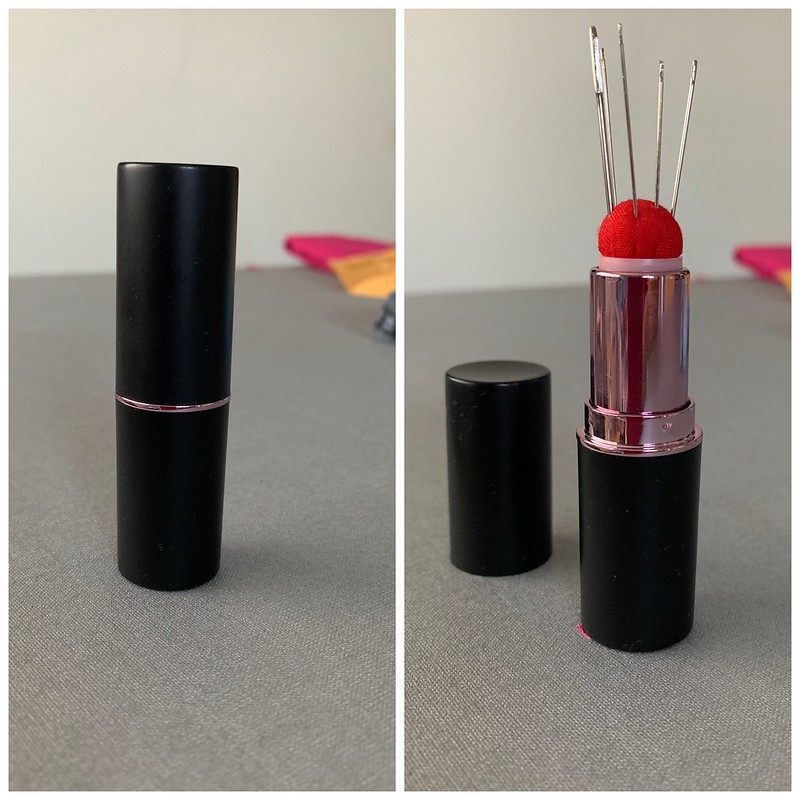
Pincushion mini

~~~~~~~~~~~~~~~~~~~
Now for an entirely different topic - we have lots of great classes coming up at Hello Stitch. 

If you are interested in any classes I suggest you register as soon as you decide, since a lot of the classes are selling out very quickly. Particularly our Learn to Sew Series - I'm thrilled at the reception that class has received and also to see so many people from that class continue with others.

Here's what's coming up, not in calendar order but I've grouped them by type of garment.

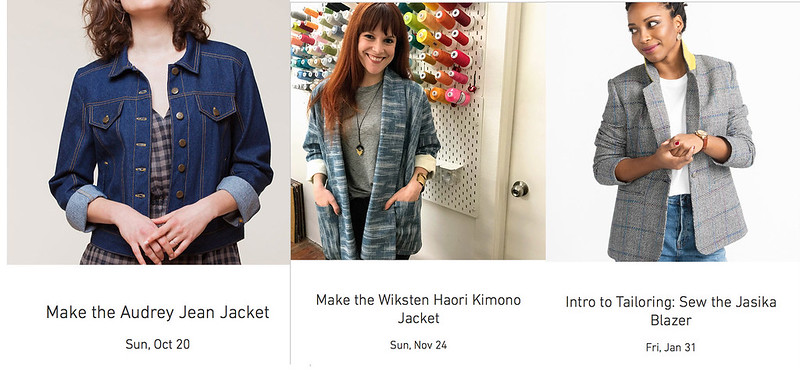
The Jeans Jacket class starts this Sunday, it's a two session class so plenty of time to get it completed. And you can make any jeans jacket pattern you would like. I think there are 2 spots remaining.
The Wiksten Haori jacket class is really popular and such a good item to make after the Learn to Sew class. It might be sold out as I write this but you can check.
Jacket classes photo montage

And my favorite - I'm doing another Intro to Tailoring Weekend Workshop Class. This one is in January so you have plenty of time to find the perfect fabric. We just held this class in September and it was so much fun, plus the jackets everyone made are gorgeous.   Let's just say the weather wasn't exactly wool jacket or steam pressing weather but it was great fun anyway. Though I am looking forward to the January weather version. You are welcome to make any blazer jacket pattern.

Jacket class

~~~~~~~~~~~
Learn to Sew Class

learn to sew composite

The interest in this class has really surprised me in a good way - we're onto our fifth (?) session of this class in just the last 6 months and it's great to meet so many people who are interested in starting to sew. Note this is a 3 week class, and there are two sessions scheduled. Morning and afternoon.

Fitting Classes: in November we have pattern fitting, the workshop part of the class (morning) still has some spots open. In this class everyone works with half size templates and you learn to do the most common alterations, plus how to measure yourself and the pattern. In the spring we have an Adjust the Bust class, specifically for adjusting bust and other bodice fit questions.

Fitting classes compositie

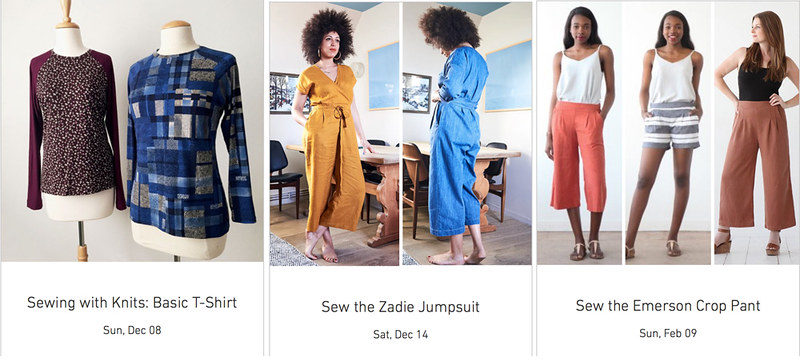
More Garment sewing, of specific patterns.  Knit T-shirt,  the Zadie Jumpsuit (make a holiday party version!) and the Emerson pants (this pattern is ideal as a first pants project).
separates composite

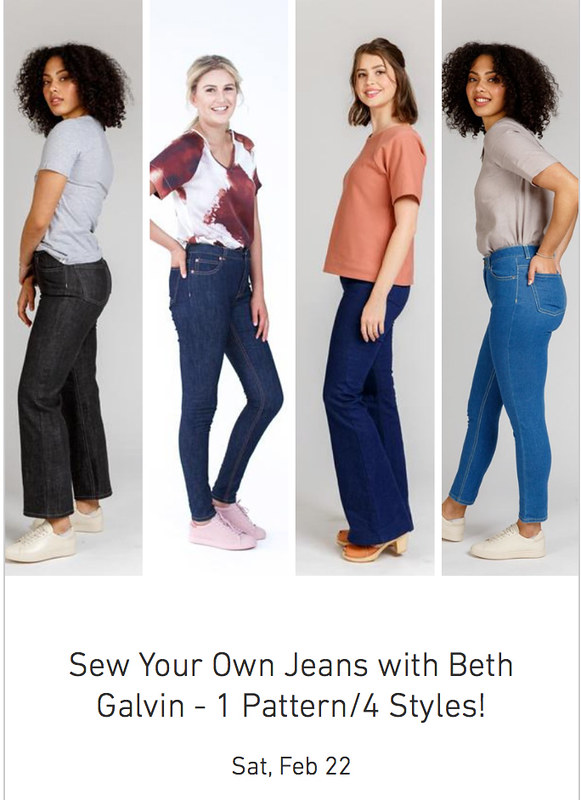
And of course, Jeans! You can use any jeans pattern, but I must say I love this pattern, and am about to sew up my 4th pair.
jeans class pic

So that's the latest on classes for the rest of 2019 and a bit of 2020. I had better look carefully at my schedule so I can fit in some travel time, there are so many sewists to meet!

Up next, I have just finished a dress from the Burda April 2019 issue - the issue that keeps on giving! and the aforementioned jeans, plus I have some lovely silk and need to decide on a shirt pattern for that.

Happy Sewing and I hope to see you in a class at Hello Stitch or a sewing meet up someday!
Beth

Today's garden photo, a dahlia that forgot I planted in the front, which despite a poor location and not much water put out some lovely sunshiny blooms.

Untitled

Thursday, June 20, 2019

Deer and Doe Myosotis dress and True Bias Emerson Crop Pants: sewing examples for classes

When we create sewing classes at Hello Stitch Studio where I teach, we've found that choosing a specific pattern and designing a class around that works out better than general sewing classes. I think because people who are new to sewing can visualize the finished item (plus probably have seen many nice versions on line). Those who are more experienced might decide to try a new style, and every one gets the encouragement and camaraderie of sewing together.

In so many classes I ask people how they know one another and come to find out they just met there in the class - while I thought they were already friends! Some even decide to take another class together which is really nice. I think everyone bonds over sewing successes and failures and there just aren't that many opportunities in everyday life to talk sewing. I mean really, do your office mates want to hear about your latest pattern haul? Well maybe - I don't know what your office is like :) but if anything like my previous corporate life there were always a few comments about stuff I made but nobody wanted to hear about fabric shopping bargains.

The latest two patterns that we've selected for summer classes are ones that fit into a summer wardrobe but I think can be useful all year round. I always sew at least one version of the pattern prior to my classes, just to compare to the instructions and check for any tricky bits.

By the way - be sure to scroll down to the 2nd outfit as it is a bit of departure for me, style-wise and I think I love it!

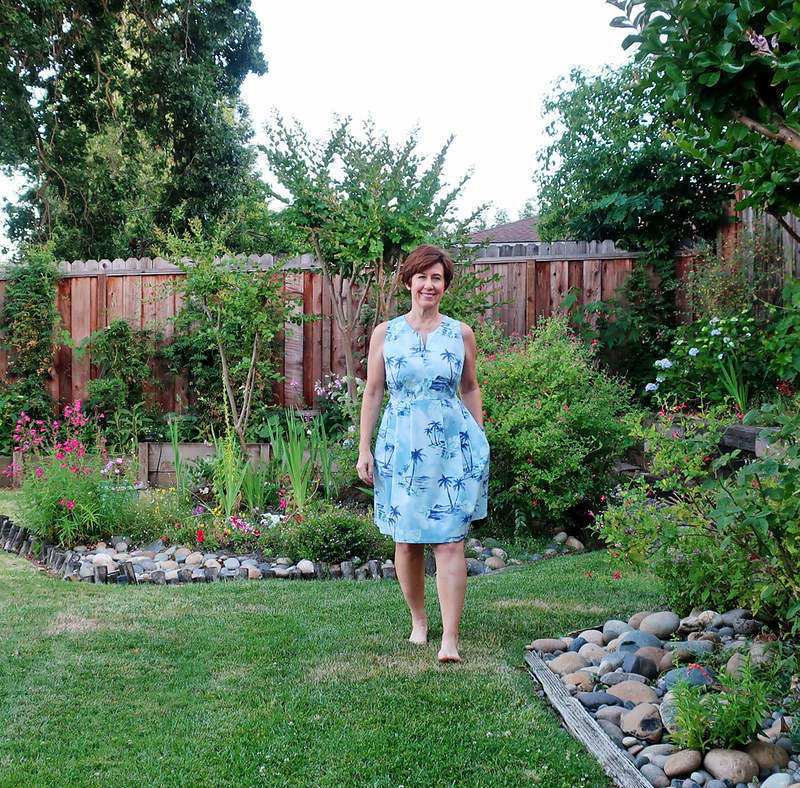
Myosotis dress 3

The Deer and Doe Myosotis Dress is the first Deer and Doe pattern that I've made, although around here I've seen plenty of great versions of the Magnolia dress and if I were a maxi dress wear I might consider it (but I'm not!)
The class at Hello Stitch is on Sunday July 14 and I think there are 3 spots still available.

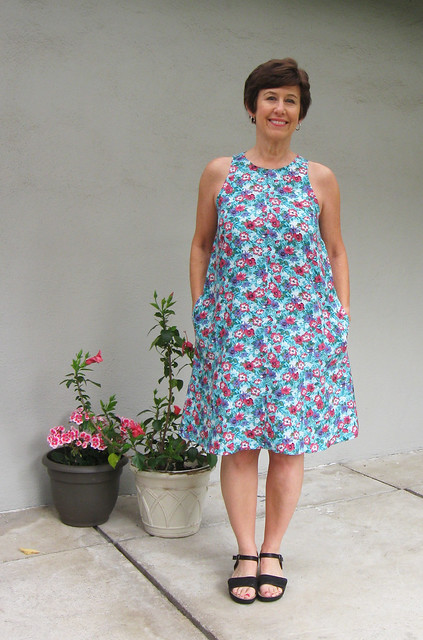
The reason I chose this pattern is that I think it is IDEAL for pattern hacking. A nice basic pattern that you can change up and use in a lot of different ways. As you can see from my summertime version below.

My changes: Sleeveless, slightly cut-in armhole, no neckband, in fact I opened the neckline about 1 inch all around. Oh yeah, and pleats in the skirt instead of gathers. Also a tie at the back waist for more shaping. Facing for neckline and button front, bias binding for armholes.

What else could I do with this pattern? Here are some more ideas:
-Make it long sleeved, with perhaps a ruffle at the sleeve hem or a standard button placket and cuff.
-Add a shirt collar to the collar stand
-Drop the seam to the true waist by adding length in the bodice front and back.
-Continue the button placket down the front of the skirt to make it a true shirtdress
-Use a contrast fabric for the upper and lower half.
-Play with stripes by adding trim or a hem band
-Reduce the width of the skirt for a different silhouette

IMG_0663

Closer look at the pattern and the adjusted neckline.

IMG_0664

Closer look at the fabric and the skirt pleats.  This might be the oldest fabric in my stash that I can recall buying, at Stone Mountain of course:) and it was in the 50% off cotton section, which is mostly quilting cottons. This happens to be a Robert Kaufman fabric, with a slightly brushed/sateen surface but not stiff. I think I've had it for maybe 10 years and not sure what possessed me to use it for this but now I think it will be my summer beach cover up dress.

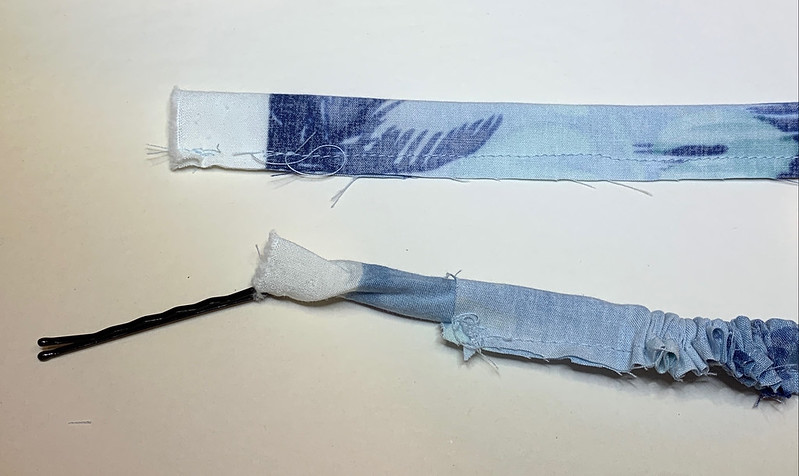
The only slight sewing detail is this - hairpins are perfect for turning smallish tube of fabric.

IMG_0658

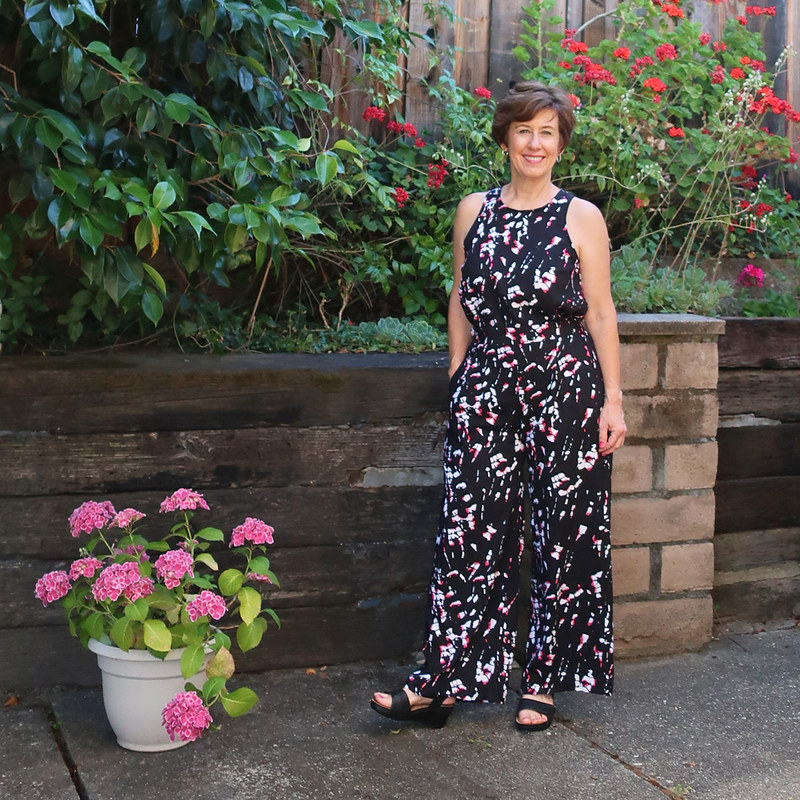
Up next: the Emerson Crop Pants from True Bias. Or in my case the not cropped pants, i.e. the full length pants and a matching top to fool you into thinking it's a jumpsuit.


Emerson outfit3

Do these qualify as wacky pants? Somehow I think so. I was given this fabric with a few other pieces by the owners of Hello Stitch as they were remainders from a fabric swap day they had last month. OK, it's a little wild but it does have pink in it and also is a very lovely weight of rayon that is perfect for both these pants and the top. Plus I have enough remaining to make a skirt so versatile, right?

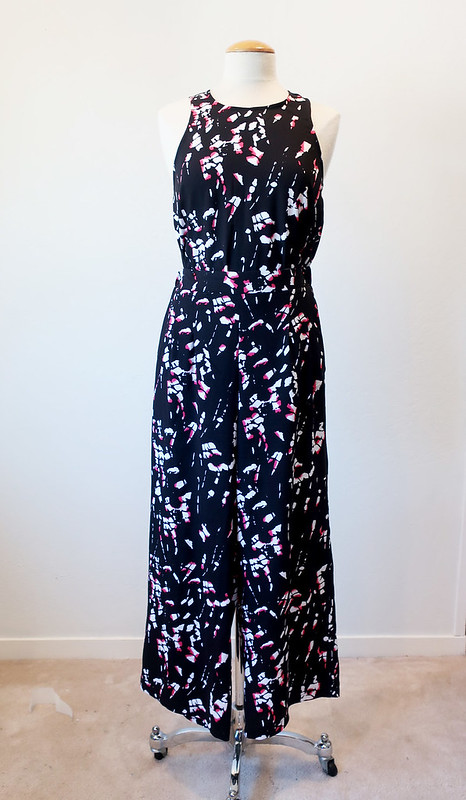
I lightened this photo a bit but it's still hard to see the details on the pants, which are probably well known by now, they have deep slant pockets, a flat front, two small pleats in front and then a wide elastic gathered back.

Emerson outfit on form


Black print bondi top front and back on form

The top is my favorite Bondi dress pattern as a top. Here's my first version of the dress, and here's the version in silk crepe I made as a top.  Gosh I wear that top a lot, so it was an easy choice to use it again for this outfit.

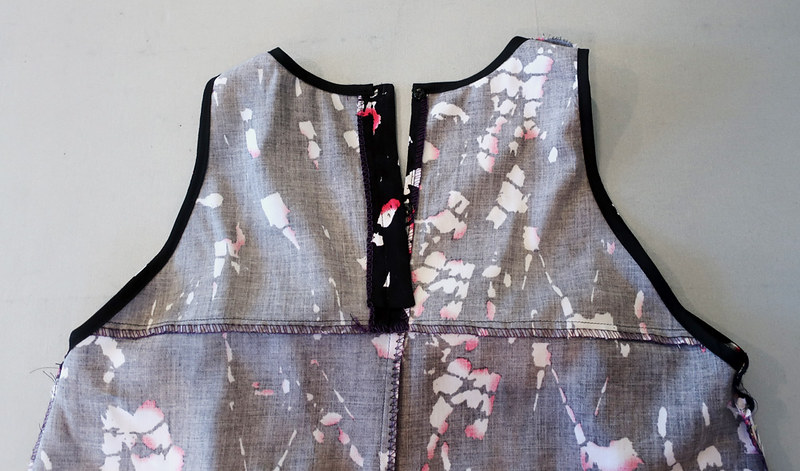
Sewing details, I don't like how the Bondi top has a loop and button closure in the back, as sewing a loop is a pain (although I have used tiny elastic which works a treat) but I decided to add a small ? placket, where I could sew a couple of snaps for closing. Also if wearing a racer back bra it keeps the center back from opening.

Bondi print top inside view

I finished the edges with bias binding I made from some black cotton voile in my stash. I can't stand to use purchased bias tape, I think it's way too stiff for most garments, and bias in self fabric or a lightweight voile, ambiance lining or silk works really well.

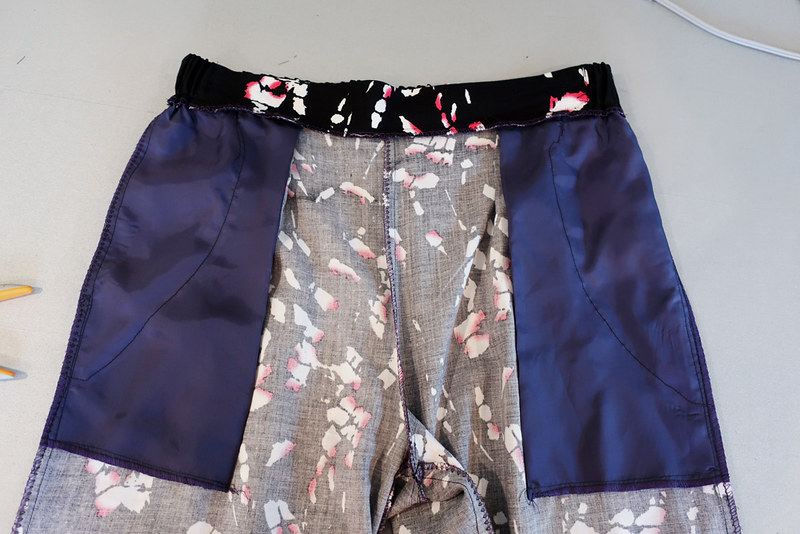
Emerson print pants inside pockets

Since I was being stingy with the fabric so I could make a skirt, I used a remnant of ambiance lining for the pockets, and sewed on the outer fabric over that where it would show on the slant pocket.


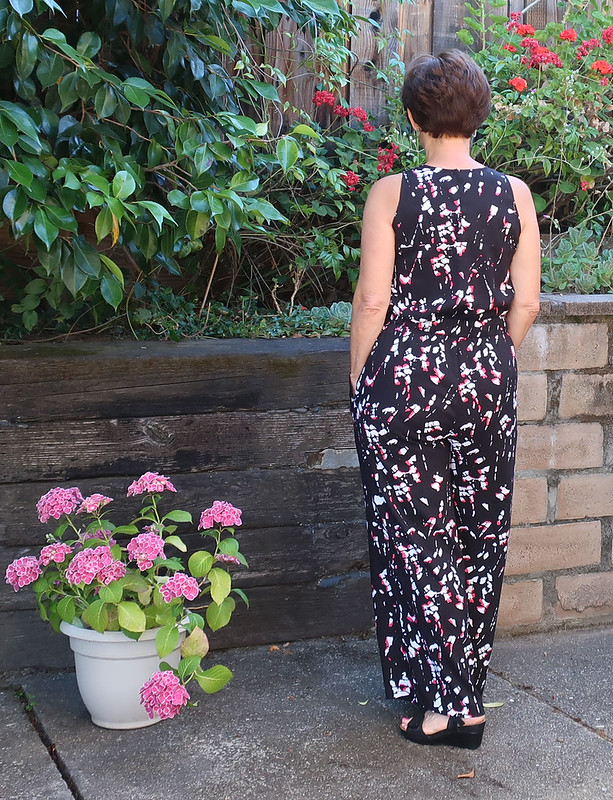
Emerson outfit back view

I chose the Emerson pattern size by my hip measurements and they fit perfectly. I made the high rise version ( or the regular rise, perhaps the other option is called the mid-rise). And I lengthened by about 5 inches and then had about 2 inches of hem to play with.

So that's the latest on my sewing for upcoming Hello Stitch classes. Soon I'm going to make a Zadie jumpsuit for myself, the class on August 3 is sold out, so we've added another one on Sept 22.

You can read more details and register for the classes here at Hello Stitch Studio which is in Berkeley.
Next up I will be starting on a Closet Case Files Jasika Blazer jacket - the class is in Sept and I think there are just 2 spots remaining in that one. (Note if you have some other jacket pattern you prefer to make that is OK with me).

And then some sewing for my Mom as she has a birthday party coming up and I found a great fabric to make her a new top, plus the June Burda arrived (Yay!!!) so I'm sure I will find something in that.

Emerson outfit4

Happy Summer sewing, Beth

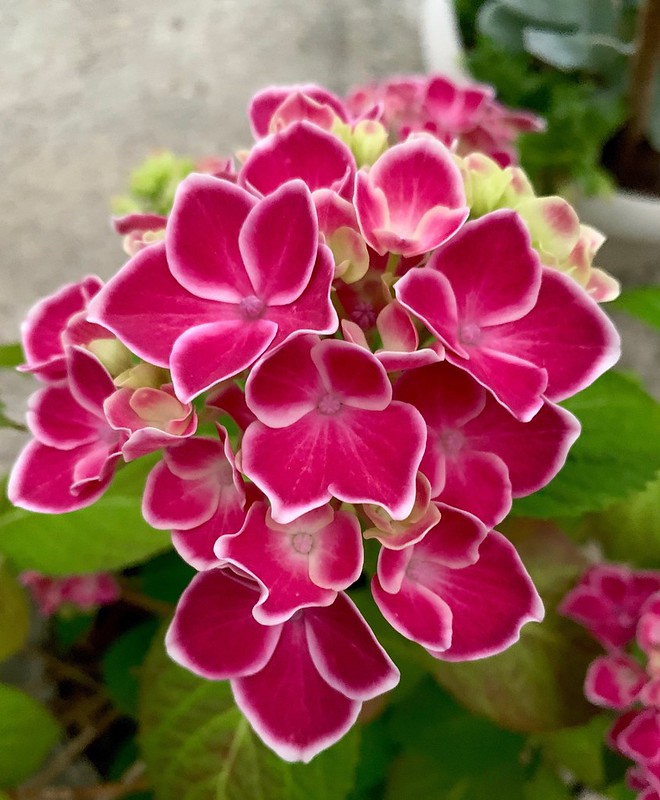
Today's garden photo - the same hydrangea that is shown above in the white pot. It looked a little scraggly all winter and I never dreamed it would come out with all these blooms. Another Trader Joe's plant that I couldn't resist. Plus it's kept its color and is blooming in the same pink color as when I first brought it home. A winner!
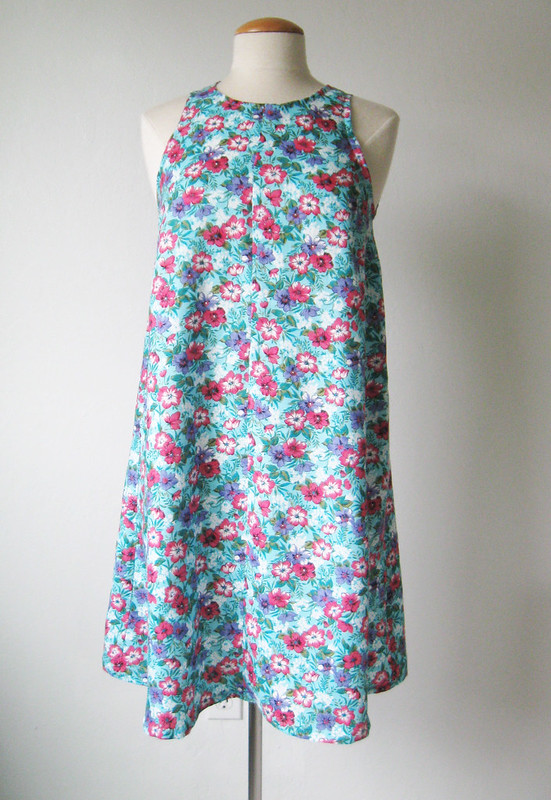
IMG_0651

Thursday, August 9, 2018

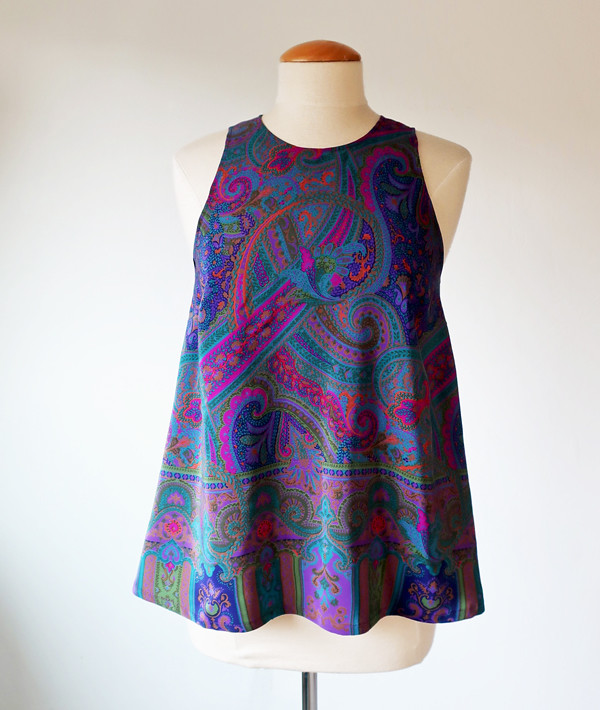
More mileage: Bondi Dress Pattern as a top in silk crepe

One of my favorite things in sewing is to find ways to get more mileage out of one pattern. Once I made the Bondi dress from Tessuti patterns I knew it would make a great top. It's ideal for any silk or a floaty rayon. Really for any lightweight fabric, and I predict a color block version in my future (as half the work is done already due to the back design).

Second only to getting more mileage out of a pattern has to be using fabric remnants to make another item. I just don't mean using the scraps for pocket lining, or testing, but sewing another garment in the same fabric from the remainder of the first project. Of course it helps if you bought a great big piece of fabric and in this case I had about 5/8 of a yard plus another sizable bit to work with. So now I have two tops out of this fabric that I absolutely love. And I was able to use the border print, so that was another level of sewing happiness...

If you want a Bondi dress or top of your own - our last Bondi Dress class of the summer is this upcoming Sunday 8/12, at Hello Stitch Studio in Berkeley. Here's the link. Note that the pattern comes with the class plus we have all the sizes sewn up in the studio so you can try on the samples and determine just which size to make. Then you trace off your pattern size (with everything you need supplied) and it's on to sewing!  If you do plan to take the class sign up asap as sometimes we have more people that want to take a class but on a different day so we reschedule if that day turns out to work for more people. If that makes sense. Anyway if you want to do this Sunday class please register by Friday.


Bondi silk top on form

and here I am near the end of my class last weekend, which was our Wrap Dress class. Everyone made super cute dresses including a couple of versions of the Eve dress from Sew Over It (my version shown here).
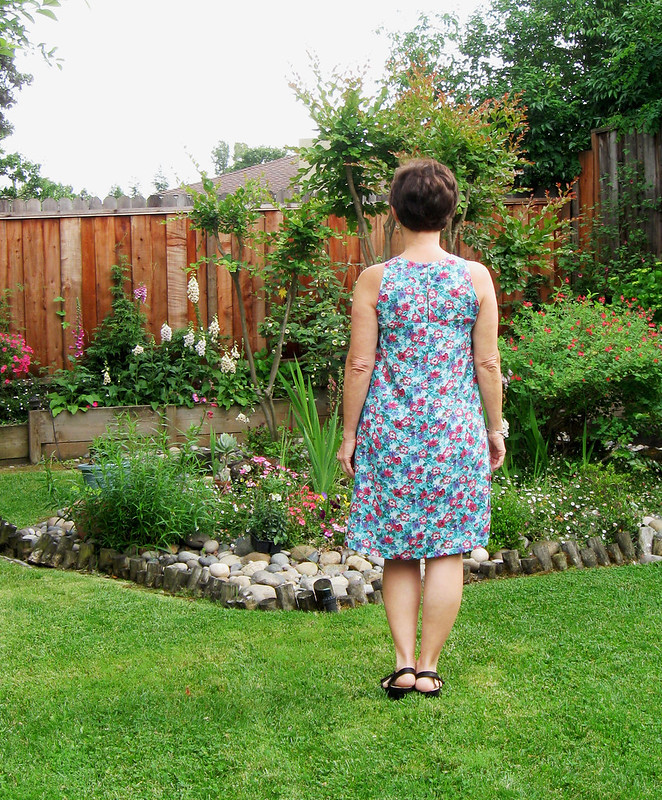
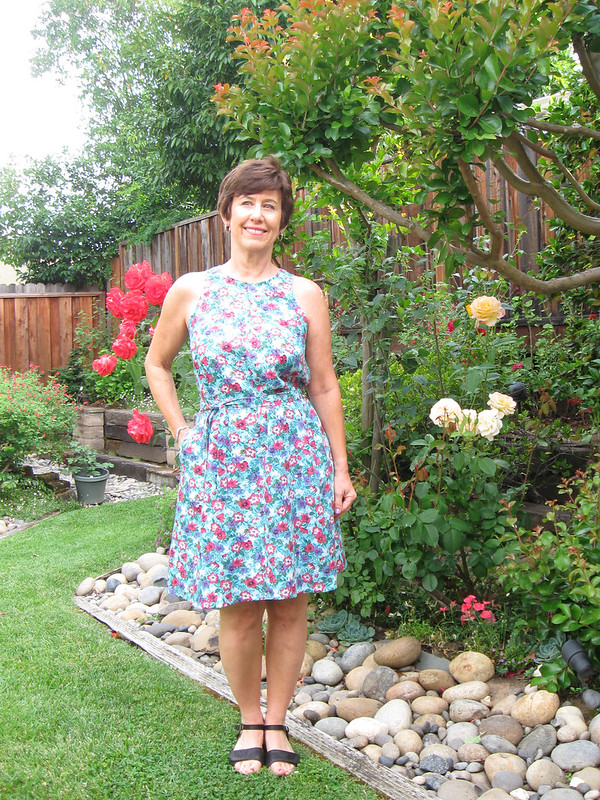
Bondi top 2

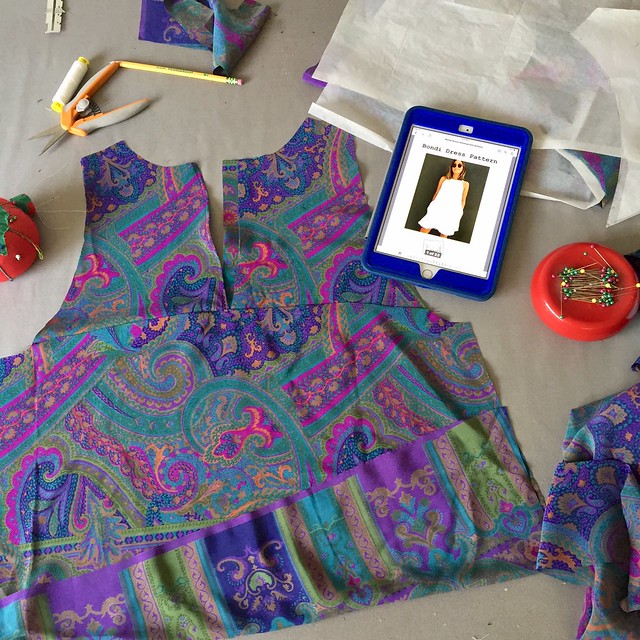
Sewing details: I played around with the length on this top, I think it needs to be long enough to keep the flowy shape and I'm not a fan of a crop top on me, although they look cute on some people. But too long and it looks like a dress that shrank, right?  So I held up the paper pattern piece and took a gamble. Because I wanted to use the border edge, which is printed along the selvedges of this fabric. I figured if it was a bit too long I could do a narrow hem and still keep a bit of the border.

There's the Tessuti Bondi dress instructions on my iPad. They show a lot of versions in linen but I actually like it best in silk or rayon (perhaps because I'm just not a fan of linen). However with linen you can do the cool frayed edge hem treatment, so there is that.

IMG_4266

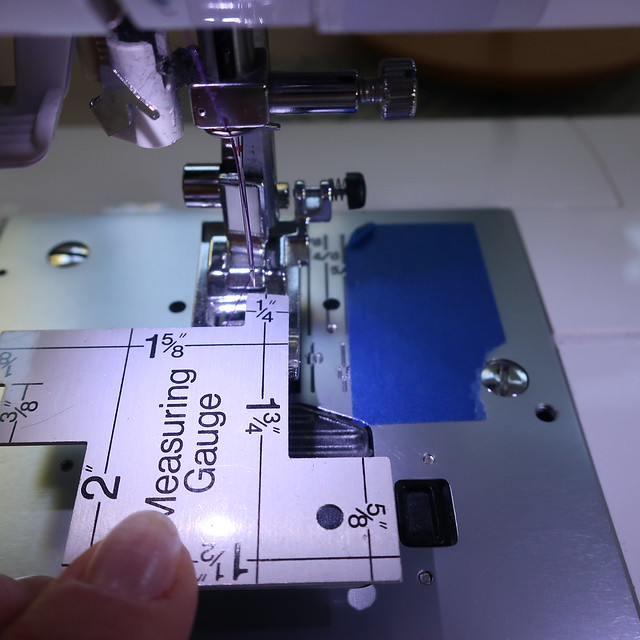
How about some macro lens type sewing detail? Truth be told I'm a straight stitch kind of sewer. I almost never change the stitch type, although I do change the length all the time. But one feature I do like is the capacity to move the needle to one side or the other.

IMG_0306

Using the edge of the foot is the best way I've found to get a super even seam allowance stitched around bias binding. I'm sure everyone has their own method but this works for me. So the needle is moved to exactly 1/4 inch away from the edge of the foot (which might not be as shown in the above photo).

IMG_0304

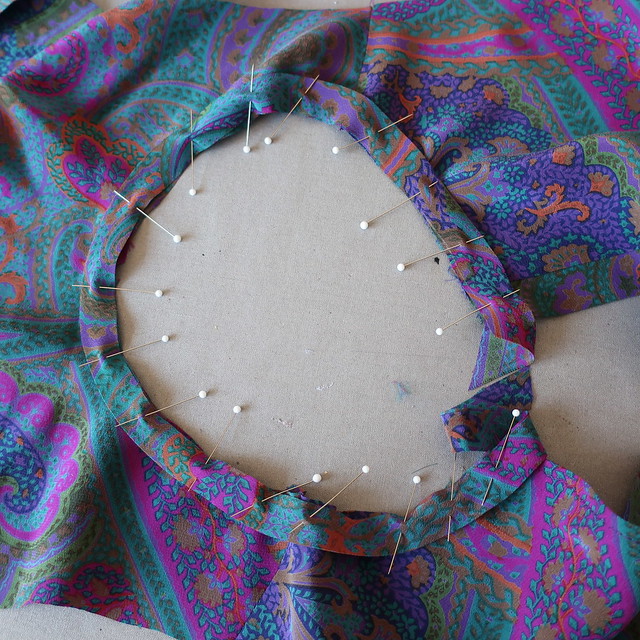
Then I pin on the bias binding which is cut about 1 1/8 wide and folded in half. I add that extra 1/8" due to the folding and when manipulated into place around the circle the binding is a fairly accurate 1/2" wide.

IMG_0305

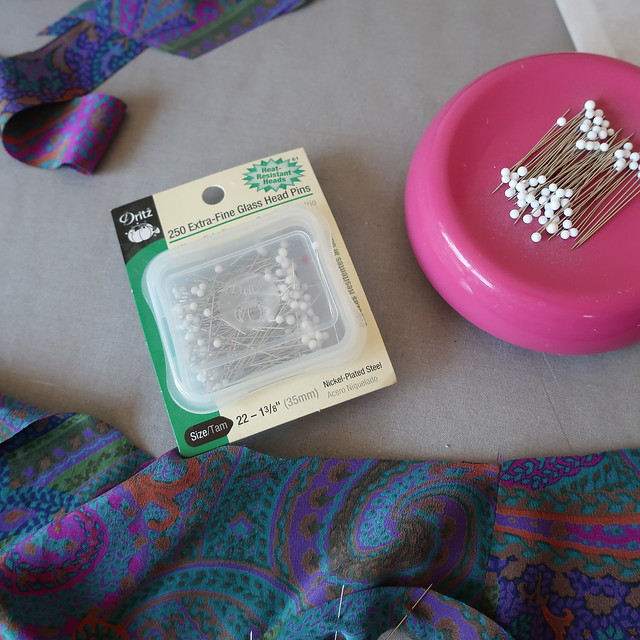
Not an ad but just a mention, I really like these pins for almost all sewing, but especially for silks they work so well. Also my treasured magnetic pin holder. Which I'm calling a pin holder so as to distinguish between that and a pin cushion. Whew I despise pincushions!!! I just cannot deal. All that poking pins in and out, it takes forever. I run around my sewing classes giving people little dishes or boxes to put their pins in and try to say "learn to wrangle your pins a different way if you want to sew a bit faster" But mostly people have their own way so I should let it go :)  Breathe in, breathe out, let it go!

Back to stitching.

IMG_0307

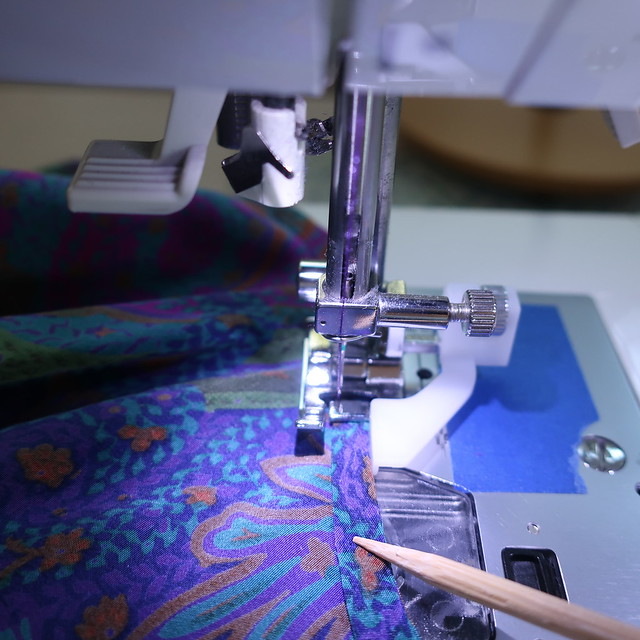
Changing the presser foot - another feature that I rarely use. But this tiny binding seemed to call for whatever this foot is. My machine manual says it is the blind hem foot, but I think that it works really well for keeping something aligned along the edge as shown. And then I use a wooden skewer to push the binding flat and in place, no pins needed as it is pressed in place and silk presses so well.


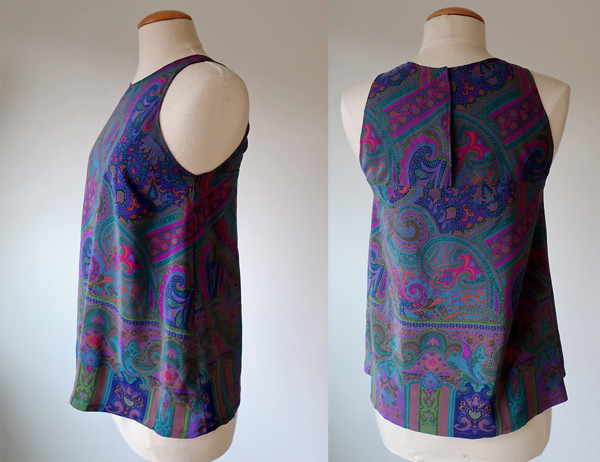
bondi silk top side and back

I ended up liking the length just fine so I was glad I could cut it out to use the border.

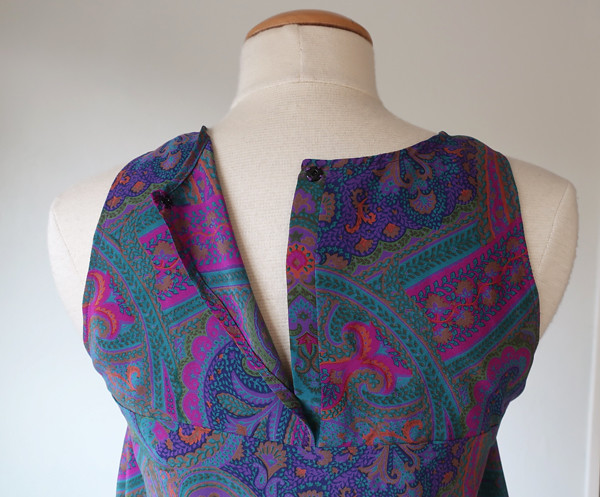
bondi silk top back closure

When I did the dress version I knew that my X -back bra straps peeked out a the middle so for this slightly more elegant version I put a small extra piece on one side so they back could overlap that. And then for a closure I used a snap.

Here's the dress version of this pattern:

Bondi dress 1

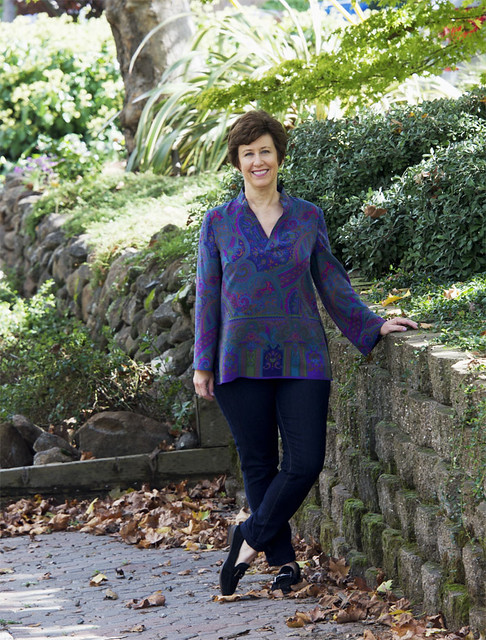
And the tunic top version of this fabric:

silk tunic autumn leaves

So now I really have only small scraps left, just enough for pocket linings.


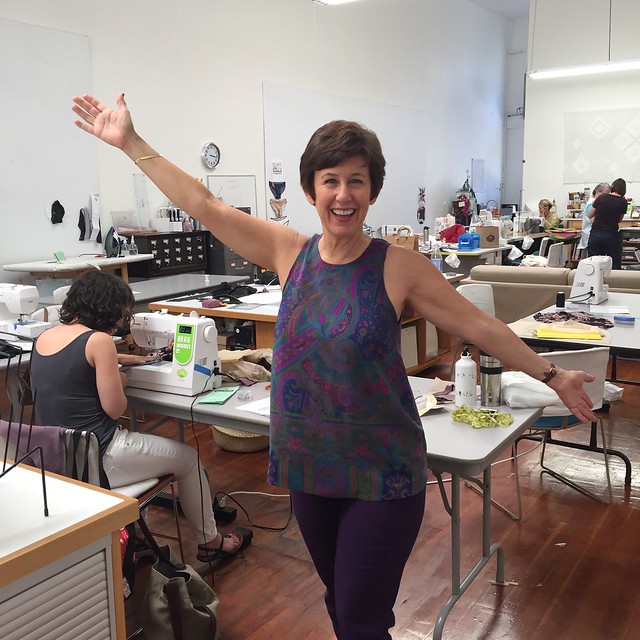
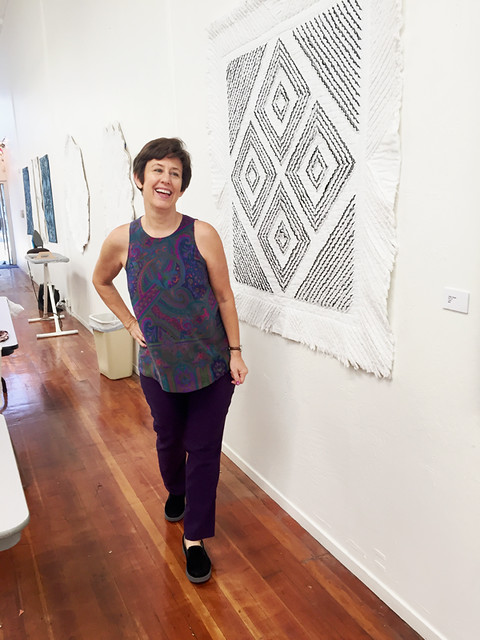
Bondi top on me at studio

One more look at this top, and my purple jeans. Which I made using a pattern I made by copying a pair of jeans. It's now my go-to pattern for pants and needs to be a blog post, one of these days.

Other classes coming up for fall are:

Sewing Pattern Alteration: Tissue Fitting and Fit Lab on Sun. Aug. 26
Make the Lander Pants on Sat. Sept 8
Copy for favorite Garment on Sun. Sept 30

and then we are into Autumn sewing with
Cape Tailoring Weekend Workshop  Oct 13-14  this is a great option if you want to make a fun outerwear piece, avoid some fitting headaches, but still learn how to work with heavier fabrics, interfacing, lining, buttonholes etc.   On that registration page there is a link to a Pinterest board of all kinds of great cape patterns.

Jacket and Coat Tailoring Weekend Workshop Nov. 3-4  You can make a jacket! I plan to do lots of demos on techniques, explain interfacing, linings, sewing perfect sleeves, how to do bound buttonholes and welt pockets. Even if your pattern doesn't have each one of these details you will have a change to see and practice these techniques.

So what's up next in my sewing list? I gave a sneak peek on Instagram of my latest project and the fabric got a few raves so I am anxious to finish that one and wear it - because our weather is scorching and a summer shift dress will be just right.

And then I had better make some Lander pants to learn all about that pattern. And my Burda magazines are calling me. But today it's 100℉ so I think it's time for a swim.

Happy sewing, 
Beth

today's garden photo, a yellow dahlia that I've been waiting for all summer. Did not disappoint! So pretty in the evening light.

yellow dahlia 2018


Friday, May 25, 2018

Bondi dress from Tessuti patterns

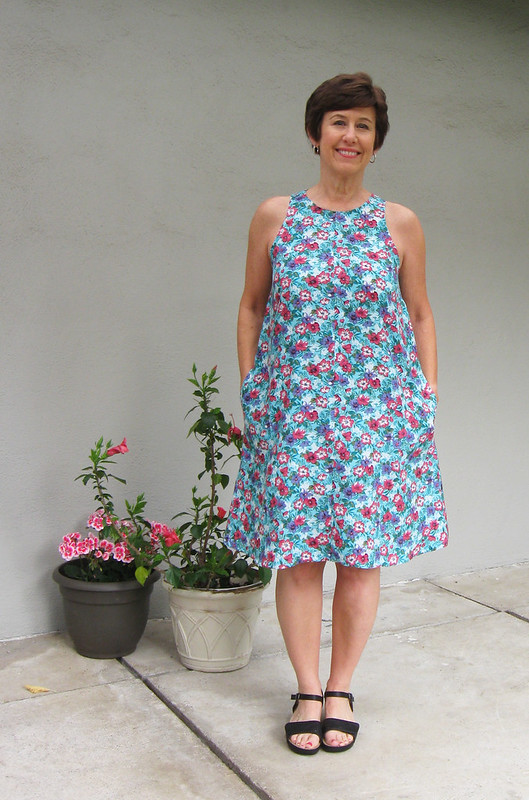
How could I resist a dress named after a beach? When it comes to nature a sunny ocean beach is my favorite spot. Plus this dress is a great summer basic, I love the shaping of the neckline and shoulders and it works in so many fabrics.

Bondi dress 1

We were looking for a versatile pattern to use at Hello Stitch Studio for a dressmaking class and Stacey, one of the owners saw this pattern and loved it. Which was great as we were planning to make one in each size!

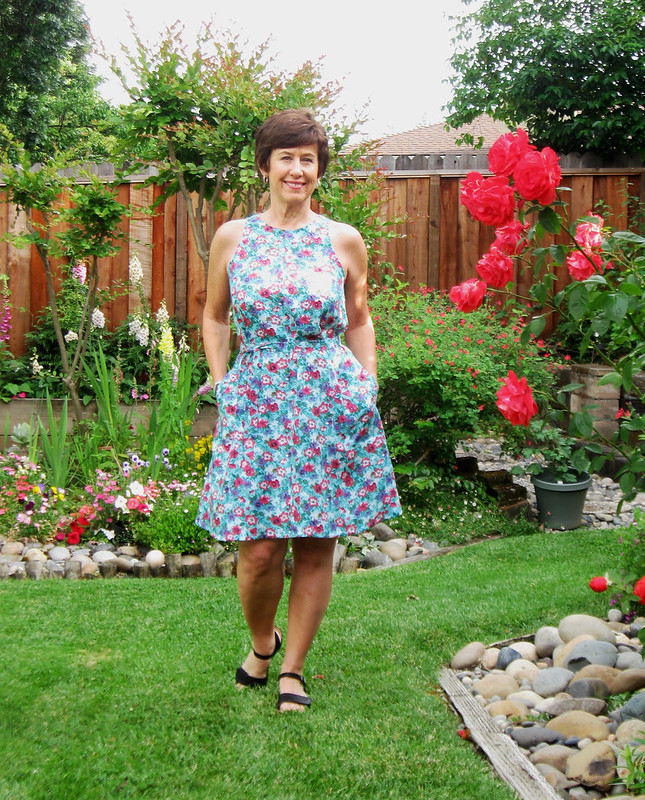
I think this dress is really versatile. With a little pattern hacking you could change up the neckline (I made one sample with a V-neck) and yesterday I sewed a tie belt which works with this lightweight rayon fabric.

Bondi dress wth belt 2

Sewing and pattern details: I used a woven rayon fabric that I had in my stash. I must have bought it at some kind of tag sale - maybe at the local ASG stash sale that they have 2 times per year. It had a piece of paper pinned onto it that said 45" wide 3 yards and was serged on the cut ends. Nice when I find a remnant that is ready for the pre-shrinking like that. Irresistible as it is a sort of tropical floral in my favorite colors. Super soft and great drape as well, which I think works nicely for this pattern.

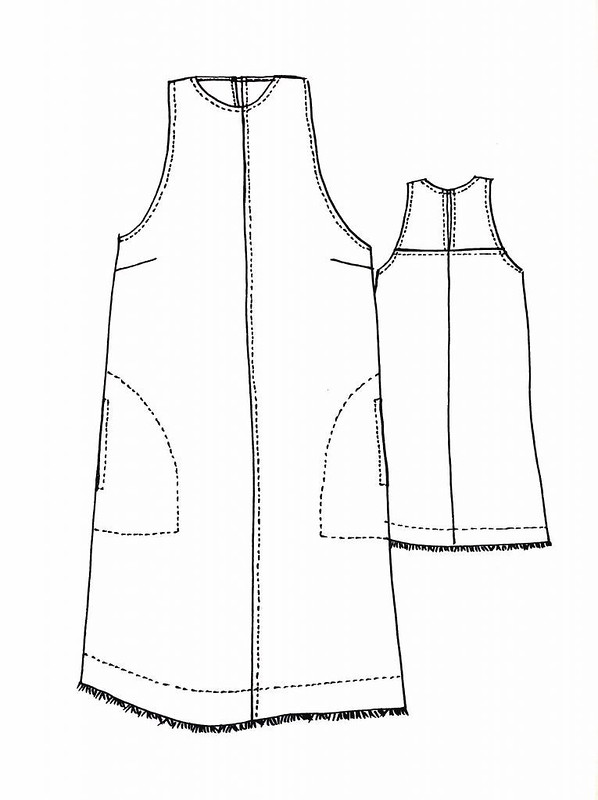
Here's the line drawing for the Bondi dress pattern which is from Tessuti Fabrics in Australia.

Bondi dress line drawing

This is the first Tessuti pattern that I have sewn. They are a great choice for beginners or any level as they are mostly simple shapes that show off the fabrics, not a lot of fitting and I found the instructions to be very good.
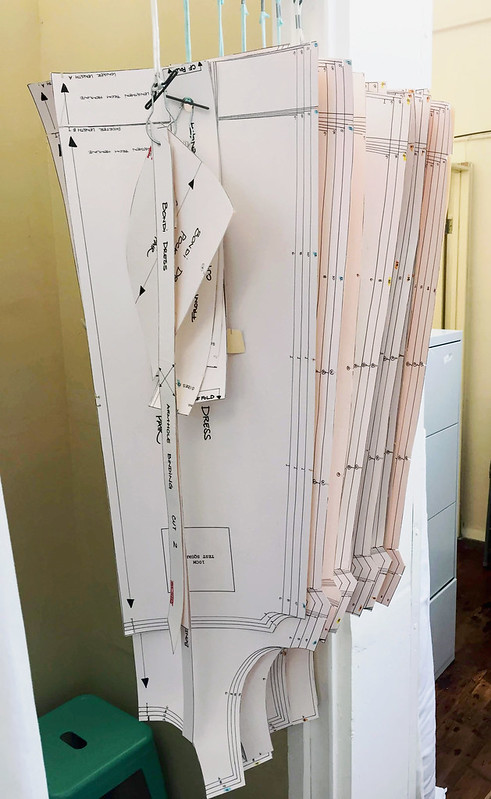
For our class the pattern is included when you register, you will receive the PDF of the pattern and the instructions to keep, but perhaps the best part - you don't have to print it out because it is already done at the studio! So you can trace out your size. How do you know which size? Because between myself and the studio owners, we have sewn a Bondi dress in each size so you can try them on, figure out which size to make and trace away :) Here's a link to the next session of the class (Sat. June 2) . If it is full then I believe we are scheduling it again before the summer is too far gone.

bondi dress pattern pieces

The pattern pieces are on sturdy tagboard and they have large tracing paper at the studio so this might be the easiest tracing project ever. Which was not ready when I made a couple of the sizes 🙁 so I had to trace for myself. On the positive side - we had the patterns printed at PDF Plotting which was great, super fast service, and quite economical, especially if you have multiple patterns printed in one order. Although recently someone told me about a copy shop here in my town that is equally good and local - so instant gratification! Now if I could just drop off my Burda magazine sheets for them to trace out I would be a happy girl!!


Bondi dress front on form

I made a size 10, and the neckline etc. was just right. I took it in just about 1/2" on each size above the bust dart as the armhole was a bit gaping on me, but otherwise no adjustment. I was thinking of making the size 12 for me but last weekend I tried on the various ones at the studio and realized the 10 would be better. So a win for the try-on system.

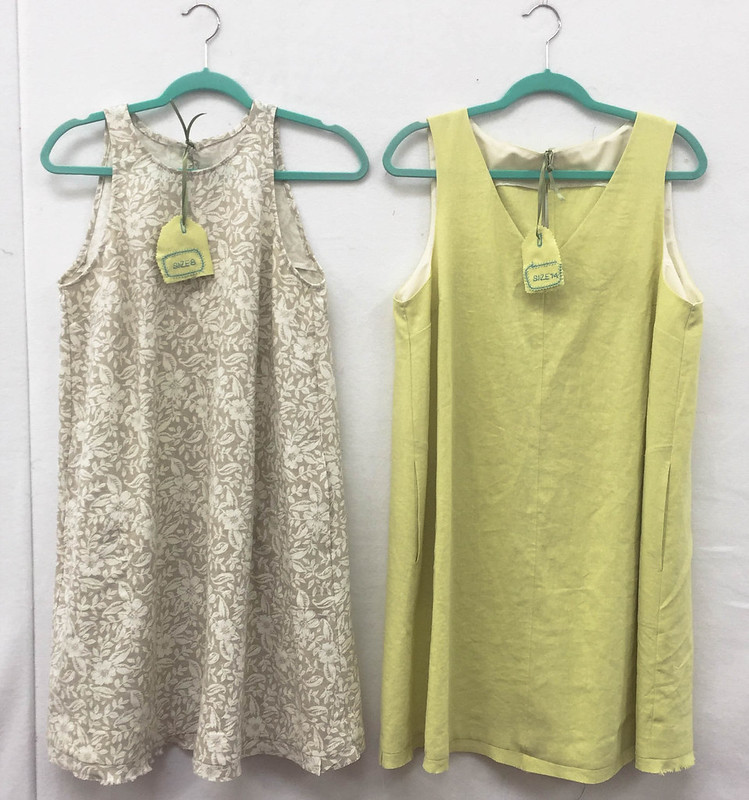
Here are a couple of the samples at the studio. Left, size 8, made as pattern indicates, and on the right, in a soft linen from Stone Mountain, the size 14 with the neckline changed to a V-neck and the shoulder edge brought out to a more standard sleeveless dress placement. (also on that one I did an all-in-one facing instead of a bias binding, so that's an option as well.)

Bondi dress examples

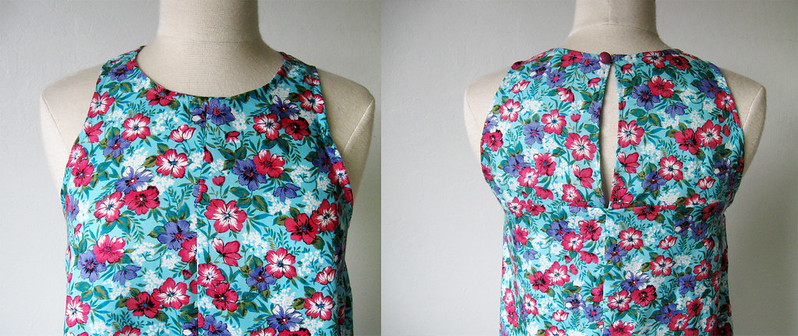
Closer look at the neckline on my dress. I love this back yoke detail and the simple closure. Time to confess - I don't make the bias loop for the button - I sew a piece of 1/8" elastic as a loop. So much easier!

Bondi closeup front and back on form

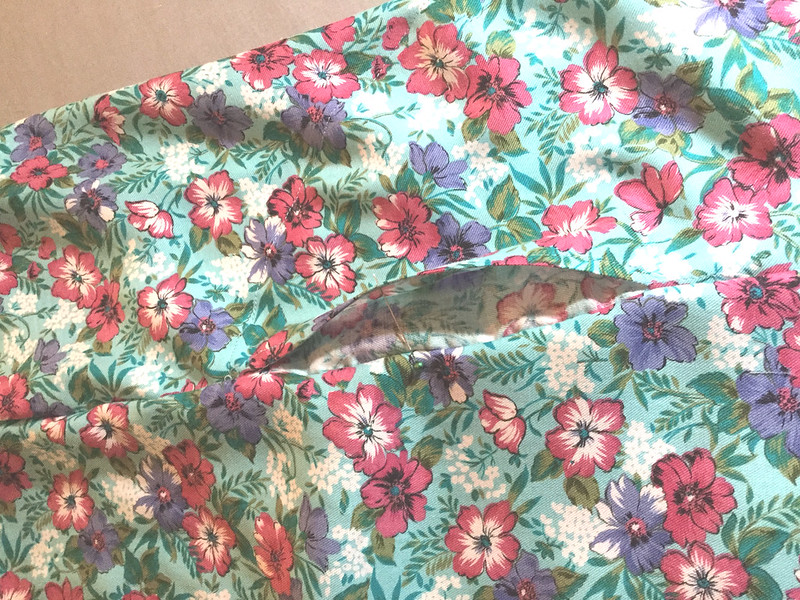
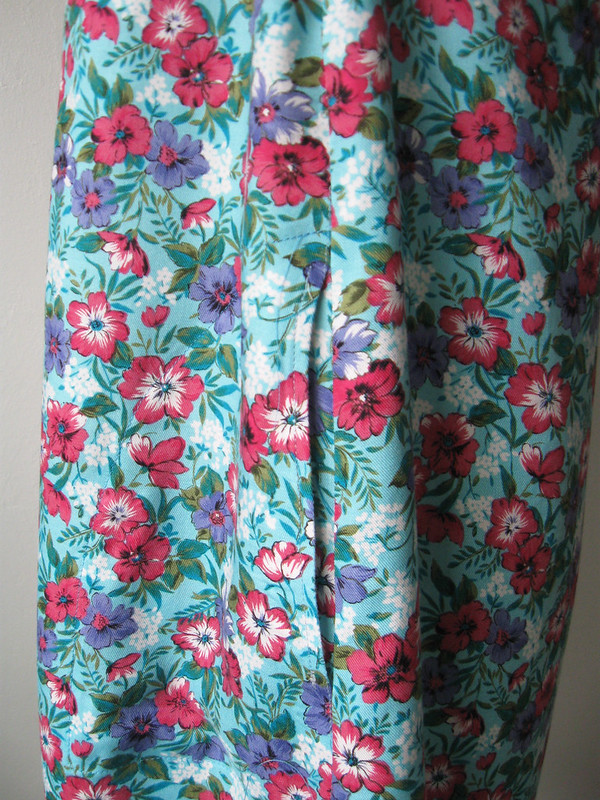
More true confessions - I do make sewing mistakes, usually one per project and on this one I sewed the pockets on backwards, i.e. with the wrong side of the fabric facing outwards. The pocket design on this dress is clever so that you have a stitched on pocket on the front of the dress but that means you need to have the right side of the fabric on the wrong side of the front inside. Makes no difference in the green linen version above as both sides of the fabric are the same but in a print...

Pocket mistake Bondi dress

Late night sewing fail. Oh well, unstitched and did it the right way.

Bondi dress pocket closeup

Bondi dress belt on form

For the tie I just cut up some remnants and stitched together to make a long tie, about 1" wide. Didn't really pay attention to the length, and found that it goes around my waist twice with room to tie which works well in this soft fabric. I think in a linen it wouldn't work as well with a waist tie. This look reminds me of the Sway dress from Papercut Patterns which I have always liked.


Bondi dress back view

Back view. Just FYI, for a bra I tried one that I have where the straps can be changed to an X in the back and it worked perfectly. Although there is probably a peek of strap at the opening in the center back yoke. Which I think is better than the straps sticking out at the shoulders (ugh that makes me crazy to see that).

So that's the latest on my Bondi dress. Pattern love!

Bondi dress with belt 4

After these pictures were taken I looked at the thermometer on the patio and it said 59℉. Yep, it was a bit brisk for a sundress. The weather is weird, people. But you know that. In any case, we are supposed to have a nice warm up this long weekend, which is Memorial Day, so a bit of sewing, some garden work, a sewing student tomorrow, a plant sale on Sunday, plus dinner reservations and a holiday get-together. I had better step away from my laptop and get moving!

Upcoming classes at Hello Stitch Studio: 
Sat. June 2:       Bondi dress class mentioned above
Sat. June 12:     Sewing Pattern Alteration and Fit Lab
Thurs. June 14:  How to read a sewing pattern 6-9pm. *I love to do this class - and it's not just for beginners  - it's a great way to discuss sewing patterns, find out about what makes a pattern good/not good, how to match the right fabrics to a pattern, how to choose your size and all kinds of other details before you sew a stitch. (p.s. this one is post-workday so I think we will include a happy hour element to the class 🍷
Sat. June 16:     Pencil skirt  (two session class)
Sat. June 16:     Sewing with Knits, Basic T-shirt
Sat. July 14:     Pants clinic: Diagnose your fit issues.
Tues. July 17:   Button front shirt class (two session) any shirt pattern
Sun. July 22:    Copy your favorite garment.  (we just did this one last weekend and it was So Much Fun! and a few people emailed that they couldn't make that date so here's another session)

and one more that's not on the website but will be soon:  Pattern Hacks, (Sat. July 28) where I will show how to use the patterns you already have and create new necklines, add or move darts, change sleeves, mix and match two different patterns and generally have fun with hacking up your existing patterns.

Happy Weekend Sewing,
Beth

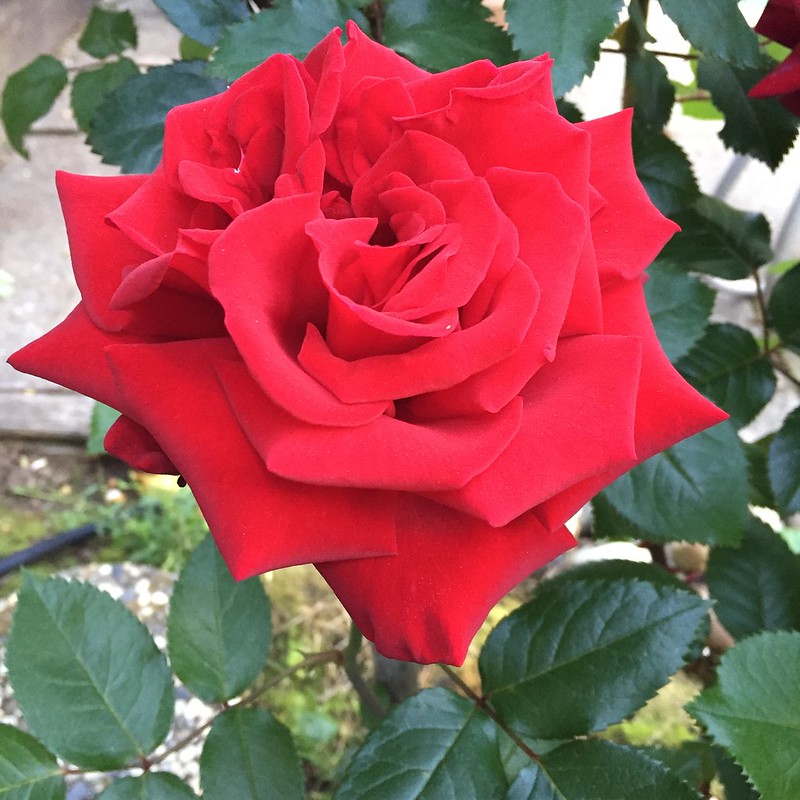
for today's garden photo - May means rose season, as you can see in the photos above, most of my rose bushes are blooming like mad. Which is lovely and means I have an abundance both outside and in the house. We have to enjoy them now because they get a bit tired in the August heat, particularly that yellow one. But today's rose is one that blooms all summer long, and might be 30 years old? no idea as it was here way before me. I would love to know which variety it is. I think maybe Mr. Lincoln. (for you rosarians, I think it is a hybrid tea, canes are about 3-4 feet long and then stems grow anywhere from 2-5 feet long, and puts out either single flowers or a cluster on the stem. I probably have that nomenclature all wrong but you can get the idea. Also it has a lovely rose fragrance and the blooms last at least 2 weeks often longer).

IMG_3786