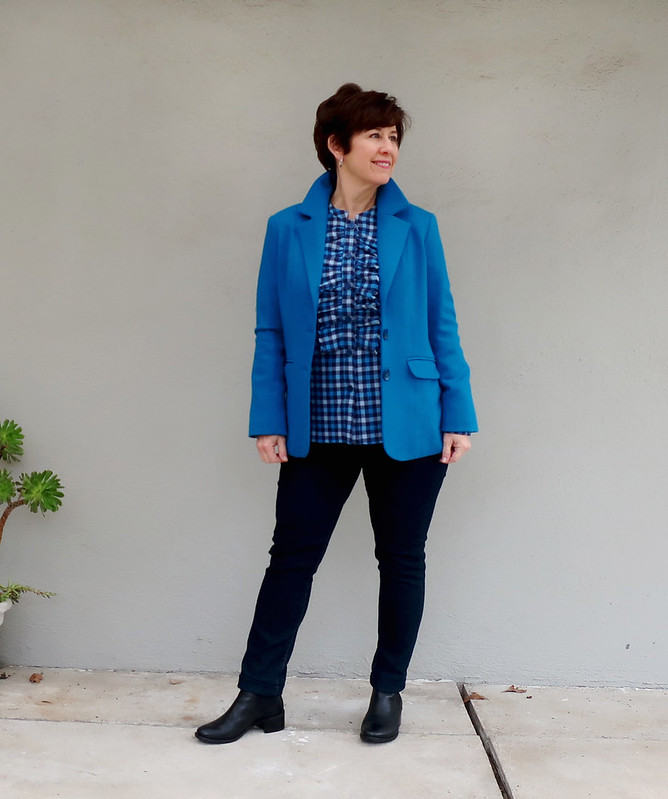
Organizing my fabric stash can be blamed for this fabric pairing which didn't turn out quite how I expected. Along with a lot of other people I decided to reorganize my fabric, see what I actually had accumulated and perhaps get rid of some stuff. To my surprise I found this plaid flannel which I think was purchased last year at the same time, at Joann's when they had one of their typical super discount days. I do like the colors and it's really soft and cozy, however I think my pattern choice took me in the wrong direction. But I have rescued it somewhat and I will wear it.
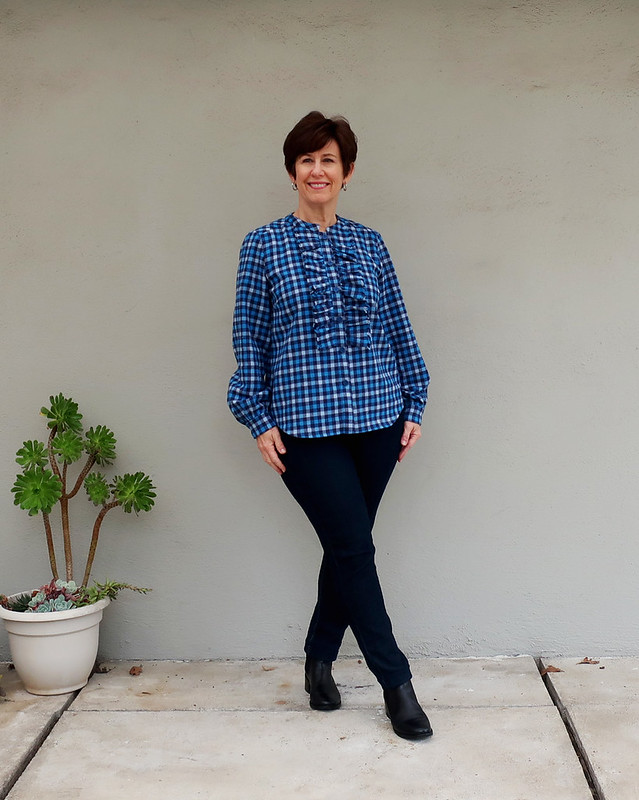
This is the final version but it started out with a bit more ruffle than you see.
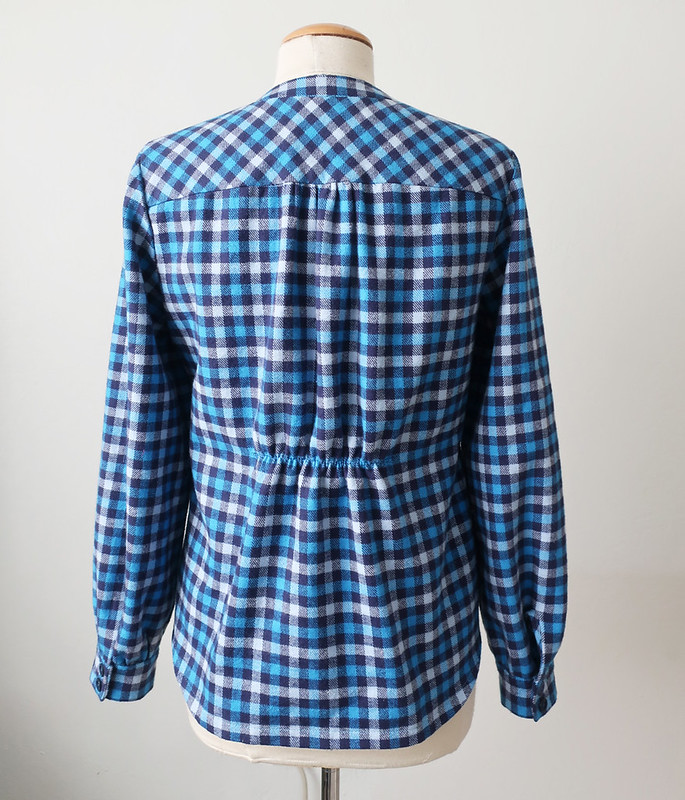
This is how it looked on it's first "finish". I got the bright idea to use the fabric selvedge on the edge of the ruffle parts, so they didn't need hemming or finishing. Which was fine, but this fabric is quite thick so not really suitable for this pattern. The recommended fabrics are things like chiffon, silk, etc. lightweight fabrics that will gather softly. While we are here let's not mention my wonky edge on the back where you can see the white stripe of the lower back peeking of the yoke bottom. I didn't notice the misalignment until it was all finished and I took the pictures. At that point I thought about opening the yoke and fixing that but at this point I am done. And maybe it's fine to have some imperfections (especially in the back where I don't have to see them :)
Here's the pattern photo, this is Burda December 2019 # 101. Her hair is obscuring the neck ruffle detail (grrr, why with the poses that don't permit us to see details?). but it sure looks like a lightweight fabric, perhaps a voile.
Anyway I tried it on and just was annoyed by the neck ruffle, it wasn't really itchy but kind of poking my neck if that makes sense. Also the front ruffle makes the front a bit stiff - not a deal breaker but noticeable. So yesterday I just got out my snippy scissors and opened up the top seam of that neck band, removing the neck ruffle. I call those my snippy scissors - they probably have a real name but I cannot sew without them - I have about 5 pairs, all that type of squeeze snip. The new ones are super sharp, almost too sharp but I've learned to be more careful. I never use a seam ripper but just snip the threads with those if I have to remove stitching.
And then once the ruffle was removed I pulled out all the stray threads with what I think is called a "self-locking forceps or hemostat" Also indispensable - can't sew without that either. (If I ever lose the 2 pairs that I have I will order more, there seem to be lots on Amazon.) Then I hand stitched the top back closed, with a little artful adjustment at the center front. Which I'm not 100% pleased with but I've had enough with this shirt.
Now that I've taken the neck ruffle off it's way more comfortable to wear, feels like a tunic top really. Plus it coordinates with my new blazer so there is that.
The other change I made was to add a strip of elastic at the waist in the back. It seemed really shapeless and due to the fabric didn't have the flowy look that might be better for a shirt like this. So I added the elastic to give a bit of shaping. I also took it in at the side seams about an inch at the waist tapering out to zero at the hip for a more fitted shirt.
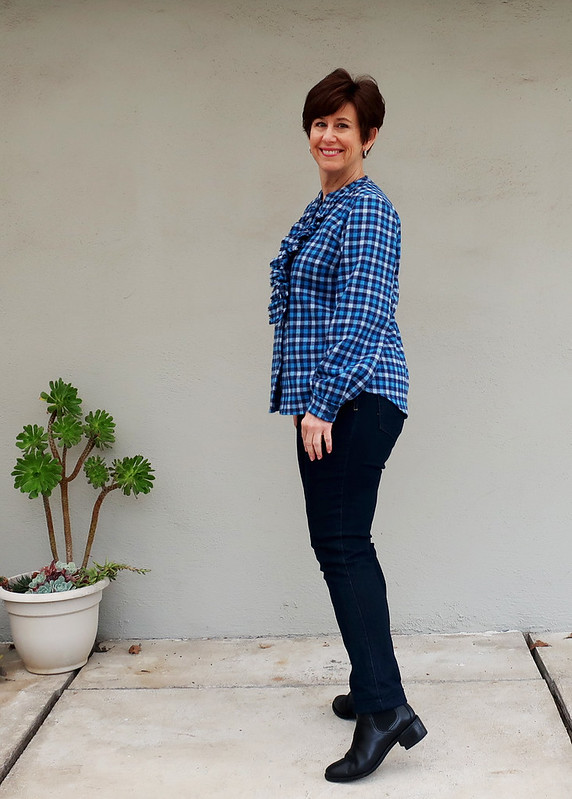
I gathered the sleeves into the cuffs which are a bit wider than the pattern specified. I never use pattern pieces for cuffs, I just make what feels right for the style and fabric. The sleeves are a bit long for my ultra short arms but I like cuffed sleeves to be on the long side, sometimes I wear with turned back cuffs.
And buttons - they seem to be making me crazy lately. As I've mentioned they used to stock a nice selection at Joann's but now it's so may plastic-y crafty buttons. What do people do with those, glue them in scrapbooks or something? sheesh. Anyway, I needed 10 buttons and I had 9 matching. The one on the bottom is one of those 9 and then I just rummaged until I found a reasonably similar blue button, sewed it on and called it a day. I don't care that much about one small button and it's certainly not worth making a shopping trip for that. Plus use up what you have! that is definitely one of my sewing mottos.
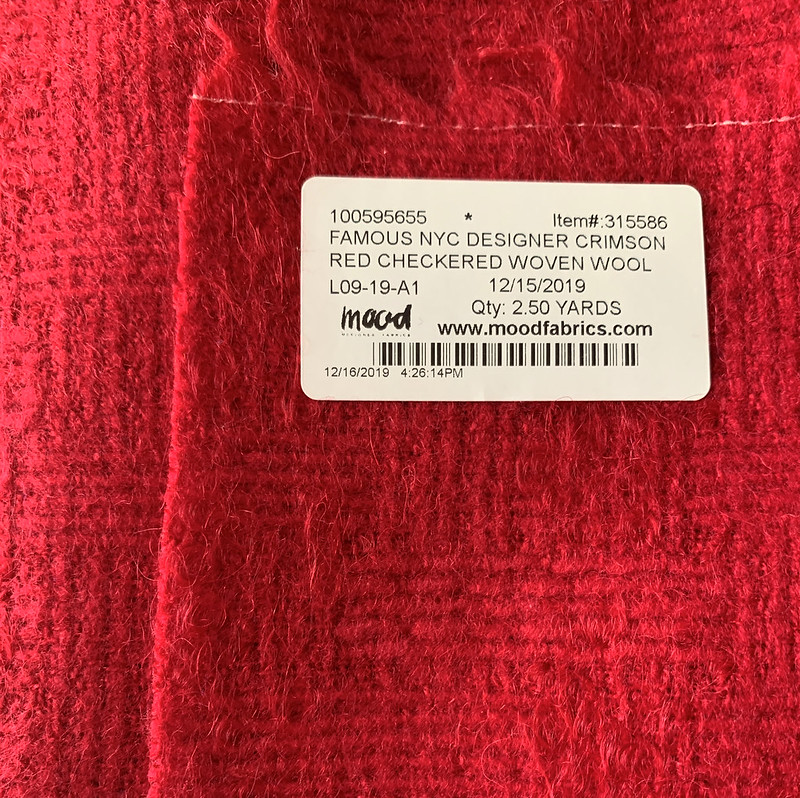
So that's one fabric out of the stash - not the best result but hey - it's wearable and it's warm! Up next I'm finishing that lovely silk shirt shown at the end of my previous post and then I think I will make a coat. I haven't made a coat for myself in a few years and I have some gorgeous cherry red wool from Mood that needs to be a coat by February!
Next weekend is my Jacket Tailoring Workshop Fri pm and Sat/Sun. Which is always fun for me and I look forward to seeing what people make. Although we didn't know when we scheduled it that the SF 49'ers would be playing in the Super Bowl on Sunday!! Being on the west coast the game starts late so I likely see most of it.
Happy January Sewing,
Beth
spring is coming - the first daffodil appeared this week π
Friday, January 24, 2020
Monday, January 20, 2020
Shirt fit details: Vogue 9029
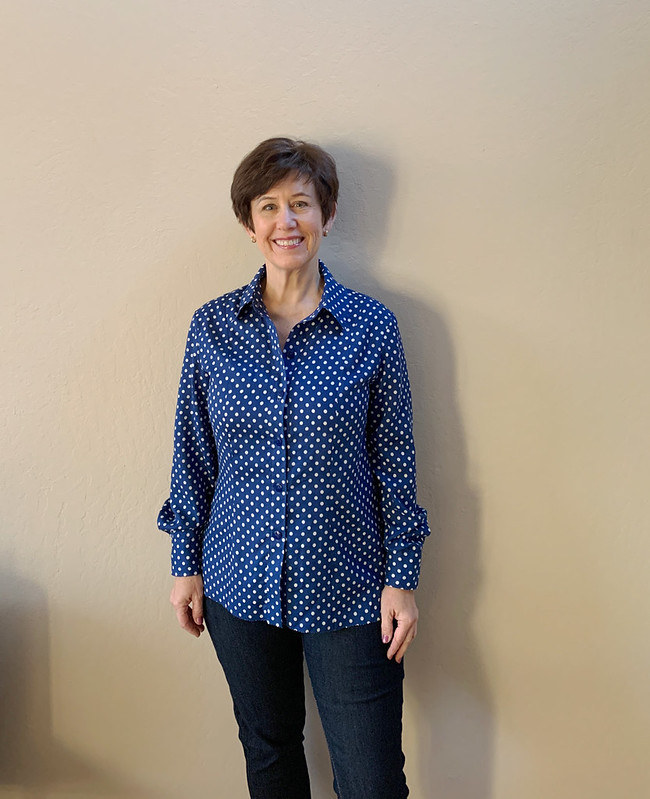
Lately I've sewing only from my Burda magazines, but I do have quite a stash of envelope patterns. Some used frequently, and others never even opened. I got a copy of Vogue 9029 at a Bay Area Sewists pattern swap, and decided to give that a try. Actually this was a bit of an audition for some silk fabric that I've had since the spring. I wanted to see if a different blouse pattern might be good and while I didn't end up using this Vogue pattern for the silk I will probably return to it in the future, with a few fit adjustments.
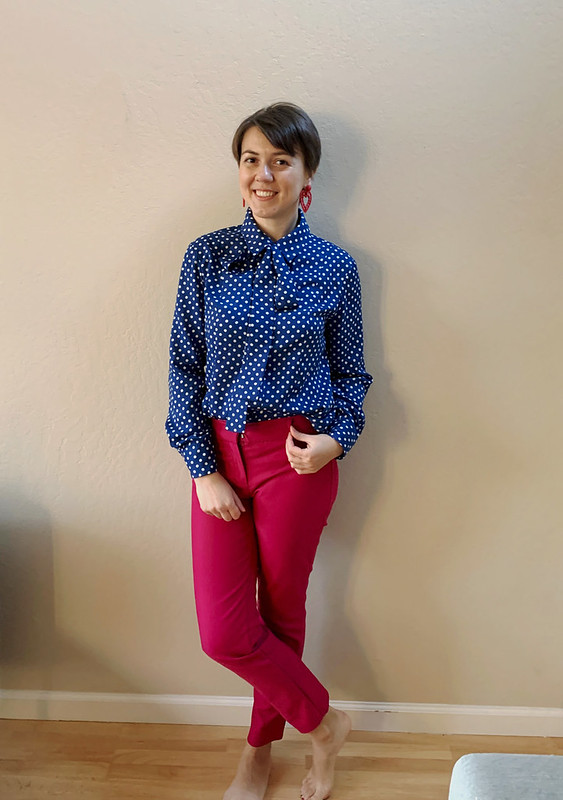
As befits a test garment, not exactly very interesting photos but sufficient to talk about the details of this pattern. It has shoulder princess seams front and back, a sewn on button band, collar stand and collar. The pattern also has options for ruffles on the cuffs, a ruffle along the button band, and a tie bow in place of the collar and stand.
I used some nice weight cotton that I have no idea the origin, perhaps I bought it at an ASG sale last year? in any case it was about 2.5 yards so enough for a shirt.
Here's a look at the pattern details.
I started with a size 12 in the neck and shoulders which is my usual size in Vogue patterns and then graded out at the waist and hip to fit my measurements.
Here is the pattern piece for the side front. Note that the pattern lists the finished garment measurements on the pattern piece. On any Vogue/McCalls pattern these numbers are on the front piece, or if it is a multiple piece front (such as on princess seams) it usually is on the side front. I find them SO useful, particularly with princess seams, you can just see at a glance the circumferences. Occasionally I've measured them to check and they are accurate (note you have to deduct seam allowance from each pattern piece to get the finished garment measurement which is tedious so I just tend to believe them :)
Another note -and something I repeat in my sewing classes, these measurements are based on accurate sewing of the seam allowance. So in a multi seam garment if your stitching wobbles around and the seam allowance is not consistent you can gain or lose circumference. A change of 1/4" multiplied by several seams is a big difference. Ok that's enough lecturing.
Looking at the finished measurements and not wanting a body skimming shirt I added ONLY at the side seam of the Front Side and Back Side pieces. Giving myself about an extra 2" circumference at the hip. For myself I find the fit will usually be fine in the upper body so I just sew all seams as size 12 and add this fit insurance on the side seam only. If I were substantially adjusting a pattern, say adding 5-6 inches in various places then I would distribute that among the various seams but for this type of garment and this amount of difference I find for myself this method works. And makes the sewing SO much easier.
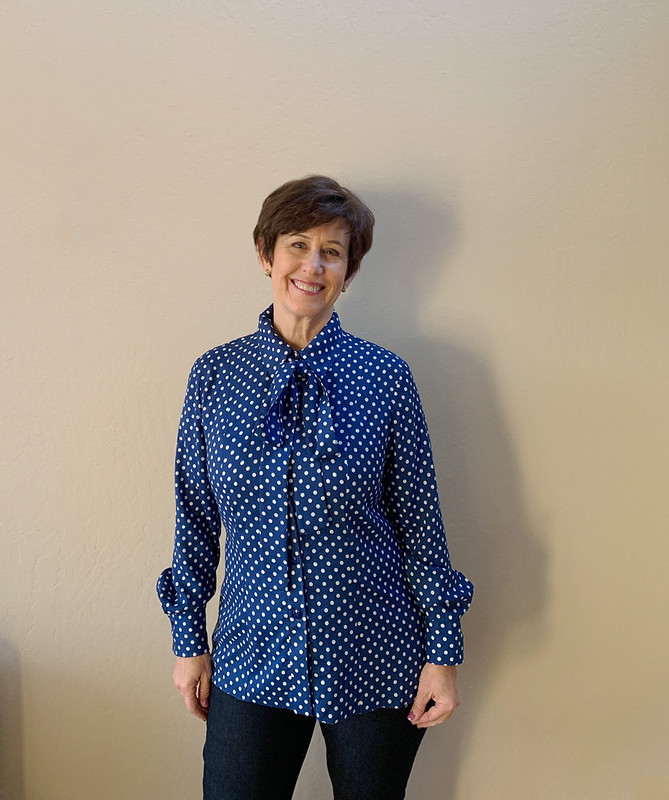
Fit-wise that worked out fine. You might be able to see that I haven't hemmed this shirt, plus the sleeves are a bit long. As I was making it I decided I didn't need another blue/white polka dot shirt as I already have this one so I decided to leave it partially finished and give it to a friend who could hem etc. to fit her. By the way I don't think I am a shirt with bow person, I always feel a bit silly with shirts like this even though I like the idea of them.
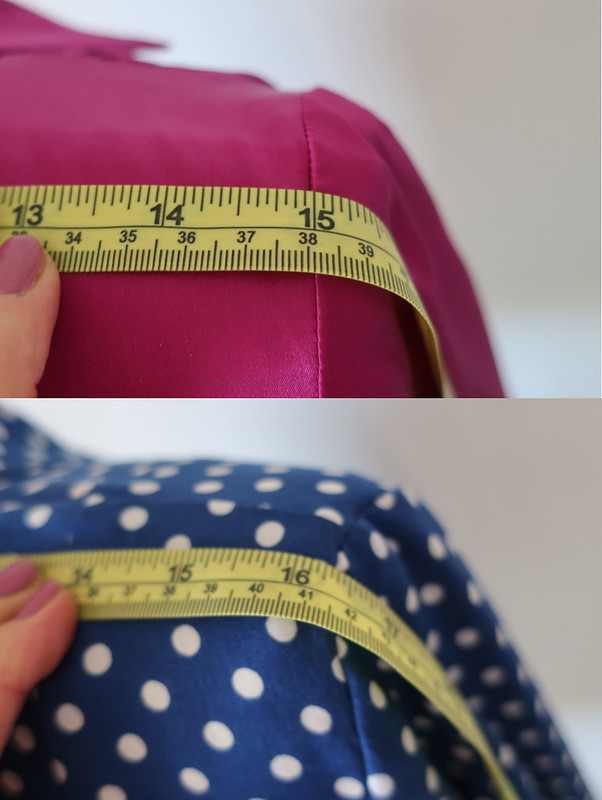
Back to fit analysis: the issue I had with this pattern is the width of the shoulders. Looking at the photo above, and as soon as I tried it on I felt the shoulders were too wide and the armhole seam wasn't in the right place for me.
Comparing it to another shirt which has a fit I like, I found that the distance from sleeve to sleeve across the back was 1.25" wider in the Vogue pattern. The bright pink shirt is this one from last winter. For that shirt I used my Simplicity 2339, a pattern that is going on maybe 20 uses? Bargain!!
Anyway - it is so interesting to compare shapes and measurements on what look like very similar items.
And here are the two shirts both on the same dress form. The pink shirt is stretch silk charmeuse and I don't think that ever photographs well - but it is dreamy to wear.
See, now that I've pointed it out you can see that the sleeve seam is falling off my shoulders. I mean it's not the worst fitting issue but something that I noticed and not a big deal to adjust for the next version.
Front back view, this pattern has potential and I think I will adjust the shoulder width and sew it again one of these days. Plus this fabric is such a nice shade of blue.
And here is my friend Halyna (who is @zigzagstitching on IG) wearing this shirt which I had to remind her needed hemming - she was ready to wear it immediately as she is crazy for polka dots.
So that's the latest on this pattern, which I will return to one of these days. Perhaps in a cotton lawn in the spring.
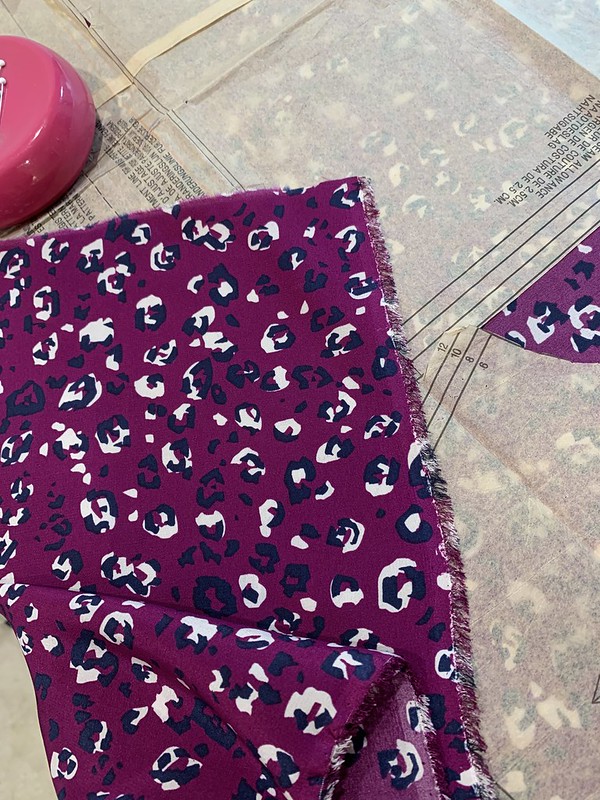
And what about "my precious" which is this silk from Stone Mountain that I've been hoarding in search of the perfect shirt pattern. I cut it out this weekend using my trusty Simplicity 2339 π. And have a bit of a saga even with that variable in the mix. More on that in a future post.
Happy Sewing,
Beth
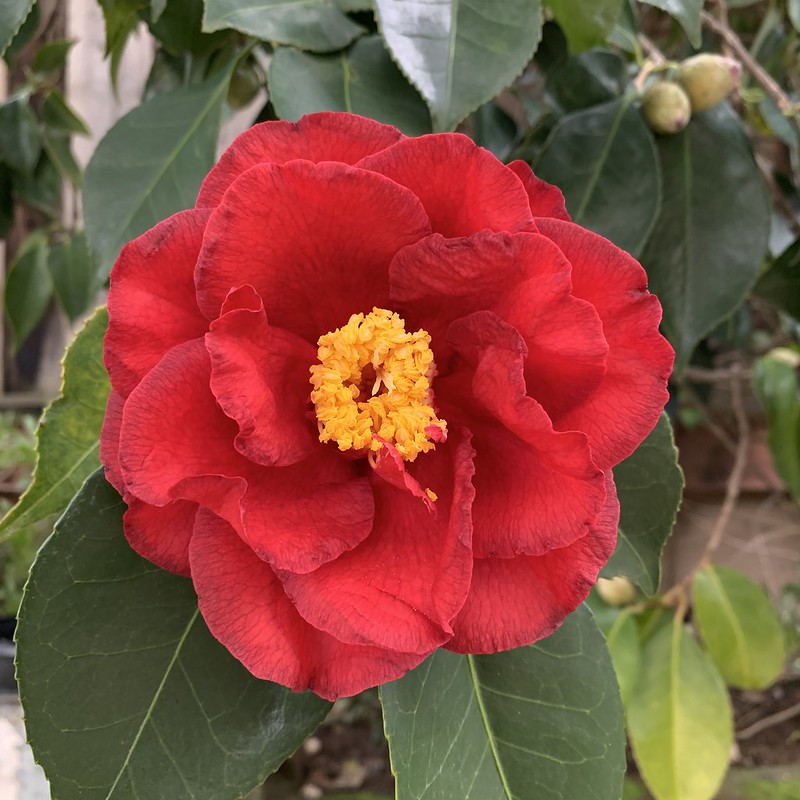
today's garden photo - we have a new bloom! The messy camellias which sort of annoy me most of the year are starting to put out these luscious flowers. The color is so lush and velvety. And they are so messy when the flowers fall. At least the bees love then, full of sticky nectar.
Saturday, January 11, 2020
Ready for spring: an out of season shirt plus pattern storage idea
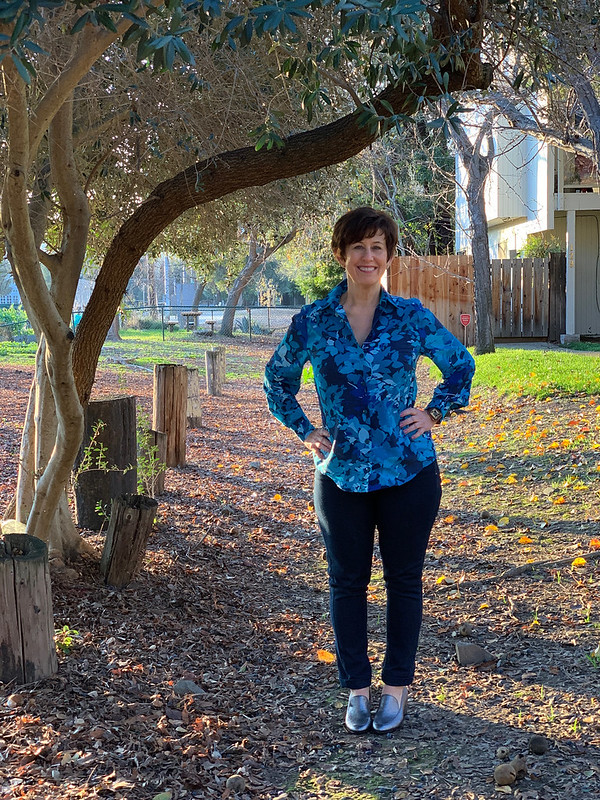
Here's something I sewed up on a rainy day in December, and the whole time I thought "well this will go in the closet until spring arrives". However I had the chance to take some outdoor pictures last week on a beautiful sunny day.
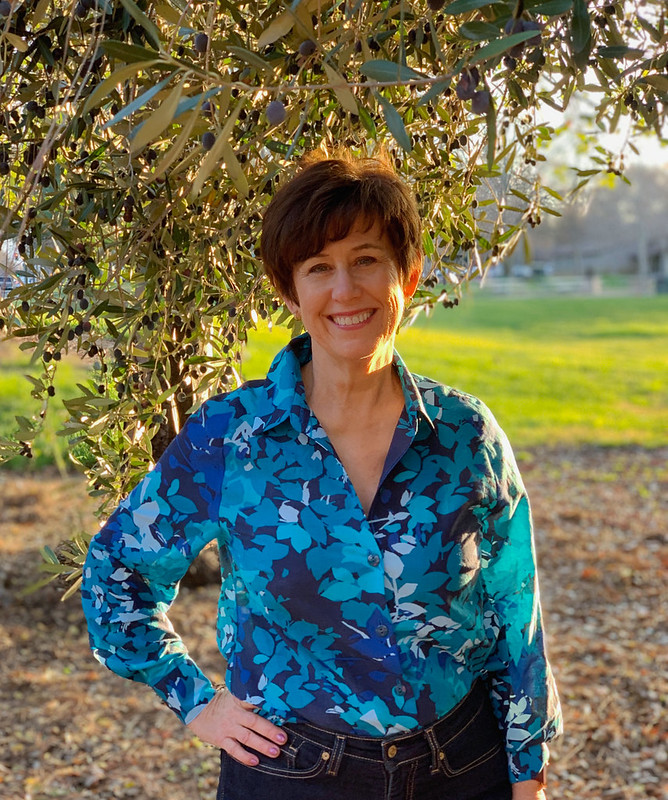
Although I should have known better than to stand under an olive tree - these trees are common around here and while they give a nice mediterranean touch to the landscape there are a lot of fallen olives to step on and make a mess on the bottom of your shoes. Everything is so green right now and we Californians have to enjoy it while it lasts. I have so much sympathy for everyone in Australia, the fires are devastating as we here well know. But the scope of their situation is mind boggling and I hope it settles down soon.
Back to the mundane details of my new shirt. This is from Burda Magazine, January 2019 #109 which I made last year in March. That version was also a print so the design lines don't show there either. That was in a wool challis which I paired with an ultra suede skirt - a successful sewing of two pieces that I wear often. Keep reading to see the interesting pattern pieces that make up this shirt.
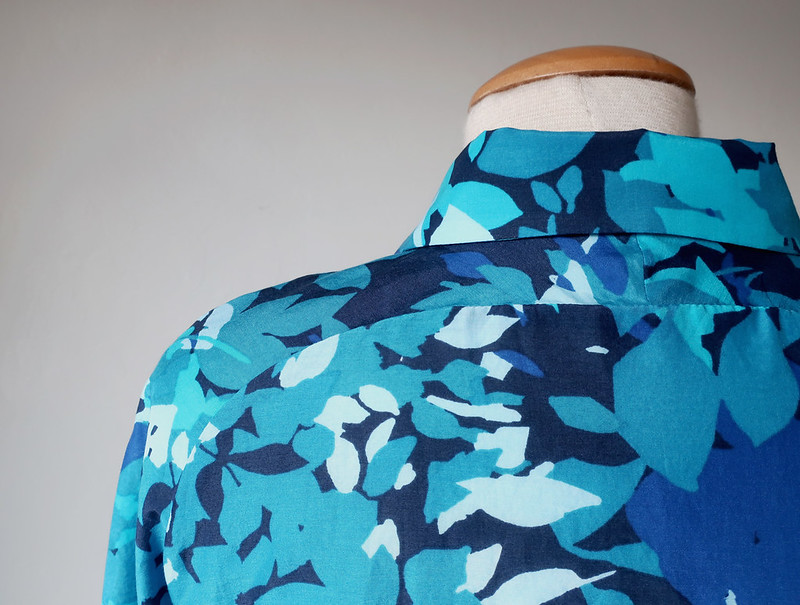
The fabric is from Mood, I ordered it last summer and it's a silk and cotton voile. 60" wide, I ordered 1.5 yards which is enough for me to make a shirt. I posted this recently on Instagram asking if it looked too "geriatric palm beach style" but it got a lot of positive feedback. Not sure why I saw it like that, maybe working up close with the leafy print it seems a bit much. However now that it's finished I do love it. The colors are among my favorites.
Plus it goes so well with my blue wool blazer that I posted about previously. Please ignore my pocket flap which is annoyingly out of place in that picture. Also it's interesting how the iPhone reacts to the light, photos taken seconds apart can have such a different tone.
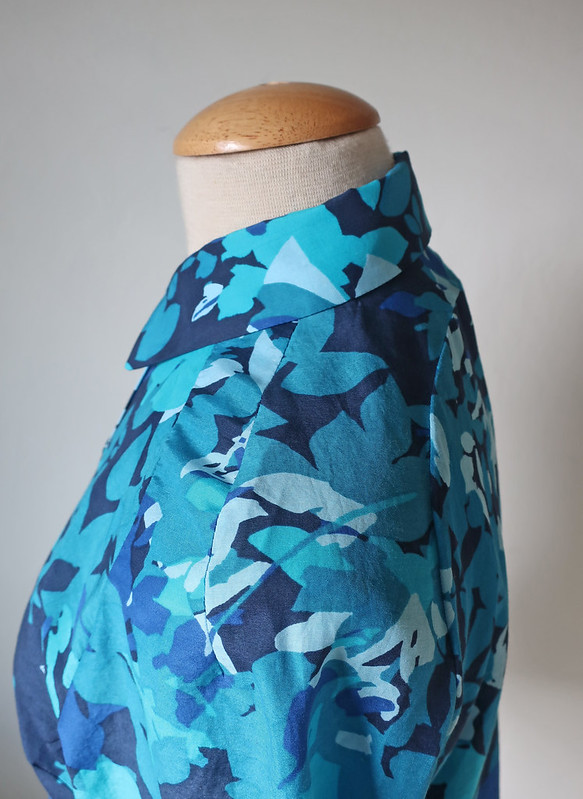
I thought it would be interesting to show you the pattern pieces for this shirt. It's a raglan sleeve where the yoke is incorporated into the top of the sleeve, with a dart at the shoulder. The front has a facing instead of a button band (facing not pictured, also the collar and stand as they are just like any other shirt.)
But I think this is a clever design and results in a nicely fitting shirt. Plus it is super quick to sew. I don't think this is the last time I will use this pattern.
Yep those colors definitely make me smile. I think turquoise is my basic black, if that makes any sense π.
Since I've been sewing so many Burda magazine patterns I have plenty of tracings like those shown above. I find you have to be systematic with labeling - nothing worse than looking for a pattern piece for what seems like hours. Sometimes I've search for days and finally the missing item turns up when I stop looking for it, although that applies to any pattern, not just Burda.
For my envelope patterns such as Vogue, McCalls etc, I put the pattern pieces and instructions in file folders, and label the folder with the pattern brand, number and then a note for whatever garment I first used the pattern for. Example: "Simplicity 2339 blue silk charmeuse". It's far easier to remember the specific garment than the pattern. By the way - when I open an envelope pattern I look through the instruction sheets and get rid of unnecessary ones (typically in other languages) and just use those sheets for scrap paper note writing. Anything to make the file folder less bulky. I'm lucky to have a big file drawer cabinet where I store the file folders in hanging files but it's getting stuffed and so probably time to cull a few of the ones I'm never going to make again.
This label system also applies well to Burda since they have issue and pattern numbers. However with Burda all I have to file is the traced sheets and it seemed like it would take up too much space to make a file folder for each pattern I traced. So one day I thought about putting them in binders, and this is what I came up with.
The clear page covers hold two patterns, and I keep all the pattern pieces together with a paper clip, then put a post-it on the bundle with the magazine year/month and the pattern number PLUS my description of whatever I made first with that pattern. It's quite easy to flip through and find a pattern.
I have about 10 patterns in the binder now and will put the rest of my traced patterns in there. I think having a few of these binders on the shelf is a lot easier than an individual folder for each pattern. In fact I could see having a different binder for each category once I get a sizable quantity of patterns traced.
So that's the scintillating scoop on my pattern storage, ha ha. Onward to the next project. I had some lovely burgundy corduroy and had the idea to make some trouser style pants with slant pockets and a front pleat. Which may or may not be a good idea, pleated pants can be friend or foe, a lot depends on shape and style.
Anyway, here's a peek at the pants.
I'm not 100% happy with them despite the fact that they fit very nicely above the knee. Which is usually the trouble zone but they are a winner there - however the legs are more tapered than I would like. I think if they were straight legs or wide they would look better with the pleated top. So I am playing around with the seam allowance on the legs and seeing if I can adjust a bit. I have a lot of the corduroy remaining so I think I'll make that skirt pictured to the right. And if I could order those long legs and the boots that would be nice also :).
Enough hanging around - I think happy hour was calling my name right then.
Tomorrow I have a full day of classes at Hello Stitch, it's our Intro to Sewing class and in the first session I explain how to decode all that info on the pattern envelope and discuss fabric choice, pattern markings and all the other stuff that is so helpful to know when you begin making your own clothes. I really enjoy it plus I bring a bunch of things I've made to compare with the pattern envelope. I think when you start sewing that's one of the trickiest things to master, matching or visualizing the fabric with the pattern. It's fun for me and the most common comment is "I would never have imagined that garment based on the picture on the pattern!" Which once you get going is the fun part of sewing and making clothes that are your own choices.
Next up, maybe those corduroy pants and a new to me shirt pattern (Vogue 9029) with a good result but some interesting observations.
Happy Sewing,
Beth
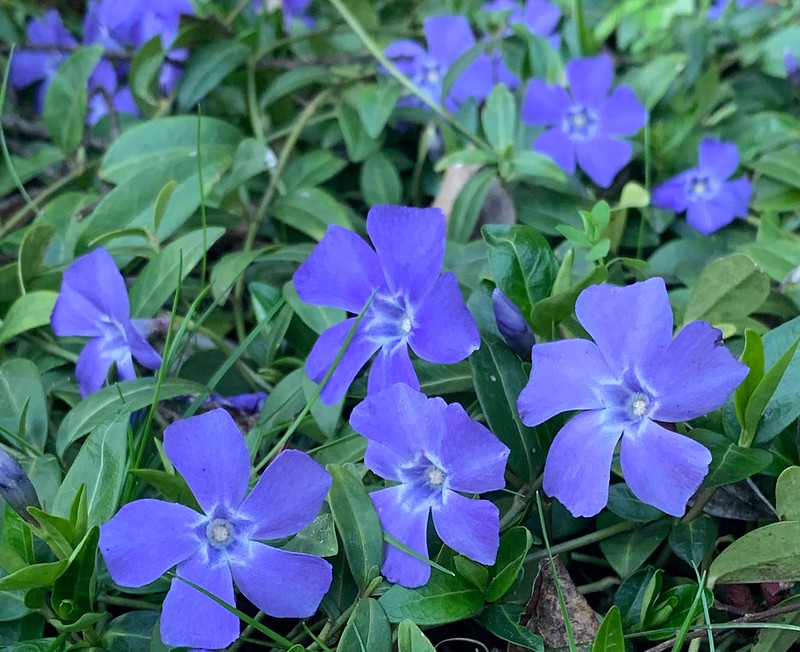
Today's garden photo, reaching among my flower photos for something blue and came across this one. It's Vinca minor which is a nice ground cover and I should get outside and take some cuttings to make more. Or stay inside and sew :)
Although I should have known better than to stand under an olive tree - these trees are common around here and while they give a nice mediterranean touch to the landscape there are a lot of fallen olives to step on and make a mess on the bottom of your shoes. Everything is so green right now and we Californians have to enjoy it while it lasts. I have so much sympathy for everyone in Australia, the fires are devastating as we here well know. But the scope of their situation is mind boggling and I hope it settles down soon.
Back to the mundane details of my new shirt. This is from Burda Magazine, January 2019 #109 which I made last year in March. That version was also a print so the design lines don't show there either. That was in a wool challis which I paired with an ultra suede skirt - a successful sewing of two pieces that I wear often. Keep reading to see the interesting pattern pieces that make up this shirt.
The fabric is from Mood, I ordered it last summer and it's a silk and cotton voile. 60" wide, I ordered 1.5 yards which is enough for me to make a shirt. I posted this recently on Instagram asking if it looked too "geriatric palm beach style" but it got a lot of positive feedback. Not sure why I saw it like that, maybe working up close with the leafy print it seems a bit much. However now that it's finished I do love it. The colors are among my favorites.
Plus it goes so well with my blue wool blazer that I posted about previously. Please ignore my pocket flap which is annoyingly out of place in that picture. Also it's interesting how the iPhone reacts to the light, photos taken seconds apart can have such a different tone.
I thought it would be interesting to show you the pattern pieces for this shirt. It's a raglan sleeve where the yoke is incorporated into the top of the sleeve, with a dart at the shoulder. The front has a facing instead of a button band (facing not pictured, also the collar and stand as they are just like any other shirt.)
But I think this is a clever design and results in a nicely fitting shirt. Plus it is super quick to sew. I don't think this is the last time I will use this pattern.
Yep those colors definitely make me smile. I think turquoise is my basic black, if that makes any sense π.
Since I've been sewing so many Burda magazine patterns I have plenty of tracings like those shown above. I find you have to be systematic with labeling - nothing worse than looking for a pattern piece for what seems like hours. Sometimes I've search for days and finally the missing item turns up when I stop looking for it, although that applies to any pattern, not just Burda.
For my envelope patterns such as Vogue, McCalls etc, I put the pattern pieces and instructions in file folders, and label the folder with the pattern brand, number and then a note for whatever garment I first used the pattern for. Example: "Simplicity 2339 blue silk charmeuse". It's far easier to remember the specific garment than the pattern. By the way - when I open an envelope pattern I look through the instruction sheets and get rid of unnecessary ones (typically in other languages) and just use those sheets for scrap paper note writing. Anything to make the file folder less bulky. I'm lucky to have a big file drawer cabinet where I store the file folders in hanging files but it's getting stuffed and so probably time to cull a few of the ones I'm never going to make again.
The clear page covers hold two patterns, and I keep all the pattern pieces together with a paper clip, then put a post-it on the bundle with the magazine year/month and the pattern number PLUS my description of whatever I made first with that pattern. It's quite easy to flip through and find a pattern.
I have about 10 patterns in the binder now and will put the rest of my traced patterns in there. I think having a few of these binders on the shelf is a lot easier than an individual folder for each pattern. In fact I could see having a different binder for each category once I get a sizable quantity of patterns traced.
So that's the scintillating scoop on my pattern storage, ha ha. Onward to the next project. I had some lovely burgundy corduroy and had the idea to make some trouser style pants with slant pockets and a front pleat. Which may or may not be a good idea, pleated pants can be friend or foe, a lot depends on shape and style.
Anyway, here's a peek at the pants.
I'm not 100% happy with them despite the fact that they fit very nicely above the knee. Which is usually the trouble zone but they are a winner there - however the legs are more tapered than I would like. I think if they were straight legs or wide they would look better with the pleated top. So I am playing around with the seam allowance on the legs and seeing if I can adjust a bit. I have a lot of the corduroy remaining so I think I'll make that skirt pictured to the right. And if I could order those long legs and the boots that would be nice also :).
Enough hanging around - I think happy hour was calling my name right then.
Tomorrow I have a full day of classes at Hello Stitch, it's our Intro to Sewing class and in the first session I explain how to decode all that info on the pattern envelope and discuss fabric choice, pattern markings and all the other stuff that is so helpful to know when you begin making your own clothes. I really enjoy it plus I bring a bunch of things I've made to compare with the pattern envelope. I think when you start sewing that's one of the trickiest things to master, matching or visualizing the fabric with the pattern. It's fun for me and the most common comment is "I would never have imagined that garment based on the picture on the pattern!" Which once you get going is the fun part of sewing and making clothes that are your own choices.
Next up, maybe those corduroy pants and a new to me shirt pattern (Vogue 9029) with a good result but some interesting observations.
Happy Sewing,
Beth
Today's garden photo, reaching among my flower photos for something blue and came across this one. It's Vinca minor which is a nice ground cover and I should get outside and take some cuttings to make more. Or stay inside and sew :)
Thursday, January 9, 2020
Bye 2019 and a quick review before starting 2020 sewing
Is it too late to do a review of 2019? I actually started the blog in Feb of 2010 so the ten year mark is coming up soon, and I plan to take a retrospective look then. But for now let's take a look at my sewing in 2019. Which is the year I officially became a Burda magazine fanatic.
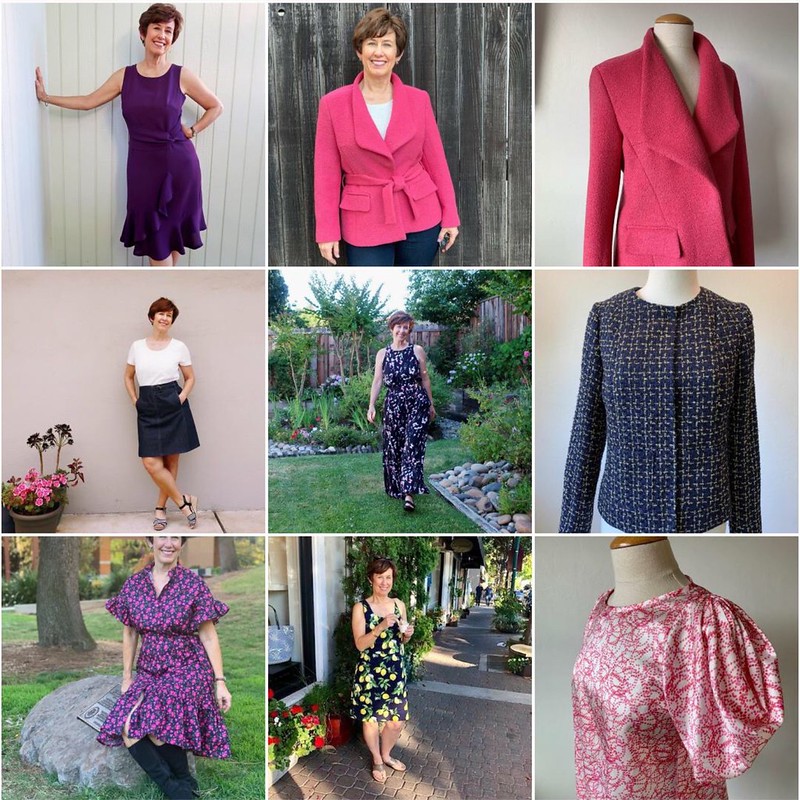
Here's my Instagram Top Nine for 2019.
My Burda fandom is certainly evidenced by that pink jacket and my smile. Here's the blog post on that project which is Burdastyle Oct. 2018, pattern 108.
Although I did start off the year with a pair of Ash jeans and since then I've made a few more pairs. I think the most challenging part about sewing jeans is finding the exact right fabric. But once you get a style and fit you like they go together rather quickly.
What did I sew in 2019? I went thought my blog posts and counted up the garments and they break down like this:
3 Blazer - Jackets
9 Dresses
4 Shirts (I consider these as button front shirts with sleeves)
5 Tops (woven or knit)
1 Jumpsuit
2 Skirts
1 Pants
2 Jeans
When I added up those numbers I thought what??? It seemed like I sewed so many more items and in actuality I did. Throughout the year I made a lot of things that were samples connected to teaching my classes at Hello Stitch. If we used a new pattern then I made a sample to familiarize myself with it, plus to have as an example in the studio.
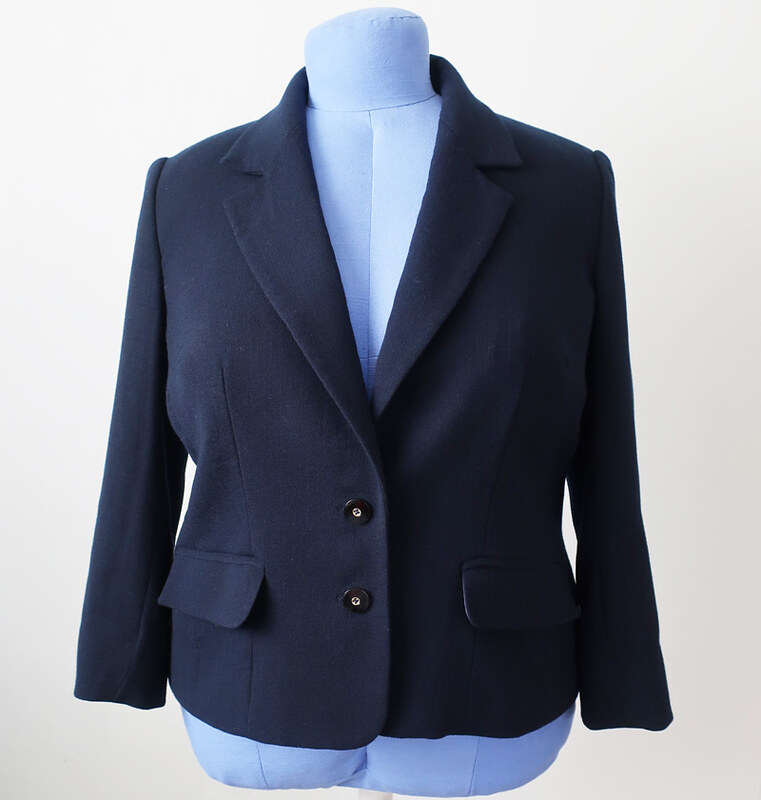
I sewed a few things for other people, including a blazer jacket for my friend Heather using a beautiful wool from Britex. I actually made two jackets, this navy blue one was the first and it was kind of a wearable test version which turned out to be supremely wearable. I also discussed this pattern McCalls 6172 and other blazer patterns on a recent blog post.
Since I rarely sew with any plan and am not missing anything in my wardrobe, I just sew what grabs my interest. Lately I have been given a LOT of different fabrics, and as I have mentioned previously the fun of turning something that was free into something very wearable is a fun challenge. Currently I have been given a very unusual hot pink wool sweater knit which I'm thinking could be a 60's style dress. But as I said, I'll just sew where my mood takes me.
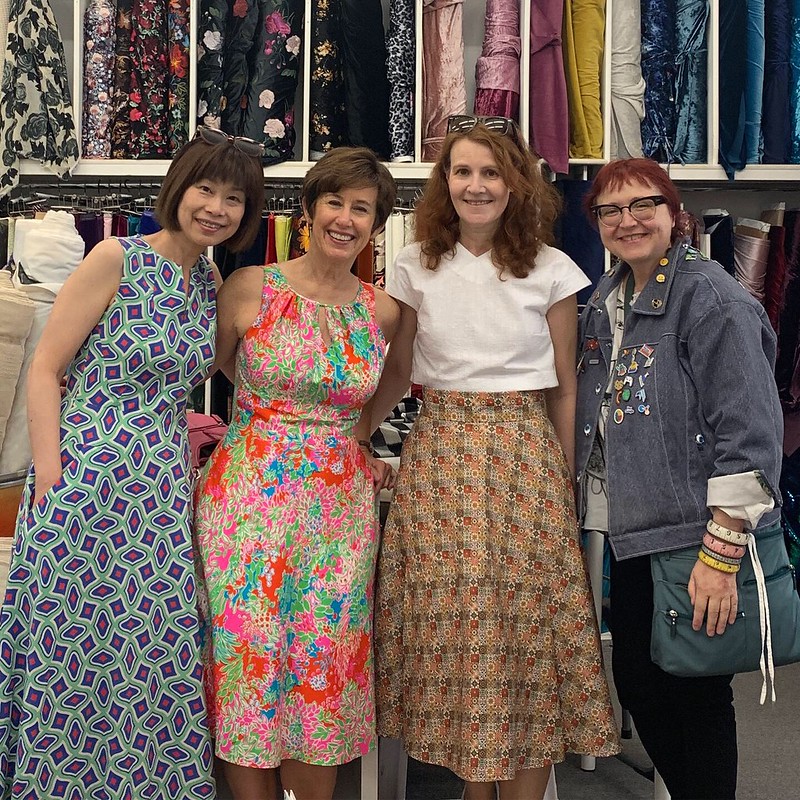
This year also brought me the sewing meet-up of dreams as I got to meet my far away friends Carolyn and Yoshimi. Carolyn lives in Perth, Australia, writes the blog Handmade by Carolyn and is a sewing and knitting wizard plus appreciates a sewing and/or fabric challenge. Yoshimi is from Tokyo and sews meticulous garments plus knits beautifully as well. Time for my frequent lament of I wish I could knit but I'm not going to start now! It seemed like magic to be together in person after so many years of online connection and we had a fun shopping excursion plus dinner together. Plus further bonded over our shared love for Vogue designer patterns, particularly the Donna Karan and DKNYpatterns.
Yoshimi, me, Carolyn and Shams. Everyone wearing handmade garments and now I just noticed Shams' bracelets and want one.
It was a great year of teaching classes at Hello Stitch Studio. They opened their doors for business in 2017 and gradually the classes are getting more and more busy - to the point that they fill up quite soon after being listed which is very rewarding. Plus I see so many people come back for different classes, I know they want to learn to make garments but I think they have also enjoyed their sewing day with me π. We're always trying to think of new classes to offer, particularly in that intermediate skill level so if you have a suggestion please let me know.
Of course one of my favorites is the Jacket Making weekend workshop which last year was held on a ridiculously hot September weekend but they all powered through with the steaming and pressing to make beautiful blazers.
My next session of this class at the end of this month is full, if you are interested let the studio know as they will schedule another session based on requests. For sure we will do it again in the fall.
A quick mention about patterns. For the most part I've sewn with Vogue patterns plus a few from New Look, McCalls, Simplicity. Once I started reading a lot of blogs I was so intrigued by Burda, as they seemed to have a lot of styles I liked, so I bought a few issues and also someone gave me a a few older ones. I purchased a few PDF patterns off their US website (which has gone through a weird transition and isn't very useful right now) but they were all good. Particularly the Burda Plus patterns, they seem to have a good variety of styles, with real fashion details and interesting design lines. Of course not everything in the plus section is super interesting, they have their fair share of shapeless silhouettes but they have the same thing in the 34-42 sizes as well so I don't think it's inherently a problem due to the size range. In any event, once I started subscribing I just used the magazines more and more, as it is so convenient to just flick through the magazine or the Russian website which collates all the Tech drawings onto one page, and find what I'm in the mood to make, be it a dress, or a shirt or skirt. Whatever. In fact when each issue comes I usually see more things I want to make then time allows. Granted you have to trace the patterns and believe me - it gets a lot easier after you have done it for a while. Now I can trace a complex pattern in about 15 minutes.
The second feature that actually makes them easy (at least for me) to fit is that you trace the size, no seam allowances, then do you adjustments for fit, and lastly add the seam allowances. It does turn out to be easier to check a pattern with no seam allowances for flat pattern measurement and not alway have to deduct the seam allowance on each seam. So the work of tracing etc. is a happy trade-off for never every printing and taping PDF's together.
So that's my little editorial about Burda - yeah - I'm a convert so perhaps a bit over-enthusiastic.
Here's the link to my blog post on this dress which is Burda April 2019 # 117.
That's a wrap for 2019. We had all kinds of sunshine yesterday so I took pictures of several finished items and hope to post those soon.
Happy 2020 Sewing π
Beth
For today's photo, the current state of my garden is fallen leaves and sprouting weeds, so here's something from a few months ago. Puts me in a color block sewing mood.
Subscribe to:
Posts (Atom)