Showing posts with label jumpsuit. Show all posts

Monday, January 24, 2022

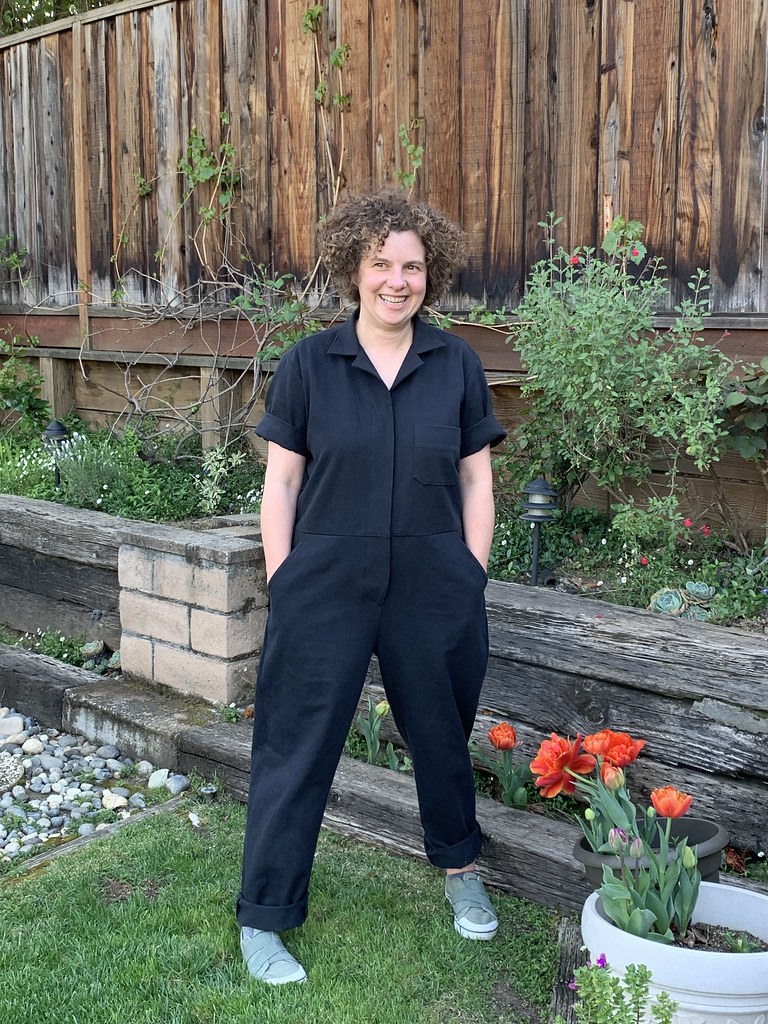
Blanca Jumpsuit in Floral Corduroy

Sometimes I come across a piece of fabric and instantly know what I want to sew with it. There are several textile and sewing groups in my area that have periodic fundraising sales of fabrics, supplies and patterns where I've found some real gems. I snagged this piece of floral corduroy earlier this year and thought it would be great for another Blanca flight suit for my friend Halnya. It's rare to find a nice floral corduroy, it must be a few years old as it has no stretch and was 45" wide but the piece was around 4 yards so enough to fit the jumpsuit with a bit of pattern puzzling. I made this pattern last spring when I taught an online class and it's fun to put together. More details below but FYI I'm doing this class again starting Feb 1, here's the link. 

jumpsuitblancacord3

She is a fashion risk taker so was very happy to wear this jumpsuit which I think has a 70's look about it. Here's a better look at this fabric. I think it actually looks better with a leather belt rather than the fabric belt. I really like corduroy and unlike other fabrics that I am fine with ordering online, for corduroy I want to feel it and see the weight and the color in person. Lately I've been looking for stretch corduroys in interesting colors, it's always on my list and if I see some I will buy for the stash. I guess it's out there but I find that the price seems too high for my liking. For some reason I would pay a fortune for a imported wool but I feel like corduroy should be in the $10-$15/yard range which is probably unrealistic. 
Anyway - this was a bargain of a few dollars, and then I ordered a zipper from Wawak, their selection and shipping speed is amazing. 

Back pockets blanca

If you note in this photo above I made a change to the sleeve design. On the pattern the long sleeve has a seam down the center and then no cuff, just a snap to make it smaller at the wrist. Which is feature that I didn't really care for so I extended the short sleeve pattern piece into a long sleeve and added a cuff with snaps. 
For cuffs I just decide how wide I want them, how much overlap, measure the finished sleeve opening (where I added a small pleat) and then draw up the cuff piece right on the fabric. And then use that one to cut out the second.

making cuff blanca

For the opening into the cuff I just used the continuous bound placket and then let the underlap of the cuff be about one inch longer so that the cuff would overlap.

sewing on cuff blanca

Since the zipper was metal I thought that snaps would look good on the cuffs instead of buttons so that gave me an opportunity to get out my snap tools. Which consist of a bunch of snap kits that I keep in an old metal cookie tin. So many sewing supplies in old metal cookie tins, right? Another one is full of buttons. 

applying snaps blanca

I've found that these Dritz snap kits actually work very well. The key to using these is to follow the diagram on the package exactly. Also not lose any of the little pieces! Now I just buy replacement snaps as I have the snap setting components that came in the kit. Also when I apply the snaps I put the rubber disc on a piece of wood and then the snap holder plus snaps/garment on that, and then hammer on that. The block of wood gives a firm surface to hammer onto and also kind of absorbs the hammer blow so the snap doesn't smash but locks into place. 

Here's a look at this pattern and the technical drawing.

blanda jumpsuit cover art

When I first made this I was a bit cautious as I really don't like sewing bulky zippers but it came out fine. In my class I have some further details but here are a couple of tips for getting this zipper in just right. 

Zipper top Blanca

When it comes to zippers I work from the top down, as this type of zipper is very visible on the garment and the opening is the most important. It has to be even at each side of the collar.  I mark the stitch line where the collar will attach and then placed the top of the zipper in relation to that line. Then I pin the zipper down to the zipper stop. As it happened this zipper was a bit too long so I cut off the bottom, hand sewed a new zipper stop and then covered the bottom with lining. I did remove the teeth from the zipper tape below the new stop. 

basted zipper blanca

After fixing the bottom of the zipper I hand basted the whole thing and then it was ready to stitch in. I find it takes a few minutes to hand baste in something like a 22 inch zipper but the time is so well worth it as you can then sew it in by machine, with no pins and be sure that it's in just the right location, and centered. 

collar blanca

So that's a second go round with this pattern and I think another friend wants one so it may again be on my to-do list. Meanwhile I might also make up another Merchant and Miller Boiler Suit for Stacey as she wears her first one constantly. I made both of these pattern back in April when I did my online class for Jumpsuit/Boilersuit and that will start again in February, here's the listing on the Hello Stitch website.  I'm happy to say that Hello Stitch will continue as an online entity and continue to offer classes in sewing and quilting so I will be teaching more online classes this year. 

IMG_5724

I'm turning into a jumpsuit fan, maybe I will even make one for myself!

jumpsuitblancacord2

Up next, more completed things to post here, and on my calendar next weekend a trip to Britex with my friend Heather. I want a tweedy wool in tones of burgundy for a jacket, and she wants some camel color wool for a coat. That's the plan but who knows what we will come home with!

Happy winter sewing,
Beth

Today's garden photo, a flower from the mallow bush that I got a few years ago at the local community college horticultural department sale. The flowers are so pretty and this thing is incredibly hardy, I think it's about 6 ft x 6ft now and that's with a periodic chop. 

IMG_3920

Sunday, September 6, 2020

Resort wear dreams: Jumpsuit from the cover of Burda June 2020 #101

Once in a while the new issue of Burda arrives and immediately I want to make the item pictured on the cover. However I rarely do it, as other things start to catch my eye. This time I traced out the pattern and to test I sewed it up in a quilting cotton. Not the ideal material but something I had in my stash. That accomplished I actually ordered some woven rayon to use for the real jumpsuit. Despite a lot of fabric in my stash there was nothing suitable so I ordered from Fabric Mart and the print with the vertical striping was ideal.

Blue jumpsuit 3

As patterns go this is really easy to sew up. I wanted to check if the pants fit would be right so I compared the pieces to my Emerson pants which have a similar loose fit. The length of the rise was very similar so I didn't have to do a lot of adjustment for this pattern, I made the bodice portion in size 38 and the bottom half in size 42 - blending at the waist so they joined up.

Jumpsuit Burda Magazine pattern image

Here's the pattern photo and the line drawing. The pattern is June 2020 #101. Their version is ankle length but I think that looks terrible on me so I lengthened a lot.

jumpsuit front on form

jumpsuit front tie

This pattern is designed for the knot to be loosely tied, so that the sides can fold and drape over the hips. I've seen some versions where the knot is tied very tightly and to me that looks a bit strained. I think also if you are quite tall then the bodice may need to be lengthened so that the drape can cover the front elastic waist.   Can you see that I had to piece the fabric on one side? The two fronts are cut with the tie as part of the bodice, and with lengthening the pants I was a bit short on fabric. So I pieced the end of the tie with a french seam there and I think it hides well enough.

There's a look at the front waist and how the bodice folds under at the side seam to create the tie and draping. I think this is such a clever and yet simple design, I will definitely make it again next summer and perhaps even a dress version.

jumpsuit inside waist tie


Bluejumpsuit9

Not quite resort location, more like the backyard swimming pool at my parents house. Which I really appreciate this summer and especially this week - as I write today the afternoon temperature is around 110℉ which seems par for the course for this very weird summer. Not that we don't occasionally have heat waves but the staying mostly home has made for a very hot and boring summer here in N. California without a lot of the options we might typically have (like going to the movies or a nice chilly restaurant). Growing up with a pool I started swimming very early but the idea of swimming for exercise has eluded me. Not this year - with the gym closed and the smokey air making walking unpleasant I feel fortunate to have this alternative.

Returning to sewing, here's the back view. The back top blouses at the waist, perhaps more than in the pattern pictures as I am shorter, but for a jumpsuit it makes it quite comfortable when you sit down!

jumpsuit back

Bluejumpsuit7

One other change I made on this pattern is to reshape the neckline front and back. When I made the test version I thought the tank top was a bit chunky - not very elegant looking and it needed some reshaping. To find a nice neckline I looked through my photos and realized that using this dress pattern would be a good way to reshape the neckline. Also I have to restrain myself from wearing that dress for any and all occasions that require a summer dress - I think it is my favorite of the last few years.


jumpsuit side view on form

And what about getting in and out of this number for a bathroom break? Well one benefit of widening the neckline is that I can pull it up or down over my hips and shoulders without unfastening the back. Although be warned untying the knot in front is necessary.

jumpsuit snap back closure

The back has a short slit opening to make it possible to get in and out, although as I mentioned with my neckline change I can just about do it without undoing that snap. As seen in my other posts, I don't like those loop/button things so I always make a little tab and sew on a snap, I think it stays flatter and then the closure is hidden. 

Here's my tip of the day:  another little thing I like to add to anything that has shoulder straps or sometimes in a tank top shape such as this are the little straps that hold the top of the shoulder in place on your bra strap. I just make them out of the fabric if it's thin or I use a piece of ribbon. My realization one day is that to make it easier, I first sew the snap on the garment, then sew the snap on the end of the strap, then snap together and then lastly sew the end of the strap down on the garment. This way you can make the strap part the right length. This makes it SO much easier than sewing the strap on and then having to place the snaps. 

jumpsuit shoulder snaps


Bluejumpsuit8

So that's the latest on my summer jumpsuit. They also show it in the magazine as a romper which I am tempted but I think it's too late in the season for that. Maybe next spring. 

Next week is the first session of our Hello Stitch Sewing Club (which is a  virtual class in the evening.) We've had lots of sign-ups which is great and I'm glad the studio is able to stay in business during this crazy time, at least in some capacity. And crossing our fingers that things turn around soon so we can all get back to our regular lives. And travel to a resort somewhere :) Meanwhile I will make do with the backyard resort and hope that the temperature is a bit less tomorrow. Forecast is for only 108℉ tomorrow - whew a whole degree cooler! (I jest because what else can we do except pray that the power doesn't get turned off due to fire danger). Oh this is absolutely the best summer ever, she says sarcastically.....

wishing everyone better days to come,

Happy Sewing,  Beth


Today's garden photo - some blue violas from earlier in the summer when things were still very green.
I used to plant pansies but decided I like violas better, they seem to do better and rebloom plus each plant has more flowers. Also they reseed and I find them popping up in random spots which makes me smile. 

IMG_2326

Thursday, August 1, 2019

Zadie Jumpsuit from Paper Theory Patterns

If you had told me two years ago that I would be making and wearing a jumpsuit I would have said "not in a million years". And yet here I am, wearing this jumpsuit, and teaching a class this weekend on this very pattern. After this pattern came out and I saw so many great versions on IG and blogs I came to the conclusion that it's a pattern that's both simple and stylish, quick to sew, actually easy to get on and off, and it looks great in so many different fabrics. This is the Zadie jumpsuit from Paper Theory Patterns. 

jumpsuit zadie 4

I wanted to take photos and do this blog post this week, so I was outside as the light was fading around 7pm. On the positive side - I had just come home from getting my haircut so I figured bright lipstick, dash out and take my photos. That spot on my patio has a nice blank wall but the light is limited due to the angle and the patio cover. I'm still contemplating painting a section in a nice light color. Oh the things we do for photos these days, right?

This fabric is a polyester crepe ? kind of a textured fabric with a very slight stretch, which I bought around New Years time at Joann's on one of their super sale days. I loved the color but didn't really have any need for some poly, however when I was thinking about this jumpsuit I saw it in my stash. I still have about 1.5 yards remaining so I think that will be a dress. Because now I'm sold on this color :)

Super duper fabric closeup so you can see the texture. Which is a nice feature - it presses perfectly but no wrinkles! And you can see one small change I made which was to add belt loops.


Zadie fabric up close

If you've been living under a rock for the past few months and haven't seen this pattern here is the tech drawing.

Zadie jumpsuit tech drawing


I did make a couple of fitting adjustments, as I made a sample version which is hanging on the wall at Hello Stitch, in my size 10 and which I thought the overall fit was nice the crotch was very low, to me it felt awkward. I decided to raise it up on this version and then if it turned out too high I could always stitch it lower.  Here's the change I made, raising both the front and back crotch curve by 2 inches. That turned out to be perfect and I left it that way after I basted it to try on.

pattern adjustment zadie pants


jumpsuit back view

The slight drawback of raising the crotch curve is that it is now shorter in the body, so slightly more wriggling to get it on since the length of the opening is now shorter, but it is by no means too short and I think the back looks better than on the test version that I made. (In this post if you scroll down you can see the test version that I made).


jumpsuit zadie 3

The other notable change is the length, I added 6 inches to the length, and then ended up hemming up about 2.5-3 inches as I wanted it to be full length, I don't think the crop length looks good on me at all.

This jumpsuit is very cleverly designed in that there are no closures other than the tie belt, but it is really like a wrap dress, so the fronts overlap and provide very good coverage. It's one of the type of garment that probably doesn't look all that great on the hanger if you were to see it in a store but once you put it on then it looks fantastic.

zadie jumpsuit on hanger


Zadie belt

I might have gone a little overboard with the belt loops but that is one criticism of the pattern, or the wearability. Most all of them that I see have the tie belt wrapped but the waist seam tends to slide down below it, and sometimes it looks a bit baggy in the backside. I almost wonder if it would look OK and be comfortable to have a casing with elastic just across the back waist. Might try that sometime in the future.

One other little adjustment was to add to the front edge of the bodice, where the wraps overlap at the center front. This is another of my "I will add a little bit here and if I don't like it when I sew it together and try on then I can always remove it" adjustments. But I left it as it. By adding that small amount on a wrap dress or top you are raising the point where the overlaps intersect. Often this is the difference between a pretty and comfortable neckline and a slightly too revealing wrap neckline.
I wrote an article on the Craftsy blog in the past which is now on the Bluprint site, so it may be helpful when fitting a wrap neckline,

pattern adjustment zadie bodice

One other place when I decided to go off the instructions was in the binding of the opening. This fabric was a bit spongy and it didn't look great with topstitching as a linen or cotton would, so I hand stitched the bias binding around the neck.
It did take a few minutes but the thread really disappeared into the texture of the fabric and allowed me to get the binding even all the way around. Plus a bit of hand sewing is fine when it's SHARK WEEK on Discovery channel. Any other shark week fans out there? It's silly, it's bombastic and yet I find it so mesmerizing. Also as someone who loves to swim in the ocean, I find it both educational and nightmare inducing. But I love anything ocean related so it's really interesting.

Zadie binding

jumpsuite ig

So that's the scoop on my Zadie jumpsuit. This Saturday I have a class on this pattern which is full, however we are offering it again in September and I think there are some spots still open, but I think they will fill up.

What else? I'm sneaking in a few new summer dresses here and there in my sewing time, as I have a vacation coming up. We have a jean jacket class on the calendar at Hello Stitch in October - that will be fun and it's such a great item for our bay area weather. There is one spot that opened up in my Jacket Tailoring class in mid-Sept. I just started on a Jasika blazer this week as I wanted to try out the pattern so I will post some progress on my IG story. Also we're planning a capsule wardrobe class so more details on that soon.


I wasn't going to include this picture but I decided it needed a caption of this type "oh hello, welcome to my garden, where I flounce around in my elegant jumpsuit admiring my flowers, and I ignore the dry patch on the lawn where the sprinklers refuse to cooperate". Or something equally silly but you get the idea.

Zadie 5 jumpsuit

Happy Summer Sewing,
Beth

Today's garden photo, dahlias and a milkweed, which I happily planted to help the monarch butterflies. And I was thrilled this week to see some in my yard. Long live the monarch butterflies! 


IMG_0684