Showing posts with label cotton. Show all posts

Sunday, November 11, 2018

Burda 04-2018-105 shirt with dart details in cotton print

As any Burda subscriber knows, it's one thing to have the excitement of receiving that new issue in the mail, to page through it and imagine all the possibilities. It's then quite another to actually trace out and sew a pattern. Not that I don't want to - but there is a tiny bit of hesitancy.  The folded sheets are so neatly stapled, and not at this point likely to get lost. The other patterns on my shelf are calling to me. Those lovely tissue patterns from Vogue or McCalls which I can just open up and cut into without searching among the multi-colored pattern puzzle that is the Burda magazine sheet.

But in the end I convince myself to detach the staples holding those sheets, and search out the necessary pattern pieces for my selected item. And I'm always surprised that it takes me less time than I expect to find and trace. However - if the pattern of my choosing is "red lines" (you Burda users know what I mean) then I often think twice about it. The red seems the most difficult to trace. If my selection is the black lines I give a small yeah! of triumph. It's the small things in sewing that often give pleasure, right?

This is a long way round to say that I just sewed up a shirt from the April 2018 issue. One that I traced back last spring, actually started on another fabric, determined the fabric wasn't suitable and changed mid-construction to a different pattern. Which was the right decision for that silk.

But this pattern still interested me so I've sewn it up in a fabric that is really nice however again I have a slight issue - because the details are lost in this busy print. As soon as it was finished I resolved to make it again in a solid. Time will tell :)


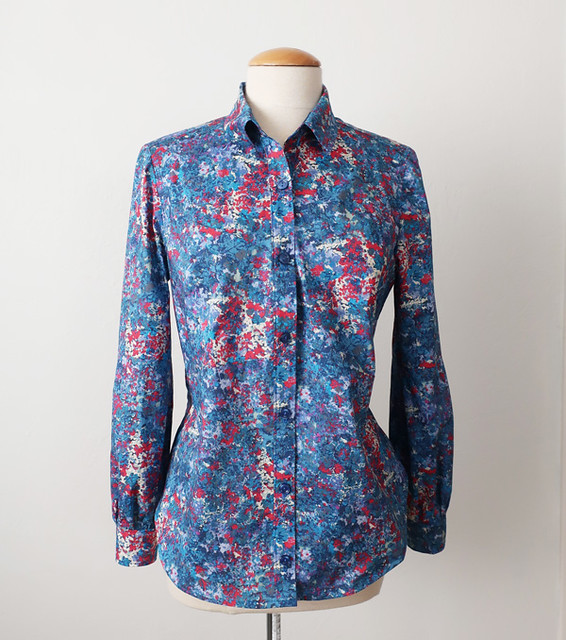
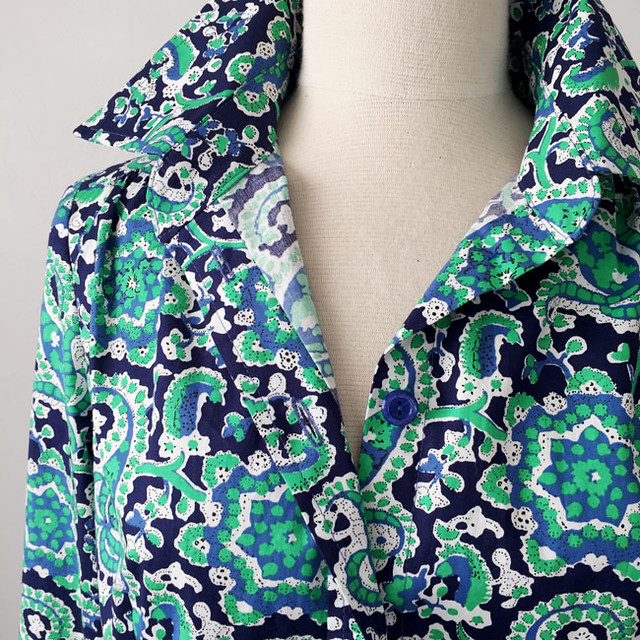
blue shirt front on form

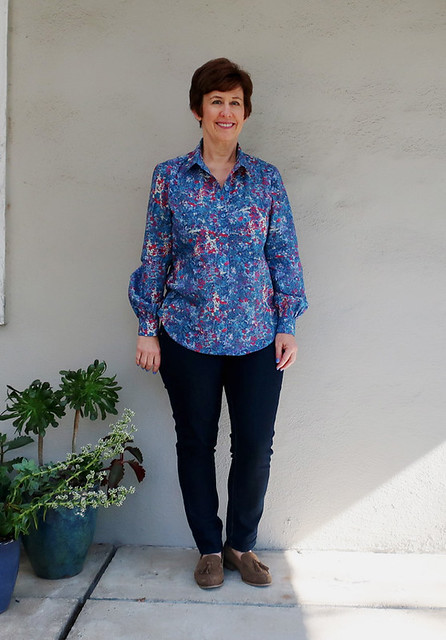
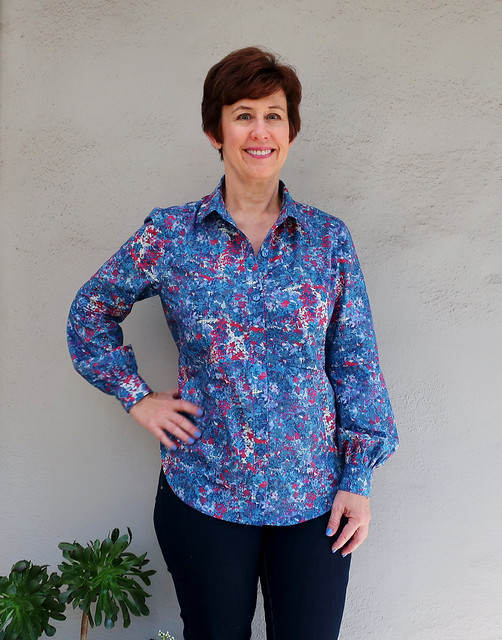
I bought this fabric 2 years ago at Mood in NY, it's a lightweight cotton, I suppose a cotton lawn but with a tiny bit of body and crispness which is perfect for a shirt. I love the color mix and find it works with so many things in my wardrobe, including this jacket which I've been pairing it with this week for an unintentionally patriotic look.


Burda blue shirt 2


IMG_4531

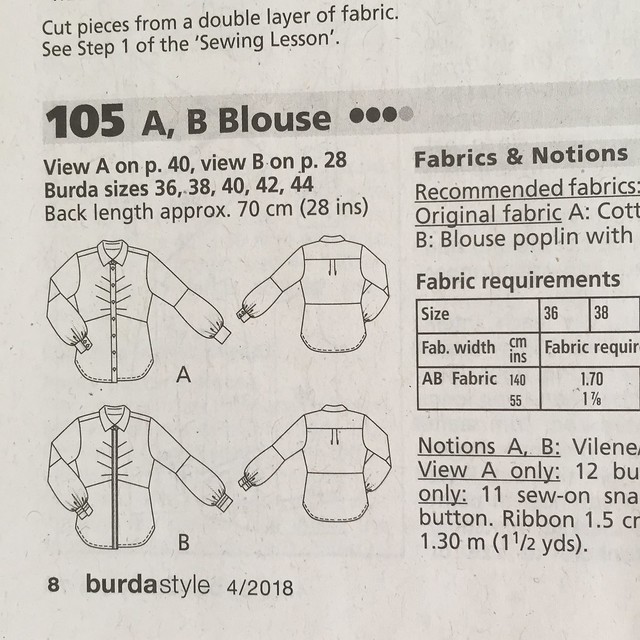
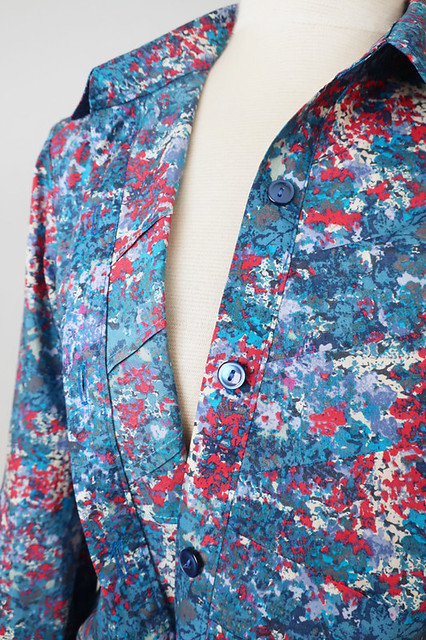
Here's the detail from the magazine, so you can see that this shirt has this interesting dart detail down the center front which would show a lot more in a solid.


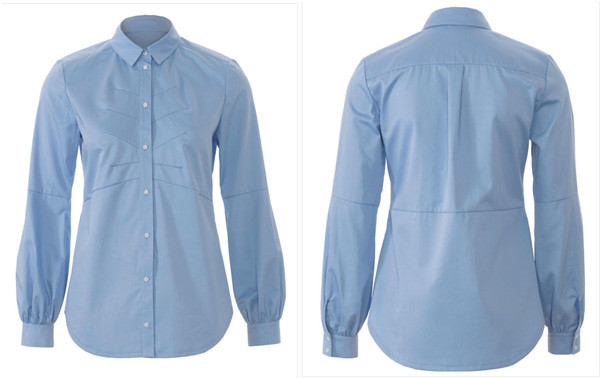
Burda version dart blouse

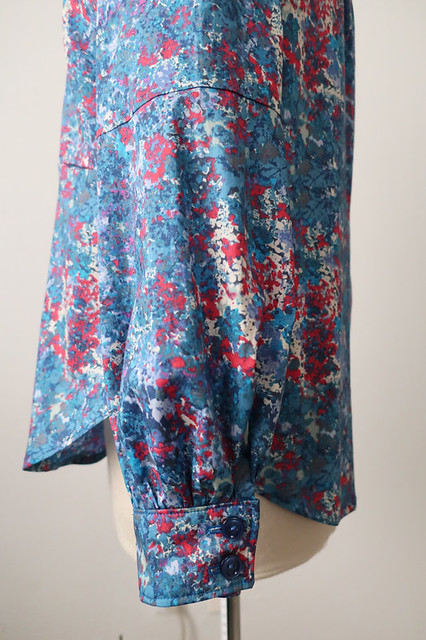
From the technical drawing page in the magazine and this light blue version from the Burda website you can see the dart detail. Another interesting feature is the sleeve, which has a seam at the elbow and then the lower piece flares out quite a bit so it can be gathered into the cuff. As I was tracing I wondered why it had the seam in the center back but looking at this version you can see that the seaming lines up in an interesting way. I wonder how it would look if I used two different fabrics and did a color block version?  Will have to give that some thought.


blue shirt sleeve detail

I didn't copy the cuff pattern pieces, I rarely do - I just make one up as I go along after I decide the length and see how wide I want the cuff.


blue shirt darts inside

Perhaps here you can see the dart detail a bit better. I have a really beautiful dark fuchsia color silk charmeuse which I got at Stone Mountain a few months ago, it would show off the details nicely however it is a stretch silk and sometimes crisp details like darts don't do as well with a stretch silk. I'll have to do a little test on a scrap.


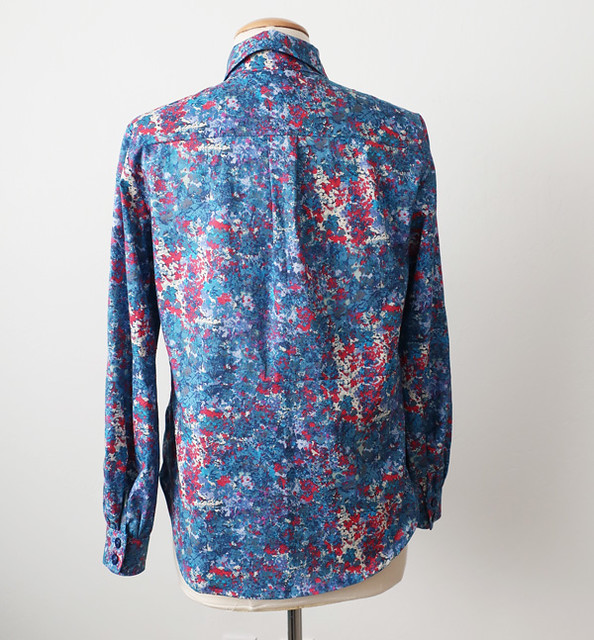
blue shirt back view on form

blue shirt 5

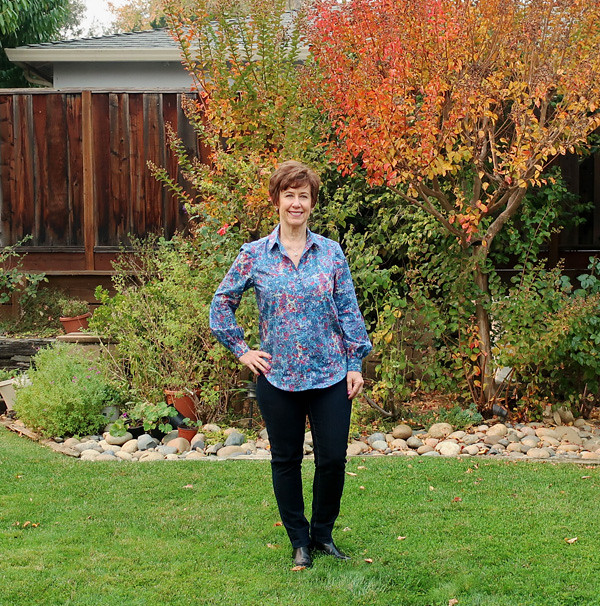
Different day,  more pictures. Some days I take photos against a blank wall on the patio which has a covered roof that lets in 50% of the sunlight - at certain times of day the light is just right for photos but if I miss it by just a few minutes then the shadows are there. So I ran outside yesterday to take some more photos. This one was taken at high noon - yet no shadows at all due to the sky being covered with smoke. The sun was a red ball in the sky and it was so strange to see the whole bay area covered with grey - unfortunately the 2nd time in about a year this has happened. Last year with the north bay/Napa fires and this time the one near Paradise, Ca. The devastation is shocking and it's heartbreaking to see what people are going through.

Blue shirt with darts close up

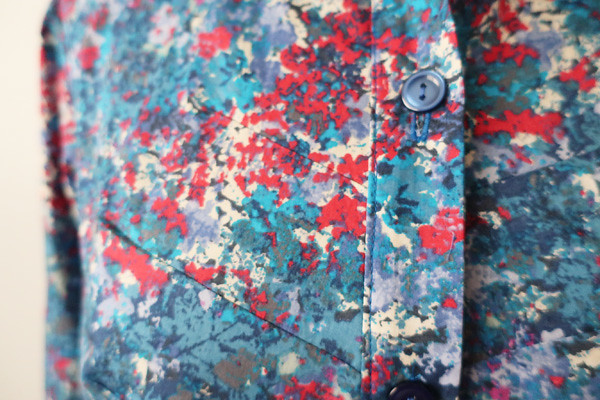
This fabric has so many colors it in, I really like this type of abstract or splatter prints.


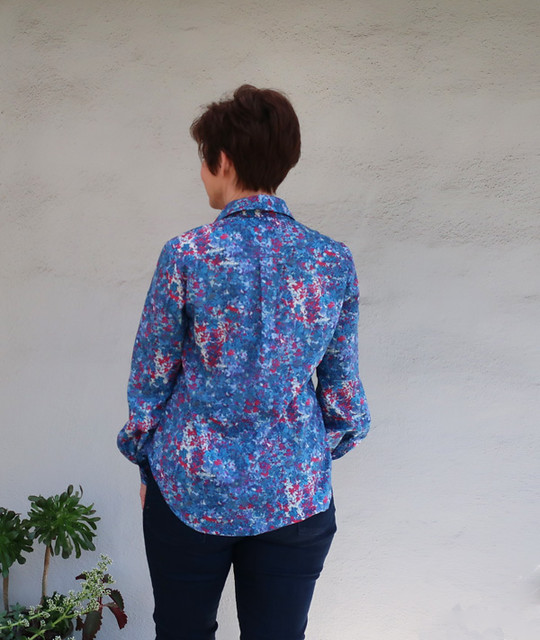
Burda blue shirt back view

blue Burda shirt close view

unintentionally matching blue nail polish :)

So that's the latest on my Burda magazine sewing. This morning I just stitched up a version of something from the November issue !!  Same knit top as KS_Sews has made. I like it a lot although I changed it to a crew neck instead of a wide boat neck (always cold neck so I like more coverage). Also this afternoon I'm teaching a knit top class at Hello Stitch Studio and I wanted to change the neckline to show how to redesign the neckband.
All my classes at Hello Stitch for the remainder of the year are sold out! We have LOTS on the schedule for Jan-Mar and I wrote about them in my previous post. If they're not listed on the website yet you can always call or email the studio to sign up.

ok, gotta run!


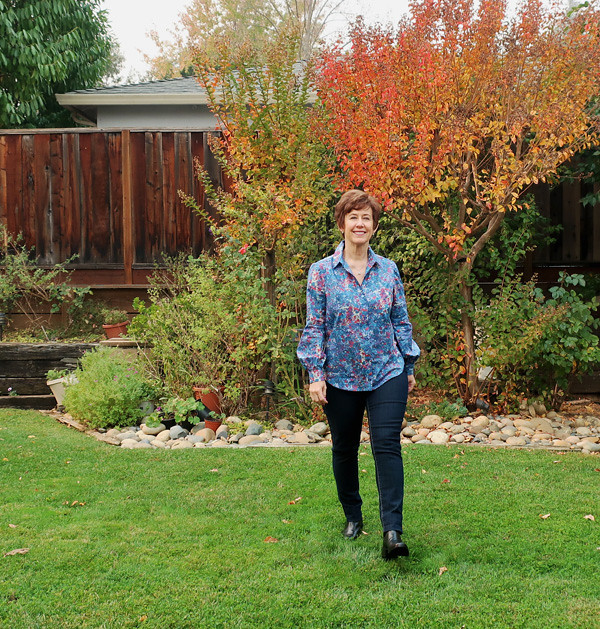
blue shirt 6


Happy Sewing, Beth

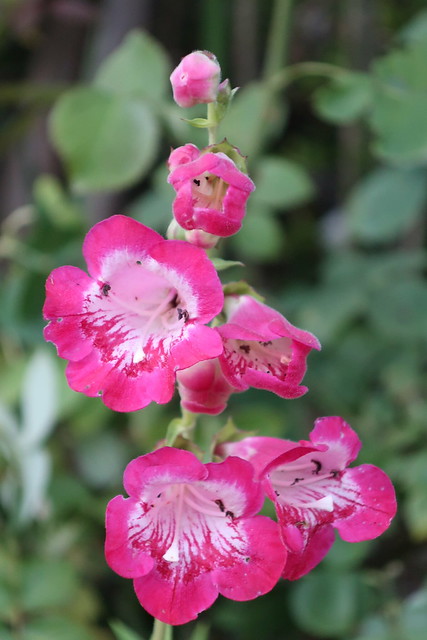
today's garden photo, a penstemon that is probably in the wrong place in the garden. Winter will bring some rearranging - at least if it ever rains around here.

IMG_0116

Friday, October 19, 2018

Liberty cotton/silk for a new shirt

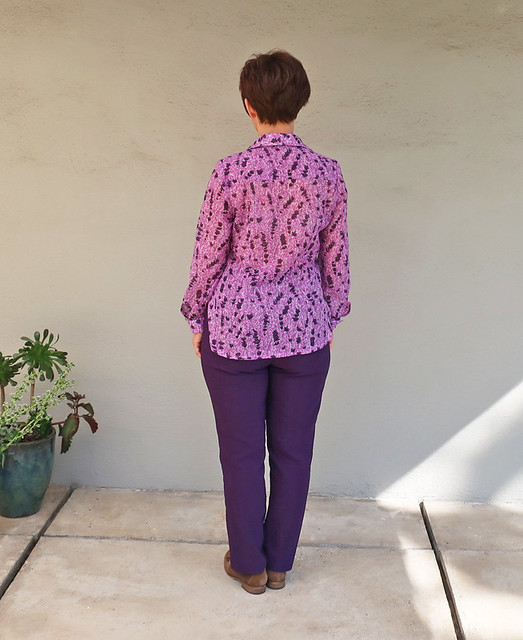
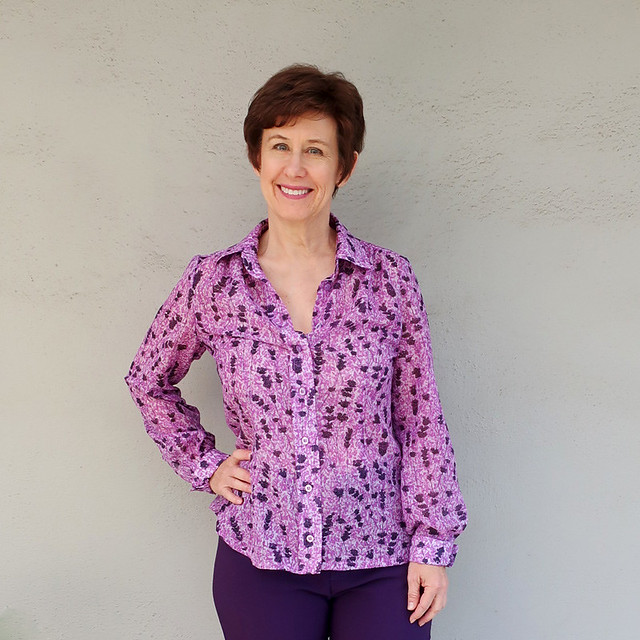
One of these days I'm going to use a different shirt pattern, but not this week. In fact I just rummaged around my pattern file and found a Burda tracing that I did last winter - which I scrapped mid-project due to the wrong fabric. That one became this top which I wear all the time. So I will try that Burda next but for this fabric my old standby of Simplicity 2339. And this might be version number 15? I've lost count but after all a button front shirt doesn't really change so why reinvent.

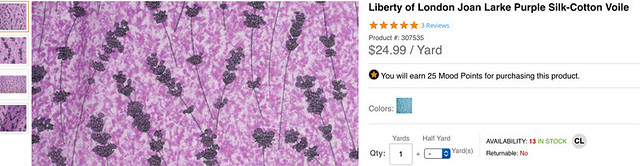
The novelty in this shirt comes entirely from the fabric, which is a 70%cotton/30% silk voile Liberty of London fabric. It's so light and lovely to wear, it feels like a feather. 

Purple shirt 9
So n
I sewed a shirt for someone else using this fabric which I found on the Mood website. and after completing that I had about 3/4 yard remaining. Since it's 52" wide that's a substantial amount. So I ordered another 1 yard so as to have enough to make a shirt for myself 😍 Because purple, right?
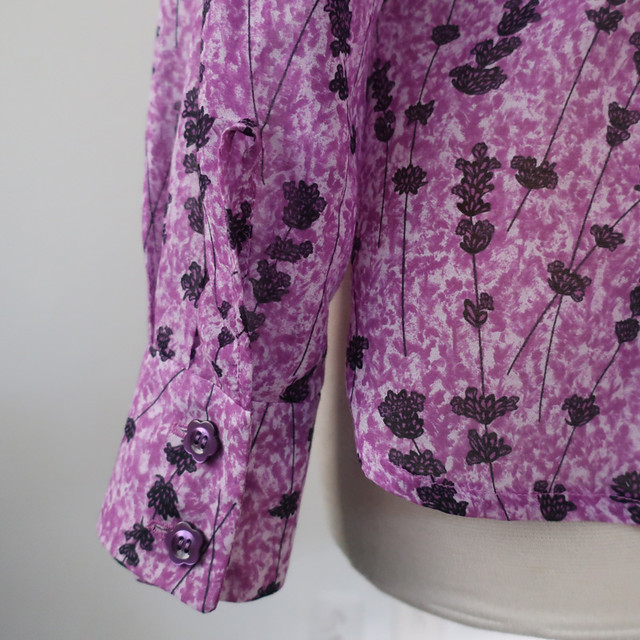
And lavender print. So garden-y.

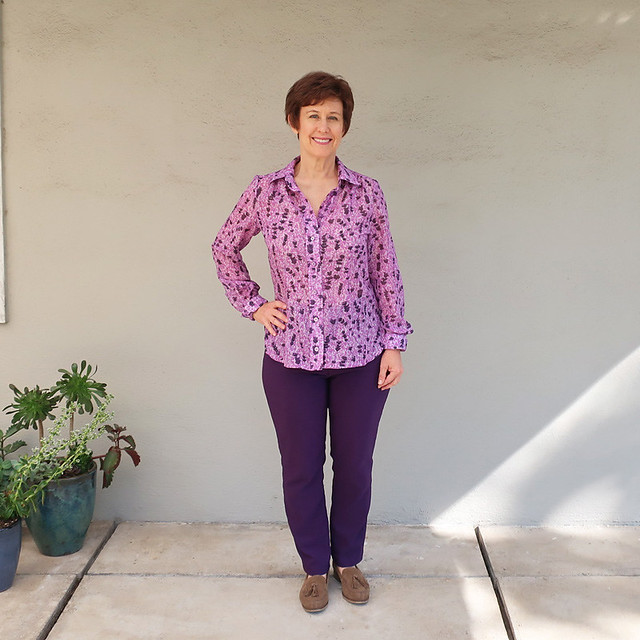
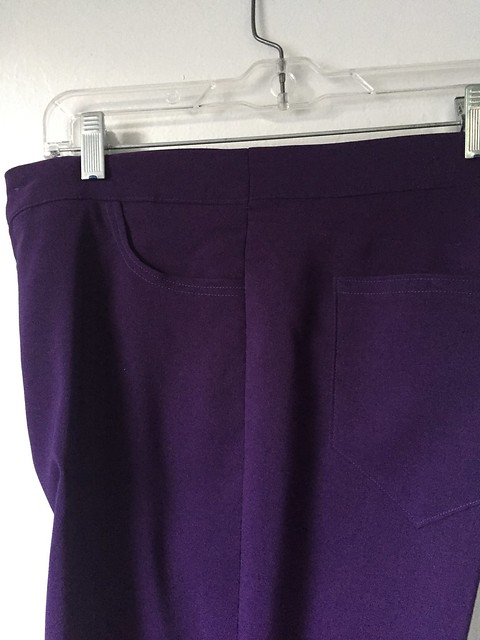
I had made these purple jeans late last spring, and they didn't get a lot of wear in the summer as they are a stretch bengaline (I think - at least they are some type of stretch woven, stretchier than stretch denim but not a knit. I classify them as bengaline because I received a swatch of the same type from Style Arc a long time ago and it was labeled with that name.) A very good fabric for pants, but a rayon-nylon-lycra so a bit too clammy for my summers here. But just right for fall and winter so I've been wearing them a lot. I like jeans that aren't jeans - in all kinds of colors. The pattern is my own, I made a pattern from a pair of jeans I own which fit just right. I should do a post about pants copying, one of these days. It's a good learning experience.

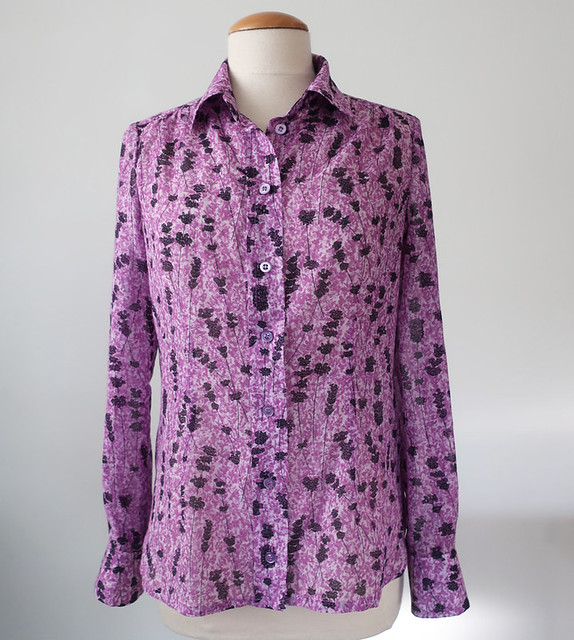
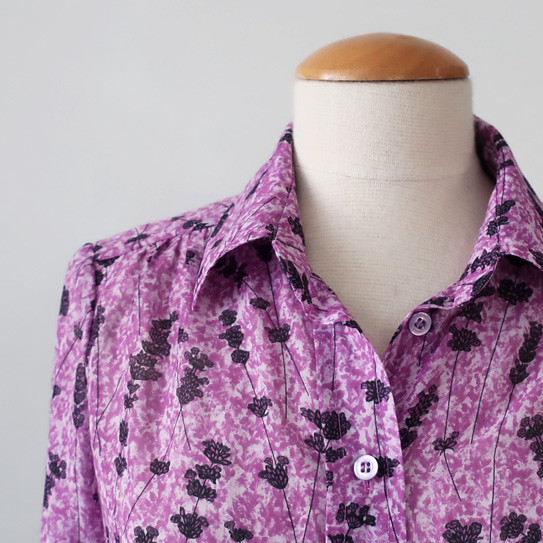
So now I have a shirt to wear with my purple jeans. Here's a better look on the dress form.

purple liberty shirt front

Based on my usual miserly tendencies when it comes to fabric spending, this was a bit of a splurge for me. So in total I paid more than $ 40 for the fabric. More than my typical $ 5 - 10 yard!

Fabric liberty voile

I'm not a big spender when I comes to fabric and I don't really like to have a bunch around that is not specifically for projects but I'm glad I bought this as I just love the color and the lavender pattern makes me smile. Here's a closer look at the fabric of the jeans. I didn't do a bunch of topstitching on this fabric - topstitching doesn't look as it does on denim and I figured it was a timesaver to skip it.

purple pants

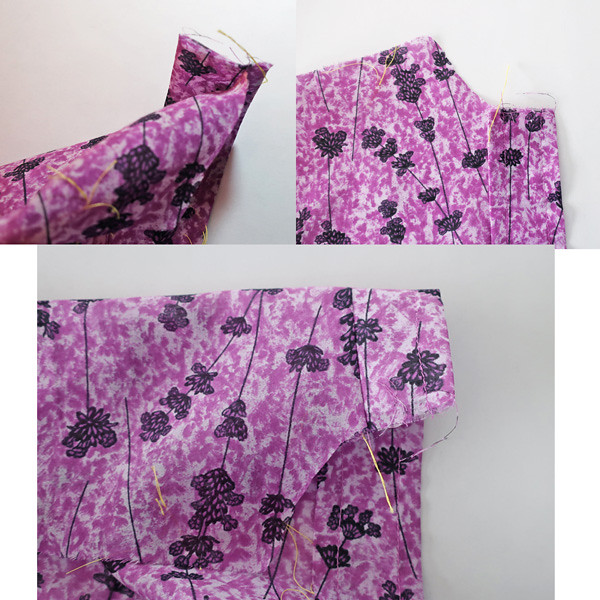
Here's a closer look at the front placket. I did the placket method I devised (which I copied from a RTW shirt) which is a continuous placket where a small pleat encloses the raw edges. If you look to the left of the buttonholes the shirt is actually all one piece, not a sewn on button band.

purple liberty shirt close up2

Here's a look at the components during construction. If you are really interested in this modification to a shirt front I did a step-by-step photo guide in this blog post.

purple shirt front placket examples

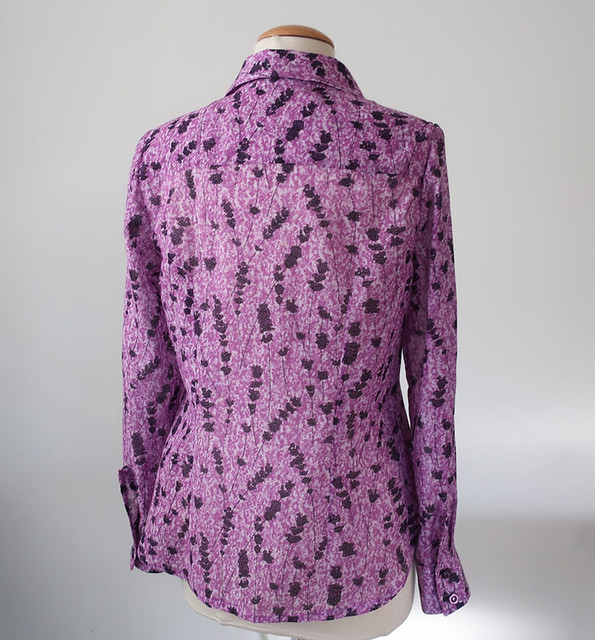
purple liberty shirt back view on form
purple shirt 12


purple shirt cuff

This fabric is so soft so I thought that a placket would be a bit tricky and I opted for a bias binding on the cuff opening. I think with every fabric you have to evaluate how it will work with various techniques or design features and be willing to adjust accordingly.


purple shirt 11

So that's it for my light as a feather shirt. I think I need a dark purple coat now for winter:)

Up next, I am finishing a few things for Heather including that silk wrap dress which I talked about in my last post on fitting. And if I do say so myself - it is going to be gorgeous!!

My jacket/coat tailoring weekend workshop at Hello Stitch is coming up on Nov 3-4 so if you have wanted to sew a jacket I hope you can make it. You will spend a weekend seeing me demonstrate all my tips, plus hang out in Berkeley and meet some great people who are as wild about sewing as you are. sign up here.     Also upcoming is another session of Sew the Lander pants, and a kimono jacket class. Look at the Garment Sewing page on HelloStitchStudio.

I have some vague plans for another wool coat or jacket for myself but nothing firm at this time. Plus our weather has still been no-jacket-required so not really conducive to wintery sewing. Not complain ing about that! Still wearing shorts when out in the garden, planting bulbs under the watchful eye of the squirrels.

Happy almost Halloween sewing, Beth

Today's garden photos. Multiple photos because this was one of those magical moments. I went to take some pics of the shooting star hydrangea that had put out a magnificent bloom. And didn't even notice the visitor until I looked at the image on the screen of my camera. Glad I caught that and was able to take a few more. There's something about praying mantis, they seem to have so much personality.

IMG_0507
IMG_0508
IMG_0510

white hydrag3

Friday, November 10, 2017

A Shirt and a Shirtdress, Butterick 6333 in paisley cotton poplin

Which came first, the shirt or the shirtdress? In fact the fabric came first, and the idea for the shirt, but then I took a detour to sew this shirtdress.

B6333 green shirtdress close up front neckline

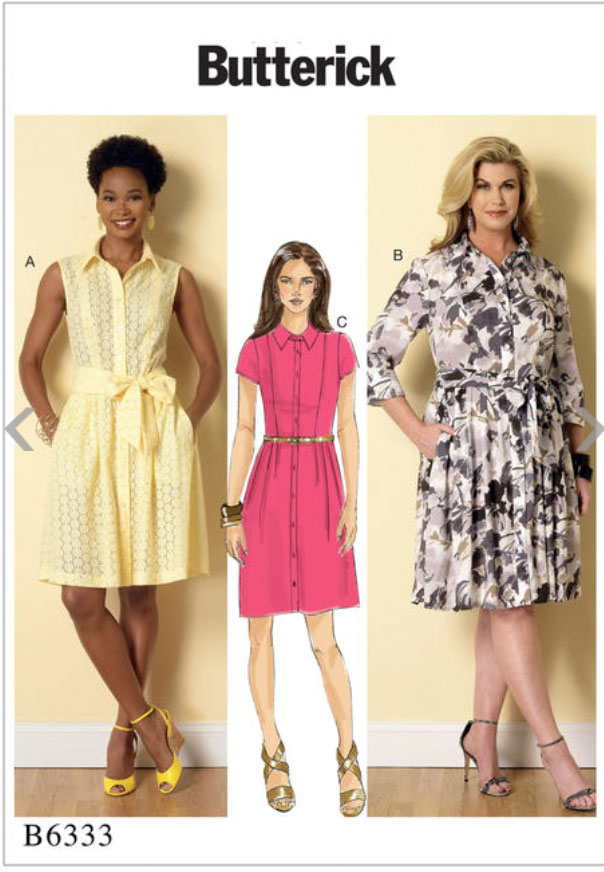
Which is Butterick 6333, a shoulder princess seamed shirt dress pattern with two skirt options.
A really good basic pattern, that I made a little more difficult for myself with some fitting adjustments  that overshot the mark, as well as adding a waistband and zipper. WHAT? a zipper? yep, read on for details.

B6333 pattern env

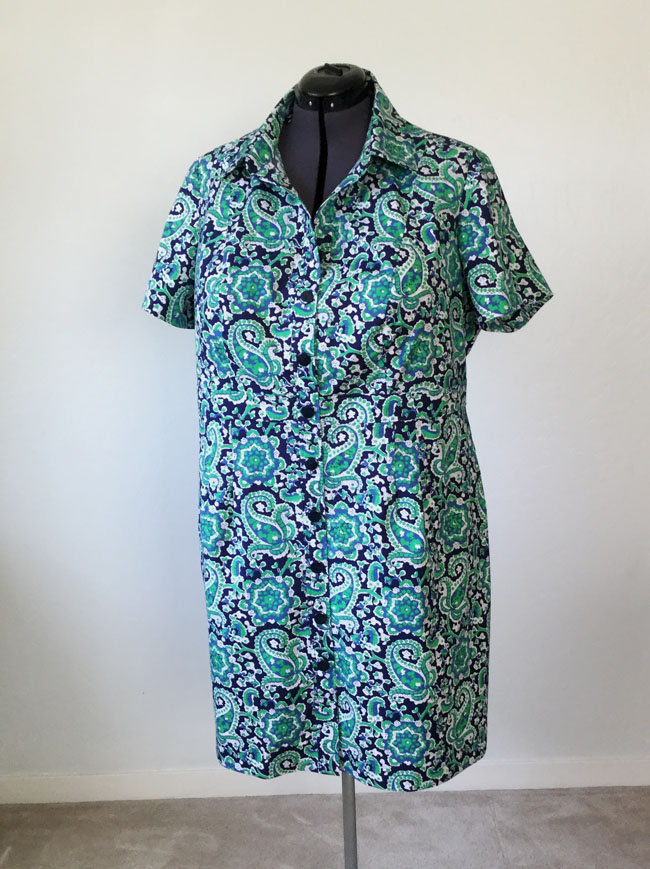
This is a dress I made for my friend Heather. She has been wanting a shirtdress for a while and we figured it was time to sew up a lightweight cotton one for late summer/fall. I've made a shirtdress style for her previously (probably not blogged) by copying an existing dress she had but for this one we wanted the traditional shirt styling with collar, stand, button band etc. However - and this is a big however, she likes to have a waistband to emphasize the waist, and this pattern didn't have that feature. So I improvised and the waistband you see is actually an applied piece. I sewed the dress as is, but added the waistband overlay on the outside of the bodice front and back, and that worked really well, plus let me do the fitting on the side seams. You know my aversion to sewing the skirt onto the top of a dress in one move, I always do the front, and then the back and sew the side seams near the end.

The second thing that she wanted was not to have the skirt actually unbutton. I can see for wearing that buttons are just a pain, they gape when you sit down and get ruined at the cleaners.

B6333 shirtdress front with text

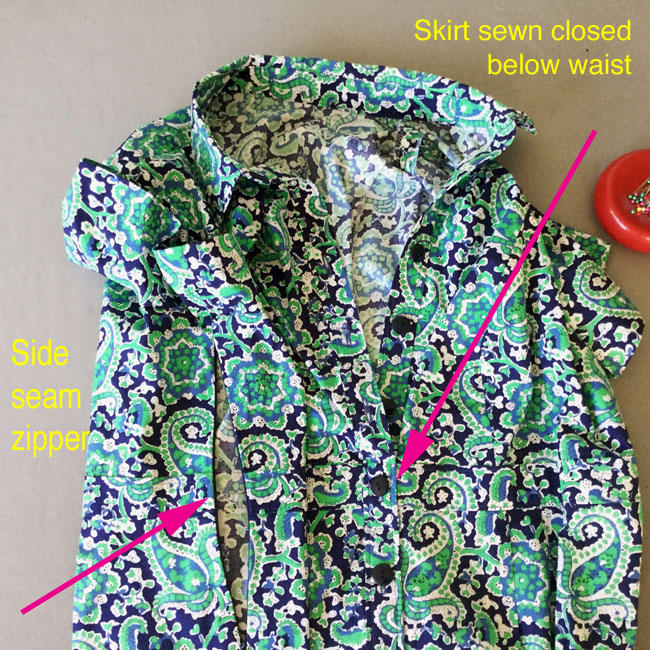
So I sewed the dress as normal, including the buttonholes all the way down the front of the dress. But from the waistband down to about 5 inches above the hem the dress is stitched closed. The topstitching on the button bands allowed me to overlay them as if they were buttoned and then stitch on either edge of the band. You can't even tell that it is sewn shut but no chance of any wardrobe or button malfunction. I sewed the buttons on in that portion right over the buttonholes (which I didn't slice open, no need). But of course what does this rearrangement require - our old friend the side seam zipper. Which means the dress has to fit at the waist just right, and then the zipper is put in next to last. (the sewing the front shut is actually the last). Well hemming is actually the last.

Dress form view. I did cause myself a bit more work as she has gone down a few inches and so I adjusted the pattern and then had to revise after I cut it out. But thankfully those shoulder princess seams allow for plenty of adjustment.

B6333 green shirtdress on form front

Cute huh? I love this fabric so much. Which is why it made it back with me last November when I shopped at Mood Fabrics.

Mood purchases 2

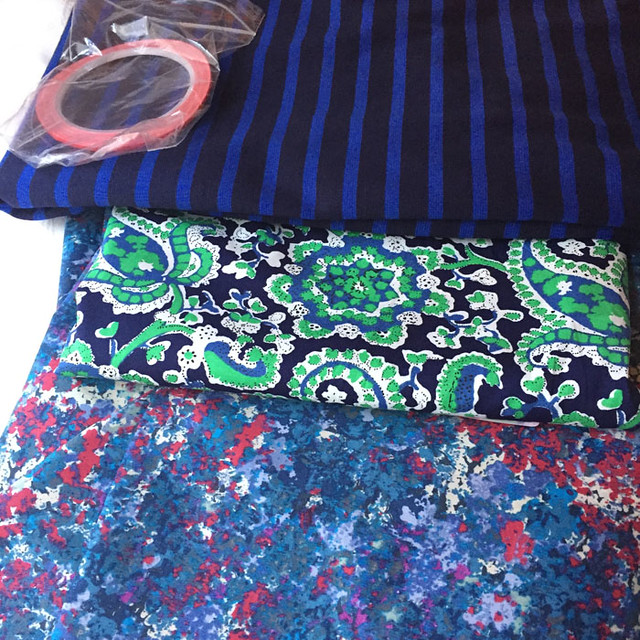
Heather and I were searching for a stretch cotton in a print, maybe a sateen or a poplin that would work for a shirtdress, and I remembered that I had this fabric from Mood. So I checked on their website and it was still available. They have it still (in 3 color ways) although it says this green/navy is almost sold out. (search stretch cotton poplin).  Soon I plan to use that cotton shirting in the bottom of the photo for another shirt, it goes with so many things in my wardrobe.

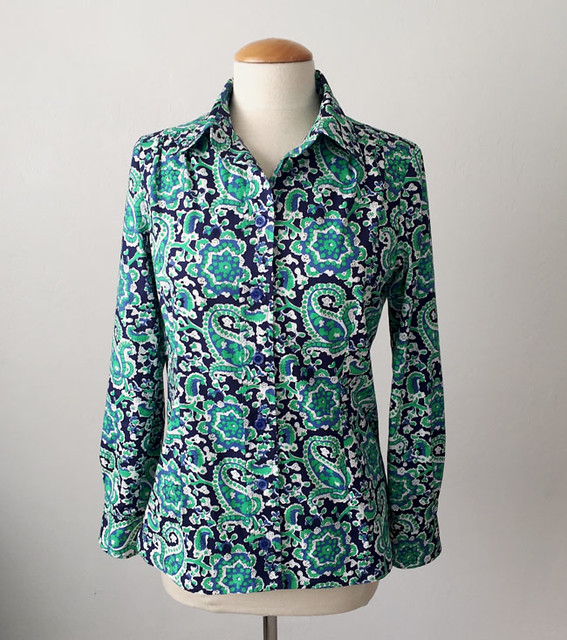
Back to fact that I originally bought this cotton for a shirt for me. And here it is, using what else? My trusty Simplicity 2339 shirt pattern. At this point the pattern pieces are getting a bit raggedy, I guess it's time to copy them over onto sturdier paper (maybe 14 versions?)

Green paisley shirt front view

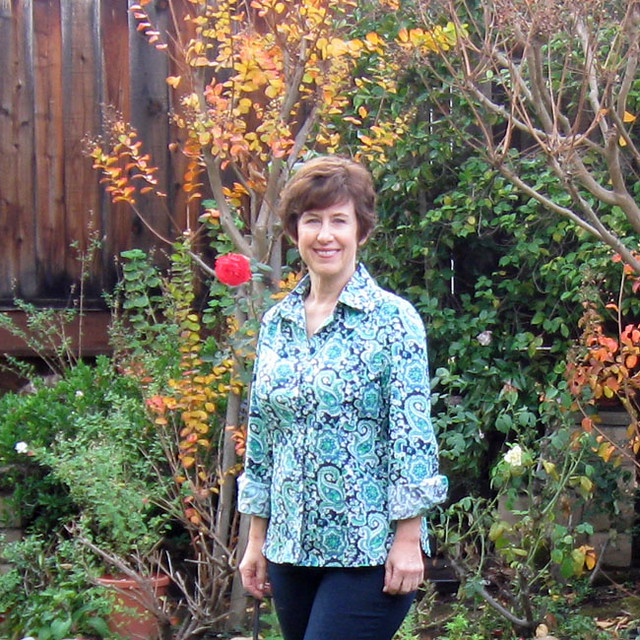
Nothing much to say about this version other than I love the fabric and can wear this with so many things I have.

For every version I have made in the last couple of years I do the front placket as a continuous piece that gets folded and sewn into a small pleat. I was all set to show how I do it but a search through my old blog posts shows that I already did that :)  Here is the link to how to make this type of shirt front placket.

Which you can see a little better in this picture.

Green shirt inside placket front

 The sleeves extra long on this version as I like to wear shirts under sweaters when the weather is colder and flip up the cuffs for a little extra peek at the shirt.  Tower plackets on the cuff opening which are hard to see in this busy fabric.

green paisley shirt cuff

Sewing a button front shirt has turned out to be one of our most popular classes at Hello Stitch Studio in Berkeley where I teach. The next button front shirt class starts Jan 13 as well as some other new classes, including some shorter mini-classes covered one type of techniques. Last week was my first mini class on zippers, and we will be adding more to the 2018 schedule. (including things like buttonholes, welt pockets, facings, linings, popular pattern hacks etc) I'll post when they are available for registration. I think Stacey is in the process of adding them to the website now.

This shirt is a bit longer than other versions, and I changed the shape of the side seam hem edge curve.

green paisley shirt on me

That's it for the paisley fabric from Mood. I have a few good size chunks leftover which might get combined with other retainers and turn into a sleeveless top next summer. But for now they go in the scrap box.

Up next, I have a long list of stuff that is either started or on the proverbial drawing board, including some jeans, a custom dress form, and an assortment of knit tops.

Can you believe Thanksgiving is around the corner - it sounds so trite to say it but this year is flying by. Only 8 more months until summer!

Happy fall sewing, Beth

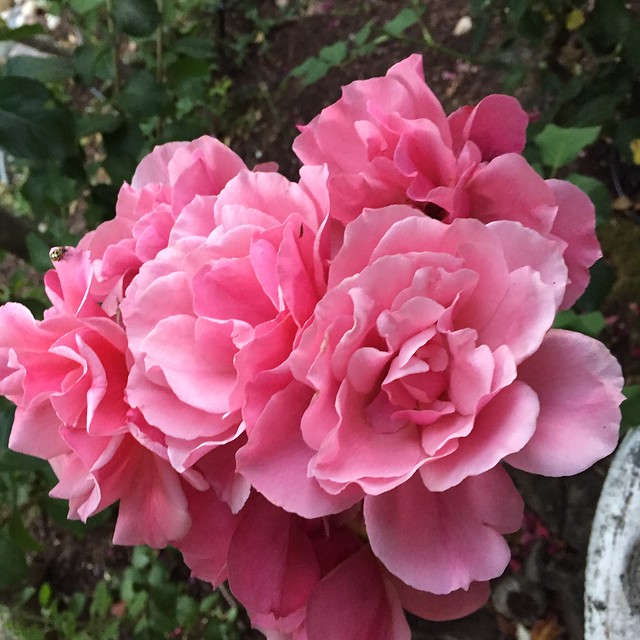
for today's garden photo, some roses that bloomed back in July. This is one of the oldest rose bushes in my garden, way predates me and despite being in a shady spot puts out these lovely pink blooms. 
So many thorns though - and I've snagged my shirt on it numerous times trying to wriggle past to prune one of it's neighbors. I've planted a number of newer roses in the past few years but these older ones are worth keeping, which they bloom well they are showstoppers. 


IMG_2932


Friday, May 5, 2017

Fabric Store recommendation and review of McCalls 7094 top

Where do you buy fabric? The web has opened up every possibility to us all, and I'm like many of you - jumping from one site to another because you saw a great fabric on an IG or blog post. I'm sure a lot of us are disillusioned with the chain fabric stores. It seems the fabric they sell, while sometimes useful, is kind of the lowest common denominator of fabric choice. At the same time I am coming around to the idea of supporting local and small business owners - particularly when they are selling products for so many of the things I love, be it fabrics, garden supplies, books, the special produce market in my neighborhood or the hardware store with the helpful guys who know how to fix everything.
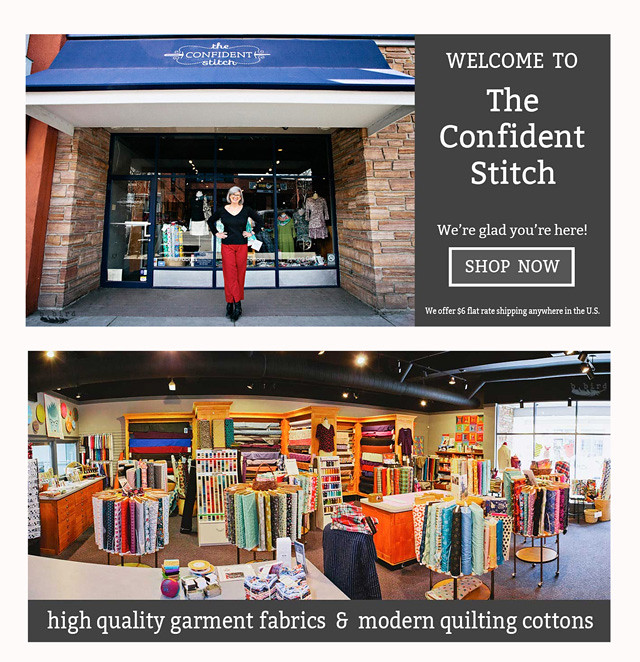
Which is a long way around to introduce a fabric shop, The Confident Stitch, owned by Kate who I met a few years ago when she came for a sewing and fitting lesson. She is originally from my corner of the bay area but moved years ago to Montana and has now fulfilled her dream of owning a fabric store. I don't think I will every make it to Missoula but happily we all can order from their lovely selection.
Confident stitch image2
I like the way she lists the fabrics on the site, the photos show the color and drape of the fabric. I saw some interesting Japanese fabrics and even the ever elusive tencel denim (I love tencel-cotton blends and in denim colors they are great for a wear-everywhere shirt dress.) But for a coat and jacket maker like me I was really pleased to see the pressing tools listed - they sell a 2-in-1 Tailor board very similar to one you have probably seen on my blog. Plus lots of marking tools, like Chalkoner chalk markers and Frixon pens. If you have been lamenting that you can't find these tools near you give a look at The Confident Stitch website.

Fabric - Kate offered to send me something from their website so I chose a couple of cotton lawns that I had seen in person as I met the fabric designer (who is based here in my local area).

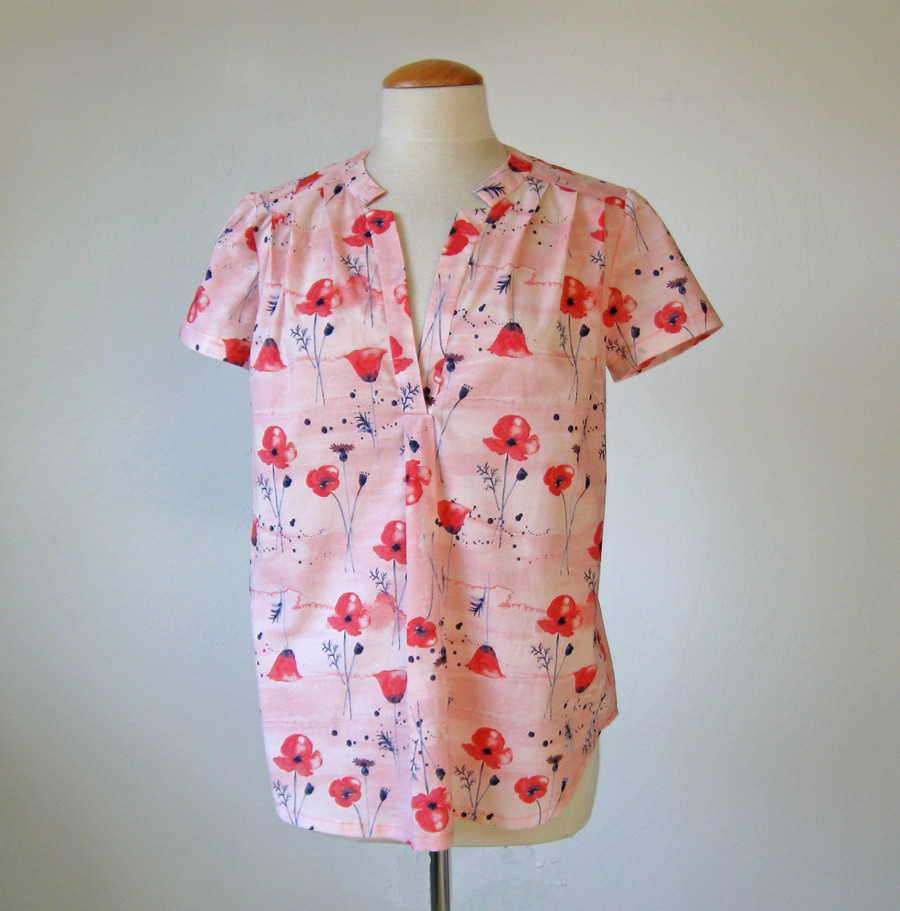
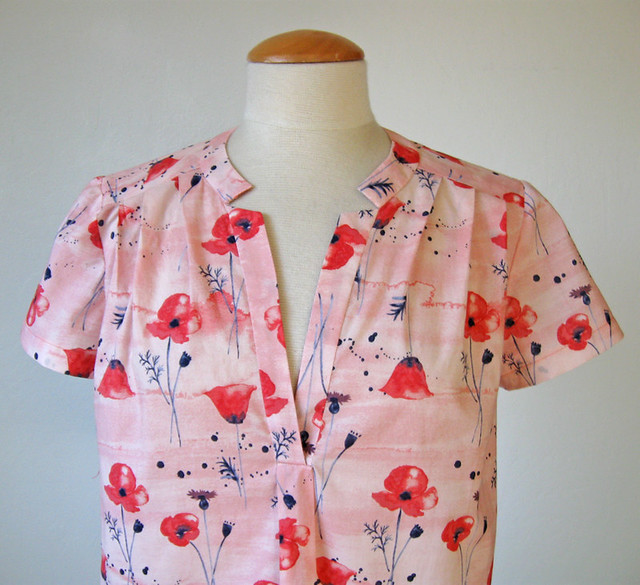
First up is this dreamy floral print, the poppies evoke California (our state flower) but the color way is a bit different than the usual poppy prints with the pink background. It reminds me of Japanese porcelain. I decided to try out a new pattern, McCalls 7094.

McCalls 7094  front on form

I've been on a tunic top kick lately as I will be teaching a Sew a Tunic Top class at Hello Stitch Studio in Berkeley which starts next week, so I made a few different patterns to check them out.


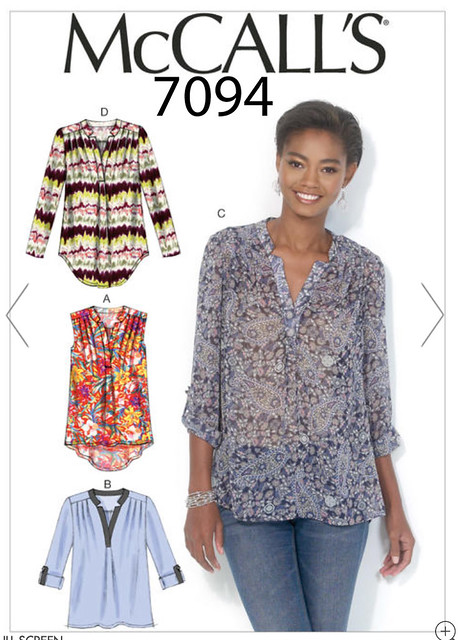
McCalls 7094 pattern envelope

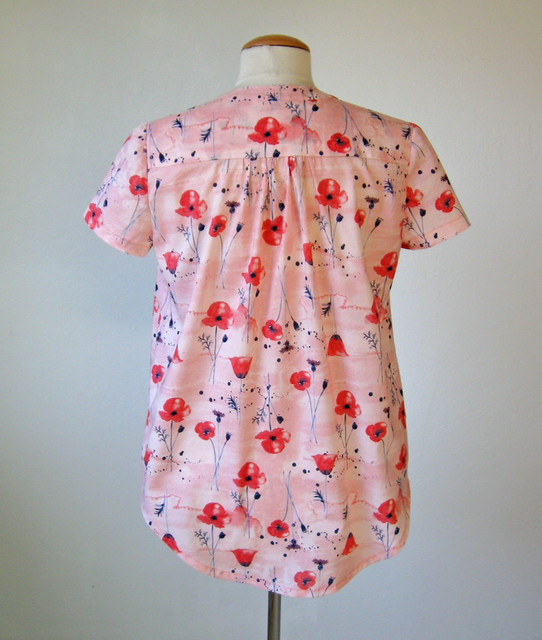
This pattern has pleats at the shoulder which I like, and a sewn-on placket plus an interesting collar that meets at the top of the placket. However I will say that this part is a bit tricky to sew. It's one of those areas where you have to stay-stitch and then snip the fabric to the stitching, and then apply the placket and collar precisely so they meet and create that v-notch on either side of the neckline. It looks nice and this fabric had enough body to deal with that little minefield but I think in a silk or something that ravels like linen it would be a nightmare.


McCalls 7094 back view on form

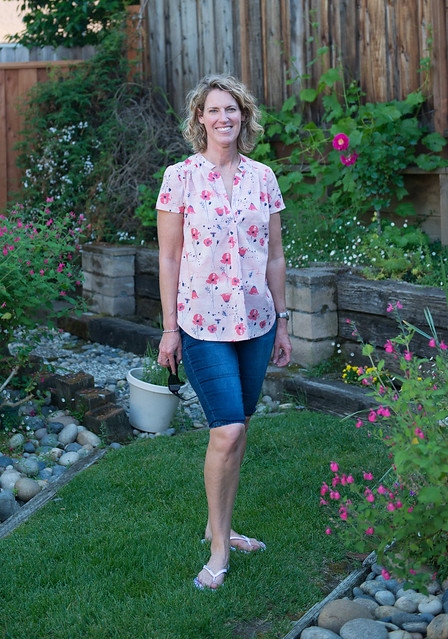
Do you ever make something and think it is really pretty then try it on and it's "just not you"? I don't have that happen very often but when you are on a kick to try new silhouettes you encounter some that just won't work. I felt like it was both much fabric and and a bit frumpy on me. But I loved this fabric - so mentioned to my pal Alice that I had made a new top which she might be able to wear to work, an extra pretty scrub top if you will. When she came over she said, "oh no, that won't be for work, that is going in my actual wardrobe. And it looks great on her!

alice cotton top front view

I'm coming to the conclusion - when in doubt about my sewing choices - give it to a tall friend and it will be fine :)  Or try to grow a few inches myself. Which is probably not going to happen.

Here's a closer look at the neckline and fabric.


M7094 cotton top front neckline

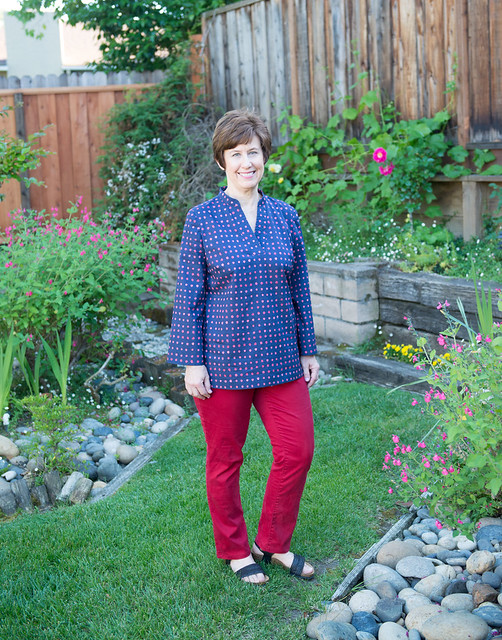
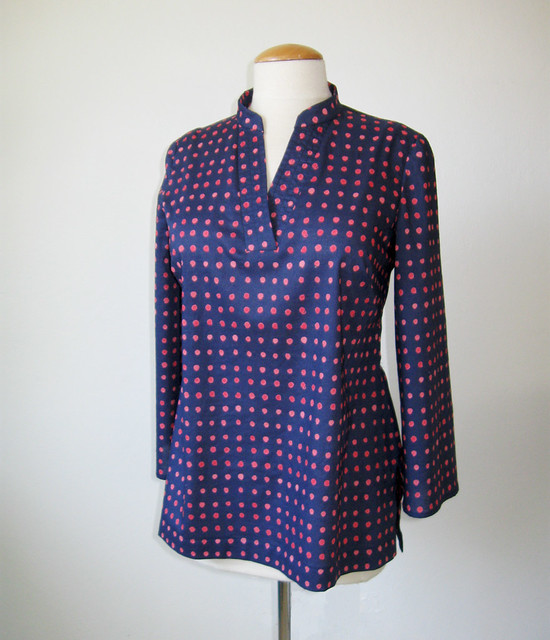
I also chose a coordinating fabric from the same designer, and used that to make up my favorite tunic top pattern (New Look 6688 which I have sewn several times already, in eyelet, silk, silk, and rayon. So version five is in cotton lawn and the name of this fabric is Sun Spots - which I didn't realize but is kind of fitting for me.

Tunic top dots on me

This one is great with my red jeans but I am seriously tempted to remove the sleeves and have a top I can wear in our hot weather. However I think I will refrain and then have a cute casual top to wear a little bit now and then again in the fall when it cools off. I love the painterly dots of this print.

dot tunic top on form front view

The pink lawn is just a tiny bit softer than the blue dotted one, I did wash both but probably with another wash it will soften up some more. By the way, both these cotton lawns are organic cotton. I've seen a summer quilt that incorporated these plus other fabrics from the same designer and it is gorgeous.

So that's the scoop on The Confident Stitch - check them out. Thank you to Kate for sending me this fabric at no charge and I'm sure I will find more to purchase on her site.

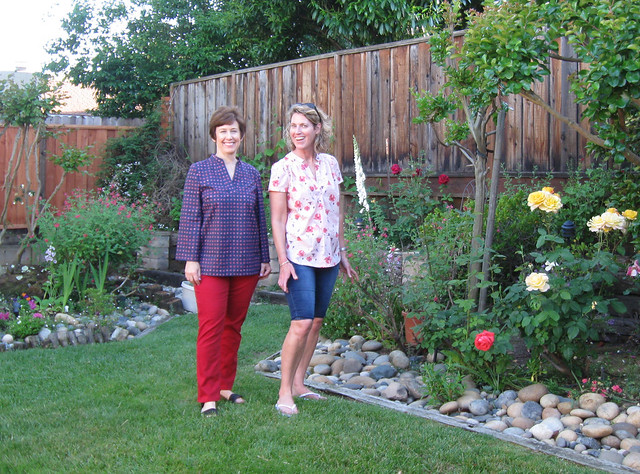
Here's me and Alice and a corner of my garden in full bloom - this is the best time of year for a California garden, still so green.

me and alice cotton tops

Up next - I have been sewing quite a few things for others, some I will share including a plaid coat I am working on, the boucle fabric is an unraveling mess but the result is turning out so well.

Happy Sewing,
Beth

today's garden photo, a close up of that yellow rose shown above. It starts out a bright yellow touched with pink and fades to a pale almost white.


yellow pink rose


SaveSave

Sunday, February 19, 2017

Denim-look voile shirt and a new method for the front placket

Why do I find sewing button front shirts so satisfying lately? It is a bit curious as basic shirts with a button front and a traditional stand collar are not something that played a large role in my wardrobe in past years. Perhaps they always seemed very serious - a shirt was something to wear with a suit jacket, worn to look serious and businesslike. But in the past few years I have made a lot of shirts and find them really enjoyable to sew. For a basic garment there are countless variations possible and it is fun to change up a pattern without having to start over with the fit. Fun is an understatement - who doesn't love having a pattern that fits perfectly? It is the holy grail of sewing, the TNT pattern (= tried and true).

For me it is Simplicity 2339, one of their Amazing Fit patterns that I started using in Dec. 2011. And even then I didn't make it as the pattern was designed. For that version I adapted it to have a hidden buttonhole placket. I was off to the races with this pattern, never once sewing it as it was from the pattern envelope.

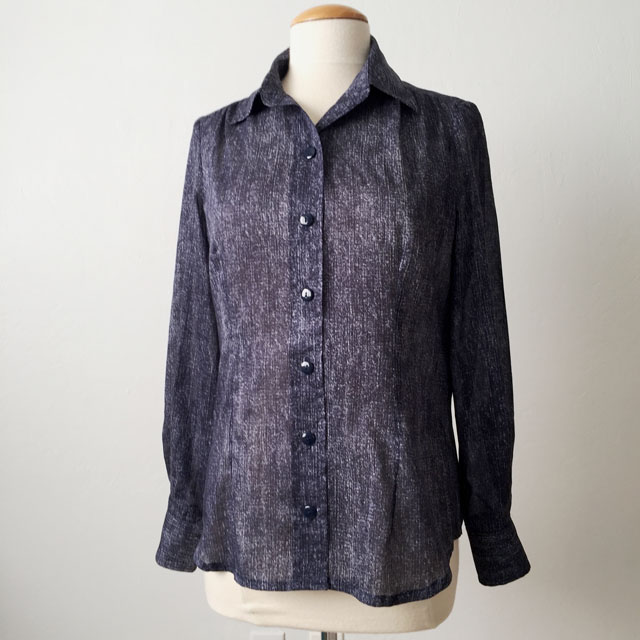
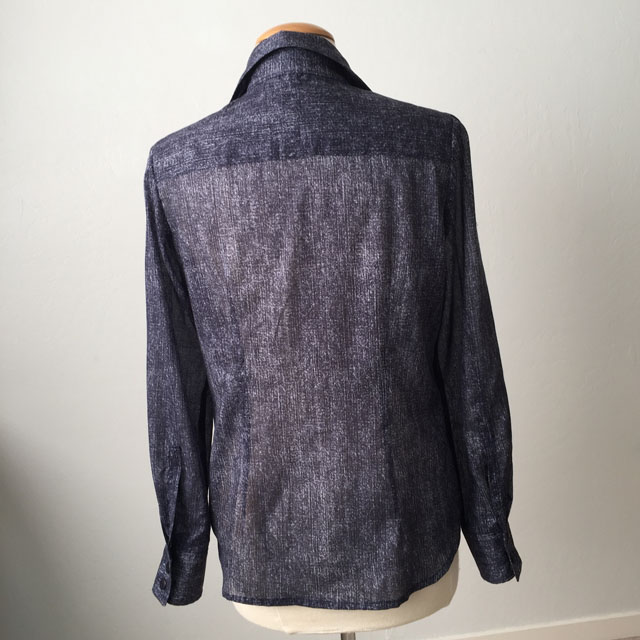
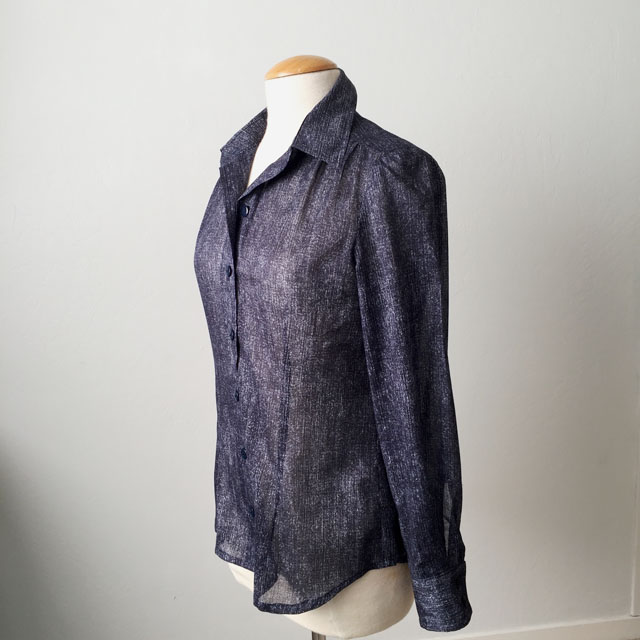
Here is the latest version. As for the fabric, it is divine. A lucky find of this cotton voile at Stone Mountain Fabrics in Berkeley. Their upstairs section is now filled with an assortment of interesting things, a lot of designer roll ends, never the same things on any given week and if you find something that interests you the price is great. It does take a bit of searching - when I was last there I didn't see anything that inspired, and then tucked behind the forest of upright bolts was a skinny cardboard tube with a small amount of this fabric remaining.
blue voile 2 on form

While it was 54" wide the amount remaining on the bolt was perhaps 1 yard with a very crooked edge giving me maybe another 1/3 yard in a triangular shape. But it was too lovely to pass up so I bought it - for less than $ 3. It is unbelievably soft, slightly sheer, and vaguely denim looking. A perfect companion piece to so many things in my wardrobe.
Would you believe that I came home, tossed it in the dryer with a wet towel to shrink and then cut it out later that afternoon?  I never do that! But it was a vaguely springlike day and I was feeling ready to jettison the coats and sweaters for a light and floaty cotton shirt. Then I played around with my pattern puzzle pieces until I could just squeeze it onto the yardage available.

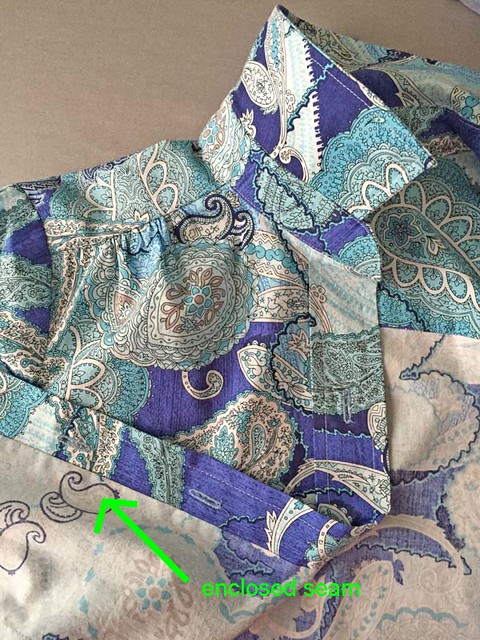
Now for some info on the front closure. A while ago I copied a shirt for someone and it had a placket (button band)  that wasn't sewn on but continuous with the fabric of the front of the shirt. I don't know if this has a name in the trade but I refer to it as the one-piece placket. It is slightly difficult to see in this navy blue cotton voile version, so here's a look at it on an older shirt, in cotton poplin.
enclosed seam on placket

Now for the how-to. This is a general how-to on creating this - I may have missed some details but I think if you know how to sew shirts and have played around with various placket styles that it will make sense.

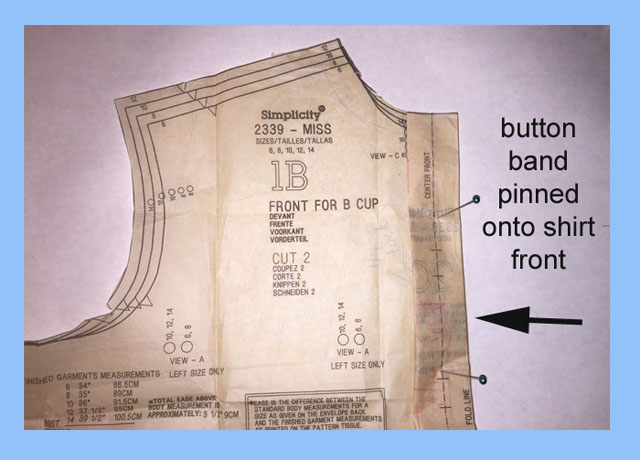
Start with the basic shirt pattern, and the front button band piece. I folded away the seam allowance and overlaid the sewn-on button band to create the dimension of the shirt when completed and the button band is sewn on. Basically you want to see the finished shape of the shirt front where the collar stand is sewn on. Trace this outline, with markings for collar, sleeve etc. I always trace to retain the original pattern for future use. Plus it is easier to mark all over a sheet of blank tracing paper.

Placket shirt band 1


Here's the traced front shirt (for this example I did it on white paper so I can mark with various colored pens. Note that this now includes the center front of the shirt, where the buttonholes will go, but no seam allowances at the center front (don't need them).  On the right I have marked 5/8' in from the center front. That inner green line is equivalent to where the seam would be if there was a sewn on button band.

Steps 1 and 2:
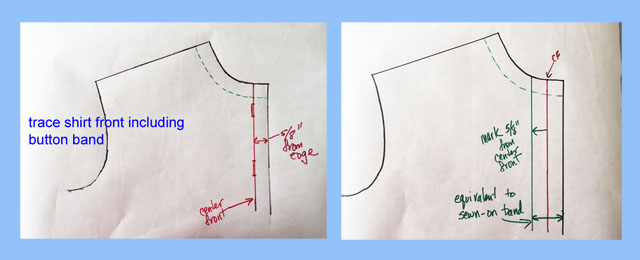
Placket step 1 and 2

Now I create the extra part (Step 3) which turns into a fold that simulates the edge of the button band, and creates a space where the back of this one piece button band tucks in and gets stitched.
I have sliced open the pattern on the green  line and inserted 5/8" of space. Why 5/8" when I am creating a 1/4" tuck? Trial and error has shown me that even on thin fabrics the turn of the cloth takes up some fabric, maybe less than 1/8" but it is something, and you can adjust the actual width on the other side.  The image on the right shows how this insert gets folded behind what is becoming the all one piece button band.

Step 3
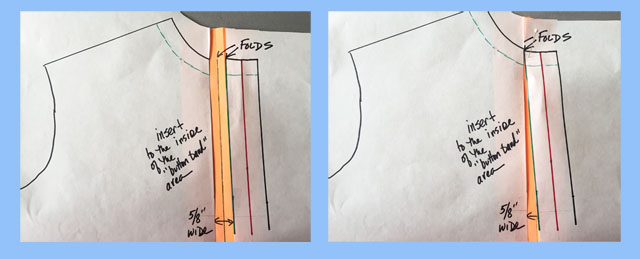
Placket step 3 and 4

Next I add to the side of the shirt another 1 1/4", or equivalent to the width of the button band if you started with a different width button band. Basically this part has to fold behind the front and reach into the fold created by the inset, and then get stitched in there to make the clean finish. Sometimes I even add a little bit more just to be sure, and then trim it off after folding. In case of a thick fabric, like flannel this would be a good idea.

Step 4:
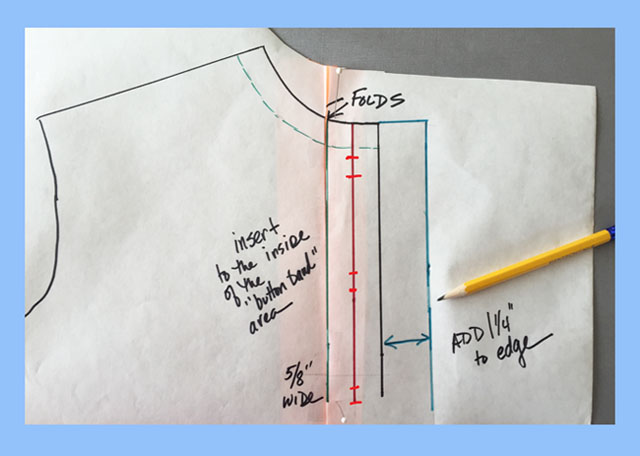
Placket step 5

Now the pattern is basically completed, here is the back side of the pattern on the left, showing the extension folded into the tuck (orange paper section). On the right showing the front with the extension folded behind.  Also I have marked the stitching that you do on either side of the center front. On the inner side, this serves to catch the extension into the 1/4" tuck, and then stitching the other side 1/4" from the edge gives it symmetry.
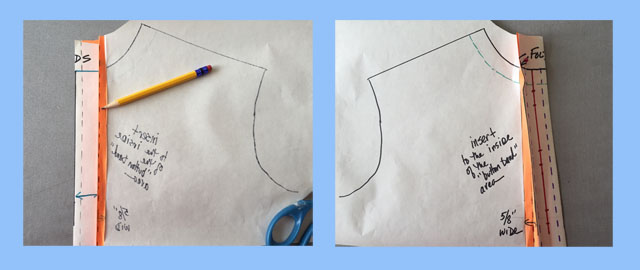
Placket step 6 and 7

This is the trickiest part to show, here is a view from a different angle. The extension portion fold back inside, is caught in that 1/4" tuck and if all measurements and folds are correct then you sew the tuck at 1/4" and have a clean finish inside the shirt.
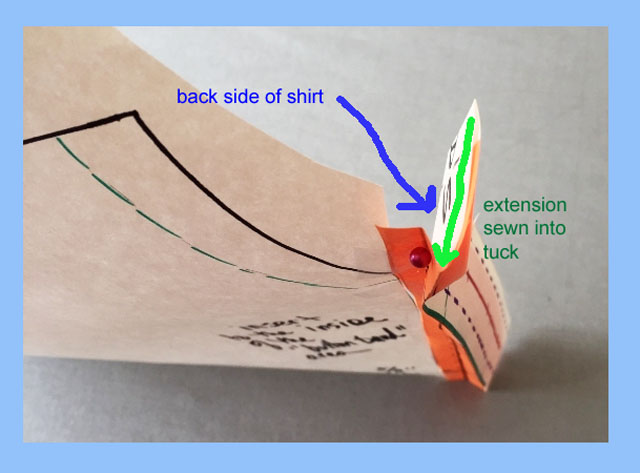
Stitching tuck in one piece button band

What I have not photographed or mentioned is marking and interfacing. I have this pattern piece created and it is well worn, I mark these lines with tailors tacks and then the folding is very quick. The iron is your friend here, I just press the various lines into the fabric and then open it back out and apply a strip of interfacing to the inside of the extension portion. Most fabrics need some interfacing for the buttonholes so don't skip adding this.

One last thing to check before actually using the pattern is to make sure the collar stand matches the newly created shirt front. I use a tape measure set on its side to measure curved distances but I couldn't get it to stay still for a photo - so this is my flexible ruler. The portion of the collar stand and the shirt front should still marry up properly after all the folding and tucking. The green lines are equal so all is good. Don't forget when measuring to take away that seam allowance on the front of the collar stand - see how the green arrow doesn't go to the edge of the pattern piece but stops 5/8" from the edge.  This is why they do pattern drafting and design with NO seam allowances - so much easier to do all this and then add back when completed.
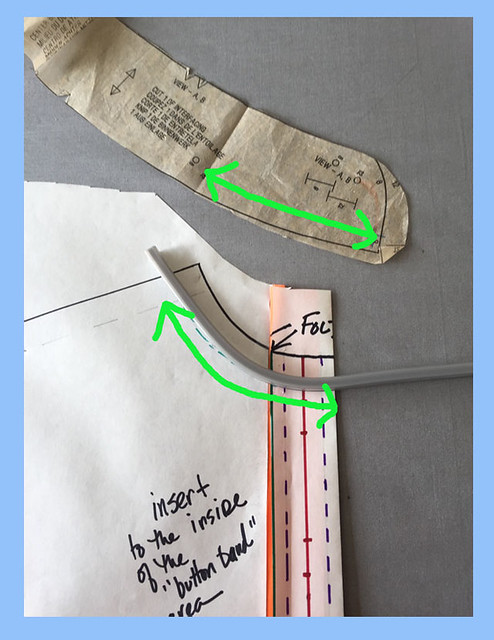
Placket step 8

As for the other side of the shirt. I cut out two fronts, a right and left exactly the same. Then I create the one-piece button band on one side. After that is done I overlay the other side on top, fold back the extension to create the same finished dimension as the other side. This will ensure that your center fronts are matching. Then then fold it in again to basically create three layers there and a clean finish on that side as well. The original Liberty shirt I was copying had no stitching on that side and I have continued with that. It looks really pretty and feminine with minimal stitching.
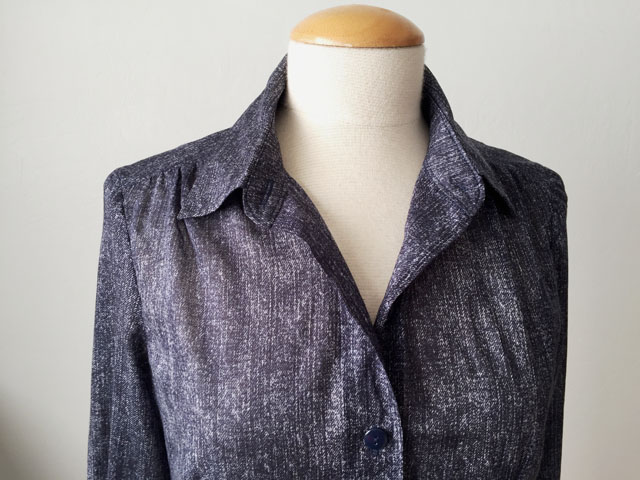

blue voile collar close up

One quick backyard photo to show how this shirt looks, although the light was not optimal. But you get the idea.
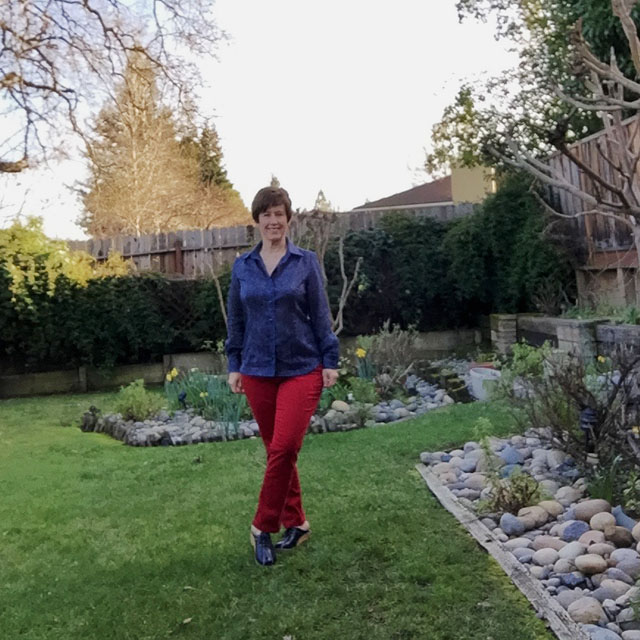
blue voile shirt on me plus daffodils


blue voile blouse back on form

Someone asked me on Instagram about the gathered shoulders. That is a case of rotating the horizontal bust dart into shoulder gathers, I wrote a post on Craftsy a while ago about that. I will have to search around to find that and show it again. And it is great for plaids since the bust dart plays havoc with the pattern for matching. You can see how sheer this fabric is - although not really see-through so kind of the best of both features.
blue voile side view on form

Fabric love on this one - and I think it will be able to be worn with so many things.

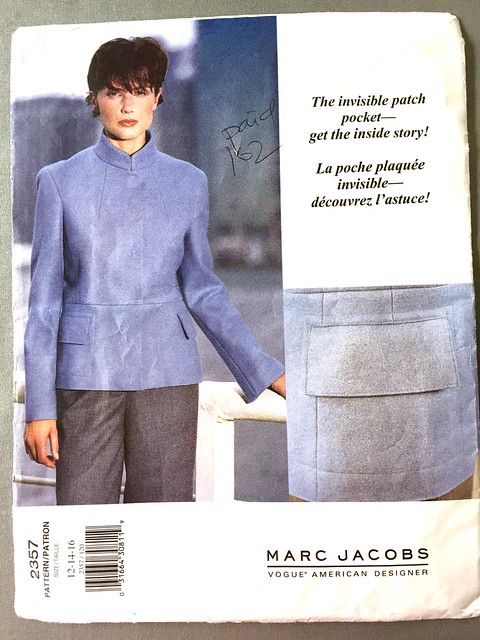
Onward to the next thing - I finally gave into my urge to try a pattern that I found some time ago at some yard sale or other, it is a Vogue designer pattern from 1999, by Marc Jacobs. A designer that I find annoying but occasionally has something really interesting. And my version will be a bit different from the one pictured. Stay tuned :)
Vogue 2357 jacket pattern

It's a rainy Sunday afternoon here, perfect for staying in and doing some sewing. I had ideas of getting out and pulling weeds but the weather said something different  - not that I am complaining, ha ha. The weeds will be there next week.

Happy sewing, and if you are in the US then tomorrow is a holiday for most. Yeah! What will you be doing with that time off?  I have a guess...

Beth

today's garden photo, this time of year what else but daffodils?

Daffodils