Thursday, February 29, 2024

Remnant Fabrics to Coat: Part 2 Finished Look Burda 6845 coat

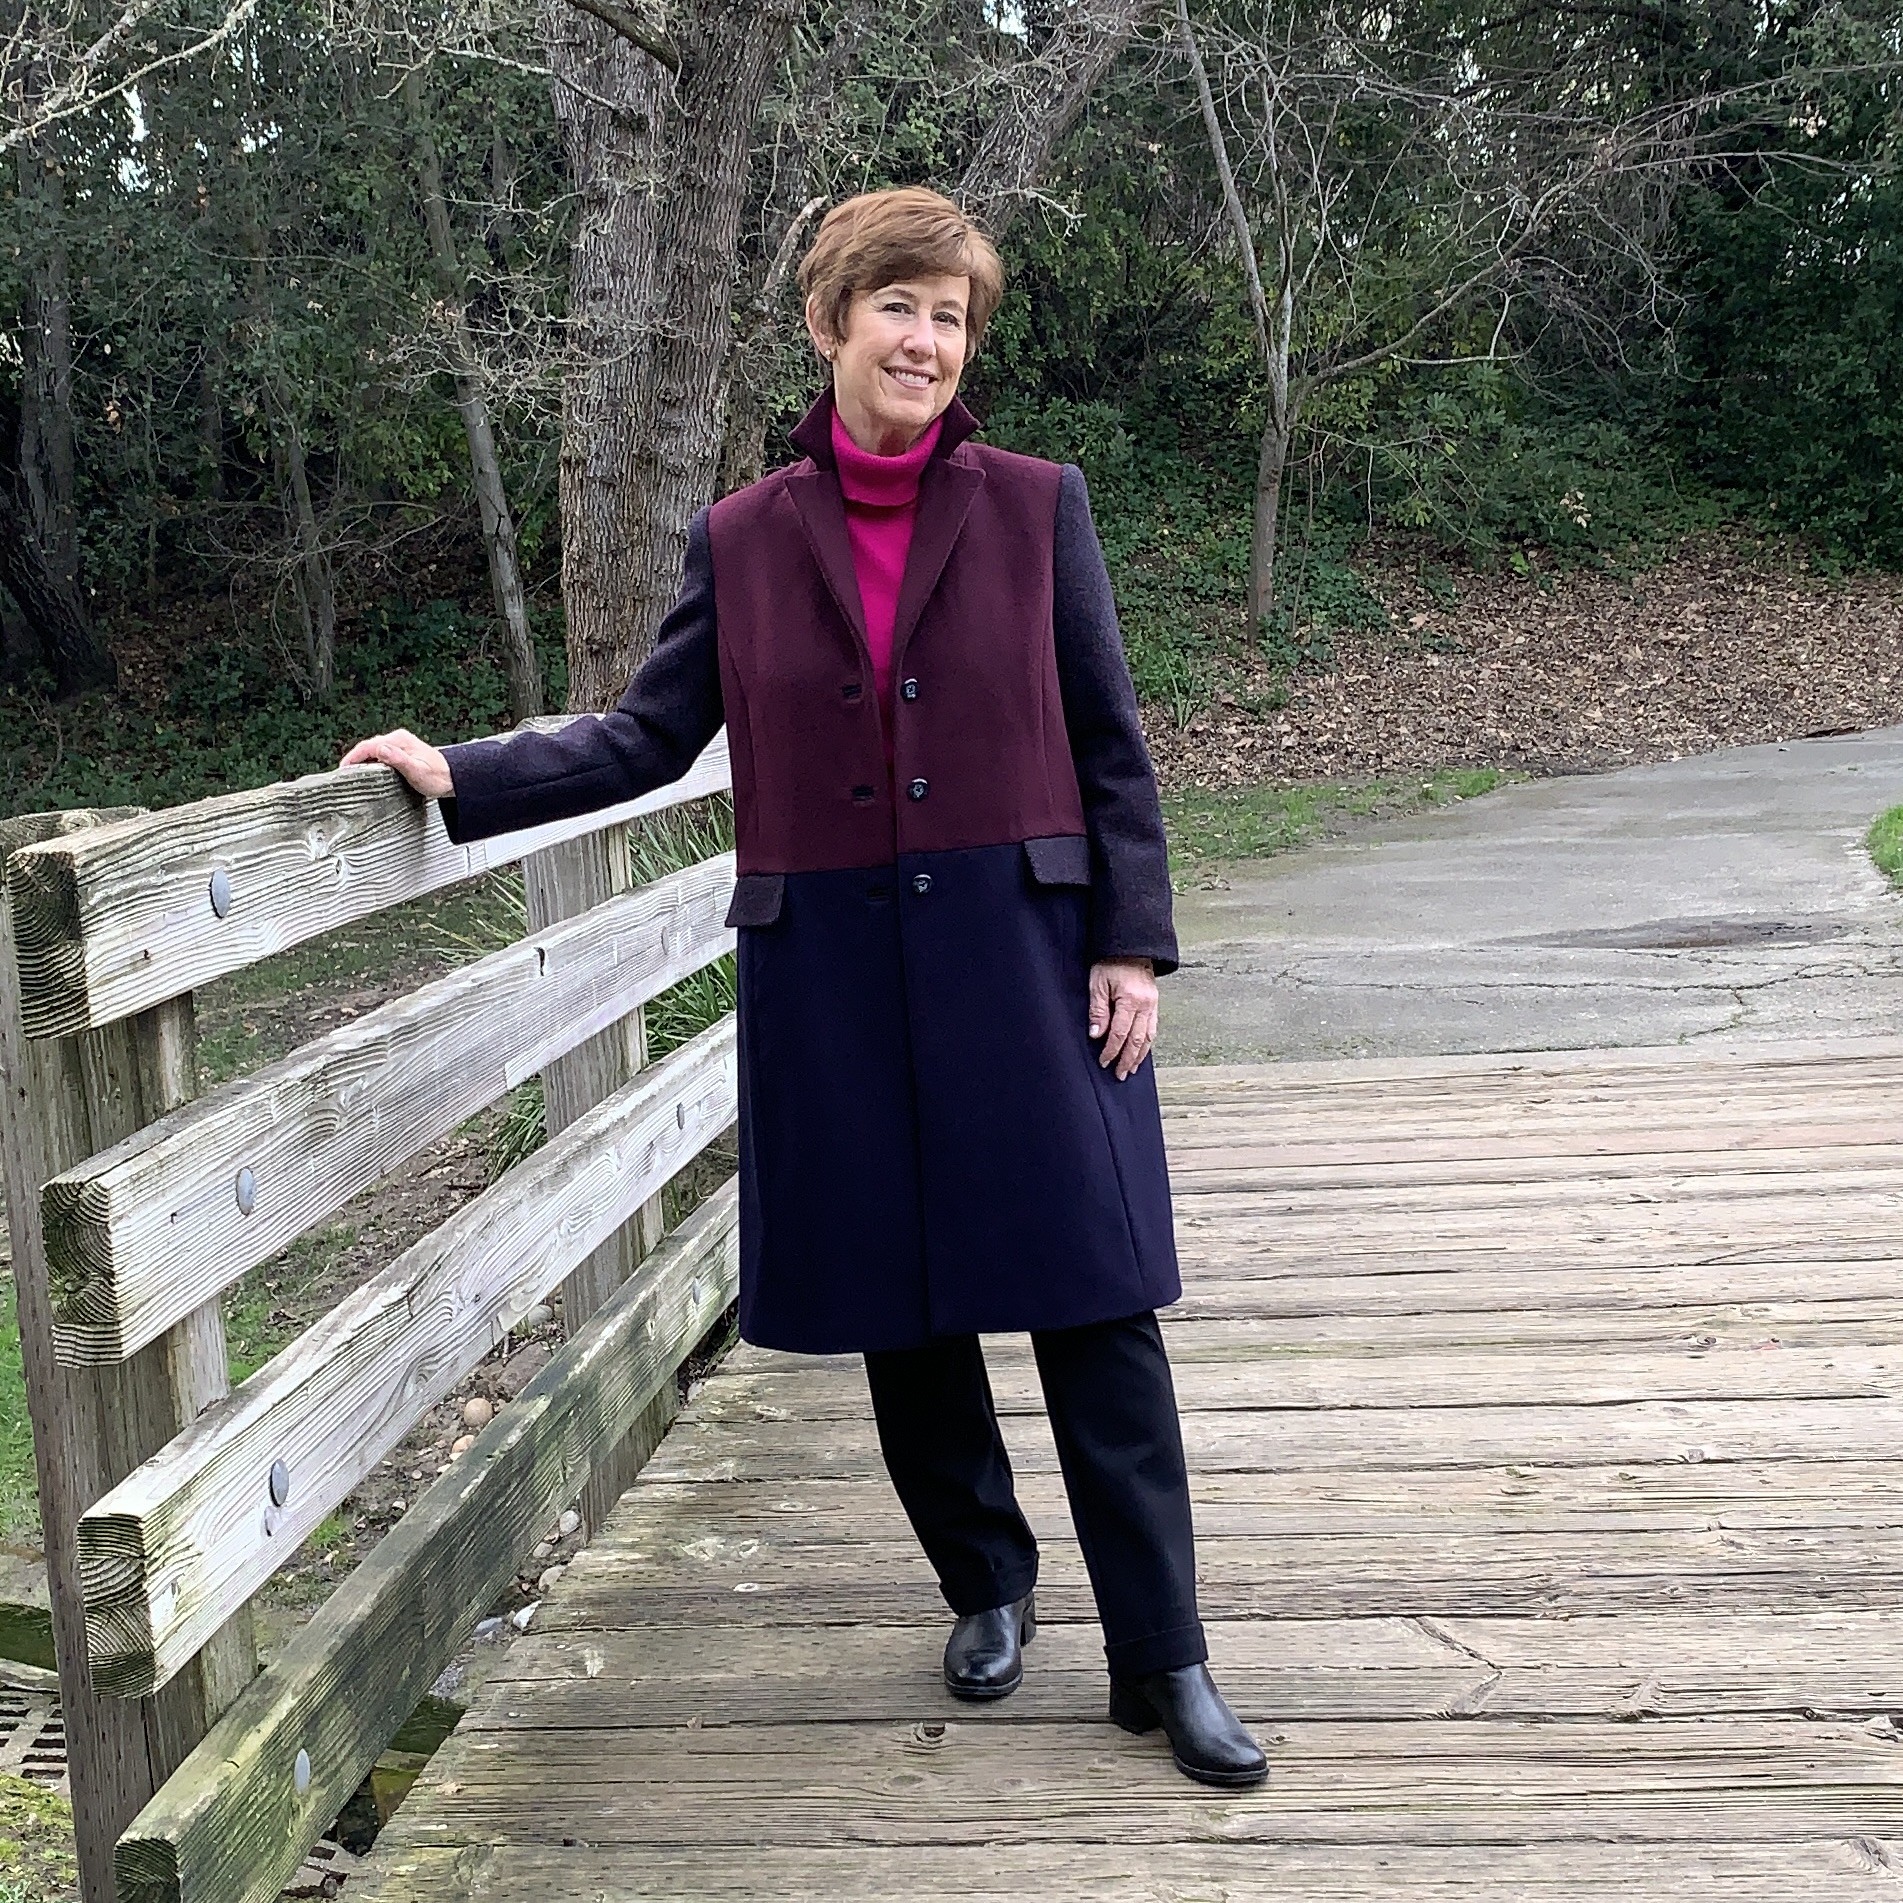
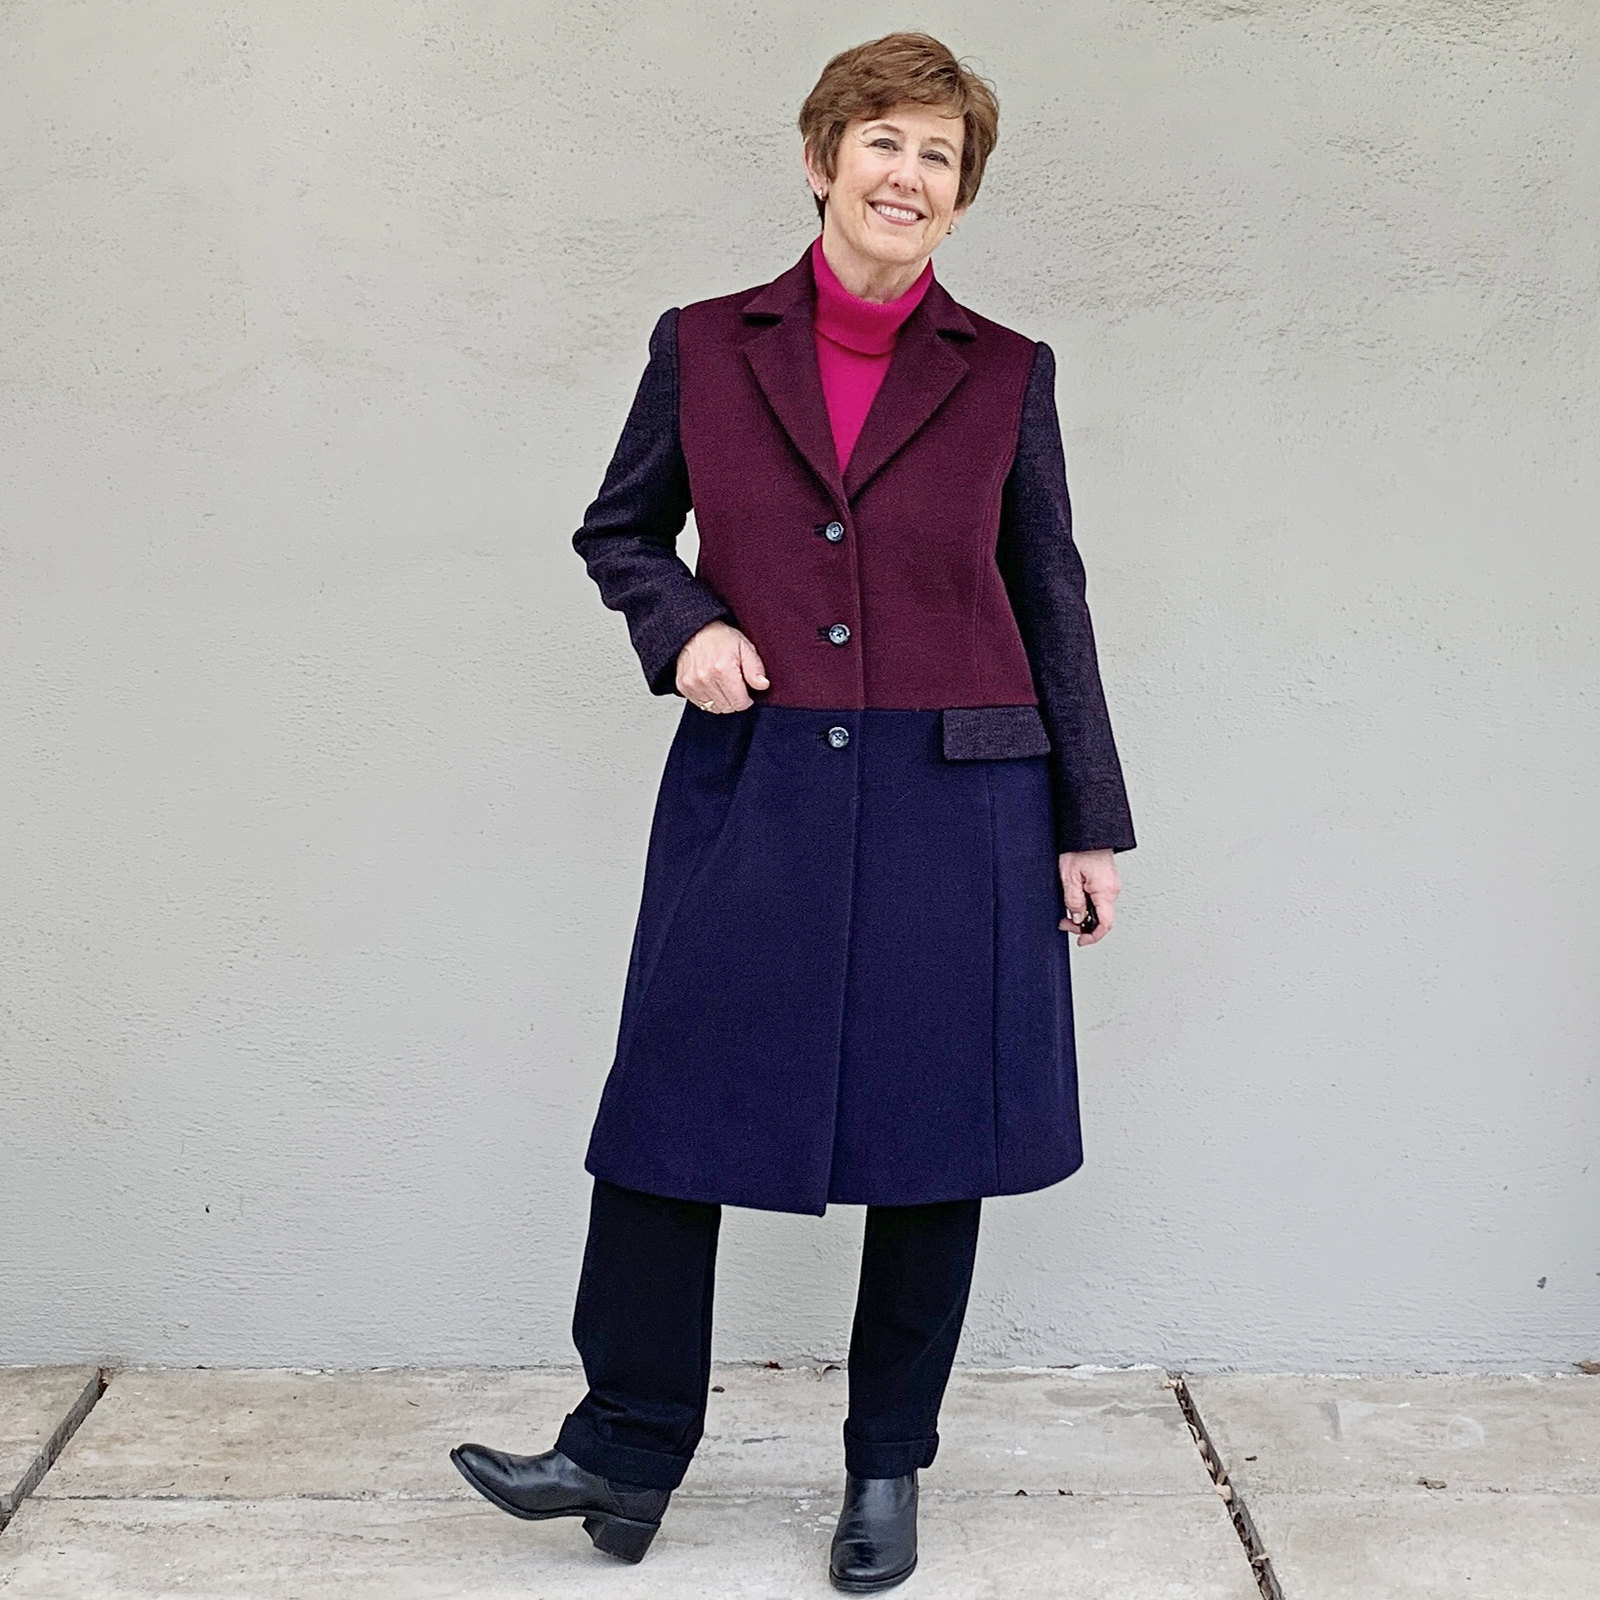
What is it about making coats that is so satisfying? I think they are my favorite item to make but I'm starting to think I'm getting to coat maximum - or at least my closet is saying so.  But if they are all as nice as this one I will keep doing it.  This blog post is a look at the finished coat, for lots of fitting and construction details see my previous post here.

Remnant coat on bridge
I still can't get over how nicely the colors of these various remnant fabrics go together. In my previous post I have links to the blog posts of the previous projects that resulted in these remnants. 
Photographing this coat has made me crazy, the colors looks different in every image and various times of day, sunny or cloudy etc. These photos in the park on what was an almost rainy day are the most accurate of how it looks in person. 
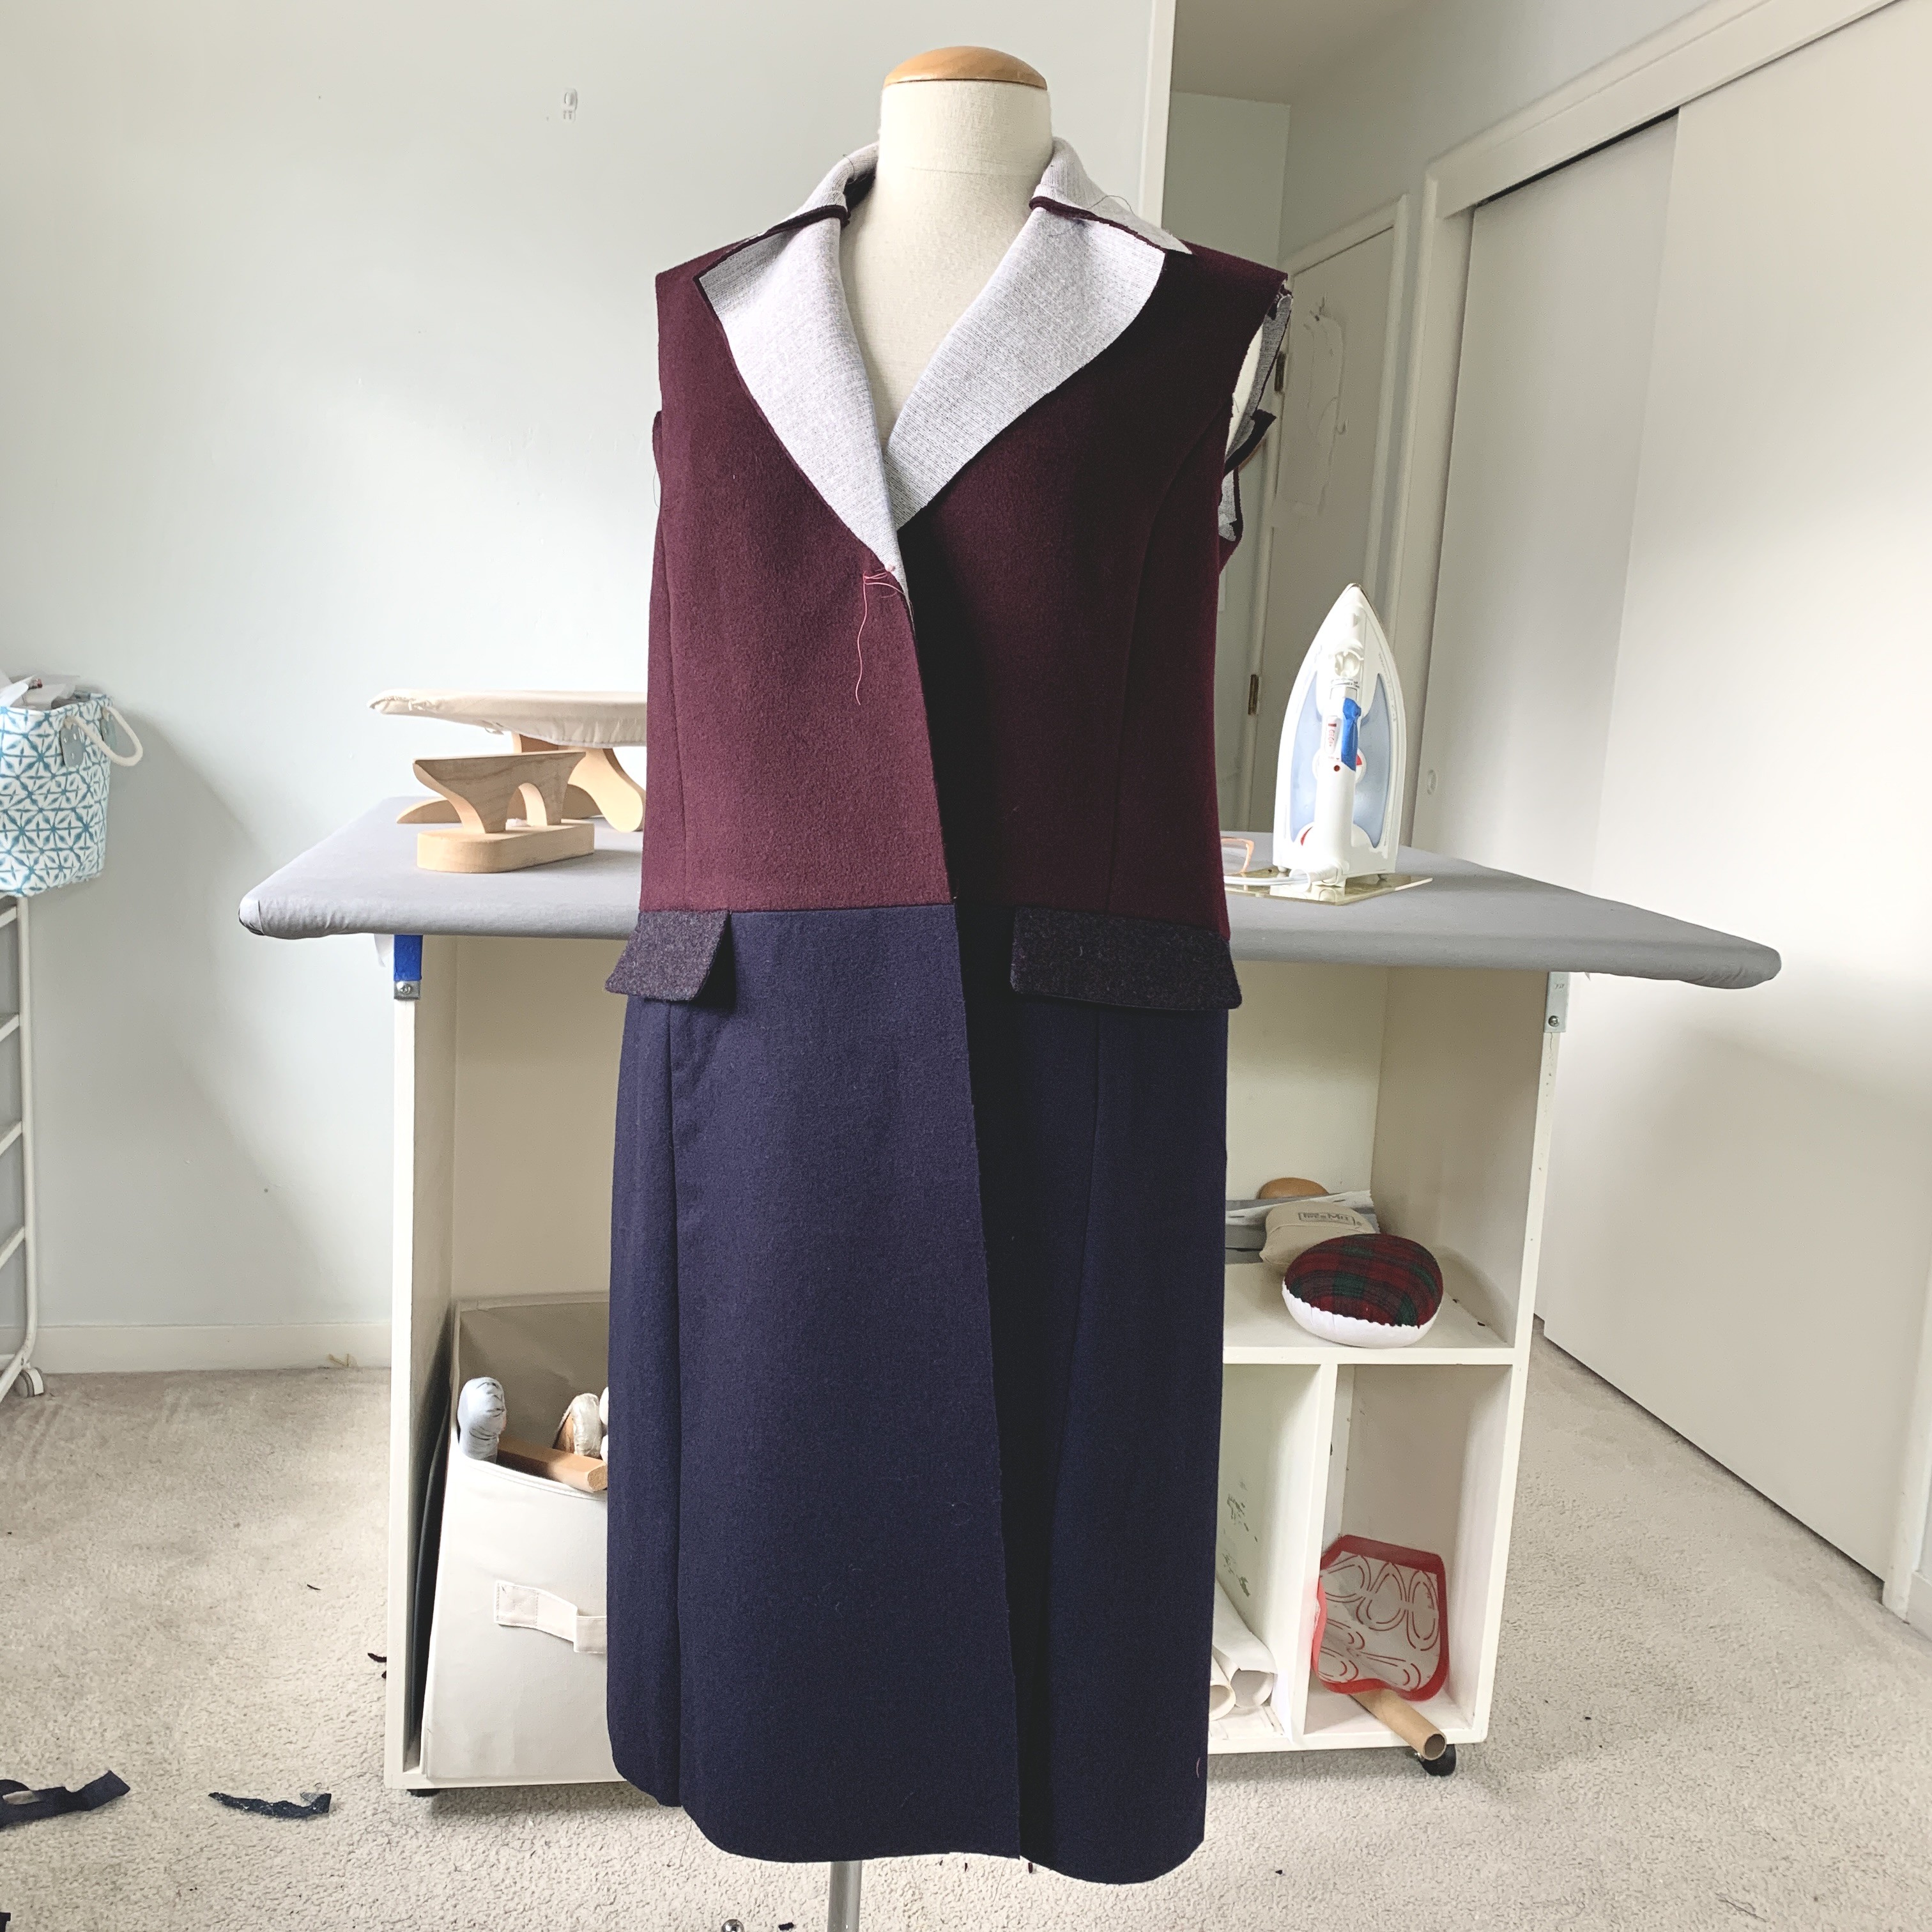
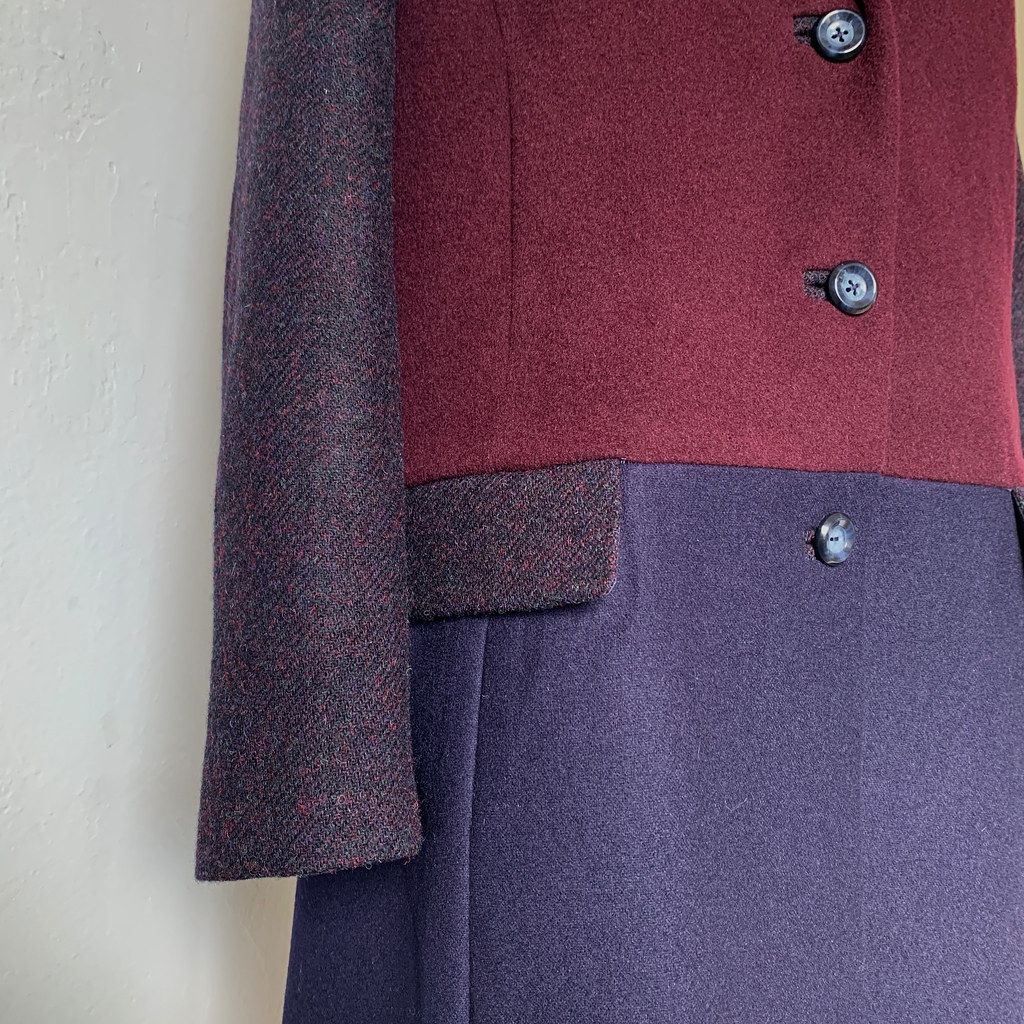
I lightened the shadows on this one to make the collar more visible. I used Burda 6845 which is an envelope pattern with princess seams and option of the horizontal seam which I used. If I was being really picky I think the lapels are a tiny bit on the narrow side but that's just my style preference. 
remnant coat 2

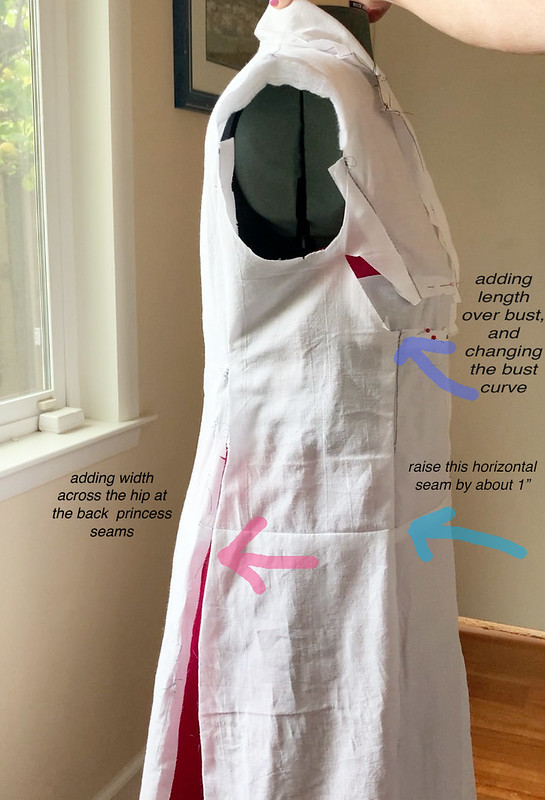
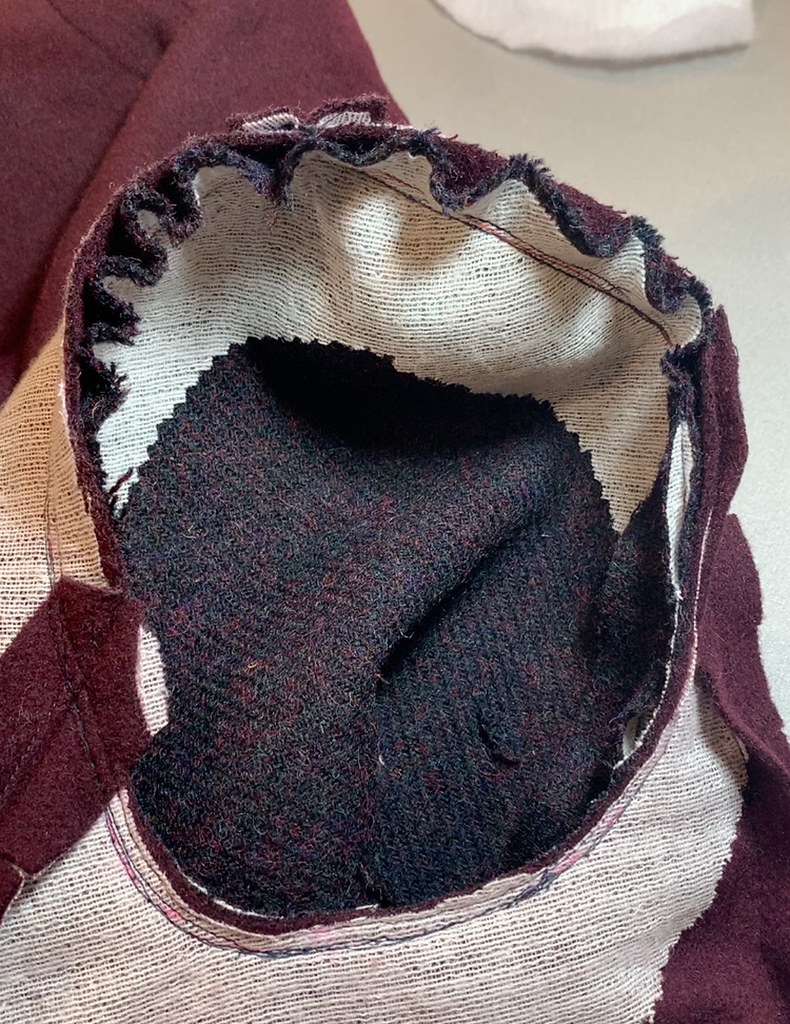
I wrote about fitting and construction details in the previous post so I don't have much more to say about that. But if I can give some outerwear sewing tips they are 1. plenty of interfacing 2. grade the seams and 3. press (with care).  Also I really like this photo which shows how it is the stitching lines that match on a sleeve, not the edges.  Confession time - I almost never do any gathering of the sleeve cap or press it to shape before I sew the sleeves in. Which is contrary to sewing wisdom but my method seems to work for me!
  
Inside sleeve


Coat on fomr
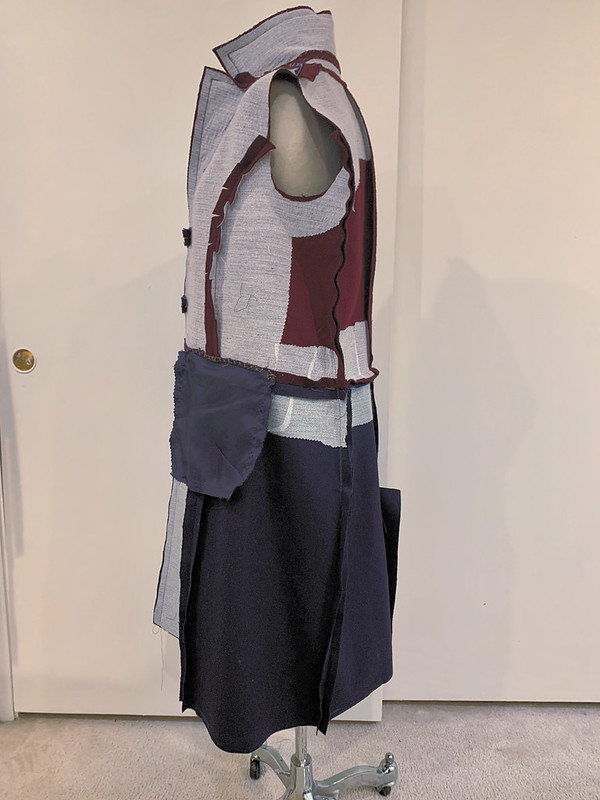
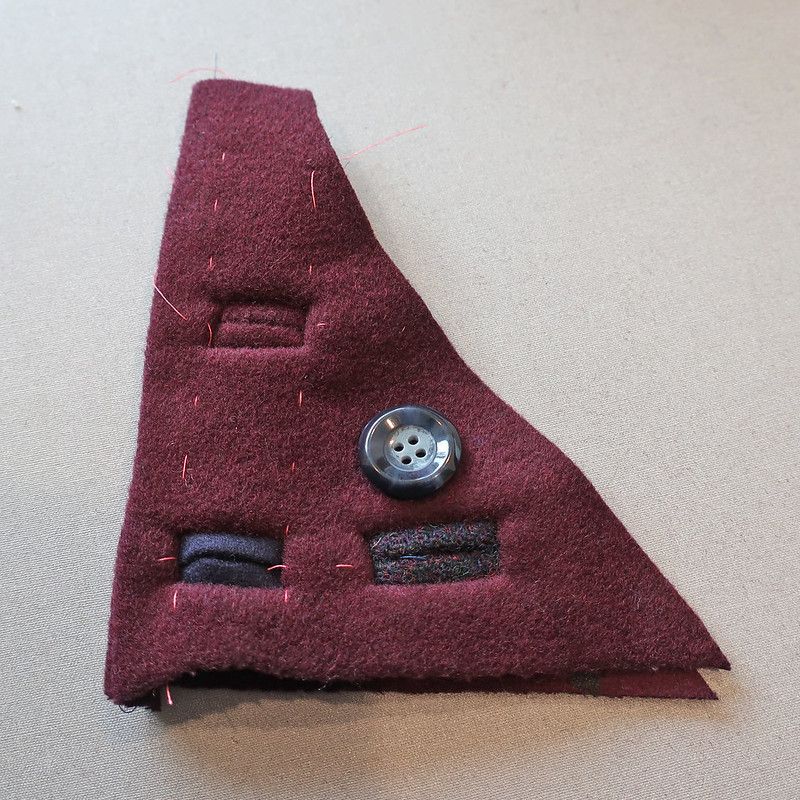
It took some time and concentration to get that horizontal color block seam to line up precisely when buttoned and I am very satisfied with the result. FYI,  3 buttons, probably sewn on a total of 8 times, on/off, move a tiny fraction of an inch, sew again, etc. The seams all line up as well which also entailed some unpicking and restitching with some tiny adjustments. But that is the point of this coat so it was worth the time. 

coat sleeve and pocket

For the lining I used navy blue bemberg rayon throughout.  I have done a coat with a color block lining to match the outside but as this coat was remnants I thought it was a bit silly to buy more lining fabric when I already had this navy blue. 
remnant coat lining


IMG_1031

So that's about it for my latest coat project, a very satisfying one on many levels. We are in the midst of a big rainstorm but I think spring is right around the corner and I have a couple of new t-shirt patterns that I might try out next.

IMG_1099

Happy almost Spring Sewing,
Beth

Today's garden photo, a camellia that needs a good trim once all the flowers are gone. But I can't do it now while all these beautiful flowers are on it. And the bees are in heaven. 

Camelia 2024 Feb

Tuesday, February 20, 2024

Remnant Fabrics to coat, Part 1: fitting and details

Looking back I see that I haven't made a new coat for myself since April of 2021 so I feel a tiny bit justified in starting a new one. With the caveat that it is not often coat weather here and when cold it is likely rainy too so I will probably be wearing a rain jacket. But I was reorganizing my fabrics and realized that I had some sizable remnant pieces from other projects that gave me an idea to combine them in one coat. I am so glad I did as I just love how this turned out and thought it was time for a detailed blog post with some fitting details.

outer shell finished

Here's a look at the coat in progress (with a very good view of my rolling worktable behind it).  I had the navy blue fabric leftover from this project, the burgundy wool is from this project, and the tweed sleeves are from a blazer that I made myself last year, although I didn't put it on the blog. But the fabric is the same as this one I made for Heather. I liked the fabric so much I bought some at Britex for myself. 
Something about the 3 fabric color ways goes together well and if I were an artist I might understand why, but I just knew they complemented each other. 
Here's the pattern that I used, and envelope pattern Burda 6845 which  has lots of versions online and is a really nice pattern. And it had the two-fabric version already in the pattern. 
IMG_0690IMG_0691

Let's talk about fitting.  This pattern has plenty of seams which I like as it makes adjusting for multi-size a bit easier. I made a muslin in size 38 graded to 42 in the hip and then evaluated that for adjustments. 
One of the reasons I like using Burda patterns is that the neck/shoulders/armhole etc of the size 38 is just right for me and I only need to adjust a bit in the circumferences.

I give a lot of credit to new sewers because if I was starting out and tried on some muslin test garment I might say nope as the test version is always so hideous and you really have to use your imagination to know the final product will be nice. I skip the sleeves (which I do not advise but I know they will fit me already) but I do put in the shoulder pads since that affects the drape and bust location. 
To resolve those drag lines indicated by the blue arrow I split the front horizontally and added more length and width at the princess seam bust area. 

drag lines coat

Here's another look at this adjustment. Actually not the adjustment but cutting across the muslin to create space. I pin fabric in the gap created and then check again. The major change was to add more length across the front princess seam, also to add some width at the back hip.  Keep reading to see the changes on the actual paper pattern pieces. 

fitting on form coat copy

Explanations in paragraph below. 

coat mods pattern copy

Here are the upper pattern pieces for this coat. I added length and a bit of horizontal distance in the front princess seam, using a wedge that tapered to nothing at the armhole. Then I added the similar amount of length to the center front piece. I remade the muslin test version and decided that the front princess seam edge was a bit too long so I pinched out a small wedge noted with the purple arrow. This just removes some length along that area and made it sew to the other edge better. Then I added to the center back princess seam down to the bottom, particularly around the hip area. However when I sewed it up it in the wool was a bit to big and shapeless at the back waist but it was easier to take in that seam in the final garment. Lastly I shortened all the upper pieces shown in the yellow sections above. I think I shortened about 1.5 inches. The seam needs to be below the waist but not too low so think I raised up that seam by the similar amount that I lengthened the front. 

I spoke about a lot of the sewing details on Instagram and have saved the series in an Instagram Highlight called "Remnant Coat" so you can see a lot of the sewing and construction details there. my Instagram is:   beth_sunnygal
This coat has a particular sewing order and the dart under the lapel is incorporated into attaching the collar. Which for some reason I don't like and since I rarely read the instructions I almost missed it. Although it probably would have turned out just fine sewing dart and the attaching collar. But their method is smoother in the sewing so I'm glad I took a quick look at the instructions. 

Collar and dart instruction

collar seam instruc

When it comes to working with coating fabrics I think the trimming and grading seams is the key to a good finish. If there is any spot with more than 2 layers of cloth and it can be trimmed, I trim it. Even tiny corner squares like this one. 

trimming upclose


Interfacing inside coat
Inside before trimming and pressing. I think when you have some seams intersecting in two different wools like this then adding interfacing gives them a bit of structure and helps them to match together well and press similarly. Originally I didn't have any interfacing on either the blue or the burgundy around the horizontal seam but it just looked limp, particularly as compared to the front portion which had interfacing on the entire pieces. I had only machine basted it together just to double check fit so it was easy to detach some seams and add interfacing. Below shows the front with the silk thread tracing in preparation for the bound buttonholes, see how nicely that seam presses where the two colors meet. That was the result I wanted all around the coat so it was worth the extra time to go back and add the interfacing. I use Pro-Weft Supreme Light from Fashion Sewing Supply for almost all coat or jacket projects. 

thread mark for buttonholes

Coat starting to come together at this point and decided to use these buttons which I bought in NY in October at Pacific Trimming. I always make some test buttonholes and play around with size, plus see how the fabric behaves. Note that I sew two layers of interfaced fabrics so that simulates the actual coat front including the seam edge so I can really see how the real buttonholes will turn out. 

IMG_5308


Remnant coat on a sunny day

So that's some detail on the fitting and construction for this coat. And a look at the meyer lemon tree outside my sewing room window. Next up I will post the finished coat. Then it's on to a new project - whatever that might be!  I just was given some really cute vintage patterns from the 60's so I might get started on a summer dress. 

I'm teaching a combo "Learn to use patterns / simple pattern fitting" class this upcoming weekend via HelloStitchStudio but I think it is sold out.  April 27-28 I'm teaching a shirt class using the Kalle Shirt pattern from Closet Core which we just listed so there are spots open. (Location is Bay Quilts in Richmond CA, they have a really nice classroom space).

Of course there is plenty to do outside now with all kinds of weeks popping up and plants needing attention. Plus I just ordered some new plants this morning  - they're like fabric, hard to resist!

Happy almost Spring Sewing,
Beth

Today's garden photo, taken yesterday between the downpours. A cheerful daffodil is so welcome this time of year. 


Daffodils 2024 Feb